Home>Home Appliances>Lighting Appliances>How To Connect LED Strips To TV
Lighting Appliances
How To Connect LED Strips To TV
Modified: August 17, 2024
Enhance your TV viewing experience with LED strips! Learn how to easily connect lighting appliances to your TV for a mesmerizing ambiance.
(Many of the links in this article redirect to a specific reviewed product. Your purchase of these products through affiliate links helps to generate commission for Storables.com, at no extra cost. Learn more)
Introduction
Welcome to the world of LED lighting! LED strips have become a popular choice for adding ambiance and a touch of creativity to any space, and connecting them to your TV can take your viewing experience to a whole new level. Whether you want to create a dynamic backlight effect or simply enhance the mood while you watch your favorite shows, connecting LED strips to your TV is a relatively simple and affordable DIY project.
In this guide, we will walk you through the process of connecting LED strips to your TV, step by step. Before we dive into the technical details, let’s take a moment to understand what LED strips are and why they are a fantastic addition to your television setup.
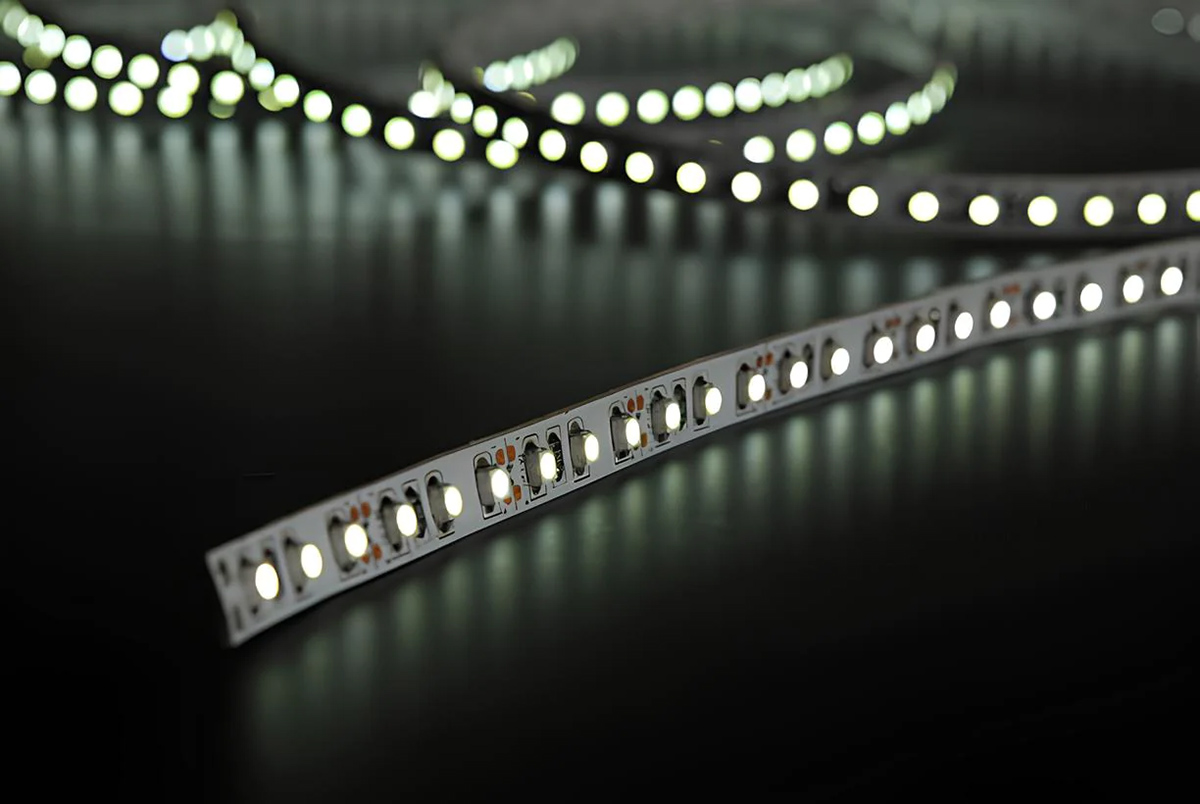
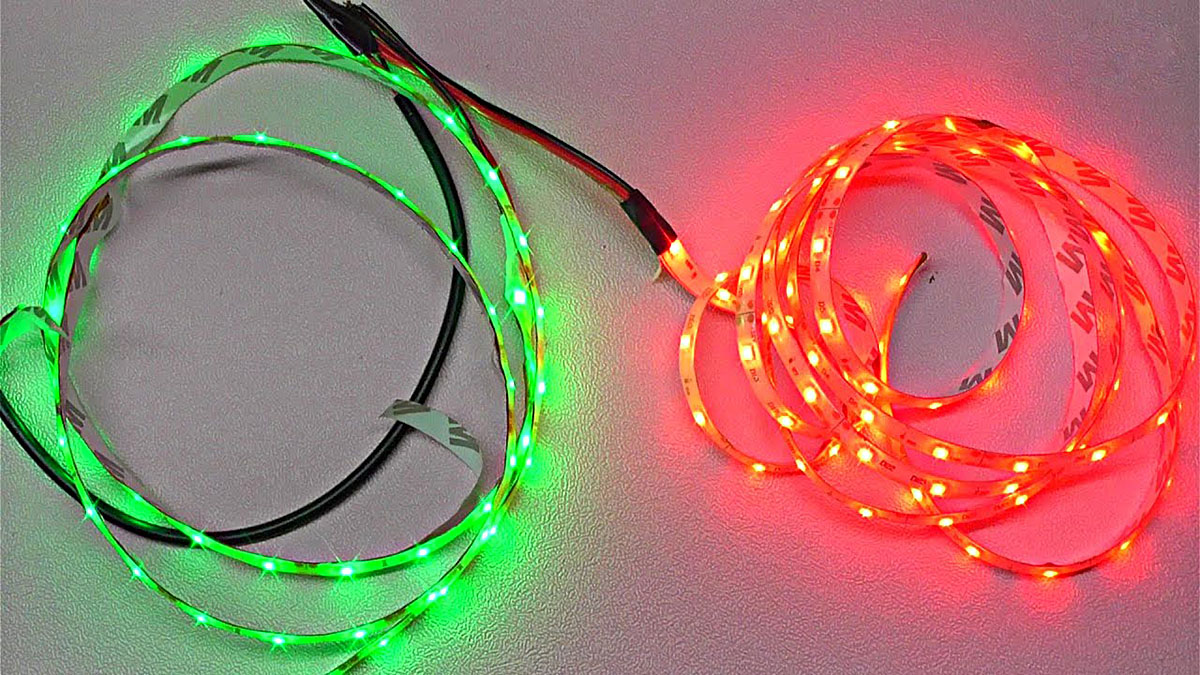
LED strips are flexible strips of LED lights that can be easily attached to any surface. These strips consist of multiple small light-emitting diodes (LEDs) arranged in a linear pattern. LED strips are energy-efficient, long-lasting, and offer a wide range of colors and effects to create stunning visuals.
Now, you might be wondering why you would want to connect LED strips to your TV. Well, imagine yourself watching a movie or playing a video game in a dark room, and suddenly a burst of vibrant colors matching the on-screen action illuminates the space behind your television. LED strips can turn your TV into a captivating focal point, amplifying the visual impact of what you’re watching and adding ambiance to the room.
Additionally, LED strips can also reduce eye strain by providing a gentle bias lighting behind the TV. This subtle lighting can help soften the contrast between a bright screen and a dark room, making your viewing experience more comfortable and enjoyable.
Now that you understand why LED strips are a great addition to your TV setup, let’s move on to the materials you will need to connect them seamlessly and securely.
Key Takeaways:
- Elevate your TV viewing experience by connecting LED strips for captivating visuals and reduced eye strain, creating a comfortable and immersive ambiance.
- Ensure seamless and secure LED strip connection to your TV by assessing compatibility, preparing connectors, and troubleshooting common issues for a hassle-free installation.
Read more: How To Connect LED Strips To Bluetooth
Understanding LED Strips and TV Connection
Before you start connecting LED strips to your TV, it’s essential to have a basic understanding of how they work and the different connection options available.
LED strips typically come in two types: analog and digital. Analog LED strips work by varying the voltage to each LED, allowing for smooth color transitions and effects. On the other hand, digital LED strips consist of individually addressable LEDs, which means each LED can be controlled separately, providing more precise control over colors and patterns.
When it comes to connecting LED strips to your TV, there are a few methods you can choose from:
- USB Connection: Many modern TVs have USB ports that can power low-voltage LED strips. This is a convenient option as it eliminates the need for an external power supply. However, keep in mind that the power output of the TV’s USB port may not be sufficient for longer or brighter LED strips.
- HDMI Connection: Some LED strips come with HDMI inputs and outputs, allowing you to connect them directly to your TV via the HDMI port. This method is usually used for LED strips that are designed to create an ambient lighting effect behind the TV.
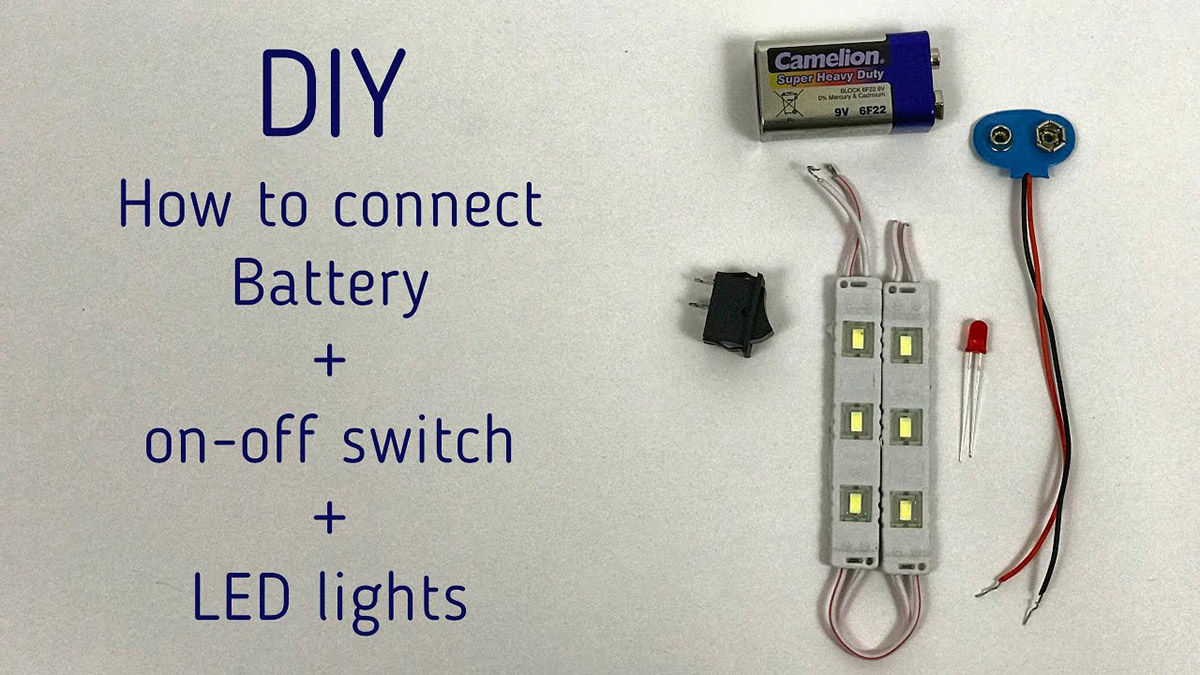
- Power Adapter Connection: If your TV doesn’t have a USB port or you want to use a more powerful LED strip, you can connect the LED strip to a power adapter. This method requires an external power supply and involves connecting the LED strip to the power adapter using wires or connectors.
Understanding the different connection options will help you choose the method that best suits your TV and LED strip setup. Now, let’s move on to the materials you will need for a successful LED strip connection.
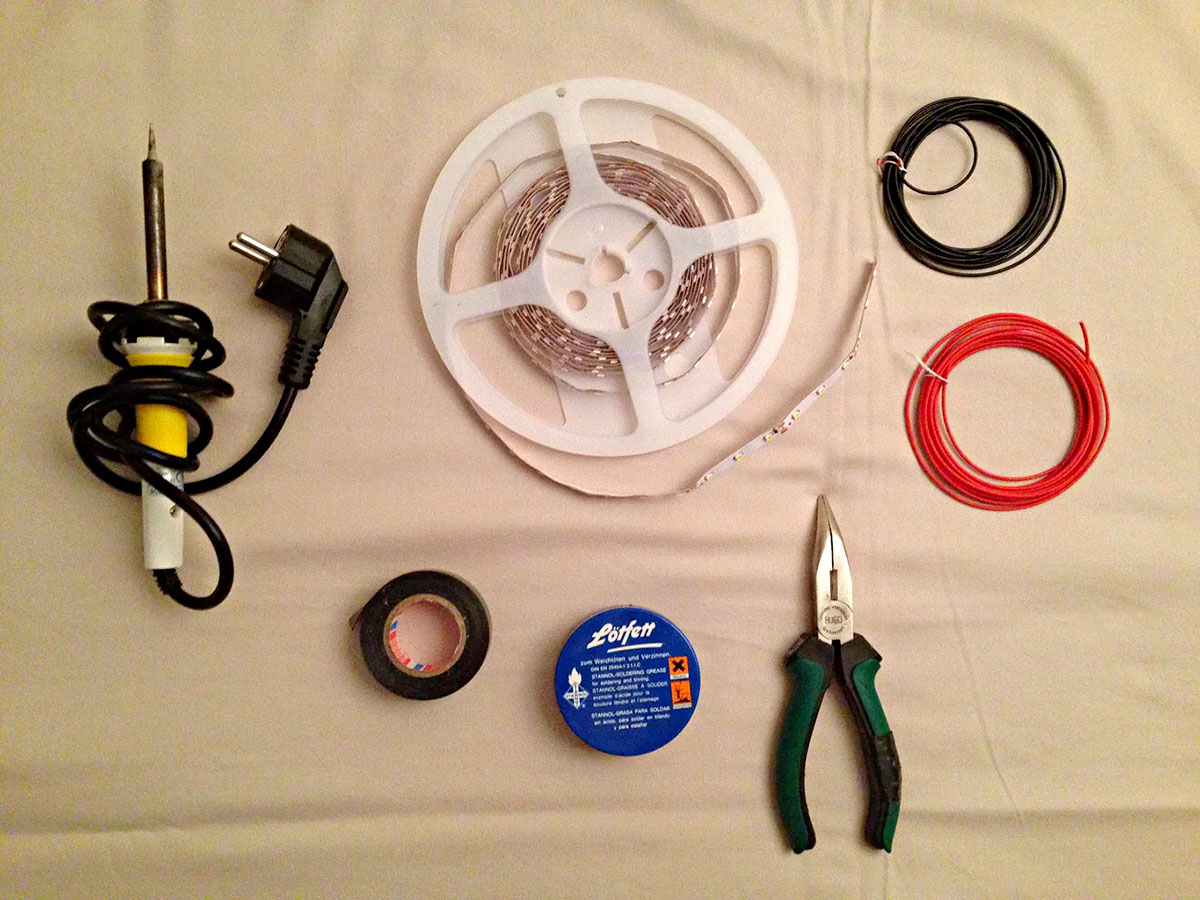
Required Materials
Before you begin connecting LED strips to your TV, it’s important to gather all the necessary materials. Here’s a list of items you will need:
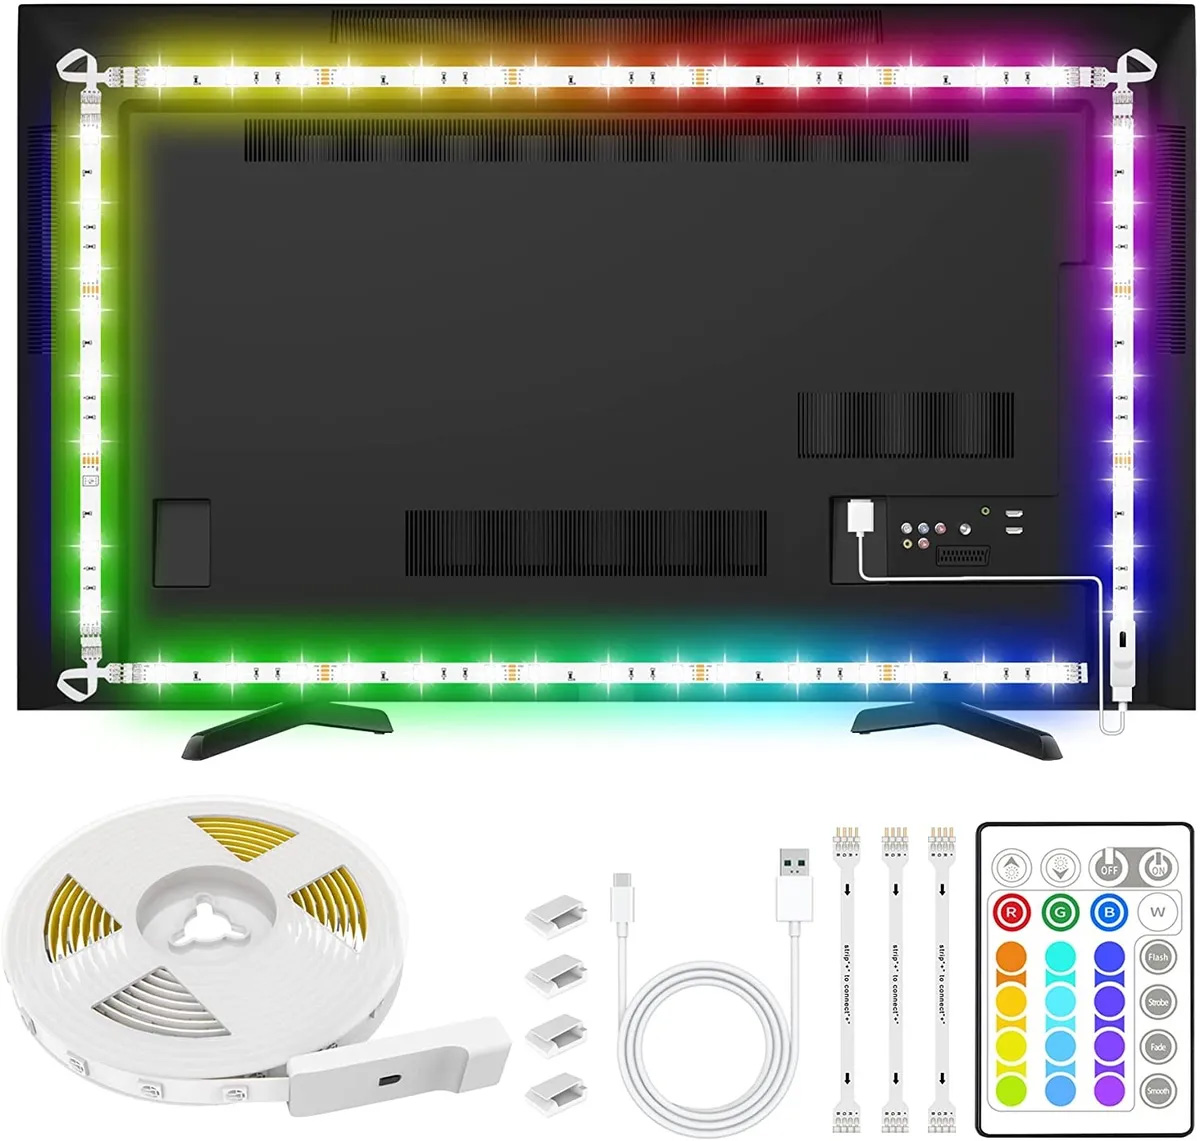
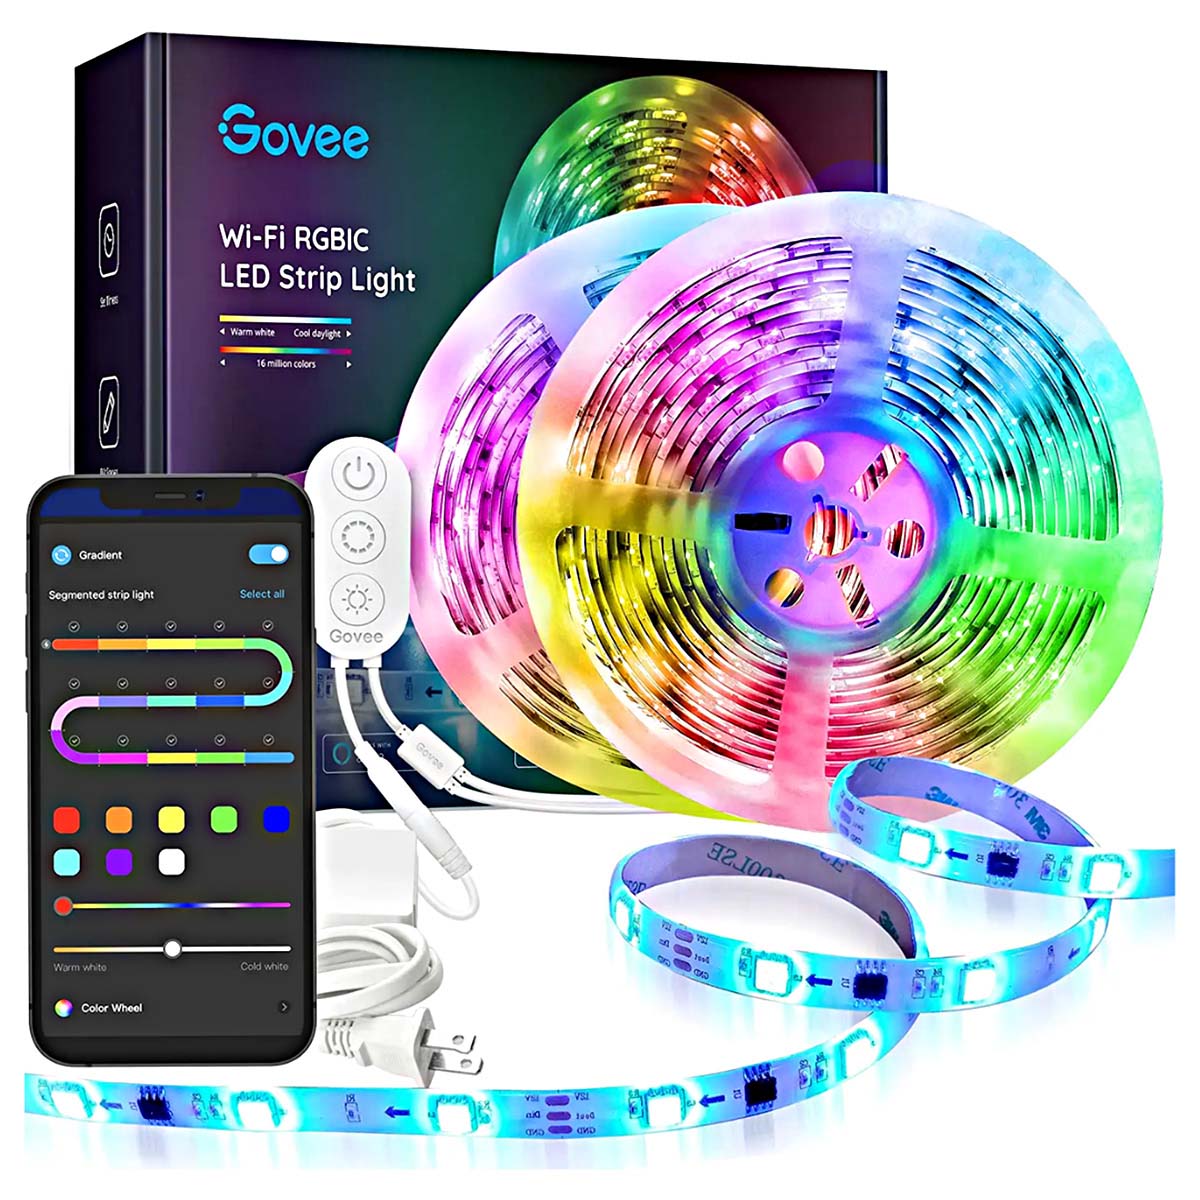
- LED Strips: Choose LED strips that are compatible with your TV and meet your desired specifications. Consider factors such as strip length, color options, and whether you prefer analog or digital LED strips.
- TV Compatibility: Check if your TV has the necessary ports to connect LED strips. Look for USB ports, HDMI ports, or power outlets to determine the most suitable connection method for your setup.
- Connectors and Adapters: Depending on your chosen connection method, you may need connectors, adapters, or cables to establish the link between the LED strips and your TV. USB connectors, HDMI connectors, or wires with appropriate connectors are commonly used for this purpose.
- Power Supply: If you opt for connecting LED strips using a power adapter, make sure to have a suitable power supply. Check the voltage and current requirements of your LED strips and choose a power supply that can meet those specifications.
- Mounting Materials: To secure the LED strips behind your TV, you will need adhesive strips, clips, or other mounting materials. Ensure that they are compatible with your LED strips and will allow for a secure and reliable installation.
- Cleaning Supplies: Before attaching LED strips to your TV, it’s a good idea to clean the surface where they will be mounted. Gather some cleaning supplies, such as a microfiber cloth and cleaning solution, to remove any dust or debris.
- Tools: Depending on the type of connectors or adapters you are using, you may need tools like wire cutters, wire strippers, or a screwdriver to make the necessary connections. Make sure to have these tools on hand to facilitate the installation process.
By gathering all the required materials beforehand, you can ensure a smooth and hassle-free installation of LED strips on your TV. Once you have the materials ready, we can move on to the step-by-step process of connecting LED strips to your TV.
Step 1: Assess Your TV and LED Strip Compatibility
Before you proceed with connecting LED strips to your TV, it’s crucial to assess the compatibility between your TV and the LED strips you have chosen. Here are a few factors to consider:
TV Ports: Take a look at the ports on your TV. Look for USB ports, HDMI ports, or power outlets. These will determine the type of connection method you can use for your LED strips. Ensure that the TV’s ports are compatible with the connectors or adapters that come with your LED strips.
Voltage and Current: LED strips typically have specific voltage and current requirements. Check the specifications of your LED strips and ensure that they are compatible with the power supply available through your chosen connection method. Using an incompatible power supply can result in damage to the LED strips or cause them to malfunction.
Length and Coverage: Consider the length of the LED strips and the area of your TV that you want to cover with the lighting. Measure the dimensions of your TV and compare them to the length of the LED strips. Ensure that the LED strips are long enough to span the desired area behind the TV.
Color Options: LED strips offer a variety of color options, ranging from single-color strips to ones that can display multiple colors. Decide on the color or color combination that best matches your preference and the ambiance you want to create. Make sure the LED strips you choose can produce the desired colors.
Analog or Digital: Consider whether you want analog LED strips for smooth color transitions or digital LED strips for more precise control over colors and patterns. Choose the type that aligns with your desired aesthetic and the level of customization you want.
By assessing the compatibility between your TV and LED strips, you can ensure a seamless and successful connection. This will make the installation process easier and help achieve the desired lighting effects on your TV.
Once you have confirmed the compatibility, you can proceed to the next step of preparing the LED strip and TV connectors.
Step 2: Prepare the LED Strip and TV Connectors
With the compatibility between your TV and LED strips confirmed, it’s now time to prepare the LED strip and TV connectors for the connection. Follow these steps to ensure a smooth and secure setup:
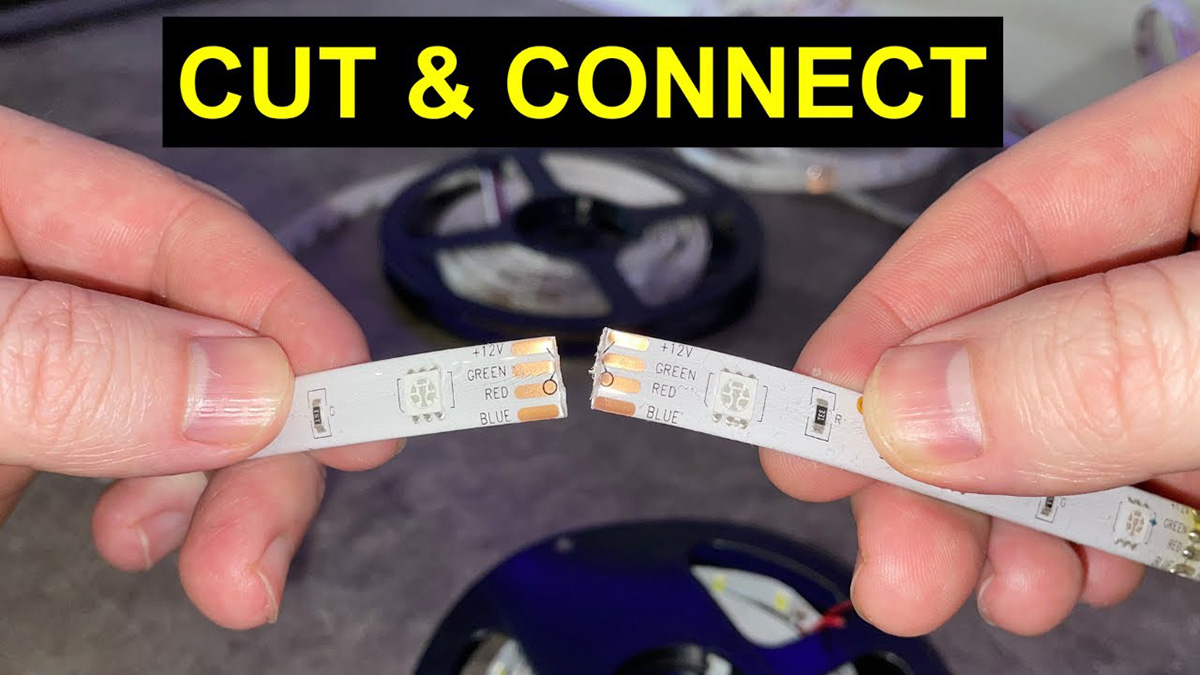
- Unroll the LED Strip: Carefully unroll the LED strip and place it flat on a clean surface. Make sure there are no kinks, twists, or damages to the strip.
- Cut the LED Strip (if necessary): If your LED strip is longer than needed to cover the area behind your TV, use a pair of scissors to cut it to the desired length. Some LED strips may have marked cutting points for accuracy. Follow the manufacturer’s instructions to cut the strip without causing any damage.
- Attach the Connectors (if applicable): Depending on the chosen connection method, you may need to attach connectors to the LED strip. This step is necessary if you are using connectors like USB or HDMI to establish the link between the LED strip and your TV. Follow the manufacturer’s instructions to securely attach the connectors to the designated end of the LED strip.
- Inspect the TV Connectors: Examine the connectors or ports on your TV where you will be connecting the LED strip. Ensure they are clean and free from any dust or debris that may hinder a proper connection. Use a microfiber cloth or compressed air to remove any dirt if necessary.
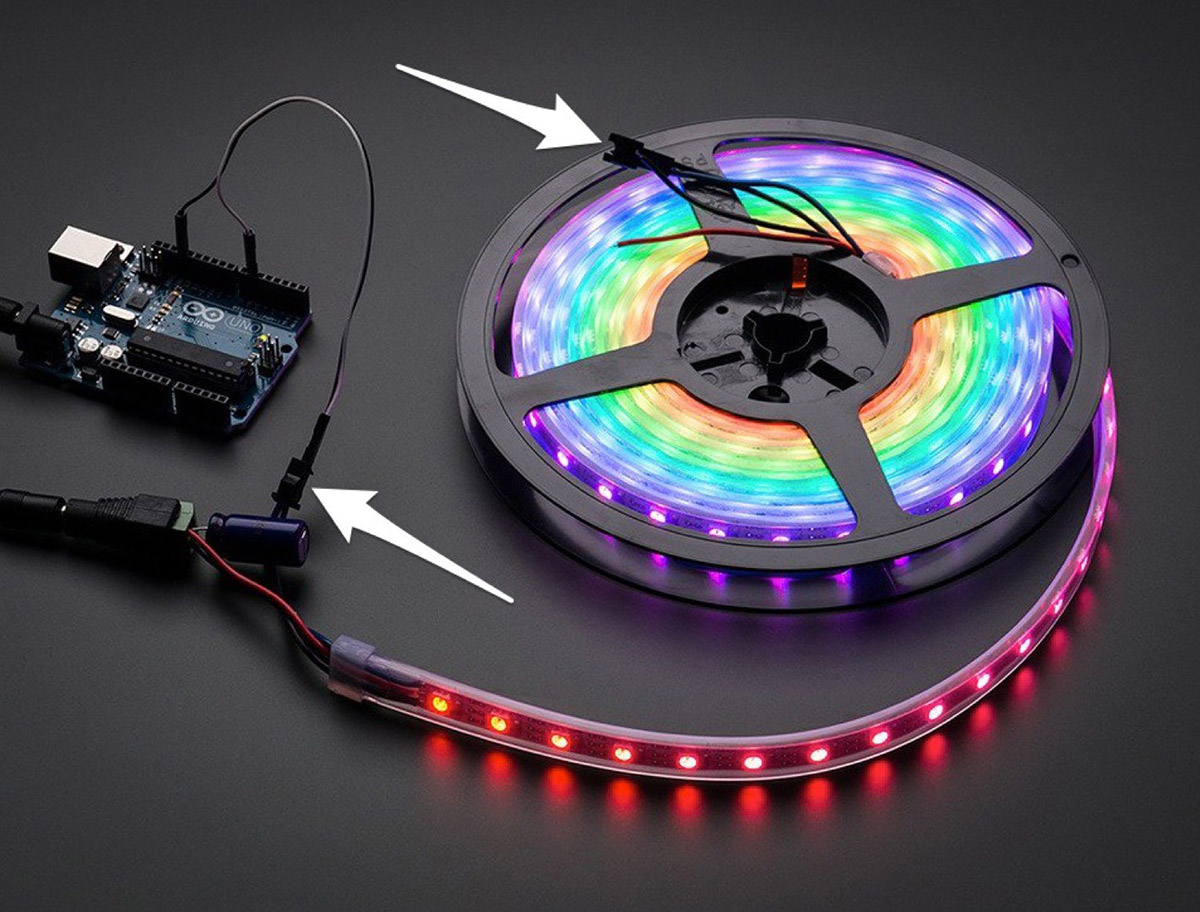
- Test the LED Strip: Before proceeding with the installation, it’s a good idea to test the LED strip to ensure it is functioning properly. Connect the LED strip to the power source as per your chosen connection method and check if all the LEDs are lighting up correctly. If you encounter any issues, double-check the connections and refer to the LED strip manufacturer’s troubleshooting guide if needed.
- Prepare the Mounting Surfaces: Clean the surface behind your TV where you will be attaching the LED strip. Use a microfiber cloth and a cleaning solution to remove any dust or grease. This will help the adhesive on the LED strip stick properly and ensure a secure installation.
- Gather the Tools: Depending on the connectors or adapters you are using, you may need tools like wire cutters, wire strippers, or a screwdriver. Keep these tools handy as you move forward with the installation process.
By following these preparation steps, you will have your LED strip and TV connectors ready for the next step: connecting the LED strip to your TV.
Make sure to use LED strips that are specifically designed for TV backlighting. Connect the LED strips to the USB port on the TV for power, and use the adhesive backing to attach them to the back of the TV for a seamless look.
Read more: How To Connect Cut LED Strips
Step 3: Connect the LED Strip to the TV
Now that you have prepared the LED strip and TV connectors, it’s time to connect the LED strip to your TV. Follow these steps to establish a secure and functional connection:
- Choose the Connection Method: Based on the compatibility and available ports on your TV, decide on the most suitable connection method for your LED strip. Whether it’s using the USB port, HDMI port, or a power adapter, make sure it aligns with your chosen setup.
- If using USB:
- Plug the USB connector attached to the LED strip into an available USB port on your TV. Ensure a secure connection is made.
- Check if your TV provides an option in the settings to customize the USB port’s power output. Adjust the power output according to the LED strip’s requirements, if available.
- If using HDMI:
- Connect one end of the HDMI cable to the HDMI port on your TV.
- Connect the other end of the HDMI cable to the HDMI input on the LED strip. Ensure a secure connection is established.
- If using a Power Adapter:
- Connect the LED strip to the power adapter according to the manufacturer’s instructions. This may involve attaching wires or connectors.
- Plug the power adapter into a nearby power outlet.
Once the LED strip is connected to the TV using the chosen method, take a moment to ensure all the connections are secure and properly seated. This will ensure a stable connection and reliable performance.
If you’re using a power adapter, make sure the LED strip receives power by checking if the LEDs come on. Adjust the brightness or color settings if your LED strip offers customization options.
With the LED strip successfully connected to your TV, you’re ready to move on to the final step: powering on and testing the LED strip connection.
Step 4: Power On and Test the LED Strip Connection
Now that you have connected the LED strip to your TV, it’s time to power on and test the connection. Follow these steps to ensure that the LED strip is functioning properly:
- Turn on Your TV: Switch on your TV using your remote or the power button on the TV itself.
- Check the LED Strip: Look behind your TV and observe the LED strip. Check if all the LEDs are lighting up and if the colors are displaying correctly. If there are any issues, such as dim LEDs or incorrect colors, double-check the connections and make sure they are secure.
- Adjust the LED Strip Settings (if available): Depending on the LED strip you have, there may be options to adjust the brightness, color, or lighting effects. Use the remote or controls provided by the LED strip to customize the lighting to your preference. Experiment with different settings to find the perfect ambiance for your viewing experience.
- Test Different Content: Play various types of content on your TV to see how the LED strip enhances the visuals. Whether it’s a movie, TV show, or a video game, observe how the LED strip adds depth and ambiance to the viewing experience. Pay attention to how the colors and effects synchronize with the on-screen action.
- Make Further Adjustments: If needed, fine-tune the LED strip settings to achieve the desired lighting effects. You may need to adjust the brightness, color saturation, or even the positioning of the LED strip behind the TV.
Remember that the LED strip is meant to enhance and complement your viewing experience, so feel free to tweak the settings until you find the perfect balance of lighting and visual appeal.
If you encounter any issues during testing or if the LED strip doesn’t work as expected, refer to the troubleshooting tips in the next section. These tips can help you identify and resolve common problems that may occur during the LED strip connection process.
With the LED strip successfully connected and tested, you can now sit back, relax, and enjoy your favorite entertainment with a dazzling lighting setup behind your TV.
Troubleshooting Tips
While connecting LED strips to your TV is generally a straightforward process, you may encounter some common issues or challenges along the way. Here are some troubleshooting tips to help you overcome these obstacles:
- Inadequate Power: If your LED strip doesn’t light up or appears dim, the power supply may be insufficient. Check the voltage and current requirements of the LED strip and ensure that the power source is capable of meeting those specifications. Consider using a power adapter with higher output or connecting the LED strip to a different power source.
- Poor Connection: If the LED strip has intermittent lighting or flickering, check the connections at both ends. Make sure the connectors or adapters are securely attached and that the wires are properly stripped and inserted. Loose or faulty connections can cause unreliable performance.
- Wrong Color or Color Inconsistency: If the LED strip doesn’t display the correct colors or you notice color variations along the strip, ensure that you have selected the correct color settings. If the problem persists, there may be a defect in the LED strip or a compatibility issue. Consider contacting the manufacturer or supplier for assistance.
- Placement and Mounting: If the LED strip is not providing the desired lighting effect, try repositioning or readjusting the strip. Ensure that it is evenly and securely mounted behind the TV, without any obstructions. Experiment with different placements or mounting techniques to achieve the desired ambiance.
- Interference: If the LED strip’s performance is affected by interference from other electronic devices, try relocating those devices or the LED strip itself. Devices emitting strong electromagnetic signals, such as Wi-Fi routers or microwave ovens, can disrupt the LED strip’s signal and cause erratic behavior.
- Compatibility Issues: If you are experiencing compatibility issues between the LED strip and your TV, ensure that you have chosen the correct type of LED strip (analog or digital) and the appropriate connectors or adapters. Double-check the specifications of both the TV and LED strip to confirm compatibility.
If you have attempted these troubleshooting tips and are still encountering issues with your LED strip connection, it may be necessary to seek further assistance from the manufacturer or consult with a professional.
Remember, troubleshooting is part of the process, so don’t get discouraged. With patience and persistence, you will be able to address any issues and enjoy the captivating lighting effects of your LED strip connected to your TV.
Conclusion
Congratulations! You have successfully connected LED strips to your TV, unlocking a whole new level of visual appeal and ambiance. By following the step-by-step guide and troubleshooting tips provided in this article, you have created an immersive viewing experience that enhances your enjoyment of movies, TV shows, and games.
LED strips offer a wide range of customization options, from vibrant colors to dynamic lighting effects. They not only add a touch of style to your TV setup but also help reduce eye strain and create a more comfortable viewing environment.
Remember to regularly check the connections and ensure that your LED strip is working as expected. Fine-tune the settings to suit your preferences and experiment with different lighting effects to create the perfect atmosphere for any occasion.
Whether you use the USB port, HDMI connection, or a power adapter, always consider the compatibility between your TV and LED strips to ensure a seamless and secure connection. Pay attention to the voltage, current, and length requirements of the LED strips to avoid any potential issues.
If you encounter any difficulties during the installation or face challenges along the way, refer to the troubleshooting tips provided to help identify and resolve common problems. Don’t hesitate to reach out to the manufacturer or seek professional assistance if needed.
Now, sit back, relax, and enjoy your favorite content with the captivating lighting effects provided by your connected LED strips. Turn your viewing experience into a visual spectacle and immerse yourself in a world of colors and ambiance.
Thank you for following this guide, and we hope you enjoy the enhanced viewing experience with your LED strip-connected TV!
Frequently Asked Questions about How To Connect LED Strips To TV
Was this page helpful?
At Storables.com, we guarantee accurate and reliable information. Our content, validated by Expert Board Contributors, is crafted following stringent Editorial Policies. We're committed to providing you with well-researched, expert-backed insights for all your informational needs.

0 thoughts on “How To Connect LED Strips To TV”