Home>Home Maintenance>How Do You Clean An Air Conditioner
Home Maintenance
How Do You Clean An Air Conditioner
Modified: March 7, 2024
Learn how to clean your air conditioner with our comprehensive home maintenance guide. Keep your AC running efficiently and prolong its lifespan with these easy-to-follow steps.
(Many of the links in this article redirect to a specific reviewed product. Your purchase of these products through affiliate links helps to generate commission for Storables.com, at no extra cost. Learn more)
Introduction
Welcome to the world of home maintenance, where taking care of your air conditioner is paramount for a comfortable and healthy living environment. Keeping your air conditioner clean and well-maintained not only ensures efficient cooling performance but also prolongs its lifespan and reduces energy consumption.
In this article, we will guide you through the process of cleaning an air conditioner, providing you with step-by-step instructions and insightful tips to achieve optimal results. Whether you are a seasoned DIY enthusiast or a beginner in the world of home maintenance, this comprehensive guide will equip you with the knowledge and tools necessary to keep your air conditioner in top-notch condition.
By regularly cleaning your air conditioner, you can improve indoor air quality, prevent mold and bacteria growth, and maintain optimal cooling performance. Neglecting regular maintenance can lead to decreased efficiency, higher electricity bills, and potential breakdowns that might require costly repairs.
But before we dive into the cleaning process, let’s take a moment to understand why cleaning your air conditioner is so important.
Key Takeaways:
- Regularly cleaning your air conditioner is essential for a comfortable and healthy home environment, improving indoor air quality and reducing energy consumption.
- Prioritize safety, gather necessary tools, and follow step-by-step instructions to clean your air conditioner, ensuring optimal performance and longevity.
Read more: How Do You Clean A Portable Air Conditioner
Understanding the Importance of Cleaning Your Air Conditioner
An air conditioner is an essential appliance in any modern home, providing relief from the sweltering heat of summer and creating a comfortable indoor environment. However, over time, dust, dirt, and other debris can accumulate in the various components of your air conditioner, hindering its performance and potentially causing health issues.
One of the main reasons why cleaning your air conditioner is crucial is to maintain optimal indoor air quality. As the air circulates through the system, it passes through the filters and evaporator coils. If these components are dirty, they can harbor dust, allergens, and other contaminants that can be released back into the air you breathe. This can lead to respiratory problems, allergies, and other health issues, especially for those with pre-existing respiratory conditions.
Regular cleaning of your air conditioner also helps to improve the system’s efficiency. When the filters and coils are clogged with dirt and debris, airflow is restricted, causing the unit to work harder to cool the air. This increased strain on the system not only leads to higher energy consumption but can also result in unnecessary wear and tear on the components, potentially shortening the lifespan of your air conditioner.
Cleaning your air conditioner not only benefits your health and the efficiency of the system but can also save you money in the long run. A clean air conditioner operates more efficiently, meaning it requires less energy to cool the air. This, in turn, can lead to lower electricity bills and reduce your carbon footprint.
Additionally, regular maintenance and cleaning of your air conditioner can help identify any issues or potential problems early on. By inspecting the unit and cleaning it regularly, you can catch minor issues before they escalate into major and costly repairs.
In summary, cleaning your air conditioner is crucial for several reasons – it improves indoor air quality, enhances the system’s efficiency, saves you money on energy bills, and allows for early detection of potential issues. Now that we understand the importance, let’s move on to the necessary safety precautions before you begin the cleaning process.
Safety Precautions before Cleaning Your Air Conditioner
Before you start cleaning your air conditioner, it is essential to prioritize safety to protect yourself and your appliance. Here are some important safety precautions you should take:
- Turn off the power: Before beginning any maintenance or cleaning procedures, make sure to turn off the power supply to your air conditioner. This will help prevent any accidental electric shocks or damage to the unit.
- Wear protective gear: Cleaning an air conditioner involves handling potentially dirty and dusty components. To protect yourself, it is recommended to wear gloves, safety glasses, and a face mask. These will shield your hands, eyes, and respiratory system from any harmful substances that may be present.
- Ensure proper ventilation: When cleaning your air conditioner, fumes or dust particles may be released. Therefore, it is essential to work in a well-ventilated area. Open windows and doors to allow for proper airflow and prevent the buildup of any potentially harmful substances.
- Use appropriate cleaning products: It is crucial to use the right cleaning products for your air conditioner. Avoid using harsh chemicals or abrasive cleaners that can damage the components. Instead, opt for mild, non-abrasive cleaners recommended by the manufacturer or specifically designed for air conditioner cleaning.
- Prevent water damage: When cleaning the interior components of your air conditioner, be careful not to allow excess water to accumulate or come into contact with electrical parts. Use a damp cloth or sponge for wiping and avoid spraying water directly onto the unit.
- Follow manufacturer’s instructions: Different air conditioner models may have specific cleaning instructions provided by the manufacturer. It is important to consult the user manual or any provided guidelines to ensure you are following the correct procedures for your specific unit.
- Stay cautious around moving parts: Air conditioners have fans and other moving parts that can cause injuries if not handled properly. Take extra caution when cleaning or inspecting these components and avoid sticking your hands or any objects into the running unit.
By taking these safety precautions, you can minimize the risk of accidents, injuries, and damage to your air conditioner. Now that we have covered the safety guidelines, let’s move on to the tools and materials you will need for cleaning your air conditioner.
Tools and Materials Needed
Before you get started with cleaning your air conditioner, it’s important to gather all the necessary tools and materials. Having these items on hand will make the process smoother and more efficient. Here’s a list of what you’ll need:
- Screwdriver: A screwdriver with multiple head sizes will be needed to remove any screws or fasteners holding the unit together.
- Vacuum Cleaner: A vacuum cleaner with a brush attachment will help in removing dirt and debris from the unit. Make sure it has enough suction power to effectively clean the air conditioner components.
- Soft Bristle Brush: A soft bristle brush will be useful for gently scrubbing and cleaning the coils, fan blades, and other delicate parts of the air conditioner.
- Garden Hose or Spray Bottle: You’ll need a garden hose with a spray nozzle or a spray bottle filled with water to rinse off the cleaning solution and flush out dirt and debris.
- Cleaners: Depending on the type of dirt or buildup on your air conditioner, you may need different cleaning solutions. Mild dish soap, a vinegar-water solution, or commercially available coil cleaners can be effective options.
- Cloth or Towel: Have a cloth or towel on hand to wipe down surfaces and absorb any excess moisture during the cleaning process.
- PPE (Personal Protective Equipment): As mentioned earlier, it’s important to prioritize safety. Wear gloves, safety glasses, and a face mask to protect yourself from any potential hazards or harmful substances.
- Fin Comb: A fin comb or fin straightener tool is handy for straightening any bent fins on the condenser unit, improving the airflow and efficiency of the air conditioner.
- Fin Cleaning Brush: To remove dirt and debris from the air conditioner’s condenser unit, a fin cleaning brush with soft bristles will be helpful.
- Plastic Garbage Bags or Drop Cloth: Place a plastic garbage bag or a drop cloth underneath the air conditioner unit to catch any falling debris or water during the cleaning process.
Having these tools and materials readily available before you start cleaning your air conditioner will ensure that you have everything you need to complete the job efficiently and effectively. Now that you’re well-prepared, let’s move on to the step-by-step guide for cleaning your air conditioner.
Step-by-Step Guide to Cleaning Your Air Conditioner
Cleaning your air conditioner is a relatively straightforward process that can be done with a little time and effort. Follow these step-by-step instructions to ensure a thorough cleaning:
- Turn off the power: Start by turning off the power supply to your air conditioner to avoid any accidents or electrical hazards.
- Remove the outer cover: If your air conditioner has an outer cover or casing, use a screwdriver to remove any screws or fasteners holding it in place. Set the cover aside for now.
- Access the filter: Locate the air filter, usually positioned near the front or side of the air conditioner. Remove the filter carefully and assess its condition. If the filter is disposable and clogged with dirt and dust, replace it with a new one. If it’s reusable, clean it thoroughly according to the manufacturer’s instructions.
- Clean the coils: Using a soft bristle brush, gently remove any debris or dust from the evaporator coils. Be cautious not to bend or damage the delicate fins. You can also use a vacuum cleaner with a brush attachment to suck up loose debris.
- Clean the condensate drain: Locate the condensate drain, typically a small tube or pipe attached to the air conditioner. Clear any blockages in the drain using a thin brush or wire. You can also flush the drain with a mixture of vinegar and water to prevent mold and mildew growth.
- Clean the fan and fan blades: Carefully wipe down the fan and its blades with a damp cloth or sponge. Be gentle and avoid bending the blades. Remove any dirt or debris from the fan motor area as well.
- Reassemble the air conditioner: Once all the components are clean and dry, reassemble the air conditioner in the reverse order of disassembly. Make sure all screws and fasteners are tightly secured.
- Test the unit: Turn the power supply back on and test the air conditioner to ensure it is working properly. Listen for any unusual noises or vibrations and check for cool airflow from the unit.
- Regular maintenance: To keep your air conditioner in optimal condition, schedule regular maintenance and cleaning every three to six months. This will help prevent the buildup of dirt and maintain peak performance of the unit.
Following these steps will help you maintain a clean and efficient air conditioner. However, if you are uncomfortable or unsure about cleaning your unit yourself, it is always best to seek professional assistance.
Now that you know the step-by-step process for cleaning your air conditioner, let’s move on to specific instructions for cleaning the filter, coils, condensate drain, and fan blades individually.
Read more: How Do You Say Air Conditioner In Spanish
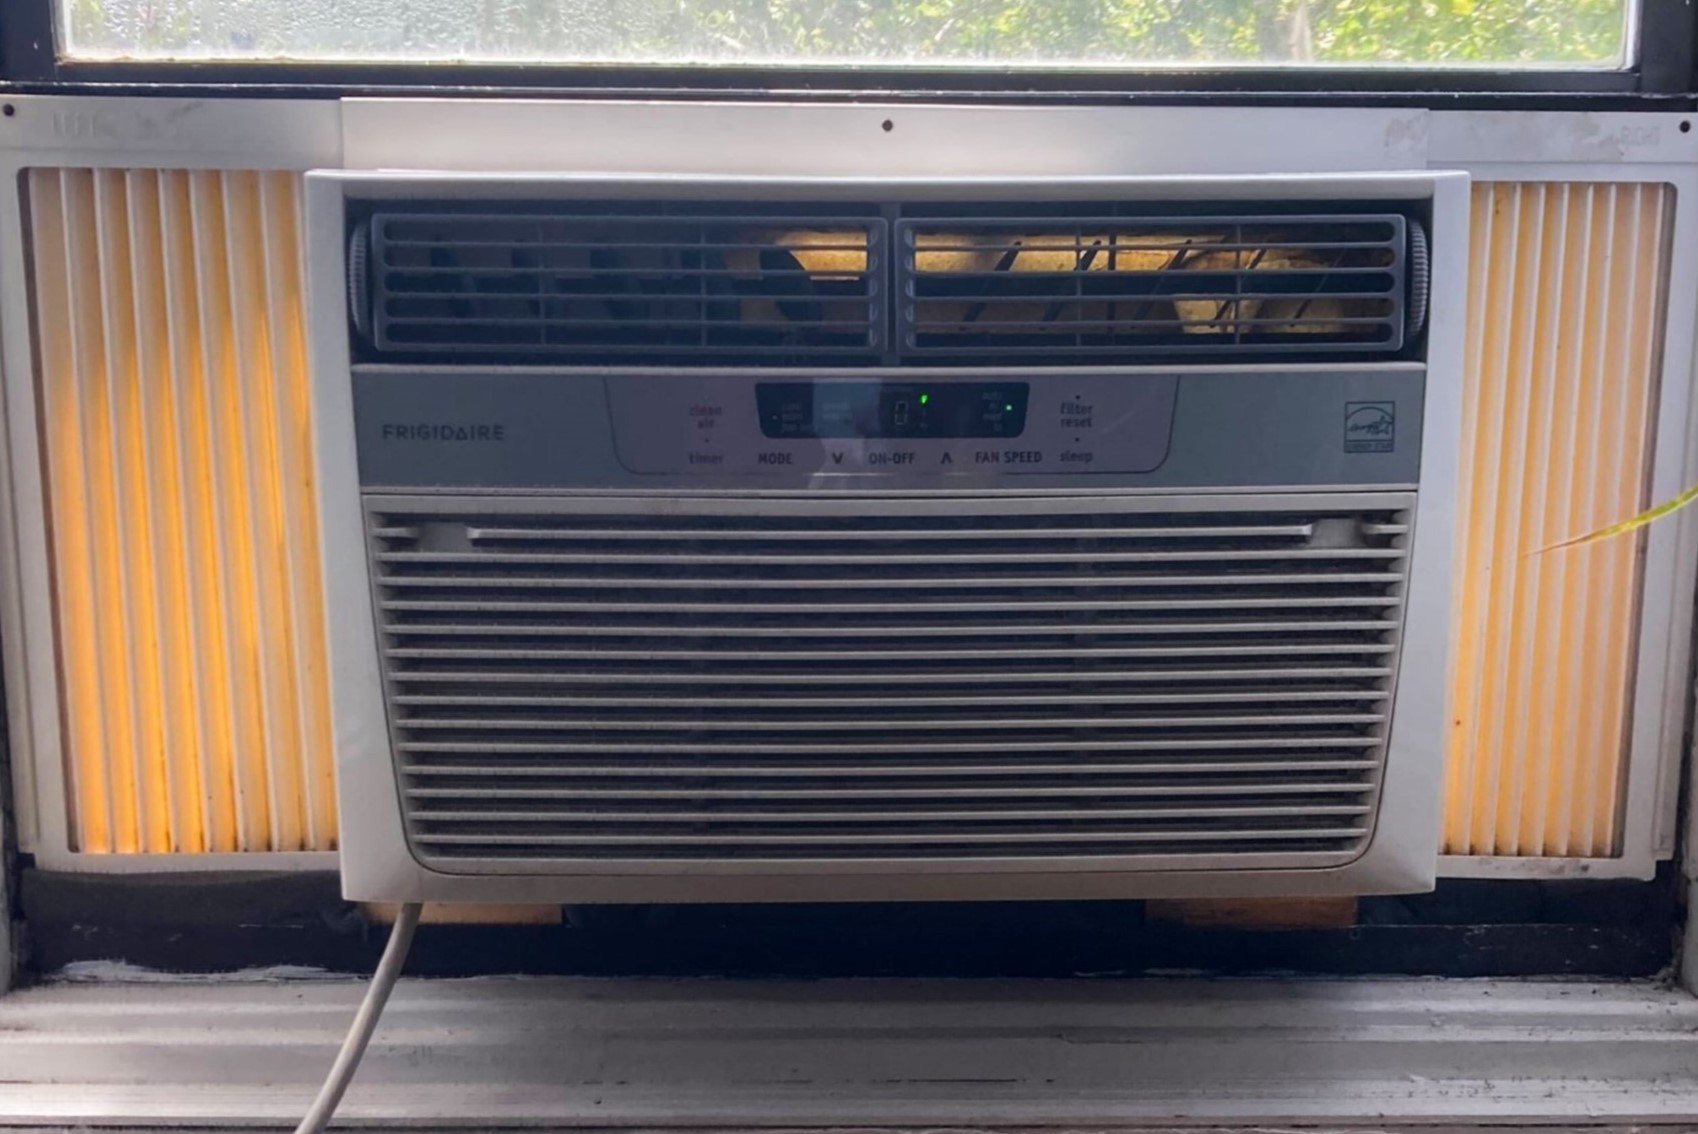
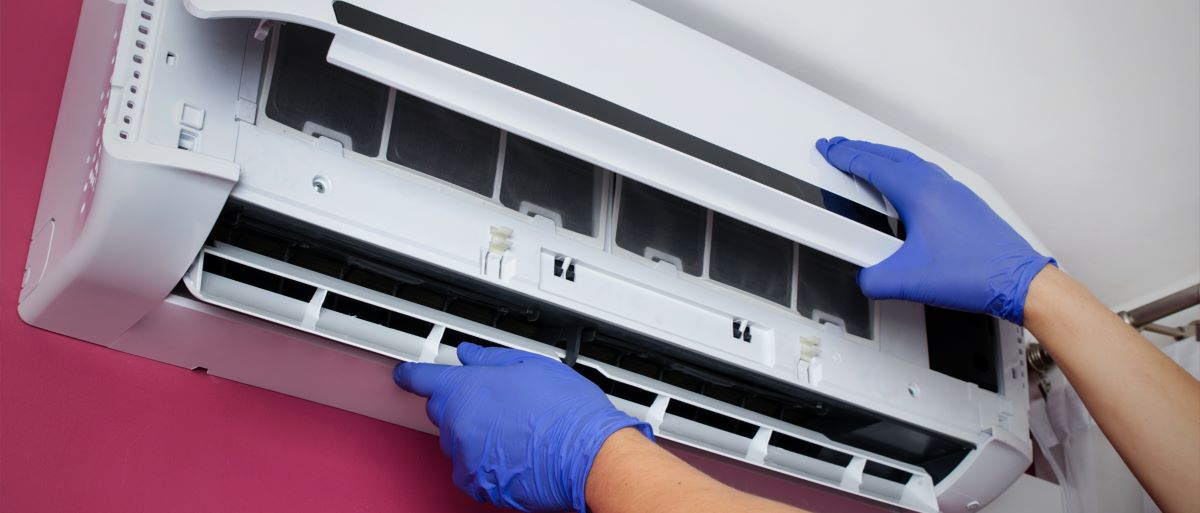
Cleaning the Filter
The air filter in your air conditioner plays a vital role in maintaining good indoor air quality by trapping dust, allergens, and other particles. Cleaning or replacing the filter regularly is essential for optimal performance. Here’s how to clean the filter:
- Locate the air filter: The air filter is usually located near the front or side of the air conditioner. It can be accessed by removing the front panel or opening a compartment.
- Remove the filter: Carefully slide out or detach the filter from its housing. Take note of how the filter is positioned, ensuring you reinstall it correctly.
- Assess the condition: Check the filter for dirt, dust, and debris. If the filter is disposable and heavily clogged, it’s best to replace it with a new one. If it’s reusable and only lightly soiled, you can proceed with cleaning it.
- Clean the filter: Gently tap the filter on a surface or use a soft brush to remove loose dirt and debris. Rinse the filter under running water to remove stubborn dirt and grime. If needed, use a mild detergent or cleaner specifically designed for air filters. Avoid using harsh chemicals or excessive force, as it can damage the filter.
- Dry the filter: Shake off excess water and allow the filter to air-dry completely before reinstalling it. Placing it under direct sunlight or using a fan can expedite the drying process.
- Reinstall the filter: Once the filter is dry, slide it back into its housing, ensuring it is correctly positioned. Pay attention to any arrows or markings indicating the proper orientation.
- Test the system: Turn on the air conditioner and ensure it’s running smoothly with clean airflow. Monitor the filter periodically and clean or replace it as needed.
Keep in mind that the frequency of cleaning or replacing the filter depends on various factors such as the environment, usage, and the type of filter. It’s recommended to check the filter every 30 days and clean or replace it every 3 to 6 months, or as recommended by the manufacturer.
Maintaining a clean air filter not only improves air quality but also ensures the efficient operation of your air conditioner. Now, let’s move on to cleaning the coils of your air conditioner.
Regularly clean or replace the air filter in your air conditioner to maintain its efficiency and prevent dust and debris from circulating in your home.
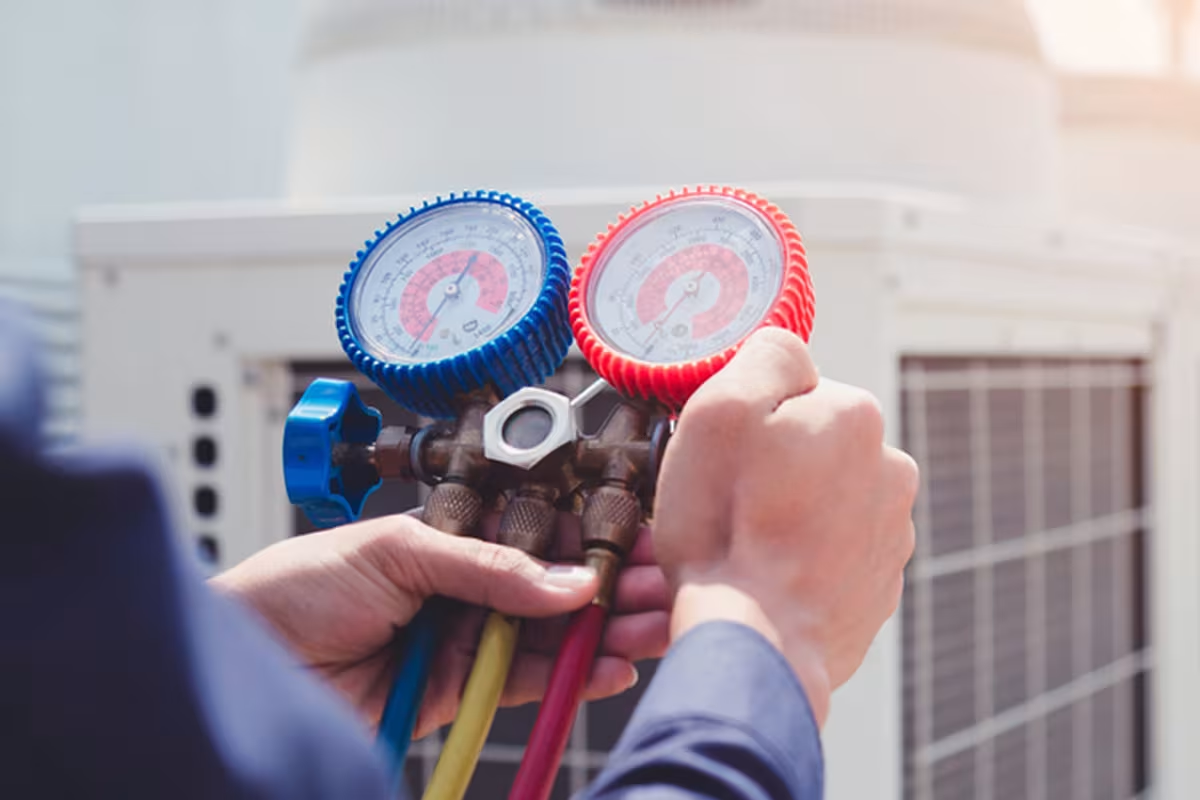
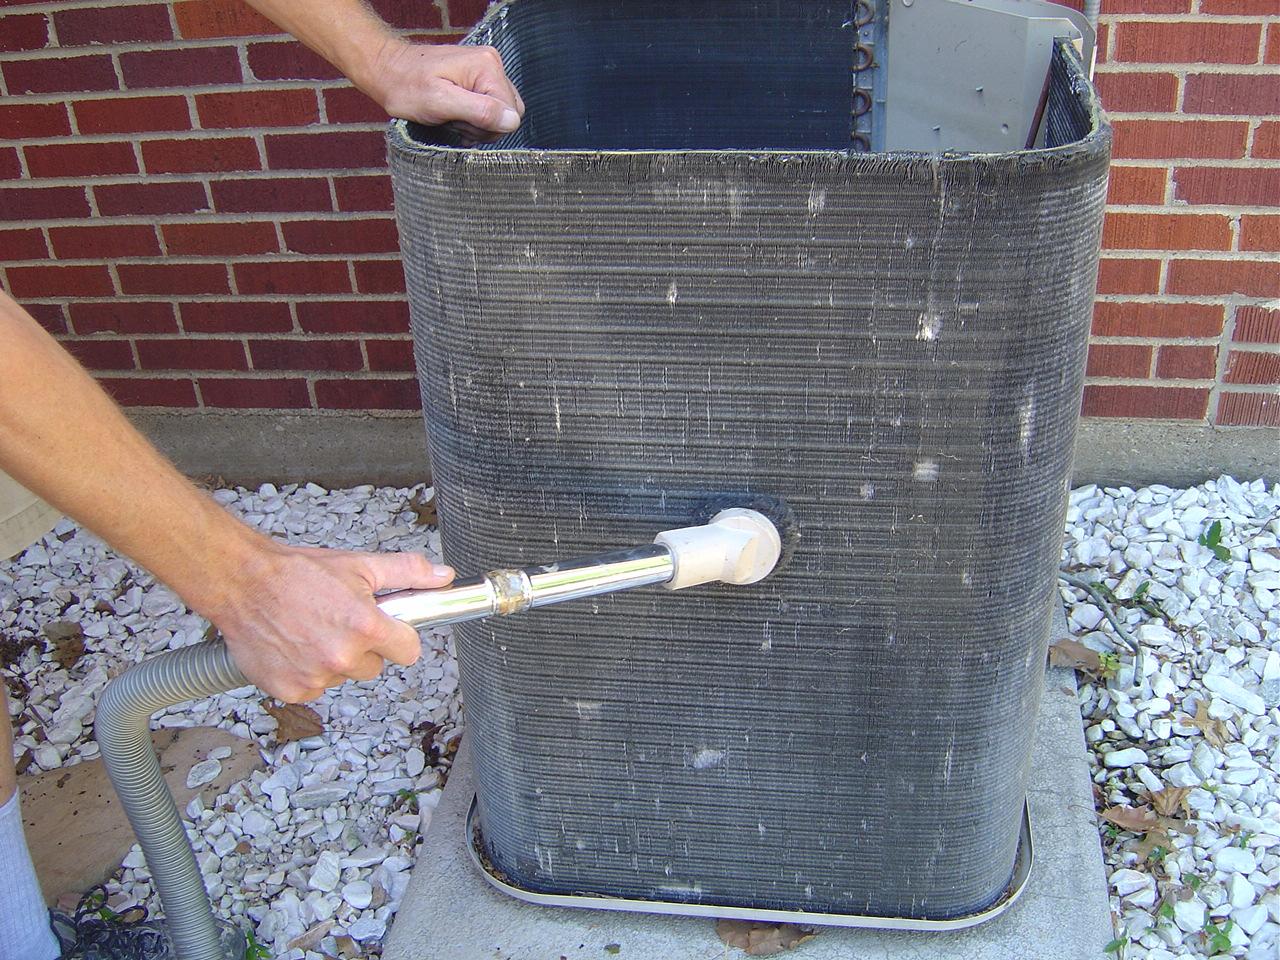
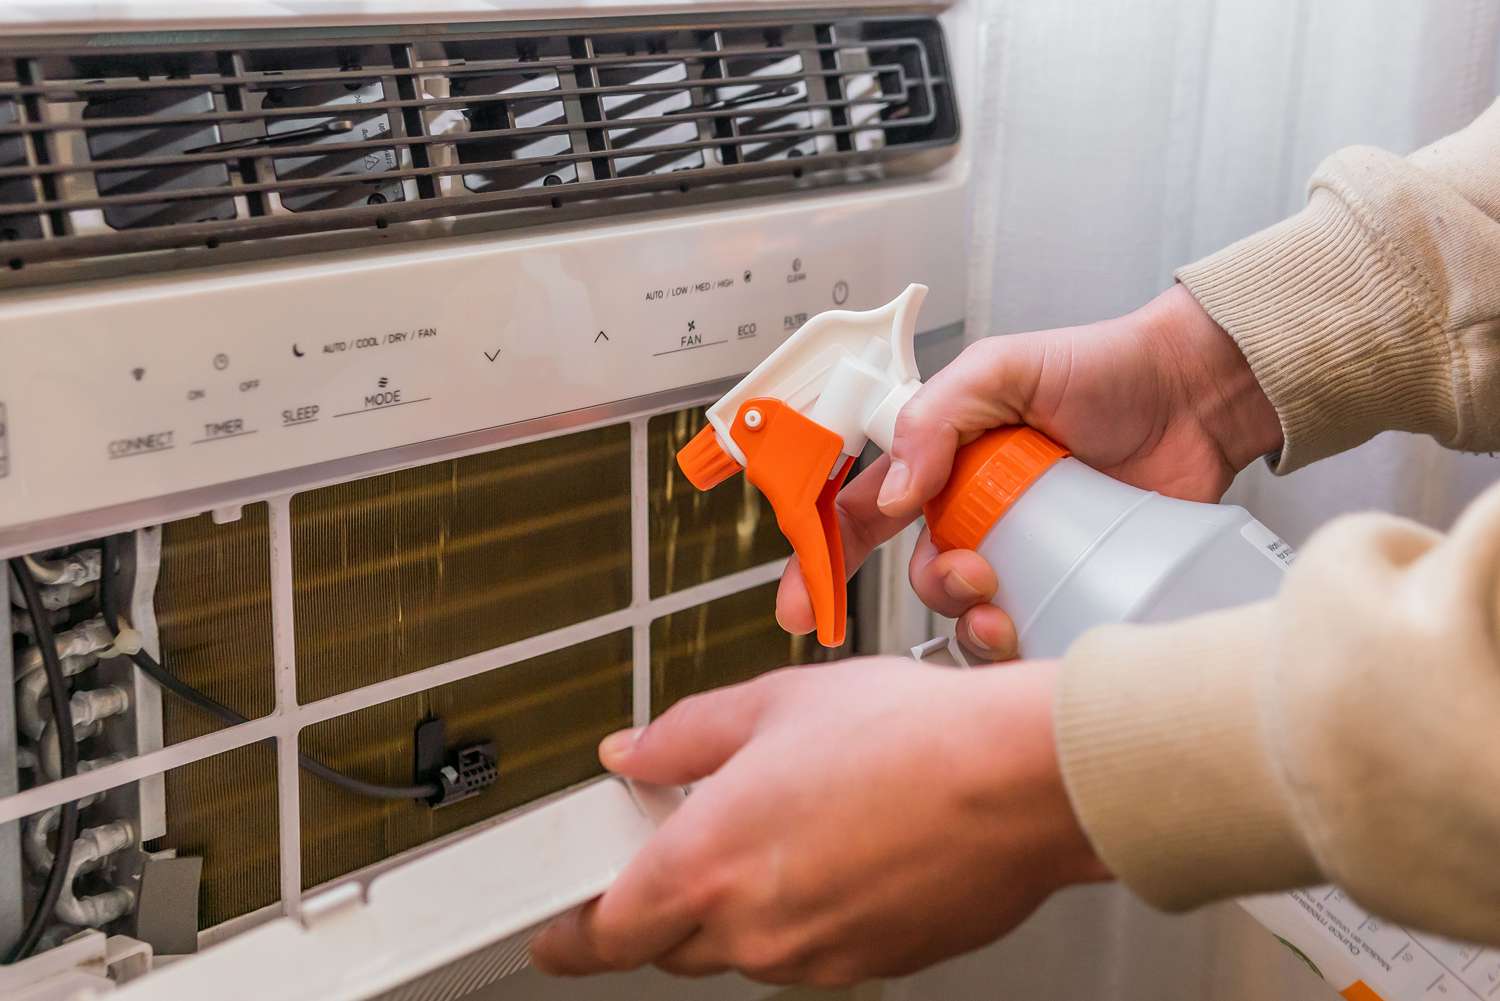
Cleaning the Coils
The coils of your air conditioner are responsible for transferring heat and cooling the air. Over time, these coils can accumulate dirt, dust, and other debris, inhibiting their efficiency and reducing the cooling capacity of your unit. Cleaning the coils is an important step in maintaining the performance of your air conditioner. Here’s how to clean the coils:
- Turn off the power: Before proceeding with cleaning, make sure to turn off the power supply to your air conditioner to avoid any accidents or electrical hazards.
- Access the coils: Depending on the design of your air conditioner, you may need to remove a panel or access the coils from the front or side. Consult the user manual or manufacturer’s instructions for guidance.
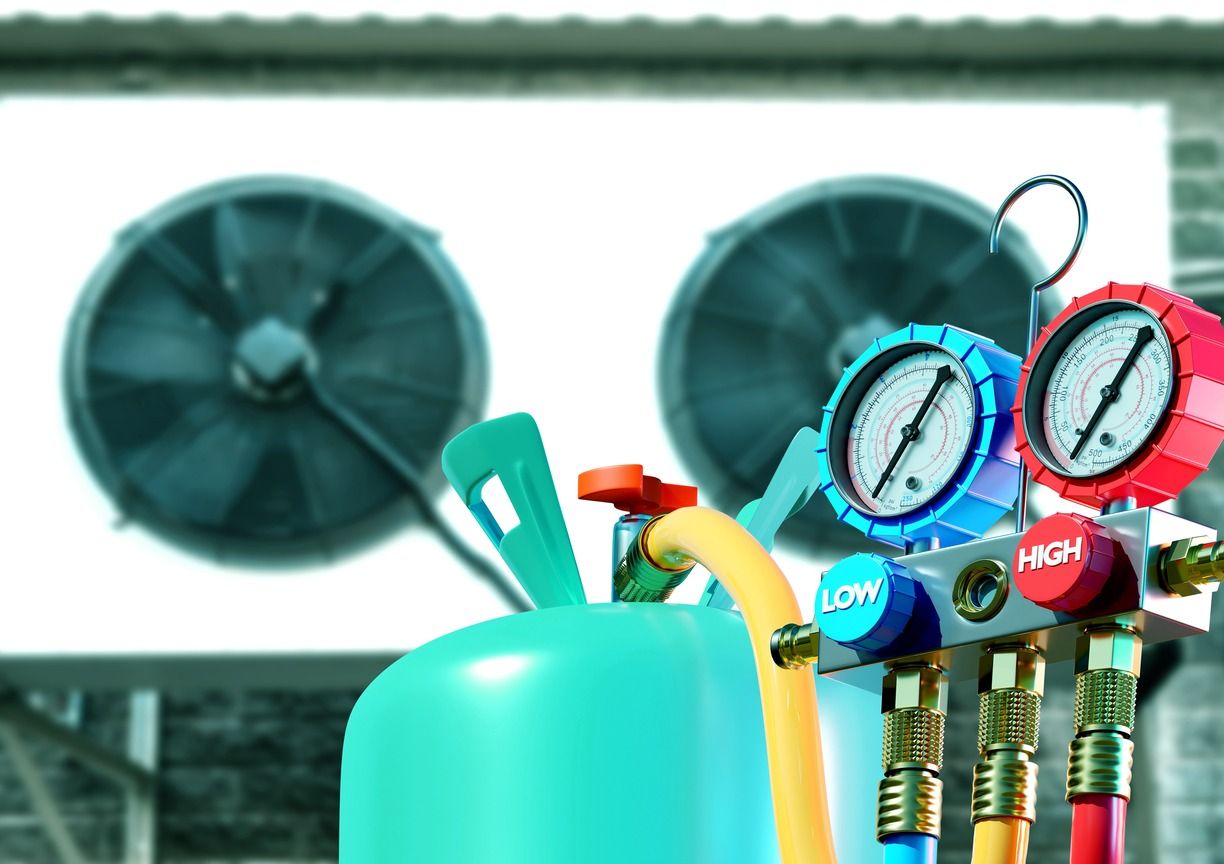
- Inspect the coils: Take a close look at the coils to assess their condition. Look for any visible dirt, debris, or signs of mold or mildew growth. If the coils are heavily soiled and the buildup is difficult to remove, it might be necessary to use a coil cleaner specifically designed for this purpose.
- Clean the coils manually: If the coils are not severely dirty, you can start by manually cleaning them. Use a soft bristle brush to gently remove any loose dirt and debris. Be careful not to damage the delicate fins of the coils.
- Vacuum the coils: Using a vacuum cleaner with a brush attachment, carefully vacuum the coils to remove any remaining dirt and debris. Ensure that the vacuum cleaner has enough suction power to effectively clean the coils.
- Use a coil cleaner (if necessary): If the coils are heavily soiled or have mold and mildew growth, it’s recommended to use a coil cleaner. Follow the manufacturer’s instructions and apply the cleaner generously to the coils. Allow it to sit for the recommended duration to break down the dirt and grime.
- Rinse the coils: After using a coil cleaner, rinse the coils with clean water to remove any residue and cleaning solution. Use a gentle stream of water and be mindful of not applying excessive force that could bend or damage the fins.
- Dry the coils: Once the coils are rinsed, allow them to air-dry completely before reassembling the unit. To expedite the drying process, you can use a fan or a soft cloth to remove excess moisture.
- Reassemble the unit: Once the coils are dry, carefully reassemble the air conditioner in the reverse order of disassembly. Ensure that all screws and fasteners are securely tightened.
- Test the system: Turn on the power supply and test the air conditioner to ensure that it’s functioning properly. Monitor the cooling performance and airflow to ensure that the cleaning has improved the efficiency of the unit.
It’s important to note that cleaning the coils should be done with care to avoid causing any damage. If you’re unsure or uncomfortable with cleaning the coils yourself, it’s always best to seek professional help. With the coils now cleaned, let’s move on to cleaning the condensate drain of your air conditioner.
Cleaning the Condensate Drain
The condensate drain in your air conditioner collects and removes the excess moisture that is produced during the cooling process. Over time, this drain can become clogged with dirt, algae, and other debris, leading to potential water damage and reduced efficiency of your unit. Cleaning the condensate drain is an essential maintenance task. Here’s how to do it:
- Locate the condensate drain: The condensate drain is usually a small tube or pipe attached to the air conditioning unit. It can typically be found at the bottom or side of the unit, near the evaporator coils.
- Inspect the drain: Take a close look at the condensate drain to assess its condition. Look for any signs of blockage such as standing water or mold accumulation.
- Clear the blockage manually: If you notice any visible debris or clogs in the drain, you can try to clear them manually. Use a thin brush or wire to carefully remove the blockage. Be gentle to avoid damaging the drain or causing leaks.
- Flush the drain: If the blockage is not easily cleared, you can flush the drain with a mixture of vinegar and water. This will help break down any organic matter and disinfect the drain. Mix equal parts vinegar and water in a spray bottle or bucket.
- Apply the solution: Spray or pour the vinegar and water solution into the condensate drain. Be cautious not to use excessive force that could cause water to overflow or leak into the surrounding area.
- Let it sit: Allow the vinegar and water solution to sit in the condensate drain for about 30 minutes to an hour. This will give the solution enough time to break down any buildup and disinfect the drain.
- Flush with clean water: After the solution has had enough time to work, rinse the condensate drain with clean water. Use a gentle stream to flush out any remaining debris or residue.
- Repeat if necessary: If the drain is still not clear, you may need to repeat the process of applying the vinegar and water solution and flushing with clean water. Stubborn blockages may require a more thorough cleaning or professional assistance.
- Monitor the drain: Once the drain is cleaned and clear, monitor it regularly to ensure it remains free from blockages. Check for any signs of water accumulation or mold growth and address any issues promptly.
Cleaning the condensate drain will help prevent water damage, reduce the risk of mold growth, and ensure efficient performance of your air conditioner. Now that we have covered cleaning the condensate drain, let’s move on to cleaning the fan and fan blades of your air conditioner.
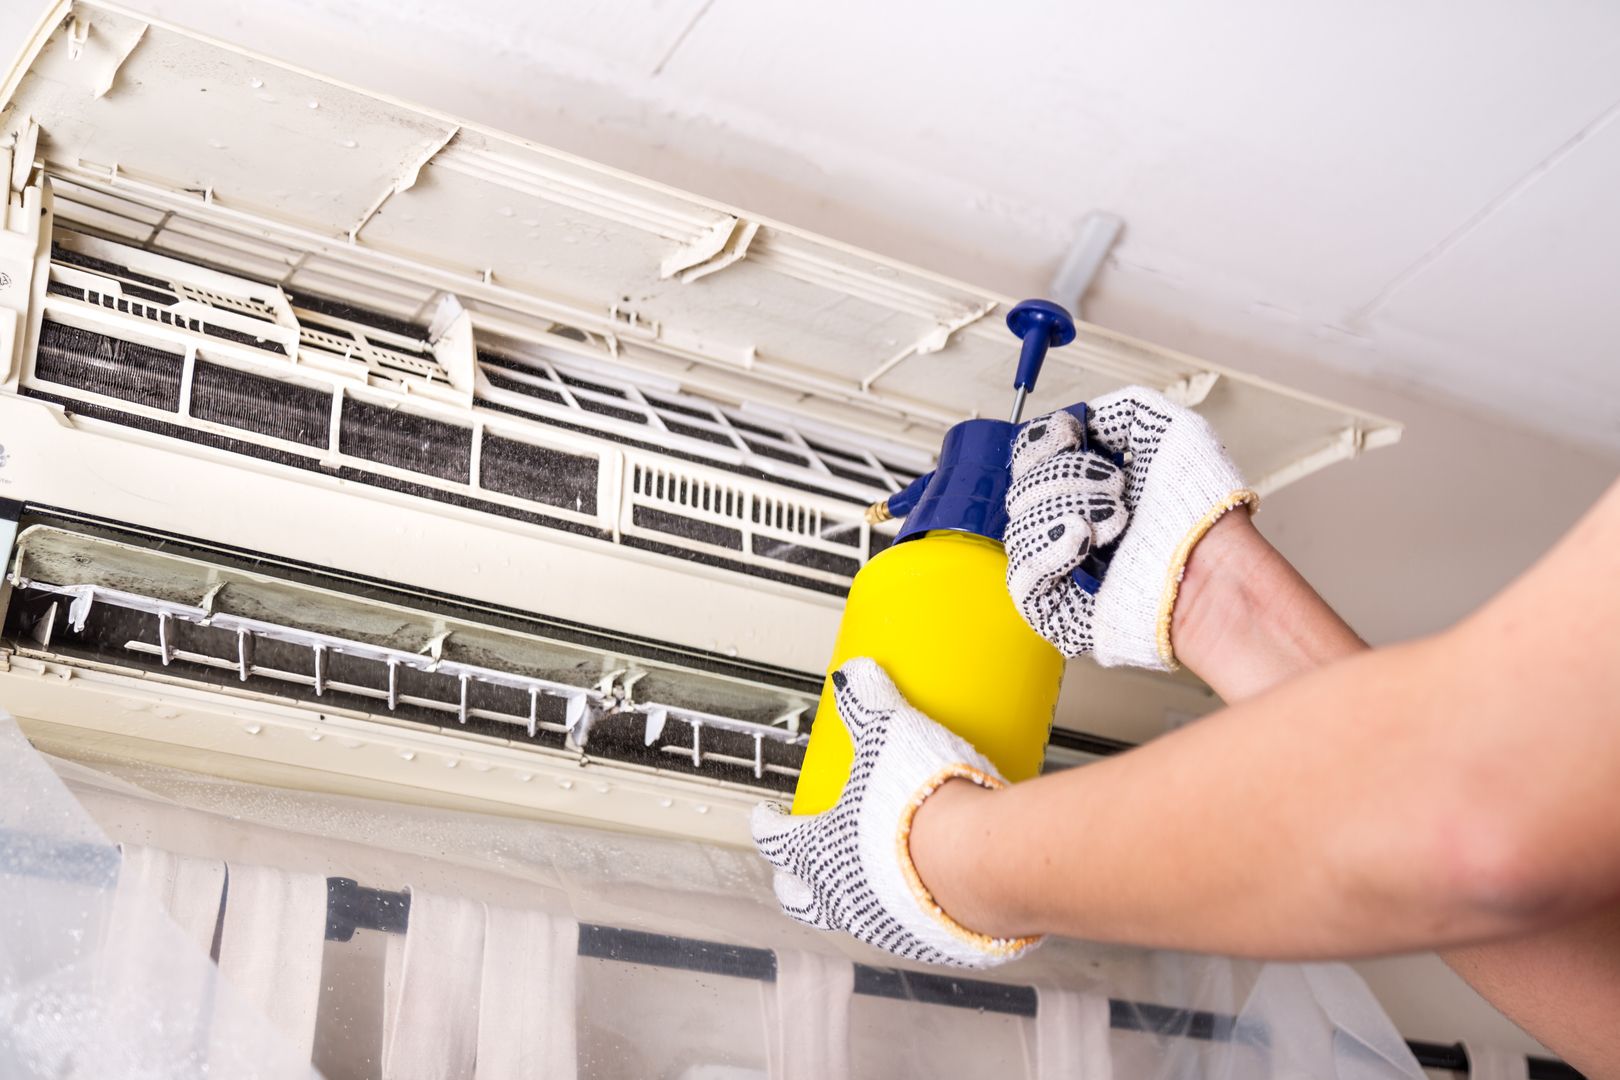
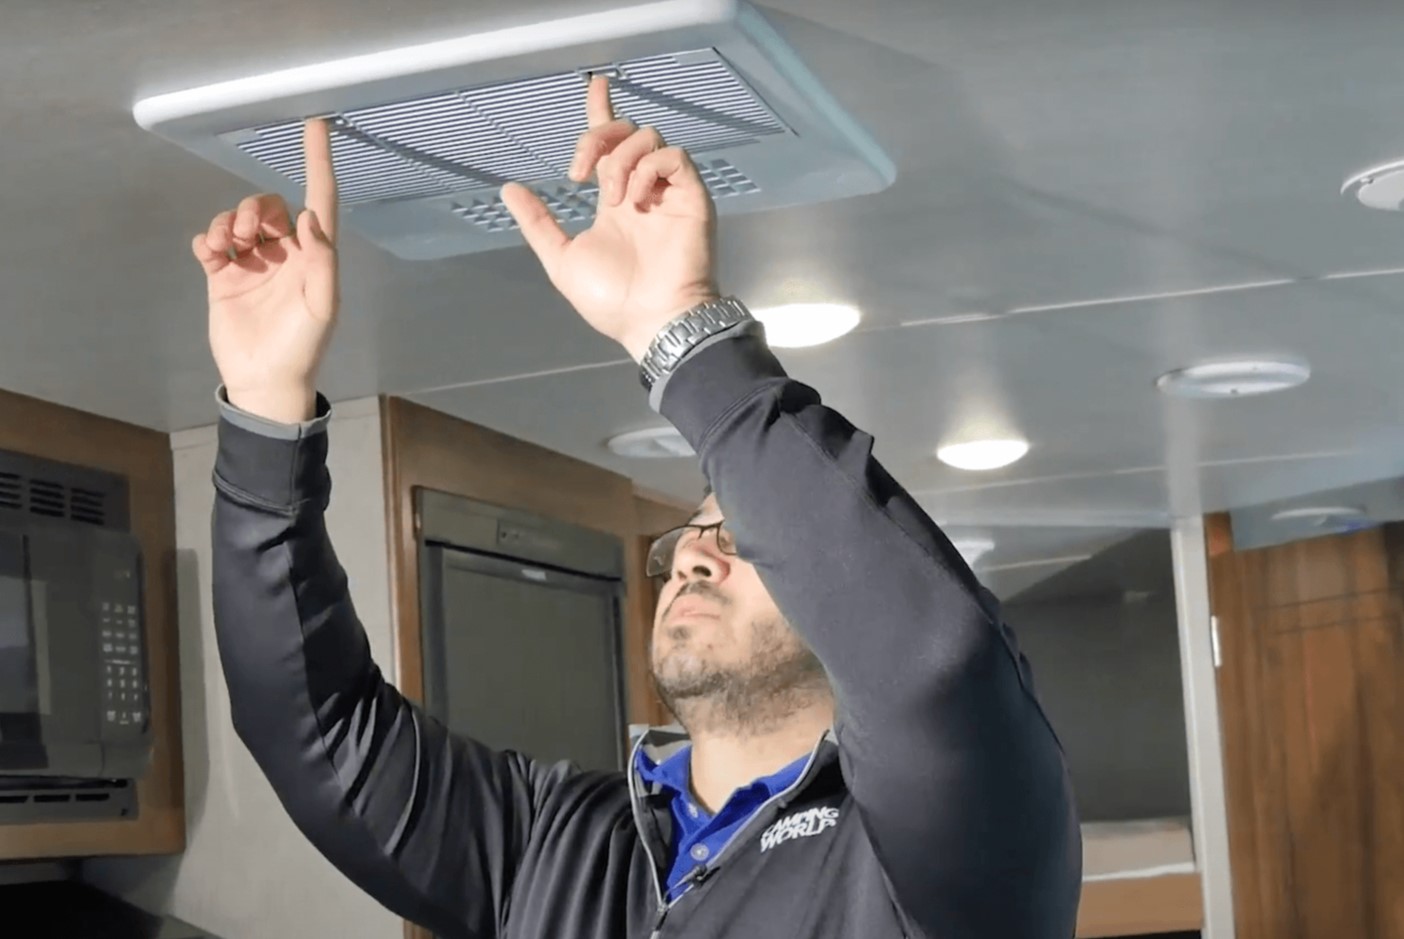
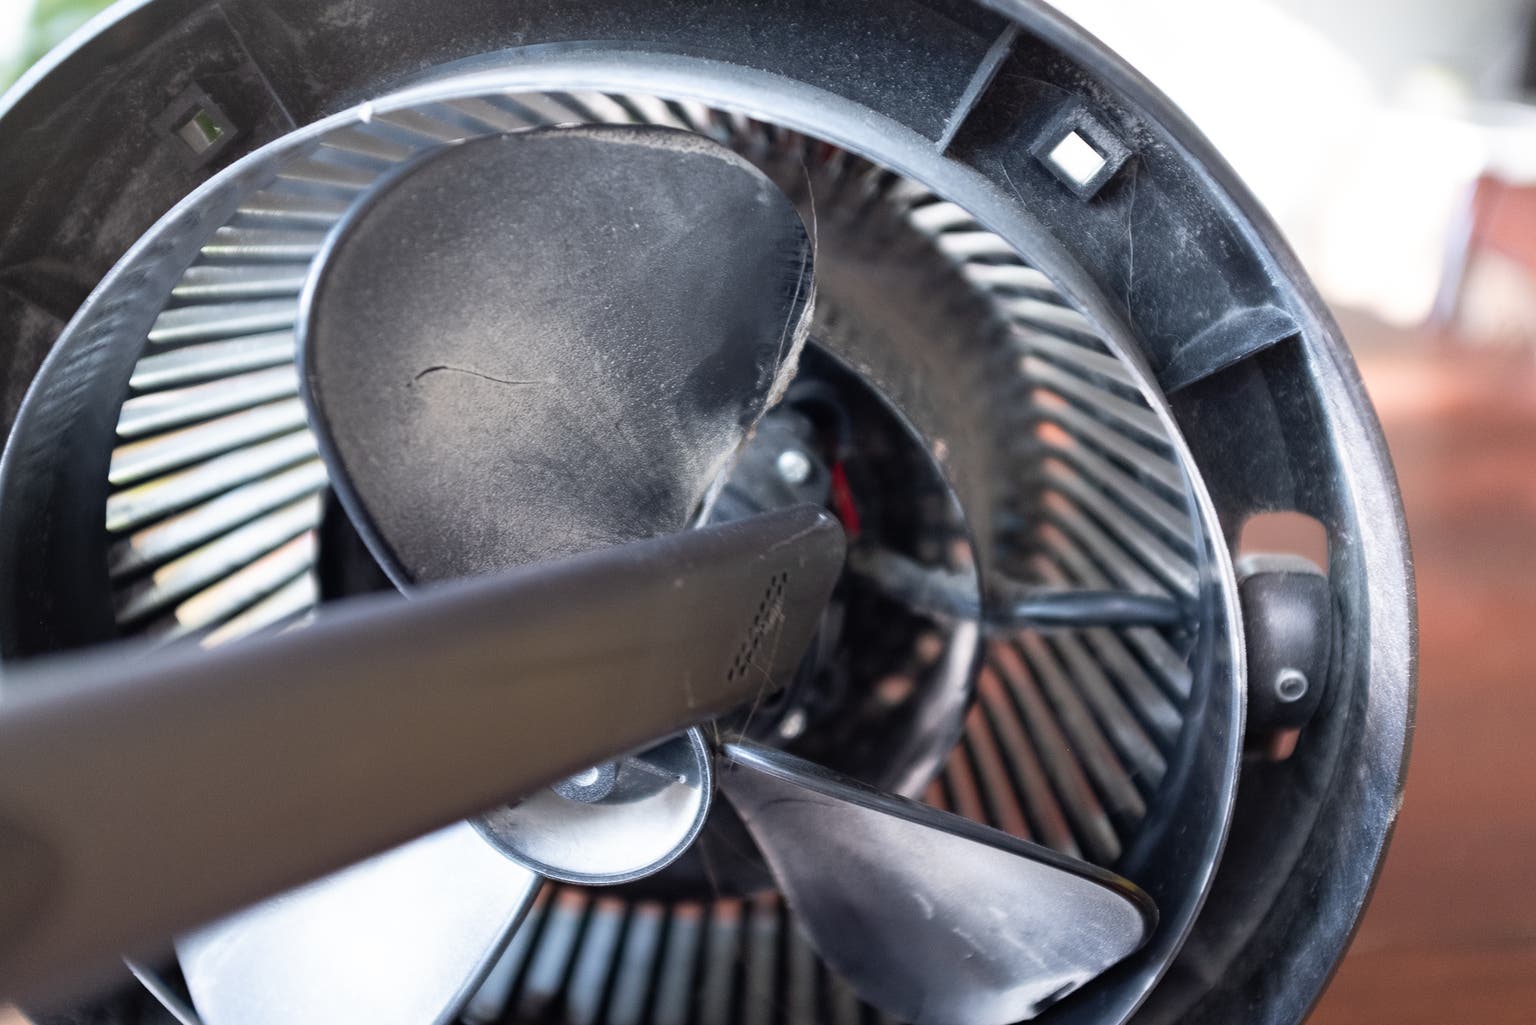
Cleaning the Fan and Fan Blades
The fan and fan blades of your air conditioner play a crucial role in circulating air and ensuring efficient cooling. Over time, dirt, dust, and debris can accumulate on the fan and blades, hindering their performance and reducing airflow. Cleaning the fan and fan blades is an important step in maintaining the overall efficiency of your unit. Here’s how to clean them:
- Turn off the power: Before starting any cleaning procedures, make sure to turn off the power supply to your air conditioner.
- Access the fan and blades: Locate the fan and fan blades, usually located behind the front or side cover of the air conditioner. Remove any screws or fasteners holding the cover in place.
- Gently wipe down the fan blades: Use a damp cloth or sponge to gently wipe down the fan blades, removing any dust or dirt accumulation. Be cautious not to bend or damage the blades during the cleaning process.
- Remove stubborn dirt: If there is stubborn dirt or debris on the fan blades, you can use a soft bristle brush to gently scrub off the buildup. Avoid using excessive force that could damage the blades.
- Clean the fan motor area: Carefully remove any dirt or debris from the area surrounding the fan motor. Use a vacuum cleaner with a brush attachment or a soft cloth to remove loose particles.
- Reassemble the unit: Once the fan and fan blades are clean and dry, reassemble the air conditioner in the reverse order of disassembly. Make sure all screws and fasteners are securely tightened.
- Test the system: Turn on the power supply and test the air conditioner to ensure that the fan and blades are functioning properly. Monitor the airflow and listen for any unusual noises or vibrations.
- Regular maintenance: To maintain the cleanliness of the fan and fan blades, include them in your regular air conditioner maintenance routine. Wipe down the blades whenever you clean the unit or notice visible dirt accumulation.
Cleaning the fan and fan blades improves the airflow and ensures the efficient operation of your air conditioner. Remember to exercise caution when handling the fan and blades to avoid injury and damage to the unit. Now that we have covered cleaning the fan and fan blades, let’s move on to reassembling your air conditioner.
Read more: How Do You Fix A Leaking Air Conditioner
Reassembling Your Air Conditioner
After thoroughly cleaning the various components of your air conditioner, it’s time to reassemble the unit. Proper reassembly is crucial for the efficient and safe operation of your air conditioner. Here’s a step-by-step guide to reassembling your air conditioner:
- Gather all cleaned components: Ensure that all the components you have cleaned, including the filters, coils, fan blades, and any removed covers, are ready for reassembly.
- Align the components: Carefully align and position the components in their respective places. Refer to the manufacturer’s instructions or the way they were before disassembly if you’re not sure.
- Secure the fasteners: Use a screwdriver to securely fasten any screws or other fasteners to hold the components in place. Ensure they are tightened properly but be careful not to overtighten and damage the unit.
- Double-check connections: Check that all connections, such as electrical wires or tubing, are properly reattached and secured. Ensure they are properly positioned and not pinched or twisted.
- Inspect for any loose parts: Before restoring power to the unit, inspect the air conditioner for any loose parts or debris that may have been missed during reassembly. Remove any obstructions to prevent damage to the unit.
- Turn on the power: Once you are confident that all components are properly reassembled, turn on the power supply to the air conditioner.
- Test the air conditioner: Test the air conditioner to ensure it is functioning properly. Listen for normal operating sounds and verify that cool air is being produced and circulated effectively.
- Monitor the performance: Keep an eye on the performance of your air conditioner after reassembly. Monitor the temperature, airflow, and any unusual noise or vibration. If you notice any significant issues, it may be best to contact a professional for assistance.
- Maintain regular cleaning and maintenance: To keep your air conditioner running smoothly, continue with regular cleaning and maintenance as recommended by the manufacturer. This will help maximize efficiency and extend the lifespan of your unit.
Following these steps will ensure a successful reassembly of your air conditioner. Take your time and be meticulous to avoid any mistakes or missed connections. With the unit properly reassembled, you can now enjoy the benefits of a clean and well-maintained air conditioner for your home. Lastly, let’s explore some additional tips for effective air conditioner maintenance.
Tips for Effective Air Conditioner Maintenance
Maintaining your air conditioner regularly is key to ensuring its optimal performance and longevity. Here are some valuable tips to help you effectively maintain your air conditioner:
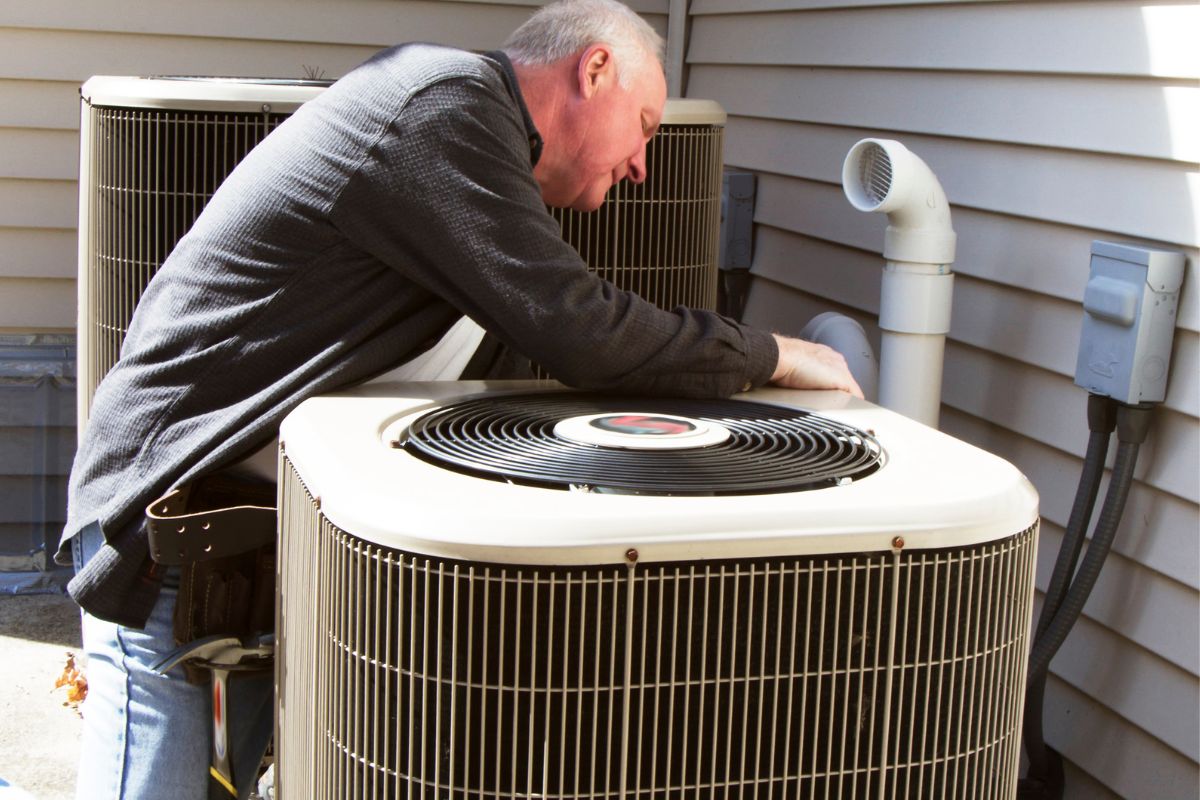
- Keep the area around the air conditioner clear: Ensure that the area surrounding the outdoor unit is clear of any obstructions such as leaves, debris, or vegetation. This will allow for proper airflow in and out of the unit.
- Regularly clean or replace the air filter: The air filter should be cleaned or replaced every 3 to 6 months, or more frequently if it becomes visibly dirty. A clogged filter restricts airflow and can affect the cooling efficiency of the unit.
- Check and clean the evaporator coils: Over time, the evaporator coils can accumulate dirt and dust, hindering their efficiency. Regularly inspect and clean the coils to ensure optimal heat transfer and cooling performance.
- Monitor the condensate drain: Check the condensate drain regularly to ensure it is clear of blockages. Clear any clogs immediately to prevent water damage and the growth of mold or mildew.
- Inspect and clean the fan and fan blades: The fan and fan blades can accumulate dirt and debris, affecting airflow and performance. Regularly clean these components to maintain smooth and efficient operation.
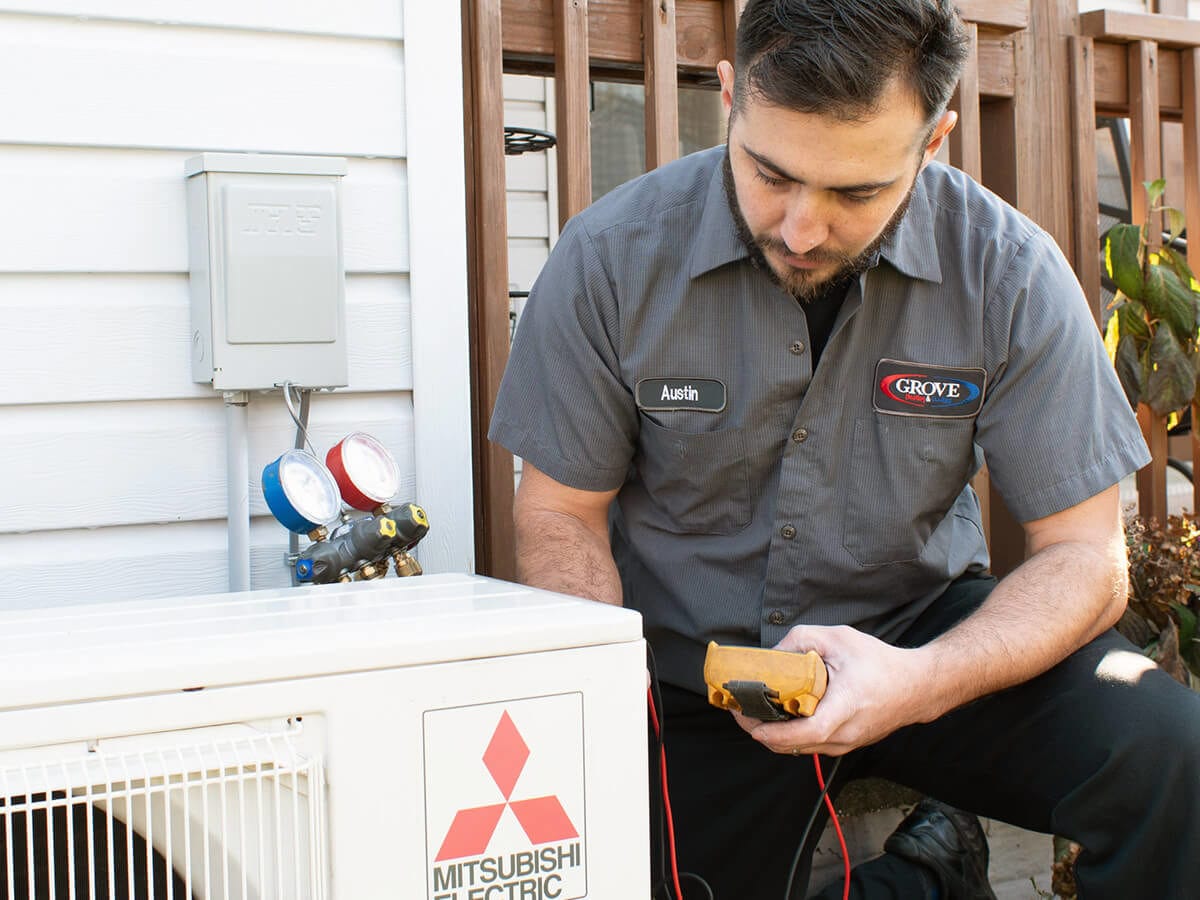
- Schedule professional maintenance: While regular DIY maintenance is important, it’s recommended to have a professional HVAC technician perform a thorough inspection and tune-up of your air conditioner annually. They can identify any potential issues and ensure the unit is running optimally.
- Invest in a programmable thermostat: A programmable thermostat allows you to set temperature schedules and save energy when you’re not at home. It helps regulate the cooling cycles of your air conditioner more efficiently.
- Use ceiling fans: Ceiling fans can help circulate the cooled air in your home, allowing you to set your air conditioner at a higher temperature. This can reduce the workload on your air conditioner and save energy.
- Keep windows and doors sealed: Ensure that windows and doors are properly sealed to prevent air leaks, which can result in energy wastage and strain on your air conditioner.
- Monitor energy consumption: Regularly check your air conditioner’s energy consumption to detect any sudden spikes. This can indicate potential problems or inefficiencies that require attention.
By following these tips, you can maintain the efficiency and longevity of your air conditioner while maximizing your energy savings. Remember that regular maintenance and attention to cleanliness are essential for the optimal performance of your unit.
Now that you have a comprehensive understanding of how to clean and maintain your air conditioner, you can enjoy the benefits of a cool and comfortable home environment throughout the year. Keep up with routine maintenance, and you’ll ensure your air conditioner operates at its best for years to come.
Stay cool!
Conclusion
Cleaning and maintaining your air conditioner is a crucial part of home maintenance that can greatly impact your comfort, energy efficiency, and indoor air quality. By following the step-by-step guide and implementing the tips provided in this article, you can ensure that your air conditioner remains in optimal condition, providing you with effective cooling and peace of mind.
Understanding the importance of regular cleaning and maintenance allows you to prevent issues such as reduced cooling efficiency, increased energy consumption, and potential breakdowns. By cleaning the filter, coils, condensate drain, and fan components, you can remove dirt, dust, and other particles that can hinder the performance of your air conditioner.
Remember to prioritize safety by turning off the power supply, wearing protective gear, and following manufacturer’s instructions. Gather the necessary tools and materials before starting the cleaning process and take care not to damage any components during reassembly.
In addition to regular cleaning, it is important to schedule professional maintenance and keep an eye on your air conditioner’s energy consumption. By investing in a programmable thermostat, using ceiling fans, and keeping windows and doors sealed, you can optimize the efficiency of your air conditioner and reduce energy usage.
By following these practices, you can enjoy a cool and comfortable home, while also saving money on energy bills and protecting the lifespan of your air conditioner. Regular maintenance will not only benefit your comfort but also contribute to a healthier indoor environment by improving air quality and reducing the risk of mold or allergen buildup.
Remember, if you are ever uncertain or uncomfortable with the maintenance tasks involved, it’s always best to consult with a professional HVAC technician who can provide expert guidance and assistance.
With proper care and maintenance, your air conditioner will continue to provide you with reliable and efficient cooling, allowing you to enjoy a comfortable living space year-round. So, don’t neglect your air conditioner’s maintenance needs – follow the steps outlined in this guide and enjoy the benefits of a well-maintained and clean air conditioning system.
Stay cool and enjoy a refreshing home environment!
Frequently Asked Questions about How Do You Clean An Air Conditioner
Was this page helpful?
At Storables.com, we guarantee accurate and reliable information. Our content, validated by Expert Board Contributors, is crafted following stringent Editorial Policies. We're committed to providing you with well-researched, expert-backed insights for all your informational needs.