Home>Home Maintenance>How To Clean A Trane Air Conditioner
Home Maintenance
How To Clean A Trane Air Conditioner
Modified: March 7, 2024
Learn how to properly clean your Trane air conditioner for optimal home maintenance. Follow our step-by-step guide and enjoy cool, clean air all summer long.
(Many of the links in this article redirect to a specific reviewed product. Your purchase of these products through affiliate links helps to generate commission for Storables.com, at no extra cost. Learn more)
Introduction
Welcome to our comprehensive guide on how to clean a Trane air conditioner. Regular maintenance and cleaning of your air conditioner are essential to ensure its optimal performance, energy efficiency, and longevity. Trane air conditioners are known for their reliability and effectiveness in cooling your home, but without proper cleaning, dust, debris, and dirt can accumulate, leading to decreased performance and potential damage.
In this article, we will walk you through the step-by-step process of cleaning your Trane air conditioner. From preparing for the cleaning to turning the power back on, we will cover everything you need to know to keep your air conditioner in top condition. So, let’s get started!
Key Takeaways:
- Regularly cleaning your Trane air conditioner is essential for optimal performance, energy efficiency, and longevity. Follow the step-by-step guide to ensure cool and comfortable air in your home for years to come.
- Remember to take necessary safety precautions, such as turning off the power before cleaning and wearing appropriate protective gear. If unsure, seek the assistance of a professional HVAC technician for peace of mind.
Read more: How Much Does A Trane Air Conditioner Cost
Preparing for Cleaning
Before you begin cleaning your Trane air conditioner, there are a few important steps you should take to ensure your safety and effectiveness:
- Turn Off the Power: The first and most crucial step is to shut off the power supply to your air conditioner. This will prevent any accidents or electric shock while cleaning. Locate the electrical disconnect switch near the outdoor unit and flip it to the “off” position.
- Gather Your Tools: To clean your air conditioner, you will need a few basic tools, including:
- Screwdriver or nut driver to remove the air filter
- Soft bristle brush or vacuum cleaner with a brush attachment to clean the coils
- Mild detergent or coil cleaner solution
- Rag or brush to clean the condensate drain
- Water hose for rinsing the outdoor unit
- Dress Appropriately: Wear appropriate protective clothing, such as gloves and safety goggles, to avoid any contact with dirt or cleaning solutions.
- Choose the Right Time: It is advisable to clean your air conditioner on a mild, sunny day when the unit is not actively cooling or actively raining to ensure effective cleaning and drying.
Once you have completed these preparations, you are ready to proceed with cleaning your Trane air conditioner.
Shutting Off Power
Before you begin cleaning your Trane air conditioner, it is crucial to shut off the power to ensure your safety. Follow these steps to turn off the power supply:
- Locate the Electrical Disconnect: The electrical disconnect switch is typically located near the outdoor unit. It may be housed in a small box or mounted on the wall near the unit. Open the cover or flip open the lid to access the switch.
- Flip the Switch to the “Off” Position: Once you have located the electrical disconnect switch, use caution and flip it to the “off” position. This action will cut off the power supply to the air conditioner.
- Verify Power is Off: After flipping the switch, double-check to ensure that the power to the unit is indeed off. You can do this by turning on your air conditioner using the thermostat or remote control. If it doesn’t turn on, it means the power is successfully disconnected.
By shutting off the power, you eliminate the risk of electric shock and allow for safe cleaning of your Trane air conditioner.
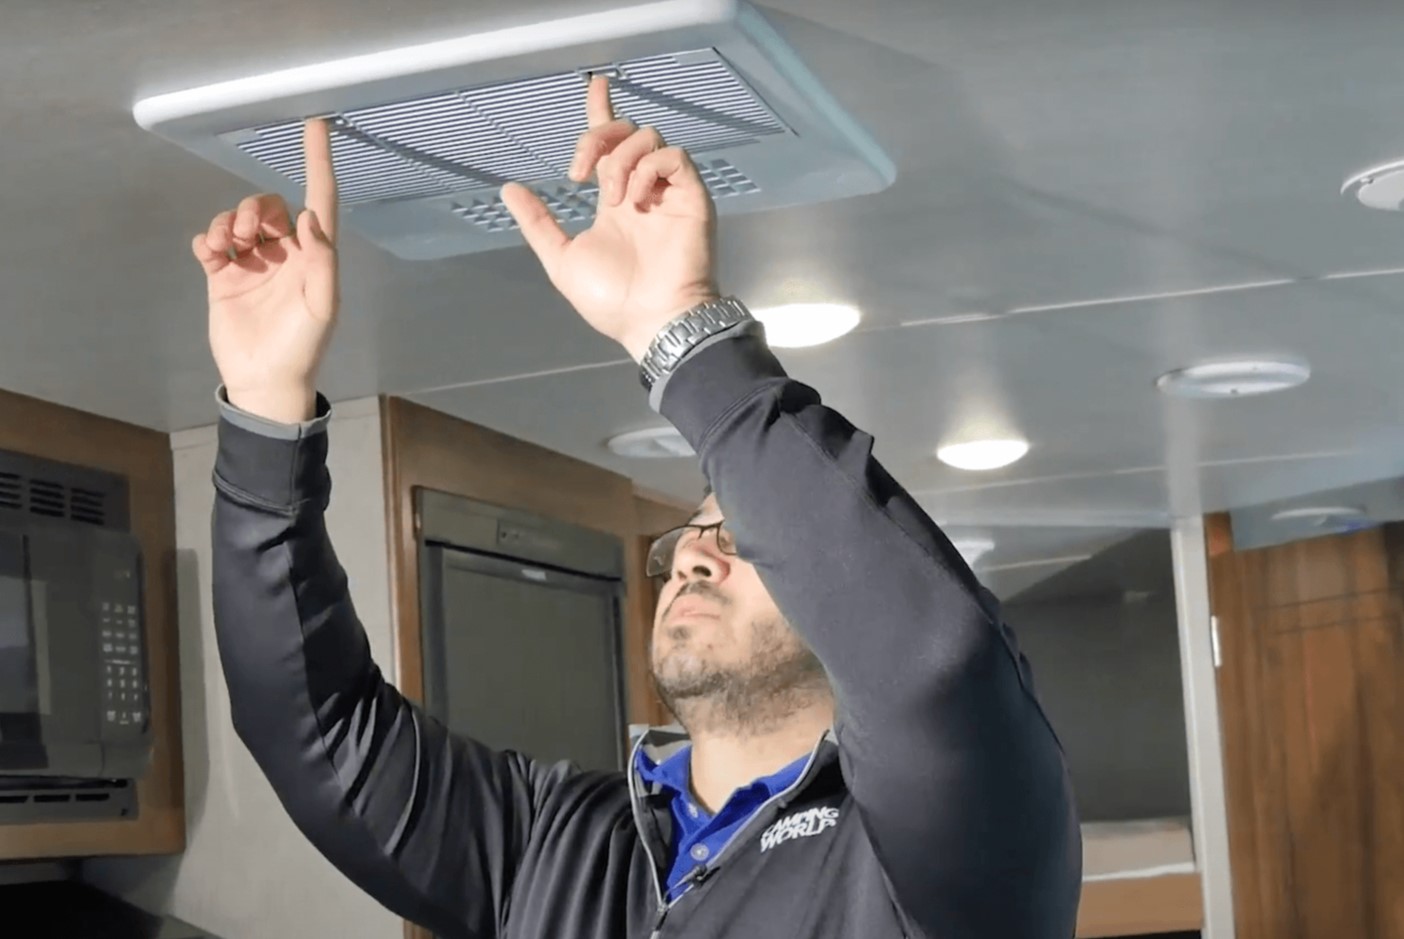
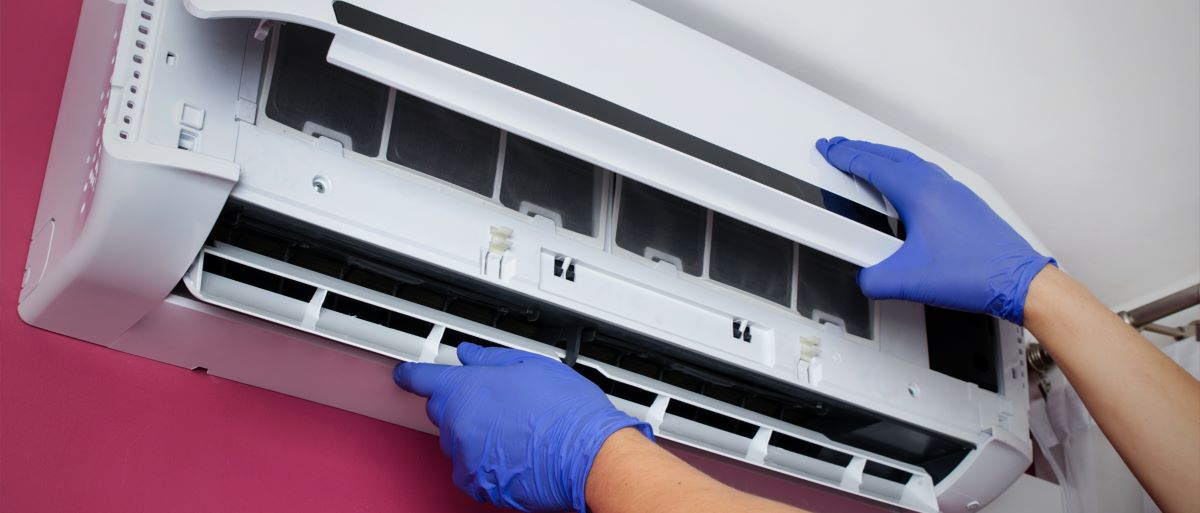
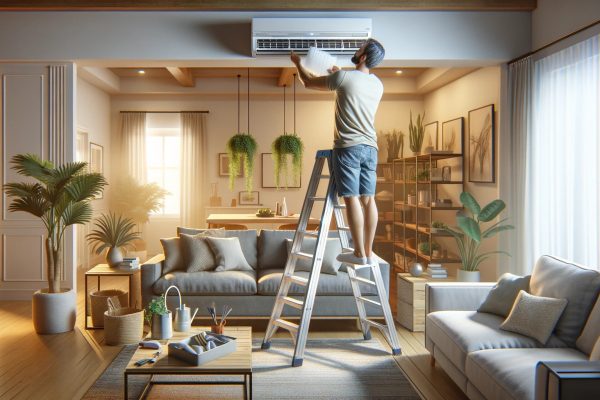
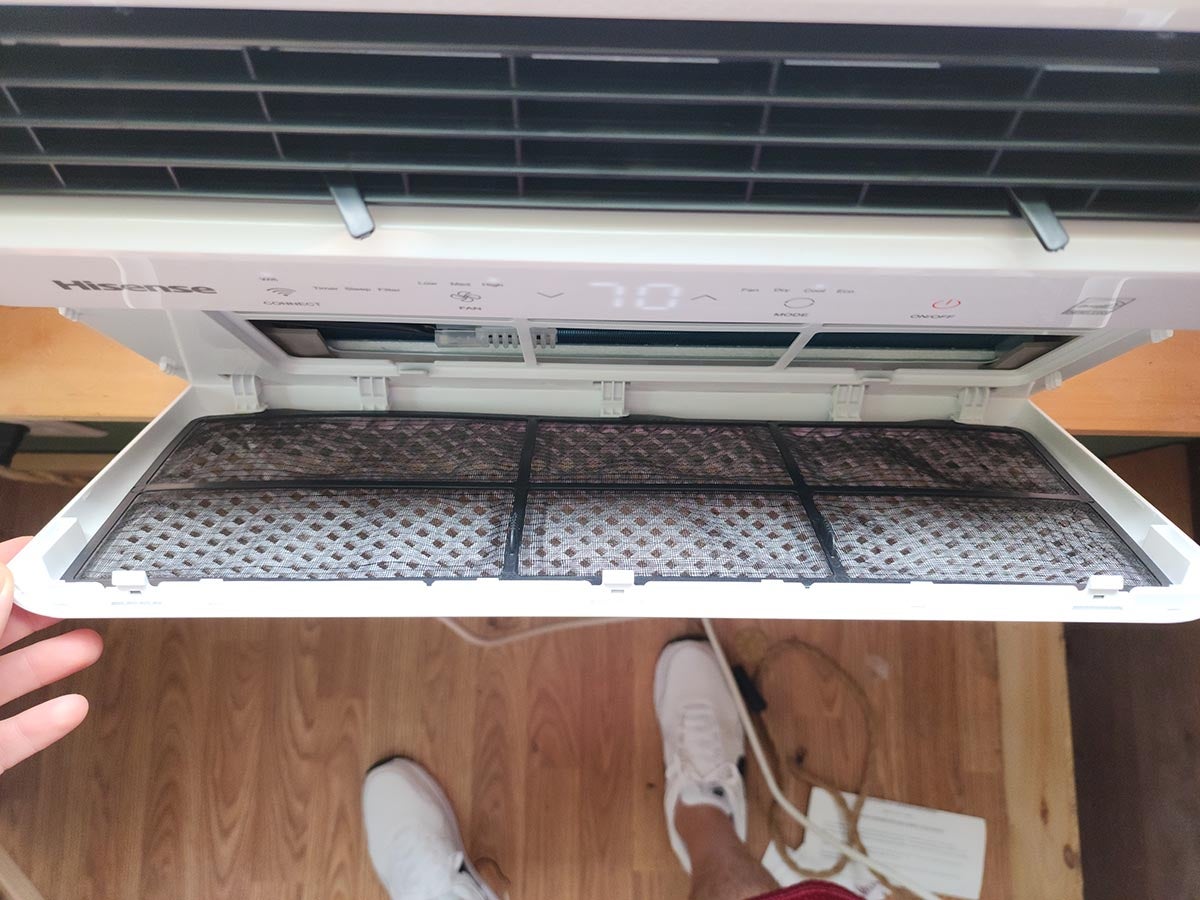
Removing the Air Filter
The air filter in your Trane air conditioner plays a crucial role in keeping the system clean and the air quality in your home at its best. Over time, the filter can become clogged with dust, debris, and allergens, hindering proper airflow and reducing the overall efficiency of your unit. Cleaning or replacing the air filter regularly is essential for optimal performance. Here’s how to remove the air filter:
- Locate the Air Filter: The air filter is typically found in the return air duct, which is usually located near the indoor unit of your Trane air conditioner. It may be behind a grille or a removable panel.
- Turn Off the Unit: Before removing the air filter, ensure that the power to your air conditioner is turned off. Refer to the previous section on shutting off the power for detailed instructions.
- Remove the Grille or Panel: If the air filter is located behind a grille or panel, carefully remove it by unscrewing or unclipping it. Set the grille or panel aside.
- Slide or Unclip the Air Filter: The air filter is usually held in place by clips or slides. Carefully slide or unclip the air filter to release it from its housing.
- Inspect the Air Filter: Once you have removed the air filter, inspect it for dirt, dust, and debris. If it appears excessively dirty or damaged, it is recommended to replace it with a new filter. Otherwise, proceed to the next step to clean it.
Removing the air filter is the first step in the cleaning process of your Trane air conditioner. By regularly checking and cleaning or replacing the air filter, you can ensure proper airflow and maintain the efficiency of your unit. In the next section, we will guide you through the process of cleaning the air filter.
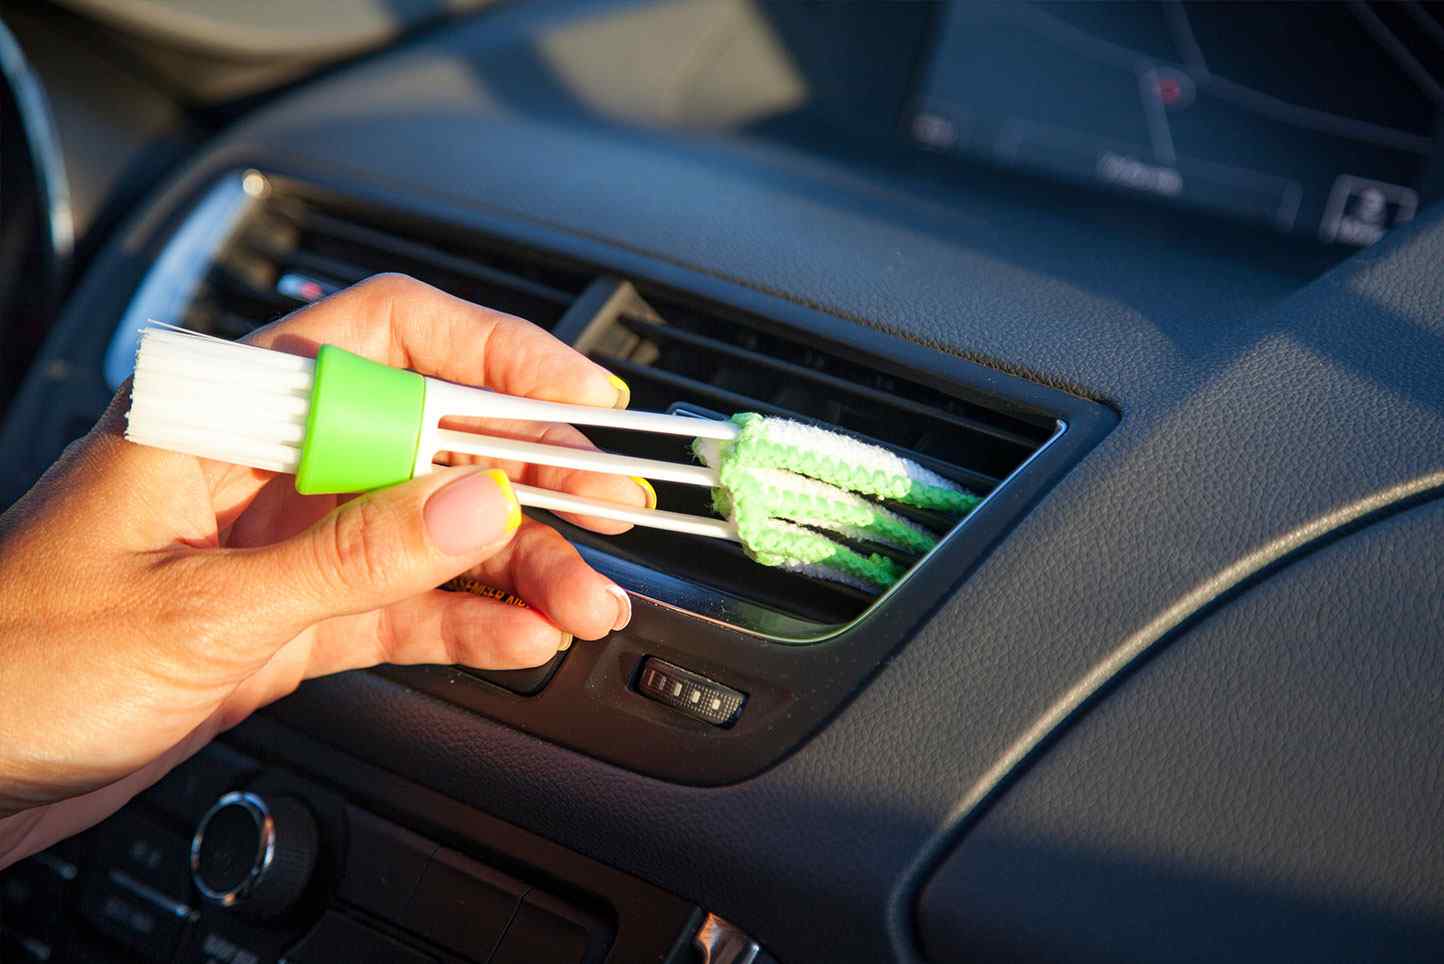
Cleaning the Air Filter
Cleaning the air filter of your Trane air conditioner is an important step in maintaining optimal performance and indoor air quality. Follow these steps to clean the air filter:
- Prepare a Cleaning Solution: In a basin or bucket, mix a mild detergent or a specialized coil cleaner solution with warm water. Follow the instructions on the cleaner for the appropriate dilution ratio.
- Submerge the Air Filter: Take the air filter that you removed from the unit and carefully submerge it in the cleaning solution. Ensure that the entire filter is submerged to allow for thorough cleaning.
- Agitate the Filter: Gently agitate the air filter in the cleaning solution to dislodge any dirt, dust, and debris. You can use your hands to swirl the filter or a soft brush to scrub it gently. Take care not to damage or bend the filter material.
- Rinse the Air Filter: After agitating the filter, remove it from the cleaning solution and rinse it thoroughly with clean, running water. Ensure that all the detergent or cleaner residue is washed away.
- Allow the Filter to Dry: Shake off any excess water from the filter and place it on a clean towel or in a well-ventilated area to dry completely. Make sure the filter is completely dry before reinserting it into the air conditioner.
- Inspect the Filter: Once the filter is dry, inspect it for any remaining dirt or damage. If the filter is heavily soiled or damaged beyond cleaning, it is recommended to replace it with a new filter.
Cleaning the air filter of your Trane air conditioner is an important step in maintaining optimal performance and indoor air quality. By removing dirt and debris, you ensure proper airflow and extend the life of your unit. In the next section, we will guide you through the process of removing debris from the outdoor unit.
Read more: How To Clean A Lennox Air Conditioner
Removing Debris from the Outdoor Unit
The outdoor unit of your Trane air conditioner is exposed to various elements, such as dust, leaves, grass, and other debris. Over time, this debris can accumulate and impede the airflow and efficiency of the unit. Here’s how to remove debris from the outdoor unit:
- Turn Off the Power: Before you begin cleaning the outdoor unit, make sure to turn off the power supply. Refer to the earlier section on shutting off power for detailed instructions.
- Remove Obstructions: Inspect the area around the outdoor unit and remove any objects, such as furniture, plants, or other debris, that may be obstructing access to the unit.
- Inspect the Condenser Fins: Carefully examine the condenser fins, which are the metal grill-like components surrounding the unit. Look for any visible debris, such as leaves or twigs, that are stuck in the fins.
- Use a Vacuum or Brush: If there is loose debris in the condenser fins, you can use a vacuum cleaner with a brush attachment to gently remove it. Alternatively, use a soft brush to sweep away the debris.
- Rinse the Fins: After removing the loose debris, use a garden hose with a gentle spray setting to rinse off any remaining dirt or debris from the condenser fins. Start from the top and work your way down, ensuring that the water flows parallel to the fins.
- Be Cautious with the Fins: Take care not to apply excessive force or bend the fins while cleaning. The fins are delicate and can easily become damaged. If you notice any bent or damaged fins, it is recommended to contact a professional for repair.
Removing debris from the outdoor unit of your Trane air conditioner is crucial for proper airflow and efficient cooling. By keeping the unit clean and free from obstructions, you can ensure optimal performance. In the next section, we will guide you through the process of cleaning the outdoor unit.
Regularly clean or replace the air filters in your Trane air conditioner to ensure efficient operation and improve indoor air quality.
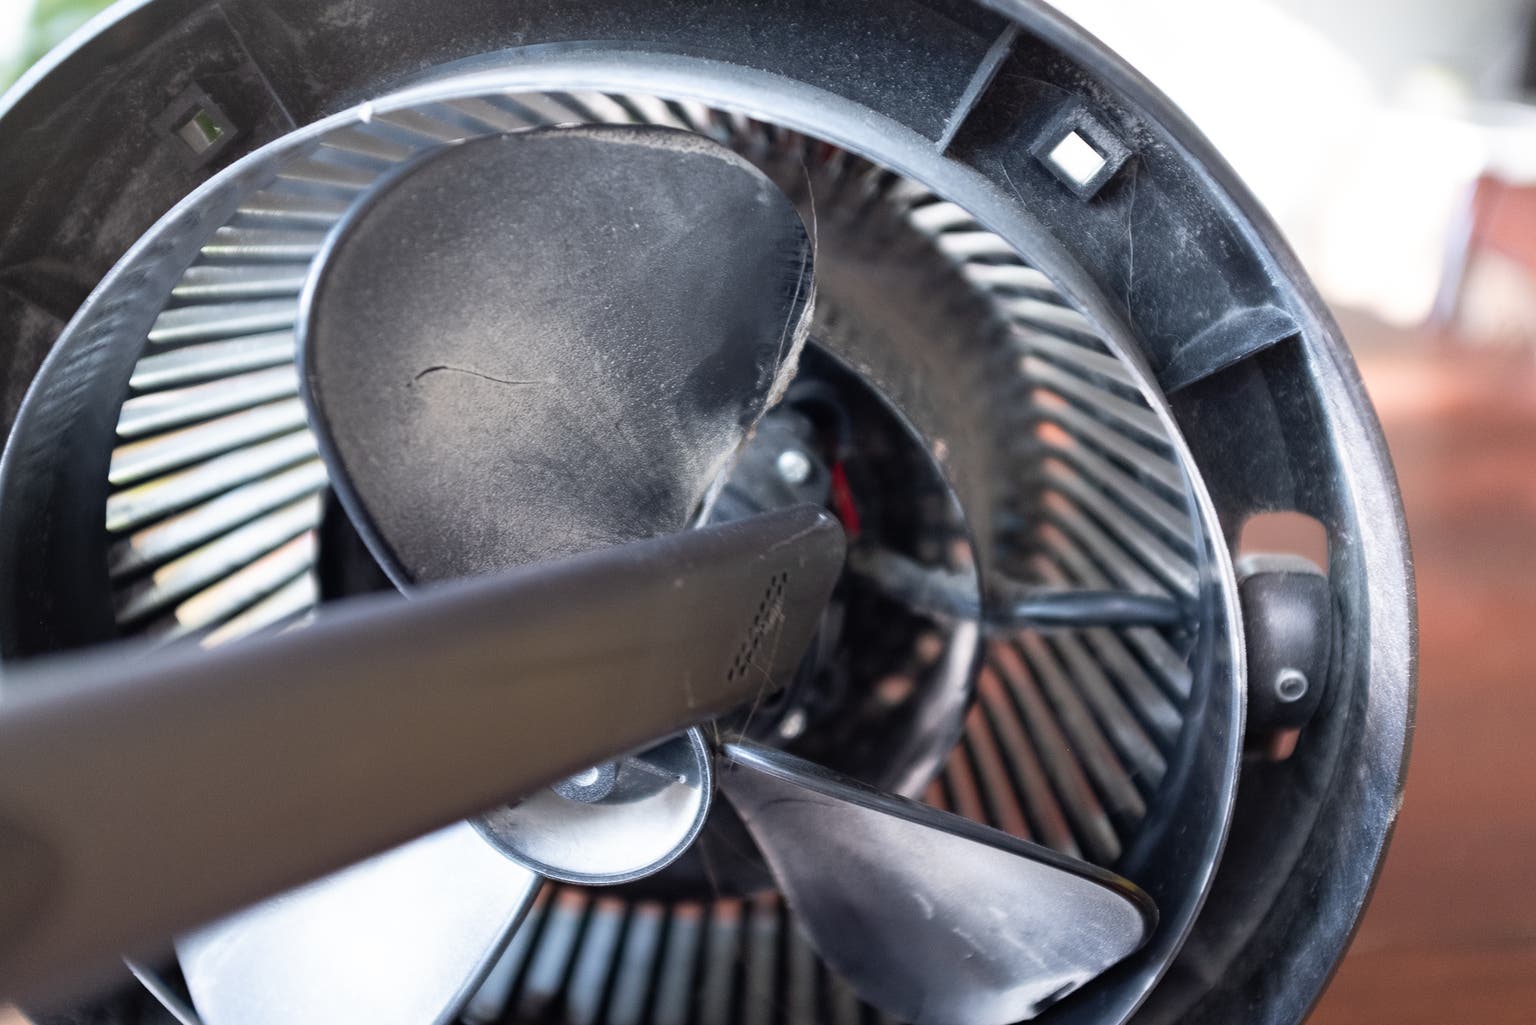
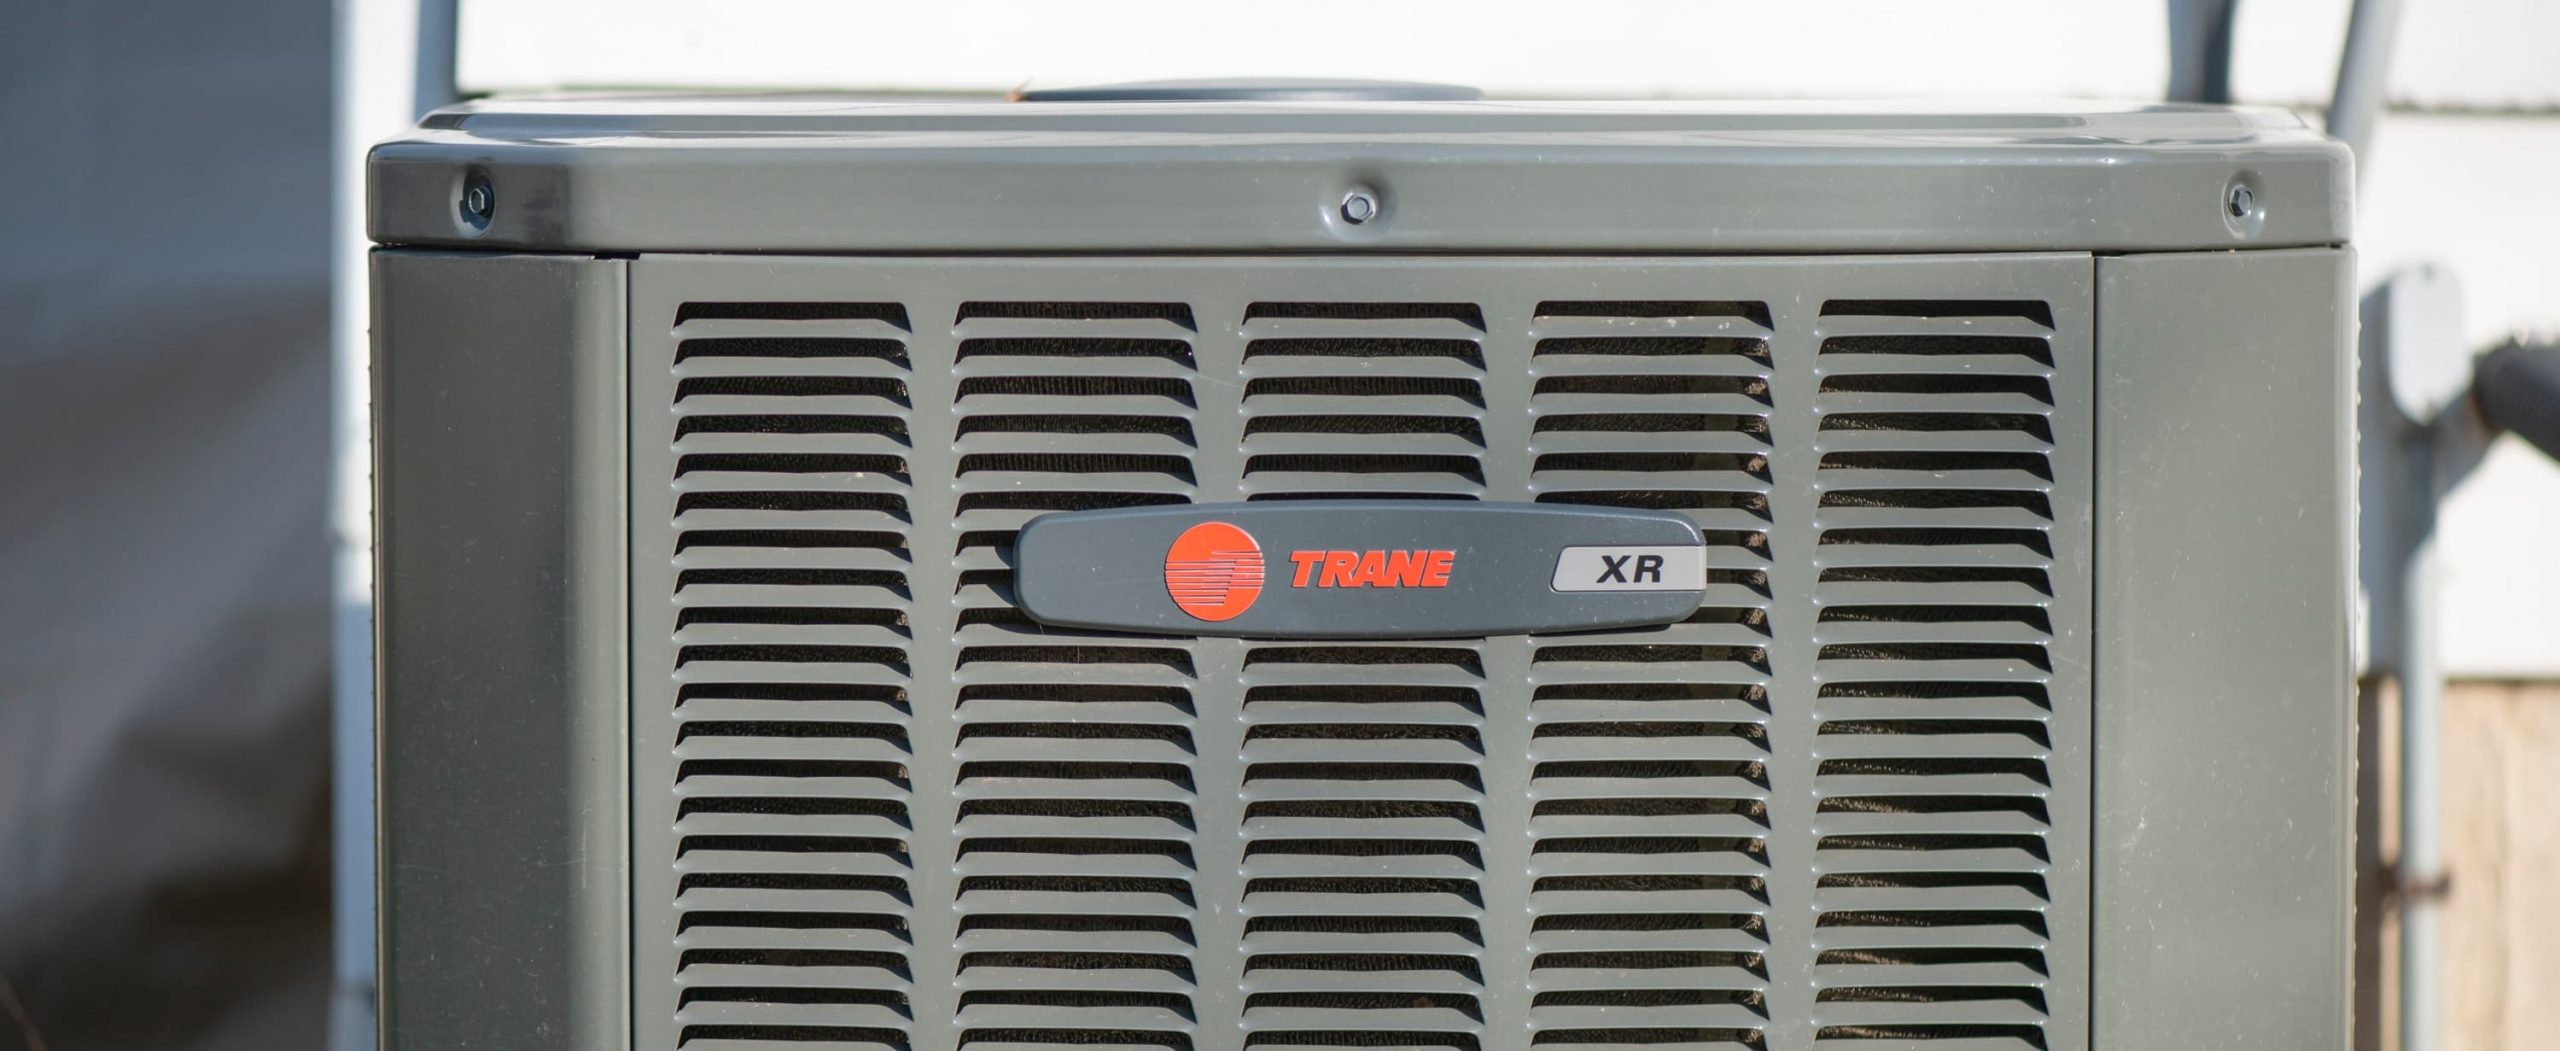
Cleaning the Outdoor Unit
Regular cleaning of the outdoor unit of your Trane air conditioner is essential to maintain its performance and efficiency. Follow these steps to clean the outdoor unit:
- Turn Off the Power: Before you begin cleaning the outdoor unit, ensure that the power supply is turned off. Refer to the earlier section on shutting off power for detailed instructions.
- Remove the Fan Cage: The fan cage is the protective covering surrounding the fan blades of the outdoor unit. Use a screwdriver or a nut driver to remove the screws securing the fan cage. Carefully lift off the fan cage and set it aside.
- Clean the Fan Blades: The fan blades may accumulate dirt and debris over time. Use a soft brush or a vacuum cleaner with a brush attachment to clean the blades carefully. Ensure that all the dirt and debris are removed, as they can affect the performance of the unit.
- Inspect the Fan Motor: While the fan cage is removed, take a moment to inspect the fan motor for any signs of wear or damage. If you notice any issues, it is recommended to contact a professional for repair.
- Clear Debris from the Unit: Use a gloved hand or a brush to remove any debris, such as leaves, twigs, or grass clippings, from inside the unit. Be thorough and clear out as much debris as possible.
- Check the Fins: Inspect the condenser fins for any dirt or debris. If there is visible dirt, you can use a soft brush or a fin cleaning brush to gently clean the fins. Take care not to bend or damage the fragile fins.
- Rinse the Unit: After cleaning the fan blades and clearing the debris, use a garden hose to rinse the outdoor unit. Start from the top and work your way down. Ensure that the water flows away from the unit and not into the electrical components.
- Reinstall the Fan Cage: Once the unit is rinsed and clean, place the fan cage back on the unit and secure it with the screws.
Cleaning the outdoor unit of your Trane air conditioner is essential for proper airflow and efficient cooling. By removing dirt, debris, and obstructions, you can ensure optimal performance and extend the lifespan of your unit. In the next section, we will guide you through the process of cleaning the coils.
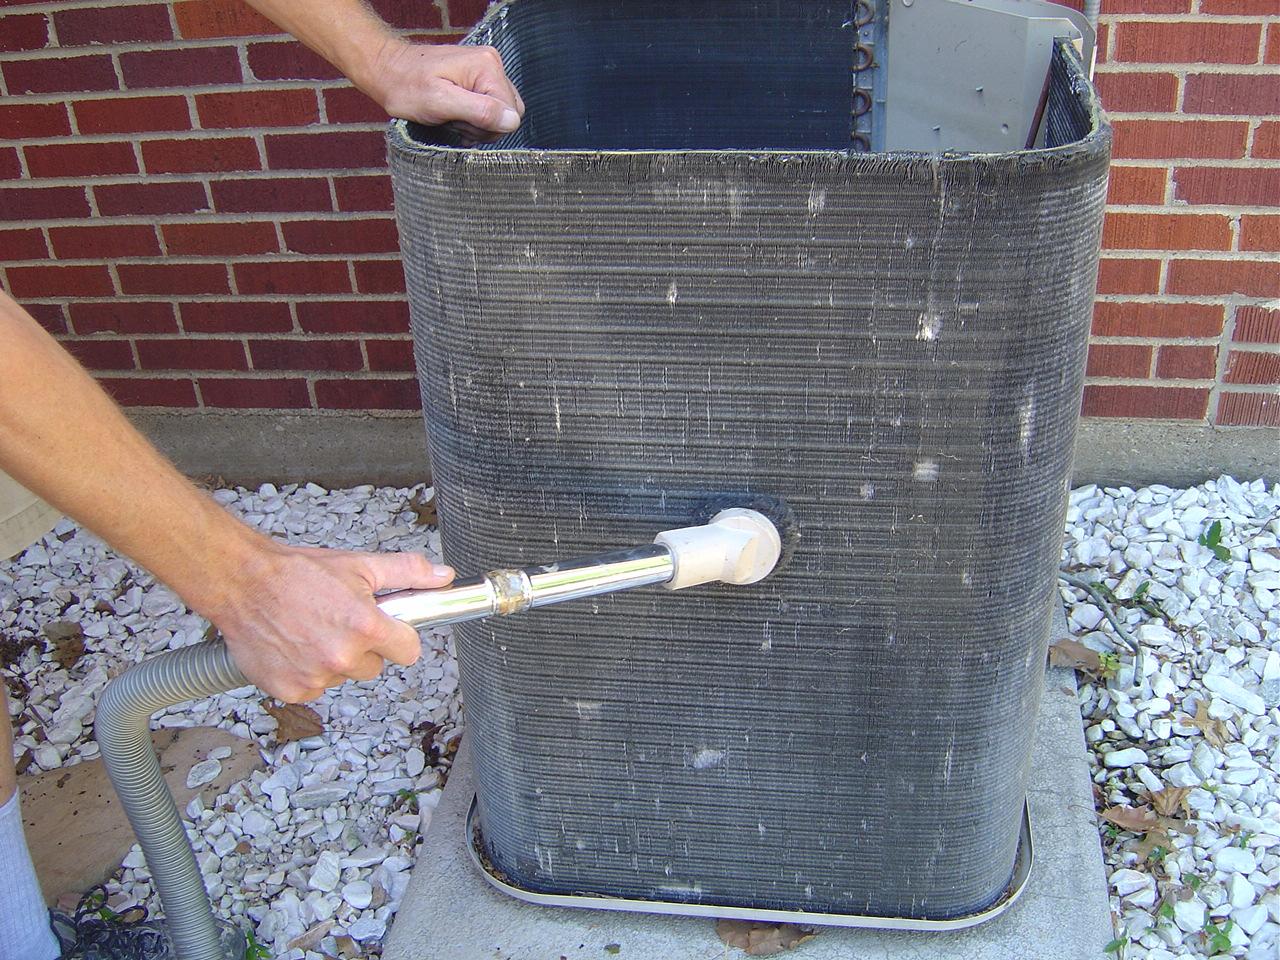
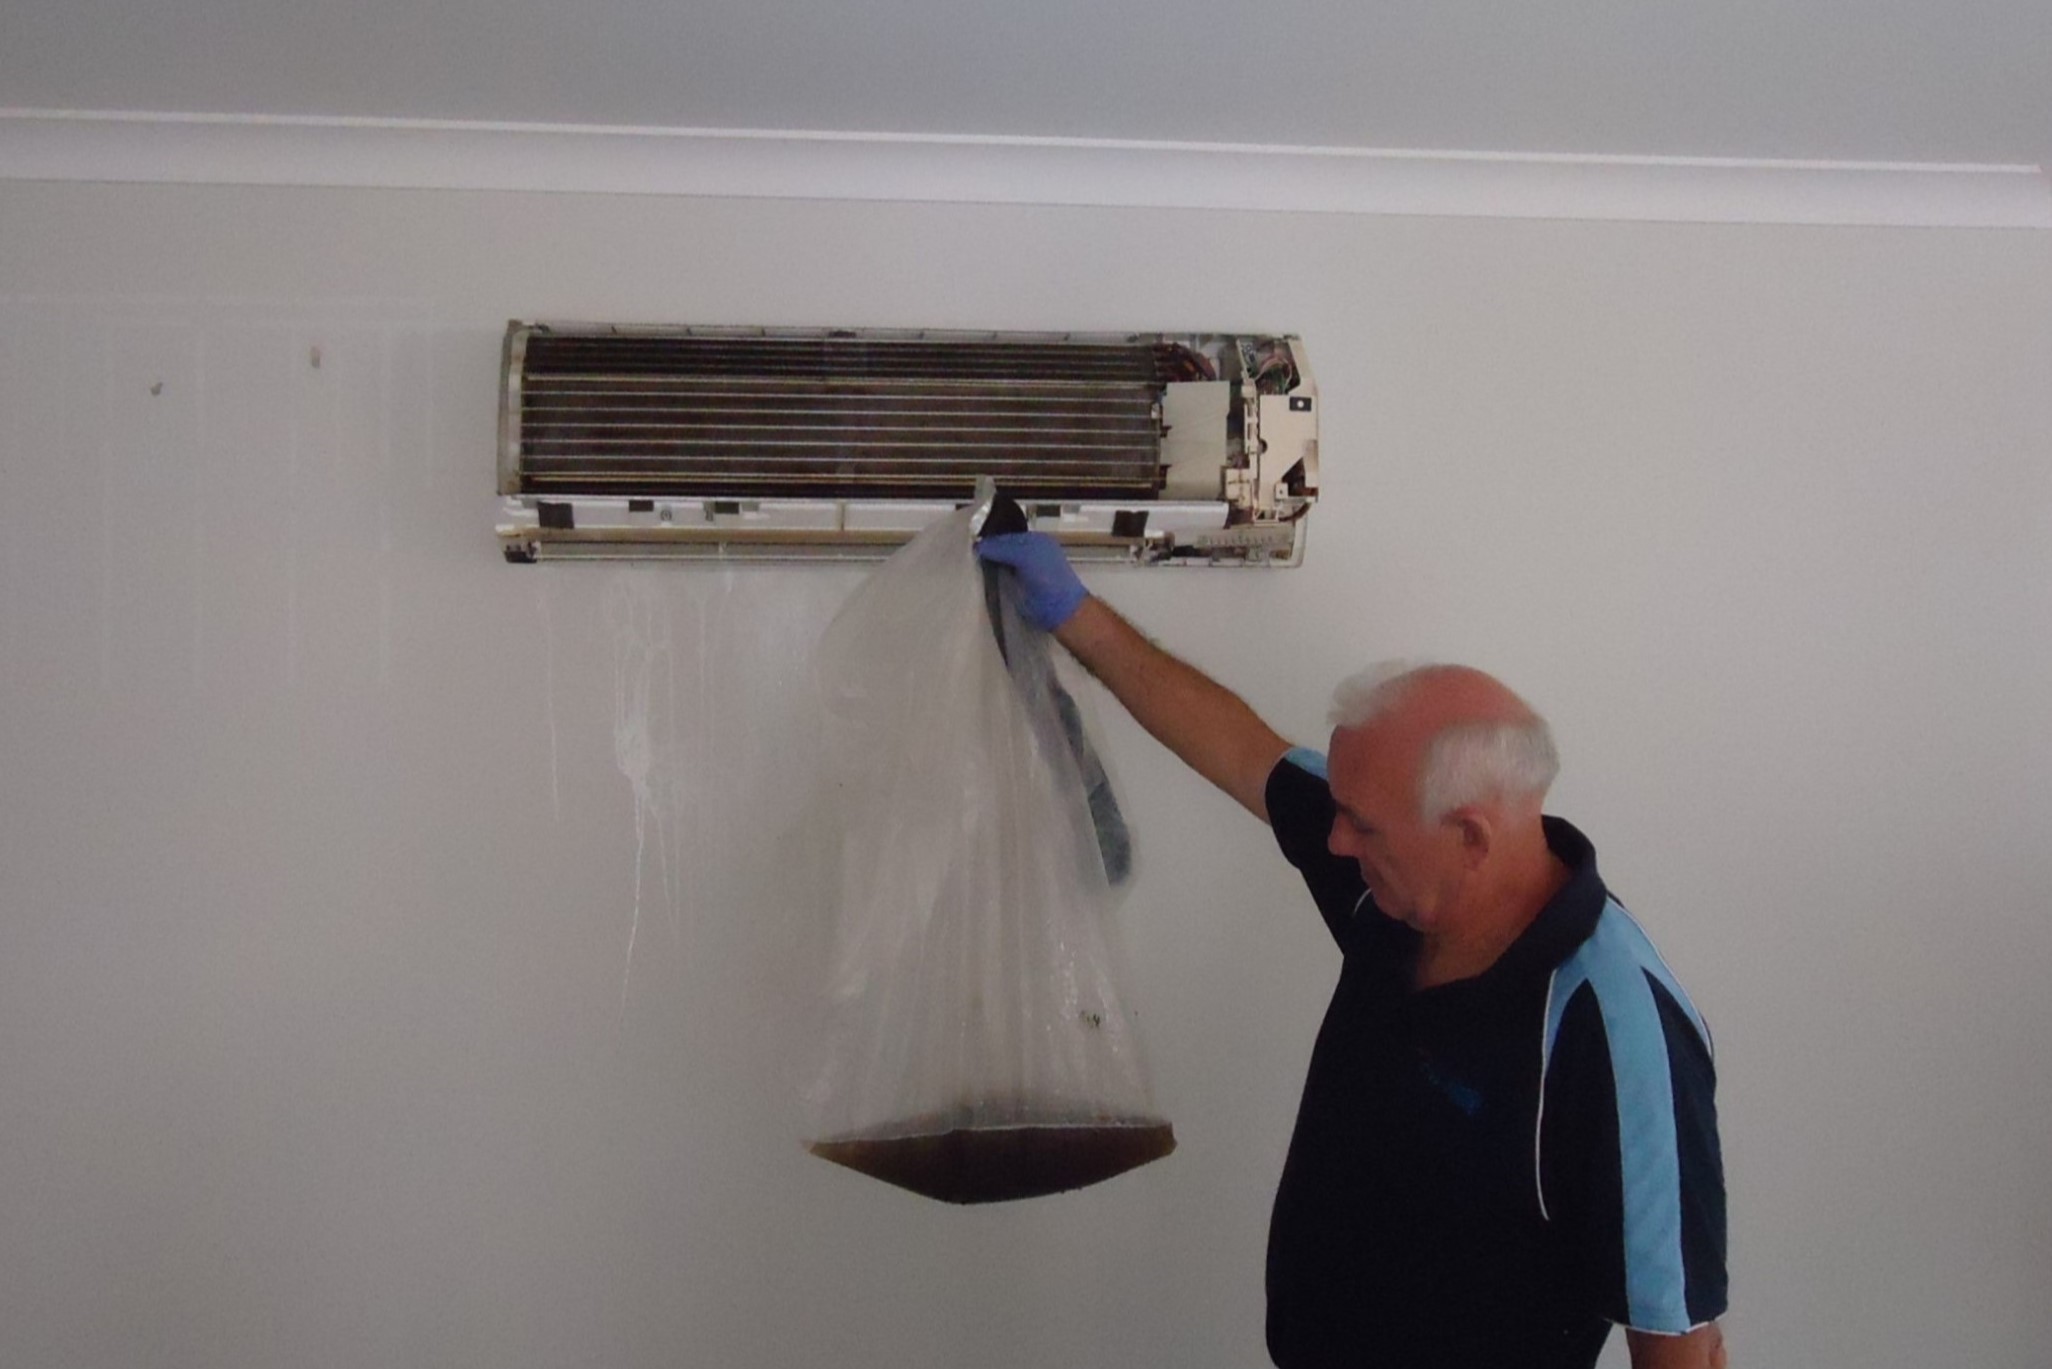
Cleaning the Coils
Cleaning the coils of your Trane air conditioner is an important maintenance step that helps optimize its cooling efficiency. Over time, the coils can accumulate dirt, dust, and debris, hindering their ability to absorb heat and cool the air effectively. Follow these steps to clean the coils:
- Turn Off the Power: Before you begin cleaning the coils, make sure the power supply to the unit is turned off. Refer to the earlier section on shutting off power for detailed instructions.
- Access the Coils: Locate the access panel on the outdoor unit that provides access to the coils. Use a screwdriver or nut driver to remove the screws holding the panel in place. Carefully set the panel aside.
- Inspect the Coils: Take a moment to inspect the coils for any visible dirt or debris buildup. If the coils appear heavily soiled, it is recommended to use a coil cleaner solution for a thorough cleaning. Otherwise, you can proceed with using a soft bristle brush or a vacuum cleaner with a brush attachment to gently remove the surface dirt.
- Apply the Coil Cleaner Solution (if necessary): If the coils are heavily soiled, follow the instructions on the coil cleaner solution to prepare it. Apply the solution to the coils, ensuring thorough coverage. Allow the solution to sit for the recommended time, as specified by the manufacturer.
- Gently Brush the Coils: Using a soft bristle brush, gently brush the coils to remove any loosened dirt or debris. Take care not to apply excessive pressure that may bend or damage the coils. Alternatively, you can use a vacuum cleaner with a brush attachment to suck away the debris.
- Rinse the Coils: After brushing or vacuuming, rinse the coils with a gentle stream of water. Ensure that the water flows in the opposite direction of the airflow to prevent pushing the dirt further into the coils.
- Check for Proper Drainage: While cleaning the coils, also check for any clogged drainage holes. If you notice any blockages, use a small brush or pipe cleaner to clear them and ensure proper drainage.
- Reinstall the Access Panel: Once the coils are clean and dry, reattach the access panel and secure it with the screws.
Cleaning the coils of your Trane air conditioner is essential for optimal cooling performance. By removing dirt and debris, you allow the coils to efficiently absorb heat and cool the air. In the next section, we will guide you through the process of cleaning the condensate drain.
Cleaning the Condensate Drain
The condensate drain in your Trane air conditioner is responsible for removing the excess moisture that builds up during the cooling process. Over time, this drain can become clogged with algae, dirt, or debris, causing water to back up and potentially damage the unit. Cleaning the condensate drain is an important maintenance step to ensure proper drainage. Here’s how to clean the condensate drain:
- Locate the Drain Line: The condensate drain line is typically a PVC pipe located near the outdoor unit of your Trane air conditioner. It may be visible or partially hidden behind insulation or other components.
- Inspect the Drain Line: Check the drain line for any signs of clogs or blockages. Look for dark sludge, algae growth, or debris obstructing the flow of water.
- Clear Debris from the Drain Line: Use a wet-dry vacuum or a small brush to remove any visible debris from the drain line. Gently insert the brush or vacuum nozzle into the drain line and carefully dislodge any obstructions.
- Use Vinegar or Bleach Solution (if necessary): If you notice significant buildup or algae growth in the drain line, you can use a vinegar or bleach solution to clean it. Mix equal parts vinegar or bleach and water and pour it into the drain line. Let the solution sit for about 30 minutes to dissolve any organic matter.
- Flush the Drain Line: After using a cleaning solution, flush the drain line with clean water. You can pour water into the drain line or use a gentle stream from a hose to force any remaining debris out of the line.
- Verify Proper Drainage: After cleaning the drain line, run your air conditioner to ensure proper drainage. Check that water is flowing freely from the drain line and there are no signs of leakage or blockage.
Cleaning the condensate drain of your Trane air conditioner is essential to prevent water damage and ensure efficient operation. By removing clogs and maintaining proper drainage, you can prolong the life of your unit. In the next section, we will guide you through the process of reinstalling the air filter.
Read more: How To Clean A Frigidaire Air Conditioner
Reinstalling the Air Filter
After cleaning or replacing the air filter of your Trane air conditioner, it is important to reinstall it properly to ensure optimal airflow and filtration. Follow these steps to reinstall the air filter:
- Inspect the Filter Slot: Before inserting the air filter, check the filter slot to ensure it is clean and free from any debris or obstructions. If necessary, use a soft brush or vacuum cleaner with a brush attachment to clean the slot.
- Orient the Filter: Examine the air filter to identify the correct orientation. Most filters have arrows indicating the airflow direction. Make sure the arrows are facing towards the blower or indoor unit.
- Slide or Clip the Filter: If your filter has slides or clips, gently slide or clip the filter back into place. Ensure that it is secure and properly fitted within the filter slot.
- Close the Grille or Panel: If the air filter is located behind a grille or panel, carefully reattach it by aligning the tabs or screws. Secure the grille or panel tightly to prevent any air leaks.
Properly reinstalling the air filter is crucial for maintaining optimal airflow and filtration in your Trane air conditioner. A clean and properly fitted filter allows for efficient cooling and helps improve indoor air quality. In the next section, we will guide you through the process of turning the power back on.
Turning the Power Back On
Once you have completed the cleaning and maintenance tasks on your Trane air conditioner, it is time to turn the power back on. Follow these steps to safely restore power to your unit:
- Double-Check: Before proceeding, double-check that all the cleaning tools and materials have been safely removed from the unit and the surrounding area.
- Reinstall the Access Panels: Ensure that all access panels, grilles, or covers that were removed during the cleaning process have been securely reinstalled.
- Locate the Electrical Disconnect: Locate the electrical disconnect switch for your Trane air conditioner. It is typically located near the outdoor unit.
- Flip the Switch to “On”: Carefully flip the electrical disconnect switch to the “on” position to restore power to the unit.
- Switch on the Thermostat: Turn on the thermostat in your home and set it to your desired cooling temperature. Listen for the air conditioner to start up and feel for cool air coming from the vents.
- Monitor the Operation: After turning on the power, monitor the operation of your Trane air conditioner for a while to ensure that it is functioning properly. Check for proper airflow, cooling, and any unusual sounds or smells.
By following these steps, you can safely and effectively turn the power back on to your Trane air conditioner after completing the cleaning and maintenance tasks. Regularly maintaining your unit will help ensure its longevity and efficient operation. Congratulations on successfully cleaning your Trane air conditioner!
Remember, if you encounter any issues or are unsure about any step, it is always best to consult a professional HVAC technician for assistance.
Thank you for reading our comprehensive guide on how to clean a Trane air conditioner. We hope you found this information helpful and that your air conditioner continues to provide you with cool and comfortable air for years to come!
Conclusion
Cleaning and maintaining your Trane air conditioner is crucial for ensuring optimal performance, energy efficiency, and longevity. By following the steps outlined in this comprehensive guide, you can keep your air conditioner in top condition and enjoy cool and comfortable air in your home for years to come.
From preparing for the cleaning to reinstalling the air filter and turning the power back on, each step plays a vital role in the overall maintenance of your unit. Regularly cleaning the air filter, removing debris from the outdoor unit, cleaning the coils, and clearing the condensate drain will help you maximize the efficiency of your Trane air conditioner.
Remember to take necessary safety precautions, such as turning off the power before cleaning and wearing appropriate protective gear. If you are unsure about any step or encounter any difficulties, it is always advisable to seek the assistance of a professional HVAC technician.
By dedicating time to properly clean and maintain your Trane air conditioner, you can enjoy consistent cooling performance, improve indoor air quality, and potentially save on energy costs. Regular maintenance also helps extend the lifespan of your unit, protecting your investment for years to come.
Thank you for choosing our guide on how to clean a Trane air conditioner. We hope that the information provided has been helpful and that you feel confident in maintaining your unit. Enjoy the cool comfort and peace of mind that comes with a properly cleaned and maintained Trane air conditioner!
Frequently Asked Questions about How To Clean A Trane Air Conditioner
Was this page helpful?
At Storables.com, we guarantee accurate and reliable information. Our content, validated by Expert Board Contributors, is crafted following stringent Editorial Policies. We're committed to providing you with well-researched, expert-backed insights for all your informational needs.