Home>Home Security and Surveillance>How To Build A Wireless Security Camera System With Raspberry Pi 3
Home Security and Surveillance
How To Build A Wireless Security Camera System With Raspberry Pi 3
Modified: August 16, 2024
Learn how to create a wireless security camera system for home surveillance using Raspberry Pi 3. Enhance your home security with this DIY solution.
(Many of the links in this article redirect to a specific reviewed product. Your purchase of these products through affiliate links helps to generate commission for Storables.com, at no extra cost. Learn more)
Introduction
Welcome to the world of home security and surveillance! With increasing concerns about safety, having a reliable security camera system has become an essential part of any household. And what better way to ensure the safety of your home than by building your own wireless security camera system using the incredibly powerful Raspberry Pi 3?
The Raspberry Pi 3 is a compact, affordable, and versatile single-board computer that can be used for a variety of projects. By utilizing its computing power and connectivity options, we can create a robust and customizable security camera system that allows you to monitor your home remotely.
In this article, we will walk you through the process of building your own wireless security camera system using a Raspberry Pi 3. We will guide you through the necessary materials, the setup process, and the installation of required software. By the end of this article, you will be able to monitor the camera feed from your home, even when you’re away.
So, let’s dive in and explore the fascinating world of home security and surveillance with Raspberry Pi 3!
Key Takeaways:
- Build your own wireless security camera system using Raspberry Pi 3 for remote home monitoring. Follow simple steps to set up, install software, and configure motion detection for added security.
- With Raspberry Pi 3, monitor your home from anywhere. Connect to the camera remotely and keep an eye on suspicious activities. Enjoy peace of mind with your DIY security system!
Materials Required
Before you start building your wireless security camera system, it’s important to gather all the necessary materials. Here’s a list of the items you will need:
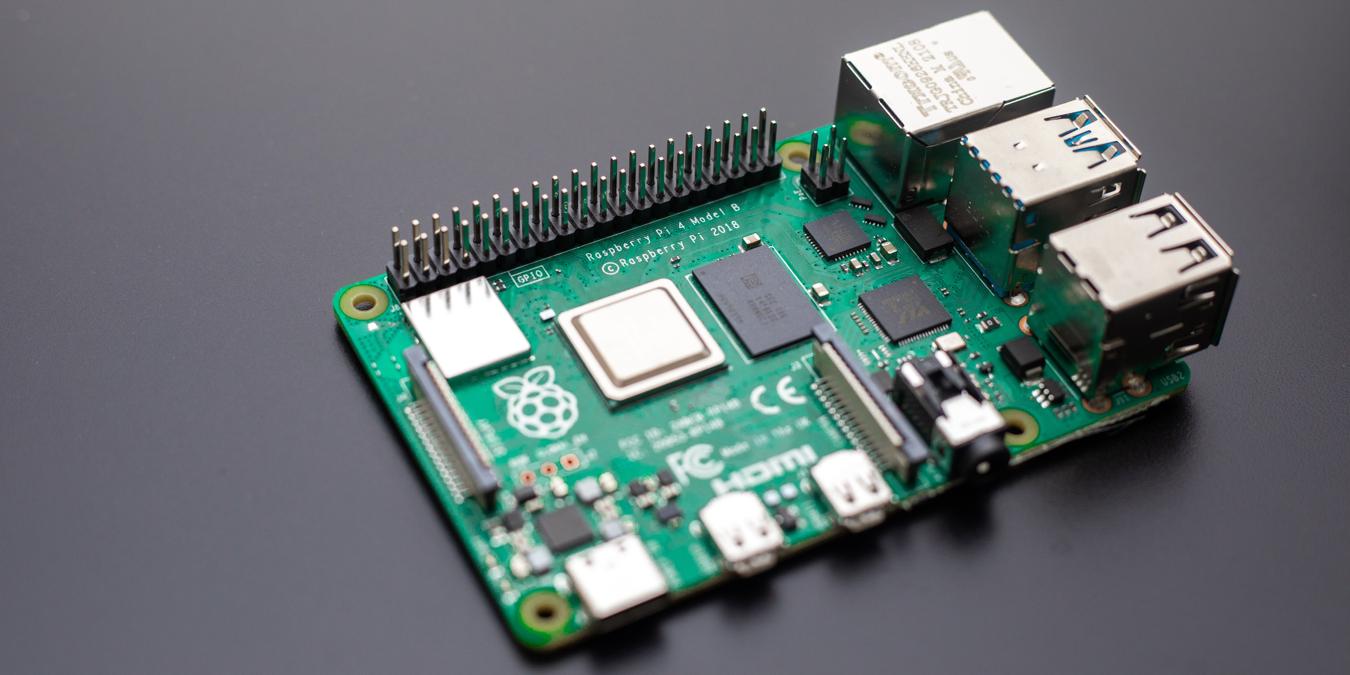
- Raspberry Pi 3: The heart of your security camera system. It is a credit card-sized computer that comes with built-in Wi-Fi and Bluetooth capabilities.
- Raspberry Pi Camera Module: A small yet powerful camera module specifically designed for the Raspberry Pi.
- Micro SD Card: A high-quality micro SD card with sufficient storage capacity to hold the operating system and camera footage.
- Power Supply: A 5V power supply with a micro USB connector to power the Raspberry Pi.
- USB Wi-Fi Adapter: If you encounter any issues with the built-in Wi-Fi of the Raspberry Pi 3, a USB Wi-Fi adapter can help improve the connectivity.
- USB Keyboard and Mouse: For initial setup and configuration of the Raspberry Pi 3.
- HDMI Cable: To connect the Raspberry Pi 3 to a monitor or television for initial setup.
- Case: Although optional, a case can protect your Raspberry Pi 3 and camera module from dust and physical damage.
With these materials in hand, you are ready to embark on the journey of building your own wireless security camera system. Make sure to choose high-quality components to ensure optimal performance and reliability.
Now that you have all the necessary materials, let’s move on to setting up your Raspberry Pi 3.
Set Up Raspberry Pi 3
Setting up your Raspberry Pi 3 is the first step towards building your wireless security camera system. Follow these steps to get your Raspberry Pi up and running:
- Insert the micro SD card into the SD card slot on the Raspberry Pi 3.
- Connect the Raspberry Pi camera module to the camera slot on the board. Make sure it is securely attached.
- Connect the HDMI cable from the Raspberry Pi to a monitor or television.
- Connect the USB keyboard and mouse to the available USB ports on the Raspberry Pi.
- Plug in the power supply to the micro USB port on the Raspberry Pi and connect it to a power source.
- The Raspberry Pi will boot up, and you will see the setup screen on the connected monitor.
- Follow the on-screen prompts to customize your settings, such as language and timezone.
- Make sure to update the Raspberry Pi’s software by opening a terminal and running the command:
sudo apt-get update && sudo apt-get upgrade - Once the update is complete, you are ready to install the required software for your security camera system.
That’s it for the initial setup of your Raspberry Pi 3. You have successfully prepared the hardware for your wireless security camera system. Now let’s proceed to the next step and install the necessary software.
Install Required Software
Now that your Raspberry Pi 3 is set up, it’s time to install the software necessary for your wireless security camera system. Follow these steps to get the required software up and running:
- Open a terminal window on your Raspberry Pi 3 by clicking on the terminal icon in the taskbar.
- Update the package lists by running the command:
sudo apt-get update - Install the Python package manager, pip, by running the command:
sudo apt-get install python3-pip - Install the necessary libraries by running the following commands:
sudo apt-get install libjpeg-dev
sudo apt-get install zlib1g-dev
sudo apt-get install libfreetype6-dev
sudo apt-get install liblcms1-dev
sudo apt-get install libopenjp2-7
sudo apt-get install libtiff5- Install the RPi.GPIO library by running the command:
pip3 install RPi.GPIO - Install the picamera library by running the command:
pip3 install picamera - Install the Flask library by running the command:
pip3 install Flask
Once the installation is complete, you have successfully installed the required software for your wireless security camera system. Now it’s time to connect your Raspberry Pi to the camera module.
Connect Raspberry Pi to Camera
With the required software installed, it’s time to physically connect the Raspberry Pi to the camera module. Follow these steps to establish the connection:
- Ensure that the Raspberry Pi is powered off and disconnected from the power source.
- Locate the camera slot on the Raspberry Pi board.
- Gently insert the ribbon cable from the camera module into the slot, making sure it is inserted securely.
- Once the cable is inserted, close the latch on the slot to hold the ribbon cable in place.
Great! You have successfully connected the camera module to your Raspberry Pi. Now it’s time to set up a wireless network to access the security camera remotely.
When building a wireless security camera system with Raspberry Pi 3, make sure to use a high-quality power supply to avoid potential issues with stability and performance.
Set Up Wireless Network
In order to remotely access your wireless security camera system, you need to set up a wireless network that your Raspberry Pi can connect to. Here’s how you can do it:
- Click on the network icon in the top-right corner of the Raspberry Pi desktop.
- Select your Wi-Fi network from the available options.
- Enter the password for your Wi-Fi network and click on Connect.
- Once connected, the Raspberry Pi will have access to the internet through your wireless network.
It’s important to ensure that your wireless network is secure by using a strong password and encryption protocol. This will help prevent unauthorized access to your security camera system.
Now that your Raspberry Pi is connected to the wireless network, it’s time to configure the motion detection software to start capturing and analyzing footage from the camera.
Configure Motion Detection Software
Configuring motion detection software is a crucial step in building an effective wireless security camera system. By enabling motion detection, you can ensure that the camera captures footage only when there is movement, saving storage space and making it easier to review critical events. Here’s how you can configure the motion detection software:
- Open the terminal on your Raspberry Pi and install the motion software by running the command:
sudo apt-get install motion - Once the installation is complete, modify the motion configuration file by running the command:
sudo nano /etc/motion/motion.conf - In the configuration file, find the settings for “daemon” and “webcam_localhost”. Set both values to “off” to allow remote access to the camera feed.
- Scroll down to the “motion detection” section and enable motion detection by setting “motion_detection” to “on”. You can also adjust the sensitivity and other settings as per your requirements.
- Save the configuration file by pressing Ctrl+X, then Y, and finally Enter to overwrite the original file.
- Restart the motion service by running the command:
sudo service motion restart
Now that the motion detection software is configured, it will start capturing footage whenever it detects any movement in the camera’s field of view. But how do you view this footage remotely? Let’s find out in the next section.
View Camera Feed Remotely
With your wireless security camera system set up and motion detection software configured, it’s time to view the camera feed remotely. Here’s how you can do it:
- Note down the IP address of your Raspberry Pi. You can find it by opening a terminal and running the command:
ifconfig. Look for the “inet” address under the wireless interface section. - On your computer or mobile device, open a web browser and enter the IP address of your Raspberry Pi followed by “:8081”
- You will now see the live camera feed from your wireless security camera system.
Make sure to bookmark this URL for easy access to the camera feed in the future. You can also access the camera feed from anywhere with an internet connection by using the IP address of your home network and configuring port forwarding on your router.
Now you can remotely monitor your home and keep an eye on any suspicious activities. The motion detection software will capture any movement in the camera’s field of view, allowing you to review the footage and take necessary actions if needed.
Before we wrap up, let’s summarize what we have covered so far.
Conclusion
Congratulations! You have successfully built your own wireless security camera system using Raspberry Pi 3. By following the steps outlined in this article, you set up the Raspberry Pi, installed the required software, connected the camera module, configured motion detection, and learned how to view the camera feed remotely.
With your new wireless security camera system, you can now monitor your home or property from anywhere in the world. Whether you’re at work, on vacation, or simply in another room of your home, you can have peace of mind knowing that you have a reliable surveillance system in place.
Remember to regularly check for software updates and keep your system secure by implementing strong passwords and encryption protocols. Additionally, consider integrating your camera system with other smart home devices or services to further enhance your home security capabilities.
We hope that this article has provided you with valuable insights and guidance in building a wireless security camera system. By harnessing the power of Raspberry Pi 3 and utilizing motion detection technology, you have taken a significant step towards safeguarding your home and loved ones.
So go ahead, enjoy the convenience, security, and peace of mind that your DIY wireless security camera system brings. Happy monitoring!
Frequently Asked Questions about How To Build A Wireless Security Camera System With Raspberry Pi 3
Was this page helpful?
At Storables.com, we guarantee accurate and reliable information. Our content, validated by Expert Board Contributors, is crafted following stringent Editorial Policies. We're committed to providing you with well-researched, expert-backed insights for all your informational needs.