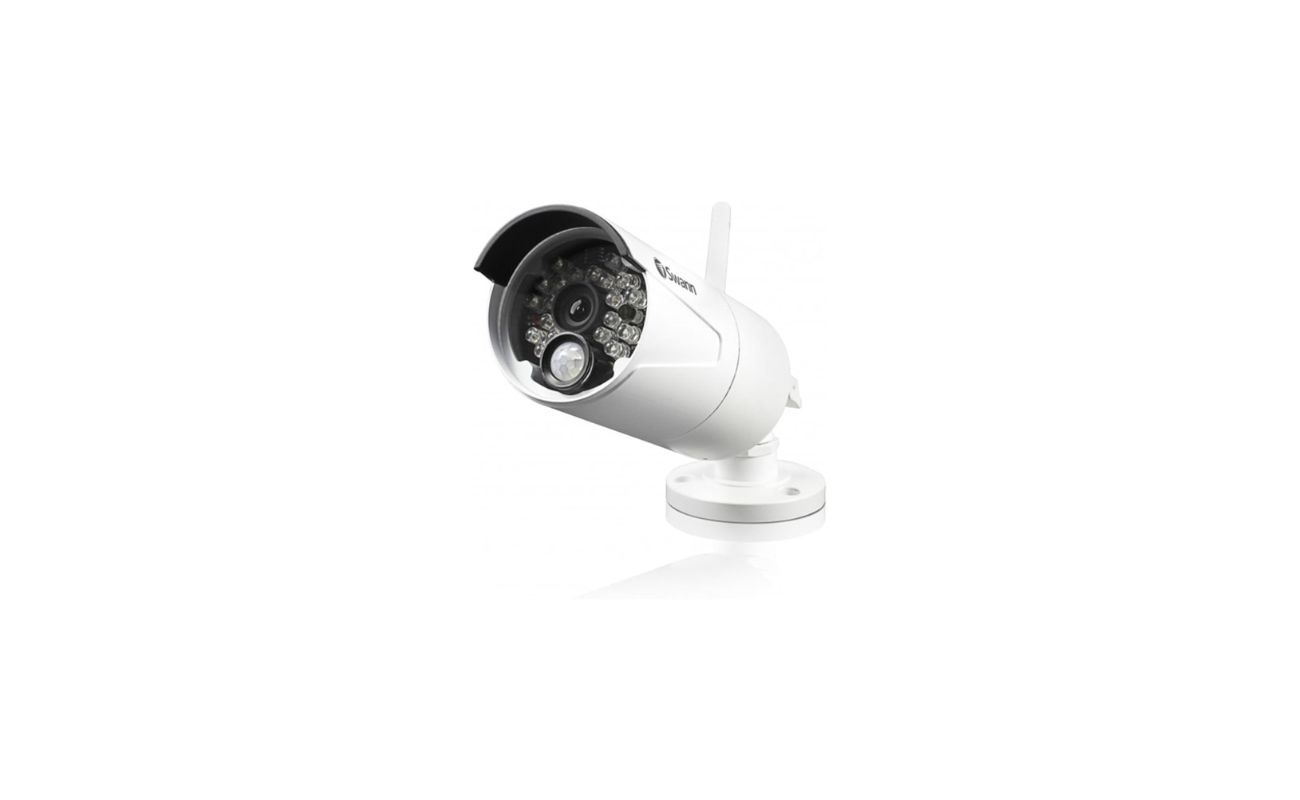
Home>Home Security and Surveillance>How To Install The Swann Pro Series Digital Wireless Security System Plug + Play ADW410
Home Security and Surveillance
How To Install The Swann Pro Series Digital Wireless Security System Plug + Play ADW410
Modified: March 6, 2024
Learn how to easily install and set up the Swann Pro Series Digital Wireless Security System for efficient home security and surveillance. Protect your property effortlessly with this plug-and-play ADW410 system.
(Many of the links in this article redirect to a specific reviewed product. Your purchase of these products through affiliate links helps to generate commission for Storables.com, at no extra cost. Learn more)
Introduction
Welcome to our comprehensive guide on installing the Swann Pro Series Digital Wireless Security System, Plug + Play ADW410. In today’s world, where home security is of utmost importance, having a reliable surveillance system is essential for the safety and protection of your loved ones and belongings. The Swann Pro Series offers cutting-edge technology and easy installation, making it an excellent choice for both experienced users and beginners.
Whether you are a homeowner looking to enhance your home security or a business owner wanting to monitor your premises, the Swann Pro Series Digital Wireless Security System is designed to meet your needs. This plug-and-play system eliminates the need for complex wiring and professional installation, allowing you to set it up yourself with ease.
In this guide, we will take you through each step of the installation process, from unpacking the system to adjusting camera positions. By following our detailed instructions, you will have your Swann Pro Series Digital Wireless Security System up and running in no time.
Before we dive into the installation process, let’s take a look at what is included in the package and familiarize ourselves with the components.
Key Takeaways:
- Easy Installation
Installing the Swann Pro Series Digital Wireless Security System is a breeze with its plug-and-play setup. From unpacking to testing, the step-by-step guide ensures a smooth and hassle-free installation process for anyone, regardless of experience level. - Comprehensive Surveillance
Once installed, the Swann Pro Series system offers reliable surveillance, motion detection, and night vision capabilities. It provides peace of mind by effectively monitoring and protecting your home or business, making security a top priority.
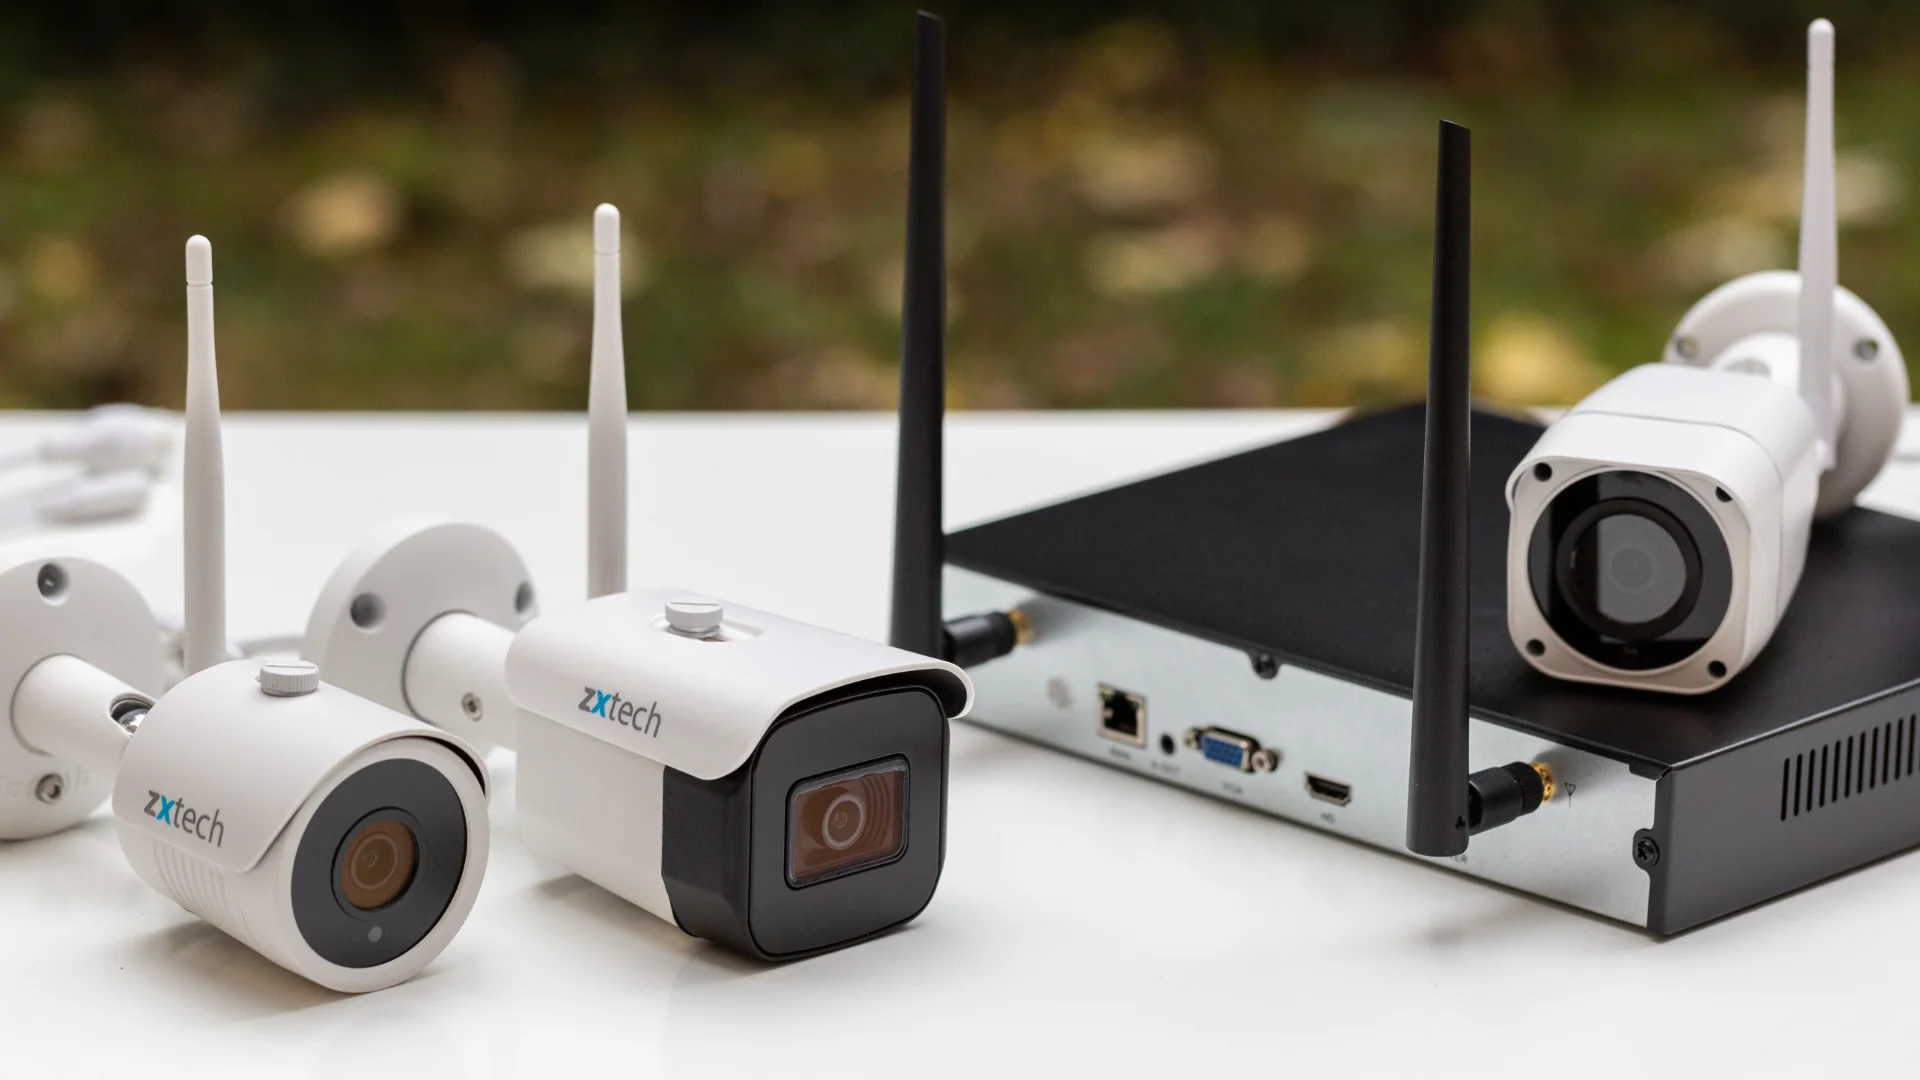
Package Contents
Before getting started, let’s go over the contents of the Swann Pro Series Digital Wireless Security System, Plug + Play ADW410 package. By knowing what is included, you can ensure that everything is present and accounted for before beginning the installation process.
The Swann Pro Series ADW410 package typically includes the following items:
- 1 x Digital Wireless Receiver
- 2 x Wireless Cameras
- 2 x Power Adapters for Cameras
- 1 x Power Adapter for Receiver
- 1 x Antenna for Receiver
- 1 x RCA Cable for Connecting to TV or Monitor
- 1 x Mounting Bracket and Hardware
- 1 x Quick Start Guide
While these are the standard items included in the package, it’s always a good idea to double-check and make sure you have received all the components.
In addition to the package contents, it’s important to note that you will need a TV or monitor with an available RCA input to connect the receiver and view the camera feeds. If your TV or monitor does not have an RCA input, you may need to purchase an RCA-to-HDMI converter or use a different display device.
Now that you are familiar with what is included in the package, let’s move on to the first step of the installation process: unpacking and inspecting the system.
Step 1: Unpack and Inspect the System
The first step in installing the Swann Pro Series Digital Wireless Security System is to unpack and inspect all the components. This ensures that everything is in good working order and ready for installation.
Start by removing all the items from the package and laying them out on a clean, flat surface. Take a moment to carefully inspect each component for any signs of damage or missing parts. This includes checking for any visible cracks, loose connections, or frayed cables. If you notice any issues, contact Swann’s customer support for assistance.
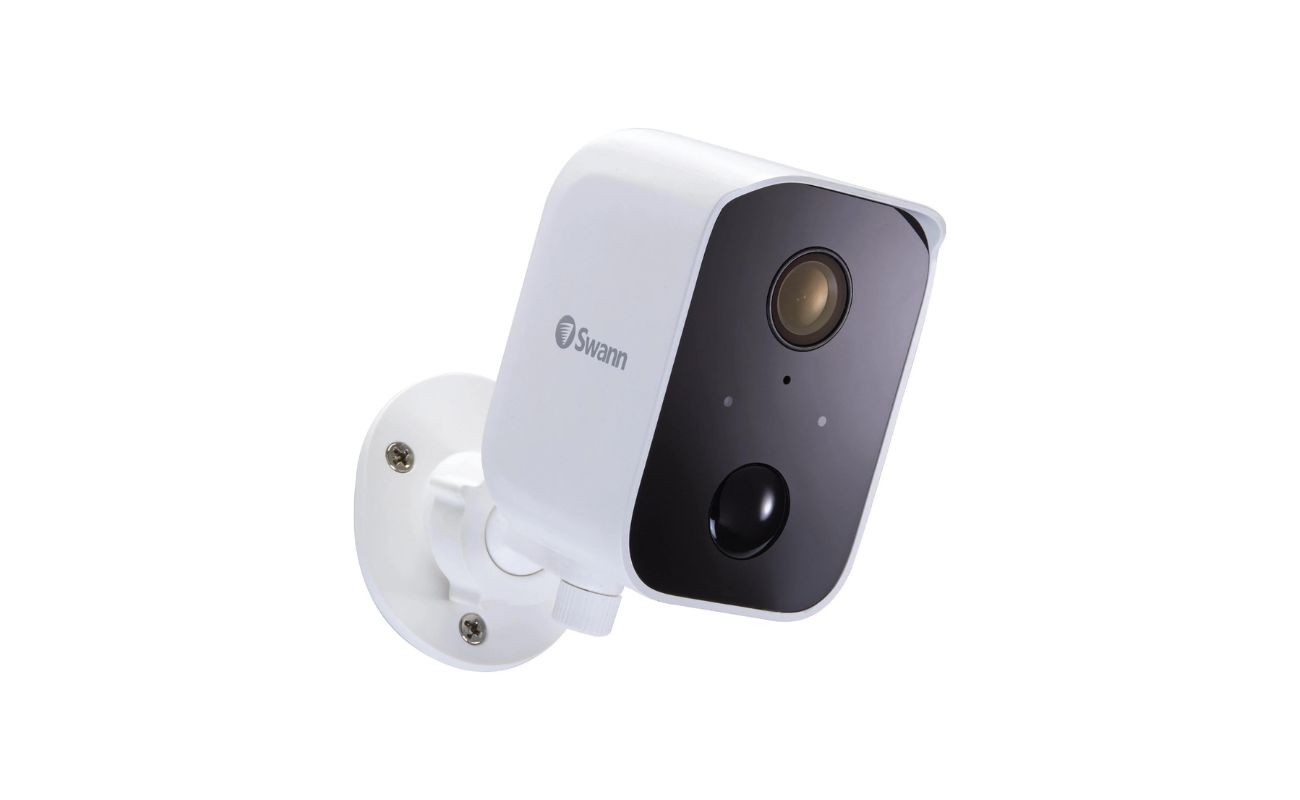
Next, familiarize yourself with the different components. The digital wireless receiver acts as the central hub for the system, receiving the camera feeds and transmitting them to your TV or monitor. The wireless cameras are designed for easy installation and come with mounting brackets for secure placement. The power adapters provide the necessary power supply for both the receiver and cameras.
Take a moment to read through the quick start guide provided in the package. This will give you a general overview of the installation process and highlight any important information or troubleshooting tips.
Once you have inspected and familiarized yourself with the system, you are ready to move on to the next step: mounting the cameras.
Step 2: Mounting the Cameras
Now that you have unpacked and inspected the Swann Pro Series Digital Wireless Security System, it’s time to proceed with mounting the cameras. Proper camera placement is crucial for maximizing the effectiveness of your surveillance system.
Start by identifying the areas you want to monitor. Consider the entrances, windows, and other vulnerable spots around your property. These are the areas where you are most likely to capture important footage in the event of any suspicious activity.
Using the mounting brackets and hardware provided, determine the best location for each camera. It is important to choose a height and angle that provides a clear view of the area while minimizing the risk of tampering or obstruction. Make sure the cameras are positioned in a way that allows for optimal coverage.
Once you have determined the ideal locations, use the included hardware to securely mount the cameras. Ensure that they are firmly attached to the desired surfaces, such as walls or ceilings, to prevent them from being knocked or moved easily.
During the mounting process, you may need to drill holes for the mounting brackets. If you are uncertain about the location or drilling process, it is recommended to consult a professional or utilize alternative mounting options, such as adhesive mounts.
After mounting the cameras, double-check to ensure they are pointing in the desired directions. Adjust the angles and make any necessary refinements to achieve the best coverage possible.
With the cameras securely mounted, you are now ready to move on to the next step: connecting the receiver.
Step 3: Connecting the Receiver
Now that you have successfully mounted the cameras, it’s time to connect the receiver. The receiver acts as the central hub for receiving the camera feeds and transmitting them to your TV or monitor.
Start by finding a suitable location for the receiver. It should be placed near your TV or monitor and within range of the cameras’ wireless signals. Keep in mind that the receiver needs to be connected to a power source and have a clear line of sight to the cameras for optimal performance.
Connect the receiver to a power outlet using the included power adapter. Ensure that the power adapter is securely plugged into both the receiver and the wall outlet. You may want to consider using a surge protector to protect the system from power fluctuations and potential damage.
Next, use the RCA cable provided to connect the receiver to the RCA input of your TV or monitor. Insert one end of the cable into the RCA output port of the receiver and the other end into the RCA input port of your TV or monitor. Make sure the connections are snug and secure.
If you are using an RCA-to-HDMI converter, connect the RCA cable to the converter instead and then connect the converter to the HDMI input of your display device.
Once you have made the necessary connections, power on the receiver and your TV or monitor. Set the input source on your TV or monitor to the corresponding RCA or HDMI input to view the camera feeds.
At this point, you should see the live camera feeds on your TV or monitor screen, indicating that the connection between the cameras and the receiver is established and working correctly.
With the receiver connected, powered on, and the camera feeds displayed, you can now proceed to the next step: powering up the system.
Step 4: Powering Up the System
Now that you have successfully connected the receiver, it’s time to power up the Swann Pro Series Digital Wireless Security System. This step involves ensuring that all components are receiving power and initializing the system for operation.
Start by plugging in the power adapters for the cameras. Connect one end of each power adapter to the respective camera and the other end to a power outlet. Ensure that the connections are secure and that power is flowing to the cameras. You may want to test each camera individually to confirm that it is receiving power and functioning properly.
Next, verify that the receiver is receiving power. Check that it is properly connected to a power outlet and that the power adapter is securely plugged in. Once confirmed, power on the receiver by pressing the power button or toggling the switch, depending on the model.
Allow the system a few moments to initialize. During this time, the receiver establishes a connection with the cameras and prepares to receive and display the camera feeds on your TV or monitor.
While the system is powering up, ensure that all connections between the cameras, receiver, and power sources are secure. Take a moment to check for any loose cables or connections that may affect the system’s performance.
Once the system has fully powered up, you should see the camera feeds displayed on your TV or monitor screen. This indicates that the cameras are successfully transmitting their video signals to the receiver, and the system is ready for the next step: pairing the cameras with the receiver.
Before moving on, it is a good idea to test the system by viewing the live camera feeds and ensuring that everything is working as expected. This will give you peace of mind and allow you to make any necessary adjustments before finalizing the installation.
With the system powered up and tested, you are now ready to proceed to the next step: pairing the cameras with the receiver.
Before installing the Swann Pro Series Digital Wireless Security System, make sure to carefully read the instruction manual to understand the installation process and requirements.
Step 5: Pairing the Cameras with the Receiver
Now that the system is powered up and functioning, it’s time to pair the cameras with the receiver. This process establishes a secure wireless connection between the cameras and the receiver, enabling the receiver to receive and display the camera feeds.
Start by accessing the camera pairing feature on the receiver. The exact method may vary depending on the model, so refer to the user manual or quick start guide for specific instructions. Typically, you will need to navigate through the receiver’s menu using the remote control or buttons to access the camera pairing function.
Once in the camera pairing mode, you will need to follow the on-screen prompts to initiate the pairing process. This usually involves pressing a specific button on the camera or the receiver to activate the pairing function.
During the pairing process, it’s important to ensure that the cameras are within range of the receiver. Keep in mind that wireless obstacles and interference, such as walls and other electronic devices, may affect the signal strength and range. If you encounter any difficulties, consider repositioning the cameras or the receiver for a better wireless connection.
As you proceed with the pairing process, the receiver will search for and detect the nearby cameras. Once detected, it will automatically pair and assign each camera with a unique channel or identifier.
After the pairing is complete, you should see the camera feeds displayed on your TV or monitor screen. Take a moment to verify that all the paired cameras are showing up and functioning correctly. You may also want to label each camera channel for easy identification in the future.
It’s worth noting that some models may allow for additional customization of settings, such as motion detection or recording schedules. Refer to the user manual for details on accessing and configuring these settings according to your preferences.
With the cameras successfully paired with the receiver, you can now proceed to the next step: adjusting camera positions for optimal coverage.
Before finalizing the camera positioning, it’s recommended to test the system by monitoring the live camera feeds and ensuring that everything is working as expected. This will give you the opportunity to make any necessary adjustments and ensure that your surveillance system is operating at its best.
With the cameras paired and the system functioning properly, you are now ready to move on to the next step: adjusting camera positions.
Step 6: Adjusting Camera Positions
Now that the cameras are paired with the receiver, it’s time to fine-tune their positions for optimal coverage. Proper camera positioning is essential to ensure that you capture the desired areas and angles in your surveillance system.
Start by reviewing the camera feeds on your TV or monitor. Take note of any areas that may be out of sight or not adequately covered. Look for blind spots or areas where the camera view may be obstructed by objects or obstacles.
Using the camera mounting brackets, gently adjust the position and angle of each camera to ensure maximum coverage. Test different angles and heights to find the optimal view for each camera.
Consider the specific areas you want to monitor, such as entrances, pathways, or parking lots. Make sure the cameras are pointed towards these areas to capture any potential activity or suspicious behavior.
Avoid pointing the cameras directly into bright light sources, such as the sun or bright outdoor lighting, as this can cause glare or wash out the image quality. Instead, position the cameras to utilize natural or ambient lighting for clearer footage.
During the adjustment process, you may need to make minor tweaks to the camera positions to eliminate any unwanted tilting or misalignment. Ensure that the cameras are securely tightened in place after making any adjustments.
Additionally, consider the range and field of view of each camera. Some models may offer adjustable zoom or focus features, allowing you to fine-tune the image clarity and exclude unnecessary areas.
Remember to take your specific property layout and surveillance objectives into account when adjusting the camera positions. The goal is to achieve comprehensive coverage while minimizing blind spots.
Once you are satisfied with the camera positions, take a final look at the camera feeds on your TV or monitor. Ensure that the important areas are well-covered and that there are no noticeable issues with the image quality or clarity.
With the camera positions adjusted, you are almost ready to begin using your Swann Pro Series Digital Wireless Security System. However, before you finalize the installation, it’s important to perform a system test and ensure that everything is functioning as expected.
Next, we will cover the step of testing the system to confirm that all components are working correctly and addressing any potential issues.
Step 7: Testing the System
After adjusting the camera positions, it’s crucial to thoroughly test the Swann Pro Series Digital Wireless Security System to ensure that all components are functioning correctly. This step allows you to identify any potential issues or areas that may require further adjustments.
Start by monitoring the live camera feeds on your TV or monitor. Take note of the image quality, clarity, and overall visibility of the captured footage. Check if the cameras are capturing the desired areas and if there are any blind spots.
Next, test the motion detection feature of the system. Move around in the monitored areas and observe if the cameras are detecting and recording any motion appropriately. Adjust the sensitivity settings if necessary, so you receive notifications for significant movements while avoiding false alarms.
During the testing process, pay attention to any potential issues with the wireless signal strength. Observe if there are any instances of intermittent connection or loss of image transmission. If you encounter signal issues, consider repositioning the cameras or receiver for improved wireless performance.
Additionally, verify that the night vision functionality is working effectively. Dim the lights or simulate low-light conditions to see if the infrared capabilities of the cameras provide clear and detailed images in the dark.
Test all the additional features and capabilities of the system, such as audio recording or remote access via a mobile app or web interface. Ensure that you can access the system remotely and that all remote viewing features are functioning correctly.
As you conduct the system test, it’s also a good idea to review the user manual or online resources to familiarize yourself with the various settings and customization options available. This will allow you to configure the system according to your specific preferences and requirements.
If you encounter any issues during testing or notice any areas that need further adjustments, consult the troubleshooting section of the user manual or reach out to Swann’s customer support for assistance. They can provide guidance to resolve any technical issues or offer recommendations for optimizing system performance.
By thoroughly testing the system, you can ensure that it is fully operational, providing reliable surveillance and peace of mind. Once you are satisfied with the results of the system test, you can proceed to the final step: finalizing the installation process.
Step 8: Finalizing the Installation
Congratulations! You have successfully installed the Swann Pro Series Digital Wireless Security System. Now it’s time to finalize the installation and ensure that everything is in order before fully utilizing your surveillance system.
Start by double-checking all the connections and mounting positions of the cameras. Ensure that all cables are securely plugged in, and the cameras are firmly mounted in their desired locations. Take a moment to tidy up any loose cables or wires to improve the overall aesthetics of the installation.
Inspect the camera feeds on your TV or monitor once more to ensure that all important areas are covered and there are no obstructions or blind spots. Adjust the camera angles if necessary to achieve the best possible view.
Consider adding any additional features or accessories to enhance the functionality of your system. This may include adding external microphones for audio recording, integrating the system with a security alarm, or connecting it to a network video recorder (NVR) for enhanced storage and playback capabilities.
Take the time to familiarize yourself with the various features and settings of the system. Explore the options available to customize recording schedules, motion detection thresholds, and notification preferences. Adjust these settings according to your specific needs and preferences.
Consider implementing a regular maintenance schedule for your surveillance system. This may involve periodically cleaning the camera lenses, checking for firmware updates on the receiver, or inspecting the power connections for any wear or damage.
Finally, make sure to securely store your system documentation and contact information for technical support. This will come in handy should you need assistance or have any questions in the future.
With the installation finalized, you can now enjoy the peace of mind that comes with having a reliable Swann Pro Series Digital Wireless Security System in place. Take advantage of the system’s features to monitor your property, deter potential threats, and keep your loved ones and belongings safe.
Remember to regularly test and maintain your system to ensure its continued functionality and optimal performance. Stay up to date with the latest advancements in home security technology and consider upgrading or expanding your system as needed.
Thank you for choosing the Swann Pro Series Digital Wireless Security System. We hope this installation guide has been helpful, and we wish you many years of reliable and effective home surveillance!
Conclusion
In conclusion, installing the Swann Pro Series Digital Wireless Security System, Plug + Play ADW410, can significantly enhance the security and surveillance of your home or business. With its easy installation, reliable performance, and advanced features, this system provides peace of mind and protection for you and your loved ones.
Throughout this comprehensive guide, we have walked you through the step-by-step process of unpacking, inspecting, mounting, connecting, and testing the system. By following these instructions, you should have successfully set up your surveillance system and ensured that all components are functioning correctly.
Remember to regularly test and maintain your system to ensure its continued reliability and performance. Regularly check camera positions, review footage, and adjust settings as needed to optimize the system’s effectiveness. Stay informed about updates and advancements in home security technology to make the most of your investment.
With the Swann Pro Series Digital Wireless Security System, you can monitor your property, deter potential intruders, and keep a watchful eye over your premises. This system offers flexibility, convenience, and ease of use, making it an excellent choice for both beginners and experienced users.
Lastly, always prioritize the safety and security of your home or business. While the Swann Pro Series Digital Wireless Security System can be a powerful tool, it should be used in conjunction with other security measures, such as proper lighting, secure locks, and an overall security plan.
Thank you for choosing the Swann Pro Series Digital Wireless Security System. We hope this guide has provided you with the necessary information to install and utilize your system effectively. Stay vigilant, stay secure!
Frequently Asked Questions about How To Install The Swann Pro Series Digital Wireless Security System Plug + Play ADW410
Was this page helpful?
At Storables.com, we guarantee accurate and reliable information. Our content, validated by Expert Board Contributors, is crafted following stringent Editorial Policies. We're committed to providing you with well-researched, expert-backed insights for all your informational needs.