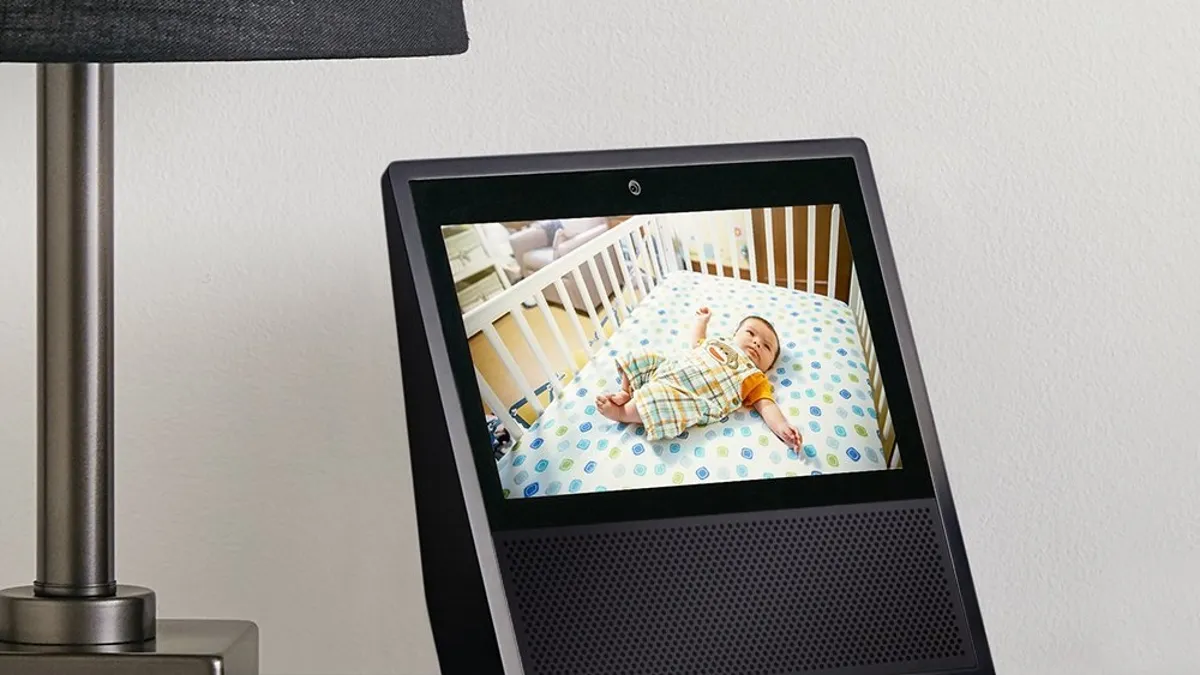
Home>Home Security and Surveillance>Why Is My Security Camera Showing No Video?
Home Security and Surveillance
Why Is My Security Camera Showing No Video?
Modified: March 6, 2024
If your security camera is showing no video, it could be due to various reasons. Learn how to troubleshoot and fix home security and surveillance camera issues.
(Many of the links in this article redirect to a specific reviewed product. Your purchase of these products through affiliate links helps to generate commission for Storables.com, at no extra cost. Learn more)
Introduction
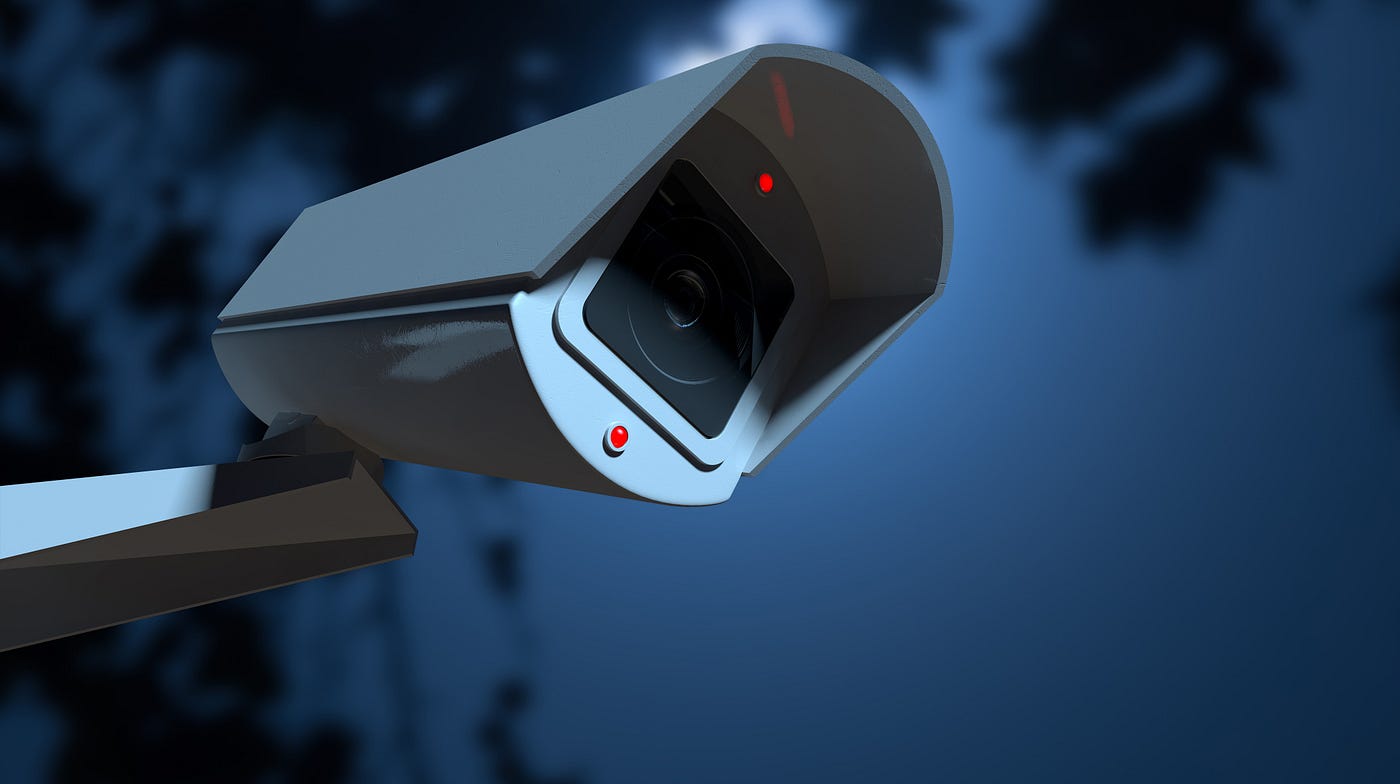
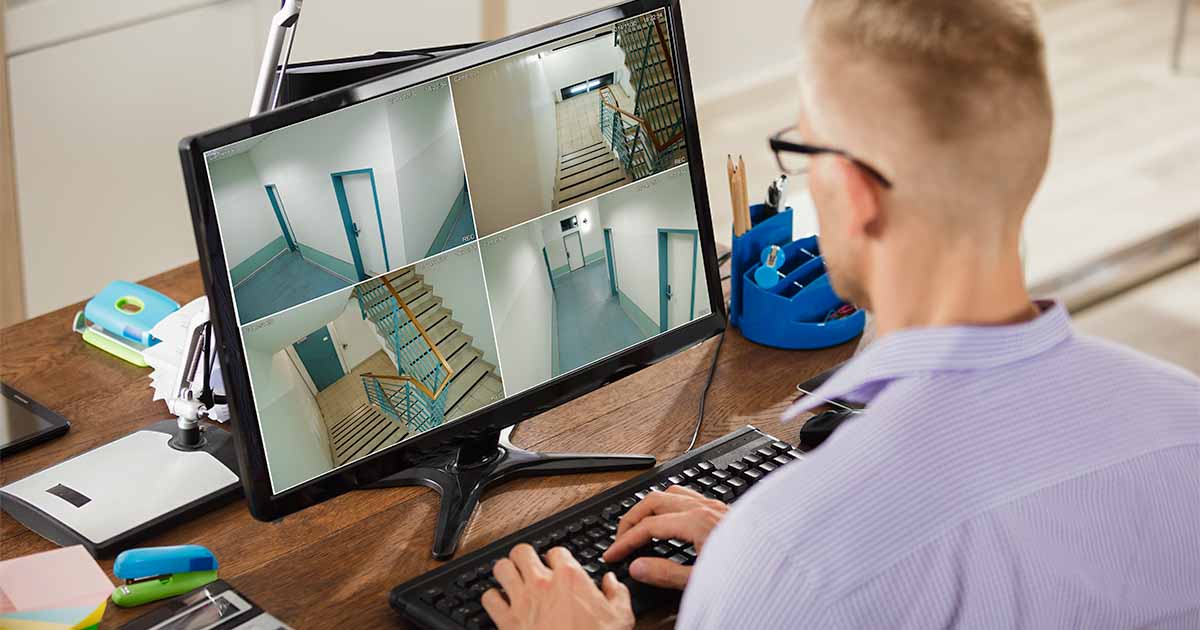
Welcome to the world of home security and surveillance! In our modern age, keeping our homes and loved ones safe is a top priority. One of the most effective ways to achieve this is by installing security cameras strategically throughout our properties. These cameras allow us to monitor and record activities, deter potential intruders, and provide valuable evidence in the event of a security breach.
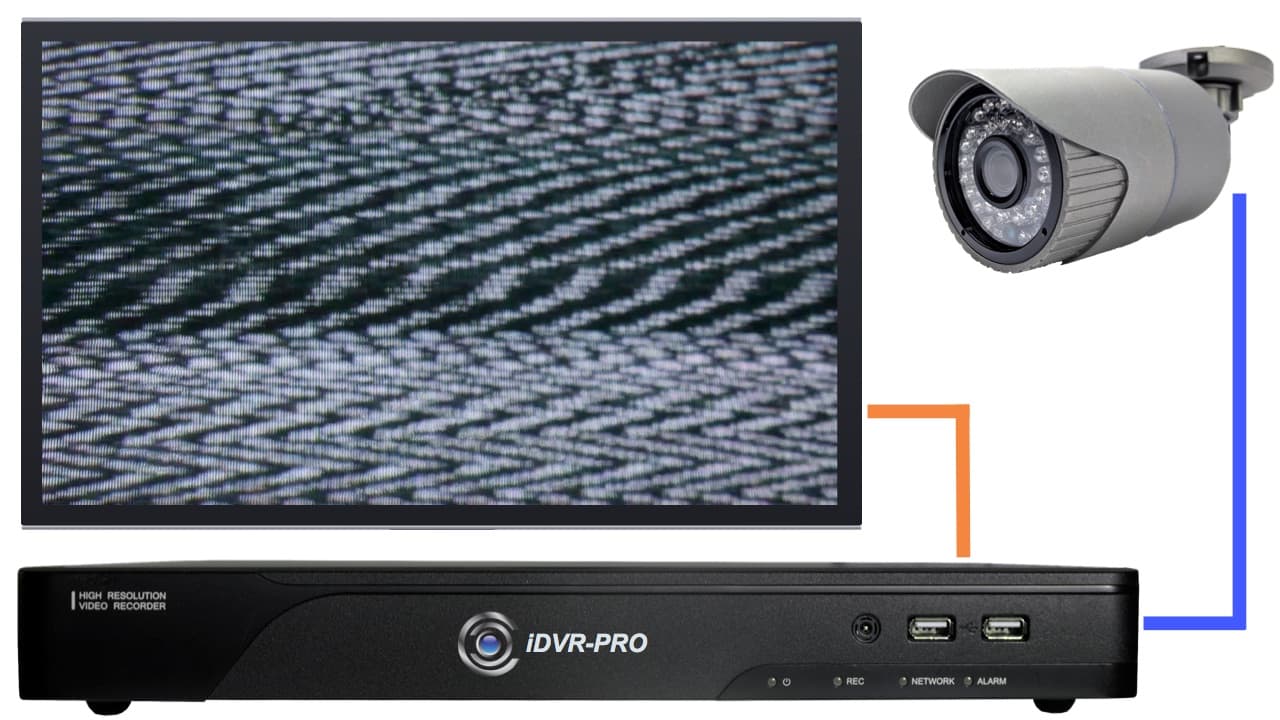
However, despite their effectiveness, security cameras may occasionally encounter technical issues. One common problem that homeowners face is a security camera showing no video. It can be frustrating and concerning when you expect to have a visual feed from your camera, but instead are met with a blank screen or an error message.
In this article, we will explore the common causes of no video display on security cameras and provide troubleshooting steps to help you resolve the issue. Whether you are a DIY enthusiast or a homeowner seeking assistance, this guide will equip you with the knowledge to address the problem and get your security cameras back online.
It is important to note that the troubleshooting steps discussed in this article are general guidelines and may vary depending on the specific brand and model of your security camera. Always refer to the manufacturer’s documentation and consult their technical support if needed.
Without further ado, let’s dive into the common causes of no video display on security cameras and learn how to troubleshoot these issues.
Key Takeaways:
- Troubleshooting your security camera’s connections, power supply, and settings can help resolve no video display issues. Contacting technical support for further assistance is also recommended.
- Resetting your security camera and checking its connections and power supply can help restore video display functionality. If issues persist, contacting technical support is advisable.
Read more: Why Is My Security Camera Flickering
Common Causes of No Video Display
When your security camera is not displaying any video, several factors could be at play. Identifying the root cause is crucial in order to identify the appropriate solution. Here are some common causes of no video display on security cameras:
- Camera Connection Issues: One of the most common reasons for no video display is a faulty camera connection. This can occur if the camera is not properly plugged into the power source or if the cable connecting the camera to the recording device is damaged or loose.
- Power Supply Problems: Another frequent culprit is a power supply issue. If your security camera does not have a stable power source, it may not be able to transmit the video feed. This can happen if the power adapter is malfunctioning, the power outlet is not working, or there is a problem with the electrical wiring at your location.
- Network and Internet Connectivity Problems: Many modern security cameras connect to the internet to allow remote viewing and monitoring. If your camera is unable to establish a stable network connection or if the internet connection at your location is weak or unreliable, it can result in no video display.
- Camera Settings and Configuration: Sometimes, the issue may be related to incorrect camera settings or misconfigured configurations. If the camera settings are not properly adjusted, it can prevent the video feed from being displayed. This can happen if the resolution or frame rate settings are too high or if certain features, such as motion detection, are not enabled correctly.
- Technical Malfunctions or Failures: In some cases, the lack of video display may be due to technical malfunctions or failures within the security camera itself. This can include hardware issues, firmware bugs, or software glitches that are impeding the camera’s ability to capture and transmit video.
Keep in mind that these are just a few possible causes of no video display on security cameras. There may be other factors specific to your situation. It is important to assess all potential causes and systematically troubleshoot each one to resolve the issue.
In the next sections, we will delve deeper into each cause and explore troubleshooting steps to help you rectify the problem.
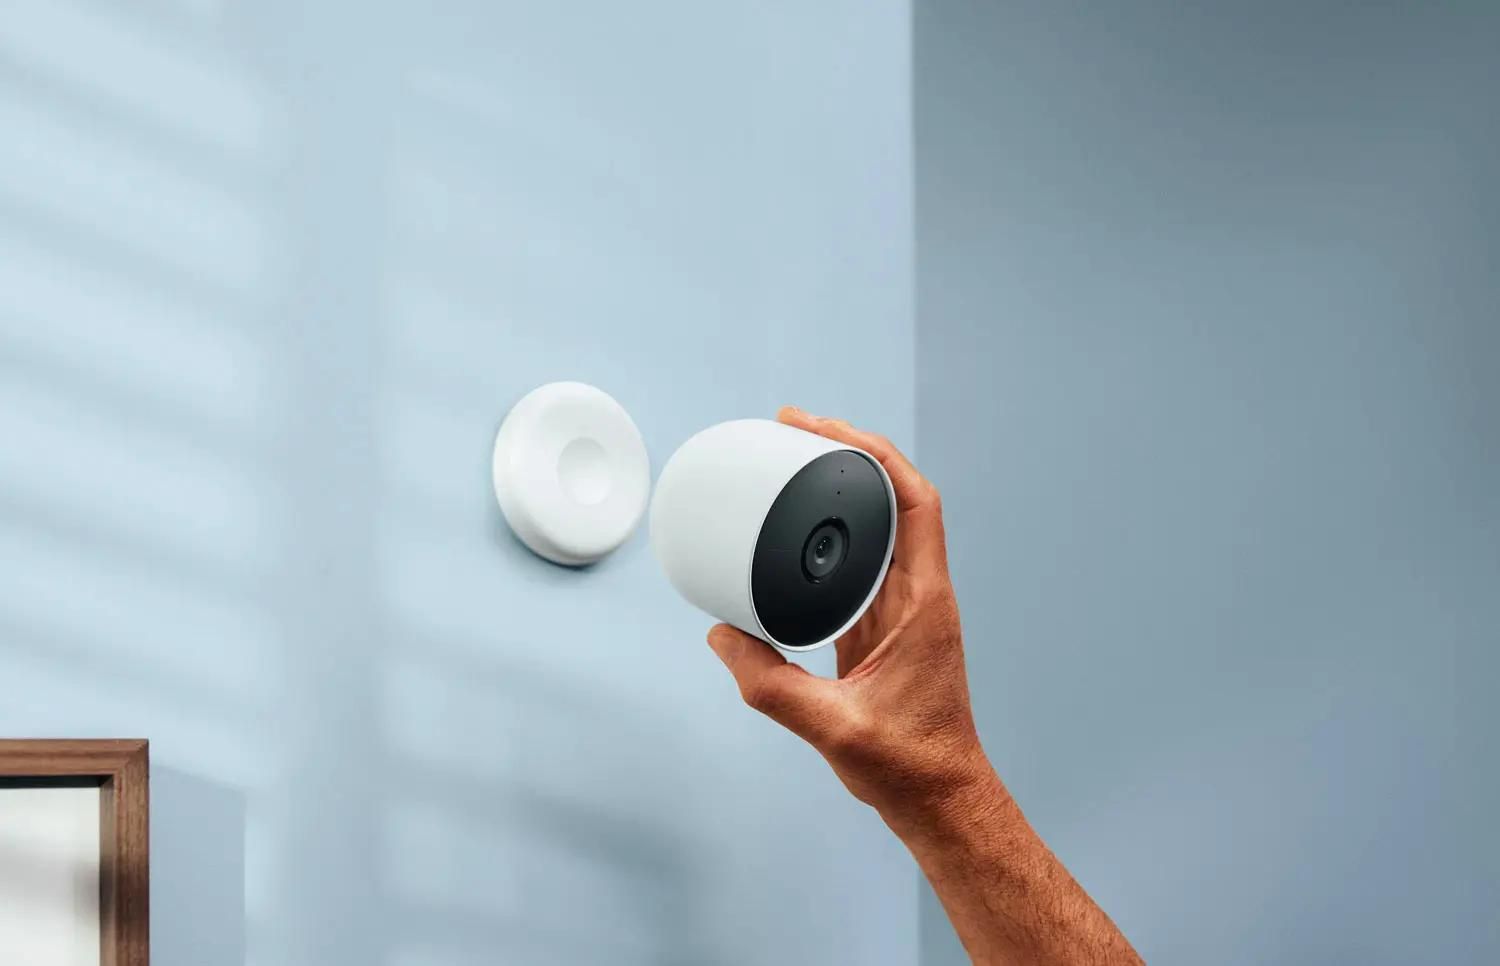
Camera Connection Issues
When it comes to security cameras not displaying any video, camera connection issues are often the first culprit to investigate. Here are some possible camera connection problems that could be causing the issue:
- Faulty power connection: Ensure that the camera is properly plugged into a power source. Check if the power adapter is securely connected to the camera and the power outlet. If the camera is battery-powered, make sure the batteries are not depleted and properly inserted.
- Damaged or loose cables: Inspect the cable connecting the camera to the recording device or network interface. Look for any visible signs of damage or loose connections. If there are any issues with the cables, try replacing them with new ones to see if that resolves the problem.
- Interference: In some cases, external factors can interfere with the camera’s connection. Wireless cameras, for example, may suffer from signal interference from nearby electronic devices or obstacles such as walls and other objects. Make sure there are no devices or objects obstructing the camera’s signal path.
- Compatibility issues: Ensure that the camera and recording device or network interface are compatible with each other. Check if they are from the same brand or compatible with the same network protocols. Incompatible devices may not be able to establish a proper connection, resulting in no video display.
To troubleshoot camera connection issues:
- Double-check the power connection, ensuring that the camera is securely plugged in and that the power source is functioning correctly.
- Inspect the cables for any signs of damage or loose connections. If necessary, replace the cables with new ones to rule out any potential cable-related issues.
- If using wireless cameras, try repositioning the camera or relocating the wireless receiver to improve the signal quality.
- Verify the compatibility of the camera and the recording device or network interface. Check the user manuals or contact the manufacturer’s support for guidance on compatibility requirements.
If the issue persists after troubleshooting camera connection issues, it’s time to move on to addressing power supply problems, which we will discuss in the next section.
Power Supply Problems
One of the common causes of a security camera not displaying any video is power supply issues. Without a stable power source, the camera may not be able to transmit the video feed. Here are a few power supply problems to consider:
- Malfunctioning power adapter: The power adapter that connects the camera to the power source may be faulty or defective. Check if the power adapter’s indicator light is on. If it’s not, try using a different power adapter or test the camera with a different power outlet.
- Inoperable power outlet: Ensure that the power outlet is working by plugging in another device and checking if it powers on. If the outlet is not functioning, try using a different outlet or consult an electrician to fix the problem.
- Electrical wiring issues: If you have recently experienced a power outage or electrical surge, it’s possible that the camera’s electrical wiring has been damaged. Inspect the wiring for any signs of damage or consult a professional electrician to assess and repair any issues.
- Inadequate power supply: Some security cameras require a specific amount of power to operate properly. If the power supply is insufficient to meet the camera’s power requirements, it may result in no video display. Check the camera’s specifications and ensure that the power source meets or exceeds the recommended power requirements.
To address power supply problems, follow these troubleshooting steps:
- Check the power adapter and ensure that it is properly connected to the camera. If the indicator light on the power adapter is off, try using a different power adapter.
- Test the power outlet by plugging in another device to determine if it is functioning correctly. If the outlet is not working, try using a different outlet or consult an electrician for assistance.
- If you suspect electrical wiring issues, consider contacting a professional electrician to inspect and repair any damage to the camera’s electrical wiring.
- Verify that the power supply meets the camera’s power requirements. Refer to the camera’s specifications or consult the manufacturer’s documentation for the recommended power supply.
If the camera still does not display any video after troubleshooting power supply problems, it’s time to investigate network and internet connectivity issues, which we will explore in the next section.
Network and Internet Connectivity Problems
When dealing with security cameras, network and internet connectivity issues can often lead to a lack of video display. Here are some common network and internet-related problems to consider:
- Weak Wi-Fi signal: If your security camera relies on a wireless connection, a weak Wi-Fi signal can result in intermittent or no video display. Factors such as distance from the router, obstacles, or interference from other devices can weaken the signal. Consider relocating the camera closer to the router or using Wi-Fi extenders to boost the signal strength.
- Internet service provider (ISP) issues: Problems with your internet service provider can affect the camera’s ability to connect to the internet and transmit video. Check if other devices connected to the same network are experiencing connectivity issues. If so, contact your ISP to investigate and resolve any network problems.
- Incorrect network settings: Ensure that the camera’s network settings are properly configured. Check the SSID (Wi-Fi network name) and password entered in the camera’s settings to ensure they match your network details. Incorrect network settings can prevent the camera from establishing a connection and displaying video.
- Firewall or port forwarding issues: If you have a firewall or port forwarding set up on your network, it’s possible that they are blocking or hindering the camera’s connection. Check your router’s settings or consult the manufacturer’s documentation for instructions on configuring firewall rules or port forwarding specifically for your camera.
To troubleshoot network and internet connectivity problems, follow these steps:
- Ensure that the camera is within range of a strong Wi-Fi signal. If necessary, consider repositioning the camera or using Wi-Fi extenders to improve the signal strength.
- Check if other devices on your network are experiencing connectivity issues. If so, contact your ISP to address any network problems.
- Verify that the camera’s network settings, including the SSID and password, are correctly entered. Double-check for any typographical errors or discrepancies.
- Review your router’s firewall settings and port forwarding configuration. Make sure that the necessary ports are open for the camera to communicate with the network and internet.
If you have followed these troubleshooting steps and the camera still does not display any video, it’s time to investigate camera settings and configuration issues, which we will cover in the next section.
Read more: Why Is My Security Camera Beeping
Camera Settings and Configuration
Incorrect camera settings or misconfigured configurations can also lead to a security camera not displaying any video. Here are some camera settings and configuration issues to consider:
- Resolution and frame rate settings: If the resolution or frame rate settings on the camera are set too high, it can overload the camera’s processing capability and result in no video display. Check the camera’s settings and adjust the resolution and frame rate settings to a level that is compatible with its capabilities and your network’s bandwidth.
- Missing or incorrect codec: A codec is responsible for compressing and decompressing video data. If the camera’s codec is missing or incompatible with the recording device or playback software, it can prevent the video from being displayed. Ensure that the camera and the recording device support the same codec or check if firmware updates are available to address any codec-related issues.
- Misconfigured motion detection settings: If your camera has motion detection features, improper configuration of these settings can impact the video display. Make sure that the motion detection settings are enabled correctly and properly adjusted to trigger recording or notifications when motion is detected.
- Privacy masking: Privacy masking is a feature that allows you to block out specific areas in the camera’s field of view to safeguard privacy. If the privacy masking settings are enabled and improperly configured, it may obscure the entire video feed, resulting in no video display. Verify if privacy masking is enabled and adjust the settings accordingly.
To troubleshoot camera settings and configuration issues, follow these steps:
- Review the camera’s resolution and frame rate settings and adjust them to a level that is suitable for the camera’s capabilities and your network’s bandwidth.
- Check if the camera’s codec is compatible with the recording device or playback software. Consult the camera’s documentation or the manufacturer’s support to ensure that the codec is supported or to inquire about firmware updates that address any codec-related issues.
- Verify that the motion detection settings are enabled correctly and adjusted to detect and record motion accurately.
- Check if privacy masking is enabled and configured appropriately. Disable or adjust the settings if necessary to ensure that it does not interfere with the video display.
If the camera still does not display any video after troubleshooting the settings and configuration, it may indicate technical malfunctions or failures within the camera. In the next section, we will explore various troubleshooting steps to address these issues.
Technical Malfunctions or Failures
When all else fails, technical malfunctions or failures within the security camera itself could be the reason behind a lack of video display. Here are some common technical issues that may cause camera failures:
- Hardware issues: Components within the camera, such as the image sensor or lens, may experience hardware failures over time. This can result in a complete loss of video display. In such cases, professional repair or replacement of the faulty hardware may be necessary.
- Firmware bugs: Like any software, the camera’s firmware can occasionally have bugs or glitches that affect its performance. Check if the camera manufacturer has released any firmware updates that address known issues or contact their technical support for assistance in troubleshooting firmware-related problems.
- Software glitches: Software-based issues, such as conflicts with other applications or corrupted settings, can also lead to no video display. Restarting the camera, resetting the software settings to defaults, or reinstalling the camera’s software may help resolve software-related glitches.
- Environmental factors: Extreme temperatures, moisture, or exposure to harsh elements can damage the camera’s internal components and result in malfunctions. Ensure that the camera is installed in a suitable environment, protected from adverse weather conditions, and follow any guidelines provided by the manufacturer for proper usage and maintenance.
- Defective cables or connectors: Faulty cables or connectors can disrupt the camera’s video feed. Inspect the cables and connectors for any damage or wear and consider replacing them with new ones if needed.
To troubleshoot technical malfunctions or failures:
- Check with the camera manufacturer for any known hardware issues and inquire about repair or replacement options.
- Download and install any available firmware updates provided by the manufacturer to address known bugs or glitches.
- If experiencing software-related issues, try restarting the camera and resetting the software settings to defaults. If the problem persists, consider reinstalling the camera’s software.
- Ensure that the camera is installed in a suitable environment, protected from extreme temperatures, moisture, and other adverse conditions.
- If you suspect faulty cables or connectors, replace them with new ones to rule out any cable-related issues.
If the camera still does not display any video after attempting these troubleshooting steps, it may be necessary to contact the camera manufacturer’s technical support or seek professional assistance to diagnose and resolve the issue.
Now that we have explored various causes and troubleshooting steps, you are equipped with the knowledge to address a security camera showing no video. Remember to refer to the manufacturer’s documentation and seek professional assistance when needed. Stay vigilant and ensure that your home security system is functioning optimally to protect your loved ones and belongings.
Troubleshooting Steps
When your security camera is not displaying any video, it’s important to follow a systematic approach to identify and resolve the issue. Here are some troubleshooting steps to help you get your camera back online:
- Resetting the Camera: Start by performing a camera reset. This can often resolve minor glitches and restore the camera to its default settings. Check the camera’s user manual or the manufacturer’s website for instructions on how to perform a reset.
- Checking Camera Connections: Ensure that all camera connections are secure and properly plugged in. Confirm that the power adapter is connected to a functioning power source and that the cables are not damaged or loose.
- Verifying Power Supply: Check the power supply for any issues. Test the power adapter and the outlet by using them with another device to ensure they are functioning correctly. If necessary, try using a different power adapter or outlet.
- Examining Network and Internet Connection: If your camera connects to the internet, verify that the network and internet connections are stable. Check the Wi-Fi signal strength and make sure the camera is within range. If using a wired connection, ensure the Ethernet cable is securely connected.
- Troubleshooting Camera Settings: Review the camera’s settings and configurations. Check if the resolution, frame rate, and codec settings are appropriate. Ensure that motion detection and privacy masking settings are correctly enabled and adjusted.
- Contacting Technical Support: If you have followed these troubleshooting steps and the camera still does not display any video, it may indicate a technical malfunction or failure. Contact the camera manufacturer’s technical support for further assistance. They may provide additional troubleshooting steps or arrange for repair or replacement if necessary.
Keep in mind that these troubleshooting steps are general guidelines and may vary depending on your specific camera model. Always refer to the camera’s user manual and consult the manufacturer’s support resources for accurate and up-to-date instructions.
By systematically troubleshooting the camera’s connections, power supply, network and internet connectivity, settings, and seeking professional assistance when needed, you can increase the chances of resolving the no video display issue. Remember to exercise patience and persistence as you work through the troubleshooting process.
Now it’s time to apply these troubleshooting steps to your specific camera and get it back up and running. Good luck!
Check the power source and connections to ensure the camera is receiving power. If the power supply is working, try resetting the camera or checking for any obstructions in the camera’s field of view. If the issue persists, contact the manufacturer for further assistance.
Resetting the Camera
If your security camera is not displaying any video, resetting the camera can often help resolve the issue. Resetting the camera will restore it to its default settings, potentially clearing any minor glitches that may be causing the problem. Here are some steps to follow when resetting your camera:
- Refer to the user manual: Consult the camera’s user manual or the manufacturer’s website for specific instructions on how to reset your camera. Different camera models may have different reset methods, so it’s important to follow the correct procedure.
- Locate the reset button or option: Look for a physical reset button on the camera or a reset option in the camera’s settings. The reset button may be located on the back or underside of the camera and may require a small tool, such as a paperclip or pin, to press and hold it. If there is a reset option in the camera’s settings, access the settings menu from the camera’s interface or through a web browser.
- Perform the reset: Depending on the camera model, you may need to press and hold the reset button for a specific duration (e.g., 10 seconds) or select the reset option in the settings menu. Follow the instructions provided in the user manual to ensure that the reset is performed correctly.
- Wait for the reset to complete: After initiating the reset, give the camera a few moments to complete the process. The camera may reboot or indicate that the reset is in progress. Once the reset is complete, the camera should return to its factory default settings.
- Reconfigure the camera: After resetting the camera, you will need to reconfigure it with your desired settings. This may include setting up the camera’s network connection, adjusting resolution and frame rate settings, enabling motion detection, or configuring any other desired features. Refer to the camera’s user manual for instructions on how to configure these settings.
Remember to take note of any custom settings or configurations you had previously applied to the camera before performing the reset. You will need to reapply these settings after the reset to ensure that the camera functions according to your preferences.
By resetting your security camera, you can often resolve minor issues that may be preventing it from displaying video. If the issue persists after the reset, proceed to the next troubleshooting steps to further investigate and address the no video display problem.
Now that you know how to perform a camera reset, give it a try and see if it helps get your camera back online and displaying video. Good luck!
Read more: Why Is My Security Camera Blurry
Checking Camera Connections
When your security camera is not displaying any video, it’s important to check the camera connections to ensure they are properly configured and secure. Faulty or loose connections can prevent the camera from transmitting the video feed effectively. Here are some steps to follow when checking the camera connections:
- Inspect the power connection: Start by verifying that the camera is properly connected to a power source. Check if the power adapter is securely plugged into the camera and the power outlet. Ensure that there are no visible signs of damage or loose connections.
- Examine the cables: Next, inspect the cable connecting the camera to the recording device or network interface. Look for any visible signs of damage, such as frayed or bent cables. Make sure the cables are securely attached on both ends and that they are not loose.
- Ensure proper cable placement: If the camera has multiple cables (such as power and Ethernet cables), ensure that they are not tangled or interfering with each other. Keep the cables organized and neatly placed to avoid accidental disconnections or disruptions in the video feed.
- Consider cable replacements: If you notice any damage or suspect cable issues, it may be necessary to replace them. Obtain new cables of the appropriate length and type that are compatible with your camera and recording device. High-quality cables are recommended to ensure optimal performance.
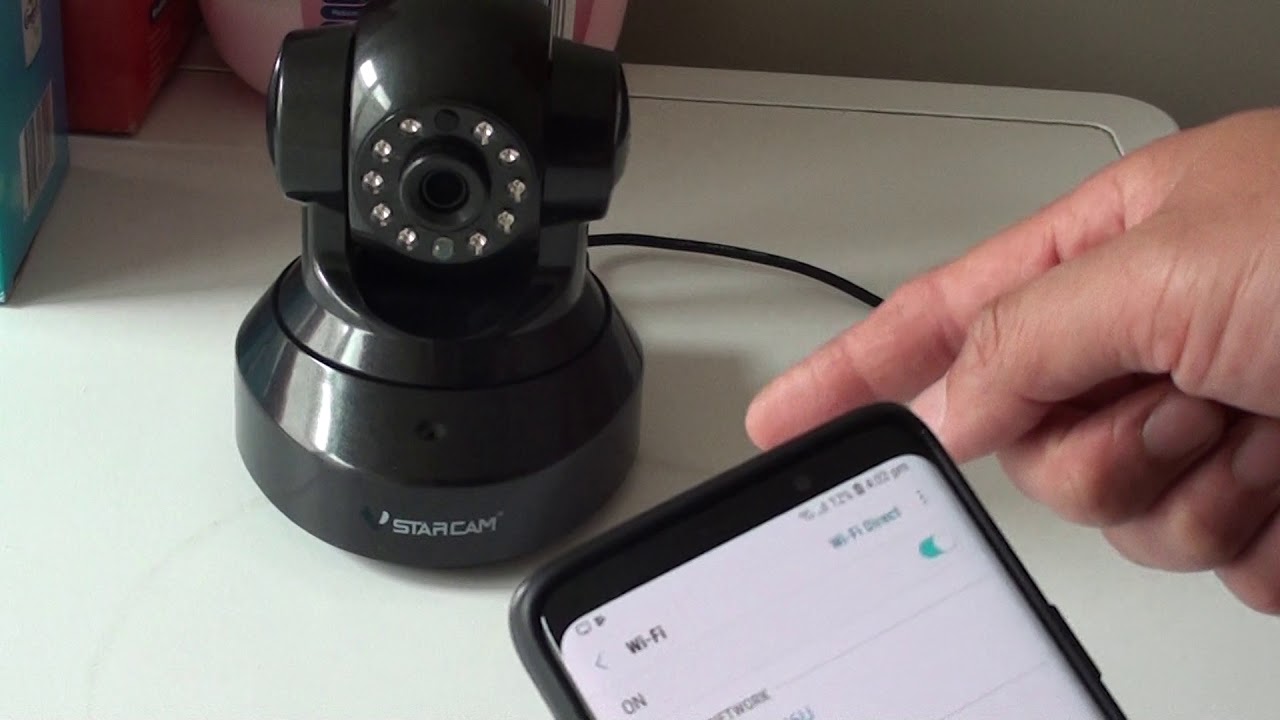
- Check wireless connectivity: If you are using a wireless security camera, ensure that it is connected to the Wi-Fi network. Check the camera’s settings or accompanying software to view the network status. If the camera is not connected, follow the instructions provided with the camera to establish a wireless connection.
By carefully checking the camera connections, you can identify and address any issues that may be causing the lack of video display. Once you have examined the connections, proceed to the next troubleshooting steps to further investigate and resolve the problem.
Remember to consult the camera’s user manual or the manufacturer’s website for specific instructions on checking and configuring the camera connections. Different camera models may have different connection options and requirements.
Now it’s time to inspect your camera connections and ensure that they are secure and properly configured. Good luck!
Verifying Power Supply
When your security camera is not displaying any video, it’s important to verify the power supply to ensure that the camera is receiving adequate power. A stable power source is crucial for the camera to function properly and transmit the video feed. Here are some steps to follow when verifying the power supply:
- Check the power adapter: Ensure that the power adapter connected to the camera is functioning correctly. Examine the power adapter for any visible signs of damage or overheating. If possible, test the power adapter with another device to ensure that it is providing a consistent power output.
- Test the power outlet: Plug another device into the power outlet to verify that it is working correctly. If the device powers on, the outlet is likely functioning properly. However, if the device does not power on, try using another power outlet or consult an electrician to resolve any issues with the power supply.
- Inspect the power cable: Examine the power cable connected to the camera for any damage or frayed wires. Ensure that the cable is securely plugged into both the camera and the power adapter. If the power cable is damaged, replace it with a new cable of the appropriate type and length.
- Consider the power source: If your security camera is battery-powered, ensure that the batteries are not depleted and are properly inserted. Replace the batteries if necessary. For cameras that rely on solar power or other alternative energy sources, make sure that the power source is functioning correctly and that the camera is receiving sufficient power.
- Verify power requirements: Check the camera’s specifications or user manual to confirm the recommended power requirements. Ensure that the power supply meets or exceeds the required voltage and current levels. Insufficient power supply can result in the camera not displaying any video.
By verifying the power supply, you can ensure that the camera is receiving the necessary power to function properly. Once you have examined the power supply, proceed to the next troubleshooting steps to further investigate and troubleshoot the lack of video display.
Remember to consult the camera’s user manual or the manufacturer’s website for specific instructions on power supply requirements and troubleshooting. Different camera models may have different power requirements and configurations.
Now it’s time to verify your camera’s power supply and ensure that it is providing adequate power for the camera to operate. Good luck!
Examining Network and Internet Connection
When your security camera is not displaying any video, it’s crucial to examine the network and internet connection to ensure that the camera can transmit the video feed effectively. Network and internet connection issues can prevent the camera from communicating with the recording device or accessing remote viewing features. Here are some steps to follow when examining the network and internet connection:
- Check Wi-Fi signal strength: If your camera uses a wireless connection, examine the Wi-Fi signal strength in the camera’s vicinity. Weak Wi-Fi signal can lead to intermittent or no video display. Make sure that the camera is within range of the Wi-Fi router, and consider using Wi-Fi extenders or repositioning the camera to improve signal reception.
- Verify network stability: Ensure that your network connection is stable and not experiencing any disruptions. Test the internet connection on other devices connected to the same network to confirm that there are no issues. If there are connectivity problems, troubleshoot your network or contact your internet service provider for assistance.
- Ensure correct network settings: Check the camera’s network settings to ensure that they are correctly configured. Verify that the SSID (Wi-Fi network name) and password entered in the camera’s settings match the network details. Incorrect network settings can prevent the camera from establishing a connection and displaying video.
- Confirm wired connections: If your camera uses a wired Ethernet connection, ensure that the Ethernet cable is securely connected to the camera and the network interface. Check that the cable is not damaged or loose. If necessary, try using a different Ethernet cable to rule out any cable-related issues.
- Investigate firewall or port forwarding: If you have a firewall or port forwarding set up on your network, they may be blocking the camera’s communication. Check your router’s settings or consult the manufacturer’s documentation for instructions on configuring firewall rules or port forwarding specifically for your camera.
By examining the network and internet connection, you can identify and resolve any issues that may be hindering the camera’s ability to transmit the video feed. Once you have investigated the network connection, proceed to the next troubleshooting steps to further diagnose and troubleshoot the lack of video display.
Remember to consult the camera’s user manual or the manufacturer’s website for specific instructions on network configuration and troubleshooting. Different camera models may have different network settings and requirements.
Now it’s time to examine your camera’s network and internet connection to ensure seamless transmission of the video feed. Good luck!
Troubleshooting Camera Settings
When your security camera is not displaying any video, it’s important to troubleshoot the camera settings to ensure they are properly configured. Incorrect or misconfigured settings can prevent the camera from transmitting the video feed effectively. Here are some steps to follow when troubleshooting camera settings:
- Review resolution and frame rate: Check the camera’s resolution and frame rate settings. High-resolution or high-frame-rate settings can overload the camera’s processing capabilities and result in no video display. Adjust the settings to a level that is compatible with the camera’s capabilities and your network’s bandwidth.
- Verify the codec compatibility: The camera’s codec is responsible for compressing and decompressing video data. Ensure that the camera’s codec is compatible with the recording device or playback software. If there are codec compatibility issues, check if the camera manufacturer provides firmware updates that address these problems.
- Check motion detection settings: If your camera has motion detection capabilities, review the motion detection settings. Improperly configured motion detection can prevent the camera from capturing and displaying video. Ensure that the motion detection settings are correctly enabled and adjusted to trigger recording or notifications when motion is detected.
- Verify privacy masking settings: Some cameras have privacy masking features that allow you to block out specific areas in the camera’s field of view to protect privacy. Check the privacy masking settings to ensure they are not obstructing the entire video feed. Adjust or disable privacy masking if necessary.
- Restart or reset camera settings: Try restarting the camera to refresh its settings. If the issue persists, consider resetting the camera settings to the default configuration. Consult the camera’s user manual or the manufacturer’s website for instructions on restarting or resetting the camera.
If you need further assistance with troubleshooting the camera settings, refer to the camera’s user manual or contact the manufacturer’s technical support. They can provide specific instructions and guidance tailored to your camera model.
By troubleshooting the camera settings, you can ensure that the camera is configured correctly and optimize its performance. Once you have adjusted or verified the settings, proceed to the next troubleshooting steps to further diagnose and troubleshoot the lack of video display.
Now it’s time to delve into your camera’s settings and configure them correctly to get your video display up and running. Good luck!
Read more: Why Is My Printer Not Showing Up
Contacting Technical Support
If you have followed the previous troubleshooting steps and your security camera still does not display any video, it may be necessary to contact the camera manufacturer’s technical support for further assistance. Technical support representatives are trained to help troubleshoot and resolve complex issues related to their products. Here are some steps to follow when contacting technical support:
- Gather necessary information: Before contacting technical support, gather all relevant information about your camera, such as the model number, serial number, and any error messages or symptoms you have observed. This information will help the support representative understand your issue more accurately.
- Visit the manufacturer’s website: Start by visiting the camera manufacturer’s website. Often, they have a dedicated support section where you can find troubleshooting articles, FAQs, and user manuals. These resources may provide you with additional self-help options.
- Look for contact information: Search for the contact information of the manufacturer’s technical support team. This may include a phone number, email address, or chat support. Note down the contact information for future reference.
- Prepare your questions and concerns: Write down any specific questions or concerns you have regarding the lack of video display on your camera. Providing detailed information about the issue and the troubleshooting steps you have already taken can help the support representative better understand and address your problem.
- Contact technical support: Reach out to the manufacturer’s technical support through the provided contact channels. Explain your issue clearly and concisely, providing them with the necessary information and answering any questions they may have. Be patient and follow their instructions and guidance during the troubleshooting process.
- Follow up, if needed: If the initial contact with technical support does not resolve the issue, don’t hesitate to follow up and provide them with any additional information or updates. They may require further testing or escalation to advanced support teams to resolve the problem.
Remember to remain polite and respectful when interacting with technical support representatives. They are there to assist you and finding a resolution may require collaboration and cooperation. If your camera is still under warranty, inquire about any repair or replacement options that may be available to you.
Contacting technical support can provide you with valuable insights and solutions to address the lack of video display on your camera. Their expertise and guidance can help you navigate any technical complexities and ensure that your camera performs optimally.
Now it’s time to reach out to technical support and get the assistance you need to resolve the issue with your security camera. Good luck!
Conclusion
In conclusion, a security camera not displaying any video can be a frustrating situation. However, by following the troubleshooting steps outlined in this guide, you can increase your chances of identifying and resolving the issue. We have explored common causes such as camera connection issues, power supply problems, network and internet connectivity issues, camera settings and configuration, and technical malfunctions or failures.
Throughout the troubleshooting process, it is important to consult the camera’s user manual or contact the manufacturer’s technical support for accurate and specific instructions based on your camera model. They can provide further guidance and assistance tailored to your situation.
Remember to approach the troubleshooting process systematically, starting with simple checks such as resetting the camera and examining connections. If the issue persists, move on to more specific troubleshooting steps such as verifying the power supply, network, and camera settings. If all else fails, contacting the manufacturer’s technical support is a wise step to take.
By being patient, persistent, and methodical, you can significantly improve your chances of resolving the no video display issue. Home security and surveillance are important for protecting your loved ones and belongings, and ensuring that your cameras are functioning properly is crucial to achieve peace of mind.
We hope that this comprehensive guide has provided you with the information and insights needed to troubleshoot and resolve the lack of video display on your security camera. Remember to prioritize your safety and consult professional assistance when necessary to ensure optimal performance of your home security system.
Stay vigilant and take the necessary steps to maintain a secure and protected environment for your home. Have confidence in troubleshooting the lack of video display on your security camera, and enjoy the peace of mind that comes with a functional and reliable security system.
Frequently Asked Questions about Why Is My Security Camera Showing No Video?
Was this page helpful?
At Storables.com, we guarantee accurate and reliable information. Our content, validated by Expert Board Contributors, is crafted following stringent Editorial Policies. We're committed to providing you with well-researched, expert-backed insights for all your informational needs.