Home>Articles>How To Test A Light Bulb Socket With A Multimeter
Articles
How To Test A Light Bulb Socket With A Multimeter
Modified: May 6, 2024
Learn how to test a light bulb socket using a multimeter in this informative article. Ensure the safety of your electrical connections with our step-by-step guide.
(Many of the links in this article redirect to a specific reviewed product. Your purchase of these products through affiliate links helps to generate commission for Storables.com, at no extra cost. Learn more)
Introduction
Light bulb sockets are an essential part of any lighting fixture, allowing you to connect and power your light bulbs. However, over time, these sockets can wear out or become faulty, resulting in flickering lights or bulbs that fail to turn on. In such cases, it is important to test the light bulb socket using a multimeter to identify the issue.
In this article, we will guide you through the process of testing a light bulb socket using a multimeter. We will cover the necessary tools and safety precautions, as well as the step-by-step procedure for conducting the test. By the end of this article, you will be able to confidently troubleshoot any issues with your light bulb sockets and restore proper functionality to your lighting fixtures.
Subtitle: Understanding Light Bulb Sockets
Before we dive into the testing process, it is important to have a basic understanding of light bulb sockets. A light bulb socket, also known as a lamp holder, is the part of a lighting fixture that holds and connects the light bulb to the electrical supply. It provides the necessary electrical connections for the bulb to receive power and illuminate.
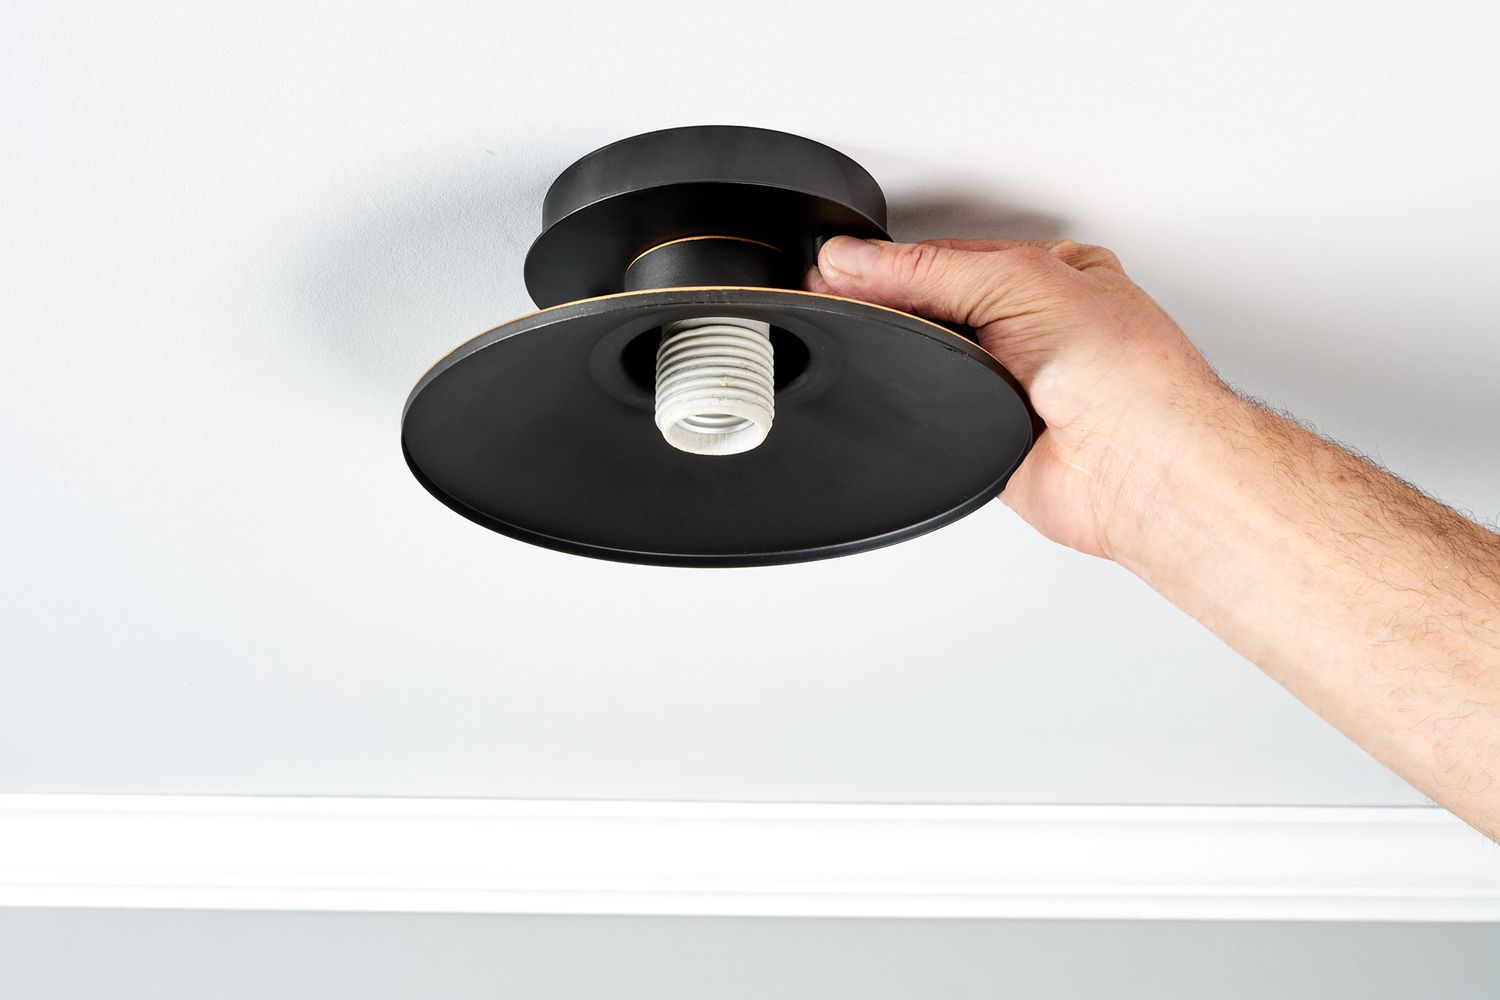
Light bulb sockets come in various sizes and designs to accommodate different types of light bulbs, such as incandescent, CFL, or LED bulbs. The most common types of light bulb sockets include screw-type (E26/E27), bayonet-type (B22), and pin-based (G4, GU10) sockets.
It is important to note that light bulb sockets can vary depending on the region or country. Therefore, it is advisable to check the specifications and compatibility of your specific light bulb socket before proceeding with the testing process.
Subtitle: Tools and Equipment Required
Before you begin testing a light bulb socket with a multimeter, make sure you have the following tools and equipment:
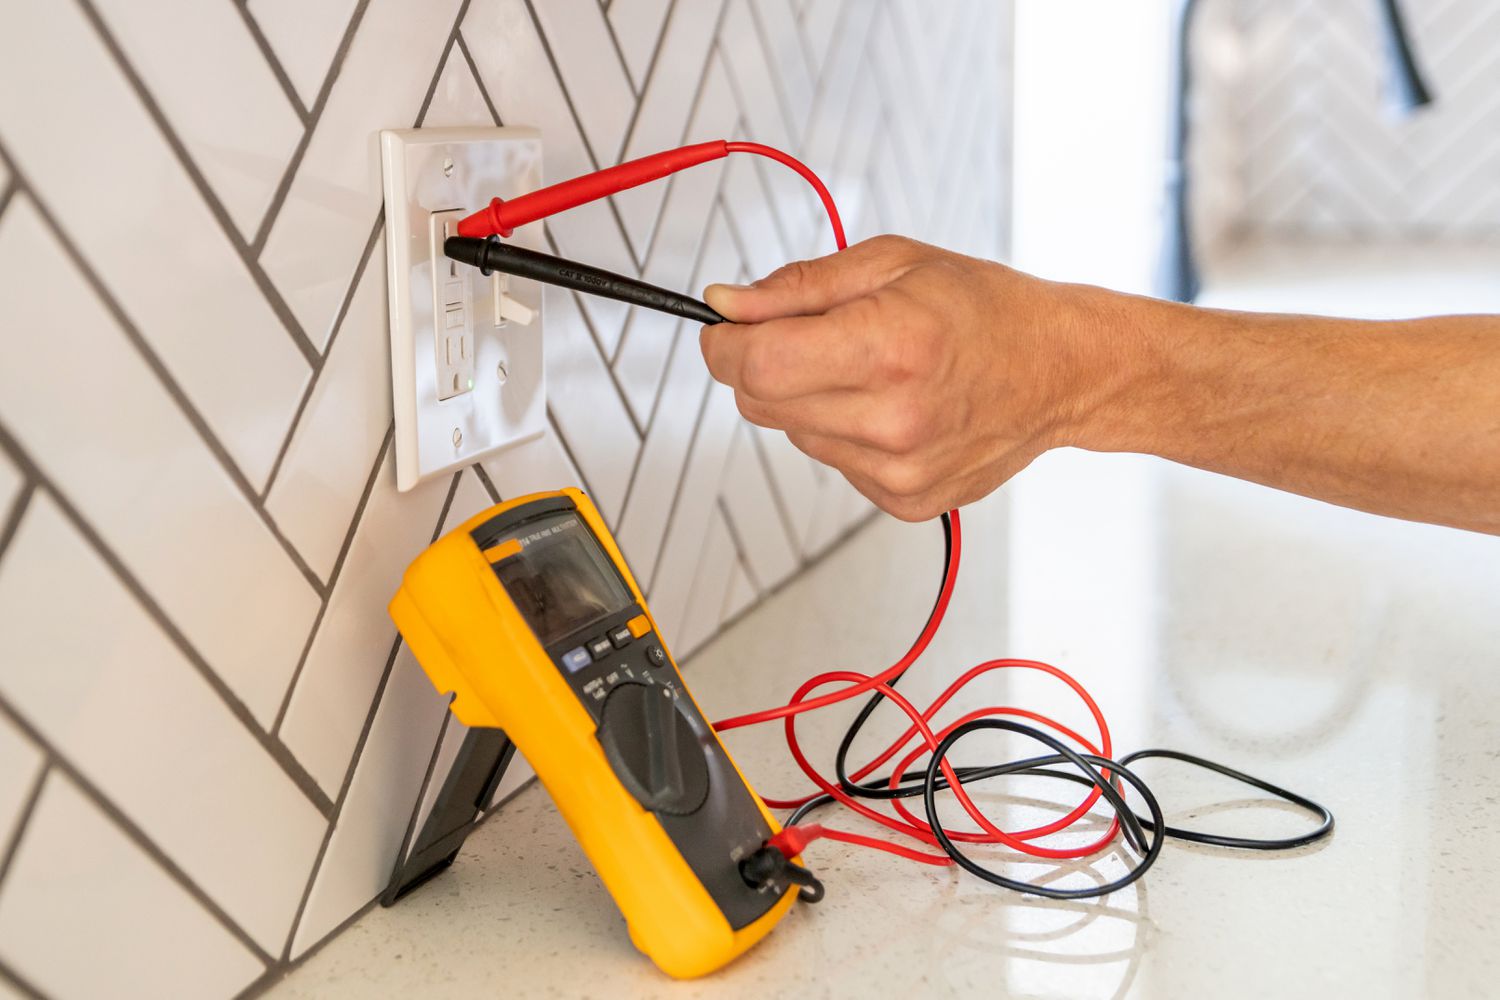
- A digital multimeter: This is the primary tool needed for testing the socket. It allows you to measure electrical voltage, resistance, and continuity.
- Protective gloves: It is always recommended to wear gloves to protect yourself during electrical work.
- Safety glasses: Protect your eyes from any potential sparks or debris.
- A step ladder: If the light bulb socket is located in a high position, you may need a ladder to reach it safely.
Ensure that you have these tools and equipment readily available before moving on to the testing process.
Key Takeaways:
- Ensure safety by turning off power, wearing protective gear, and using a well-lit area when testing light bulb sockets with a multimeter. Proper setup and interpretation of readings are crucial for identifying and troubleshooting socket issues.
- Troubleshoot socket problems by checking for loose connections, inspecting for physical damage, testing with a different light bulb, evaluating the switch mechanism, and examining wiring connections. If unsure, seek the assistance of a qualified electrician for safe and effective resolution.
Read more: How To Test A Light Socket With Multimeter
Understanding Light Bulb Sockets
Before we dive into the testing process, it is important to have a basic understanding of light bulb sockets. A light bulb socket, also known as a lamp holder, is the part of a lighting fixture that holds and connects the light bulb to the electrical supply. It provides the necessary electrical connections for the bulb to receive power and illuminate.
Light bulb sockets come in various sizes and designs to accommodate different types of light bulbs, such as incandescent, CFL, or LED bulbs. The most common types of light bulb sockets include screw-type (E26/E27), bayonet-type (B22), and pin-based (G4, GU10) sockets.
The screw-type light bulb sockets feature a threaded base that allows the bulb to be screwed on. This type of socket is commonly found in household fixtures and lamps. The bayonet-type light bulb sockets have a bayonet mount that requires the bulb to be pushed and twisted to lock it in place. This type of socket is prevalent in the UK and some other countries.
The pin-based light bulb sockets, as the name suggests, use pins to connect the bulb to the socket. The number and arrangement of pins vary depending on the specific bulb type. This type of socket is commonly found in low-voltage fixtures, track lighting, and specialty lighting applications.
When selecting a light bulb socket, it is crucial to consider the type and wattage of the bulb you plan to use. Each socket is designed to handle a specific wattage and voltage range. Exceeding these limits can lead to overheating, short circuits, and potentially dangerous situations.
It is important to note that light bulb sockets can vary depending on the region or country. Therefore, it is advisable to check the specifications and compatibility of your specific light bulb socket before proceeding with the testing process.
Now that you have a basic understanding of light bulb sockets, let’s move on to the testing process using a multimeter to ensure the efficiency and functionality of your sockets.
Tools and Equipment Required
Before you begin testing a light bulb socket with a multimeter, make sure you have the following tools and equipment:
- A digital multimeter: This is the primary tool needed for testing the socket. It allows you to measure electrical voltage, resistance, and continuity. A digital multimeter is preferred as it provides accurate readings and is easy to use.
- Protective gloves: It is always recommended to wear gloves while working with electrical components. This will protect you from any potential electric shocks or injuries.
- Safety glasses: It is important to protect your eyes from any sparks or debris that may occur during the testing process. Safety glasses will provide an extra layer of protection.
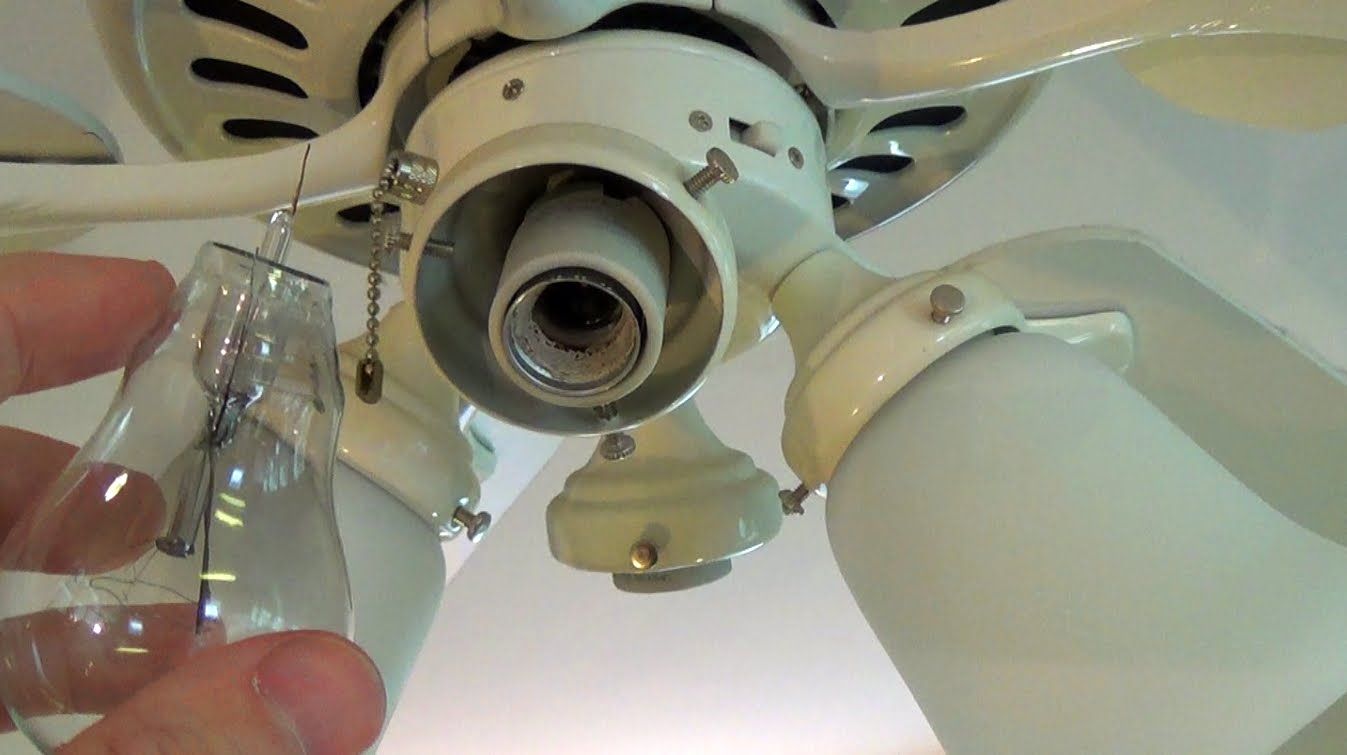
- A step ladder: If the light bulb socket is located in a high position such as a ceiling fixture, you may need a step ladder to safely reach it. Make sure the ladder is sturdy and placed on a stable surface.
Additionally, it is advisable to have a spare light bulb of the correct type for testing purposes. This will help you determine if the issue lies with the socket or the bulb itself. Having the correct replacement bulb on hand will also allow you to quickly fix any identified issues.
When working with electricity, safety should always be the top priority. It is essential to make sure that all equipment is in good working condition and properly insulated. Before starting the testing process, ensure that you are familiar with the multimeter’s functions and settings. This will ensure accurate readings and a smooth testing process.
By having these tools and equipment ready, you will be fully prepared to test your light bulb socket effectively and safely.
Step 1: Safety Precautions
Before you begin testing a light bulb socket with a multimeter, it is crucial to prioritize safety. Working with electricity can be dangerous, so taking the necessary precautions is essential to avoid accidents or injuries. Follow these safety guidelines:
- Turn off the power: Before starting any electrical work, ensure that the power to the light bulb socket is turned off. This can be done by switching off the circuit breaker or removing the fuse that supplies power to the fixture. It is also a good practice to use a non-contact voltage tester to confirm that there is no electricity flowing to the socket.
- Wear protective gear: Always wear protective gloves and safety glasses to shield yourself from potential electrical hazards. These will protect against electrical shocks and prevent any debris or sparks from entering your eyes.
- Inspect the socket: Before proceeding with the testing, visually inspect the light bulb socket for any signs of damage or loose connections. If you notice any visible damage, it is advisable to replace the socket rather than attempting to repair it.
- Work in a well-lit area: Ensure that the area around the light bulb socket is well-lit. This will help you see any details and perform the testing process accurately.
- Use a stable step ladder: If the light bulb socket is located in a high position, use a sturdy and stable step ladder to safely access it. Make sure the ladder is on a flat surface and placed at a secure angle.
- Follow manufacturer instructions: Always refer to the manufacturer’s instructions for your specific multimeter model. Familiarize yourself with its functions, settings, and safety guidelines before proceeding with the testing process.
By following these safety precautions, you will minimize the risk of electrical accidents and ensure a safe testing environment. Remember, when in doubt or if you are uncomfortable working with electricity, it is always best to consult a qualified electrician.
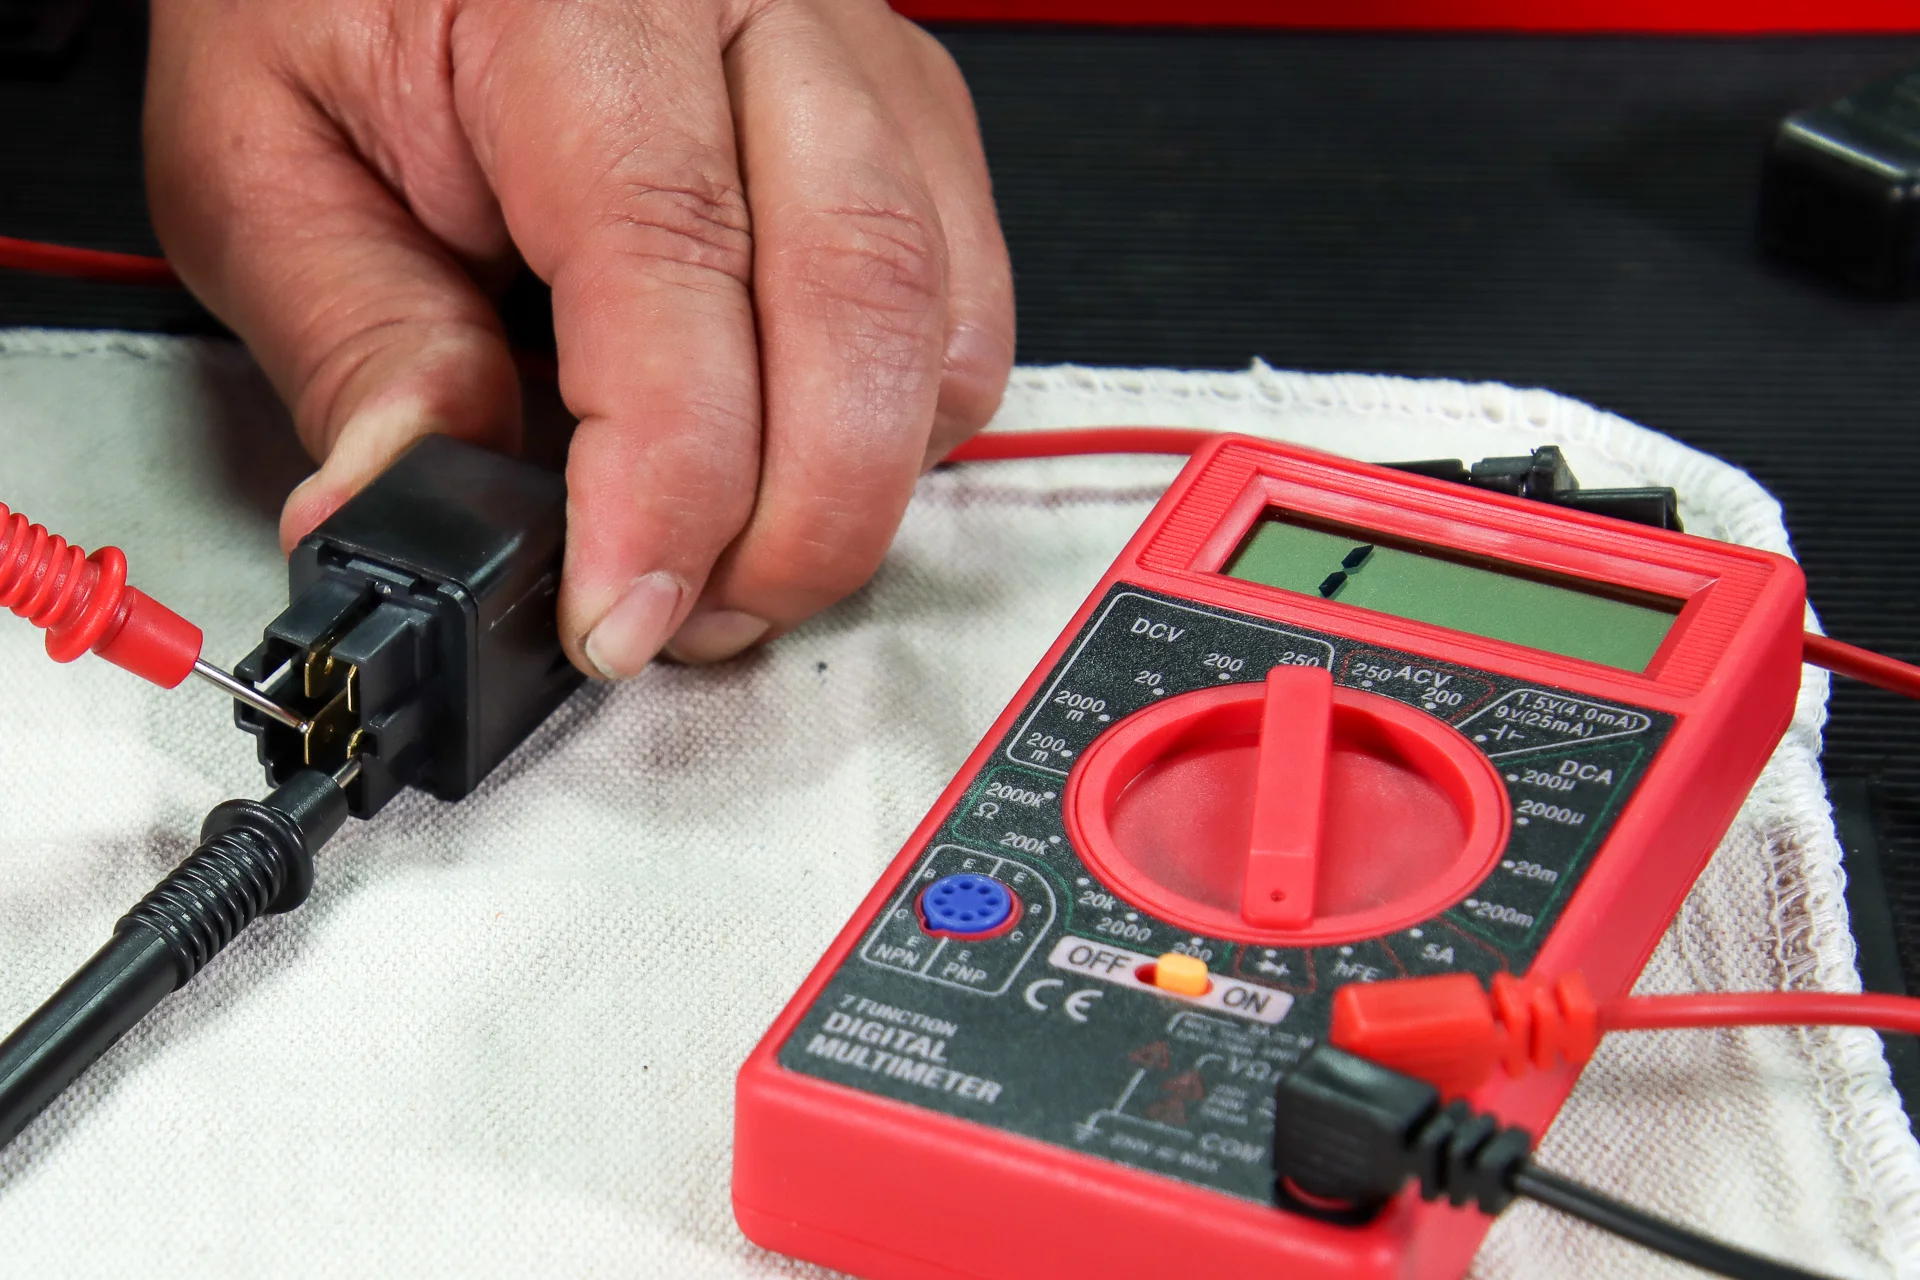
Step 2: Set Up the Multimeter
Before you can begin testing the light bulb socket, you need to set up your multimeter properly. Follow these steps to ensure accurate readings:
- Select the voltage setting: Depending on your multimeter model, choose the appropriate voltage range for the test. For most household light bulb sockets, the AC voltage setting is sufficient. Ensure that the selected voltage range is higher than the expected voltage level.
- Set the multimeter to continuity mode: Continuity mode allows you to check if there is a continuous electrical path between two points. This is useful for testing the connectivity of the socket. Consult your multimeter’s user manual to locate the continuity mode and activate it.
- Connect the test leads: Depending on your multimeter model, you may have different color-coded test leads. The red test lead is typically used for positive connections, while the black test lead is used for negative connections. Connect the appropriate test lead to the corresponding multimeter socket. Ensure that the leads are securely connected to the multimeter.
- Verify the multimeter’s functionality: Before proceeding with the testing, perform a quick functional check of the multimeter. Test a known live power source or continuity to ensure that the multimeter is functioning properly.
Once you have set up your multimeter correctly and verified its functionality, you are ready to move on to the actual testing of the light bulb socket. Remember to carefully follow the instructions provided by the multimeter’s manufacturer to ensure accurate and reliable readings throughout the testing process.
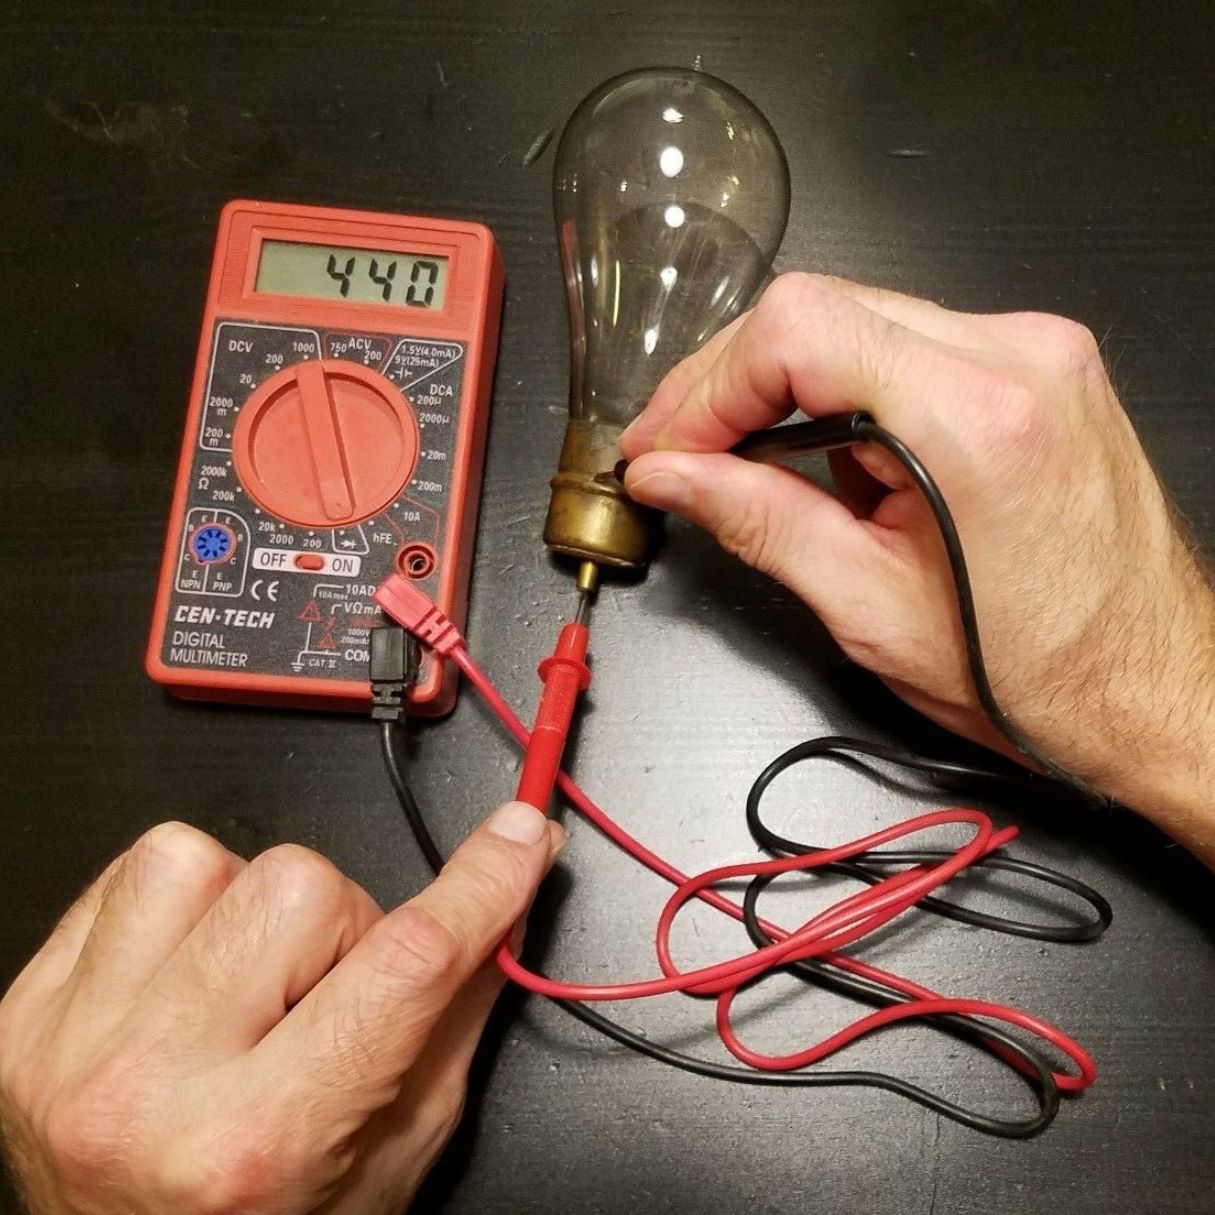
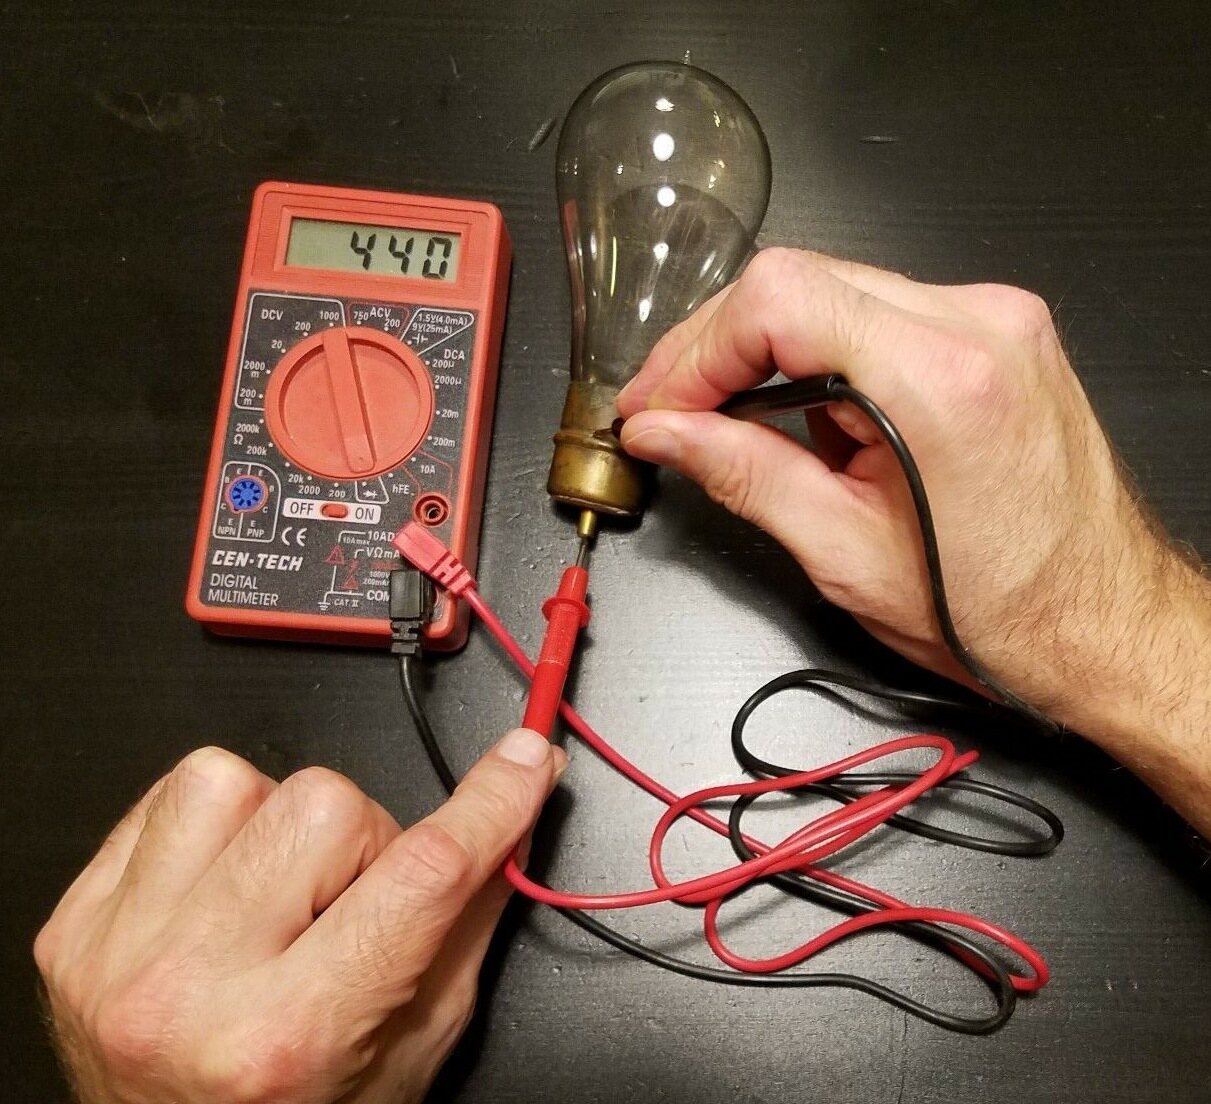
When testing a light bulb socket with a multimeter, set the multimeter to the resistance or continuity setting. Then, touch the multimeter probes to the metal tab at the bottom of the socket and the side of the socket to check for a complete circuit.
Step 3: Testing the Light Bulb Socket
Now that you have set up your multimeter, it’s time to start testing the light bulb socket. Follow these steps:
- Turn off the power: Ensure the power to the light bulb socket is switched off at the circuit breaker or by removing the fuse that supplies power to the fixture. This step is crucial to prevent any electrical shock during the testing process.
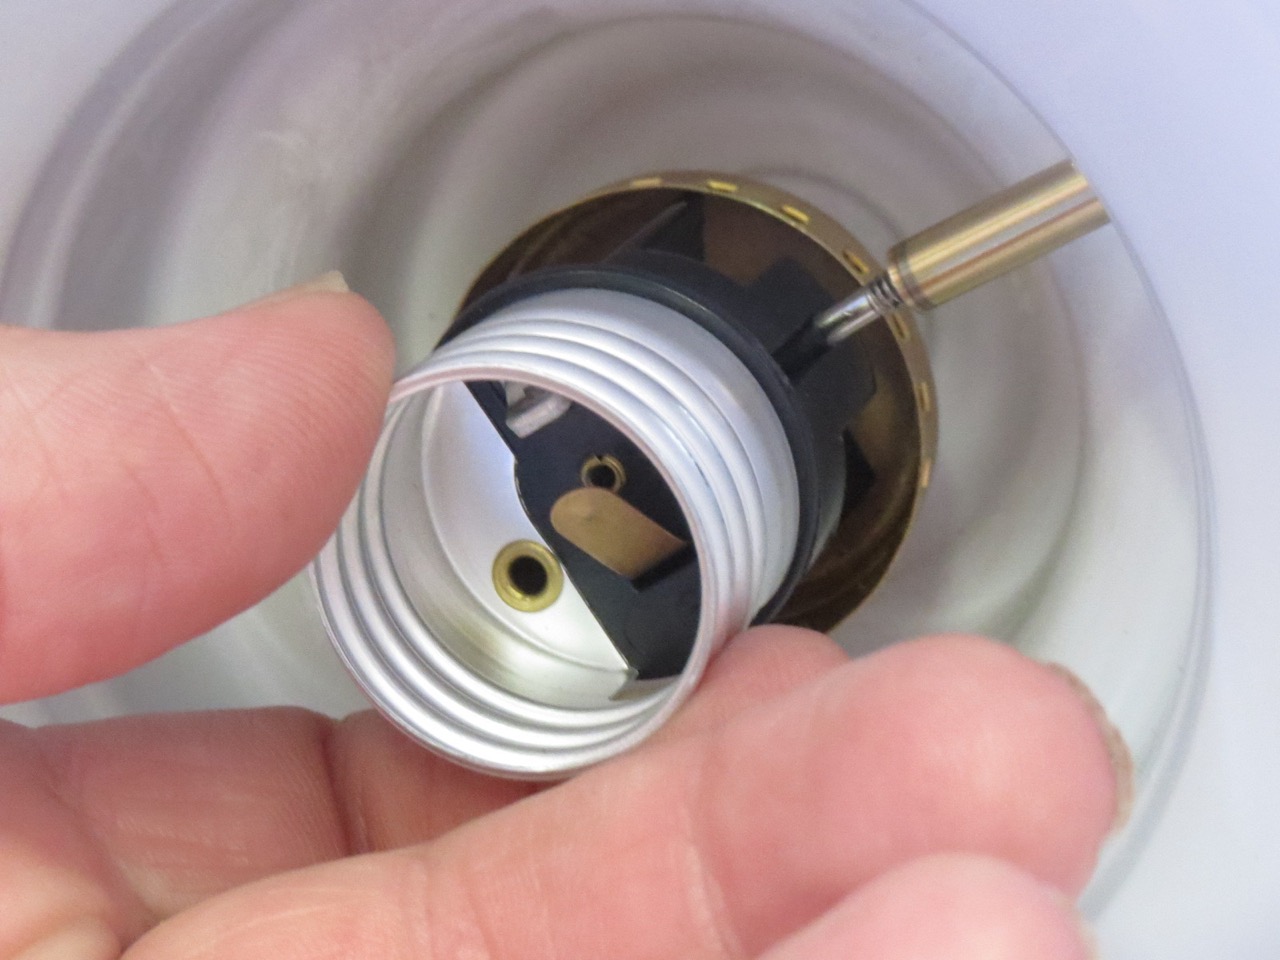
- Remove the light bulb: Carefully unscrew or detach the light bulb from the socket. This will expose the metal contacts inside the socket, which you will be testing.
- Insert the multimeter probes: Take the multimeter probes (test leads) and insert them into the corresponding holes or slots of the light bulb socket. The red probe is typically inserted into the smaller hole or slot, while the black probe goes into the larger hole or slot.
- Check for continuity: In continuity mode, touch the probes together. The multimeter should emit a beep or display a reading indicating continuity. This ensures that the multimeter is functioning and the probes are correctly placed in the socket.
- Touch the probes to the socket contacts: With the multimeter in continuity mode, touch the red probe to one metal contact inside the socket, and the black probe to the other contact. Ensure that the probes make a firm and secure connection with the metal contacts.
- Interpret the multimeter reading: If the multimeter beeps or shows continuity, it indicates that the socket has a good electrical connection. This means that the socket is functioning properly. If there is no continuity or you get a reading of infinite resistance, it indicates a problem with the socket’s connectivity.
By following these steps, you can accurately test the light bulb socket using a multimeter. Remember to be gentle when inserting the probes to prevent any damage to the socket or multimeter. If the multimeter reading indicates an issue with the socket, proceed to the next step to troubleshoot and identify the specific problem.
Step 4: Interpreting the Multimeter Readings
Once you have completed the test and obtained readings from the multimeter, it’s time to interpret the results. Here’s how to understand the multimeter readings and identify any issues with the light bulb socket:
- Continuity: If the multimeter beeps or displays a low resistance reading, it indicates continuity. This means that there is a continuous electrical path between the two contacts of the socket. In this case, the socket is functioning properly, and the issue may lie with the light bulb or another component of the lighting fixture.
- No continuity: If the multimeter does not beep or shows an infinite resistance reading, it indicates no continuity. This means that there is a break in the electrical path between the two contacts of the socket. In such cases, there might be an issue with the socket itself, such as loose connections, a faulty switch, or a damaged wire.
It is important to note that if the socket does not show continuity, further troubleshooting and examination may be required to pinpoint the exact issue. This can involve checking the wiring connections, inspecting the socket for physical damage, or examining the switch mechanism.
If you encounter any difficulties in interpreting the multimeter readings or determining the cause of the problem, it is advisable to seek the assistance of a qualified electrician. They will have the expertise to identify and resolve any electrical issues in a safe and efficient manner.
Once you have assessed the multimeter readings and determined the status of the light bulb socket, you can move on to the next step to troubleshoot and rectify any identified issues.
Step 5: Troubleshooting the Socket
After interpreting the multimeter readings, it’s time to troubleshoot and address any issues with the light bulb socket. Here’s a step-by-step guide on troubleshooting the socket:
- Check for loose connections: Inspect the socket for any loose connections. Ensure that the wires are securely attached to the contact points. If you find any loose wires, carefully tighten them or reattach them as necessary.
- Inspect for physical damage: Examine the socket for any visible signs of physical damage, such as burnt or melted components. Damage to the socket can cause connectivity issues. If you notice any significant damage, it is recommended to replace the socket.
- Test with a different light bulb: Sometimes, the issue may be with the light bulb itself. Try testing the socket with a different, known-working light bulb of the correct type and wattage. If the new bulb works fine, it means the initial bulb was faulty.
- Check the switch mechanism: If the socket has an accompanying switch, ensure that it is operating correctly. Test the switch by toggling it on and off while monitoring the socket with the multimeter. If there is inconsistency in the readings or no change, the switch may be faulty and require replacement.
- Inspect the wiring connections: If all else fails, inspect the wiring connections in the lighting fixture. Check for any loose or damaged wires that may be causing the connectivity issue. It may be necessary to disassemble part of the fixture to access the wiring. Proceed with caution and consult an electrician if needed.
By troubleshooting the socket using these steps, you can identify and address common issues that may be affecting its functionality. Remember to exercise caution and ensure that the power is turned off before working on any electrical components.
If you are unable to resolve the issue or are not comfortable with electrical work, it is always recommended to consult a qualified electrician. They will have the expertise to diagnose and repair any electrical problems in a safe and efficient manner.
Once you have successfully resolved the issue, reassemble the lighting fixture and test it again using the multimeter to ensure that the socket is functioning correctly.
Conclusion
Testing a light bulb socket with a multimeter is a simple and crucial step in troubleshooting lighting issues. By following the steps outlined in this guide, you can effectively identify any problems with the socket and take the necessary actions to rectify them.
Understanding the basics of light bulb sockets and having the right tools and equipment is essential for a safe and successful testing process. Always prioritize safety by turning off the power, wearing protective gear, and working in a well-lit area.
Setting up the multimeter correctly and interpreting the readings will provide valuable insights into the condition of the socket. Continuity indicates a properly functioning socket, while no continuity indicates a potential issue that requires further investigation.
Troubleshooting the socket involves checking for loose connections, inspecting for physical damage, testing with a different light bulb, evaluating the switch mechanism, and examining the wiring connections. These steps will help identify and resolve common socket issues.
However, it is important to note that electrical work can be dangerous, and if you are unsure or uncomfortable with the process, it is always wise to seek the assistance of a qualified electrician. They will have the knowledge and experience to handle complex electrical issues safely and effectively.
By testing and troubleshooting light bulb sockets with a multimeter, you can ensure the efficient and reliable functioning of your lighting fixtures. Maintaining well-functioning sockets will not only improve the quality of illumination but also enhance the overall safety of your home or workspace.
Now armed with the knowledge and understanding of the testing process, you can confidently tackle any light bulb socket issues that may arise and enjoy the benefits of well-lit and properly functioning lighting fixtures.
Now that you've mastered testing light bulb sockets, why not expand your home maintenance skills further? Our next guide on mastering home repair offers practical, easy-to-follow advice perfect for any DIY enthusiast. Whether you're dealing with leaky faucets or squeaky doors, these tips will help keep your home in top shape without needing to call in the pros.
Frequently Asked Questions about How To Test A Light Bulb Socket With A Multimeter
Was this page helpful?
At Storables.com, we guarantee accurate and reliable information. Our content, validated by Expert Board Contributors, is crafted following stringent Editorial Policies. We're committed to providing you with well-researched, expert-backed insights for all your informational needs.


0 thoughts on “How To Test A Light Bulb Socket With A Multimeter”