Home>Interior Design>10 Wallpapering Tips From The Experts: The Secrets Of Success
Interior Design
10 Wallpapering Tips From The Experts: The Secrets Of Success
Modified: November 1, 2024
Get the best interior design inspiration with these 10 expert tips for successful wallpapering. Enhance your home decor with these secrets of success!
(Many of the links in this article redirect to a specific reviewed product. Your purchase of these products through affiliate links helps to generate commission for Storables.com, at no extra cost. Learn more)
Introduction
Welcome to our comprehensive guide on wallpapering tips from the experts. Wallpaper is a versatile and impactful design element that can transform any room. Whether you are a DIY enthusiast or a professional interior designer, mastering the art of wallpapering can make a significant difference in the final outcome of your project.
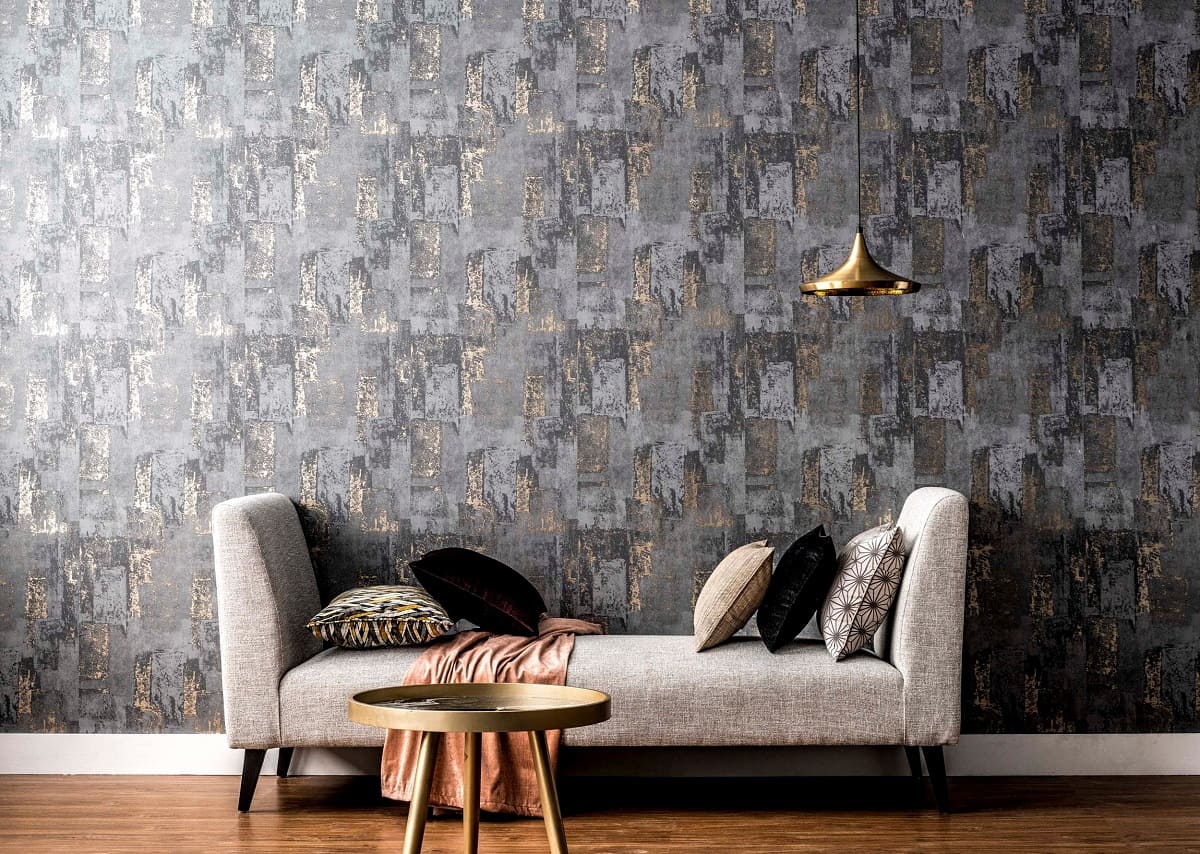
When it comes to choosing wallpaper, it’s essential to consider the overall aesthetic and style of the space. With endless options available in patterns, colors, and textures, you can find the perfect wallpaper to complement your design vision. From subtle and understated designs to bold and vibrant patterns, the choice is yours.
However, selecting the right wallpaper is just the first step. Proper preparation, accurate measuring, and the right technique are equally crucial for a successful wallpaper installation. In this article, we will walk you through ten expert tips and secrets that will ensure your wallpapering project is a success.
So let’s dive in and explore the world of wallpapering, and discover how you can achieve stunning results in any space.
Key Takeaways:
- Choose the right wallpaper that matches your design vision, considering pattern, color, texture, durability, and style. Properly prepare the walls, measure accurately, gather necessary tools, and mix wallpaper paste for a successful installation.
- Starting from the focal point creates visual impact, aids in alignment, and makes a statement. Apply the wallpaper evenly, smooth out air bubbles, trim excess wallpaper with precision, and finish with a protective top coat for a flawless and durable result.
Choose the Right Wallpaper
Choosing the right wallpaper is the foundation of a successful wallpapering project. The type of wallpaper you select will depend on your personal style, the purpose of the room, and the overall design aesthetic you want to achieve. Here are some key factors to consider when making your choice:
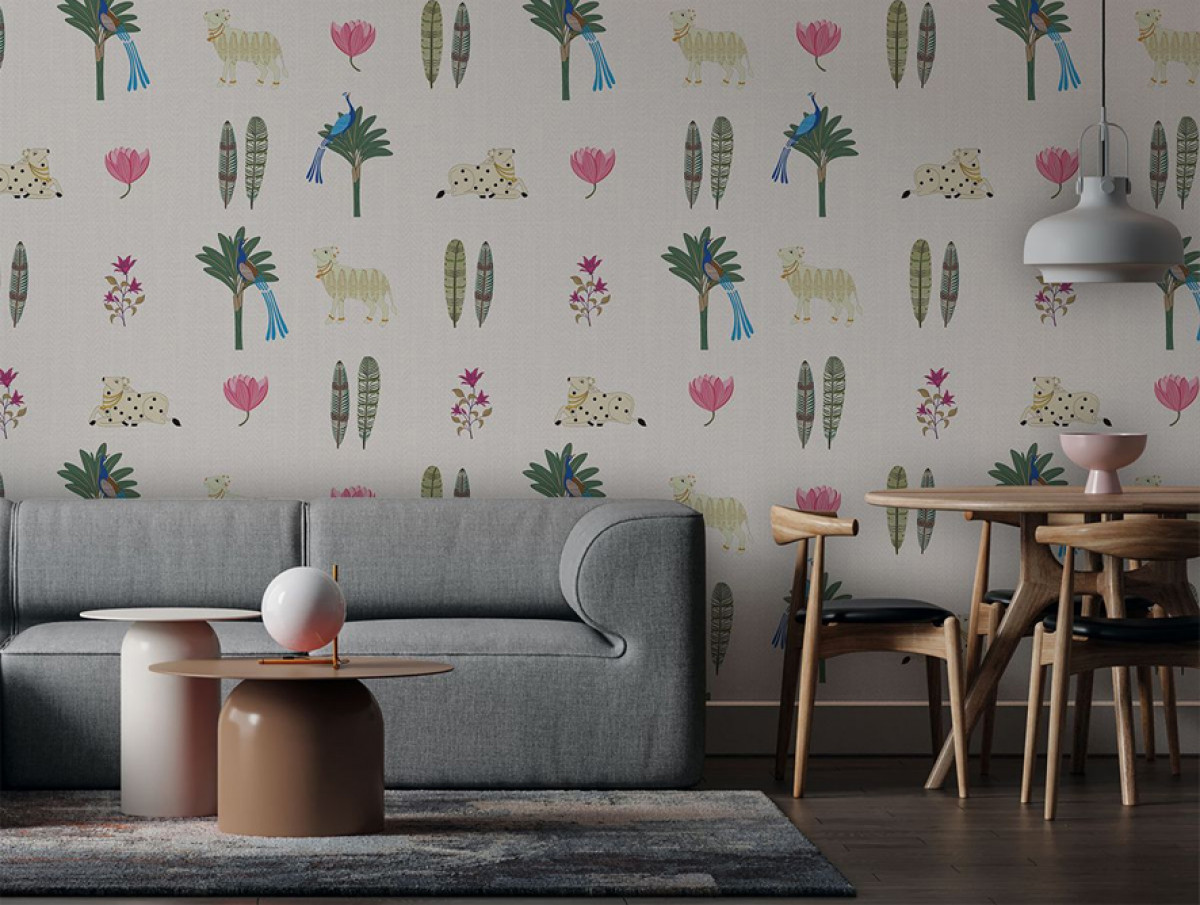
- Pattern: Consider the existing decor and the room’s purpose. A small room can benefit from a wallpaper with a smaller pattern, while a larger space can handle bolder designs. Also, consider how the pattern will flow throughout the room.
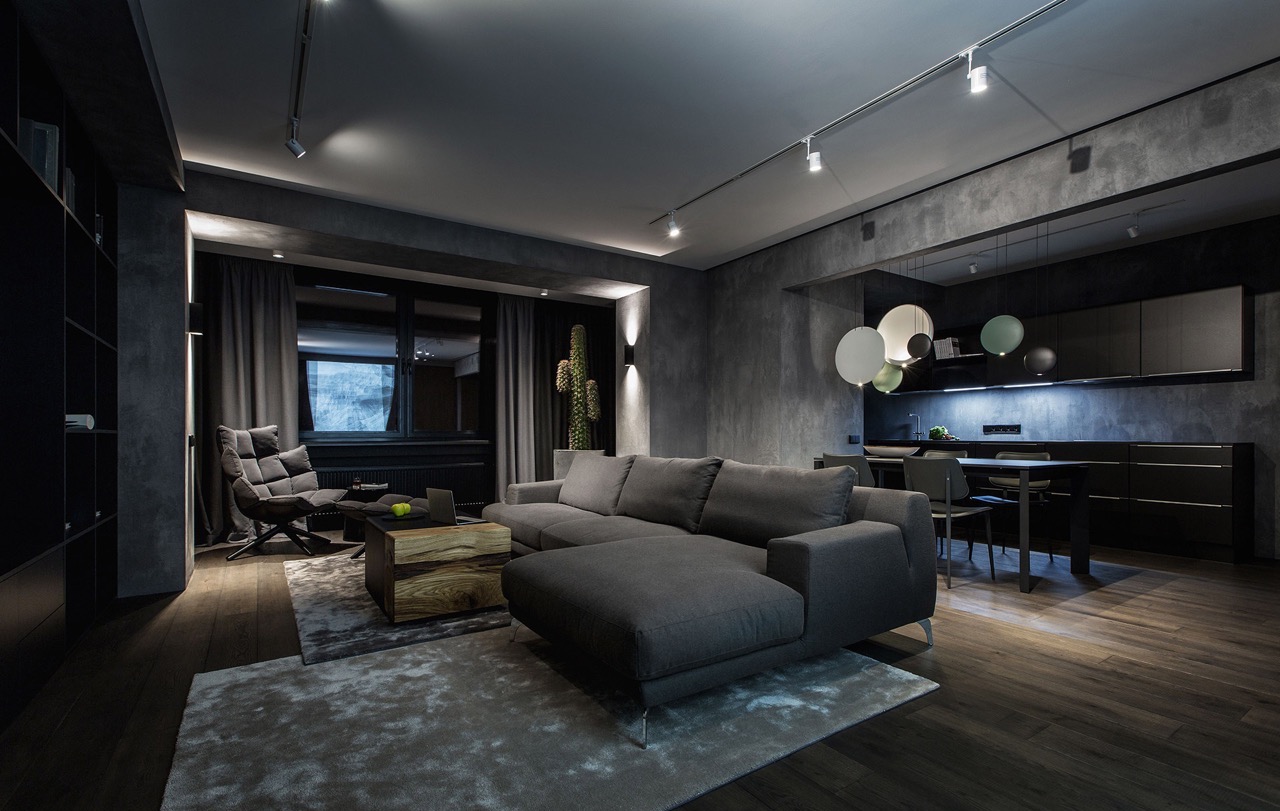
- Color: The color of the wallpaper can greatly influence the mood of the room. Lighter colors can make a space feel more open and airy, while darker colors create a sense of coziness and intimacy. Think about the desired atmosphere and how the color will interact with other elements in the room.
- Texture: Textured wallpapers can add depth and visual interest to a room. Consider whether you want a smooth finish or a textured look, such as embossed or grasscloth wallpaper.
- Durability: Depending on the room’s function, consider the durability of the wallpaper. For high-traffic areas or rooms where moisture may be present, choose a wallpaper that is washable and resistant to stains.
- Style: Explore different styles of wallpaper, from traditional to modern, to find one that suits your taste and complements the overall design of the room. Consider the architectural style of your home and select a wallpaper that enhances its unique features.
Once you have chosen the perfect wallpaper, it’s time to move on to the next step: preparing the walls.
Prepare the Walls
Properly preparing the walls before applying wallpaper is essential for achieving a smooth and long-lasting finish. Here are the steps to follow:
- Clean the walls: Start by removing any dirt, dust, or grease from the walls. Use a mild detergent and warm water to wash the walls thoroughly. Rinse with clean water and allow them to dry completely.
- Repair any imperfections: Inspect the walls for any cracks, holes, or uneven surfaces. Fill in the gaps with spackling compound or joint compound, and use a putty knife to smoothen the surface. Sand the repaired areas lightly until they are smooth and flush with the rest of the wall.
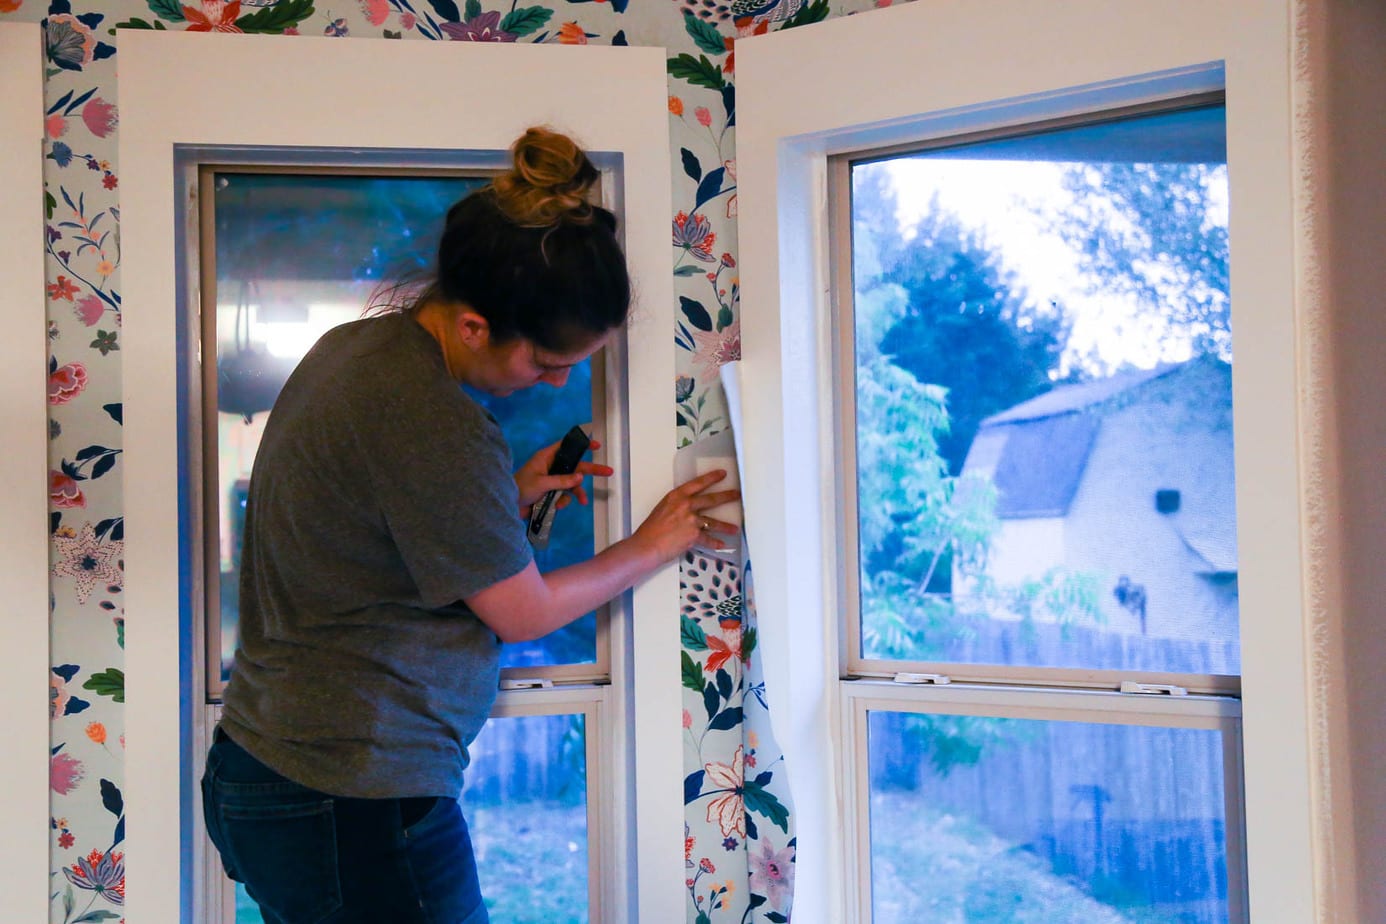
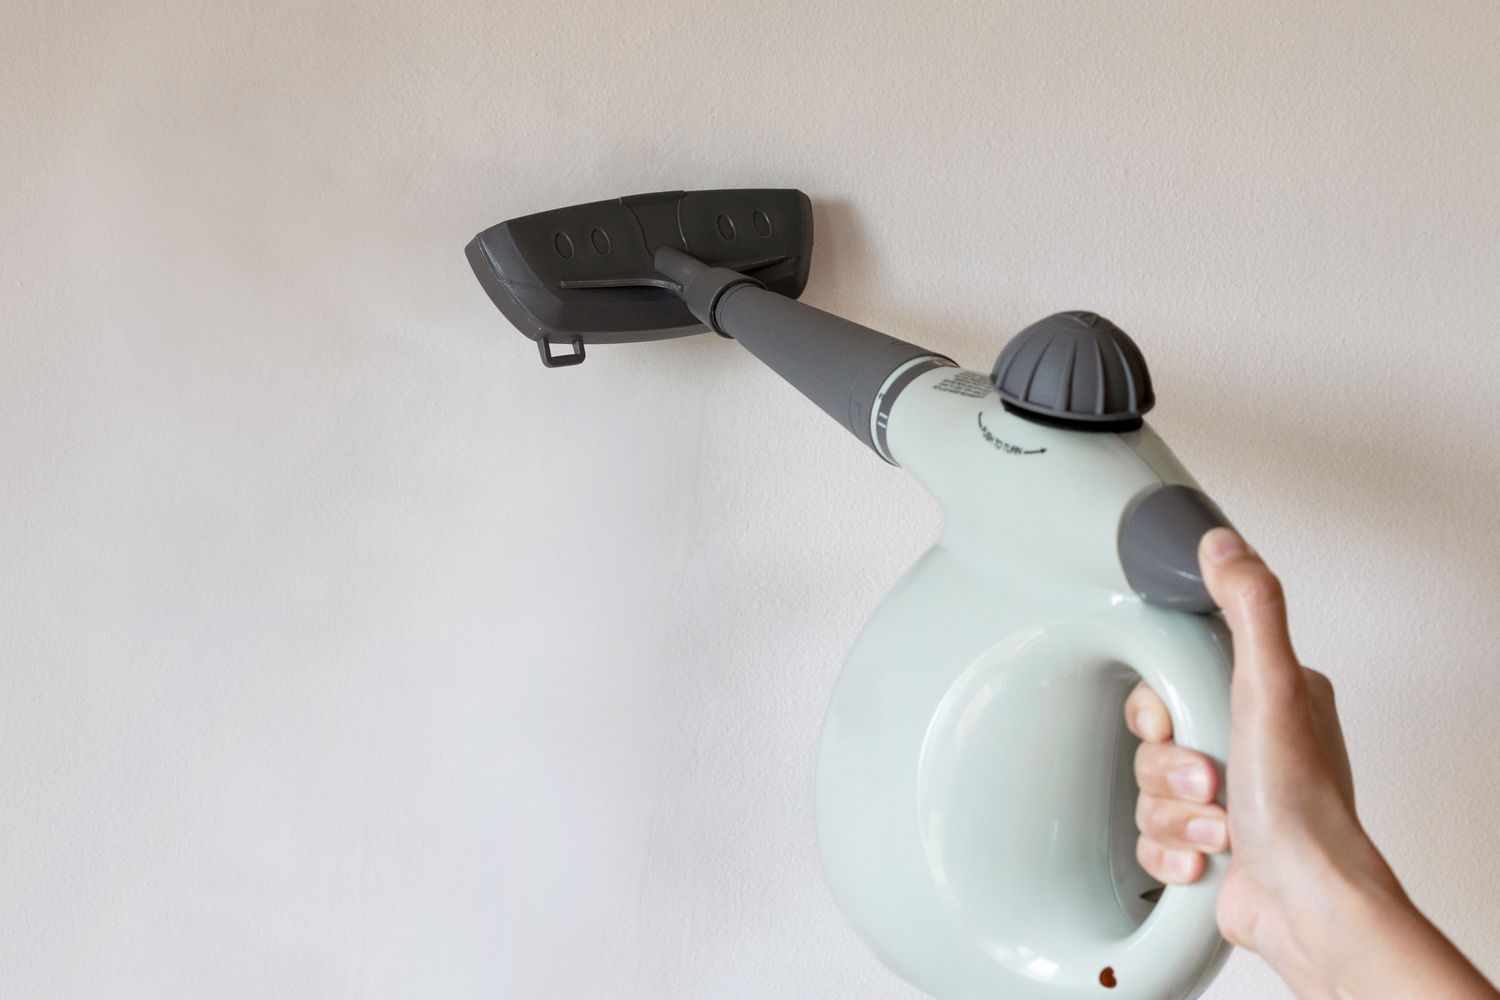
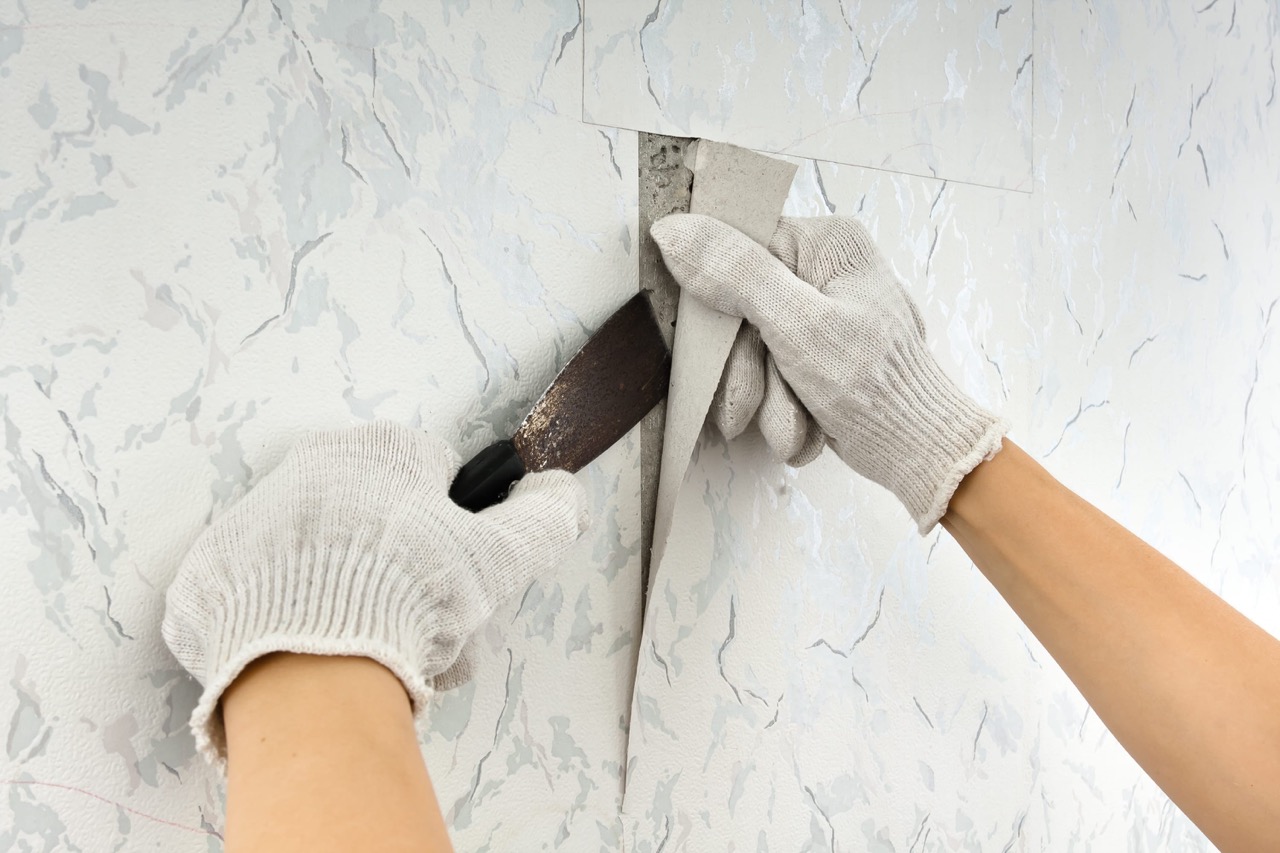
- Remove old wallpaper: If there is existing wallpaper on the walls, it’s important to remove it before applying new wallpaper. Use a wallpaper steamer or a stripping solution to loosen the adhesive, and then carefully peel off the old wallpaper. If necessary, use a scraper to remove any stubborn residue.
- Prime the walls: Priming the walls will create a smooth and uniform surface for the wallpaper adhesive to adhere to. Apply a coat of primer using a roller or brush, and make sure to cover the entire wall surface. Allow the primer to dry completely as per the manufacturer’s instructions.
- Smooth the walls: Before applying the wallpaper, it’s crucial to ensure that the walls are smooth and free from imperfections. Use a sanding block or sandpaper to gently smooth any rough spots or ridges on the walls. Wipe away the dust with a damp cloth.
By thoroughly preparing the walls, you will create an optimal surface for the wallpaper to adhere to. This will result in a professional-looking finish and help prolong the lifespan of your wallpaper.
Measure Accurately
Accurate measurement is crucial to ensure that you have enough wallpaper to cover your walls without any wastage or shortage. Here are some tips to help you measure accurately:
- Measure the height of the walls: Use a tape measure to measure the height of each wall from floor to ceiling. Take multiple measurements at different points along the wall to account for any variations in height. Note down the highest measurement.
- Measure the width of the walls: Measure the width of each wall from one corner to another. Again, take multiple measurements at different points to account for any irregularities. Note down the widest measurement.
- Calculate the total square footage: To determine the total square footage of wallpaper needed, multiply the height of the wall by the width. If you have multiple walls, add up the square footage of each wall to get the total.
- Account for pattern repeats: If your chosen wallpaper has a pattern, it’s important to account for pattern repeats. This will ensure that you have enough wallpaper to match the patterns correctly when installing. Follow the manufacturer’s instructions to determine the pattern repeat measurement and factor it into your calculations.
- Consider extra for matching patterns and mistakes: It’s always a good idea to purchase a little extra wallpaper to account for any misalignments, mistakes, or future repairs. It’s better to have a little extra than to run out and not be able to find an exact match later on.
- Consult with a professional: If you are unsure about measuring accurately or want to double-check your calculations, don’t hesitate to seek advice from a professional. They can guide you through the process and ensure that you have the correct amount of wallpaper.
By measuring accurately and accounting for all the necessary factors, you can avoid unnecessary wastage or shortage of wallpaper. This will help you achieve a seamless and visually pleasing result.
Gather the Necessary Tools
Before you begin the wallpapering process, it’s important to gather all the necessary tools. Having the right tools on hand will make the installation process smoother and more efficient. Here are the essential tools you’ll need:
- Wallpaper: Of course, you’ll need the wallpaper itself. Make sure you have enough rolls to cover the measured square footage, and consider purchasing extra for pattern matching and mistakes.
- Wallpaper adhesive: Choose a high-quality wallpaper adhesive that is suitable for the type of wallpaper you have selected. Follow the manufacturer’s instructions for mixing and applying the adhesive.
- Tape measure: A tape measure is indispensable for accurately measuring the walls and determining the amount of wallpaper needed.
- Level: Use a level to ensure that the first strip of wallpaper is hung straight. This will serve as a guide for the rest of the installation.
- Smoothing brush or roller: A smoothing brush or roller is essential for smoothing out the wallpaper after it has been applied to the wall. This will help remove any air bubbles and ensure proper adhesion.
- Utility knife: A sharp utility knife is necessary for cutting the wallpaper to size and trimming excess along edges and corners.
- Wallpaper brush or seam roller: Use a wallpaper brush or seam roller to firmly press the wallpaper into corners and edges for a seamless finish.
- Drop cloth or plastic sheeting: Protect your floors and furniture by laying down a drop cloth or plastic sheeting to catch any drips or spills.
- Stepladder: Depending on the height of your walls, you may need a stepladder to reach higher areas during the installation process.
- Sponge or damp cloth: Keep a sponge or damp cloth on hand to quickly clean up any excess adhesive or smudges on the wallpaper.
Having these tools readily available will ensure a smoother and more efficient wallpapering process. It’s always a good idea to double-check your tool supply before starting to avoid any delays or interruptions.
Mix the Wallpaper Paste
Before you can start applying the wallpaper, you need to mix the wallpaper paste according to the manufacturer’s instructions. Properly mixed paste will ensure the adhesive is smooth and sticky, allowing the wallpaper to adhere to the walls effectively. Here’s how to mix wallpaper paste:
- Read the instructions: Carefully read the instructions provided by the manufacturer of the wallpaper paste. Different types of paste may require slightly different mixing ratios and techniques.
- Prepare a clean bucket: Use a clean bucket or container to mix the wallpaper paste. Make sure it is large enough to hold the desired amount of paste.
- Add the paste: Gradually add the wallpaper paste powder or concentrate to the bucket, following the specified quantity mentioned in the instructions. It’s important to add the paste to the water and not vice versa to avoid clumping.
- Stir the mixture: Use a stirring stick or a mixer to blend the paste into the water. Stir in a circular motion, making sure to scrape the bottom and sides of the bucket to mix the paste thoroughly. Continue stirring until the paste reaches a smooth and even consistency.
- Check the consistency: The consistency of the paste should be similar to pancake batter, neither too thick nor too runny. Test a small amount of paste on a scrap piece of wallpaper or wall to ensure it spreads easily and holds the wallpaper in place.
- Let the paste rest: Allow the paste to rest for a few minutes, as specified in the instructions. This resting period allows the paste to thicken slightly and reach its optimum performance.
Following the manufacturer’s instructions for mixing the wallpaper paste is crucial to ensure the adhesive’s effectiveness. A properly mixed and consistent paste will make the wallpapering process smoother and help the wallpaper adhere to the walls securely.
When measuring and cutting wallpaper, always add a few extra inches to ensure you have enough to cover the entire wall and match patterns.
Start from the Focal Point
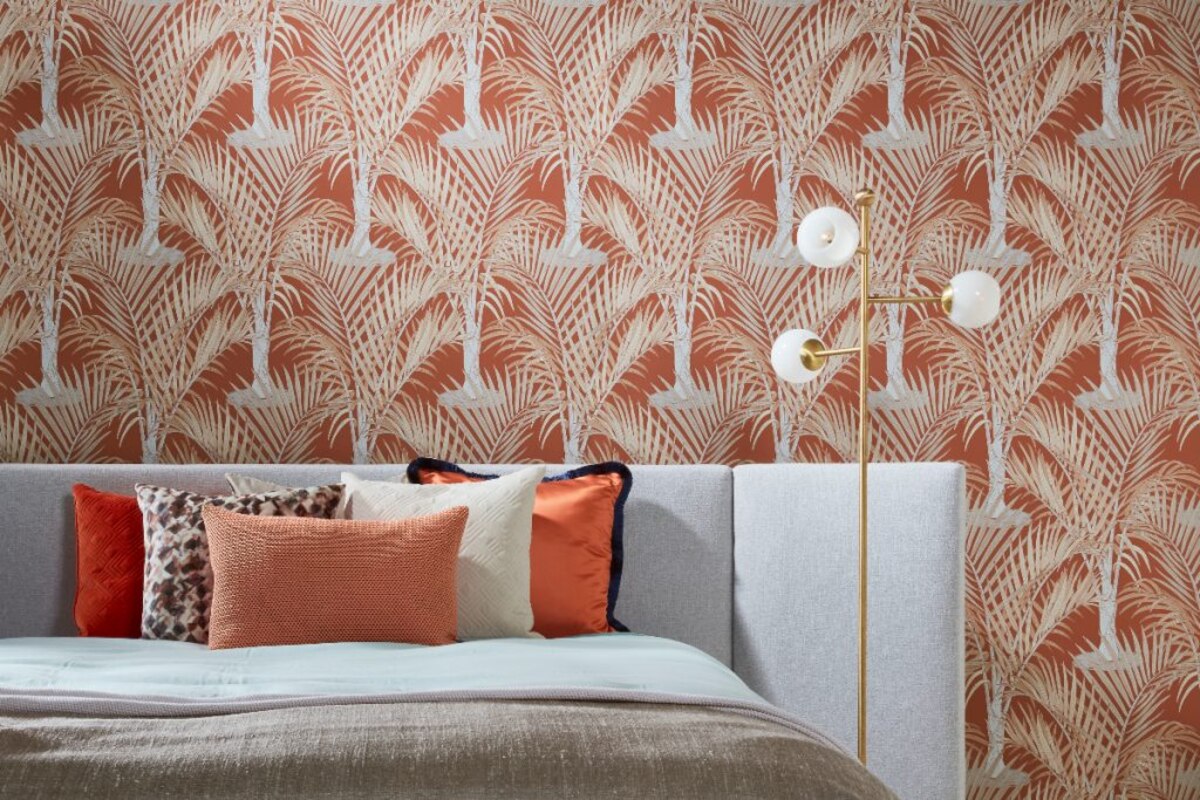
When it comes to hanging wallpaper, it’s essential to start from the focal point of the room. The focal point is the area that attracts the most attention and sets the tone for the entire space. Typically, the focal point is the wall behind the bed in a bedroom, the wall with the fireplace in a living room, or the wall with the dining table in a dining room. Here’s why starting from the focal point is important:
- Visual impact: By starting from the focal point, you immediately create a visual impact in the room. The eye is naturally drawn to this area, and by showcasing your chosen wallpaper design here, you can set the tone and create a wow factor.
- Ease of alignment: Starting from the focal point makes it easier to align the wallpaper and ensure the pattern is correctly matched. It serves as a reference point for subsequent strips of wallpaper, preventing any visible misalignment.
- Making a statement: By starting from the focal point, you make a statement and create a sense of intentionality in the room. It’s like setting a stage for the rest of the decor and design elements to follow.
- Efficient workflow: Starting from the focal point allows for a more efficient and organized workflow. You can focus on one area at a time, ensuring that the wallpaper is properly applied, aligned, and smoothed out before moving on to the next section of the room.
- Reduced waste: By starting from the focal point, you can better estimate the amount of wallpaper needed for the entire room. This helps reduce wastage and ensures you have enough wallpaper to complete the project without running short.
Remember to measure and cut the wallpaper to the appropriate length, allowing for a few extra inches at the top and bottom for trimming. Starting from the focal point and working your way outwards will create a visually cohesive and harmonious look throughout the room.
Apply the Wallpaper Evenly
Applying the wallpaper evenly is crucial to achieving a professional-looking result. Here are some essential steps to ensure even application:
- Follow the manufacturer’s instructions: Familiarize yourself with the specific instructions provided by the manufacturer of the wallpaper. Different types of wallpaper may have different application techniques, so it’s important to follow their guidelines.
- Apply the adhesive: Use a paint roller or a brush to apply an even layer of wallpaper adhesive to the back of the wallpaper. Make sure to cover the entire surface, focusing on the edges and corners.
- Allow for booking time: Booking time refers to the time needed for the adhesive to activate and the wallpaper to become pliable. Follow the manufacturer’s instructions for the recommended booking time, which is typically a few minutes.
- Hang the first strip: Start at the top of the wall and carefully align the wallpaper with the reference line or the focal point you established earlier. Smooth out the wallpaper with a brush or roller, working from the center towards the edges to remove any air bubbles.
- Hang subsequent strips: For the subsequent strips of wallpaper, align them precisely with the pattern match and the edges of the previous strip. Use a seam roller or wallpaper brush to firmly press the seams together, ensuring a seamless and smooth appearance.
- Trim excess: Use a sharp utility knife to trim any excess wallpaper at the top and bottom edges. Cut along a straight edge or use a wallpaper smoother as a guide to ensure precise cuts.
- Smooth out air bubbles: If you encounter any air bubbles during the application process, gently lift the wallpaper and reapply, smoothing out the area with a brush or roller. It’s important to do this while the adhesive is still wet and the wallpaper is pliable.
- Wipe off excess adhesive: As you work, periodically wipe off any excess adhesive that may seep through the edges of the wallpaper. Use a damp sponge or cloth to clean the surface of the wallpaper quickly.
By applying the wallpaper evenly, you can achieve a seamless and professional finish. Take your time, work methodically, and pay attention to detail to ensure a visually pleasing result that enhances the overall aesthetic of the room.
Smooth Out Any Air Bubbles
While applying wallpaper, it’s common to encounter air bubbles that can affect the overall appearance and adhesion of the wallpaper. It’s important to address these air bubbles promptly to achieve a smooth and flawless finish. Here’s how to smooth out any air bubbles:
- Identify the air bubbles: As you hang each strip of wallpaper, inspect it carefully for any air bubbles. They may be more noticeable on smooth or solid-colored wallpapers.
- Lift the wallpaper: If you spot an air bubble, gently lift the affected area of the wallpaper. It’s important to do this while the adhesive is still wet, as it allows for easier adjustment and repositioning.
- Release the air: Use a smoothing brush or a wallpaper roller to push out or release the trapped air from under the wallpaper. Start from the center of the bubble and move towards the edges, exerting gentle pressure as you go.
- Smooth and press the wallpaper: After releasing the trapped air, smooth out the wallpaper with the brush or roller to ensure proper adhesion. Work from the center towards the edges, ensuring the wallpaper lays flat and adheres evenly to the wall.
- Reapply adhesive if necessary: In some cases, you may need to reapply a small amount of adhesive to the lifted area of the wallpaper before smoothing it out. Follow the manufacturer’s instructions for proper adhesive application.
- Trim excess: Once the air bubble has been smoothed out, use a sharp utility knife to carefully trim any excess wallpaper at the edges. This will give you a clean and seamless look.
It’s important to address air bubbles as soon as you notice them to prevent them from drying and becoming more difficult to fix. Taking the time to smooth out any air bubbles will help you achieve a professional-looking and flawless wallpaper installation.
Read more: How To Paint Over Wallpaper: An Expert Guide
Trim Excess Wallpaper
After applying the wallpaper to the walls, there will be excess material that needs to be trimmed for a clean and precise finish. Trimming the excess wallpaper is an essential step to achieve a polished and professional look. Here’s how to trim excess wallpaper:
- Inspect the edges: Examine the edges of the wallpaper to identify any areas where excess material needs to be trimmed. This includes the top and bottom edges, as well as the corners and any protruding fixtures, such as outlets or switches.
- Measure and mark: Use a straight edge, such as a ruler or a wallpaper smoother, to measure and mark the desired trimming line. Make sure to leave a slight overlap of about 1/8 inch (3 mm) to ensure a clean and seamless edge.
- Cut with a sharp utility knife: Using a sharp utility knife, carefully cut along the marked line. Apply gentle pressure and use multiple, controlled cuts rather than attempting to cut through in a single motion. This will help ensure a clean and precise cut.
- Trim around corners and fixtures: Pay special attention to trimming around corners and fixtures. Take your time to make accurate cuts, carefully following the shape and contours of the corner or fixture.
- Smooth and secure: After trimming, use a wallpaper smoother or a seam roller to firmly press down the trimmed edges. This will help secure the wallpaper and ensure it is properly adhered to the wall.
Remember to always exercise caution when using a utility knife, ensuring your fingers are safely away from the cutting path. Take your time to make accurate cuts, as precision is key for a clean and professional finish.
By trimming excess wallpaper with care and precision, you can achieve crisp and neat edges, creating a seamless and visually pleasing wallpaper installation.
Finish with a Top Coat
To ensure the longevity and durability of your wallpaper, it’s important to finish the installation with a protective top coat. The top coat acts as a barrier, providing extra protection against stains, moisture, and daily wear and tear. Here’s how to finish your wallpaper installation with a top coat:
- Select the right top coat: Choose a top coat that is specifically designed for wallpaper. Look for one that is water-based and compatible with the type of wallpaper you have installed. Read the manufacturer’s instructions carefully to ensure it is suitable for your specific needs.
- Prepare the surface: Before applying the top coat, ensure that the wallpaper is clean, dry, and free from any dust or debris. Use a soft cloth or sponge to gently wipe down the wallpaper, taking care not to damage or disrupt the installation.
- Test the top coat: It’s always a good idea to test the top coat on a small, inconspicuous area of the wallpaper before applying it to the entire surface. This will allow you to ensure compatibility and assess the desired finish.
- Apply the top coat: Using a clean paint roller or a brush, apply a thin, even layer of the top coat over the entire wallpapered area. Work in small sections, gradually moving across the wall to ensure thorough coverage. Take care to apply the top coat evenly, ensuring no drips or streaks. Follow the manufacturer’s instructions regarding drying time and the number of coats required.
- Allow for drying time: After applying the top coat, allow sufficient drying time as specified by the manufacturer. This will allow the top coat to cure fully and provide maximum protection for your wallpaper.
- Inspect and touch up if needed: Once the top coat is dry, carefully inspect the wallpaper for any missed spots or imperfections. If necessary, touch up these areas by applying an additional layer of the top coat. This will ensure a uniform and flawless finish.
- Maintain and clean: Regularly clean your wallpapered walls with a soft cloth or sponge and mild detergent. Avoid using abrasive cleaners or harsh chemicals, as they can damage the top coat and the wallpaper.
Adding a top coat to your wallpaper not only enhances its durability but also makes it easier to maintain and clean. This extra layer of protection will help your wallpaper retain its beauty and extend its lifespan.
Conclusion
Congratulations! You have now learned ten expert tips and secrets for successful wallpapering. By following these guidelines, you can achieve a stunning and professional-looking wallpaper installation that elevates the aesthetic of any room. Let’s quickly recap the key points:
First, choose the right wallpaper that matches your design vision, considering pattern, color, texture, durability, and style. Secondly, properly prepare the walls by cleaning, repairing imperfections, and removing any existing wallpaper. Accurate measurement ensures you have enough wallpaper without wastage or shortage. Gathering the necessary tools beforehand guarantees a smooth and efficient installation process.
Next, mix the wallpaper paste according to the manufacturer’s instructions to ensure proper adhesion. Starting from the focal point of the room creates visual impact, aids in alignment, and makes a statement. Applying the wallpaper evenly and smoothing out any air bubbles are crucial for a flawless finish.
Trimming excess wallpaper with precision creates clean and seamless edges. Finally, finishing with a top coat protects and prolongs the life of your wallpaper, making it easier to clean and maintain.
Remember, practice and patience are key when it comes to wallpapering. Take your time, follow the instructions, and pay attention to detail. If you encounter any challenges or feel overwhelmed, don’t hesitate to consult with a professional for guidance and assistance.
Now that you have the knowledge and confidence, it’s time to embark on your next wallpapering project. Enjoy the process and watch as your chosen wallpaper transforms your space into a stunning and inviting environment.
Frequently Asked Questions about 10 Wallpapering Tips From The Experts: The Secrets Of Success
Was this page helpful?
At Storables.com, we guarantee accurate and reliable information. Our content, validated by Expert Board Contributors, is crafted following stringent Editorial Policies. We're committed to providing you with well-researched, expert-backed insights for all your informational needs.


0 thoughts on “10 Wallpapering Tips From The Experts: The Secrets Of Success”