Home>Interior Design>How To Put Up Wall Decals With Transfer Paper

Interior Design
How To Put Up Wall Decals With Transfer Paper
Modified: March 16, 2024
Learn the step-by-step process of putting up wall decals using transfer paper for easy interior design transformation. Get creative with interior design!
(Many of the links in this article redirect to a specific reviewed product. Your purchase of these products through affiliate links helps to generate commission for Storables.com, at no extra cost. Learn more)
Introduction
Welcome to the world of wall decals! If you’re looking to add a touch of style, personality, or even a whimsical design element to your living space, wall decals are a fantastic choice. They are easy to apply, affordable, and can transform any room in a matter of minutes. In this article, we will guide you through the process of putting up wall decals with transfer paper, ensuring a seamless application that will have your walls looking like a work of art.
Wall decals are adhesive vinyl stickers that can be applied to any smooth surface, such as walls, windows, or even furniture. They come in a wide variety of designs, from intricate patterns to inspirational quotes, and can be customized to suit your personal style. Transfer paper is a crucial tool that helps to transfer the decal from its backing paper onto the wall, ensuring a precise application without any air bubbles or wrinkles.
Before we dive into the step-by-step process, let’s quickly go over the materials you’ll need:
Key Takeaways:
- Transform your living space with wall decals using transfer paper. Gather materials, clean the surface, position the decal, and apply the transfer paper for a seamless and personalized look.
- Add a touch of style and personality to your walls with wall decals. Follow the step-by-step guide to prepare, position, and apply the transfer paper for a professional and polished finish.
Read more: How To Put Up Wall Decals
Step 1: Gather Materials
- Wall decal
- Transfer paper
- Clean cloth
- Scissors
- Tape or masking tape
- Squeegee or credit card
Once you have all these materials ready, you’re one step closer to transforming your wall into a personalized masterpiece. But before we begin, it’s important to properly prepare the surface that you’ll be applying the wall decal on.
Step 2: Clean the Surface
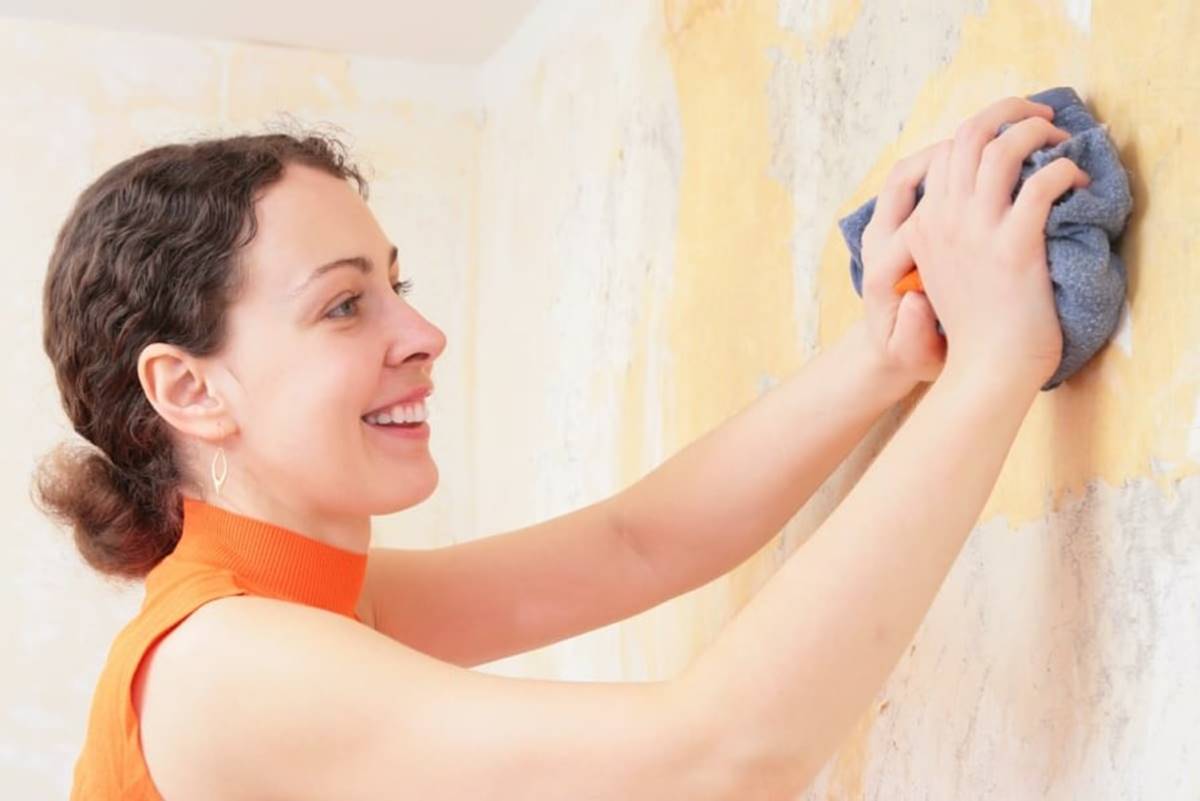
First, make sure that the wall or surface is clean and free from dust, dirt, or any debris. Dust particles can hinder the adhesive from sticking properly, which may result in the decal peeling off over time. Use a clean cloth or damp sponge to wipe down the area, and allow it to dry completely before moving on to the next step.
With the surface clean and ready, let’s move on to preparing the wall decal and transfer paper.
Key Takeaways:
- Transform your living space with wall decals using transfer paper. Gather materials, clean the surface, position the decal, and apply the transfer paper for a seamless and personalized look.
- Add a touch of style and personality to your walls with wall decals. Follow the step-by-step guide to prepare, position, and apply the transfer paper for a professional and polished finish.
Read more: How To Put Up Wall Decals
Step 1: Gather Materials
Before you start putting up wall decals with transfer paper, it’s important to gather all the necessary materials. Having everything at hand will make the process smoother and more efficient. Here’s what you’ll need:
- Wall decal: Choose a design that suits your taste and complements the style of your space. Wall decals come in various sizes, shapes, and themes, so you can find one that perfectly fits your vision.
- Transfer paper: This special paper is used to transfer the decal from its backing paper onto the wall. Make sure to choose a transfer paper that is specifically designed for wall decals, as it has the right adhesive properties for a clean and seamless application.
- Clean cloth: This will be used to clean the surface before applying the decal. Ensure that it is lint-free and won’t leave any residue behind.
- Scissors: You’ll need scissors to cut out the decal and transfer paper if necessary. Make sure they are sharp and precise for clean cuts.
- Tape or masking tape: This will be used to hold the decal and transfer paper in place while positioning them on the wall. Use a tape that won’t damage the paint or leave any residue.
- Squeegee or credit card: A squeegee or a credit card can be used to smooth out the decal and transfer paper, ensuring a bubble-free application. Make sure to choose a tool with a smooth edge to avoid scratching the decal or damaging the transfer paper.
Having all these materials ready before you begin will save you time and prevent any unnecessary pauses during the process. Now that you have everything you need, let’s move on to step two: cleaning the surface.
Step 2: Clean the Surface
Before applying the wall decal, it’s crucial to ensure that the surface is clean and free from dust, dirt, or any debris. This step is essential because any particles on the surface can interfere with the decal’s adhesive and lead to poor adhesion or bubbling. Follow these steps to properly clean the surface:
- Remove any loose dirt: Use a dry cloth or a duster to gently remove any loose dirt or dust from the wall. Be careful not to apply too much pressure, as you don’t want to damage the paint or the surface.
- Prepare a cleaning solution: Mix a small amount of mild dish soap or a gentle cleaner with warm water in a bucket or spray bottle. Avoid using harsh chemicals or abrasive cleaners, as they can damage the surface or leave residue behind.
- Dampen a cloth or sponge: Dip a clean cloth or sponge into the cleaning solution, ensuring it is not soaking wet. Wring out any excess liquid to prevent dripping.
- Clean the surface: Gently wipe the wall or surface with the damp cloth, using light circular motions. Pay extra attention to any areas that may have stains or visible dirt. If necessary, you can apply a bit more pressure, but avoid scrubbing too vigorously.
- Rinse and dry: After cleaning, rinse the cloth or sponge with clean water and go over the surface again to remove any soap residue. Finally, dry the wall with a clean, dry cloth or allow it to air dry completely.
By following these steps, you’ll create an optimal surface for the wall decal to adhere to. Remember to allow the wall to dry completely before moving on to the next step to ensure proper adhesion and longevity of the decal.
Now that you have a clean surface, it’s time to prepare the wall decal and transfer paper for application. Stay tuned for step three!
Step 3: Preparing the Wall Decal and Transfer Paper
Now that you have a clean and dry surface, it’s time to prepare the wall decal and transfer paper before applying them to the wall. Proper preparation ensures a smooth and accurate placement of the decal. Follow these steps:
- Layout the decal: Lay the wall decal flat on a clean and smooth surface, such as a table or the floor. Gently unroll or unfold the decal, taking care not to crease or damage it.
- Smooth out any wrinkles: If you notice any wrinkles or creases in the decal, use a squeegee or credit card to smooth them out. Start from the center and work your way outward, applying gentle pressure to remove any imperfections.
- Trim any excess: If your decal is larger than the desired area on the wall, use scissors to carefully trim off any excess vinyl. This step ensures that you have the perfect size for your chosen space.
- Prepare the transfer paper: Cut a piece of transfer paper slightly larger than the size of the decal. Remove the backing paper from the transfer paper, exposing the adhesive side.
- Align the decal and transfer paper: Carefully align the sticky side of the transfer paper with the adhesive side of the decal. Make sure the edges are lined up properly to ensure a precise application.
- Smooth out air bubbles: Use a squeegee or credit card to gently smooth out any air bubbles between the decal and the transfer paper. Start from the center and work your way towards the edges, exerting even pressure to ensure a bubble-free application.
By following these steps, you’ll have a properly prepared wall decal and transfer paper, ready for the next stage of the application process. In the next step, we will guide you on how to position the decal on the wall using the transfer paper. Stay tuned!
Make sure the wall is clean and smooth before applying the transfer paper. Use a credit card to smooth out any air bubbles and ensure the decal sticks properly.
Step 4: Positioning the Wall Decal
With the wall decal and transfer paper prepared, it’s time to position the decal on the wall. Proper positioning is crucial for achieving the desired look and ensuring a successful application. Follow these steps to position the decal accurately:
- Clean the wall: Remove any dust or debris from the area where you will be applying the decal. Use a clean cloth or sponge to wipe down the surface, ensuring it is smooth and dry.
- Temporarily secure the decal: Use small pieces of tape or masking tape to hold the decal and transfer paper in place on the wall. This will allow you to step back and assess the positioning before permanently attaching the decal.
- Step back and evaluate: Take a few steps back and view the wall from a distance to ensure that the decal is positioned exactly where you want it. Consider the placement in relation to other elements in the room and make any necessary adjustments.
- Mark the corners: Once you are satisfied with the positioning, use a pencil or a small piece of tape to mark the top corners of the decal. These marks will serve as a guide when transferring the decal onto the wall.
- Double-check alignment: Before moving on to the next step, make sure that the decal is still aligned properly with the marks and the desired area on the wall.
Properly positioning the wall decal is essential for achieving symmetry, optimal visibility, and overall aesthetic appeal. Take your time during this step, as slight adjustments can make a big difference in the final result. Once you are satisfied with the positioning, you are ready to move on to the next step: applying the transfer paper to secure the decal to the wall. Stay tuned!
Step 5: Applying the Transfer Paper
Now that the wall decal is properly positioned on the wall, it’s time to apply the transfer paper to secure the decal in place. The transfer paper acts as a temporary adhesive layer, allowing you to transfer the decal smoothly and precisely onto the wall. Follow these steps to apply the transfer paper:
- Starting from one corner: Begin by peeling back a small portion of the backing paper from the transfer paper, exposing the adhesive side.
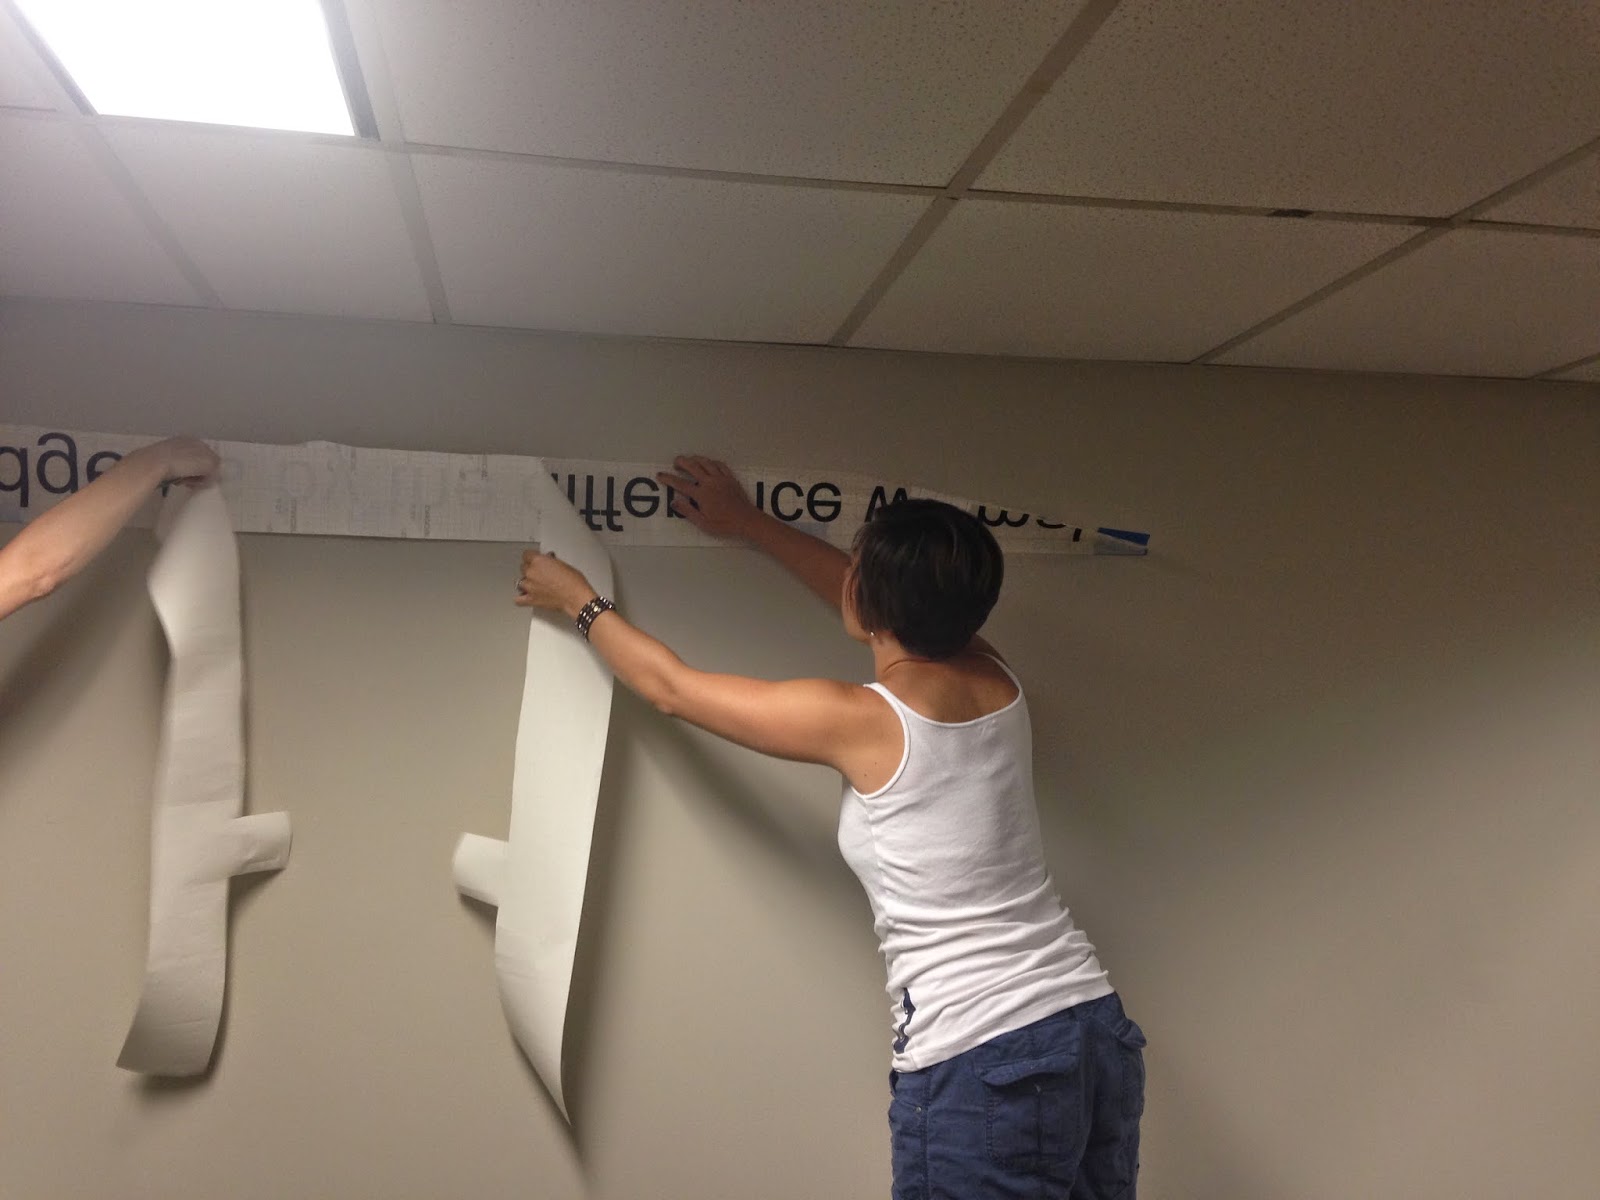
- Align and attach: Align the exposed sticky side of the transfer paper with the corresponding corner mark on the wall. Slowly lower the transfer paper, letting it come into contact with the wall while simultaneously smoothing out any air bubbles or wrinkles using a squeegee or credit card.
- Gradually remove the backing paper: Working from the corner where you began, gradually peel back the backing paper of the transfer paper while using the squeegee or credit card to press the decal onto the wall. Continue this process, peeling away the backing paper as you go, and smoothing out any air bubbles or wrinkles.
- Work systematically: As you move along, work systematically, ensuring that the entire decal comes into contact with the wall. Take your time to ensure precise placement and a smooth application.
- Smooth out any imperfections: If you notice any air bubbles or wrinkles during the application, gently lift the transfer paper and smooth them out using the squeegee or credit card. Remember to work from the center outward to push out any trapped air.
- Remove the transfer paper: Once the entire decal is attached to the wall, slowly and carefully peel off the transfer paper at a 45-degree angle. Take your time and ensure that the decal remains securely adhered to the wall.
By following these steps, you’ll be able to apply the transfer paper smoothly and securely, making sure that the wall decal is properly adhered to the wall. In the next step, we’ll guide you on how to remove the transfer paper and reveal the final result. Stay tuned!
Step 6: Removing the Transfer Paper
With the wall decal securely attached to the wall, it’s time to remove the transfer paper to reveal the final result. Removing the transfer paper can be an exciting moment, but it’s important to proceed with caution to avoid any damage to the decal. Follow these steps to remove the transfer paper:
- Starting from one corner: Begin by gently peeling back a small corner of the transfer paper at a 45-degree angle. Take care not to apply too much force, as you don’t want to accidentally lift the decal off the wall.
- Peel slowly and evenly: Gradually and evenly peel away the transfer paper while keeping it close to the wall. Use one hand to hold the transfer paper close to the surface and the other hand to guide the peeling motion. This will help prevent the decal from lifting along with the transfer paper.
- Smooth out as you go: As you remove the transfer paper, use a squeegee or credit card to gently smooth out any air bubbles or wrinkles that may appear. Apply light pressure and work from the center outward to ensure a smooth and seamless finish.
- Continue removing the transfer paper: Slowly and carefully peel off the transfer paper, working your way across the decal. Take your time and ensure that the decal stays adhered to the wall as you remove the paper.
- Inspect the decal: Once the transfer paper is completely removed, step back and inspect the decal for any remaining air bubbles or imperfections. If you spot any, gently press them out with your finger or the squeegee.
With the transfer paper removed, you’ve revealed the final result of your wall decal installation. Take a moment to admire your work and ensure that the decal is firmly adhered to the wall without any air bubbles or wrinkles. In the next step, we’ll discuss some finishing touches to complete the look. Stay tuned!
Step 7: Finishing Touches
Now that your wall decal is securely applied to the wall, it’s time to add some finishing touches to enhance the overall look. These final steps will ensure a polished and professional appearance. Here are some tips for adding those finishing touches:
- Smooth out any remaining imperfections: Take a close look at the decal and gently smooth out any remaining air bubbles or wrinkles using a squeegee or your fingertips. Make sure the decal is smooth and flat against the wall.
- Trim any excess: If there are any parts of the decal that extend beyond the desired area, carefully trim them with a sharp pair of scissors. This step will give your decal a neat and clean finish.
- Double-check adhesion: Go over the decal once more, pressing down firmly with your hand or the squeegee to ensure it is securely adhered to the wall. Pay extra attention to the edges and corners to prevent any lifting.
- Step back and admire your work: Take a moment to step back and appreciate the completed look of your wall decal. Admire how it transforms the space and adds a personal touch to your decor.
- Add complementary decor: Consider adding other decorative elements around the decal to create a cohesive and visually pleasing display. This could include framed artwork, mirrors, or other decorative items that complement the style and theme of the decal.
- Regularly clean and maintain: To ensure your wall decal stays in excellent condition, clean it regularly with a soft cloth or duster. Avoid using harsh chemicals or abrasive materials that could damage the decal.
By following these finishing touches, you’ll ensure that your wall decal looks its best and seamlessly integrates into your overall decor scheme. It’s amazing how a small addition like a wall decal can make a big impact on the ambiance and style of a room.
Congratulations! You have successfully put up your wall decal using transfer paper. Enjoy your newly transformed space and the beauty that the decal brings.
Remember, if you ever want to change or remove the decal in the future, gently peel it off the wall from one corner at a 45-degree angle. If any residue remains, use a mild cleaner to assist in the removal process.
Thank you for following this step-by-step guide. We hope it has been helpful and that you enjoy the beauty and creativity that wall decals bring to your home or office.
Conclusion
Putting up wall decals with transfer paper is a simple and effective way to add a touch of personal style and flair to your living space. With the step-by-step guide outlined in this article, you’re now equipped with the knowledge and techniques to successfully apply wall decals and achieve a professional and polished look.
From gathering the necessary materials to cleaning the surface, preparing the decal and transfer paper, positioning the decal on the wall, applying the transfer paper, removing the transfer paper, and adding the finishing touches, each step is crucial for a seamless and satisfying result.
Remember to take your time throughout the process, ensuring precision and attention to detail. Carefully clean the surface, align the decal accurately, smooth out any imperfections, and remove the transfer paper gently to reveal the beautiful outcome.
Wall decals offer versatility and creativity, allowing you to personalize your living space in a unique and stylish way. Whether you choose a captivating design, an inspirational quote, or a whimsical pattern, wall decals can transform any room into a captivating and inviting environment.
Once your wall decal is up, take a moment to appreciate the impact it has on your decor and the atmosphere of the space. Admire how it can effortlessly bring life and personality to blank walls, creating a focal point or adding a splash of color.
Remember to periodically clean and maintain your wall decal to keep it looking its best. Avoid using harsh chemicals or abrasive materials that could damage the decal’s appearance. With proper care, your wall decal will continue to enhance your space for years to come.
Thank you for following this comprehensive guide on how to put up wall decals with transfer paper. We hope you have found it informative and helpful. Enjoy the creative process, and have fun transforming your space with beautiful and eye-catching wall decals!
Frequently Asked Questions about How To Put Up Wall Decals With Transfer Paper
Was this page helpful?
At Storables.com, we guarantee accurate and reliable information. Our content, validated by Expert Board Contributors, is crafted following stringent Editorial Policies. We're committed to providing you with well-researched, expert-backed insights for all your informational needs.






0 thoughts on “How To Put Up Wall Decals With Transfer Paper”