Home>Renovation & DIY>Home Renovation Guides>How To Put Up A Backsplash
Home Renovation Guides
How To Put Up A Backsplash
Modified: October 27, 2024
Learn how to put up a backsplash in your home with our comprehensive home renovation guide. Get expert tips and step-by-step instructions.
(Many of the links in this article redirect to a specific reviewed product. Your purchase of these products through affiliate links helps to generate commission for Storables.com, at no extra cost. Learn more)
Choosing the Right Backsplash Material
Selecting the right material for your backsplash is a crucial step in the renovation process. The material not only contributes to the aesthetic appeal of your kitchen or bathroom but also affects its functionality and maintenance. Here are some popular backsplash materials to consider:
-
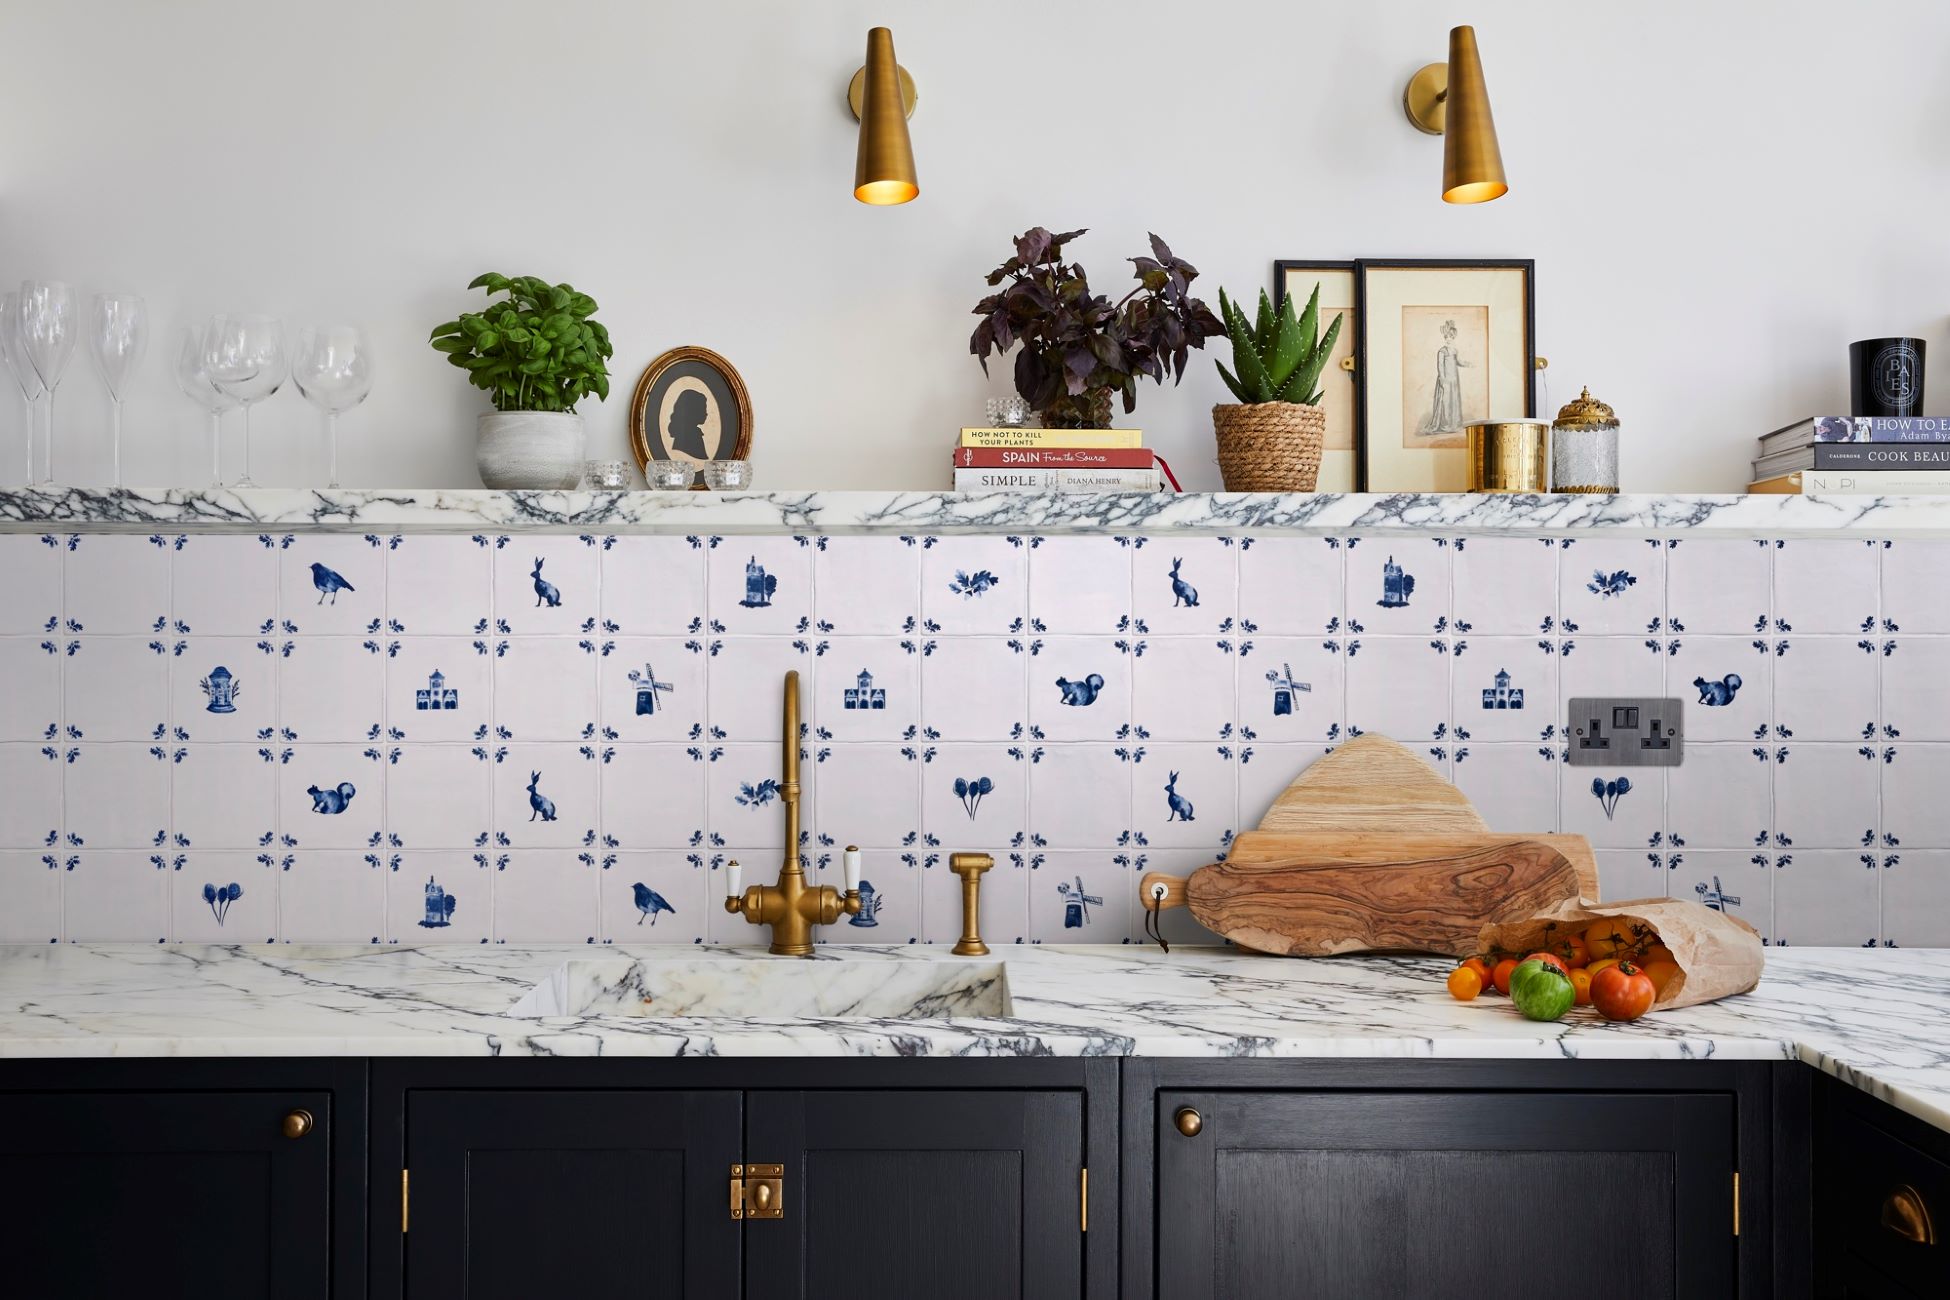
Ceramic Tiles: Ceramic tiles are a timeless choice for backsplashes. They come in a wide range of colors, patterns, and sizes, allowing for versatile design options. Ceramic tiles are durable, easy to clean, and resistant to heat and moisture, making them ideal for kitchen and bathroom applications.
-
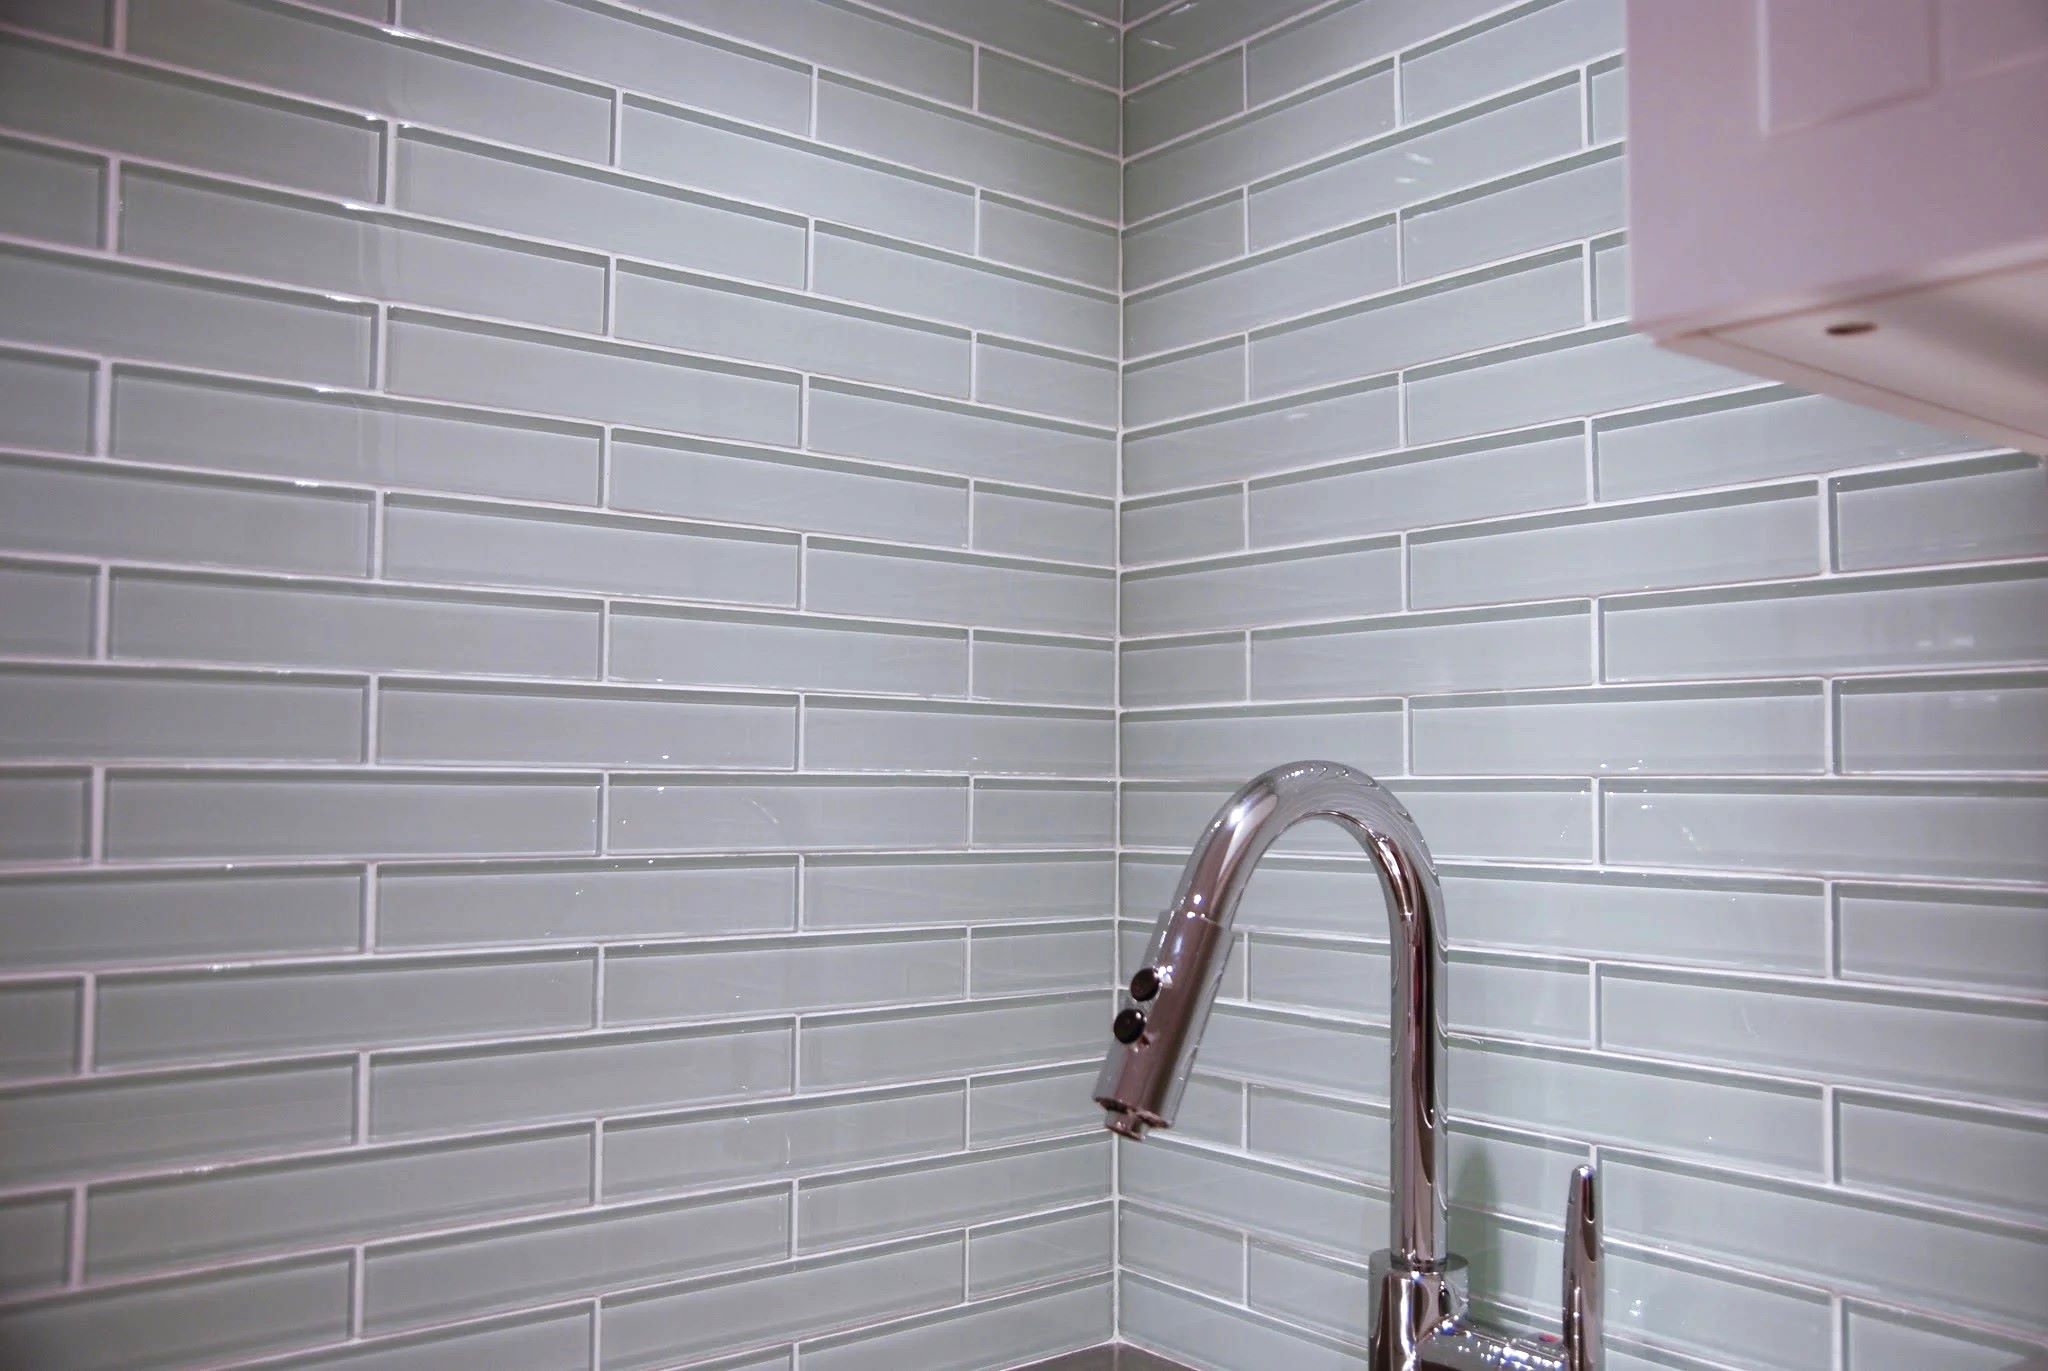
Glass Tiles: If you're aiming for a modern and sleek look, glass tiles are an excellent option. They reflect light, creating a luminous and spacious feel in the room. Glass tiles are also resistant to stains and are easy to maintain, making them a practical choice for backsplashes.
-
Subway Tiles: Subway tiles have gained popularity for their classic and versatile appeal. These rectangular tiles can be arranged in various patterns, such as the traditional offset pattern or herringbone design, adding visual interest to the space. They are available in ceramic, glass, or porcelain materials, offering flexibility in design and style.
-
Stone Slabs: For a luxurious and sophisticated look, consider using natural stone slabs, such as marble, granite, or travertine, for your backsplash. These materials exude elegance and unique natural patterns, adding a touch of opulence to the room. While stone slabs require sealing to prevent staining, they offer unparalleled beauty and durability.
-
Peel-and-Stick Backsplash: If you're looking for a budget-friendly and DIY-friendly option, peel-and-stick backsplash tiles are worth considering. These self-adhesive tiles come in various designs, including faux metal, subway, and mosaic patterns, allowing you to achieve a stylish look without the need for grout or special tools.
When choosing the right backsplash material, consider the overall style of your space, your maintenance preferences, and the practicality of the material in the designated area. Additionally, explore different textures, finishes, and colors to find the perfect backsplash that complements your home's aesthetic while serving its functional purpose.
Key Takeaways:
- Choose the right backsplash material based on your style and maintenance preferences. Consider ceramic, glass, subway tiles, stone slabs, or peel-and-stick options to enhance your space’s aesthetic and functionality.
- Meticulously measure, prepare, and apply adhesive for a flawless backsplash installation. Ensure precise alignment, consistent thickness, and proper setting time to achieve a visually stunning and durable outcome.
Read more: How To Put Up Peel And Stick Backsplash
Measuring and Preparing the Wall
Before diving into the installation process, it's essential to accurately measure and prepare the wall where the backsplash will be installed. This crucial step sets the foundation for a seamless and visually appealing outcome. Here's a detailed guide on how to measure and prepare the wall for your new backsplash:
-
Gather Your Tools: Start by gathering the necessary tools and materials, including a measuring tape, level, pencil, straight edge, and painter's tape. These tools will help you achieve precision and accuracy throughout the measurement and preparation process.
-
Measure the Area: Using a measuring tape, carefully measure the area where the backsplash will be installed. Take precise measurements of the length and height of the wall to determine the amount of material needed. It's advisable to add a small percentage to account for cuts, mistakes, or future repairs.
-
Mark the Layout: Once you have the measurements, use a pencil and straight edge to mark the layout on the wall. Start by finding the center point and work your way outwards, creating a guide for the placement of the tiles. This step is crucial for ensuring a symmetrical and balanced appearance, especially if you're working with patterned or textured tiles.
-
Prepare the Surface: Before applying the adhesive or thinset, it's important to ensure that the wall surface is clean, smooth, and free of any debris. Use a mild detergent and water to clean the area, and allow it to dry completely. If the wall has imperfections or uneven areas, consider using a suitable filler or primer to create a level surface for the backsplash installation.
-
Protect Adjacent Surfaces: To prevent any accidental damage or mess during the installation process, use painter's tape to protect adjacent surfaces, such as countertops and cabinets. This simple yet effective step can save you time and effort in cleaning up later.
-
Check for Level: Using a level, double-check the marked layout to ensure that the lines are straight and level. This step is crucial for achieving a professional-looking installation. Adjust the layout as needed to maintain consistency and precision.
By meticulously measuring and preparing the wall for your new backsplash, you set the stage for a successful and visually stunning installation. Taking the time to complete these initial steps with care and attention to detail will ultimately contribute to a polished and professional end result.
Applying Adhesive or Thinset
Once the wall is meticulously measured and prepared, the next crucial step in installing a backsplash is applying the adhesive or thinset. This process is essential for securing the tiles in place and ensuring a durable and long-lasting installation. Here's a detailed guide on how to apply adhesive or thinset for your backsplash project:
-
Selecting the Right Adhesive: Depending on the type of tiles and the wall surface, choose an appropriate adhesive or thinset. For ceramic, glass, or porcelain tiles, a high-quality thinset mortar is recommended. If you're working with peel-and-stick tiles, ensure that the wall surface is clean and smooth before applying the adhesive.
-
Mixing the Thinset: If you're using thinset mortar, carefully follow the manufacturer's instructions for mixing. Use a clean bucket and a drill with a mixing attachment to achieve a smooth and lump-free consistency. It's crucial to mix the thinset to the right thickness to ensure proper adhesion.
-
Applying the Adhesive: Using a notched trowel, apply the adhesive or thinset to a small section of the wall, starting from the center point of the layout. Hold the trowel at a 45-degree angle and spread the adhesive evenly, creating ridges for better tile adhesion. Work in manageable sections to prevent the adhesive from drying out before the tiles are placed.
-
Maintaining Consistent Thickness: As you apply the adhesive, pay attention to maintaining a consistent thickness across the entire area. This uniform application is crucial for ensuring that the tiles adhere securely to the wall and that the finished surface is level.
-
Adhering Peel-and-Stick Tiles: If you're using peel-and-stick tiles, carefully align each tile with the marked layout on the wall. Press firmly to ensure proper adhesion, and use a roller to smooth out any air bubbles and secure the tiles in place.
-
Double-Checking Alignment: Throughout the adhesive application process, periodically double-check the alignment and level of the tiles using a straight edge or level. Making adjustments as you progress will help maintain a uniform and visually appealing installation.
-
Allowing for Setting Time: After the tiles are placed, allow the adhesive or thinset to set according to the manufacturer's instructions. This setting time is crucial for ensuring that the tiles bond securely to the wall surface.
By following these steps and taking the time to apply the adhesive or thinset with precision and care, you set the stage for a successful and visually stunning backsplash installation. This meticulous approach ensures that the tiles adhere securely and that the finished result is a testament to your attention to detail and craftsmanship.
Placing and Securing the Backsplash Tiles
With the wall meticulously prepared and the adhesive or thinset applied, the next pivotal phase in the backsplash installation process is placing and securing the tiles. This step requires precision, attention to detail, and a methodical approach to ensure a flawless and durable outcome. Here's a comprehensive guide on how to expertly place and secure the backsplash tiles:
-
Starting at the Center: Begin placing the tiles at the center of the layout, following the marked guidelines on the wall. This strategic starting point allows for symmetrical placement and ensures that any cut tiles at the edges will be uniform in size.
-
Aligning the Tiles: Carefully align each tile with the marked layout, pressing gently but firmly into the adhesive or thinset. Use tile spacers to maintain consistent spacing between the tiles, ensuring a professional and polished look once the grouting is complete.
-
Checking for Level and Alignment: As you progress, use a level or straight edge to verify that the tiles are aligned and level. Making adjustments as needed will prevent any misalignment issues and contribute to a visually appealing installation.
-
Cutting Tiles to Fit: When reaching the edges or corners, measure and mark the tiles that require cutting to fit the space. Use a tile cutter or wet saw to achieve precise cuts, ensuring a seamless and tailored fit for each tile.
-
Securing the Tiles: As each tile is placed, press it firmly into the adhesive or thinset to ensure proper adhesion. Use a grout float to apply gentle pressure, setting the tiles securely in place while maintaining consistent spacing.
-
Addressing Obstacles and Outlets: For areas around outlets, switches, or other obstacles, carefully measure and cut the tiles to accommodate these features. Precision is key to achieving a seamless and professional finish in these challenging areas.
-
Maintaining Clean Lines: Throughout the placement process, periodically remove any excess adhesive or thinset that may seep through the tile joints. This simple yet crucial step ensures clean and uniform grout lines once the installation is complete.
-
Allowing for Setting Time: Once all the tiles are in place, allow the adhesive or thinset to set according to the manufacturer's instructions. This setting period is essential for ensuring that the tiles bond securely to the wall surface.
By meticulously following these steps and approaching the placement and securing of the backsplash tiles with patience and precision, you pave the way for a flawless and visually stunning installation. Each tile is expertly positioned and secured, resulting in a backsplash that not only enhances the aesthetic appeal of the space but also stands the test of time with its durable and professional finish.
Measure and cut your backsplash tiles carefully to ensure a precise fit. Use a tile saw or tile cutter for straight cuts, and a tile nipper for curved or irregular cuts. Always wear safety goggles when cutting tiles.
Grouting and Sealing the Backsplash
Grouting and sealing the backsplash is the final phase of the installation process, and it plays a pivotal role in enhancing the durability, cleanliness, and overall aesthetic of the tiled surface. This critical step involves filling the gaps between the tiles with grout, followed by the application of a sealant to protect the grout and tiles from moisture, stains, and discoloration. Here's a detailed guide on how to expertly grout and seal your backsplash, ensuring a professional and long-lasting finish.
Read more: How To Put Up A Backsplash With Glass Tiles
Grouting the Tiles
-
Selecting the Grout: Choose a high-quality grout that complements the color and style of your tiles. Opt for sanded or unsanded grout based on the width of the tile joints, ensuring a proper fit for a seamless finish.
-
Mixing the Grout: Follow the manufacturer's instructions to mix the grout to the desired consistency. Use a clean bucket and a grout float to achieve a smooth and lump-free mixture, ensuring ease of application.
-
Applying the Grout: Using the grout float, apply the grout diagonally across the tile joints, ensuring thorough coverage. Work in small sections, pressing the grout into the joints while holding the float at a 45-degree angle to achieve a uniform fill.
-
Removing Excess Grout: After applying the grout, use a damp sponge to gently wipe away excess grout from the tile surfaces. Rinse the sponge frequently and avoid applying excessive pressure to prevent dislodging the grout from the joints.
-
Final Cleaning: Once the grout has set for a short period, use a clean, dry cloth to buff away any remaining haze on the tile surfaces. This final cleaning step contributes to a polished and professional appearance.
Sealing the Grout and Tiles
-
Choosing the Sealant: Select a high-quality penetrating grout and tile sealer that provides protection against moisture, stains, and discoloration. Ensure that the chosen sealant is suitable for the specific type of tiles and grout used in your backsplash.
-
Applying the Sealant: Following the manufacturer's guidelines, use a clean brush or applicator to evenly apply the sealant over the grout lines and tile surfaces. Allow the sealant to penetrate the grout and tiles for the recommended duration.
-
Buffing and Polishing: After the initial application, use a clean, dry cloth to buff and polish the tile surfaces, removing any excess sealant and achieving a lustrous finish. This step enhances the overall appearance of the backsplash while ensuring thorough protection.
By meticulously grouting and sealing the backsplash with precision and care, you not only enhance the visual appeal of the tiled surface but also fortify it against the rigors of daily use. The grout fills the gaps between the tiles, providing structural support and preventing moisture infiltration, while the sealant safeguards the grout and tiles, preserving their pristine appearance for years to come. This meticulous approach to grouting and sealing culminates in a backsplash that exudes timeless elegance and practical functionality, serving as a stunning focal point in your kitchen or bathroom.
Frequently Asked Questions about How To Put Up A Backsplash
Was this page helpful?
At Storables.com, we guarantee accurate and reliable information. Our content, validated by Expert Board Contributors, is crafted following stringent Editorial Policies. We're committed to providing you with well-researched, expert-backed insights for all your informational needs.


0 thoughts on “How To Put Up A Backsplash”