Home>Interior Design>How To Stain Kitchen Cabinets: An Expert Guide
Interior Design
How To Stain Kitchen Cabinets: An Expert Guide
Modified: October 19, 2024
Learn how to stain your kitchen cabinets like a pro with our expert guide. Transform your interior design with this step-by-step tutorial.
(Many of the links in this article redirect to a specific reviewed product. Your purchase of these products through affiliate links helps to generate commission for Storables.com, at no extra cost. Learn more)
Introduction
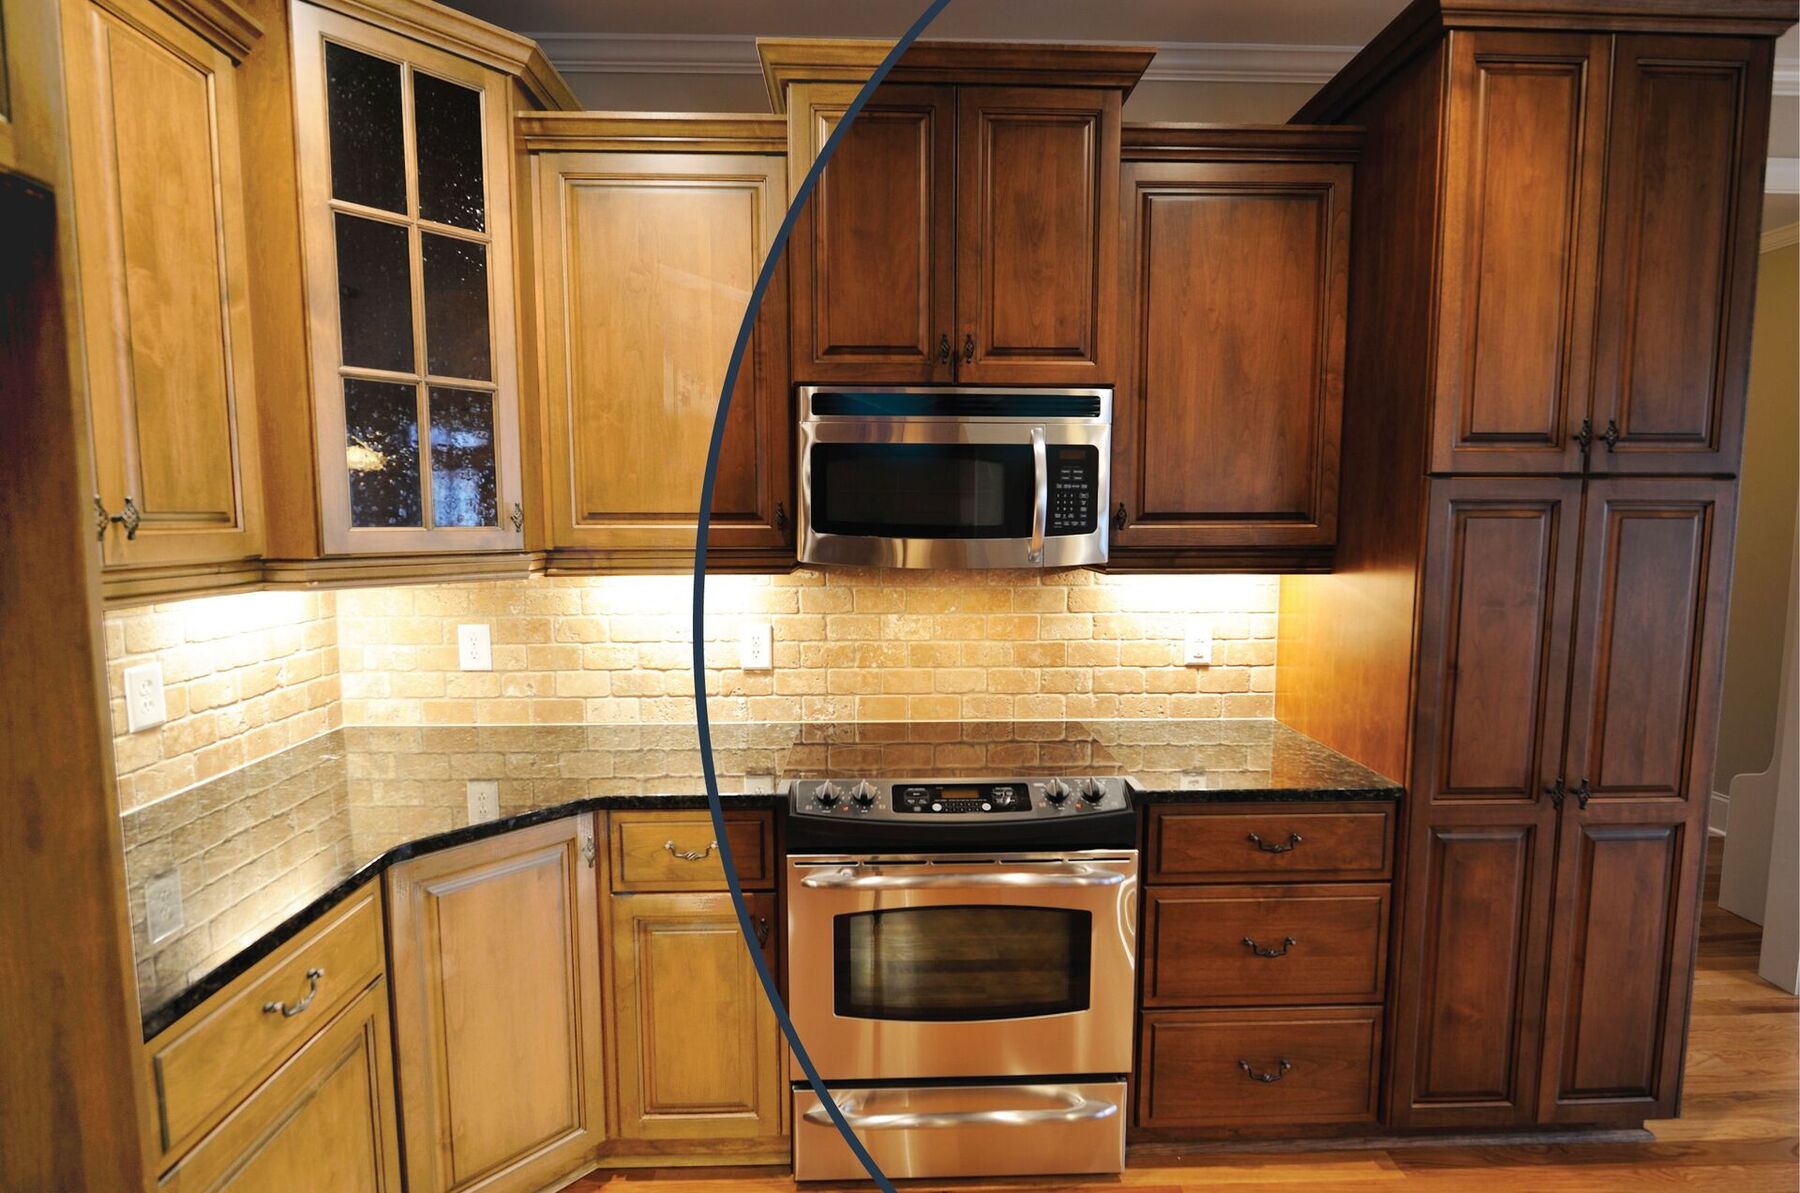
Welcome to our expert guide on how to stain kitchen cabinets! If you’re looking to refresh the look of your kitchen without breaking the bank, staining your cabinets can be a cost-effective and transformative solution. By staining your cabinets, you can enhance the natural beauty of the wood, highlight the grain, and give your kitchen a warm and luxurious feel.
Whether you’re a DIY enthusiast or a homeowner looking to tackle a home improvement project, this step-by-step guide will help you achieve professional-looking results. From preparing the cabinets to applying the stain and sealing the finish, we’ll cover everything you need to know to get started.
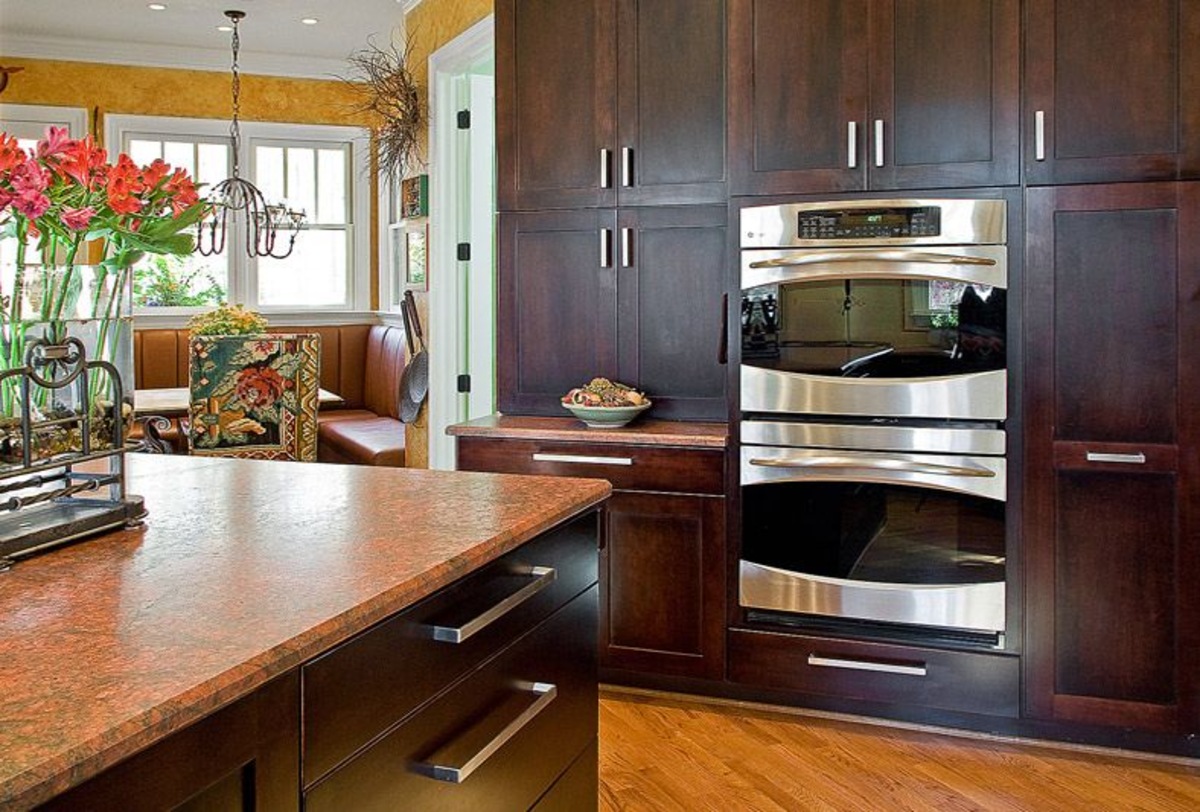
Before we dive into the specifics, let’s talk a bit about the benefits of staining your kitchen cabinets. Stained cabinets offer a timeless and classic look that can suit a variety of interior design styles, from rustic farmhouse to sleek modern. The deep and rich hues of stain can add depth and character to your kitchen, making it feel more inviting and elegant.
In addition to aesthetics, staining your cabinets also helps protect the wood from damage. The stain forms a protective barrier that shields the wood from moisture, scratches, and fading, making it more durable and long-lasting. It’s a great way to extend the lifespan of your cabinets and keep them looking beautiful for years to come.
Now that you understand the benefits, let’s jump into the step-by-step process of staining your kitchen cabinets. With proper preparation and attention to detail, you’ll be able to achieve professional-quality results and transform your kitchen into a stylish and inviting space.
Key Takeaways:
- Transform your kitchen with a cost-effective and timeless solution by staining your cabinets. Enhance the wood’s natural beauty, protect against damage, and achieve a warm, luxurious feel for years to come.
- Achieve professional-quality results by following a step-by-step guide to prepare, stain, and seal your kitchen cabinets. Embrace the transformative process and enjoy a refreshed, elegant space with extended durability.
Read more: DIY Guide To Painting Kitchen Cabinets
Step 1: Prepare Your Kitchen Cabinets
Before you can begin the staining process, it’s important to properly prepare your kitchen cabinets. This will ensure that the stain adheres evenly and that you achieve the best possible results. Follow these steps to prepare your cabinets:
1. Empty the cabinets: Start by removing all the items from your cabinets. This will not only make it easier to work but also protect your belongings from dust and stains.
2. Protect the surrounding area: Cover the countertops, floors, and other nearby surfaces with drop cloths or plastic sheets to protect them from any drips or spills.
3. Remove cabinet doors and hardware: Take off the cabinet doors, as well as any hardware such as knobs and handles. This will allow you to work on the cabinets more easily and ensure that you achieve a uniform stain application.
4. Label the doors: It’s essential to label each cabinet door and its corresponding location to ensure that you can easily reinstall them later. Use removable adhesive labels or painter’s tape to mark each door and its placement.
5. Clean the cabinets: Use a mild detergent or grease-cutting cleaner to thoroughly clean the cabinets. Pay particular attention to any areas with built-up grease or residue. This step is crucial as it will remove any dirt or grime that could interfere with the staining process.
6. Repair any damage: Inspect the cabinets for any signs of damage, such as cracks, chips, or dents. If you find any, use wood filler to repair them. Allow the filler to dry completely and then sand it down until it’s smooth and level with the surrounding surface.
7. Sand the surfaces: Sanding is a crucial step in preparing the cabinets for staining. It helps to remove any existing finish, smooth out imperfections, and create a surface that the stain can adhere to. Use a medium-grit sandpaper (around 120-150 grit) and sand in the direction of the wood grain. Be thorough but gentle to avoid damaging the wood.
By following these steps, you’ll ensure that your kitchen cabinets are properly prepared for the staining process. Taking the time to prepare them will result in a more professional-looking finish and a longer-lasting result.
Step 2: Remove Cabinet Doors and Hardware
Now that your kitchen cabinets are prepared, it’s time to remove the cabinet doors and hardware. This step allows for easier access and ensures that the stain is applied evenly. Follow these steps to remove the cabinet doors and hardware:
1. Gather the necessary tools: Before you begin, gather the tools you’ll need, such as a screwdriver or drill with the appropriate bit. This will depend on the type of screws or hardware used on your cabinet doors.
2. Start with the upper cabinets: Begin by removing the doors of the upper cabinets. Open the doors and locate the screws on the hinges connecting the door to the cabinet frame. Using the appropriate tool, carefully unscrew the hinges and remove the doors. Place the doors in a safe and clean area to avoid any damage.
3. Remove the lower cabinet doors: Follow the same process to remove the doors on the lower cabinets. Take note of any additional hardware, such as drawer pulls or knobs, that may need to be removed as well.
4. Carefully remove the hardware: Using a screwdriver or drill, remove any hardware attached to the cabinet doors and cabinets themselves. Place the hardware in a labeled container or bag to keep track of them during the staining process.
5. Store the doors and hardware: Once all the doors and hardware have been removed, store them carefully in a clean and dry location. It’s important to keep the doors and hardware organized to ensure a smooth reinstallation process later.
6. Clean the doors and hardware: Take the time to clean the cabinet doors and hardware to get rid of any accumulated dirt or grease. Use a mild detergent or specialized cleaner and a soft cloth to gently wipe them down. Allow them to air dry completely before moving on to the next steps.
Removing the cabinet doors and hardware is an essential step before staining as it allows for better access and a more consistent application of the stain. By taking the time to remove them properly and keeping them clean, you’ll ensure that the end result is a beautifully stained kitchen cabinet.
Step 3: Clean the Cabinets
After removing the cabinet doors and hardware, it’s time to thoroughly clean the cabinets themselves. Cleaning the cabinets will remove any dirt, grease, or residue that could affect the stain’s adherence and the overall finish. Follow these steps to clean your cabinets effectively:
1. Gather cleaning supplies: Start by gathering the necessary cleaning supplies. You’ll need a mild detergent or kitchen cleaner, warm water, a sponge or soft cloth, and a bucket.
2. Remove loose debris: Begin by removing any loose debris from the cabinets’ surfaces. Use a soft brush or cloth to gently brush away any dust or dirt.
3. Create a cleaning solution: Fill a bucket with warm water and add a small amount of mild detergent or kitchen cleaner. Mix the solution until it’s well combined.
4. Clean the cabinets: Dip the sponge or soft cloth into the cleaning solution and wring out any excess water. Wipe down the cabinet surfaces, paying extra attention to any areas with built-up grease or stains. Be thorough but gentle to avoid damaging the wood.
5. Rinse with clean water: Once you have cleaned the cabinets, use a clean cloth or sponge dampened with clean water to rinse off any residues from the cleaning solution. This step is crucial to ensure that no cleaning products are left behind.
6. Dry the cabinets: Lastly, use a clean, dry cloth to thoroughly dry the cabinet surfaces. It’s important to remove any excess moisture to prevent damage to the wood and ensure proper stain application.
By cleaning your cabinets before staining, you’ll ensure that the stain adheres properly and that you achieve a smooth and even finish. Taking the time to remove dirt, grease, and residues will result in a more professional-looking outcome and prolong the lifespan of your stained cabinets.
Step 4: Sand the Surfaces
One of the crucial steps in preparing your kitchen cabinets for staining is to sand the surfaces. Sanding helps to smooth out imperfections, remove any existing finishes, and create a roughened surface that allows the stain to penetrate and adhere effectively. Follow these steps to sand your cabinet surfaces properly:
1. Gather the necessary tools: Before you begin, gather the tools you’ll need. These include medium-grit sandpaper (around 120-150 grit), a sanding block or sanding sponge, and a dust mask or respirator to protect yourself from the dust.
2. Start with the cabinet doors: Begin by focusing on the cabinet doors. Lay them flat on a clean and stable surface, such as a workbench or sawhorses, with the front facing up. This position will give you better access and control while sanding.
3. Sand in the direction of the grain: Use the sandpaper or sanding block to sand the surfaces in the direction of the wood grain. Apply even pressure and use long, smooth strokes. This technique helps to minimize the risk of visible sanding marks or scratches.
4. Sand the edges and corners: Pay close attention to the edges and corners of the cabinet doors. Use a folded sandpaper or sanding sponge to reach these areas and create a smooth and blended finish.
5. Sand the cabinet frames: Once you have finished sanding the cabinet doors, move on to sanding the cabinet frames. Use the same sanding technique, following the direction of the grain, to remove any existing finish and smooth out the surfaces.
6. Remove sanding dust: After sanding, it’s important to remove any sanding dust from the surfaces. Use a clean, soft cloth or vacuum cleaner with a brush attachment to carefully remove all dust and debris. This step ensures a clean surface for the stain to adhere to.
7. Check for smoothness: Run your hands over the sanded surfaces to check for smoothness. If you come across any rough spots or imperfections, sand those areas again until you achieve a consistent smoothness throughout.
By taking the time to properly sand your cabinet surfaces, you’ll ensure a professional-looking finish and promote better stain adherence. Remember to work patiently and thoroughly, paying attention to the details, to achieve the best results in your staining project.
When staining kitchen cabinets, always sand the surface thoroughly before applying the stain to ensure a smooth and even finish.
Read more: How To Stain A Cabinet
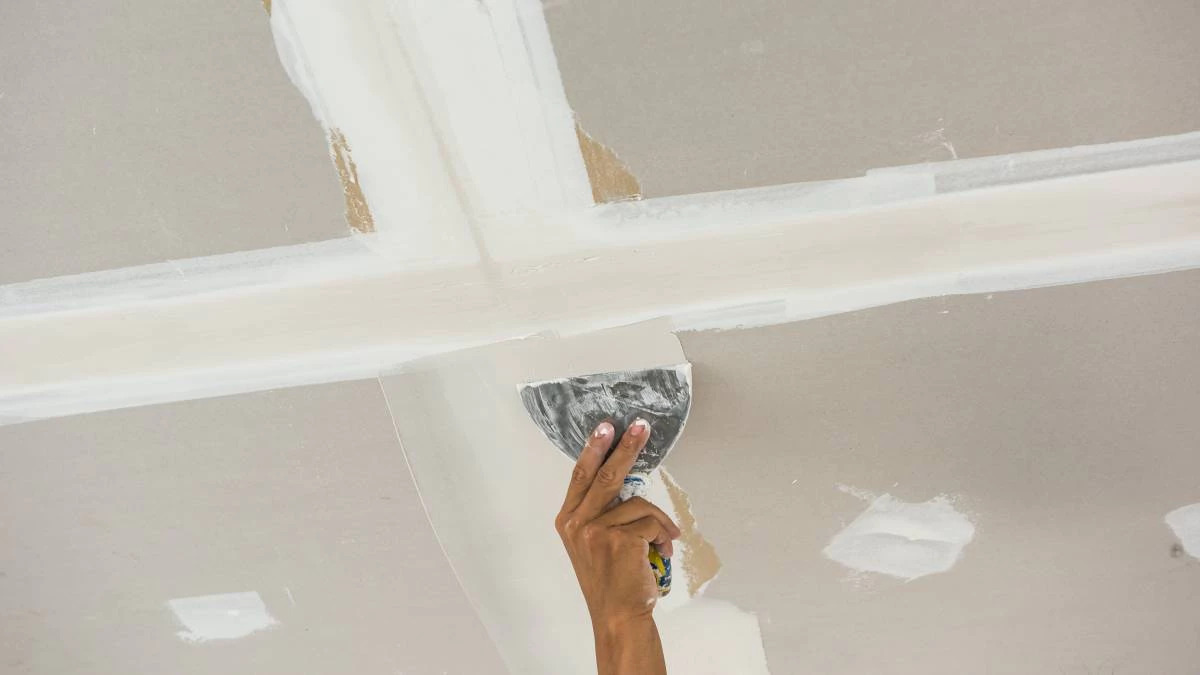
Step 5: Apply a Primer
After sanding the surfaces of your kitchen cabinets, it’s time to apply a primer. Primer is an essential step in the staining process as it helps to seal the wood and create a smooth, even surface for the stain to adhere to. Here’s how to apply a primer to your cabinets:
1. Choose the right primer: Select a high-quality wood primer specifically designed for use on cabinets. Look for a primer that is compatible with your chosen stain and offers good adhesion to wood surfaces.
2. Prepare the primer: Before you begin applying the primer, thoroughly stir it to ensure that it is well mixed. Pour the primer into a painting tray or bucket for easy access during the application process.
3. Use a brush or roller: Depending on the size and design of your cabinets, choose either a brush or roller for applying the primer. A brush is ideal for smaller or intricate areas, while a roller is great for larger flat surfaces.
4. Start with the cabinet doors: Begin by applying the primer to the cabinet doors. Use smooth, even strokes in the direction of the wood grain. Be careful to avoid drips or excessive buildup of primer.
5. Prime the cabinet frames: Once you have finished priming the doors, move on to the cabinet frames. Apply the primer using the same technique, making sure to cover all exposed surfaces.
6. Allow the primer to dry: Follow the manufacturer’s instructions on the primer to determine the drying time. Typically, it may take a few hours for the primer to dry completely. Ensure proper ventilation to facilitate the drying process.
7. Inspect the primed surfaces: Once the primer is dry, inspect the primed surfaces for any imperfections or areas that may require additional priming. If necessary, sand any rough spots gently and apply an additional coat of primer.
Applying a primer to your kitchen cabinets before staining is crucial as it helps provide a smooth and consistent surface for the stain to adhere to. By taking the time to prime your cabinets, you can ensure a more professional-looking finish and enhance the longevity of the stain.
Step 6: Choose and Apply the Stain
With the primer applied and dried, it’s time to choose the perfect stain for your kitchen cabinets and apply it. The stain will enhance the natural beauty of the wood and give your cabinets the desired color and finish. Follow these steps to choose and apply the stain:
1. Select the right stain: Consider the overall look you want to achieve in your kitchen and choose a stain color that complements your style and existing décor. Look for stain options that are specifically formulated for use on cabinets and provide the level of opacity and richness you desire.
2. Test the stain: Before applying the stain to your entire cabinet, it’s recommended to perform a stain test on a small inconspicuous area or piece of scrap wood. This will give you a better idea of how the stain will look on your cabinets and allow you to make any adjustments if needed.
3. Prepare the stain: Stir the stain thoroughly to mix any settled pigment or dye. Transfer the stain to a clean container for easier access during application. Use a brush or stir stick to ensure that the color is evenly distributed throughout the stain.
4. Apply the stain: Begin by applying the stain to the cabinet doors. Use a brush or a lint-free cloth to evenly distribute the stain, working in the direction of the wood grain. Apply the stain in thin, even coats, allowing each coat to dry before applying the next. Follow the manufacturer’s instructions regarding drying time.
5. Stain the cabinet frames: Once the cabinet doors are stained, move on to the cabinet frames, applying the stain using the same technique. Pay attention to hard-to-reach areas and ensure that the stain is evenly applied throughout.
6. Wipe off excess stain: After a few minutes of allowing the stain to penetrate the wood, use a clean cloth to gently wipe off any excess stain. This step helps to achieve a more even and consistent color. Be careful not to rub too forcefully and remove too much of the stain.
7. Let the stain dry and cure: Allow the stain to dry as per the manufacturer’s instructions. This typically takes several hours to overnight. Keep the area well-ventilated during the drying process to ensure proper ventilation.
Choosing and applying the stain is an exciting part of the cabinet staining process. By carefully selecting the right stain and following proper application techniques, you’ll be able to achieve the desired color and enhance the natural beauty of your cabinets.
Step 7: Seal the Cabinets
Once the stain has dried and achieved the desired color, it’s important to seal the cabinets to protect the finish and prolong their lifespan. Sealing the cabinets creates a durable and protective barrier against moisture, scratches, and other daily wear and tear. Follow these steps to seal your kitchen cabinets:
1. Choose the right sealer: Select a high-quality wood sealer that is compatible with your stain and offers the level of protection you desire. Look for a sealer specifically designed for use on cabinets and one that suits the type of wood you have.
2. Prepare the sealer: Thoroughly stir the sealer to ensure that it is well mixed. Pour the sealer into a clean container or paint tray for easy access during the application process.
3. Apply the sealer: Use a brush or a lint-free cloth to apply the sealer to the cabinet surfaces. Work in the direction of the wood grain, applying thin and even coats. Make sure to cover all areas, including edges and corners.
4. Allow the sealer to dry: Follow the manufacturer’s instructions regarding the drying time for the sealer. It usually takes a few hours for the sealer to dry, but this may vary depending on the product and environmental conditions. Avoid touching or using the cabinets until the sealer is completely dry.
5. Sand (optional) and apply additional coats: If desired, lightly sand the cabinets with a fine-grit sandpaper between coats of sealer to achieve a smoother finish. Apply additional coats of sealer as necessary, allowing each coat to dry according to the manufacturer’s instructions.
6. Let the sealer cure: After the final coat of sealer has been applied, allow the cabinets to cure completely. This process usually takes a few days to a week, depending on the sealer and environmental conditions. Avoid exposing the cabinets to excessive moisture or heavy use during the curing process.
Sealing the cabinets is an essential step in protecting the stained finish and ensuring its longevity. A properly sealed cabinet will be more resistant to daily wear and tear and will maintain its beauty for years to come.
Step 8: Reinstall Cabinet Doors and Hardware
Now that you have completed the staining and sealing of your kitchen cabinets, it’s time to reinstall the cabinet doors and hardware. This final step will bring your cabinets back to their full functionality and complete the transformation of your kitchen. Follow these steps to reinstall the cabinet doors and hardware:
1. Organize the doors and hardware: If you have labeled the cabinet doors and hardware during the removal process, now is the time to use those labels. Sort and organize the doors and hardware to ensure a smooth and efficient reinstallation.
2. Attach the hinges: Begin by attaching the hinges to the cabinet frames. Use a screwdriver or drill with the appropriate bit to secure the hinges with the provided screws. Make sure the hinges are properly aligned to ensure that the doors hang straight.
3. Hang the cabinet doors: With the hinges in place, it’s time to hang the cabinet doors. Hold the door carefully and align the hinges with the corresponding holes on the cabinet frame. Once aligned, secure the hinges by tightening the screws.
4. Install the hardware: With the cabinet doors in place, it’s time to install the hardware, such as knobs and handles. Refer to your labeling system to match each piece of hardware with its designated location. Secure the hardware using the provided screws or fasteners.
5. Check for alignment: Once all the doors and hardware are installed, double-check for proper alignment. Make any necessary adjustments to ensure that the doors open, close, and hang straight. This step will ensure that your cabinets not only look great but also function effectively.
6. Clean and polish: After the reinstallation process is complete, take the time to clean and polish the cabinet doors and hardware. Use a mild cleaner to remove any smudges or fingerprints and give the cabinets a final shine.
With the cabinet doors and hardware reinstalled, take a step back and admire your newly stained and sealed kitchen cabinets. The transformation is complete, and your kitchen now has a refreshed and beautiful look that will be enjoyed for years to come.
Conclusion
Congratulations! You’ve successfully learned how to stain kitchen cabinets and have completed the process from start to finish. By following the steps outlined in this expert guide, you have transformed your kitchen with a beautiful and professional-looking finish. Staining your cabinets not only enhances the natural beauty of the wood but also extends their lifespan, making them more durable and resistant to daily wear and tear.
Throughout this guide, you’ve learned the importance of proper preparation, including cleaning, sanding, and applying a primer. These steps provide a solid foundation for the stain to adhere to, ensuring a smooth and even finish. You’ve also discovered the significance of choosing the right stain color to complement your kitchen’s style and how to apply it properly, allowing the wood’s grain to shine through.
Sealing the cabinets with a high-quality sealer is the final touch that protects the stained finish and ensures its longevity. The sealer acts as a barrier against moisture, scratches, and other potential damage, keeping your cabinets looking beautiful for years to come.
Remember, the key to a successful staining project is attention to detail and patience. Take your time during each step, ensuring that the surfaces are properly prepared, the stain is applied evenly, and the sealer is allowed to dry and cure. The end result will be a kitchen that exudes warmth, elegance, and a personalized touch.
Now that you have acquired the knowledge and skills to stain kitchen cabinets, you can confidently tackle other home improvement projects in the future. Whether it’s updating bathroom cabinets, refinishing furniture, or revitalizing other wood surfaces, you have the expertise to achieve professional-quality results.
Enjoy your newly transformed kitchen and the satisfaction of a job well done. Embrace the beauty and warmth that stained cabinets bring to your space, and relish in the compliments you’ll receive from friends and family. Happy staining!
Ready to tackle more home projects? If you loved transforming your kitchen cabinets, you'll definitely enjoy diving into the world of DIY projects. Whether you're looking to spruce up your space or tackle something new, learning about DIY projects offers endless creativity and satisfaction. And for those who enjoy a fresh coat of paint, discovering new painting techniques can elevate any room in your home. With expert tricks, you can achieve a professional finish that impresses all who step through your door.
Frequently Asked Questions about How To Stain Kitchen Cabinets: An Expert Guide
Was this page helpful?
At Storables.com, we guarantee accurate and reliable information. Our content, validated by Expert Board Contributors, is crafted following stringent Editorial Policies. We're committed to providing you with well-researched, expert-backed insights for all your informational needs.


0 thoughts on “How To Stain Kitchen Cabinets: An Expert Guide”