Home>Interior Design>How To Tile A Fireplace: An Expert Reno Guide
Interior Design
How To Tile A Fireplace: An Expert Reno Guide
Modified: October 20, 2024
Transform your fireplace with our expert interior design guide on how to tile a fireplace. Upgrade your space and create a stunning focal point for your home renovation.
(Many of the links in this article redirect to a specific reviewed product. Your purchase of these products through affiliate links helps to generate commission for Storables.com, at no extra cost. Learn more)
Introduction
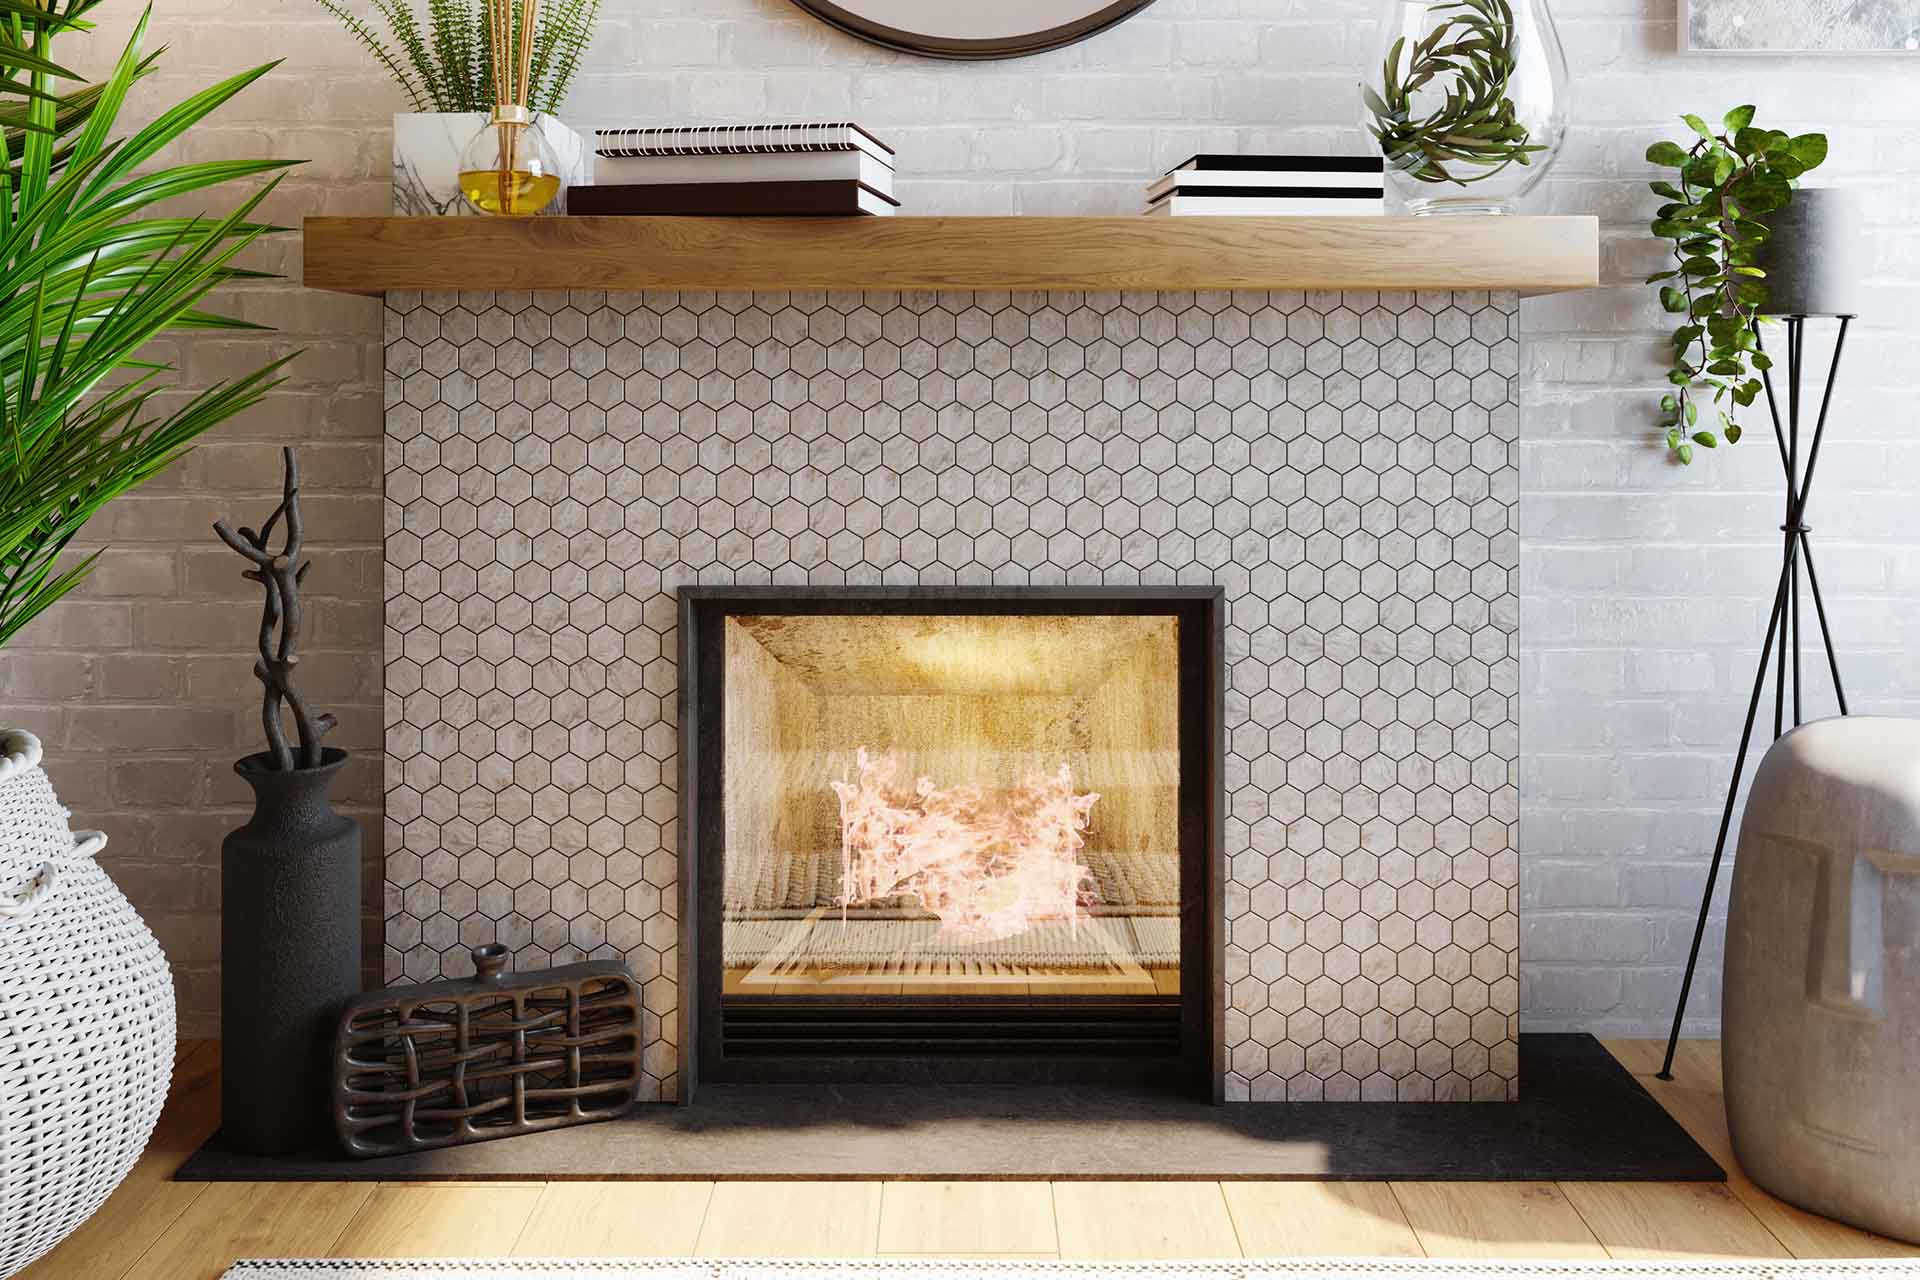
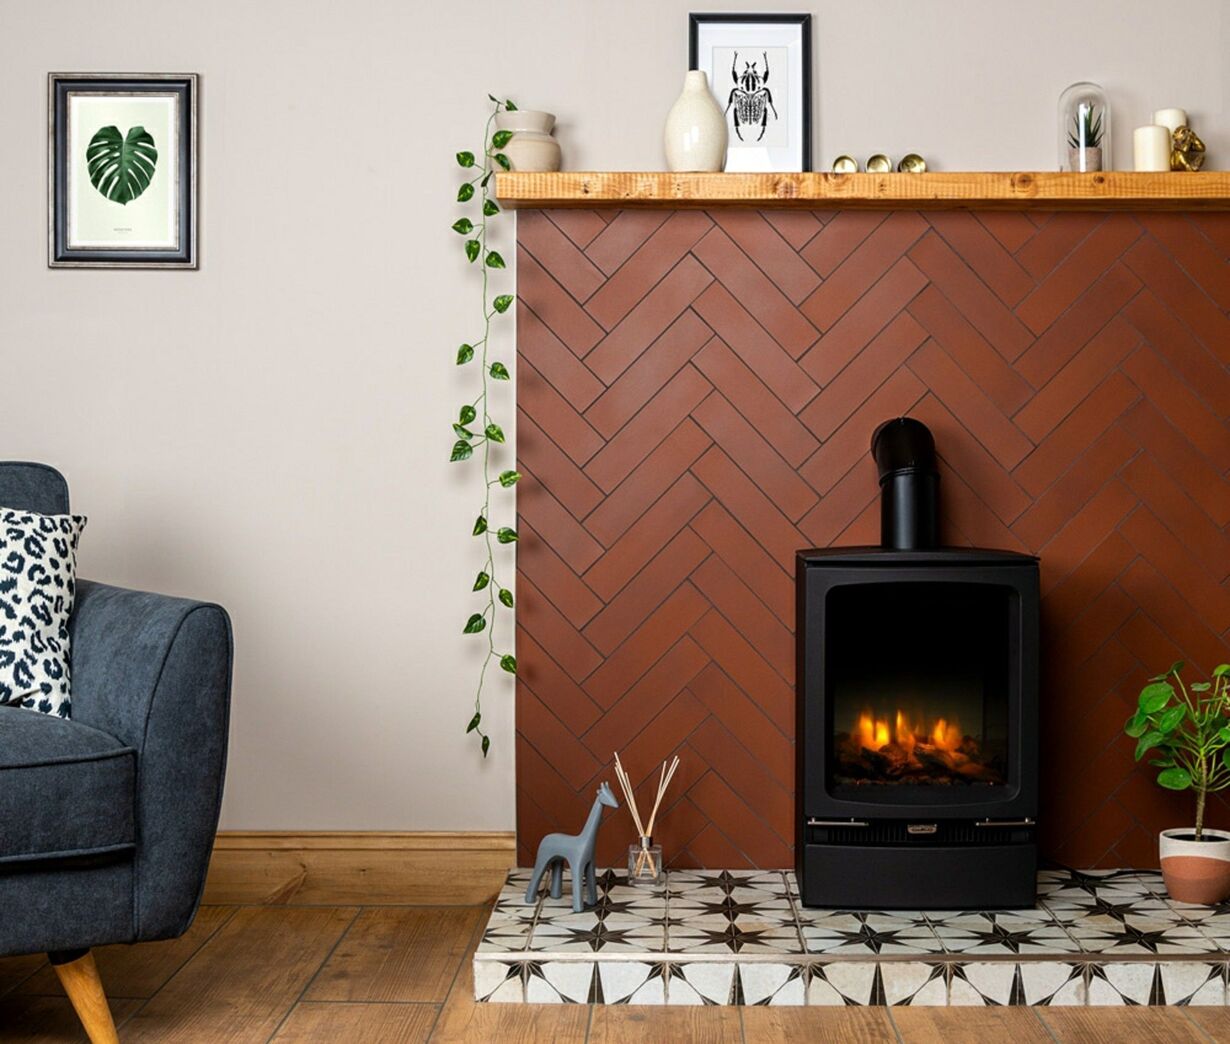
Tiling a fireplace is a fantastic way to add style and personality to your living space. Whether you want to update the existing fireplace or give it a complete makeover, tiling can transform it into a stunning focal point in your home. With the right tools, materials, and some expert guidance, you can achieve a professional-looking result that enhances the overall aesthetic appeal of your space.
In this expert renovation guide, we will walk you through the step-by-step process of how to tile a fireplace. You’ll learn all the essential techniques, tips, and tricks to ensure a successful and visually appealing fireplace renovation project.
Before you get started, it’s important to assess the condition of your fireplace. Look for any signs of damage, cracks, or loose materials. If you notice any structural issues, it’s essential to address them before proceeding with the tiling project. Consulting a professional if needed will ensure the safety and longevity of your fireplace.
Once you’ve assessed the condition of your fireplace and confirmed it’s in good shape, you can gather the necessary tools and materials required for the tiling project. Depending on your preferred tile type and design, you may need a variety of tools such as a tile cutter, adhesive applicator, trowel, grout float, and a sponge.
Preparing the surface of the fireplace is a crucial step to ensure proper adhesion of the tiles. Clean the surface thoroughly, removing any dust, dirt, or grease using a mild detergent and a scrub brush. Next, you may need to roughen the surface with sandpaper to create a better grip for the adhesive.
Measuring and cutting the tiles accurately is essential for a seamless and professional finish. Take precise measurements of the fireplace area and plan the layout of the tiles accordingly. Using a tile cutter or a wet saw, carefully cut the tiles to fit the specific dimensions of the fireplace.
Now it’s time to start tiling. Apply a thin layer of tile adhesive to the surface of the fireplace using the recommended adhesive applicator. Start placing the tiles on the adhesive, gently pressing them down and ensuring they are level and evenly spaced. Work in small sections to prevent the adhesive from drying out before you can place the tiles.
Once all the tiles are in place, it’s time to grout. Fill the gaps between the tiles with grout using a grout float, making sure to press it firmly into the spaces. Wipe away any excess grout from the tiles using a damp sponge, being careful not to remove too much grout from the gaps.
After the grout has dried, it’s important to clean the tiles thoroughly. Use a damp sponge or cloth to remove any grout haze or residue from the surface of the tiles. Finally, consider sealing the tiles to protect them from stains and enhance their durability.
By following these step-by-step instructions, you can successfully tile your fireplace and create a stunning focal point in your living space. Remember to exercise caution, use proper safety equipment, and consult professionals if needed. Happy tiling!
Key Takeaways:
- Transform your fireplace into a stunning focal point by following expert tiling techniques. From assessing the condition to grouting and sealing, achieve a professional and visually appealing renovation.
- Tiling your fireplace not only enhances aesthetics but also provides a durable, low-maintenance option. Unleash your creativity and enjoy the timeless elegance of a beautifully tiled fireplace.
Step 1: Assess the Fireplace Condition
Before embarking on your fireplace tiling project, it’s crucial to assess the condition of your fireplace. This step is essential to ensure a successful and long-lasting renovation.
First, carefully examine the fireplace for any signs of damage or structural issues. Look for cracks, loose mortar, or deteriorating materials. If you notice any significant problems, it’s essential to address them before proceeding with the tiling project. Consulting a professional is recommended if you’re unsure about the stability and safety of your fireplace.
In addition to structural issues, consider the overall cleanliness of the fireplace surface. Remove any existing tiles, paint, or other coatings to create a clean and even surface for the new tiles. If there is an existing tile surface, ensure it is intact, firmly adhered, and free from any cracks or damage.
Furthermore, assess the dimensions and shape of the fireplace. Take accurate measurements of the width, height, and depth of the fireplace opening. If your fireplace has any irregularities in shape, such as arches or curved edges, take note of them for the tile cutting and placement processes later on.
Lastly, evaluate the material of the existing fireplace surround. Different materials may require different preparation methods and adhesives. For example, if your fireplace has a brick or stone surround, you may need to roughen the surface with sandpaper to create a better bond with the adhesive. If the fireplace surround is made of drywall or wood, you may need to apply a layer of backer board or cement backer board to provide a stable and waterproof surface for the tiles.
By thoroughly assessing the condition of your fireplace, you can ensure that it is ready for the tiling process. Addressing any structural issues, preparing the surface, and taking accurate measurements will set the foundation for a successful fireplace renovation. Remember, if you have any doubts or concerns about the condition of your fireplace, it’s always best to consult a professional before proceeding with the tiling project.
Step 2: Gather Necessary Tools and Materials
Now that you’ve assessed the condition of your fireplace, it’s time to gather all the necessary tools and materials for your tiling project. Having everything on hand before you start will save you time and ensure a smooth and efficient process.
Here are the essential tools and materials you’ll need:
- Tiles: Choose tiles that suit your design preferences and fit the style of your space. Porcelain, ceramic, and natural stone tiles are popular options for fireplace tiling. Consider the size, shape, color, and texture of the tiles to achieve the desired aesthetic.
- Tile Cutter: A tile cutter is a must-have tool for cutting the tiles to fit the dimensions of your fireplace. There are different types of tile cutters, such as manual tile cutters and wet saws. Select a tile cutter that suits your tile material and cutting requirements.
- Adhesive: Select a high-quality tile adhesive suitable for your fireplace surface and tile material. Look for adhesive specifically designed for heat resistance if you have a wood-burning fireplace.
- Adhesive Applicator: An adhesive applicator, such as a trowel or notched trowel, is essential for applying adhesive evenly onto the fireplace surface.
- Grout: Choose a grout color that complements your tile choice and desired aesthetic. Ensure that the grout is suitable for both interior use and the temperature variations associated with a fireplace.
- Grout Float: A grout float is used to spread the grout evenly into the gaps between the tiles.
- Sponge: A sponge is necessary for cleaning excess grout from the surface of the tiles during the grouting process.
- Bucket of Water: Keep a bucket of clean water nearby for rinsing the sponge and for cleaning the tiles.
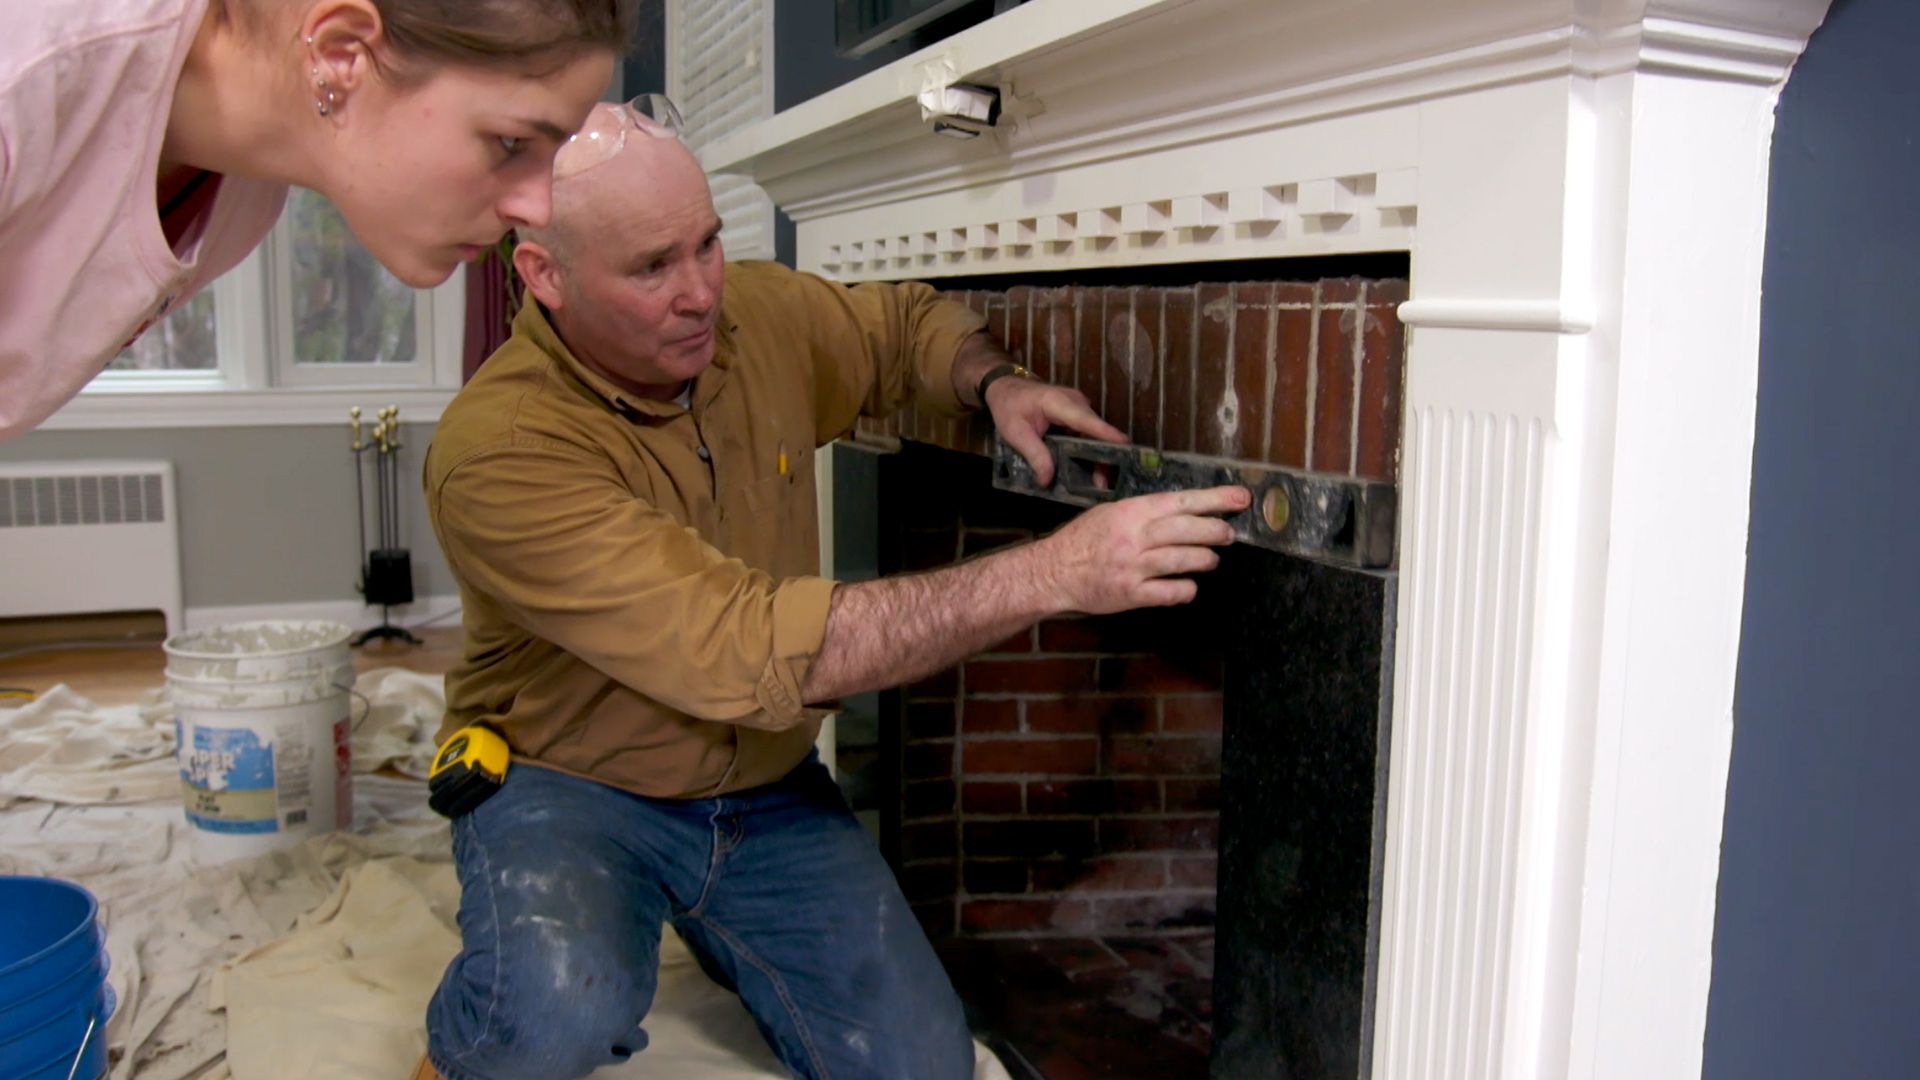
- Level: A level is essential for ensuring that your tiles are installed evenly and not crooked.
- Tape Measure: Accurate measurements are crucial for planning the layout of your tiles. Use a tape measure to measure the dimensions of your fireplace and tiles.
- Safety Equipment: It’s important to prioritize safety during your tiling project. Wear safety goggles, gloves, and a dust mask to protect yourself from any potential hazards like tile dust or sharp edges.
By gathering all the necessary tools and materials before starting your project, you can work efficiently and avoid unnecessary delays. Having everything readily available will also make it easier to focus on the tiling process and achieve a professional-looking result.
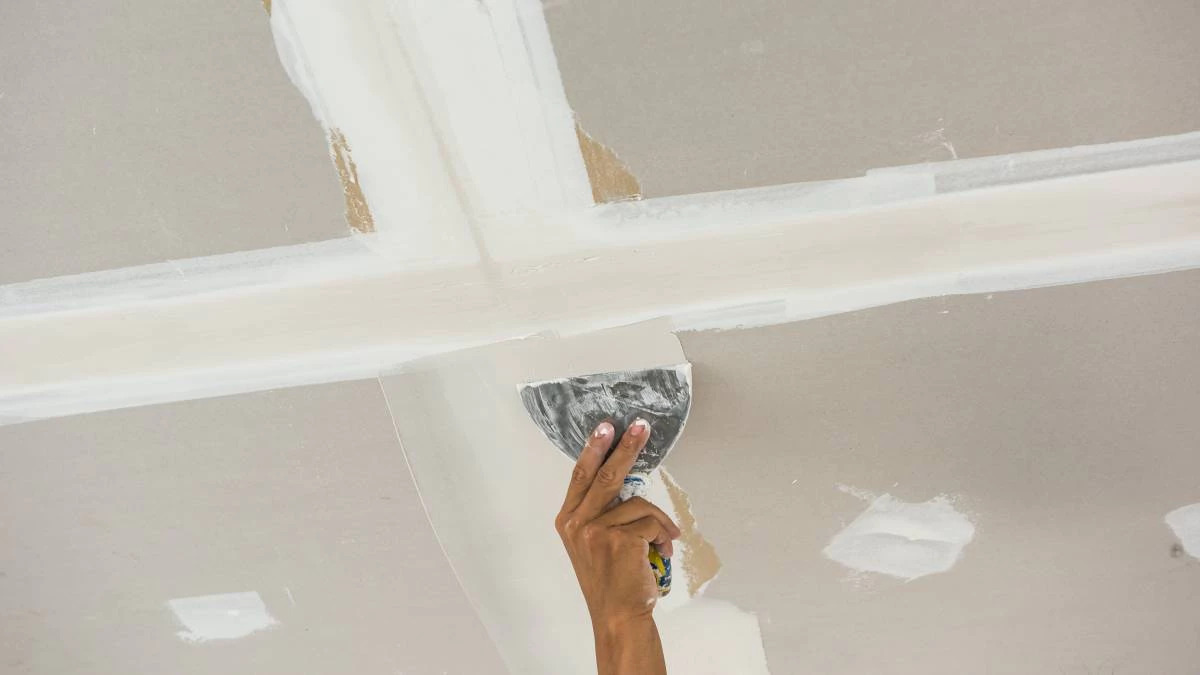
Step 3: Prepare the Fireplace Surface
Preparing the surface of your fireplace is a critical step in ensuring a successful tiling project. Proper preparation will help the tiles adhere securely and create a smooth and professional finish. Follow these steps to prepare the fireplace surface:
- Clean the Surface: Start by thoroughly cleaning the fireplace surface. Remove any dirt, dust, or debris using a mild detergent or a specialized fireplace cleaner. Scrub the surface gently with a brush to ensure it’s free from any loose particles. Ensure that the surface is completely dry before proceeding to the next step.
- Repair Cracks and Damage: Inspect the fireplace surface for any cracks, chips, or other damage. Use appropriate repair materials to fix any issues. For smaller cracks, you may be able to use a fireplace sealant. If you have larger cracks or significant damage, it’s advisable to consult a professional for repairs before proceeding with the tiling project.
- Roughen the Surface: Depending on the material of your fireplace, you may need to roughen the surface to create a better bond between the adhesive and the tiles. For a brick or stone surround, use sandpaper to lightly roughen the surface. This will enhance the grip of the adhesive. If your fireplace has a smooth surface, such as drywall or wood, consider applying a thin layer of primer or a cement backer board to create a rougher surface for the tiles to adhere to.
- Protect Surrounding Areas: Before applying any adhesive or grout, protect the surrounding areas of your fireplace. Cover nearby flooring, furniture, and other items with drop cloths or plastic sheets to prevent any damage from adhesive or grout splatter. Use painter’s tape to secure the coverings and ensure they stay in place.
- Apply a Thin Layer of Adhesive: Once the surface is clean, repaired, and prepared, it’s time to apply the adhesive. Follow the manufacturer’s instructions for the specific adhesive you’re using. Use an adhesive applicator, such as a trowel or notched trowel, to spread a thin, even layer of adhesive onto the fireplace surface. Work in small sections to prevent the adhesive from drying out before you can place the tiles.
By properly preparing the surface of your fireplace, you create an ideal foundation for the tiling project. Cleaning the surface, repairing any damage, roughening the surface if necessary, and applying a thin layer of adhesive will help ensure a strong bond between the tiles and the fireplace. This will result in a durable and visually appealing finished product.
Step 4: Measure and Cut the Tiles
Accurate measurements and precise tile cutting are crucial for achieving a professional and seamless finish in your fireplace tiling project. Follow these steps to measure and cut the tiles:
- Measure the Fireplace: Start by measuring the dimensions of the fireplace area where the tiles will be installed. Measure the width, height, and depth of the surface. Take precise measurements to ensure that you have enough tiles to cover the entire area without any gaps.
- Plan the Tile Layout: With the measurements in hand, plan the layout of your tiles. Consider any architectural features or design preferences you have. This step will help you determine where to start tiling and how the tiles will be positioned on the fireplace surface. You may want to use a pencil to mark the layout on the surface for reference.
- Account for Tile Spacing: Keep in mind that you will need to leave a small gap between each tile for grout. Typically, a 1/8-inch to 1/4-inch gap is suitable. Adjust your measurements accordingly to include the spacing between the tiles.
- Mark and Cut the Tiles: Using the measurements and layout plan, mark the tiles that need to be cut. Measure and mark each tile individually, accounting for any irregularities in the fireplace surface, such as curves or edges. Use a tile cutter or a wet saw to cut the tiles according to your marked measurements. Take your time and follow the manufacturer’s instructions for using the tile cutting tool.
- Test the Fit: Once a tile is cut, test its fit on the fireplace surface before applying adhesive. Make any necessary adjustments to ensure that the tile fits properly. It’s better to make small adjustments during this stage rather than trying to correct a mistake after the tile is already adhered.
Remember to work carefully and double-check your measurements before cutting the tiles. It’s also a good idea to order a few extra tiles to allow for any mistakes or unexpected breakages during the cutting process. Proper planning, precise measurements, and accurate tile cutting will result in a professional and visually appealing fireplace tiling project.
When tiling a fireplace, make sure to use heat-resistant tiles and mortar to withstand the high temperatures. It’s also important to measure and plan the layout carefully before starting the tiling process.
Step 5: Apply Adhesive and Start Tiling
With the tiles measured and cut to the appropriate size, it’s time to apply the adhesive and start tiling your fireplace. Follow these steps to ensure a successful and smooth tiling process:
- Prepare the Adhesive: Read and follow the manufacturer’s instructions to prepare the tile adhesive. Mix it thoroughly according to the recommended ratios and let it sit for a few minutes to activate.
- Start with the Backdrop: Begin tiling from the backdrop of your fireplace. Apply a thin layer of adhesive onto the surface using an adhesive applicator, such as a trowel or notched trowel. Spread the adhesive evenly, ensuring consistent coverage.
- Place the Tiles: Carefully place the first tile onto the adhesive, gently pressing it into place. Use a level to ensure that the tile is straight and aligned with your layout plan. Place tile spacers between the tiles to create even gaps for the grout.
- Continue Tiling: Work systematically, applying adhesive and placing tiles one by one in the desired pattern and layout. Make sure each tile is level and properly aligned with the previous tiles. Use tile spacers as needed to maintain consistent spacing between the tiles.
- Tile Cutting: As you reach the edges of the fireplace or encounter areas that require smaller tiles, use your pre-cut tiles to fit them in the designated spaces. Depending on your fireplace design, you may need to make additional cuts to achieve the desired fit. Take your time, and double-check the measurements and fit before applying adhesive to the smaller cut pieces.
- Work in Small Sections: It’s best to work in small sections, applying adhesive and placing tiles gradually. This prevents the adhesive from drying out before you can place the tiles, ensuring a strong bond between the tiles and the fireplace surface.
- Check for Level and Alignment: Periodically check the level and alignment of the tiles as you progress. Adjust them as needed to maintain a consistent, straight, and visually pleasing result.
Throughout the tiling process, be mindful of the adhesive drying time and follow the manufacturer’s instructions regarding setting time. Avoid applying excessive adhesive that can seep through the gaps between the tiles. If any adhesive gets on the tile surface, wipe it off immediately with a damp cloth or sponge.
Working patiently and meticulously will ensure a beautiful and well-organized tiling pattern. Take your time to achieve the desired look and pay attention to small details that will enhance the overall aesthetic of your fireplace.
Once you’ve completed tiling the entire fireplace surface, allow the adhesive to dry for the recommended period specified by the manufacturer. Avoid touching or disturbing the tiles during this drying time to ensure a strong and durable bond.
Congratulations! You’re well on your way to transforming your fireplace with stylish tiles. The next step is grouting the tiles to create a finished look and strengthen the overall structure of the tiled fireplace.
Step 6: Grout the Tiles
Grouting is a crucial step in the tiling process that not only enhances the aesthetic appeal of your fireplace but also strengthens the bond between the tiles. Follow these steps to properly grout the tiles:
- Select the Right Grout: Choose a grout color that complements your tile design and personal style. It’s important to select a grout specifically designed for interior use and suitable for the temperature variations associated with a fireplace. Consider factors such as grout type (sanded or unsanded) and the width of your tile gaps when selecting the appropriate grout product.
- Mix the Grout: Read and follow the manufacturer’s instructions to mix the grout correctly. Add the grout powder to a clean bucket, then gradually add water while stirring. Aim for a smooth and creamy consistency. Let the grout sit for a few minutes to activate.
- Apply the Grout: Using a grout float, scoop a generous amount of grout onto the float and spread it diagonally across the tiles, pressing it into the gaps. Work in small sections to ensure that the grout stays moist and workable. Hold the grout float at a 45-degree angle to the tiles to fill the gaps effectively.
- Remove Excess Grout: After applying the grout, use the grout float or a damp sponge to carefully remove any excess grout from the tile surface. Hold the sponge at a 45-degree angle and gently wipe across the tiles diagonally to avoid pulling out the grout from the gaps.
- Clean the Tiles: Once you have removed the excess grout, continue to clean the tiles with a clean, damp sponge. Rinse the sponge frequently in a bucket of clean water to avoid spreading grout residue. Ensure that you do not remove too much grout from the gaps during the cleaning process.
- Cure and Seal the Grout: Allow the grout to cure for the time recommended by the manufacturer. This typically ranges from 24 to 48 hours. During this curing period, keep the fireplace area dry and avoid touching or disturbing the grout. Once the grout is fully cured, consider applying a grout sealer to protect the grout from stains and moisture. Follow the manufacturer’s instructions for the appropriate curing and sealing process.
Take your time and work meticulously when grouting the tiles. Ensuring proper coverage and cleaning up excess grout will result in a polished and professional-looking finish. A well-grouted fireplace not only enhances the visual appeal but also creates a durable and long-lasting tiled surface.
Once the grouting process is complete and the grout has fully cured, you’re almost done with your fireplace tiling project! The final step is to clean and seal the tiles to maintain their beauty and protect them from potential damage.
Step 7: Clean and Seal the Tiles
After completing the grouting process, the final step in your fireplace tiling project is to clean and seal the tiles. This will ensure the longevity and beauty of your tiled fireplace. Follow these steps to properly clean and seal the tiles:
- Clean the Tiles: Once the grout has fully cured, use a clean sponge or cloth to wipe down the tiles and remove any remaining grout haze or residue. Dampen the sponge with clean water and gently scrub the tile surface to achieve a clean and polished look. Avoid using any abrasive cleaners or materials that could scratch the tiles.
- Inspect for Stains or Dullness: After cleaning the tiles, inspect the surface for any stains or areas that may appear dull. If necessary, you can use a mild tile cleaner or specific stain-removing products designed for the type of tile you installed. Follow the manufacturer’s instructions for these specialized cleaners and avoid harsh chemicals that could damage the tiles.
- Allow Tiles to Dry: After cleaning, allow the tiles to dry completely before proceeding to the sealing process. Ensure that the fireplace area is well-ventilated to facilitate the drying process.
- Apply Tile Sealer: Applying a tile sealer is an essential step in protecting the tiles from stains, moisture, and everyday wear and tear. Select a tile sealer that is suitable for the type of tile you have used and follow the manufacturer’s instructions for application. Use a paintbrush or a sponge applicator to evenly apply the sealer onto the tiles and grout lines. Allow the sealer to penetrate the surface and follow the recommended curing time.
- Wipe off Excess Sealer: After the sealer has cured, use a clean cloth or sponge to gently wipe away any excess sealer from the tile surface. Be cautious not to disturb the freshly sealed grout lines, as it may take longer for them to fully cure.
- Let the Sealer Dry Completely: Allow the sealer to dry completely, following the recommended drying time specified by the manufacturer. Avoid using the fireplace or coming into contact with the tiles until the sealer has fully dried.
Regular maintenance and cleaning are essential to preserve the appearance and longevity of your tiled fireplace. Ensure you follow proper cleaning practices and use gentle, non-abrasive cleaners to protect the tiles and grout. It’s advisable to periodically reapply the sealer to maintain the protective barrier on the tiles.
Congratulations! You have successfully completed your fireplace tiling project. Enjoy the beauty and warmth of your newly tiled fireplace, knowing that you have achieved a professional and long-lasting renovation.
Conclusion
Tiling a fireplace is a rewarding and creative project that can breathe new life into your living space. By following the step-by-step guide outlined in this article, you have learned how to transform your fireplace into a stunning focal point. From assessing the condition of the fireplace to cleaning and sealing the tiles, each step is essential to achieve a professional and visually appealing renovation.
Throughout the process, remember to work carefully, taking accurate measurements, and following the manufacturer’s instructions for adhesive, grout, and sealer. Patience and attention to detail will ensure a seamless and beautiful result.
Tiled fireplaces not only enhance the aesthetic appeal of your home but also provide a durable and low-maintenance option. With a wide variety of tile options available, you can unleash your creativity and customize your fireplace to match your unique style and personal preferences.
Whether you are completely updating the look of your fireplace or simply refreshing the existing design, tiling is an excellent choice. It adds a touch of sophistication, charm, and timeless elegance to any living space.
Remember to prioritize safety throughout the process, using the appropriate safety equipment and consulting professionals if needed. Always double-check your measurements, prepare the surface adequately, and take the time to achieve a precise fit and finish.
With your newly tiled fireplace, you’ll create a warm and inviting atmosphere that will be the envy of your friends and family. So go ahead, unleash your creativity, and enjoy the transformation of your fireplace into a stunning work of art.
Happy tiling!
Frequently Asked Questions about How To Tile A Fireplace: An Expert Reno Guide
Was this page helpful?
At Storables.com, we guarantee accurate and reliable information. Our content, validated by Expert Board Contributors, is crafted following stringent Editorial Policies. We're committed to providing you with well-researched, expert-backed insights for all your informational needs.


0 thoughts on “How To Tile A Fireplace: An Expert Reno Guide”