Home>Interior Design>No-Carve Pumpkin Ideas: 18 Easy Designs, No Knives Needed
Interior Design
No-Carve Pumpkin Ideas: 18 Easy Designs, No Knives Needed
Modified: October 20, 2024
Discover creative and knife-free no-carve pumpkin ideas for your Halloween decorations. Get inspired with 18 easy designs that require no carving.
(Many of the links in this article redirect to a specific reviewed product. Your purchase of these products through affiliate links helps to generate commission for Storables.com, at no extra cost. Learn more)
Introduction
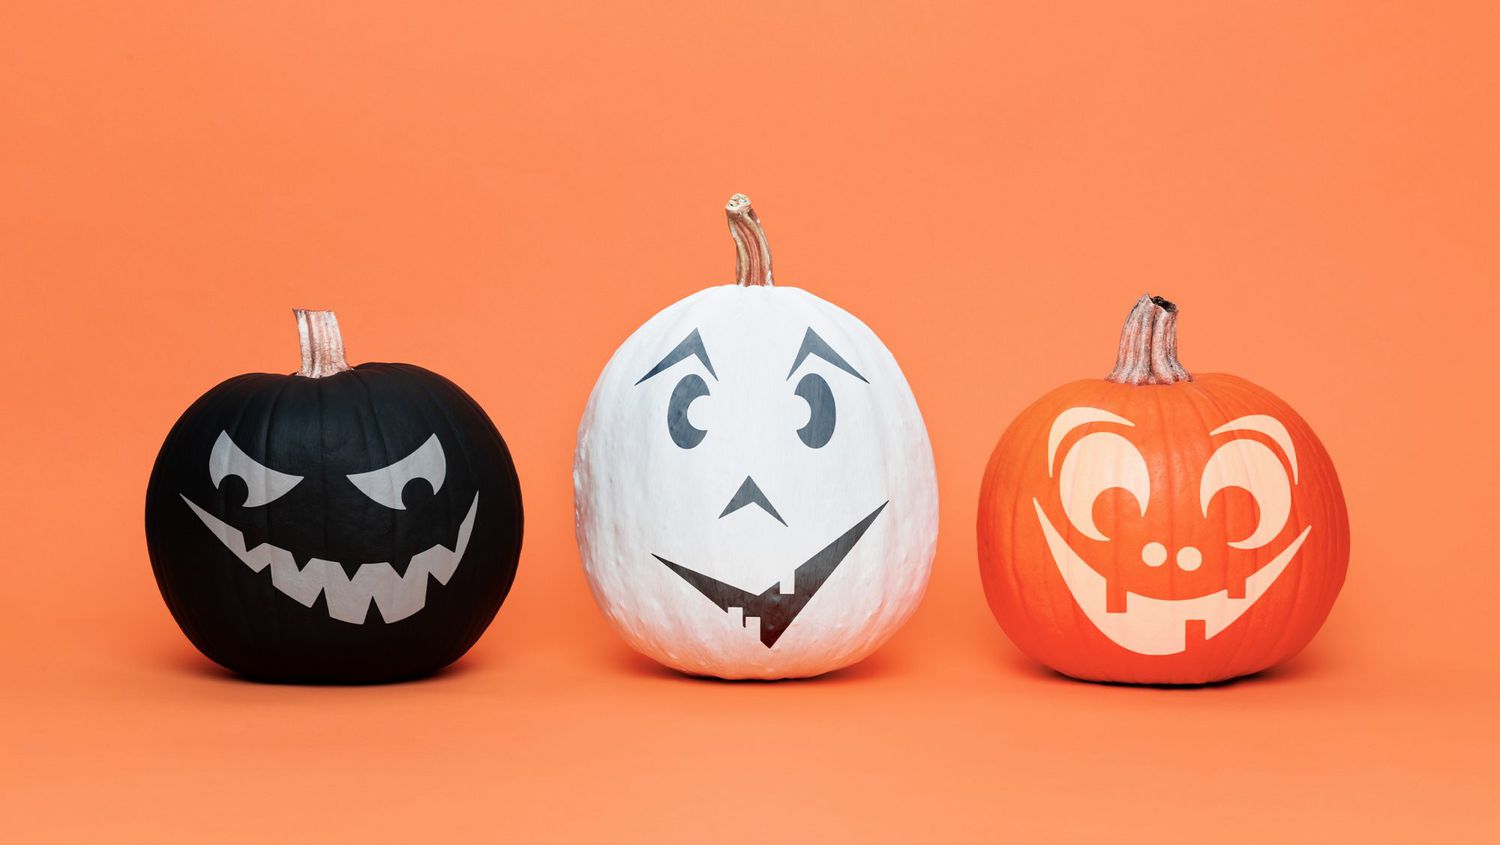
When it comes to decorating for Halloween, carving pumpkins has long been a beloved tradition. However, not everyone enjoys the mess and potential danger of using sharp knives. Fortunately, there are plenty of no-carve pumpkin ideas that allow you to create stunning designs without the need for any knives. Whether you’re looking for a fun activity to do with the kids or just want to try something new, these 18 easy designs are sure to inspire you.
No-carve pumpkins offer a variety of benefits. They are safer, especially for young children, as there is no risk of accidental cuts or injuries. These designs are also mess-free, eliminating the need for scraping out pumpkin guts or dealing with pumpkin debris. Additionally, no-carve pumpkins have a longer lifespan compared to carved ones, allowing you to enjoy your creations for even longer.
With the right materials and a bit of creativity, you can transform plain pumpkins into works of art. From melted crayons to glitter and stencils, the possibilities are endless. So, put away those knives and get ready to discover the world of no-carve pumpkin designs.
Key Takeaways:
- No-carve pumpkin designs offer a safe, mess-free, and versatile alternative to traditional carving. From melted crayon to button and flower power pumpkins, there’s a design to suit every artistic style and preference.
- Embrace the creativity of no-carve pumpkin designs and unleash your imagination with vibrant and unique pumpkins. Ditch the knives and enjoy the fun and engaging activity of crafting imaginative and captivating Halloween decor.
Melted Crayon Pumpkins
If you have some old crayons lying around, a melted crayon pumpkin design can be a colorful and unique option. Start by gathering a selection of crayons in your desired colors. Next, remove any paper wrappers and break the crayons into small pieces.
Preheat your oven to a low temperature and line a baking sheet with parchment paper. Place your pumpkin on the baking sheet and arrange the crayon pieces on top. Make sure to cover the entire surface of the pumpkin.
Once your oven is preheated, carefully place the baking sheet inside and let the crayons melt for about 10-15 minutes. Keep an eye on the pumpkin to ensure the crayons don’t overheat and drip off completely. If necessary, you can use a heat gun or hairdryer to help the melting process.
After the crayons have melted to your desired look, carefully remove the pumpkin from the oven and let it cool. The melted crayon design will create vibrant drips and patterns down the sides of the pumpkin, resulting in a stunning and colorful centerpiece for your Halloween display.
To add a personal touch, you can also use a hot glue gun to attach decorative items, such as small plastic spiders or bats, to the pumpkin before melting the crayons. This will create a whimsical and fun theme that is sure to impress your friends and family.
Remember to handle the melted crayon pumpkin with care, as the wax will be hot. Once it has cooled down completely, you can proudly display your unique creation for all to admire.
Thumbtack Pumpkins
If you’re looking for a no-carve pumpkin design that allows for intricate detailing, thumbtack pumpkins are an excellent choice. This design requires a bit of patience and precision, but the end result is absolutely stunning.
To get started, you’ll need a pumpkin, thumbtacks in various colors, and a design template or stencil. You can find printable templates online or create your own by drawing your desired design onto paper.
Secure the template or stencil onto the pumpkin using tape or pins to keep it in place. Then, begin pushing the thumbtacks into the pumpkin along the outline of the design. For more intricate details, you can use smaller thumbtacks or create patterns by arranging the thumbtacks in a specific formation.
Continue adding thumbtacks until you have filled in the entire design. You can create a monochromatic look by using thumbtacks in a single color, or mix and match different colors for a more vibrant effect.
Thumbtack pumpkins offer a variety of design possibilities. You can create spooky Halloween scenes, geometric patterns, or even spell out words or initials using the thumbtacks. The only limit is your imagination!
Once you’ve completed the design, step back and admire your masterpiece. Thumbtack pumpkins make for a unique and eye-catching addition to your Halloween decor. They can be placed on a table, displayed on a mantle, or even used as a centerpiece for your Halloween party.
With their intricate detailing and endless design options, thumbtack pumpkins are sure to impress your guests and showcase your creativity. So, grab some thumbtacks and a pumpkin, and get ready to create a truly impressive no-carve design that will wow everyone who sees it.
Glitter Pumpkins
For those who love a touch of sparkle and glamour, glitter pumpkins are the perfect no-carve option. This design is simple yet dazzling, adding a festive and elegant touch to your Halloween decorations.
To create your glitter pumpkin, you’ll need a pumpkin, craft glue or adhesive spray, and glitter in your desired color or colors. You can choose classic orange, go for a chic black and silver combination, or even opt for vibrant and bold colors to match your personal style.
Start by applying a thin layer of craft glue or adhesive spray all over the surface of the pumpkin. You can do this in sections or cover the entire pumpkin at once, depending on your preference.
Once the glue is applied, it’s time to add the glitter. Sprinkle the glitter generously over the glued areas, making sure to cover all surfaces evenly. You can roll the pumpkin in a tray of glitter or use a spoon to sprinkle it on. Gently press the glitter onto the pumpkin to ensure it adheres well.
Allow the glitter to dry completely and shake off any excess. You might want to repeat the process to achieve a more intense sparkle, especially if you’re using fine or chunky glitter.
Glitter pumpkins look beautiful as standalone decorations or as part of a festive centerpiece. You can add some extra flair by gluing on sequins, rhinestones, or other decorative elements that complement the glitter.
Whether you’re aiming for a glamorous look or simply want to make your pumpkin shimmer and shine, glitter pumpkins offer a quick and easy way to achieve a gorgeous aesthetic.
Remember to handle the glitter pumpkin with care to avoid getting glitter all over your hands or clothing. Once you’re done, find the perfect spot to showcase your sparkling creation and watch as it catches the light and adds a touch of magic to your Halloween decor.
Decoupage Pumpkins
If you’re a fan of collage and mixed-media art, decoupage pumpkins are an excellent way to showcase your creativity and add a personalized touch to your Halloween decorations. This technique involves adhering cut-out images or decorative paper to the surface of the pumpkin, resulting in a unique and eye-catching design.
To get started with decoupage pumpkins, gather your materials. You’ll need a pumpkin, Mod Podge or a similar crafting adhesive, a foam brush or paintbrush, and decorative paper or images. You can use magazine cut-outs, tissue paper, scrapbook paper, or even fabric to create interesting textures and patterns.
Begin by cutting out your chosen designs or tearing the paper into various shapes. This can include spooky Halloween motifs, autumn leaves, or any other images that appeal to you and fit the theme. Arrange the cut-outs on the pumpkin to plan out your design.
Once you have your design in mind, apply a thin coat of Mod Podge to the back of the paper and press it onto the pumpkin. Smooth out any wrinkles or air bubbles with your fingers or a clean brush. Repeat this process, adding more pieces of paper until the entire pumpkin’s surface is covered, or create a collage effect by overlapping layers of paper.
Once you’ve completed the decoupage process, apply a final coat of Mod Podge over the entire pumpkin to seal the design and give it a glossy finish. This will also help protect the paper from moisture and ensure your design lasts longer.
Decoupage pumpkins can be displayed as standalone decorations or incorporated into a festive centerpiece. They add a touch of vintage charm and can be personalized to match your individual style and artistic preferences.
With decoupage pumpkins, the possibilities are endless. You can create intricate scenes, showcase a favorite theme or pattern, or even make it a collaborative project by involving friends or family members in the design process.
Embrace your inner artist and let your imagination run wild with decoupage pumpkins. Enliven your Halloween decor with this creative and personalized no-carve option, and enjoy the unique charm it brings to your festive celebrations.
Paint Drip Pumpkins
If you’re looking for a modern and abstract take on pumpkin decorating, paint drip pumpkins are a trendy and artistic option. This no-carve design allows you to play with colors, create mesmerizing patterns, and add a contemporary touch to your Halloween decorations.
To create paint drip pumpkins, you’ll need a pumpkin, acrylic paint in your desired colors, and a brush or squeeze bottle. Start by selecting a color palette that suits your taste and the overall aesthetic you’re aiming for. You can go for traditional Halloween colors like orange and black, or opt for bold and vibrant shades to make a statement.
Take your chosen paint colors and apply them directly to the top of the pumpkin. You can do this by squeezing the paint out of a bottle or by using a brush to carefully drizzle the paint onto the pumpkin’s surface.
Let the paint drip down naturally, creating unique patterns and designs. You can rotate the pumpkin or gently tilt it to guide the direction of the paint drips, allowing you to control the overall look of the design. Experiment with different colors and techniques to achieve your desired effect.
Once you’re satisfied with the paint drips, let the pumpkin dry completely. This may take a few hours or overnight, depending on the thickness and type of paint used. Avoid touching the paint until it’s fully dry to prevent smudging or ruining the design.
Paint drip pumpkins offer a contemporary and artistic twist to traditional pumpkin decorating. These eye-catching creations can be displayed on their own or grouped together to create a visually stunning centerpiece.
To add an extra touch, you can embellish your paint drip pumpkins with additional decorative elements, such as glitter, sequins, or even adhesive gems. This will further enhance the unique and modern look of your design.
Let your creativity flow with paint drip pumpkins, experiment with colors and techniques, and enjoy the artistic freedom that this no-carve option provides. These pumpkins will make a stylish and impactful statement in your Halloween decor, showcasing your artistic abilities and contemporary flair.
Washi Tape Pumpkins
If you’re a fan of DIY crafts, Washi tape pumpkins are a fantastic no-carve option that allows you to create intricate designs with ease. Washi tape, with its beautiful patterns and vibrant colors, adds a touch of whimsy and personality to your pumpkin decorations.
To create your Washi tape pumpkin, you’ll need a pumpkin and an assortment of Washi tapes in various colors and patterns. Washi tape can be found in craft stores or online, and it offers endless design possibilities.
Start by cleaning your pumpkin’s surface and ensuring it is dry. This will ensure that the Washi tape adheres well and sticks securely. Take your first Washi tape and gently press it onto the pumpkin’s surface, starting from the top or bottom and working your way around.
Continue adding strips of Washi tape, overlapping them slightly to create interesting patterns and designs. You can create vertical stripes, diagonal patterns, or even create your own unique shapes and motifs using different tapes.
Washi tape allows for easy customization and experimentation. If you don’t like the way a tape looks, you can simply peel it off and try a different one. You can also cut the Washi tape to create smaller shapes or use it to outline specific areas of the pumpkin.
For an added touch, you can layer different tapes to create a textured look or combine solid-colored tapes with patterned ones for a dynamic effect. The beauty of Washi tape is that it’s easy to remove and reposition, so don’t be afraid to get creative and try new ideas.
Washi tape pumpkins offer a fun and versatile way to decorate your pumpkins without the mess or risk associated with carving. They are also a great activity to do with kids, as they can easily handle the tapes and create their own designs.
Once you’re satisfied with your Washi tape design, display your pumpkin proudly as a funky and colorful addition to your Halloween decor. Whether you opt for a simple and minimalist look or go all out with intricate tape patterns, Washi tape pumpkins are sure to bring a playful and lighthearted vibe to your festive celebrations.
Sticker Pumpkins
For a quick and easy no-carve pumpkin design, stickers are the perfect solution. Sticker pumpkins offer endless possibilities for creativity and allow you to achieve intricate designs without the need for any artistic skills.
To get started, gather a variety of stickers that suit your Halloween theme or personal style. You can find stickers in craft stores, online shops, or even repurpose stickers from other projects. Look for stickers in different shapes, sizes, and colors to create an interesting and visually appealing design.
Begin by cleaning the surface of your pumpkin to ensure the stickers adhere well. If necessary, you can lightly wipe the pumpkin with a damp cloth and let it dry completely.
Once your pumpkin is clean and dry, start applying the stickers to the pumpkin’s surface. You can create a pattern by strategically placing the stickers in a specific arrangement or go for a more random design. Layer the stickers and mix and match different designs to create a visually captivating effect.
Sticker pumpkins offer versatility in design. You can create spooky themes with bats, spiders, and ghosts, or go for a more whimsical look with smiling faces, animals, and festive patterns. Let your imagination run wild and have fun experimenting with different sticker combinations.
If you want to add more dimension and texture to your sticker pumpkin, you can also incorporate other elements such as ribbon, fabric, or small embellishments. For example, you can tie a ribbon around the stem of the pumpkin or glue small fabric patches onto the surface, then decorate with stickers around them to create a unique and personalized design.
Sticker pumpkins are not only a great option if you’re short on time, but they are also perfect for kids who might not be old enough to handle carving tools. It’s a family-friendly activity that allows everyone to join in the creative process and decorate their own pumpkins.
Once your sticker pumpkin is complete, proudly display it as a decorative element in your Halloween setup. Whether it’s placed on a porch, a mantel, or as part of a festive centerpiece, sticker pumpkins will add a touch of charm and simplicity to your Halloween decor.
Ribbon Pumpkins
Ribbon pumpkins are a delightful and charming no-carve option that adds a touch of elegance and whimsy to your Halloween decorations. With a wide variety of ribbons available in different colors, patterns, and textures, you can create unique designs that suit your personal style and aesthetic.
To create a ribbon pumpkin, you’ll need a pumpkin and an assortment of ribbons in your desired colors and widths. Choose ribbons that complement your Halloween theme or go for a mix of patterns and textures to create visual interest.
To start, secure one end of a ribbon to the bottom of the pumpkin using a glue dot, hot glue, or a small straight pin. Begin wrapping the ribbon around the pumpkin, making sure to overlap each layer slightly to ensure complete coverage.
As you wrap the ribbon, try different techniques to create interesting patterns and designs. You can wrap the ribbon horizontally, diagonally, or even create a crisscross pattern. Experiment with different ribbons and widths to achieve your desired look.
For added dimension, you can alternate ribbons in different colors or textures. Mixing satin ribbons with grosgrain or adding a lace ribbon for a delicate touch can create a visually stunning effect.
Continue wrapping the ribbon around the pumpkin until the entire surface is covered. Secure the other end of the ribbon with another glue dot, hot glue, or pin, ensuring it is hidden beneath the layers of ribbon.
Ribbon pumpkins offer a versatile canvas for creativity. You can add additional embellishments such as bows, charms, or even small ornaments to enhance the design further. Let your imagination run wild and customize your ribbon pumpkin to match your unique style.
Once finished, proudly display your ribbon pumpkin as a centerpiece on your table, mantle, or porch. Its elegant and festive appearance will add a touch of sophistication to your Halloween decor and impress your guests.
Ribbon pumpkins are not only beautiful but also durable. Unlike carved pumpkins that decay over time, ribbon pumpkins can last throughout the entire Halloween season, allowing you to enjoy their decorative charm for longer.
So, gather your ribbons, embrace your creativity, and have fun creating stunning ribbon pumpkins that will make a stylish statement in your Halloween decor.
Read more: Small Kids Bedroom Mistakes – The Easy Design Errors You Can Make (and How To Avoid Them)
Masking Tape Pumpkins
Masking tape pumpkins offer a fun and versatile no-carve option that allows you to create unique designs and patterns with ease. With the wide array of colors and widths available, masking tape provides endless possibilities for creating eye-catching and decorative pumpkins.
To create a masking tape pumpkin, you’ll need a pumpkin and various rolls of masking tape in different colors and widths. You can choose colors that match your Halloween theme or go for a mix of vibrant and contrasting hues to make a bold statement.
To start, clean the surface of the pumpkin and ensure it is dry. This will ensure that the masking tape adheres well and stays in place. Once the pumpkin is cleaned, you can begin applying the masking tape.
Cut or tear small strips of masking tape and apply them directly to the pumpkin’s surface. You can create simple geometric patterns, stripes, or even abstract designs by overlapping and layering the tape. Let your creativity guide you as you experiment with different combinations and arrangements.
Masking tape pumpkins offer a great opportunity for collaboration and involvement. You can include friends or family members in the creative process and have each person contribute their own unique designs. It’s a fun and interactive activity that allows everyone to showcase their artistic talents.
If you make a mistake or want to change the design, don’t worry! The beauty of masking tape is that it can be easily peeled off and repositioned, allowing you to adjust the design as you go. This makes masking tape pumpkins a forgiving option for those who want to experiment and try different ideas.
Once you’ve completed your design, step back and admire your masking tape pumpkin creation. Whether you opt for a minimalistic look or go all-out with intricate patterns and colors, your pumpkin is sure to be a unique and eye-catching addition to your Halloween decor.
Display your masking tape pumpkin proudly on a table, mantle, or porch to showcase your creativity and add a touch of artistic flair to your Halloween celebrations. These vibrant and visually appealing pumpkins are sure to catch the attention of your guests and become a favorite part of your festive decor.
Use paint, stickers, and other craft supplies to create unique designs on your pumpkins without the need for carving. This is a safe and mess-free alternative for decorating pumpkins.
Lace Pumpkins
Lace pumpkins are a beautiful and elegant no-carve option that adds a touch of delicate charm to your Halloween decor. With their intricate patterns and ethereal texture, lace pumpkins create a unique and visually captivating display.
To create a lace pumpkin, you’ll need a pumpkin and lace fabric or lace trims in various designs and widths. Look for lace that matches your desired aesthetic, whether it’s intricate and detailed or more subtle and understated.
To start, clean the surface of the pumpkin and ensure it is dry. This will ensure that the lace adheres well and stays in place. Once the pumpkin is cleaned, you can begin applying the lace.
Measure and cut the lace fabric or trim to fit the size and shape of the pumpkin. You can choose a single piece to cover the entire pumpkin or mix and match different lace designs to create a layered effect.
Using a glue gun or adhesive, carefully attach the lace to the pumpkin. Start at the top or bottom and work your way around, smoothing out any wrinkles or air bubbles as you go. If you’re using multiple lace pieces, layer them strategically to create a visually appealing composition.
Lace pumpkins offer a versatile canvas for creativity. You can enhance the design further by adding additional embellishments such as ribbon, pearls, or small fabric flowers to complement the lace.
Display your lace pumpkin as a centerpiece on a table or mantle, or cluster several lace pumpkins together for a stunning display. The delicate beauty of lace adds an element of sophistication to your Halloween decor, creating a unique and enchanting ambiance.
Lace pumpkins are also a great option for repurposing old or vintage lace fabric. You can give new life to heirloom lace or repurpose lace from old clothing or linens, adding a sentimental touch to your Halloween decorations.
Embrace the elegance and charm of lace with lace pumpkins, and let them awe your guests with their intricate and delicate designs. These sophisticated no-carve pumpkins are sure to become a standout feature of your Halloween celebrations.
Chalkboard Paint Pumpkins
Chalkboard paint pumpkins offer a unique and interactive twist to traditional pumpkin decorating. With their matte surface, these pumpkins serve as a blank canvas for creativity, allowing you to draw, write, and erase designs to your heart’s content.
To create a chalkboard paint pumpkin, you’ll need a pumpkin and chalkboard paint, which can be found at your local craft store or online. Choose a chalkboard paint color that suits your style and complements your Halloween theme.
Start by cleaning the surface of the pumpkin and ensuring it is dry. This will ensure that the chalkboard paint adheres well and provides a smooth finish. Once the pumpkin is cleaned, you can begin applying the chalkboard paint.
Using a brush or foam roller, apply a thin and even coat of chalkboard paint to the pumpkin’s surface. Allow the first coat to dry completely, then apply additional coats as needed for full coverage. Follow the instructions on the paint container for the recommended drying time between coats.
Once the chalkboard paint is dry, you have a blank canvas to work with. Use chalk or chalk markers to draw or write your desired designs on the pumpkin. Get creative with spooky Halloween motifs, witty quotes, or even interactive games for children to enjoy.
One of the benefits of chalkboard paint pumpkins is the ability to erase and create new designs whenever you want. If you’re not happy with your initial artwork or want to change things up, simply use a damp cloth or chalkboard eraser to wipe away the chalk and start fresh.
Chalkboard paint pumpkins are a great option for parties or gatherings where guests can leave messages, draw their own designs, or participate in a creative activity. They can also serve as a fun and educational tool for young kids to practice writing and drawing.
Display your chalkboard paint pumpkin as a centerpiece or incorporate it into your Halloween decor, inviting your guests to unleash their creativity and engage with your unique and interactive pumpkin design.
With chalkboard paint pumpkins, the possibilities are endless. Let your imagination run wild and have fun exploring the versatility and playfulness of this no-carve option. Enjoy the process of creating, erasing, and recreating vibrant designs on your chalkboard paint pumpkin throughout the Halloween season.
Fabric Wrapped Pumpkins
Fabric-wrapped pumpkins offer a charming and cozy touch to your Halloween decor with their soft textures and warm colors. This no-carve option allows you to customize your pumpkins using various fabrics, giving them a unique and personalized look.
To create fabric-wrapped pumpkins, you’ll need a pumpkin and fabric of your choice. You can use an old shirt, scrap fabric, or even buy fabric specifically for this project. Look for fabrics that suit your style and the ambiance you want to create.
Start by cleaning the surface of the pumpkin to ensure it’s free from dirt and debris. Once dry, apply a small amount of glue to the top of the pumpkin to secure the fabric.
Take your chosen fabric and start wrapping it around the pumpkin, gently pressing it onto the glue to adhere. Continue wrapping the fabric tightly around the pumpkin, smoothing out any wrinkles or folds as you go.
If you’re using a larger piece of fabric, you may need to trim off any excess fabric once you reach the bottom of the pumpkin. Secure the loose end of the fabric to the bottom using another small amount of glue.
Fabric-wrapped pumpkins offer versatility in design. You can use a single fabric for a clean and cohesive look, or mix and match different fabrics to create a patchwork effect. Experiment with patterns and textures to add visual interest to your pumpkins.
For added embellishment, you can tie a ribbon or twine around the stem of the pumpkin or even glue on small decorative elements such as buttons or beads to enhance the overall design.
Display your fabric-wrapped pumpkins as standalone decorations or group them together to create an attractive centerpiece. Their soft and warm appearance adds a cozy feel to your Halloween decor, making them perfect for creating a welcoming and inviting atmosphere.
Fabric-wrapped pumpkins also have the advantage of being reusable. Once the Halloween season is over, you can remove the fabric and save it for future projects or reuse it for other decorative purposes.
With fabric-wrapped pumpkins, you can bring a touch of warmth and comfort to your Halloween decor. Get creative, experiment with different fabrics, and let your unique style shine through these charming no-carve creations.
Tissue Paper Pumpkins
Tissue paper pumpkins offer a vibrant and colorful no-carve option that adds a playful and festive touch to your Halloween decorations. With their lightweight and translucent nature, tissue paper allows for gorgeous and airy designs, creating eye-catching pumpkins that are sure to delight.
To create tissue paper pumpkins, you’ll need a pumpkin, tissue paper in various colors, and craft glue or Mod Podge. Choose tissue paper in colors that match your Halloween theme or opt for a mix of bright and contrasting shades for a lively effect.
Start by tearing or cutting the tissue paper into small pieces or squares. You can experiment with different shapes and sizes to add dimension to your design.
Next, apply a thin layer of craft glue or Mod Podge to a small section of the pumpkin’s surface. Place a piece of tissue paper on top of the glue and gently press it down, smoothing any wrinkles or folds.
Continue this process, working in small sections, and overlapping the tissue paper pieces as you go. This will create layers of color and texture, giving your tissue paper pumpkin a vibrant and textured appearance.
Feel free to mix and match different colors and create patterns or designs using the tissue paper pieces. You can create stripes, polka dots, or even intricate mosaic patterns for a more intricate look.
Once you’ve covered the entire surface of the pumpkin with tissue paper, allow it to dry completely. Avoid touching or moving the pumpkin until the glue is fully dry to prevent tearing or shifting of the tissue paper.
Tissue paper pumpkins can be displayed as standalone decorations or incorporated into a festive centerpiece. They add a pop of color and a whimsical element to any Halloween setup, making them especially fun for kids’ parties or family gatherings.
With their soft and translucent nature, tissue paper pumpkins create a warm and inviting glow when illuminated from within. Insert a small battery-powered LED light or a string of fairy lights inside the pumpkin to transform it into a beautiful and luminous centerpiece.
Get creative and have fun experimenting with tissue paper pumpkins. Allow your imagination to run wild, and enjoy the process of creating these delightful, vivid, and charming no-carve decorations for your Halloween festivities.
Yarn Wrapped Pumpkins
Yarn-wrapped pumpkins offer a cozy and textured no-carve option that adds warmth and charm to your Halloween decor. With their soft and fuzzy appearance, yarn-wrapped pumpkins create a delightful and tactile experience, making them a perfect choice for a rustic or whimsical theme.
To create yarn-wrapped pumpkins, you’ll need a pumpkin, yarn in your desired color or colors, and a glue gun or craft glue. Choose yarn that matches your Halloween theme or opt for a mix of colors to create a playful and vibrant look.
Start by applying a small amount of glue to the top of the pumpkin to secure the yarn. Begin wrapping the yarn around the stem, making sure to cover it completely. This will create a neat and tidy starting point for the rest of the pumpkin.
Next, apply a small dot of glue to the wrapped stem and press the end of the yarn down to secure it. From there, continue wrapping the yarn around the pumpkin, covering the entire surface. Make sure to overlap the yarn slightly as you go to achieve a full and textured look.
Experiment with different wrapping techniques to create unique designs. You can wrap the yarn in evenly spaced lines, create diagonal or crisscross patterns, or even wrap specific sections of the pumpkin to create color blocking effects.
As you wrap the yarn, make sure to periodically add small dots of glue to secure the yarn in place. This will prevent it from unraveling or shifting as you continue wrapping.
Yarn-wrapped pumpkins offer versatility in design. You can mix and match yarn colors to create patterns or use different types of yarn, such as fuzzy or metallic yarn, to add texture and visual interest.
For added embellishment, you can tie a ribbon or twine around the stem of the pumpkin or attach small decorative elements such as buttons or beads to enhance the overall design.
Display your yarn-wrapped pumpkins as standalone decorations or group them together to create an adorable and cozy centerpiece. Their textured appearance and warm colors will add a touch of comfort and charm to your Halloween decor.
With yarn-wrapped pumpkins, you can embrace the artisanal and handmade aesthetic without the need for complicated carving techniques. Enjoy the tactile experience and creativity of wrapping yarn around your pumpkins, and let them be the cozy and inviting focal point of your Halloween celebrations.
Stenciled Pumpkins
Stenciled pumpkins offer a precise and professional-looking no-carve option that allows you to create intricate and detailed designs on your pumpkins. With the help of stencils, you can easily achieve stunning patterns and images without the need for advanced artistic skills.
To create stenciled pumpkins, you’ll need a pumpkin, stencils of your choice, acrylic paints, stencil brushes, painter’s tape, and a sponge or cloth for dabbing excess paint.
Start by cleaning the surface of the pumpkin to ensure it’s free from dirt and debris. Once dry, position the stencil onto the pumpkin and secure it in place using painter’s tape.
Dip a stencil brush into the desired paint color and remove any excess by dabbing it onto a cloth or sponge. Gently dab the brush over the stencil, making sure to cover the entire design with an even application of paint.
Once you’re satisfied with the coverage, carefully lift the stencil off the pumpkin to reveal the design. Allow the paint to dry before moving on to the next stencil or layer of the design.
This process can be repeated with different stencils, colors, and layers to create a more intricate and detailed design. Build up the image gradually by layering stencils, using different colors, or adding shading and highlights for a more realistic effect.
Stenciled pumpkins offer endless design possibilities. You can create spooky Halloween scenes, monograms, intricate filigree or lace patterns, or even replicate famous works of art.
For an extra touch, you can embellish the stenciled design with glitter, rhinestones, or other decorative elements to make it stand out even more.
Once your stenciled pumpkin masterpiece is complete, display it proudly as a centerpiece, on a porch, or as part of your Halloween decor. The precision and professional look of the stenciled design will impress your guests and add a touch of artistic elegance to your festive celebrations.
Stenciled pumpkins offer a hassle-free alternative to carving, allowing you to create stunning designs with ease. Enjoy the creative process and the ability to achieve intricate and flawless designs on your no-carve pumpkin canvas.
Mosaic Pumpkins
Mosaic pumpkins offer a unique and eye-catching no-carve option that allows you to create stunning designs using an array of colorful materials. With their intricate patterns and textures, mosaic pumpkins make a bold statement in your Halloween decorations.
To create a mosaic pumpkin, you’ll need a pumpkin, mosaic tiles, glass beads, or other small decorative materials, as well as a strong adhesive or mosaic glue. Look for materials that come in various sizes, shapes, and colors to add visual interest to your design.
Start by cleaning the surface of the pumpkin to ensure it’s free from dirt and debris. Once dry, apply a small amount of adhesive to a section of the pumpkin’s surface.
Begin placing the mosaic tiles or decorative materials onto the adhesive, ensuring they fit snugly together. You can create a random pattern or follow a specific design or image that you’ve planned out in advance.
Continue working in small sections, applying adhesive and adding the materials until the entire surface of the pumpkin is covered. Remember to leave spaces in between the tiles or materials to create a true mosaic effect.
You can experiment with different color schemes, mix and match materials, or create specific patterns using the mosaic tiles. This allows you to customize your pumpkin to suit your personal style and desired Halloween theme.
Once you’ve completed the mosaic design, allow the adhesive to dry completely. This will ensure that the tiles or materials adhere securely to the pumpkin’s surface.
Display your mosaic pumpkin as a stunning centerpiece or as part of your Halloween decor. With its intricate patterns and vibrant colors, it will catch the light and add a touch of sophistication and artistry to your celebrations.
Mosaic pumpkins offer a unique opportunity for creativity and personal expression. You can let your imagination run wild, experimenting with different materials, shapes, and patterns to create a one-of-a-kind mosaic design.
These pumpkins can be a wonderful group activity or a solo endeavor, allowing you to immerse yourself in the artistic process and create a truly standout piece of Halloween decor.
Embrace the beauty of mosaic pumpkins, and watch as they become a captivating and artistic addition to your Halloween decorations, showcasing your creativity and adding a touch of elegance to your festive ambiance.
Read more: How Long Do Pumpkins Last On The Porch
Button Pumpkins
Button pumpkins offer a charming and whimsical no-carve option that allows you to create adorable and textured designs using a variety of buttons. With their vibrant colors and playful shapes, button pumpkins make a delightful addition to your Halloween decorations.
To create button pumpkins, you’ll need a pumpkin, an assortment of buttons in different sizes, shapes, and colors, as well as a strong adhesive or a hot glue gun.
Start by cleaning the surface of the pumpkin to ensure it’s free from dirt and debris. Once dry, place a small amount of adhesive onto the back of a button and press it onto the pumpkin’s surface.
Continue adding buttons, layering them and overlapping them slightly to create depth and texture. You can cover the entire surface of the pumpkin or create specific designs or patterns using the buttons.
Experiment with different button colors and sizes to create a vibrant and lively composition. You can use large buttons for the base layer and smaller buttons for detail work, or mix and match colors and shapes for a more eclectic look.
Button pumpkins offer versatility in design. You can create imaginatively funny faces, geometric patterns, or even spell out words or initials using the buttons.
Alternatively, you can use a single color palette for a more cohesive and subdued look, or opt for a mix of colors for a playful and whimsical effect.
As you add the buttons, be mindful of the adhesive’s drying time to prevent buttons from slipping or falling off. Allow the glue to dry completely to ensure the buttons adhere securely to the pumpkin.
Display your button pumpkin as a delightful centerpiece or incorporate it into your Halloween decor. Its textured and three-dimensional appearance will surely catch the attention of your guests and become a focal point of your festive celebrations.
Button pumpkins can also be a fun activity for children or a creative project for craft enthusiasts of all ages. It’s a great way to repurpose buttons from old clothing or explore the colorful world of button collecting.
Let your creativity shine with button pumpkins and enjoy the whimsical and playful nature of these no-carve creations. They will add a touch of charm and personality to your Halloween decor, showcasing your unique style and crafting skills.
Flower Power Pumpkins
Flower power pumpkins offer a fresh and vibrant no-carve option that brings a touch of nature and femininity to your Halloween decor. With their colorful blooms and organic textures, flower power pumpkins make a beautiful and artistic statement.
To create flower power pumpkins, you’ll need a pumpkin, artificial flowers, a craft knife or scissors, and a strong adhesive or hot glue gun.
Start by cleaning the surface of the pumpkin to ensure it’s free from dirt and debris. Once dry, decide on the placement and arrangement of the flowers on the pumpkin.
Using a craft knife or scissors, carefully cut a small hole in the pumpkin’s surface, making sure it’s large enough to accommodate the stem of the artificial flower. Repeat this step for each flower you’ll be attaching.
Apply a small amount of adhesive or hot glue to the base of the flower stem and insert it into the hole in the pumpkin. Press and hold gently to secure it in place. Repeat this process for the remaining flowers, arranging them as desired.
You can create a uniform look by using flowers of the same color or mix and match different flowers for a more eclectic and vibrant design. Consider layering the flowers or clustering them in specific areas to create greater visual impact.
Flower power pumpkins offer versatility in design. You can use large blooms for a dramatic effect or opt for smaller flowers to create a dainty and delicate appearance.
Additionally, consider incorporating additional natural elements such as leaves, foliage, or even faux vines to enhance the overall botanical charm of the pumpkin.
Display your flower power pumpkin as a stunning centerpiece or incorporate it into your Halloween decor to bring a burst of color and life to the festivities. These natural and organic pumpkins will evoke a sense of joy and celebrate the beauty of nature in the autumn season.
Flower power pumpkins are a wonderful opportunity to express your creativity and even repurpose artificial flowers from previous floral arrangements or floral craft projects. It’s a sustainable and eco-friendly way to bring beauty and floral accents to your Halloween decor.
Embrace the flower power and enjoy the vibrant and natural charm of these no-carve creations. Your flower power pumpkin will surely captivate and enchant your guests, adding a touch of elegance and botanical allure to your Halloween celebrations.
Conclusion
No-carve pumpkin decorating offers a world of creative possibilities for adding charm and character to your Halloween decorations. From melted crayon pumpkins to button and flower power pumpkins, there is a design to suit every artistic style and preference.
These no-carve options provide a range of benefits, including safety, longevity, and ease of execution. They eliminate the need for sharp tools and messy pumpkin guts, making them perfect for children and individuals who prefer a less traditional approach to pumpkin decorating.
Whether you opt for the bold and colorful designs of melted crayon or glitter pumpkins, the intricate detailing of thumbtack and stenciled pumpkins, or the delicate charm of lace and fabric wrapped pumpkins, each option offers a unique and engaging aesthetic that can transform your Halloween decor.
Furthermore, the versatility of these designs allows for personalization and customization, ensuring that your pumpkins represent your personal style and artistic touch. You can unleash your creativity by experimenting with different materials, patterns, and techniques to create one-of-a-kind pieces that proudly adorn your home.
Whether you’re decorating for a Halloween party, creating a festive centerpiece, or simply wanting to add seasonal charm to your space, these no-carve pumpkin ideas provide a fun and engaging activity for both individuals and families to enjoy.
So, ditch the knives and embrace the creativity of no-carve pumpkin designs. With melted crayons, thumbtacks, glitter, stencils, fabric, and more, you have a plethora of options to create visually stunning and unique pumpkins that will undoubtedly become the highlight of your Halloween decor.
Let your imagination soar, have fun crafting, and revel in the joy of creating imaginative and captivating pumpkins that celebrate the Halloween spirit in your own creative style.
Frequently Asked Questions about No-Carve Pumpkin Ideas: 18 Easy Designs, No Knives Needed
Was this page helpful?
At Storables.com, we guarantee accurate and reliable information. Our content, validated by Expert Board Contributors, is crafted following stringent Editorial Policies. We're committed to providing you with well-researched, expert-backed insights for all your informational needs.

0 thoughts on “No-Carve Pumpkin Ideas: 18 Easy Designs, No Knives Needed”