Home>Renovation & DIY>Home Renovation Guides>How To Fix Falling Insulation In A Crawl Space
Home Renovation Guides
How To Fix Falling Insulation In A Crawl Space
Modified: February 18, 2024
Learn how to fix falling insulation in a crawl space with our comprehensive home renovation guide. Get expert tips and step-by-step instructions.
(Many of the links in this article redirect to a specific reviewed product. Your purchase of these products through affiliate links helps to generate commission for Storables.com, at no extra cost. Learn more)
Introduction
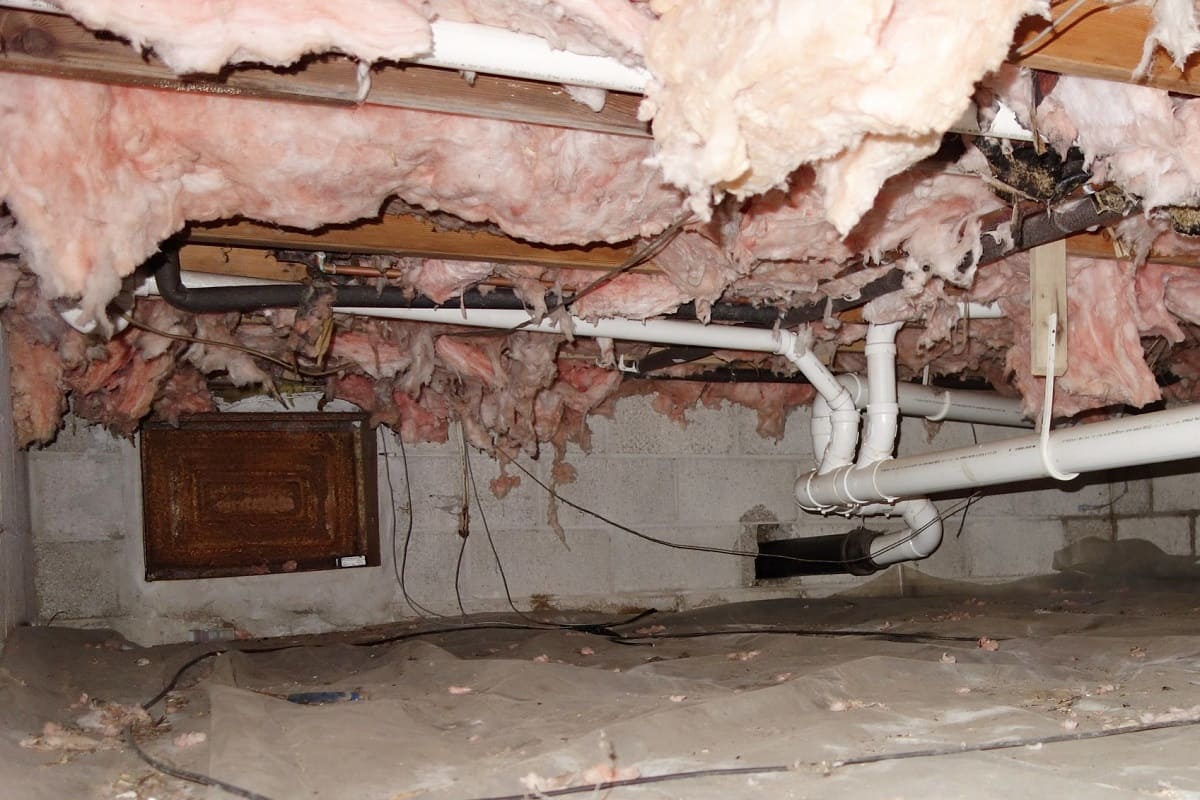
Dealing with falling insulation in a crawl space can be a common issue for homeowners. It not only compromises the energy efficiency of your home but also poses potential health risks due to exposure to fiberglass particles. However, with the right guidance and tools, fixing falling insulation can be a manageable task. In this comprehensive guide, we will delve into the causes of falling insulation and provide a step-by-step approach to address this issue effectively.
Falling insulation in a crawl space is often a result of various factors such as moisture, improper installation, or simply the natural settling of the material over time. Understanding the root cause is crucial in implementing a lasting solution. By addressing this issue, you can enhance the energy efficiency of your home, improve indoor air quality, and prevent potential damage to the structure.
Whether you are a seasoned DIY enthusiast or a homeowner looking to tackle this issue for the first time, this guide will equip you with the knowledge and confidence to address falling insulation in your crawl space. From understanding the causes to gathering the necessary tools and materials, we will walk you through each step of the process. By the end of this guide, you will have the expertise to restore the insulation in your crawl space, ensuring a more comfortable and energy-efficient living environment for you and your family.
Now, let's delve into the underlying causes of falling insulation in a crawl space and explore the essential steps to effectively remedy this common household issue.
Key Takeaways:
- Don’t let falling insulation in your crawl space bring you down! Address moisture, repair, and install new insulation to create a cozy, energy-efficient home environment.
- Stay safe and savvy when fixing falling insulation. Use protective gear, address moisture, and follow a step-by-step approach for a secure and enduring solution.
Read more: How To Insulate A Crawl Space Door
Understanding the Causes of Falling Insulation
Falling insulation in a crawl space can be attributed to several underlying causes, each of which contributes to the deterioration of the insulation material. Understanding these factors is essential in effectively addressing the issue and preventing its recurrence.
Moisture and Humidity
One of the primary culprits behind falling insulation is excessive moisture and high humidity levels in the crawl space. When insulation becomes damp or wet, it loses its structural integrity and adhesive properties, leading to sagging and eventual detachment from the joists or subfloor. This can occur due to poor ventilation, water seepage, or plumbing leaks within the crawl space.
Improper Installation
In some cases, falling insulation can be traced back to improper installation techniques. If the insulation material was not securely fastened or was compressed during installation, it is more likely to shift and sag over time. Additionally, gaps or voids left during installation can exacerbate the problem, allowing the insulation to lose its position and effectiveness.
Settling Over Time
Over the years, insulation materials can naturally settle due to gravity and the gradual compression of the fibers. This settling can cause the insulation to lose its original thickness and density, leading to sagging and eventual detachment. In older homes, this phenomenon is particularly common and may necessitate periodic inspection and maintenance to ensure the insulation remains intact.
Read more: How To Insulate PEX Pipes In A Crawl Space
Pest Infestation
Pests such as rodents and insects can also contribute to falling insulation by nesting within the material or disturbing its structure. Their activities can displace the insulation, causing it to droop and lose its insulating properties. Addressing pest infestations in the crawl space is crucial not only for insulation maintenance but also for overall home hygiene and safety.
By recognizing these underlying causes of falling insulation in a crawl space, homeowners can take targeted measures to rectify the issue and prevent its recurrence. In the following section, we will explore the essential steps to effectively fix falling insulation, empowering homeowners to restore the energy efficiency and structural integrity of their homes.
Steps to Fix Falling Insulation in a Crawl Space
Addressing falling insulation in a crawl space requires a systematic approach to ensure a lasting and effective solution. By following these essential steps, homeowners can restore the integrity of the insulation and create a more energy-efficient and comfortable living environment.
Step 1: Inspection and Assessment
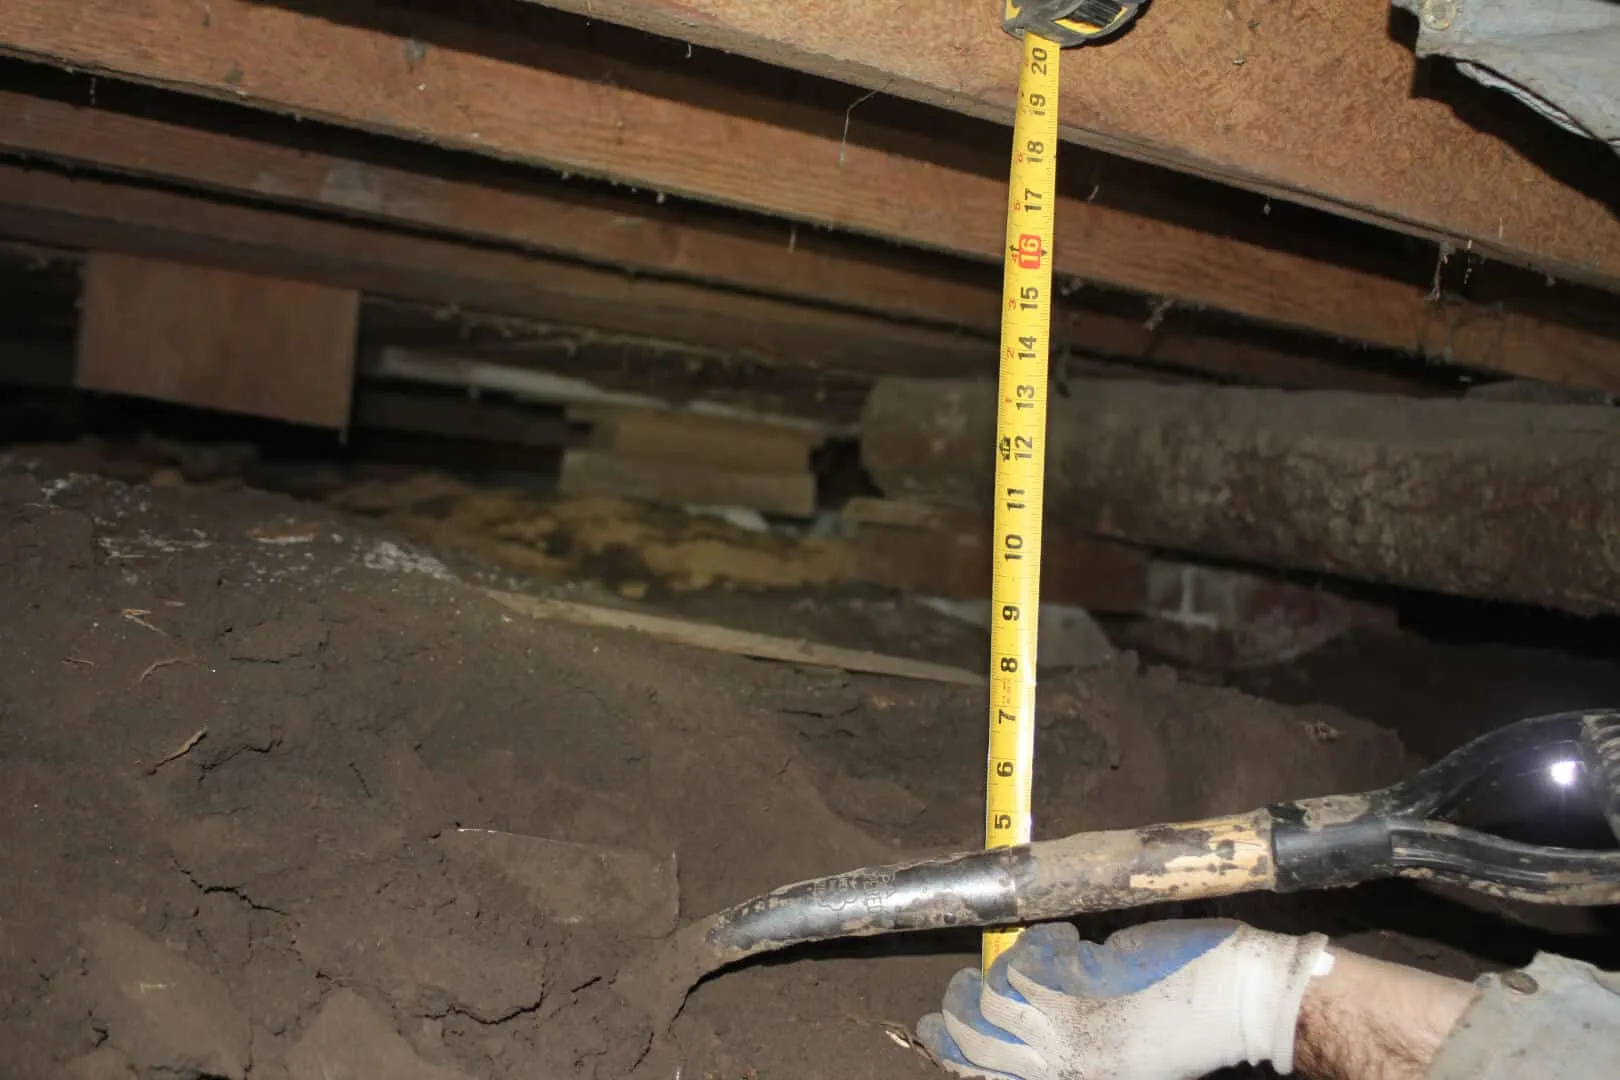
Begin by thoroughly inspecting the crawl space to identify the extent of the insulation damage and the underlying causes. Look for signs of moisture, water damage, pest infestation, and areas where the insulation has sagged or detached. This comprehensive assessment will provide valuable insights into the specific areas that require attention and the factors contributing to the insulation issues.
Step 2: Remove Damaged Insulation
Carefully remove the damaged or fallen insulation from the crawl space. Exercise caution to minimize disturbance to the surrounding areas and to prevent the spread of fiberglass particles. Use protective gear such as gloves, a mask, and goggles to ensure personal safety during this process. Dispose of the damaged insulation in accordance with local regulations.
Read more: How To Maintain A Crawl Space
Step 3: Address Moisture and Humidity
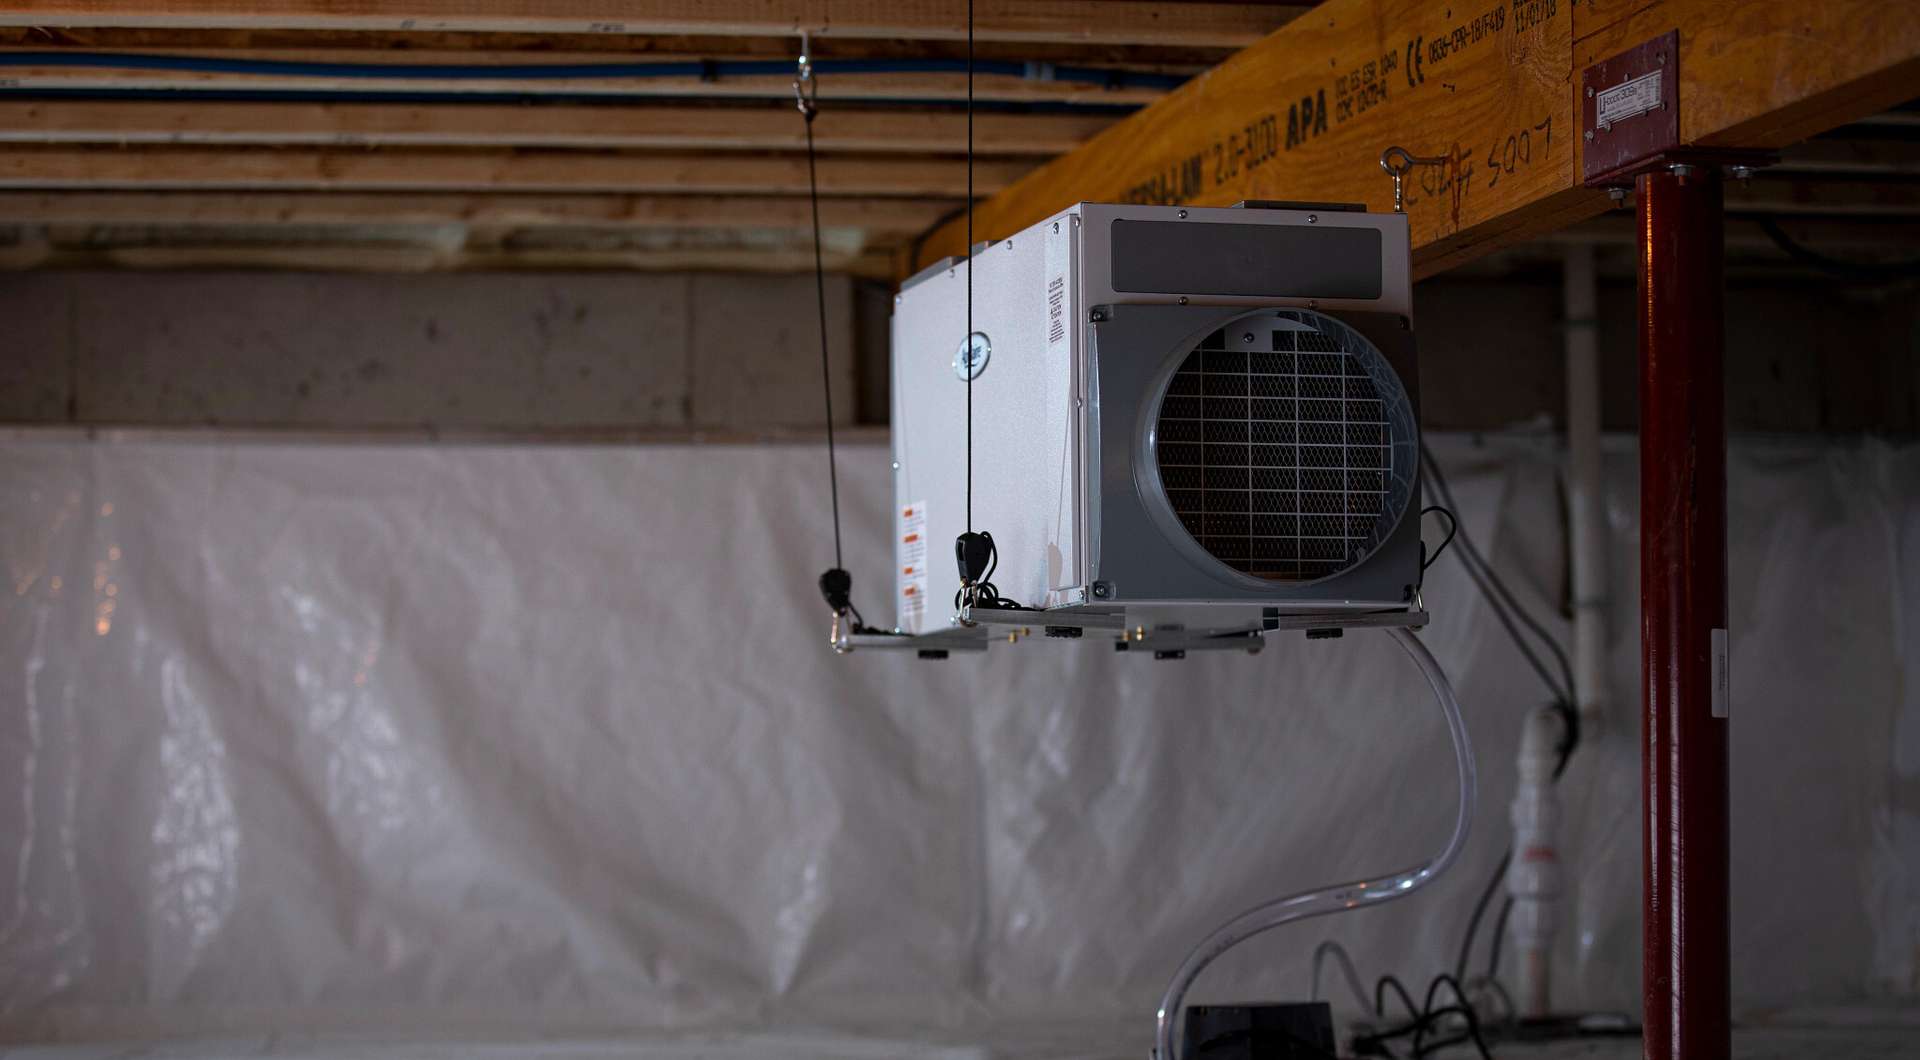
Identify and address the sources of moisture and humidity within the crawl space. This may involve improving ventilation, repairing plumbing leaks, installing a vapor barrier, or addressing drainage issues around the foundation. By mitigating moisture-related issues, homeowners can prevent future damage to the insulation and promote a healthier crawl space environment.
Step 4: Repair and Reinforce
Before installing new insulation, address any structural issues within the crawl space. Repair damaged joists, subflooring, or any other components that may have contributed to the insulation problems. Additionally, reinforce the attachment points for the insulation to ensure a secure and long-lasting installation.
Step 5: Install New Insulation
Select high-quality insulation materials suitable for the crawl space environment. Install the new insulation according to manufacturer guidelines, ensuring a snug and secure fit between joists and other structural elements. Pay attention to sealing gaps and joints to prevent air leakage and maximize the insulation's effectiveness.
Step 6: Monitor and Maintain
Regularly monitor the crawl space for signs of moisture, pest activity, or insulation issues. Implement preventive maintenance measures such as periodic inspections, maintaining proper ventilation, and addressing any emerging issues promptly. By staying proactive, homeowners can preserve the integrity of the insulation and prevent future problems.
By following these steps, homeowners can effectively address falling insulation in a crawl space, restoring energy efficiency and structural integrity to their homes. This proactive approach not only enhances the comfort and safety of the living environment but also contributes to long-term cost savings and home maintenance.
Read more: How To Inspect A Crawl Space
Tools and Materials Needed
When addressing falling insulation in a crawl space, having the right tools and materials is essential to ensure a successful and efficient restoration process. Here's a comprehensive list of the items you'll need to effectively fix falling insulation and create a more energy-efficient and secure crawl space environment.
Tools
-
Protective Gear: Prioritize safety by wearing gloves, a mask, and goggles to protect yourself from fiberglass particles and other potential hazards during insulation removal and installation.
-
Utility Knife: A sharp utility knife will be indispensable for cutting and shaping insulation materials to fit the specific dimensions of the crawl space.
-
Staple Gun: Use a staple gun to securely fasten the insulation to the joists and subfloor, ensuring a tight and uniform installation.
-
Tape Measure: Accurately measure the dimensions of the crawl space and the insulation material to ensure a precise and snug fit during installation.
-
Flashlight or Work Light: Proper illumination is crucial for inspecting and working within the crawl space. A reliable flashlight or work light will facilitate visibility and precision during the restoration process.
-
Caulk Gun: Seal gaps and joints effectively by using a caulking gun to apply sealant, preventing air leakage and enhancing the insulation's performance.
-
Hammer and Nails: For reinforcing structural components and addressing any damage within the crawl space, a hammer and nails will be essential tools.
-
Pliers: Use pliers to remove any remaining staples or fasteners from the previous insulation and to handle small adjustments during the installation process.
Materials
-
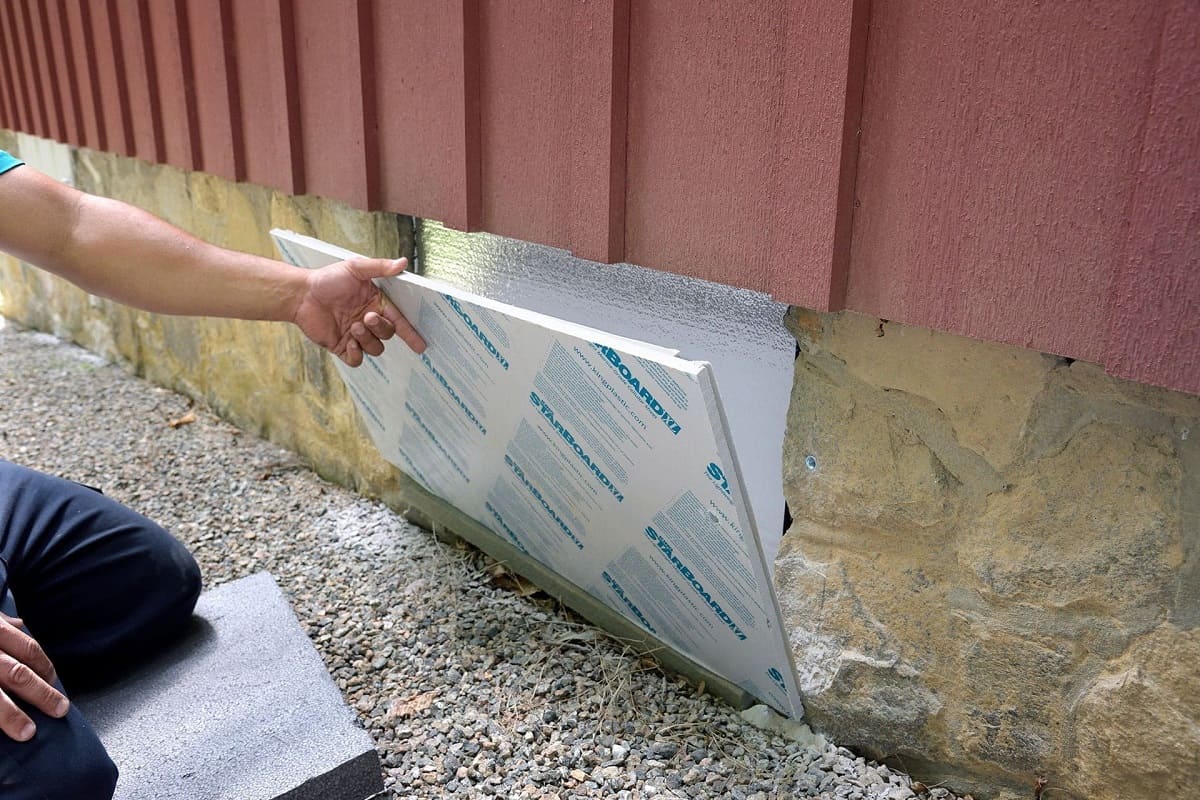
Insulation Material: Select high-quality insulation suitable for the crawl space environment, such as fiberglass batts or rigid foam boards. Ensure the R-value of the insulation meets the recommended standards for your region.
-
Vapor Barrier: If moisture and humidity are significant concerns in the crawl space, consider installing a vapor barrier to prevent moisture infiltration and protect the insulation.
-
Sealant: Choose a durable and moisture-resistant sealant to seal gaps, joints, and other potential air leakage points within the crawl space, enhancing the overall effectiveness of the insulation.
-
Fasteners: Stock up on staples or insulation hangers compatible with the chosen insulation material to securely fasten it to the structural elements of the crawl space.
-
Repair Materials: Depending on the specific structural issues identified during the inspection, gather the necessary materials for repairing and reinforcing damaged joists, subflooring, or other components.
By ensuring you have these essential tools and materials on hand, you can approach the restoration of falling insulation in your crawl space with confidence and efficiency, ultimately creating a more resilient and energy-efficient home environment.
Safety Precautions
When addressing falling insulation in a crawl space, prioritizing safety is paramount to safeguarding your well-being throughout the restoration process. From insulation removal to installation and maintenance, implementing the following safety precautions will minimize potential hazards and ensure a secure working environment.
Read more: How To Insulate A Floor Over A Crawl Space
Personal Protective Equipment
Before entering the crawl space or handling insulation materials, equip yourself with the necessary personal protective equipment (PPE). This includes wearing heavy-duty gloves to protect your hands from fiberglass particles and sharp edges, a respirator or mask to prevent inhalation of airborne contaminants, and safety goggles to shield your eyes from debris and insulation fibers. Additionally, wearing long sleeves, pants, and closed-toe shoes will provide an extra layer of protection against potential skin irritation and injuries.
Ventilation and Air Quality
Prior to commencing any work in the crawl space, ensure adequate ventilation to minimize the accumulation of airborne particles and maintain air quality. If possible, use portable fans or open windows and vents to facilitate air circulation. This will help disperse any lingering dust or particles, reducing the risk of respiratory irritation and promoting a healthier work environment.
Secure Footing and Lighting
When navigating the crawl space, exercise caution to maintain secure footing on the often uneven and confined surfaces. Use a sturdy and stable ladder for access and ensure proper illumination with a reliable flashlight or work light. Adequate lighting is essential for clear visibility and safe maneuvering within the crawl space, reducing the risk of tripping or accidental contact with protruding objects.
Handling and Disposal of Insulation
During the removal of damaged insulation, handle the material with care to minimize disturbance and the release of airborne particles. Avoid shaking or agitating the insulation excessively, and carefully place it in designated disposal bags or containers. Adhere to local regulations for the proper disposal of insulation materials, ensuring compliance with environmental and safety standards.
Read more: What Is A Crawl Space?
Working in Pairs or Notifying Others
Given the confined nature of crawl spaces, consider working with a partner to enhance safety and provide assistance if needed. If working alone, inform a family member or friend of your whereabouts and the duration of your work in the crawl space. This proactive measure ensures that someone is aware of your activities and can provide assistance in the event of an unforeseen circumstance.
By adhering to these safety precautions, homeowners can mitigate potential risks associated with addressing falling insulation in a crawl space. Prioritizing personal protection, air quality, and secure working conditions will contribute to a safer and more controlled restoration process, ultimately ensuring a successful and secure outcome.
Conclusion
In conclusion, addressing falling insulation in a crawl space is a crucial aspect of maintaining a healthy, energy-efficient home environment. By understanding the underlying causes, following a systematic approach to restoration, and prioritizing safety, homeowners can effectively remedy this common issue and prevent its recurrence.
The comprehensive inspection and assessment process serve as the foundation for a successful restoration endeavor. By identifying the specific areas of damage and the contributing factors, homeowners can tailor their approach to address moisture infiltration, structural issues, and insulation installation with precision and efficacy.
The removal of damaged insulation and the subsequent installation of new, high-quality materials are pivotal steps in restoring the crawl space's energy efficiency and structural integrity. By utilizing the right tools, materials, and safety precautions, homeowners can ensure a secure and enduring insulation solution that enhances the overall comfort and efficiency of their homes.
Moreover, addressing moisture and humidity concerns within the crawl space is essential for preventing future insulation issues and maintaining a healthy indoor environment. Implementing measures such as vapor barriers, proper ventilation, and proactive maintenance will contribute to the long-term resilience of the insulation and the structural components of the crawl space.
By prioritizing safety throughout the restoration process, homeowners can mitigate potential hazards associated with insulation handling and installation. Equipping oneself with the necessary personal protective equipment, ensuring adequate ventilation, and maintaining secure footing and lighting are fundamental precautions that contribute to a safer and more controlled working environment.
In essence, addressing falling insulation in a crawl space is not only a practical necessity but also an opportunity to enhance the overall quality and sustainability of one's living environment. By following the guidance provided in this comprehensive guide, homeowners can approach this task with confidence, knowing that they have the knowledge and tools to create a more resilient and energy-efficient home.
Ultimately, the restoration of falling insulation in a crawl space contributes to a healthier, more comfortable living environment, while also promoting long-term cost savings and sustainability. By taking proactive measures to address insulation issues, homeowners can enjoy the benefits of improved energy efficiency, enhanced structural integrity, and a safer, more resilient home for years to come.
Frequently Asked Questions about How To Fix Falling Insulation In A Crawl Space
Was this page helpful?
At Storables.com, we guarantee accurate and reliable information. Our content, validated by Expert Board Contributors, is crafted following stringent Editorial Policies. We're committed to providing you with well-researched, expert-backed insights for all your informational needs.

0 thoughts on “How To Fix Falling Insulation In A Crawl Space”