
Articles
How To Run HVAC Ductwork
Modified: January 23, 2024
Learn how to run HVAC ductwork with our informative articles. Find step-by-step guides and tips to ensure effective installation and airflow.
(Many of the links in this article redirect to a specific reviewed product. Your purchase of these products through affiliate links helps to generate commission for Storables.com, at no extra cost. Learn more)
Introduction
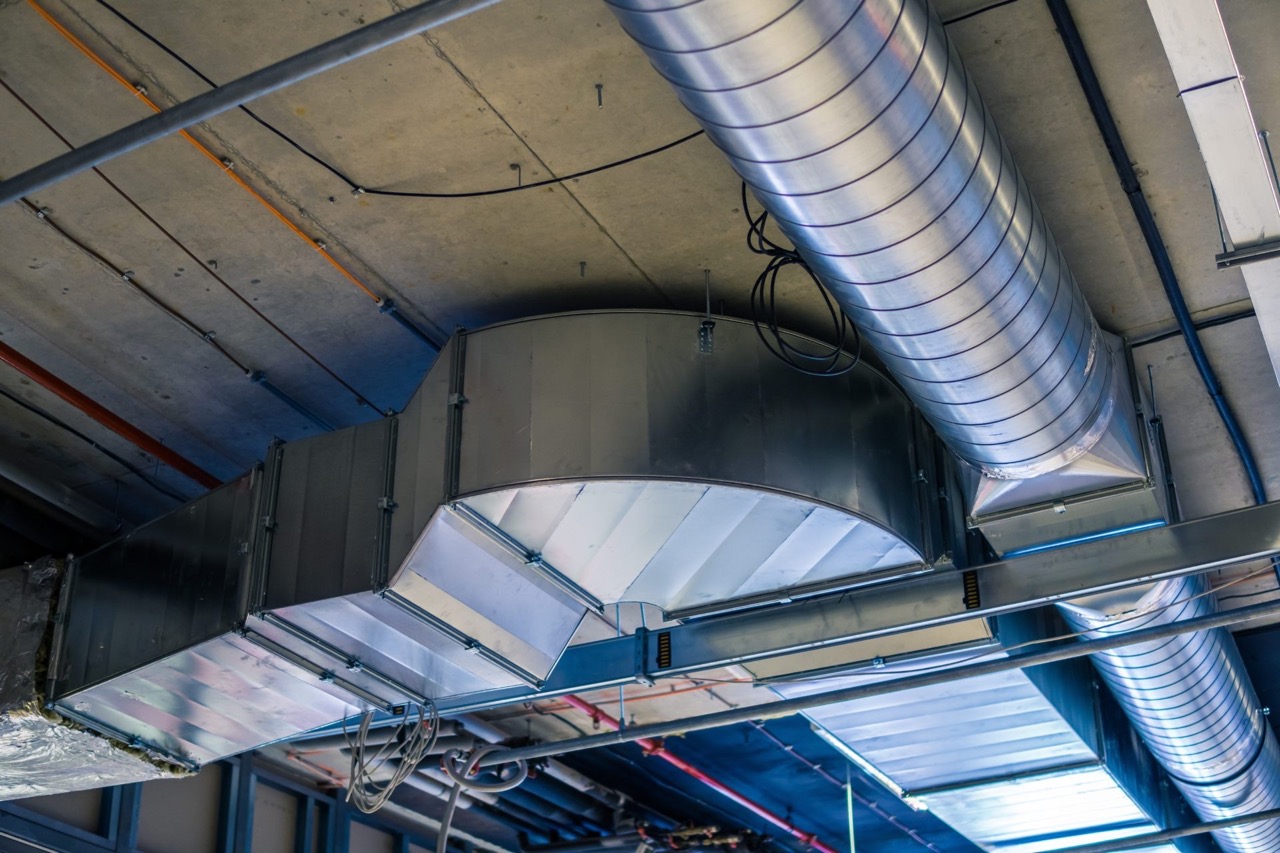
When it comes to delivering warm or cool air throughout your home efficiently, a properly installed HVAC ductwork system is paramount. Whether you’re building a new home or upgrading your existing heating and cooling system, understanding how to run HVAC ductwork is essential for optimal comfort and energy efficiency.
In this article, we will guide you through the process of planning, designing, and installing HVAC ductwork in your home. We will cover the materials needed, determining the layout, measuring and cutting the ducts, installing the main trunk line, connecting the branch ducts, sealing and insulating the ductwork, and testing and balancing the system.
By following these steps, you will be able to install a reliable and efficient HVAC ductwork system that will evenly distribute conditioned air throughout your home, ensuring maximum comfort and energy savings.
Before we dive into the details, let’s take a look at the materials you will need for this project.
Key Takeaways:
- Proper planning and design are essential for a successful HVAC ductwork installation. Consider room layout, airflow requirements, and potential obstacles to ensure optimal comfort and energy efficiency in your home.
- Sealing, insulating, and balancing your HVAC ductwork system are crucial final steps. These ensure efficient airflow, consistent comfort, and maximum energy savings, resulting in a comfortable and energy-efficient indoor environment.
Read more: How To Run Ductwork In Basement
Materials Needed
Before you begin installing HVAC ductwork, it’s essential to gather all the necessary materials to ensure a smooth installation process. Here are the materials you will need:
- Ductwork: This includes long sections of rectangular or round metal ducts for the main trunk line and branch ducts. Make sure to choose the appropriate size and material for your specific HVAC system.
- Duct fittings: These fittings, such as elbows, straight connectors, and reducers, are used to connect the ducts and change the direction of airflow.
- Hangers and straps: These are necessary for supporting and securing the ducts in place. Hangers can be either metal or plastic, depending on your preference.
- Mastic or foil tape: Mastic is a sealant used to seal any gaps or joints in the ductwork. Foil tape is an alternative option that provides a strong adhesive bond.
- Insulation: Insulating the ductwork is crucial to prevent energy loss and maintain the desired temperature. Choose insulating material with the appropriate R-value for your region.
- Sheet metal screws: These screws are used to secure the duct fittings and joints together.
- Measuring tools: You will need a tape measure to accurately measure and mark the lengths for cutting the ducts.
- Cutting tools: Depending on the type of ductwork you are using, you may need tin snips or a duct cutting tool to cut the ducts to the desired length.
- Protective gear: It’s important to prioritize safety during the installation process. Wear safety goggles, gloves, and a mask or respirator to protect yourself from sharp edges and insulation fibers.
Taking the time to gather these materials before you begin will ensure that you have everything you need to complete the installation without interruptions. Now that you have the necessary materials, let’s move on to planning and designing your HVAC ductwork system.
Planning and Designing
Before you start running HVAC ductwork, it’s crucial to have a well-thought-out plan in place. This involves assessing your home’s layout, determining the placement of vents and registers, and considering any potential obstacles or challenges you may encounter during the installation process. Here are the key steps for planning and designing your HVAC ductwork system:
- Assess your home’s layout: Start by evaluating the layout of your home. Identify the different rooms and areas that will require heating and cooling. Consider the size of each space, as well as any unique features or challenges that may impact airflow.
- Determine the placement of vents and registers: Decide where the supply vents and return air registers will be located in each room. Strategically placing these components will help ensure even distribution of air and optimal comfort.
- Consider obstacles and challenges: Take note of any obstacles, such as walls, ceilings, or obstructions, that may affect the installation of ductwork. Anticipate any potential challenges and plan for alternative routing options.
- Calculate airflow requirements: Determine the amount of air that needs to be delivered to each room to ensure proper heating and cooling. Consider factors such as room size, insulation levels, and desired temperature differentials.
- Select the appropriate size ducts: Based on the airflow requirements, choose the appropriate size of ducts for your HVAC system. Undersized ducts can lead to reduced airflow and poor performance, while oversized ducts may result in wasted energy.
- Create a detailed ductwork layout: Once you have gathered all the necessary information, create a detailed ductwork layout that includes the main trunk line, branch ducts, and the placement of vents and registers. This will serve as a visual guide during the installation process.
Taking the time to plan and design your HVAC ductwork system will help ensure a successful installation and maximize the efficiency of your heating and cooling system. Once you have finalized your design, it’s time to start running the ducts and bringing your plan to life.
Determining the Layout
Once you have completed the planning and design phase of your HVAC ductwork system, the next step is to determine the layout. The layout refers to the specific path that the ducts will take throughout your home. Here are the key considerations when determining the layout:
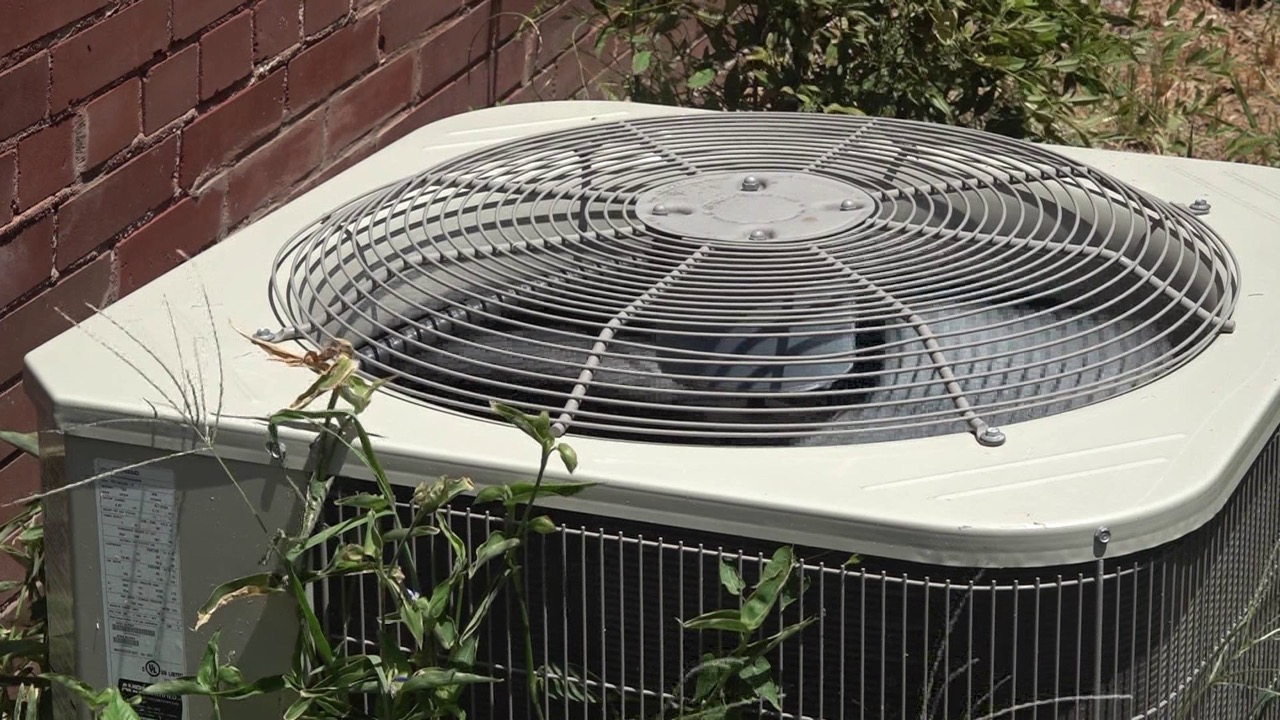
- Identify the location of the HVAC unit: Start by identifying the location of your HVAC unit or furnace. This will serve as the starting point for your ductwork system.
- Plan for the main trunk line: The main trunk line is the central duct that delivers air from the HVAC unit to the different rooms. Determine the optimal path for the main trunk line, considering factors such as accessibility, available space, and minimizing obstructions.
- Establish the branch ducts: Branch ducts extend from the main trunk line and distribute air to specific rooms. Determine the length and position of each branch duct, ensuring that it provides sufficient airflow to each room.
- Consider the shortest and straightest route: Aim for the shortest and straightest route when running the ductwork. This helps minimize energy losses and improves the overall efficiency of your HVAC system.
- Avoid obstructions: As you plan the layout, be mindful of any obstructions that may hinder the installation process or obstruct the airflow. These obstructions can include structural elements, plumbing, electrical wiring, or existing ductwork.
- Plan for access points: Incorporate access points into your layout design to ensure easy maintenance and cleaning of the ductwork. Access panels or hatches can be strategically placed to allow for inspection and adjustments if needed.
By carefully determining the layout of your HVAC ductwork system, you can optimize airflow, minimize energy losses, and ensure efficient distribution of conditioned air throughout your home. Once you have finalized the layout, it’s time to move on to measuring and cutting the ducts.
Measuring and Cutting the Ducts
Measuring and cutting the ducts accurately is crucial for a successful HVAC ductwork installation. Properly cut ducts ensure a tight fit, minimize air leaks, and allow for efficient airflow. Here are the steps to follow when measuring and cutting the ducts:
- Start with the main trunk line: Begin by measuring and cutting the main trunk line. Measure the length needed based on your layout and add a few inches for the connection to the HVAC unit and the branch ducts.
- Mark the measurements: Use a measuring tape to mark the desired lengths on the ductwork. In the case of rectangular ducts, use a square to draw straight lines for cutting.
- Cut the ducts: Depending on the type of ductwork you have, use tin snips or a duct cutting tool to make the cuts. Follow the marked lines precisely to ensure clean and accurate cuts.
- Smooth the edges: After cutting the ducts, smooth any sharp edges or burrs using a file or sandpaper. This ensures a smooth airflow and prevents damage to the duct insulation during installation.
- Repeat for branch ducts: Measure and cut the branch ducts in the same manner as the main trunk line, considering the specific lengths needed for each room.
- Double-check measurements: Before proceeding with installation, double-check all the measurements to ensure the ducts fit properly and align with the layout plan.
Remember, accuracy is key when measuring and cutting the ducts. Small discrepancies can lead to inadequate airflow, leaks, or uneven heating and cooling in your home. Take your time and be meticulous in this step to ensure the best outcome for your HVAC ductwork system.
With the ducts cut to the correct sizes, you are ready to move on to the next step: installing the main trunk line.
When running HVAC ductwork, make sure to properly size and seal all joints to prevent air leakage and ensure efficient airflow throughout the system.
Read more: How To Remove HVAC Ductwork
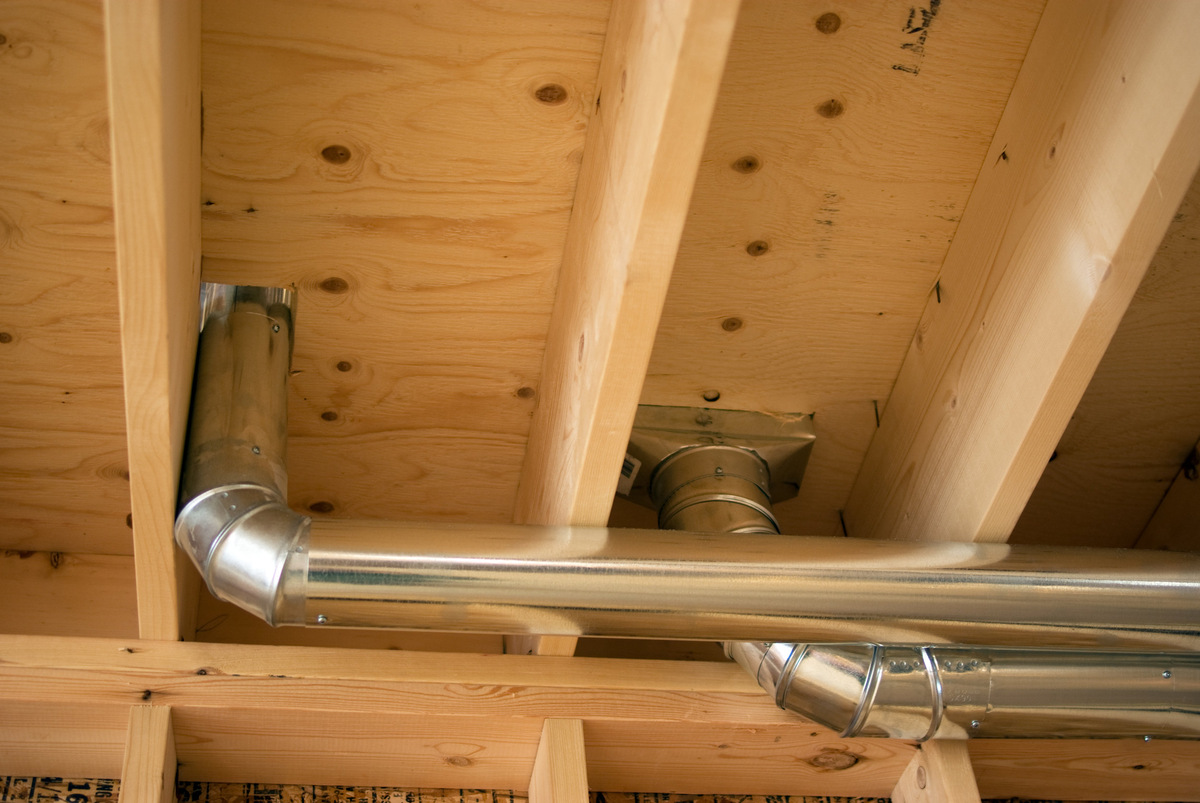
Installing the Main Trunk Line
Installing the main trunk line is a significant step in the HVAC ductwork installation process. The main trunk line carries the conditioned air from the HVAC unit to the branch ducts, ensuring even distribution throughout your home. Here’s how to install the main trunk line:
- Position the main trunk line: Start by positioning the main trunk line in the designated area. Ensure that it aligns with the layout plan and allows for easy access to the HVAC unit.
- Secure the trunk line: Use hangers and straps to secure the main trunk line in place. Make sure it is level, straight, and supported adequately to prevent sagging or movement over time.
- Connect to the HVAC unit: Connect one end of the main trunk line to the HVAC unit. Ensure a secure and airtight connection using appropriate connectors or collars. Follow manufacturer instructions for your specific HVAC unit.
- Extend the trunk line: Extend the main trunk line to its designated endpoint, adding any necessary connectors or elbows to navigate around obstacles or corners. Carefully align and secure each piece with sheet metal screws, ensuring a tight and secure fit between sections.
- Seal the joints: Apply mastic or foil tape to seal any joints between sections of the main trunk line. This helps to prevent air leaks and ensures optimal airflow. Pay special attention to corners and intersections.
- Insulate the trunk line: Insulate the main trunk line using appropriate insulation material. This helps to prevent energy loss and maintain temperature consistency within the ductwork. Secure the insulation in place using tape or insulation clips.
Throughout the installation process, be mindful of maintaining a smooth and unrestricted airflow within the main trunk line. Avoid sharp bends, kinks, or excessive twists that could impede airflow or cause excessive pressure differences. With the main trunk line securely installed, it’s time to move on to connecting the branch ducts.
Connecting the Branch Ducts
Connecting the branch ducts is the next crucial step in the HVAC ductwork installation process. The branch ducts distribute conditioned air from the main trunk line to individual rooms or zones within your home. Here’s how to connect the branch ducts:
- Position the branch ducts: Locate the designated positions for the branch ducts based on your layout plan. Ensure they align with the vents or registers in the respective rooms.
- Measure and cut the branch ducts: Measure and cut the branch ducts to the appropriate lengths, based on the distances between the main trunk line and the vents in each room. Double-check the measurements before making any cuts.
- Attach connectors: Attach appropriate connectors or collars to the ends of the branch ducts. These connectors will serve as connections points between the branch ducts and the main trunk line.
- Secure the connectors: Secure the connectors in place with sheet metal screws, ensuring a tight and secure fit. It’s important to maintain an airtight connection to prevent air leaks.
- Connect to the main trunk line: Attach the branch ducts to the main trunk line using the connectors. Position the ducts in the designated locations, ensuring they extend into the rooms and align with the vents or registers.
- Seal the connections: Apply mastic or foil tape to seal any connections between the branch ducts and the main trunk line. This helps to prevent air leaks and ensures optimal airflow to each room.
- Insulate the branch ducts: Insulate the branch ducts using appropriate insulation material. This helps to prevent energy loss and maintain temperature consistency within the ductwork. Secure the insulation in place using tape or insulation clips.
While connecting the branch ducts, be mindful of maintaining a smooth and unobstructed airflow path. Avoid sharp bends, restrictive angles, or excessive length of the branch ducts, as these can hinder airflow and reduce the efficiency of your HVAC system.
With the branch ducts properly connected, it’s time to focus on sealing and insulating the ductwork to maximize energy efficiency and performance.
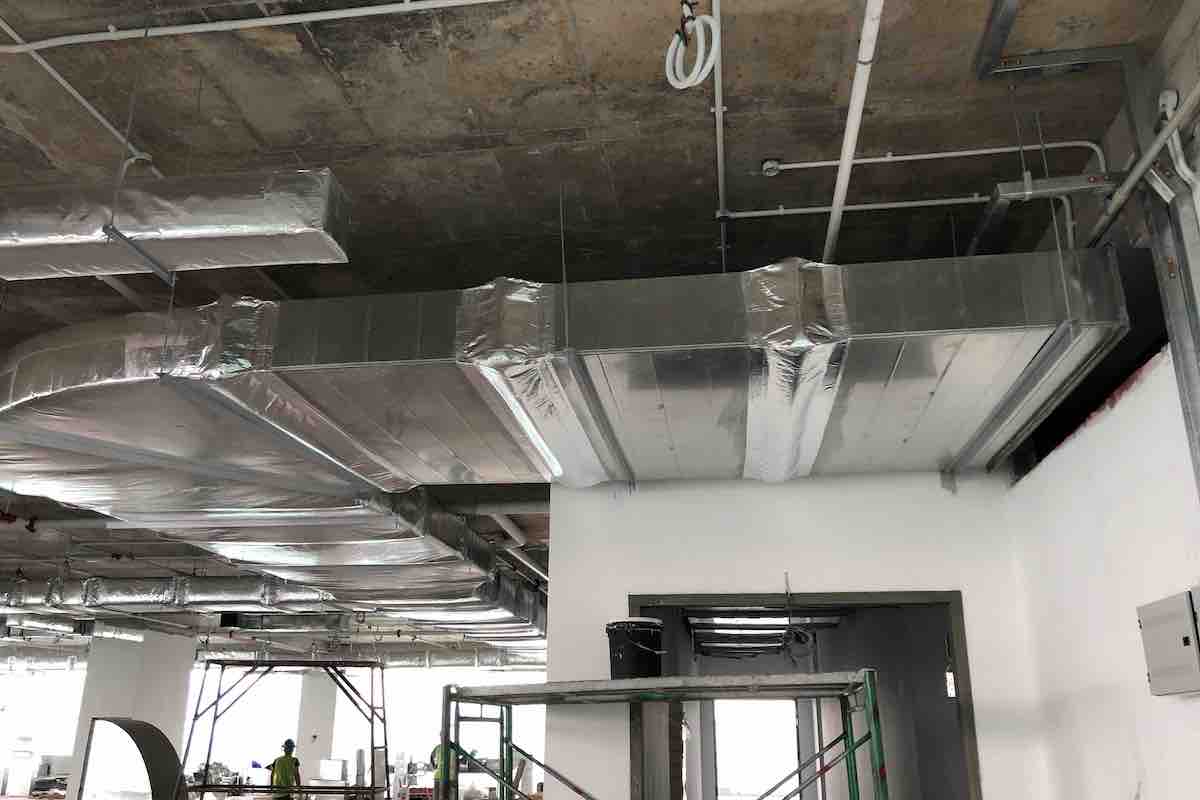
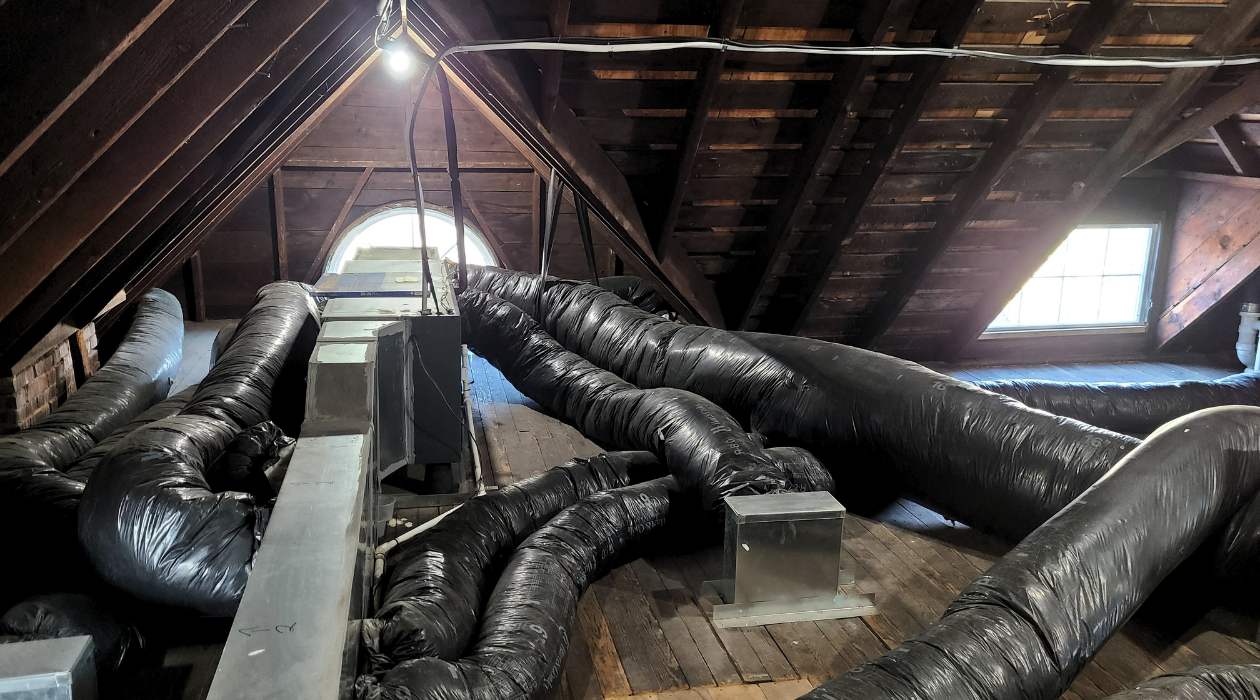
Sealing and Insulating the Ductwork
Sealing and insulating the ductwork is a critical step in the HVAC ductwork installation process. Proper sealing prevents air leaks, while insulation helps maintain the desired temperature and prevents energy loss. Here’s how to seal and insulate your ductwork:
- Inspect for leaks: Before sealing, inspect the ductwork for any visible gaps, joints, or holes that may cause air leaks. Use a flashlight to carefully examine the entire length of the ductwork.
- Seal gaps and joints: Apply mastic or foil tape to seal any gaps, joints, or connections in the ductwork. Ensure a thorough and airtight seal by spreading the mastic or firmly pressing the tape onto the affected areas.
- Pay attention to corners and intersections: Focus on sealing corners and intersections where air leaks are common. Apply extra layers of mastic or tape to ensure a robust and long-lasting seal.
- Insulate the ductwork: Wrap the ductwork with insulation material to minimize energy loss and maintain the desired temperature. Choose insulation with the appropriate R-value for your region and climate.
- Secure the insulation: Use tape or insulation clips to secure the insulation in place along the length of the ductwork. Make sure it is snug and tightly secured to prevent sagging or gaps.
- Insulate exposed connections: Insulate any exposed connections, such as where the branch ducts connect to the main trunk line. This ensures that these areas do not lose heat or cool air.
- Protect the insulation: If the ductwork is located in an area prone to damage or moisture, consider adding a protective layer such as a vapor barrier or an additional layer of insulation.
Properly sealing and insulating your ductwork plays a significant role in reducing energy consumption and ensuring optimal performance of your HVAC system. The tight seals and adequate insulation work together to maintain consistent airflow and temperature distribution throughout your home.
With the ductwork sealed and insulated, it’s time to move on to the final step: testing and balancing the system to ensure proper airflow and performance.
Testing and Balancing the System
Testing and balancing the HVAC system is the final step in the HVAC ductwork installation process. This step ensures that each room receives the right amount of airflow for optimal comfort and efficiency. Here’s how to test and balance your HVAC system:
- Close all vents and registers: Start by closing all the vents and registers throughout your home. This allows the air to flow through the ductwork and helps identify any potential imbalances.
- Turn on the HVAC system: Turn on your HVAC system and let it run for a few minutes to allow the air to circulate properly.
- Check airflow in each room: Open one vent or register at a time and check the airflow in each room. Use your hand or a piece of lightweight paper to feel the air movement. Make note of any rooms that have weak airflow or noticeably less air coming out.
- Adjust dampers or airflow regulators: If there are imbalances in airflow between rooms, adjust the dampers or airflow regulators located in the ductwork. These devices help control the amount of airflow to each room and can be adjusted to achieve a more balanced system.
- Repeat the airflow check: After adjusting the dampers or airflow regulators, repeat the airflow check in each room. Ensure that the airflow is consistent and balanced throughout your home.
- Inspect for leaks: While testing the system, inspect the ductwork for any signs of air leaks. Use a small brush or your hand to feel for air escaping from joints or connections. If you find leaks, seal them with mastic or foil tape.
- Monitor temperature and comfort: Monitor the temperature and comfort in each room to ensure that it is consistent and meets your desired comfort levels. Adjust the airflow as needed to achieve optimal climate control.
Testing and balancing your HVAC system may require some trial and error to achieve the desired results. If you encounter any challenges or imbalances that you cannot resolve, it’s recommended to consult with a professional HVAC technician who can provide further guidance and assistance.
By properly testing and balancing your HVAC system, you can ensure efficient airflow, consistent comfort, and maximize the performance of your newly installed ductwork.
Congratulations! With the testing and balancing complete, you have successfully installed HVAC ductwork in your home. Enjoy the comfort and energy efficiency provided by your properly installed and balanced HVAC system!
Read more: What Is HVAC Ductwork
Conclusion
Installing HVAC ductwork is a crucial aspect of creating a comfortable and energy-efficient home. By following the steps outlined in this article, you have learned how to successfully plan, design, measure, cut, install, seal, insulate, and balance your HVAC ductwork system.
Starting with a well-thought-out plan and considering factors such as layout, airflow requirements, and room distribution, you were able to determine the best route for your ductwork and ensure optimal airflow to each room. Through careful measuring and cutting, you achieved properly sized ducts, allowing for efficient heating and cooling delivery throughout your home.
With the main trunk line and branch ducts securely installed, you focused on sealing any gaps or joints to prevent air leaks. Insulating the ductwork helps to maintain the desired temperature and minimize energy loss. Finally, through testing and balancing, you achieved a well-balanced airflow, ensuring consistent comfort in every room.
Remember, proper maintenance and regular inspections are key to maintaining the efficiency and performance of your HVAC ductwork system. Checking for any signs of air leaks, inspecting insulation, and adjusting dampers when needed will help ensure optimal airflow and energy efficiency for years to come.
Installing HVAC ductwork requires precision and attention to detail. If you encounter any challenges or are unsure about any step of the process, it is always recommended to consult with a professional HVAC technician who can provide expert guidance and assistance.
By successfully installing HVAC ductwork in your home, you have taken a significant step towards creating a comfortable and energy-efficient indoor environment. Enjoy the fruits of your labor and reap the benefits of a well-designed and properly installed HVAC ductwork system!
Frequently Asked Questions about How To Run HVAC Ductwork
Was this page helpful?
At Storables.com, we guarantee accurate and reliable information. Our content, validated by Expert Board Contributors, is crafted following stringent Editorial Policies. We're committed to providing you with well-researched, expert-backed insights for all your informational needs.


0 thoughts on “How To Run HVAC Ductwork”