Home>Renovation & DIY>Tools & Equipment>How To Take Apart IPhone 4S Without A Screwdriver
Tools & Equipment
How To Take Apart IPhone 4S Without A Screwdriver
Published: December 20, 2023
Learn how to disassemble an iPhone 4S without a screwdriver using alternative tools and equipment. Follow our step-by-step guide for easy disassembly.
(Many of the links in this article redirect to a specific reviewed product. Your purchase of these products through affiliate links helps to generate commission for Storables.com, at no extra cost. Learn more)
Introduction
So, you've found yourself in a predicament: your trusty iPhone 4S is in need of repair, and you're eager to roll up your sleeves and get to work. Whether you're a DIY enthusiast, a tech-savvy individual, or simply someone looking to save a few bucks on professional repair services, the prospect of disassembling your iPhone 4S without a screwdriver may seem daunting at first. However, fear not! With the right guidance and a steady hand, you can tackle this task with confidence.
In this comprehensive guide, we'll walk you through the process of disassembling your iPhone 4S without the need for a screwdriver. From gathering the necessary tools to accessing the internal components, we've got you covered every step of the way. By following these instructions carefully, you'll gain a deeper understanding of your device's inner workings and potentially save money on repairs. So, grab your metaphorical tool belt, and let's dive into the fascinating world of iPhone 4S disassembly!
Key Takeaways:
- You can disassemble your iPhone 4S without a screwdriver by using specialized tools like plastic opening tools, a suction cup, and tweezers. This DIY approach can save money on professional repairs and give you a deeper understanding of your device.
- After safely disassembling and reassembling your iPhone 4S, you can enjoy its renewed functionality and potentially address any necessary repairs. Embrace DIY exploration and continue to empower yourself in your technological pursuits.
Step 1: Gather Necessary Tools
Before embarking on the disassembly process, it’s crucial to ensure that you have the right tools at your disposal. While this method doesn’t require a traditional screwdriver, you’ll still need a few specialized items to successfully take apart your iPhone 4S. Here’s a rundown of the essential tools you’ll need:
- Plastic Opening Tools: These non-conductive and non-scratch tools are designed to safely pry open electronic devices without causing damage. They come in various shapes and sizes, allowing you to access different areas of the iPhone 4S with precision.
- Suction Cup: A small suction cup can be incredibly useful for lifting the front panel of the iPhone 4S and creating a small gap for the plastic opening tools to slide into.
- Spudger Tool: This handy tool features a flat, wedge-shaped tip that aids in disconnecting cables and removing components without causing harm to delicate parts.
- Tweezers: Precision tweezers are indispensable for handling small screws and other intricate components during the disassembly process.
- Sim Eject Tool: To safely remove the SIM card from your iPhone 4S, a sim eject tool or a small paperclip will come in handy.
- Cloth and Cleaning Solution: Keeping a lint-free cloth and a small amount of cleaning solution on hand will allow you to wipe down components and remove any accumulated dust or debris.
By ensuring that you have these tools within reach, you’ll be well-prepared to tackle the disassembly of your iPhone 4S. With the right equipment at your disposal, you can proceed with confidence, knowing that you’re equipped to handle each step of the process effectively.
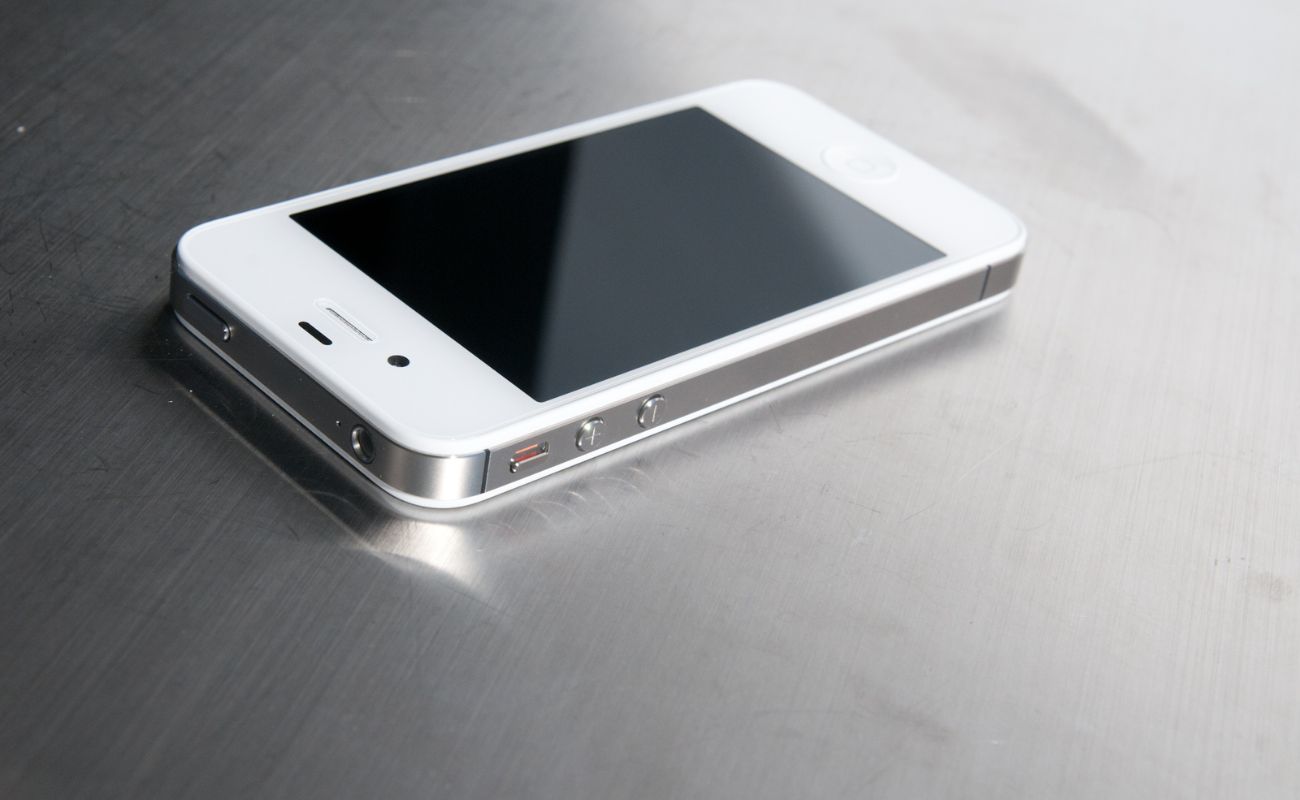
Step 2: Removing the Back Panel
With your tools at the ready, it’s time to begin the disassembly process. The first step involves removing the back panel of the iPhone 4S to gain access to the internal components. Here’s how to do it:
- Power Off the Device: Before starting, ensure that your iPhone 4S is powered off to prevent any potential electrical mishaps during the disassembly process.
- Locate the Pentalobe Screws: The iPhone 4S features two small pentalobe screws at the bottom of the device, on either side of the charging port. These screws hold the back panel in place and will need to be removed using a pentalobe screwdriver or a compatible tool.
- Use the Suction Cup: Once the screws are removed, place a small suction cup near the home button of the iPhone 4S. Gently pull up on the suction cup to create a slight gap between the back panel and the body of the device.
- Insert the Plastic Opening Tool: With the gap created by the suction cup, carefully slide a plastic opening tool into the space. Slowly run the tool along the edges of the iPhone 4S to gradually separate the back panel from the rest of the device. Exercise caution to avoid applying excessive force, as this could damage the panel or the internal components.
- Remove the Back Panel: Once you’ve loosened the back panel, carefully lift it away from the iPhone 4S and set it aside in a safe location. Take note of any adhesive or connectors that may still be attached, as you’ll need to address these in the subsequent steps.
By successfully removing the back panel, you’ve taken the crucial first step in gaining access to the inner workings of your iPhone 4S. With patience and precision, you can now proceed to the next phase of the disassembly process, ready to delve deeper into the device’s internal components.
Step 3: Disconnecting the Battery
Now that the back panel has been removed, the next vital step in disassembling your iPhone 4S is disconnecting the battery. This is a crucial safety measure to prevent accidental electrical mishaps while working on the device. Follow these steps to safely disconnect the battery:
- Locate the Battery Connector: Within the iPhone 4S, the battery connector is situated near the top of the device, adjacent to the rear-facing camera. It is secured by a small metal bracket and a connector cable.
- Use the Spudger Tool: Gently insert a spudger tool underneath the metal bracket securing the battery connector. Carefully pry up the bracket to release it from the logic board.
- Disconnect the Battery Cable: After removing the metal bracket, delicately lift the battery connector cable away from the logic board using the flat end of the spudger tool. Ensure that you exert even pressure and avoid bending or damaging the cable during this process.
- Verify Disconnection: Once the battery cable has been disconnected, double-check to ensure that it is no longer in contact with the logic board. This step is crucial for preventing any potential electrical currents from flowing through the device as you proceed with the disassembly.
By disconnecting the battery, you’ve taken a pivotal safety measure that allows you to work on the iPhone 4S with reduced risk of electrical hazards. With the battery safely disconnected, you’re now ready to proceed to the next phase of disassembly, confident in your ability to navigate the internal components of the device.
You can use a small suction cup to carefully lift the front panel of the iPhone 4S. Then, use a plastic opening tool to gently pry the panel away from the device. Be cautious and patient to avoid damaging the phone.
Step 4: Removing the Display Assembly
With the battery safely disconnected, the next critical stage in disassembling your iPhone 4S involves removing the display assembly. This step requires precision and care to avoid damaging the delicate components of the device. Follow these steps to successfully detach the display assembly:
- Separate the Display Assembly: Carefully lift the display assembly away from the body of the iPhone 4S, ensuring that you do not pull it too far from the device. The display assembly is connected to the logic board by several cables, and excessive force could damage these connections.
- Support the Display Assembly: Once the display assembly is partially separated, use a small stand or prop to support it at an angle, allowing easy access to the internal components without putting strain on the attached cables.
- Disconnect the Display Cables: Using a spudger tool or your fingertips, gently disconnect the various cables that attach the display assembly to the logic board. Exercise caution and patience during this process to avoid damaging the delicate connectors.
- Set Aside the Display Assembly: After all the cables are safely disconnected, carefully set the display assembly aside in a secure location, ensuring that it is protected from accidental damage or debris.
By successfully removing the display assembly, you’ve achieved a significant milestone in the disassembly process, gaining access to the internal components of your iPhone 4S. With the display assembly safely detached, you can now proceed to explore and address the device’s internal workings with confidence and precision.
Read more: What Size Screwdriver For Iphone 4
Step 5: Accessing the Internal Components
With the display assembly safely removed, you’ve now gained access to the internal components of your iPhone 4S. This is where the true magic happens, as you can now explore the intricate inner workings of the device and address any issues or perform necessary repairs. Here’s how to navigate this crucial phase of the disassembly process:
- Inspect the Internal Components: Take a moment to survey the internal layout of the iPhone 4S. You’ll be able to see the logic board, battery, camera modules, and various other components that make up the device’s functionality.
- Addressing Specific Concerns: If you’re disassembling the iPhone 4S for a specific repair or maintenance task, this is the stage where you can focus on the targeted components. Whether it’s replacing a faulty battery, addressing camera issues, or resolving connectivity problems, you now have a clear view of the components that require attention.
- Exercise Caution and Patience: As you navigate the internal components, handle each part with care and precision. Avoid applying excessive force or placing components in precarious positions, as this could lead to damage or complications during reassembly.
- Document and Organize: If you’re performing repairs or maintenance tasks, it’s helpful to document the disassembly process and organize the removed components in a systematic manner. This will streamline the reassembly process and ensure that each component is accounted for and properly handled.
By reaching this stage of the disassembly, you’ve unlocked the potential to address specific issues, perform repairs, or gain a deeper understanding of the internal workings of your iPhone 4S. With patience and a methodical approach, you can navigate this phase with confidence, knowing that you’re well-equipped to handle the intricacies of the device’s internal components.
Step 6: Reassembling the iPhone 4S
After successfully navigating the disassembly process and addressing any necessary repairs or maintenance tasks, it’s time to reassemble your iPhone 4S. This phase requires careful attention to detail and precision to ensure that the device functions optimally once it’s put back together. Here’s a comprehensive guide to reassembling your iPhone 4S:
- Retrieve the Display Assembly: Begin by carefully retrieving the display assembly, ensuring that it is free from dust or debris. Check the connectors and cables to confirm that they are clean and undamaged.
- Reconnect the Display Cables: Using steady and gentle pressure, reconnect the various cables from the display assembly to the logic board. Ensure that each connector is securely in place without forcing it or causing damage.
- Secure the Display Assembly: Once the cables are reconnected, carefully position the display assembly back onto the body of the iPhone 4S. Gently press it into place, ensuring that it is aligned correctly and sits flush with the device’s frame.
- Reconnect the Battery: With the display assembly secured, reattach the battery connector to the logic board. Carefully position the cable and secure it with the metal bracket, ensuring a snug and secure connection.
- Replace the Back Panel: Align the back panel of the iPhone 4S with the device’s frame and gently press it into place. If there are any adhesive strips, ensure that they are properly positioned to secure the back panel in place.
- Secure the Pentalobe Screws: Using a pentalobe screwdriver or a compatible tool, reinsert and tighten the two pentalobe screws at the bottom of the iPhone 4S, securing the back panel in place.
- Power On and Test: Once the device is reassembled, power it on and test its functionality. Verify that the display, buttons, and other components are functioning as expected, ensuring that the reassembly process was successful.
By meticulously following these steps, you can confidently reassemble your iPhone 4S, knowing that each component has been handled with care and precision. With the device fully reassembled, you can now enjoy its renewed functionality and, if applicable, the successful completion of any repair or maintenance tasks.
Conclusion
Congratulations! You’ve successfully navigated the intricate process of disassembling and reassembling your iPhone 4S without the need for a traditional screwdriver. By following the steps outlined in this guide and exercising patience and precision, you’ve gained a deeper understanding of your device’s internal components and potentially addressed any necessary repairs or maintenance tasks.
Throughout this journey, you’ve demonstrated a commendable level of technical prowess and a willingness to take on a DIY challenge. By embracing the intricacies of iPhone 4S disassembly, you’ve not only expanded your knowledge but also potentially saved on professional repair costs.
Remember, the process of disassembling and reassembling electronic devices requires careful attention to detail, a methodical approach, and a commitment to safety. By utilizing the appropriate tools and following the outlined steps, you’ve showcased your ability to tackle complex tasks with confidence and precision.
As you reflect on this experience, take pride in the knowledge and skills you’ve acquired. Whether it’s for the thrill of DIY exploration or the satisfaction of breathing new life into your iPhone 4S, this endeavor has undoubtedly enriched your technical expertise and problem-solving abilities.
As you venture forward, equipped with a deeper understanding of your iPhone 4S and the confidence to address its internal components, may you continue to embrace the world of DIY technology with enthusiasm and a spirit of discovery.
With your iPhone 4S reassembled and potentially revitalized, the journey doesn’t end here. Your newfound expertise and hands-on experience have paved the way for future endeavors, whether they involve further device maintenance, exploration of new technologies, or the pursuit of innovative DIY projects.
So, as you bid adieu to this chapter of iPhone 4S disassembly, remember that the skills and knowledge you’ve gained are invaluable assets that will continue to empower you in your technological pursuits. Embrace the spirit of curiosity, innovation, and DIY ingenuity, and may your future endeavors be as rewarding and enlightening as this one.
Frequently Asked Questions about How To Take Apart IPhone 4S Without A Screwdriver
Was this page helpful?
At Storables.com, we guarantee accurate and reliable information. Our content, validated by Expert Board Contributors, is crafted following stringent Editorial Policies. We're committed to providing you with well-researched, expert-backed insights for all your informational needs.


0 thoughts on “How To Take Apart IPhone 4S Without A Screwdriver”