Home>Furniture>Bedroom Furniture>How To Take Apart An IKEA Bed

Bedroom Furniture
How To Take Apart An IKEA Bed
Modified: February 24, 2024
Learn how to disassemble an IKEA bed with our step-by-step guide. Perfect for bedroom furniture enthusiasts looking to move or store their bed.
(Many of the links in this article redirect to a specific reviewed product. Your purchase of these products through affiliate links helps to generate commission for Storables.com, at no extra cost. Learn more)
Introduction
When it comes to moving, downsizing, or simply redesigning your bedroom, one common challenge is dealing with large furniture pieces like the bed. Taking apart an IKEA bed may seem like a daunting task, but with the right tools and a little know-how, it can be a straightforward process. In this article, we will guide you through the step-by-step process of dismantling an IKEA bed so that you can easily move or store it.
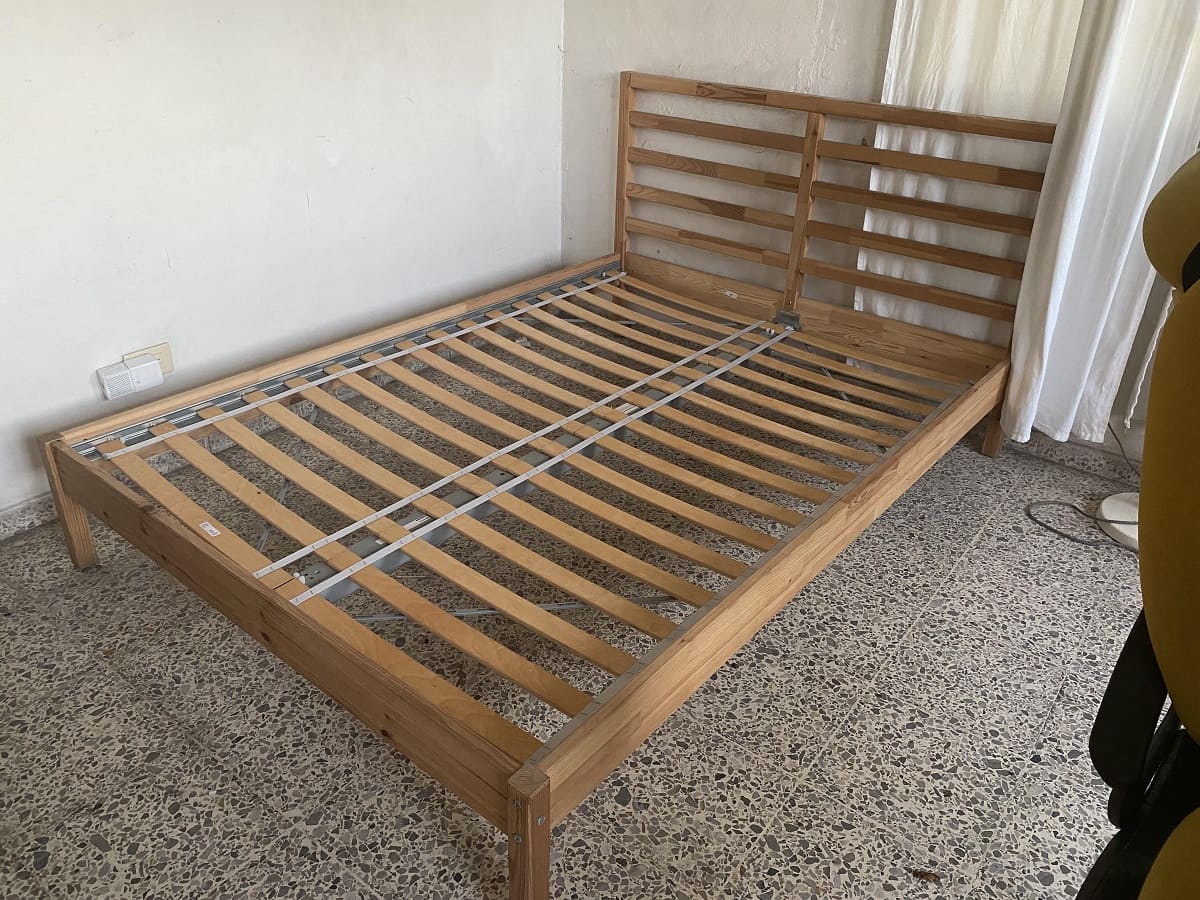
A bed is typically comprised of several components, including the frame, headboard, footboard, slats or support boards, and side rails. Each of these components needs to be taken apart carefully to ensure they can be reassembled later on.
Before beginning the disassembly process, it’s important to gather the necessary tools. This will make the task easier and more efficient. Common tools required for taking apart an IKEA bed include a screwdriver (both flathead and Phillips), an Allen wrench (typically included with the IKEA bed), and possibly a rubber mallet or hammer to assist with stubborn connections.
With the tools in hand, you’re ready to begin disassembling your IKEA bed. Follow the steps outlined below, ensuring you take your time and exercise caution to prevent any damage or injury.
Key Takeaways:
- Disassembling an IKEA bed requires the right tools and a systematic approach to ensure a smooth process. From removing the mattress to organizing and labeling parts, careful dismantling sets the stage for easy reassembly or responsible disposal.
- Whether you’re moving, upgrading, or donating, the step-by-step guide for disassembling an IKEA bed provides a clear path to handle the components responsibly. From storage to recycling, thoughtful decisions ensure a clutter-free space and eco-friendly choices.
Read more: How To Take Apart A Dresser
Step 1: Gather Required Tools
Before you start the process of taking apart your IKEA bed, it’s essential to have the necessary tools on hand. Here are the tools you will need:
- Screwdriver: A screwdriver is the most common tool needed for disassembling an IKEA bed. You’ll likely need both a flathead and a Phillips screwdriver, as different types of screws may be used.
- Allen wrench: Most IKEA beds come with an Allen wrench included, as they often use Allen screws for assembly. Make sure you have the appropriate size Allen wrench for your bed.
- Rubber mallet or hammer: While not always necessary, a rubber mallet or a hammer can be useful for gently tapping and loosening tight connections.
- Extra pair of hands: Having an extra person to assist you can make the process smoother, especially when dealing with larger and heavier bed components.
Once you have gathered all the necessary tools, you are prepared to move on to the next steps of disassembling your IKEA bed.
Step 2: Remove the Mattress and Bedding
Before you can start disassembling the bed frame, it’s important to remove the mattress and bedding. This step not only makes the disassembly process easier but also helps protect your mattress and bedding from potential damage. Here’s how to remove them:
- Remove any pillows, blankets, or other bedding items from the bed.
- Carefully lift the mattress off the bed frame and place it in a safe and clean area.
- If your bed has a mattress protector, remove it as well and set it aside.
- If there are any bed slats or support boards on top of the bed frame, remove them and set them aside for disassembly later.
- Take a moment to inspect the mattress and bedding for any stains, tears, or damage. Address any issues before storing or moving them.
By removing the mattress and bedding first, you’ll have an unobstructed view of the bed frame and will be able to disassemble it more easily. Set the mattress and bedding aside in a safe place to ensure they stay clean and protected throughout the disassembly process.
Step 3: Disassemble the Bed Frame
With the mattress and bedding removed, it’s time to start disassembling the bed frame itself. Follow these steps to take apart the bed frame:
- Start by locating the connections between the different parts of the bed frame. This includes any screws, nuts, or bolts that hold the frame together.
- Using the appropriate screwdriver or Allen wrench, start loosening and removing the screws and bolts from each connection point.
- As you loosen the screws, be sure to hold the bed frame securely to avoid any parts from falling or shifting abruptly.
- Work your way around the bed frame, systematically removing screws from each connection point. Take your time and be cautious to prevent any damage to the frame or injury to yourself.
- Once all the screws have been removed, gently separate the different sections of the bed frame. In some cases, this may require some wiggling or slight tapping with a rubber mallet or hammer to loosen any tight connections.
- Continue disassembling the bed frame until all the sections are separated.
By carefully and methodically removing the screws and bolts, you’ll be able to dismantle the bed frame without causing any damage or frustration. Keep the hardware in a safe place, such as a zip-lock bag, so you can easily reassemble the bed frame later on.
Step 4: Remove Slats or Support Boards
After disassembling the bed frame, it’s time to remove the slats or support boards that provide a sturdy foundation for your mattress. These components may vary depending on the design of your bed, but the general process remains similar. Follow these steps to remove the slats or support boards:
- Locate the slats or support boards underneath the mattress, which are usually held in place by screws or clips.
- Using the appropriate tools, such as a screwdriver or Allen wrench, remove any screws or clips securing the slats or support boards to the bed frame.
- Gently lift each slat or support board off the bed frame, being careful not to damage them or the frame itself.
- If the slats or support boards are connected to each other, separate them one by one.
- Set the slats or support boards aside for storage or transportation. You may want to bundle them together using zip ties or tape to keep them organized.
By removing the slats or support boards, you’ll have a lighter and more manageable bed frame to transport or store. It’s important to handle these components with care to prevent any damage and ensure they can be reassembled properly.
Read more: How To Take Apart A Lamp
Step 5: Dismantle the Headboard (If Applicable)
If your IKEA bed has a headboard, you’ll need to dismantle it as well. This step may not be applicable to all bed models, so skip to the next step if your bed doesn’t have a headboard. To dismantle the headboard, follow these steps:
- Start by examining the headboard and identifying any screws, bolts, or connectors that hold it to the bed frame.
- Using the appropriate tools, such as a screwdriver or Allen wrench, start removing the screws or bolts from the connection points.
- As you loosen the screws or bolts, hold the headboard securely to prevent it from falling or causing any damage.
- Once all the screws or bolts have been removed, gently detach the headboard from the bed frame.
- If the headboard has any additional components, such as decorative panels or shelves, remove them as well by following the same procedure.
- Store the headboard and its components separately to prevent any scratches or damage during storage or transportation.
Dismantling the headboard may require some patience and care, especially if it’s large or heavy. Take your time and ensure that all the screws and bolts are fully removed before attempting to detach the headboard from the bed frame.
When taking apart an IKEA bed, be sure to keep all screws and hardware organized and labeled to make reassembly easier. Use a power drill with the appropriate bit to speed up the process.
Step 6: Remove the Footboard (If Applicable)
If your IKEA bed has a footboard, you’ll need to remove it as well. Not all bed models include a footboard, so skip to the next step if this doesn’t apply to your bed. Here’s how to remove the footboard:
- Inspect the footboard and identify any screws, bolts, or connectors that secure it to the bed frame.
- Using the appropriate tools, such as a screwdriver or Allen wrench, begin loosening and removing the screws or bolts from each connection point.
- Hold the footboard securely as you remove the screws or bolts to prevent it from falling or causing any damage.
- Once all the screws or bolts are removed, carefully detach the footboard from the bed frame.
- If there are any additional components attached to the footboard, such as decorative panels or storage compartments, remove them following the same procedure.
- Store the footboard and its components separately to protect them from damage during transportation or storage.
Removing the footboard may require careful handling, especially if it’s bulky or heavy. Take your time to ensure that all the screws and bolts are fully removed before attempting to detach the footboard from the bed frame.
Step 7: Take Apart the Side Rails
Now that you have dismantled the headboard and footboard (if applicable), it’s time to take apart the side rails of your IKEA bed. The side rails are the horizontal pieces that connect the headboard and footboard. Follow these steps to take apart the side rails:
- Inspect the side rails and identify the attachment points where they connect to the headboard and footboard.
- Using the appropriate tools, such as a screwdriver or Allen wrench, begin removing the screws or bolts that secure the side rails to the headboard and footboard.
- Hold the side rails firmly as you loosen the screws or bolts to prevent any sudden movements or damages.
- Once all the screws or bolts are removed, gently separate the side rails from the headboard and footboard.
- If the side rails are in multiple sections, as in some adjustable beds, detach each section from one another using the same method.
- Store the side rails separately to prevent any damage during transportation or storage. It’s a good idea to label or mark each section to ensure easy reassembly later.
Taking apart the side rails may require some patience, especially if they have multiple connection points. Follow the instructions carefully and take your time to dismantle the side rails properly.
Step 8: Organize and Label Disassembled Parts
After disassembling your IKEA bed, it’s important to stay organized to make the reassembly process as smooth as possible. Follow these steps to organize and label the disassembled parts:
- Find a clean and spacious area where you can lay out all the disassembled parts.
- Group similar parts together, such as screws, bolts, and other hardware, to keep them organized.
- Consider using small plastic bags or containers to store the hardware for each section or component.
- Label each bag or container with clear and descriptive labels, indicating which section or component it belongs to.
- Place any smaller components, such as decorative panels or shelves, in separate bags or boxes and label them accordingly.
- Keep all the labeled bags or containers in a secure location, ensuring they won’t be misplaced during storage or transportation.
By organizing and labeling the disassembled parts, you’ll save time and prevent any confusion when it’s time to reassemble the bed. Staying organized throughout the process will make the reassembly process much more efficient.
Read more: How To Disassemble An Ikea Bed Frame
Step 9: Store or Dispose of the Bed Frame Components
Once you have disassembled your IKEA bed and organized the components, it’s time to decide whether to store or dispose of the bed frame components. Consider the following options:
- Storage: If you plan to use the bed frame again in the future, storing the components is a good option. Find a suitable storage space, such as a basement, attic, or storage unit, where the components can be kept safe and protected from damage.
- Reusing or Selling: If you are simply upgrading or replacing your IKEA bed, you may want to reuse or sell the components. Clean them thoroughly and store them in a secure location. You can either assemble the bed frame again in the future or sell the components online or through a local classifieds platform.
- Donation: Another option is to donate the bed frame components to a charity or organization in need. Check with local charities or organizations to see if they accept furniture donations. This way, you can contribute to a good cause and help someone in need.
- Recycling: If the bed frame components are no longer functional or in poor condition, consider recycling them. Contact your local recycling centers to inquire about their guidelines for recycling metal or wooden furniture. This is an eco-friendly option that ensures the materials are reused and not wasted.
- Disposal: If none of the above options are viable, you may have to dispose of the bed frame components. Check your local waste management or municipality guidelines for proper disposal methods. Be sure to follow any regulations regarding furniture disposal to minimize environmental impact.
Choose the option that best suits your needs and environmental considerations. By properly storing or disposing of the bed frame components, you can ensure a clutter-free space and make responsible choices for the environment.
Conclusion
Taking apart an IKEA bed may initially seem like a daunting task, but with the right tools and a systematic approach, it can be a straightforward process. By following the step-by-step guide outlined in this article, you can successfully disassemble your IKEA bed and prepare it for storage, transportation, or disposal.
Remember to gather all the necessary tools before starting the disassembly process. Removing the mattress and bedding first will provide you with a clear workspace and protect them from potential damage. Be careful when disassembling the bed frame, taking your time to remove screws and bolts correctly.
If your bed has a headboard or footboard, follow the steps to dismantle them accordingly. Additionally, remove the slats or support boards and separate the side rails to fully disassemble the bed. As you progress, organize and label the disassembled parts to ensure an efficient reassembly process in the future.
Depending on your situation, you can choose to store or dispose of the bed frame components. Consider options such as storage, reusing or selling, donation, recycling, or proper disposal based on the condition and your preferences.
By following these steps and making thoughtful decisions regarding your IKEA bed, you can successfully disassemble it and handle the components responsibly. Whether you’re moving, downsizing, or simply redesigning your bedroom, this guide will help you navigate the disassembly process with ease.
Remember to take your time, exercise caution, and seek assistance if needed. With a little effort, you’ll be able to disassemble your IKEA bed and prepare it for its next chapter.
Frequently Asked Questions about How To Take Apart An IKEA Bed
Was this page helpful?
At Storables.com, we guarantee accurate and reliable information. Our content, validated by Expert Board Contributors, is crafted following stringent Editorial Policies. We're committed to providing you with well-researched, expert-backed insights for all your informational needs.
