Home>Storage Ideas>Kitchen Storage>How To Clean A Showerhead Using Basic Pantry Ingredients
Kitchen Storage
How To Clean A Showerhead Using Basic Pantry Ingredients
Modified: March 2, 2024
Discover effective kitchen storage ideas to declutter your pantry and keep it organized. Maximize space with innovative solutions and create an efficient cooking environment.
(Many of the links in this article redirect to a specific reviewed product. Your purchase of these products through affiliate links helps to generate commission for Storables.com, at no extra cost. Learn more)
Introduction
Keeping your showerhead clean is an essential aspect of maintaining a hygienic bathroom. Over time, mineral deposits, limescale, and bacteria can accumulate on the surface of the showerhead, leading to reduced water flow, unpleasant odors, and even potential health hazards. While there are various commercial cleaning products available, you can also achieve effective results using simple pantry ingredients.
In this article, we will explore two methods for cleaning your showerhead using basic pantry ingredients. Whether you prefer to use vinegar and baking soda or lemon juice and water, both methods are cost-effective, eco-friendly, and safe for use in your home.
By following these cleaning methods regularly, you can ensure that your showerhead remains in optimal condition, delivering a consistently refreshing and enjoyable showering experience.
So, let’s dive in and discover how to clean your showerhead using basic pantry ingredients!
Key Takeaways:
- Regularly cleaning your showerhead with pantry ingredients like vinegar, baking soda, or lemon juice ensures optimal water flow, prevents bacterial contamination, and maintains a refreshing showering experience.
- Removing, soaking, scrubbing, and reattaching your showerhead using basic pantry ingredients is an eco-friendly, budget-friendly, and effective way to eliminate mineral deposits, limescale, and bacteria for a clean and revitalized showering experience.
Read more: How To Clean A Showerhead
Why Should You Clean Your Showerhead?
Cleaning your showerhead regularly is crucial for both hygiene and functionality. Over time, mineral deposits, sediment, and bacteria can build up inside the showerhead, leading to a range of common issues that can affect your showering experience.
First and foremost, cleaning your showerhead ensures optimal water flow. When mineral deposits and limescale accumulate inside the showerhead, they can clog the nozzles and restrict water flow. This can result in a weak and uneven spray, making it frustrating to rinse off shampoo, conditioner, and soap effectively. By keeping your showerhead clean, you can maintain a strong and consistent flow of water.
In addition to water flow, a clean showerhead also helps to improve your showering experience by enhancing water pressure. When the nozzles are clogged, water pressure can be significantly reduced, resulting in a lackluster shower. By regularly cleaning your showerhead, you can remove any obstructions and ensure that water pressure remains strong and invigorating.
Furthermore, a dirty showerhead can harbor bacteria and mold. The warm and damp environment in the bathroom provides the perfect breeding ground for microbes to thrive. When you shower under a contaminated showerhead, you expose yourself to potentially harmful organisms. By cleaning your showerhead, you can eliminate these microorganisms and reduce the risk of skin infections or respiratory problems.
Another reason to clean your showerhead is to prevent unpleasant odors. Bacteria and other organic matter can produce foul smells, which can be easily transferred to your hair and body when you shower. By regularly cleaning your showerhead, you can keep it fresh and eliminate any unwanted odors, ensuring a pleasant and refreshing shower every time.
Lastly, cleaning your showerhead is an important part of overall bathroom maintenance. A clean showerhead not only improves the functionality of the fixture but also contributes to the overall cleanliness and aesthetics of your bathroom. It’s a small task that can make a big difference in maintaining a hygienic and comfortable bathroom environment.
Now that you understand the importance of cleaning your showerhead, let’s explore the pantry ingredients you’ll need for the cleaning process.
Common Issues with Unclean Showerheads
Neglecting to clean your showerhead can result in various common issues that can impact your showering experience. Understanding these issues will highlight the importance of regular cleaning and motivate you to take action. Let’s explore some of the most common problems associated with unclean showerheads.
1. Reduced Water Flow: Mineral deposits and limescale can accumulate inside the showerhead over time, leading to clogged nozzles. This obstructs the water flow, resulting in a weak and uneven spray. You may find it difficult to rinse off soap or shampoo properly, leading to longer showers and wasted water.
2. Low Water Pressure: When the nozzles are clogged with mineral deposits and other debris, the water pressure decreases significantly. A weak stream of water can make it difficult to enjoy a refreshing and invigorating shower experience.
3. Uneven Spray Pattern: If some of the nozzles are partially or completely clogged, the spray pattern can become uneven and erratic. This can result in water being directed in different directions, causing inconvenience and an inconsistent showering experience.
4. Foul Odors: Bacteria, mold, and mildew thrive in the warm and damp environment of an unclean showerhead. These microorganisms can produce unpleasant odors, which can be transferred to your hair and body when you shower. This can leave you feeling less refreshed and clean after your shower.
5. Bacterial Contamination: Unclean showerheads can harbor harmful bacteria, such as Legionella, that can cause respiratory infections. Breathing in contaminated water vapor during your shower can put your health at risk, especially if you have a weakened immune system or respiratory conditions.
6. Mineral Stains: Mineral-rich water can leave unsightly stains on your showerhead. Over time, these stains can become difficult to remove and may require additional cleaning efforts. Regular maintenance and cleaning can prevent the buildup of stubborn mineral stains.
7. Aesthetics and Hygiene: An unclean showerhead can degrade the overall appearance of your bathroom. Stains, discoloration, and visible debris on the showerhead can make your bathroom look unkept and dirty. Regular cleaning not only ensures proper functionality but also contributes to a clean and visually appealing bathroom environment.
By addressing these common issues with unclean showerheads, you can enhance your showering experience, maintain good hygiene, and ensure the longevity of your showerhead. Let’s move on to the next section and discuss the materials you’ll need for cleaning your showerhead using basic pantry ingredients.
Materials Needed for Cleaning
Before you begin the cleaning process, it’s essential to gather the necessary materials. The great thing about cleaning your showerhead with pantry ingredients is that you probably already have most of these items in your kitchen. Here are the materials you’ll need for cleaning your showerhead using basic pantry ingredients:
- Vinegar: White distilled vinegar is highly effective in breaking down mineral deposits and limescale. It’s a natural cleaner that is safe to use and readily available in most households.
- Baking Soda: Baking soda is a versatile cleaning agent that helps to deep clean and remove grime. Its abrasive properties aid in scrubbing away stubborn buildup on the showerhead.
- Lemon Juice: If you prefer a more citrusy scent, you can use lemon juice instead of vinegar. Lemon juice contains citric acid, which helps dissolve mineral deposits and adds a fresh, natural fragrance.
- Water: Clean, preferably warm water is essential for diluting the cleaning agents and rinsing the showerhead thoroughly.
- An Old Toothbrush: A soft-bristled toothbrush is ideal for scrubbing the nozzles and other hard-to-reach areas of the showerhead.
- Plastic Bag or Ziplock Bag: A plastic bag or ziplock bag is useful for soaking the showerhead in the cleaning solution.
- A Wrench or Adjustable Pliers: Depending on the type of showerhead, a wrench or adjustable pliers may be needed to remove it for cleaning.
- A Clean Cloth or Sponge: A cloth or sponge is handy for wiping away any residue or debris from the showerhead.
These materials are simple to acquire and can be found in most households. By having them ready before you start the cleaning process, you can ensure a smooth and efficient cleaning experience. Now that you have gathered your materials, we can move on to the next section and explore the two methods for cleaning your showerhead using pantry ingredients.
Method 1: Cleaning with Vinegar and Baking Soda
One of the most effective ways to clean your showerhead is by using a mixture of vinegar and baking soda. Both of these pantry ingredients work together to remove mineral deposits, limescale, and bacteria, leaving your showerhead clean and refreshed.
Here are the steps to follow when cleaning your showerhead using vinegar and baking soda:
- Step 1: Remove the showerhead
- Step 2: Prepare the vinegar and baking soda mixture
- Step 3: Soak the showerhead in the mixture
- Step 4: Scrub the showerhead
- Step 5: Rinse and reattach the showerhead
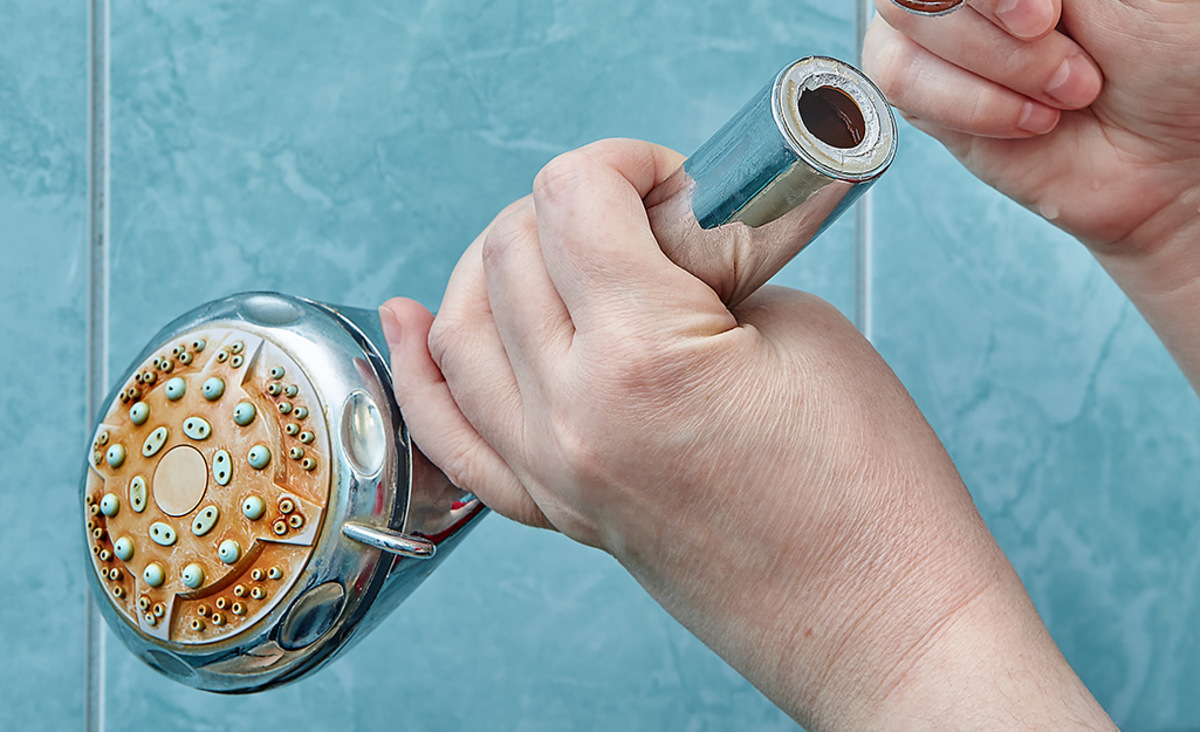
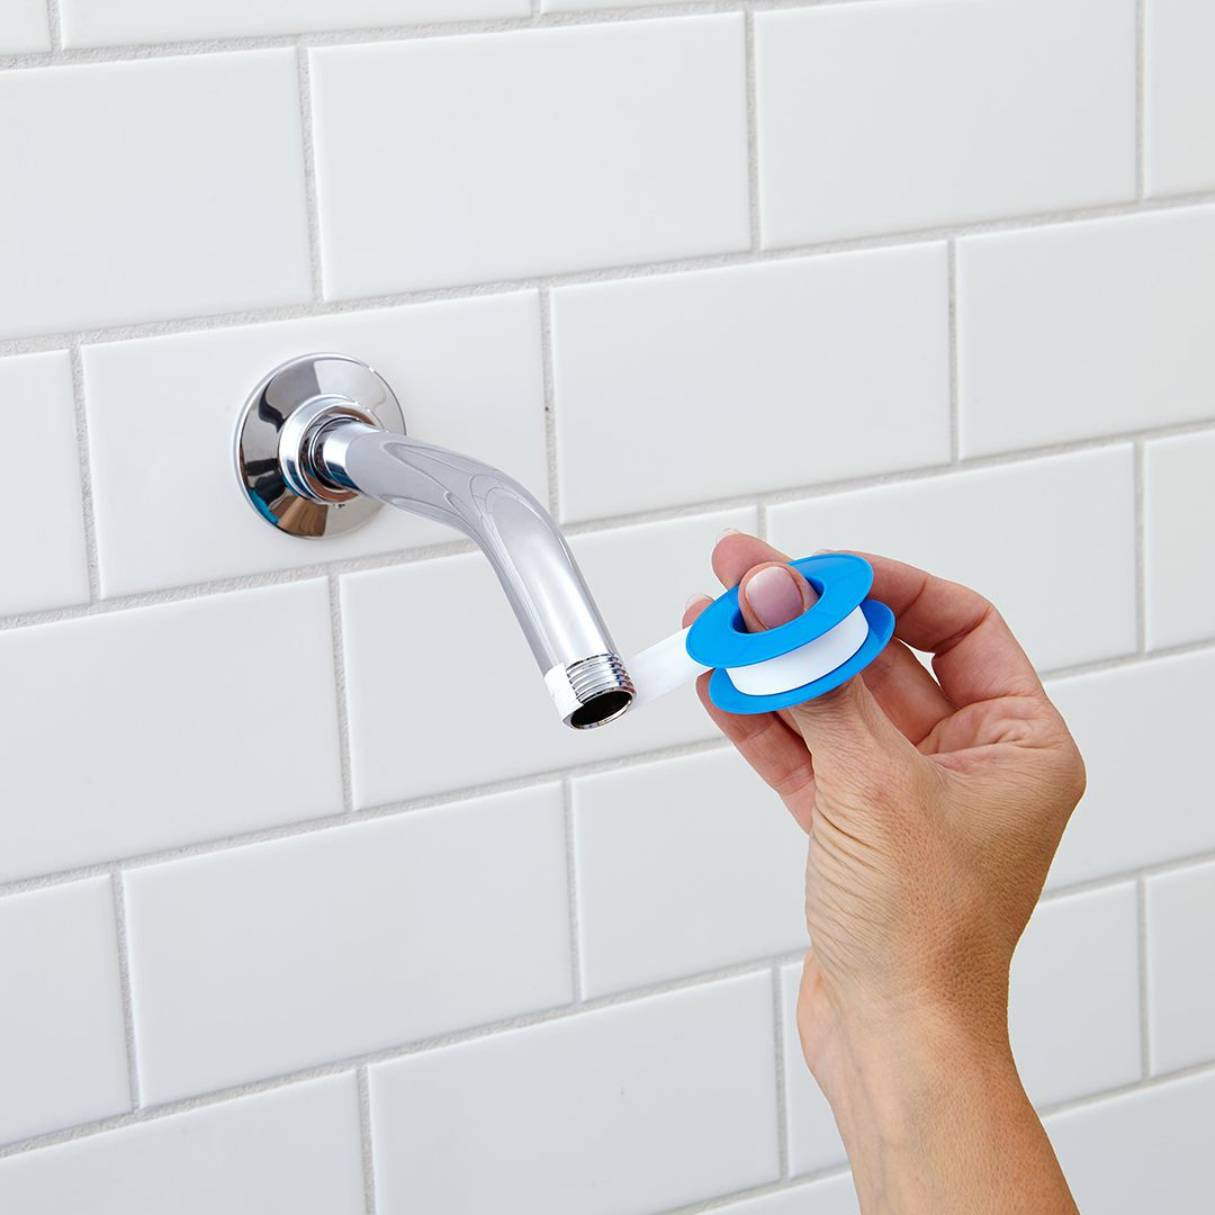
Begin by carefully removing the showerhead from the shower arm. Use a wrench or adjustable pliers to loosen and unscrew the showerhead. Be careful not to damage the shower arm during this process. Place the showerhead aside for cleaning.
In a bowl or container, mix equal parts white distilled vinegar and water. The amount of mixture needed will depend on the size of your showerhead, but a cup or two should be sufficient. Add a tablespoon of baking soda to the mixture and stir well until the baking soda is dissolved.
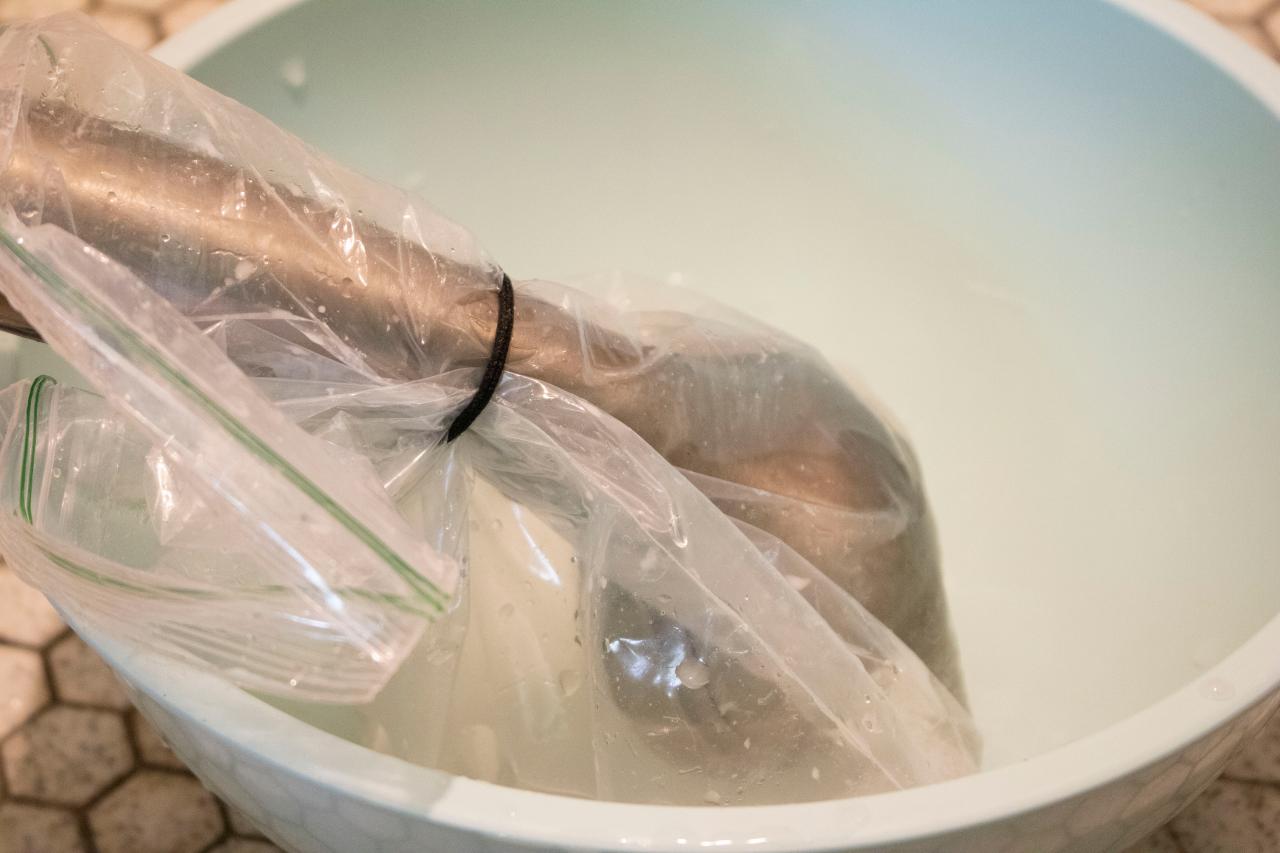
Place the showerhead in a plastic bag or ziplock bag and pour the vinegar and baking soda mixture into the bag until the showerhead is fully submerged. Seal the bag securely, ensuring that there are no leaks. Allow the showerhead to soak in the mixture for at least an hour or overnight for more stubborn buildup.
After the soaking period, remove the showerhead from the bag and use an old toothbrush to scrub away any remaining mineral deposits or buildup. Be gentle with the brush to avoid damaging the showerhead surface. Pay close attention to the nozzles and any hard-to-reach areas.
Rinse the showerhead thoroughly with clean water to remove any vinegar and baking soda residue. Use a cloth or sponge to wipe away any remaining debris. Then, reattach the showerhead to the shower arm, ensuring a secure fit.
By following these steps, you can effectively clean your showerhead using vinegar and baking soda. This method is safe, eco-friendly, and budget-friendly, making it an excellent choice for regular maintenance. However, if you prefer a different scent or don’t have access to vinegar, you can try the alternative method using lemon juice and water, which we will explore next.
Read more: How To Clean A Showerhead
Step 1: Remove the Showerhead
Before you can begin the cleaning process, you’ll need to remove the showerhead from the shower arm. This step allows for easier access and a more thorough cleaning of the individual components.
Here’s a step-by-step guide on how to remove the showerhead:
- Turn off the water: Before removing the showerhead, it’s important to turn off the water supply. Locate the shut-off valve or handles in your bathroom and ensure that the water flow to the showerhead is completely stopped. This will prevent any accidental leaks or splashing during the removal process.
- Protect the finish: The showerhead’s surface may be vulnerable to scratches or damage, so it’s important to take precautions to protect its finish. Wrap a thin cloth or towel around the nut or connector that connects the showerhead to the shower arm. This will help prevent any potential damage to the surface while using pliers or a wrench for removal.
- Loosen the showerhead: Using a pair of adjustable pliers or a pipe wrench, grip the nut or connector firmly. Make sure to grip it near the base of the showerhead where it attaches to the shower arm. Turn the wrench counterclockwise to loosen and unscrew the showerhead. It may require a bit of force, so be cautious and apply steady pressure.
- Remove the showerhead: Once the nut or connector is loosened, you can remove the showerhead from the shower arm. Twist it gently and continue unscrewing until the showerhead is completely detached. Take care not to drop or damage the showerhead during removal.
- Inspect the showerhead and shower arm: With the showerhead removed, take a moment to inspect both the showerhead and the shower arm for any signs of damage, buildup, or debris. This is a good opportunity to assess the condition of the components and ensure they are in good working order.
By following these steps, you will be able to remove the showerhead safely and efficiently. Remember to exercise caution while using tools and be mindful of protecting the showerhead’s finish. Once the showerhead is removed, you can proceed to the next steps of the cleaning process to restore its optimal functionality and cleanliness.
Step 2: Prepare the Vinegar and Baking Soda Mixture
Once you have successfully removed the showerhead, it’s time to prepare the vinegar and baking soda mixture. This powerful combination will help break down mineral deposits, limescale, and other buildup on the showerhead.
Follow these steps to prepare the vinegar and baking soda mixture:
- Measure the ingredients: Start by gathering the necessary ingredients. You will need white distilled vinegar, baking soda, and water. The ratio of vinegar to water should be equal, such as one cup of each, depending on the size of your showerhead and the amount of buildup.
- Mix the vinegar and water: In a bowl or container, pour the equal parts of vinegar and water. Stir them together to ensure they are thoroughly mixed. The vinegar acts as a natural acid that helps dissolve mineral deposits and limescale.
- Add the baking soda: Once the vinegar and water are mixed, add a tablespoon of baking soda to the mixture. Baking soda is an excellent natural cleaner that helps remove grime and stubborn buildup. Stir the mixture again to combine the ingredients.
- Ensure proper dissolution: Make sure that the baking soda is fully dissolved in the vinegar and water mixture. Stir it well to ensure that there are no lumps or clumps left. This will ensure an effective cleaning solution for your showerhead.
By following these steps, you will have prepared the vinegar and baking soda mixture for cleaning your showerhead. This mixture is highly effective in breaking down mineral deposits and limescale, allowing for a thorough and efficient cleaning process. Next, we’ll move on to the next step, which involves soaking the showerhead in the mixture to remove the buildup.
Step 3: Soak the Showerhead in the Mixture
Now that you have prepared the vinegar and baking soda mixture, it’s time to move on to the next step in the cleaning process – soaking the showerhead. This step allows the mixture to work its magic and break down any mineral deposits, limescale, and other buildup on the surface of the showerhead.
Follow these steps to soak the showerhead in the vinegar and baking soda mixture:
- Secure the showerhead in a bag: Take a plastic bag or a ziplock bag and place the showerhead inside. Make sure the bag is large enough to hold the entire showerhead and that it can be sealed securely. This ensures that the mixture stays in contact with the showerhead throughout the soaking process.
- Pour the mixture into the bag: Slowly pour the vinegar and baking soda mixture into the bag, ensuring that the showerhead is fully submerged. The mixture should cover the entire surface of the showerhead, so adjust the quantity as needed. Seal the bag tightly to prevent any leaks or spills.
- Allow the showerhead to soak: Place the bag containing the showerhead and the vinegar and baking soda mixture in a safe and secure location. Allow the showerhead to soak for at least an hour, or overnight for more stubborn buildup. During this time, the mixture will work to dissolve and loosen the mineral deposits and limescale on the showerhead.
- Check periodically: While the showerhead is soaking, you can periodically check on its progress. You may notice the mixture becoming darker or cloudy as it reacts with the buildup. This is a sign that the solution is actively working to dissolve the deposits. Feel free to gently shake or swirl the bag to help dislodge any stubborn mineral deposits.
By following these steps, you will allow the vinegar and baking soda mixture to effectively penetrate and break down any mineral deposits and limescale on the showerhead. The soaking process is essential for achieving a thorough clean. Once the soaking time is complete, you can proceed to the next step and scrub away any remaining buildup.
Step 4: Scrub the Showerhead
Now that you have completed the soaking process, it’s time to move on to the next step – scrubbing the showerhead. This step involves using a soft-bristled toothbrush or a cleaning brush to remove any remaining mineral deposits, limescale, and buildup from the surface and the nozzles of the showerhead.
Follow these steps to effectively scrub the showerhead:
- Remove the showerhead from the soaking mixture: Carefully remove the showerhead from the bag containing the vinegar and baking soda mixture. Be mindful of any excess liquid that may drip, as it can be acidic or contain cleaning agents.
- Inspect the showerhead: Take a close look at the showerhead and its nozzles. You may notice that some of the mineral deposits and buildup have already loosened or dissolved during the soaking process. This makes it easier to scrub them away.
- Dip the toothbrush or cleaning brush into the mixture: Dip a soft-bristled toothbrush or a cleaning brush into the remaining vinegar and baking soda mixture. The mixture acts as a mild abrasive and helps to dislodge any stubborn residue.
- Gently scrub the showerhead: Scrub the surface of the showerhead, paying specific attention to the nozzles and any areas with visible buildup. Use gentle, circular motions to dislodge any remaining mineral deposits or limescale. Be careful not to apply too much pressure, as this may damage the surface of the showerhead.
- Focus on the nozzles: The nozzles of the showerhead are often the areas with the most stubborn buildup. Use the toothbrush or cleaning brush to thoroughly clean each nozzle, ensuring that water can flow freely through them. Gently scrub away any residue or blockages that may be impeding the water flow.
By following these steps and gently scrubbing the showerhead, you will remove any remaining mineral deposits, limescale, and buildup. The combination of the previous soaking process and the scrubbing action will help restore the showerhead to its optimal condition.
Once you have completed the scrubbing process, rinse the showerhead thoroughly with clean water to remove any vinegar and baking soda residue. Wipe away any excess moisture and debris using a clean cloth or sponge. Now, you are ready to reattach the showerhead to the shower arm and enjoy a revitalized showering experience.
To clean a showerhead using basic pantry ingredients, mix equal parts white vinegar and water in a plastic bag, then secure it around the showerhead with a rubber band. Let it soak for a few hours, then scrub with a brush and rinse.
Read more: How Clean Showerhead Deposits
Step 5: Rinse and Reattach the Showerhead
After scrubbing away the mineral deposits, limescale, and buildup from the showerhead, it’s time to move on to the final step — rinsing and reattaching the showerhead. This step ensures that any remaining residue is thoroughly removed, and the showerhead is ready for use.
Here are the steps to rinse and reattach the showerhead:
- Rinse with clean water: Take the showerhead and rinse it thoroughly with clean water. This will help wash away any vinegar and baking soda residue, ensuring that your showerhead is clean and fresh.
- Wipe away excess moisture: Use a clean cloth or sponge to wipe away any excess moisture from the showerhead. This will prevent water spots and help restore the shine of the fixture.
- Inspect the shower arm: While the showerhead is drying, take a moment to inspect the shower arm. Look for any signs of damage or buildup. If you notice any issues, such as rust or excessive buildup, you may want to clean or replace the shower arm as well.
- Reattach the showerhead to the shower arm: Once the showerhead is dry, align it with the shower arm and firmly screw it back in place. Use a wrench or adjustable pliers to tighten it, but be careful not to overtighten and risk damaging the showerhead or the shower arm.
- Turn on the water supply: Finally, turn on the water supply to allow water to flow through the newly cleaned showerhead. Check for any leaks or drips and make sure that the water is flowing smoothly and evenly.
By following these steps, you will rinse off any remaining residue, ensure that the showerhead is securely reattached, and test its functionality. Once you have completed these steps, you can enjoy a clean, rejuvenated showerhead and experience enhanced water flow and a refreshing showering experience.
Remember to regularly clean your showerhead to prevent the buildup of mineral deposits, limescale, and bacteria in the future. Incorporating regular cleaning into your bathroom maintenance routine will help maintain the optimal performance and cleanliness of your showerhead.
Method 2: Cleaning with Lemon Juice and Water
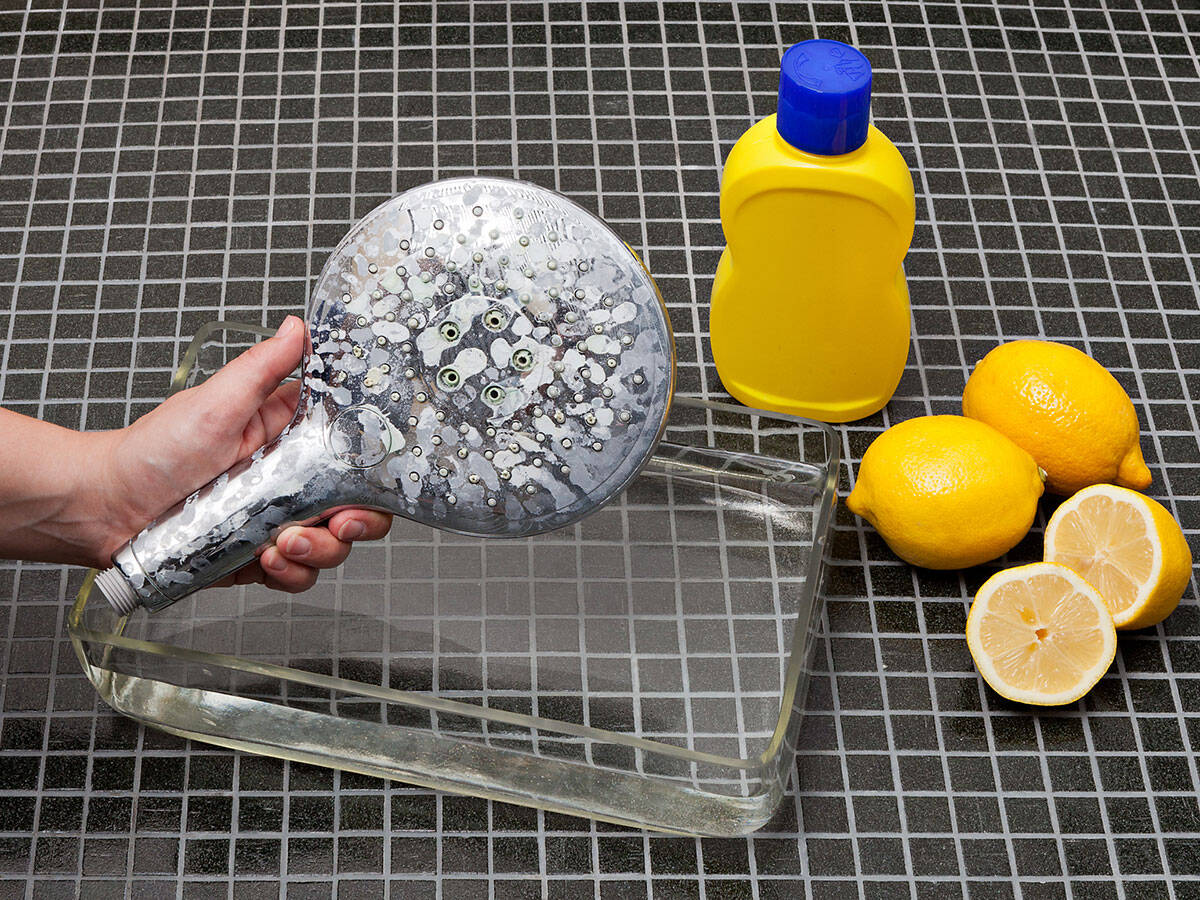
If you prefer a more citrusy scent or don’t have vinegar readily available, you can effectively clean your showerhead using lemon juice and water. Lemon juice contains natural citric acid, which helps dissolve mineral deposits and limescale, leaving your showerhead clean and refreshed.
Here are the steps to follow when cleaning your showerhead using lemon juice and water:
- Step 1: Remove the showerhead
- Step 2: Prepare the lemon juice and water mixture
- Step 3: Soak the showerhead in the mixture
- Step 4: Scrub the showerhead
- Step 5: Rinse and reattach the showerhead
Begin by carefully removing the showerhead from the shower arm. Use a wrench or adjustable pliers to loosen and unscrew the showerhead. Be careful not to damage the shower arm during this process. Place the showerhead aside for cleaning.
In a container, mix equal parts lemon juice and water. The amount of mixture needed will depend on the size of your showerhead, but a cup or two should be sufficient. The lemon juice acts as a natural acid to break down mineral deposits and limescale.
Submerge the showerhead in the lemon juice and water mixture. Ensure that the showerhead is fully covered and there is enough liquid to soak it effectively. Allow the showerhead to soak for at least an hour or overnight for stubborn buildup.
After the soaking period, remove the showerhead from the mixture and use an old toothbrush or cleaning brush to scrub away any remaining mineral deposits and buildup. Pay close attention to the nozzles and any hard-to-reach areas. The acidity of the lemon juice will help dissolve and loosen the residue.
Rinse the showerhead thoroughly with clean water to remove any lemon juice residue. Use a cloth or sponge to wipe away any remaining debris. Then, reattach the showerhead to the shower arm, ensuring a secure fit.
By following these steps, you can effectively clean your showerhead using lemon juice and water. This method is a great alternative to vinegar and baking soda, especially if you prefer a citrusy scent. After the cleaning process, your showerhead will be free from mineral deposits, limescale, and buildup, ensuring a refreshing and enjoyable showering experience.
Remember to regularly clean your showerhead to prevent the buildup of mineral deposits and maintain its optimal performance. Now that you have two methods to choose from, you can easily keep your showerhead clean using pantry ingredients available in your kitchen.
Read more: How To Clean A Showerhead
Step 1: Remove the Showerhead
Before you can begin cleaning your showerhead with lemon juice and water, it’s important to remove it from the shower arm. This step allows for easier access and thorough cleaning of the individual components.
Follow these steps to safely remove the showerhead:
- Turn off the water supply: Before removing the showerhead, make sure to turn off the water supply to your shower. Locate the shut-off valve or handles in your bathroom and ensure that the water flow to the showerhead is completely stopped. This will prevent any potential spills or leaks during the removal process.
- Protect the showerhead surface: Take a soft cloth or towel and wrap it around the collar or connector that connects the showerhead to the shower arm. This will protect the finish of the showerhead from scratches or damage while using pliers or a wrench for removal.
- Loosen the showerhead: Use a wrench or adjustable pliers to grasp the collar or connector near the base of the showerhead, where it attaches to the shower arm. Turn the wrench counterclockwise to loosen and unscrew the showerhead. Apply steady pressure, but be cautious not to overtighten or force it, as this can cause damage.
- Remove the showerhead: Once the collar or connector is loosened, continue unscrewing until the showerhead is completely detached from the shower arm. Take care not to drop or damage the showerhead during this process.
- Inspect the showerhead and shower arm: With the showerhead removed, take a moment to inspect both the showerhead and the shower arm for any signs of damage, debris, or buildup. This is a good opportunity to assess the condition of the components and ensure they are in good working order.
By following these steps, you can safely and effectively remove the showerhead from the shower arm. Remember to turn off the water supply and protect the surface of the showerhead before loosening and unscrewing it. Once the showerhead is removed, you can proceed to the next steps and clean it using lemon juice and water for a fresh and revitalized showering experience.
Step 2: Prepare the Lemon Juice and Water Mixture
With the showerhead successfully removed, it’s time to prepare the lemon juice and water mixture to effectively clean and refresh it. The natural acidity of lemon juice helps to dissolve mineral deposits and limescale, leaving your showerhead clean and free from buildup.
Follow these steps to prepare the lemon juice and water mixture:
- Gather the ingredients: The main ingredients you will need are fresh lemons and water. Squeeze enough lemons to extract the juice needed for cleaning. The number of lemons required will depend on the size of the showerhead and the amount of buildup.
- Measure the water: Fill a measuring cup or container with an equal amount of water as lemon juice. The ratio of lemon juice to water should be 1:1 to create a diluted solution that is safe yet effective for cleaning.
- Mix the lemon juice and water: Pour the measured lemon juice into the container with water. Stir the mixture well to ensure the lemon juice is thoroughly combined with the water. This will create a solution with the right level of acidity for breaking down mineral deposits and limescale.
By following these steps, you will have prepared the lemon juice and water mixture for cleaning your showerhead. The natural citric acid in lemon juice, when combined with water, offers a safe and non-toxic cleaning solution that is effective in removing buildup. Now that the mixture is ready, you can move on to the next step of soaking the showerhead.
Step 3: Soak the Showerhead in the Mixture
Now that you have prepared the lemon juice and water mixture, it’s time to proceed to the next step – soaking the showerhead. This step allows the mixture to work its magic and break down any mineral deposits, limescale, and other buildup on the showerhead’s surface.
Follow these steps to soak the showerhead in the lemon juice and water mixture:
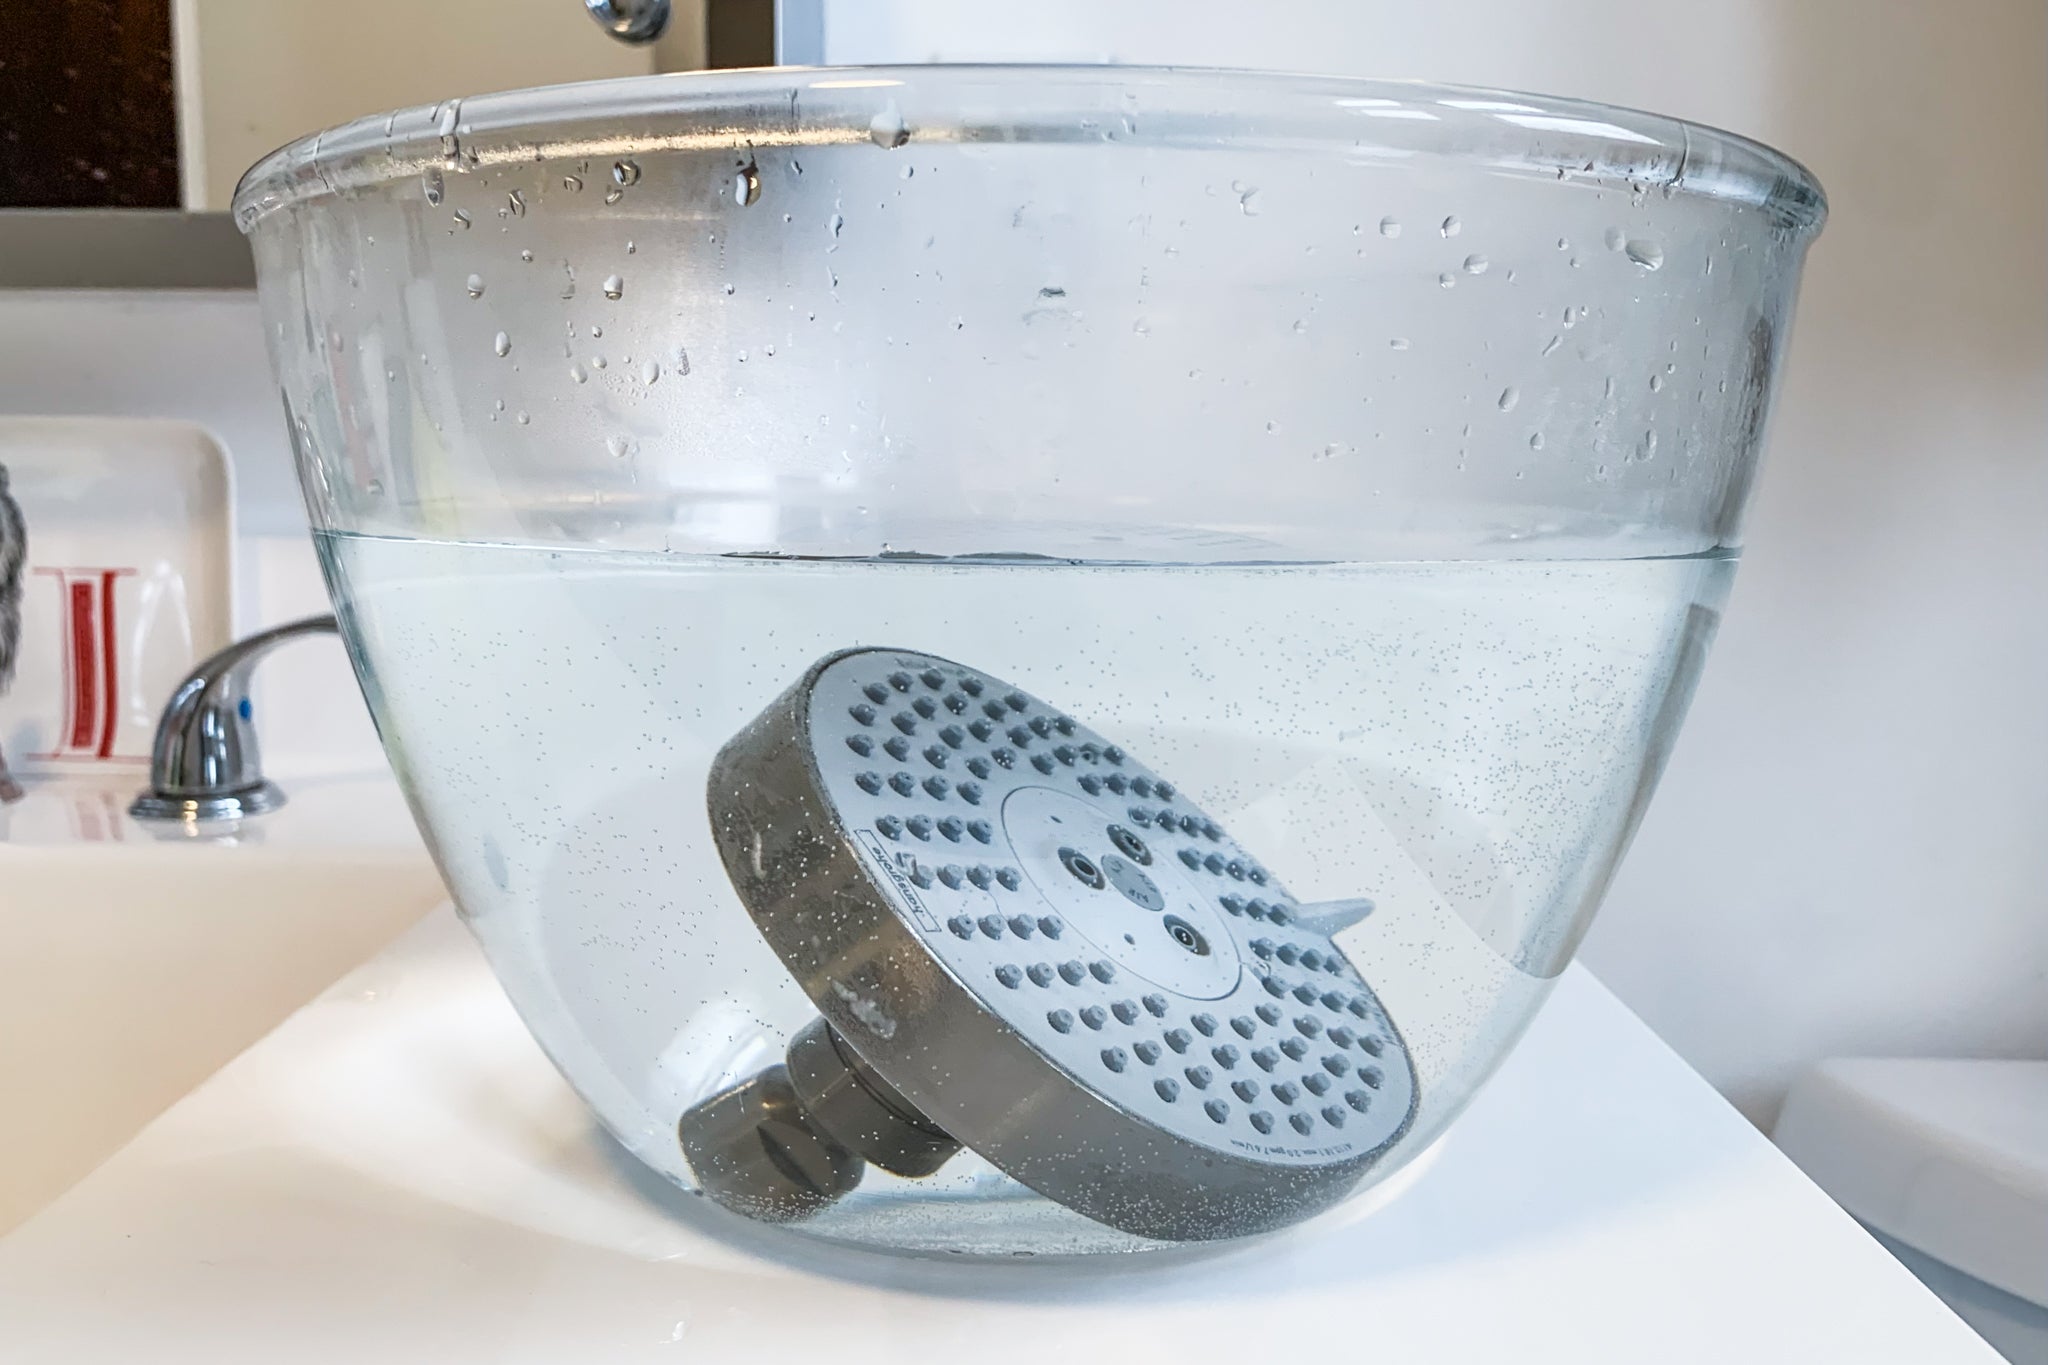
- Find a suitable container: Select a container or bowl that is large enough to accommodate the showerhead. Ensure that it is deep enough to fully submerge the showerhead and that it can hold the lemon juice and water mixture.
- Place the showerhead in the container: Carefully place the showerhead into the container, ensuring that it is completely submerged in the lemon juice and water mixture. If needed, adjust the quantity of the mixture to ensure the entire showerhead is covered.
- Allow the showerhead to soak: Let the showerhead soak in the lemon juice and water mixture for at least an hour or overnight for more stubborn buildup. During this time, the natural acidity of the lemon juice will work to dissolve mineral deposits and limescale on the surface of the showerhead.
- Periodically agitate the mixture: While the showerhead is soaking, you can gently swirl or agitate the container to ensure that the mixture reaches all parts of the showerhead. This will help loosen any clinging residue and enhance the effectiveness of the cleaning process.
By following these steps, you will allow the lemon juice and water mixture to effectively penetrate and break down any mineral deposits and limescale on the showerhead. The soaking process is crucial for achieving a thorough clean. Once the soaking time is complete, you can proceed to the next step and give the showerhead a gentle scrub to remove any remaining buildup.
Step 4: Scrub the Showerhead
After the showerhead has soaked in the lemon juice and water mixture, it’s time to give it a gentle scrub to remove any loosened mineral deposits, limescale, and other buildup. This step ensures a thorough cleaning and helps restore the showerhead to its optimal condition.
Follow these steps to effectively scrub the showerhead:
- Remove the showerhead from the soaking mixture: Carefully remove the showerhead from the container with the lemon juice and water mixture. Be mindful of any excess liquid that may drip, as it can be acidic or contain cleaning agents.
- Inspect the showerhead: Take a close look at the showerhead and its nozzles. You may notice that some of the mineral deposits and buildup have already loosened during the soaking process. This makes it easier to scrub them away.
- Dip a soft brush or toothbrush into the mixture: Wet a soft brush or toothbrush in the remaining lemon juice and water mixture. The gentle bristles of the brush help dislodge any remaining residue without damaging the showerhead’s surface.
- Gently scrub the showerhead: Using a circular motion, gently scrub the surface of the showerhead, focusing on areas with visible buildup. Pay extra attention to the nozzles and any hard-to-reach corners. The mild acidity in lemon juice will aid in dissolving the mineral deposits and limescale. Avoid applying excessive pressure to prevent damage.
- Rinse the showerhead: Once you have thoroughly scrubbed the showerhead, rinse it under running water to remove any leftover residue and lemon juice. Ensure that all traces of buildup and cleaning solution have been washed away.
By following these steps, you will effectively remove any remaining mineral deposits, limescale, and buildup from the showerhead. The gentle scrubbing action, combined with the natural acidity in lemon juice, will leave your showerhead clean and refreshed. Once the showerhead is rinsed and free from residue, you can proceed to the final step of reattaching it to the shower arm.
To clean a showerhead using basic pantry ingredients, mix equal parts white vinegar and water in a plastic bag, then secure it around the showerhead with a rubber band. Let it soak for a few hours, then scrub with a brush and rinse.
Read more: How Clean Showerhead Deposits
Step 5: Rinse and Reattach the Showerhead
Now that you have scrubbed away the mineral deposits, limescale, and buildup from the showerhead, it’s time to move on to the final step – rinsing and reattaching the showerhead. This step ensures that any remaining residue is thoroughly removed and the showerhead is ready to be used once again.
Follow these steps to rinse and reattach the showerhead:
- Rinse the showerhead: Hold the showerhead under running water, ensuring that all surfaces are rinsed thoroughly. This will help remove any remaining lemon juice residue along with the loosened mineral deposits, limescale, and buildup.
- Wipe away excess moisture: Use a clean cloth or sponge to wipe away any excess moisture from the showerhead. This will prevent water spots and help restore the shine of the fixture.
- Inspect the shower arm: Take a moment to inspect the shower arm, the part to which the showerhead is attached. Look for any signs of damage, buildup, or debris. If needed, clean or replace the shower arm as well to ensure optimal water flow.
- Reattach the showerhead to the shower arm: Align the showerhead with the shower arm and firmly screw it back in place. Use a wrench or adjustable pliers to tighten it if necessary, but be cautious not to overtighten and risk damaging the showerhead or the shower arm.
- Turn on the water supply: Finally, turn on the water supply to allow water to flow through the newly cleaned showerhead. Check for any leaks or drips and make sure that the water is flowing smoothly and evenly.
By following these steps, you will rinse off any remaining residue, ensure that the showerhead is securely reattached, and test its functionality. Once completed, you can enjoy a clean and refreshed showerhead, ensuring optimal water flow and a rejuvenating showering experience.
To maintain the cleanliness of your showerhead, it’s recommended to clean it regularly using either the vinegar and baking soda method or the lemon juice and water method. Regular cleaning will prevent the buildup of mineral deposits and keep your showerhead functioning optimally for a refreshing shower every time.
Additional Tips for Maintaining a Clean Showerhead
Cleaning your showerhead on a regular basis is essential for maintaining a clean and hygienic bathroom. Here are some additional tips to help you keep your showerhead in optimal condition and prevent the buildup of mineral deposits, limescale, and bacteria:
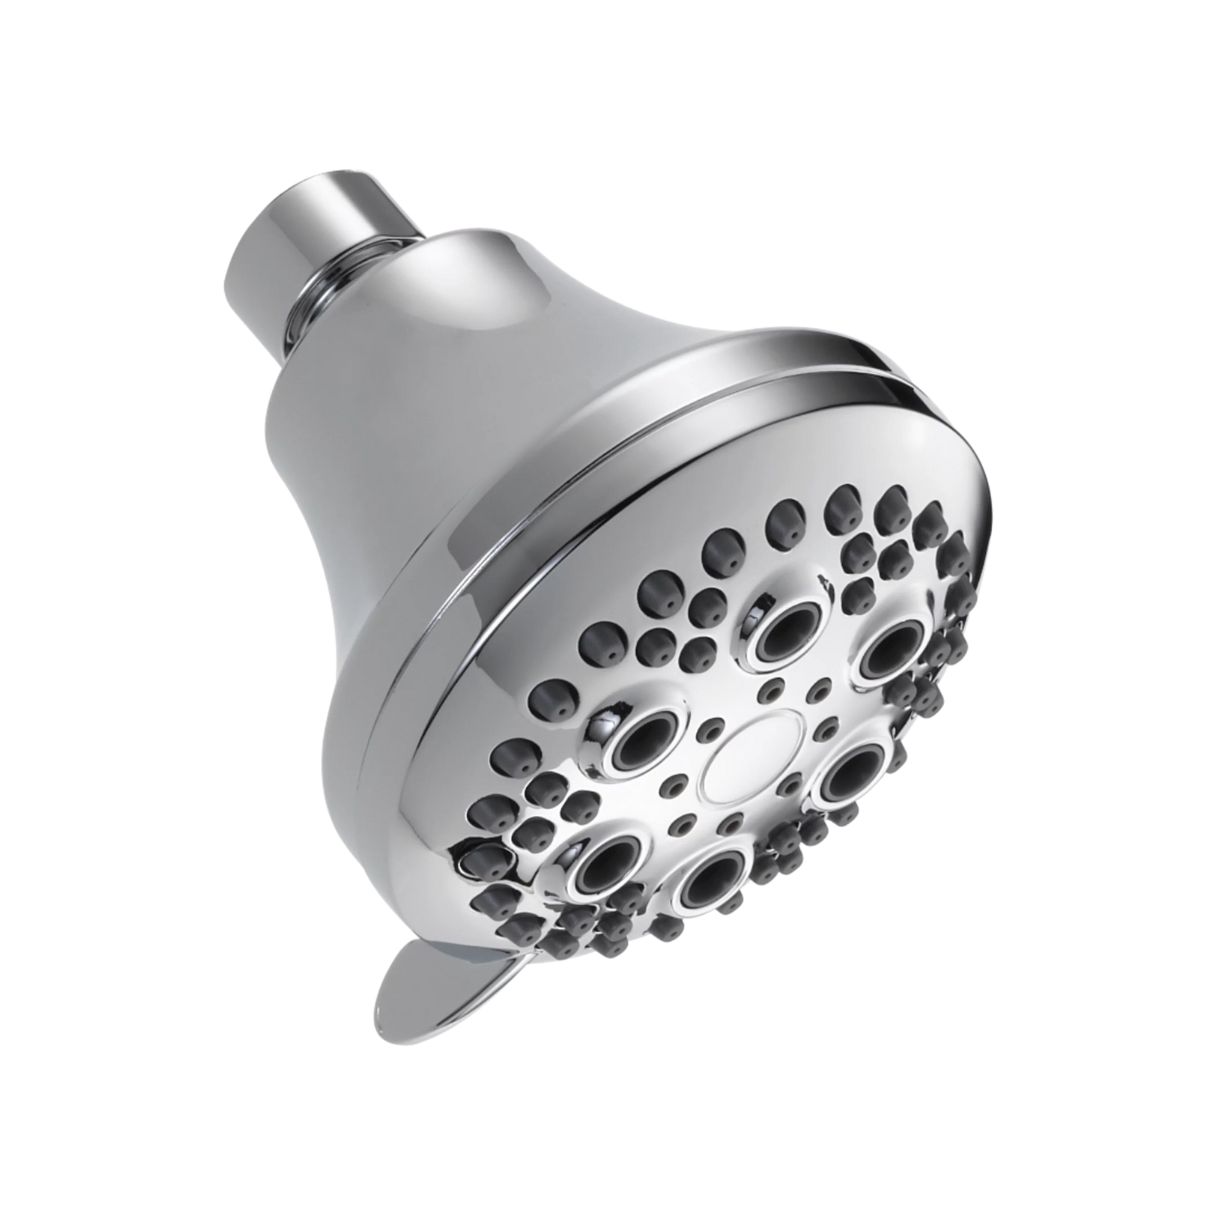
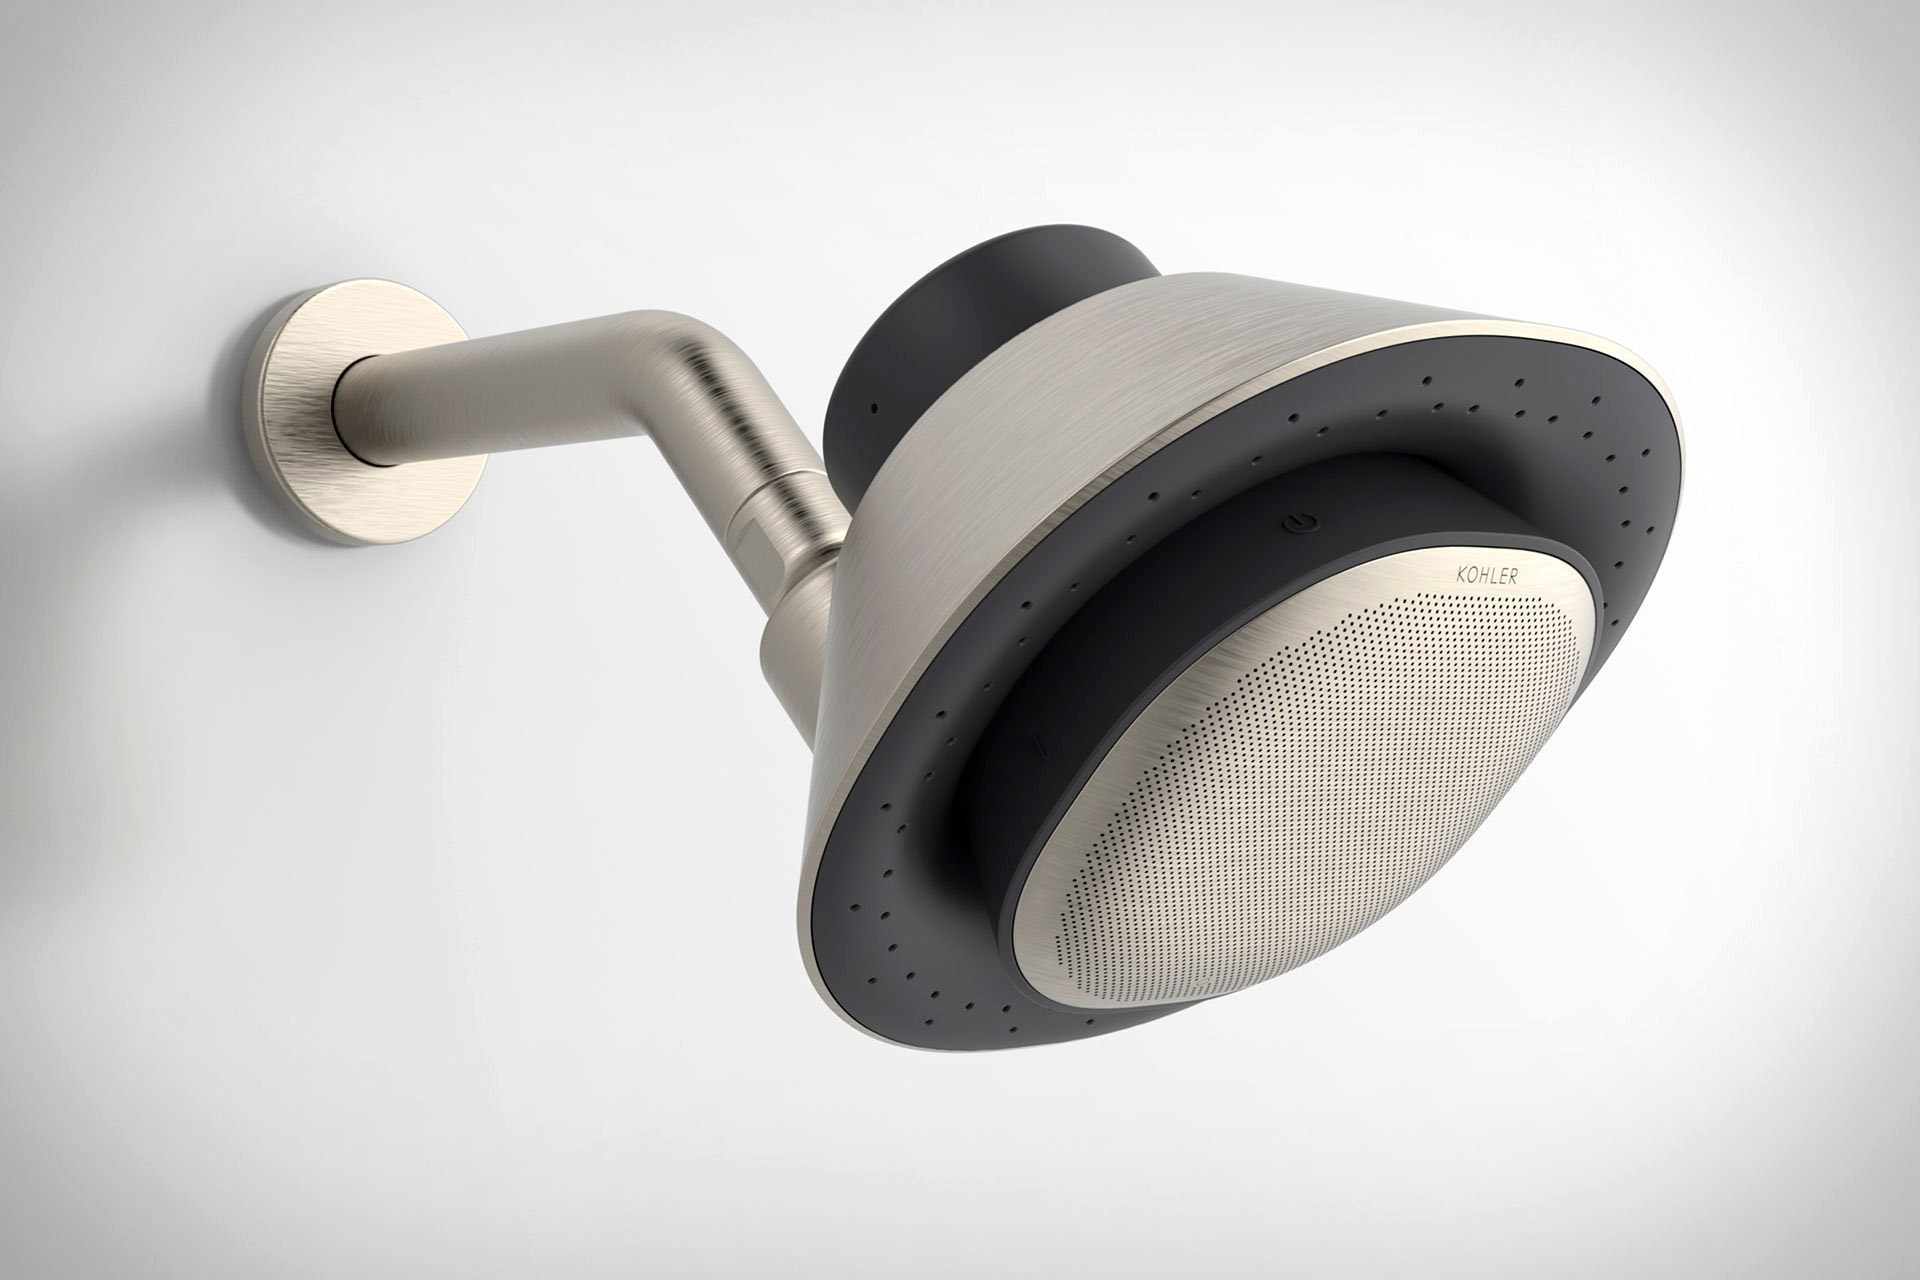
- Use a showerhead with anti-clog features: Consider investing in a showerhead that is specifically designed to prevent clogging. These showerheads often come with built-in anti-clog mechanisms or removable nozzles that are easier to clean.
- Install a water softener: If you live in an area with hard water, installing a water softener can help reduce the mineral content in your water. This will minimize the formation of mineral deposits on your showerhead and other fixtures.
- Regularly remove and clean the showerhead: Make it a habit to remove and clean your showerhead every few months, even if it appears to be clean. This will help prevent the buildup of residue and maintain optimal water flow.
- Use a toothbrush or small brush for regular maintenance: In between deep cleanings, use a soft-bristled toothbrush or a small brush to gently scrub the nozzles and surface of the showerhead. This will help prevent the accumulation of mineral deposits and keep the nozzles clear.
- Avoid harsh chemical cleaners: While commercial cleaning products may seem effective, they can be harsh on your showerhead and the environment. Stick to natural cleaning solutions like vinegar, baking soda, and lemon juice or opt for mild dish soap for regular maintenance.
- Remove and clean the shower filter: If your showerhead has a built-in filter, it’s important to follow the manufacturer’s instructions for cleaning or replacing it. A clogged or dirty filter can affect water flow and the overall performance of the showerhead.
- Keep the showerhead dry after use: After taking a shower, use a clean towel or cloth to wipe the surface of the showerhead and remove any excess moisture. This will help prevent the growth of mold, mildew, and bacteria.
- Inspect the rubber gasket: If your showerhead has a rubber gasket or O-ring, regularly inspect it for any signs of wear or damage. Replace it as needed to maintain a tight seal between the showerhead and the shower arm.
- Consider using a descaler: If you find that mineral deposits and limescale build up quickly on your showerhead, you may want to use a descaling product specifically designed for removing stubborn buildup. Follow the instructions carefully to avoid any damage to your showerhead.
- Regularly clean your shower: A clean shower stall or bathtub can help reduce the buildup of dirt, soap scum, and grime on your showerhead. Make it a habit to regularly clean your shower area to maintain the overall cleanliness of your bathroom.
By following these tips and incorporating regular cleaning and maintenance into your routine, you can ensure that your showerhead remains clean, functional, and provides a refreshing shower experience every time. Remember, prevention is key when it comes to maintaining a clean showerhead, so take proactive measures to minimize the buildup of mineral deposits and keep your showerhead in top shape.
Read more: How To Clean A Rainshower Showerhead
Conclusion
Maintaining a clean and well-functioning showerhead is essential for a pleasant and refreshing showering experience. With the use of basic pantry ingredients such as vinegar, baking soda, lemon juice, and water, you can easily clean your showerhead and eliminate mineral deposits, limescale, and bacteria that may affect its performance.
In this article, we explored two effective methods for cleaning your showerhead. Whether you choose the vinegar and baking soda method or the lemon juice and water method, both offer safe, environmentally-friendly, and budget-friendly solutions for maintaining a clean showerhead.
By following the step-by-step instructions provided, you can remove the showerhead, prepare the cleaning solution, soak the showerhead in the mixture, scrub away residue, rinse the showerhead, and reattach it to the shower arm. Regular maintenance, along with the additional tips shared, will prevent the buildup of mineral deposits, limescale, and bacteria, ensuring optimal water flow and a hygienic shower.
Remember to clean your showerhead on a regular basis, adjust the cleaning frequency based on the hardness of your water, and adopt preventive measures to maintain a clean showerhead. By doing so, you will prolong the lifespan of your showerhead, improve its functionality, and enjoy a revitalizing shower experience.
So, roll up your sleeves, gather your pantry ingredients, and give your showerhead the attention it deserves. A clean and well-maintained showerhead will not only enhance your showering experience but also contribute to a clean and hygienic bathroom environment.
Frequently Asked Questions about How To Clean A Showerhead Using Basic Pantry Ingredients
Was this page helpful?
At Storables.com, we guarantee accurate and reliable information. Our content, validated by Expert Board Contributors, is crafted following stringent Editorial Policies. We're committed to providing you with well-researched, expert-backed insights for all your informational needs.


0 thoughts on “How To Clean A Showerhead Using Basic Pantry Ingredients”