Home>Storage Ideas>Storage Baskets>How To Make Sweetgrass Baskets
Storage Baskets
How To Make Sweetgrass Baskets
Modified: August 17, 2024
Learn how to make beautiful sweetgrass storage baskets with our step-by-step guide. Create unique and functional storage solutions. Start crafting today!
(Many of the links in this article redirect to a specific reviewed product. Your purchase of these products through affiliate links helps to generate commission for Storables.com, at no extra cost. Learn more)
Introduction
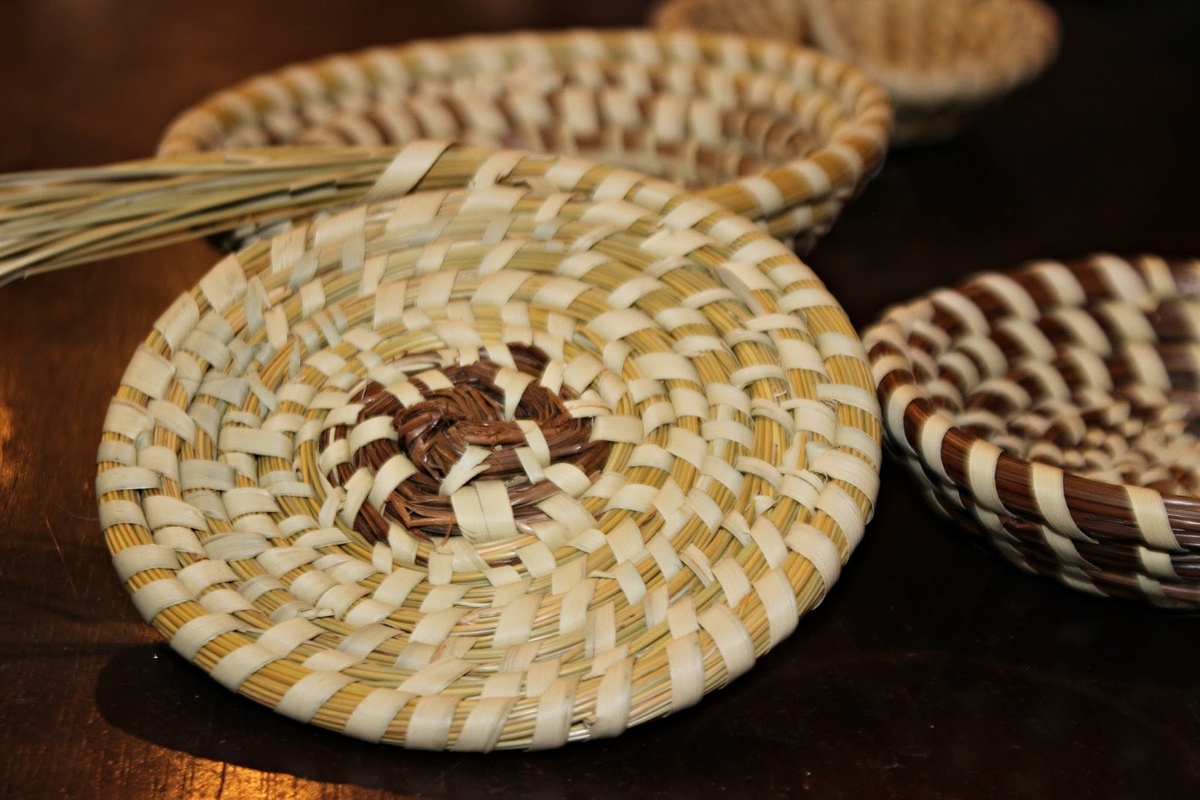
Welcome to the world of sweetgrass basket making! A cherished tradition passed down through generations, sweetgrass basketry is not just a craft; it is a way of preserving cultural heritage and expressing creativity. The art of weaving beautiful baskets using sweetgrass is deeply rooted in cultural significance and is often associated with the Gullah Geechee people of the Lowcountry region in South Carolina and Georgia.
These baskets are not only practical storage containers, but they also serve as works of art, showcasing intricate designs and impeccable craftsmanship. The process of making sweetgrass baskets requires patience, attention to detail, and a passion for preserving this unique art form.
In this article, we will delve into the fascinating world of sweetgrass basket making, exploring the materials needed, the process of gathering and preparing sweetgrass, and the techniques involved in creating these stunning baskets. Whether you’re a beginner looking to learn the basics or an experienced weaver hoping to refine your skills, this comprehensive guide will provide you with the knowledge to make your own sweetgrass baskets.
So, let’s gather our supplies and embark on this creative journey, discovering the beauty and significance of sweetgrass basket making along the way!
Key Takeaways:
- Embrace the rich tradition of sweetgrass basket making by responsibly gathering materials, mastering weaving techniques, and adding personal touches to create stunning, culturally significant baskets.
- Connect with cultural heritage and express creativity through the captivating process of sweetgrass basket making, from gathering materials to adding finishing touches, creating unique and functional works of art.
Read more: How To Make Candy Baskets
Materials Needed
Before you begin your sweetgrass basket making adventure, it’s important to gather all the necessary materials. Here’s what you’ll need:
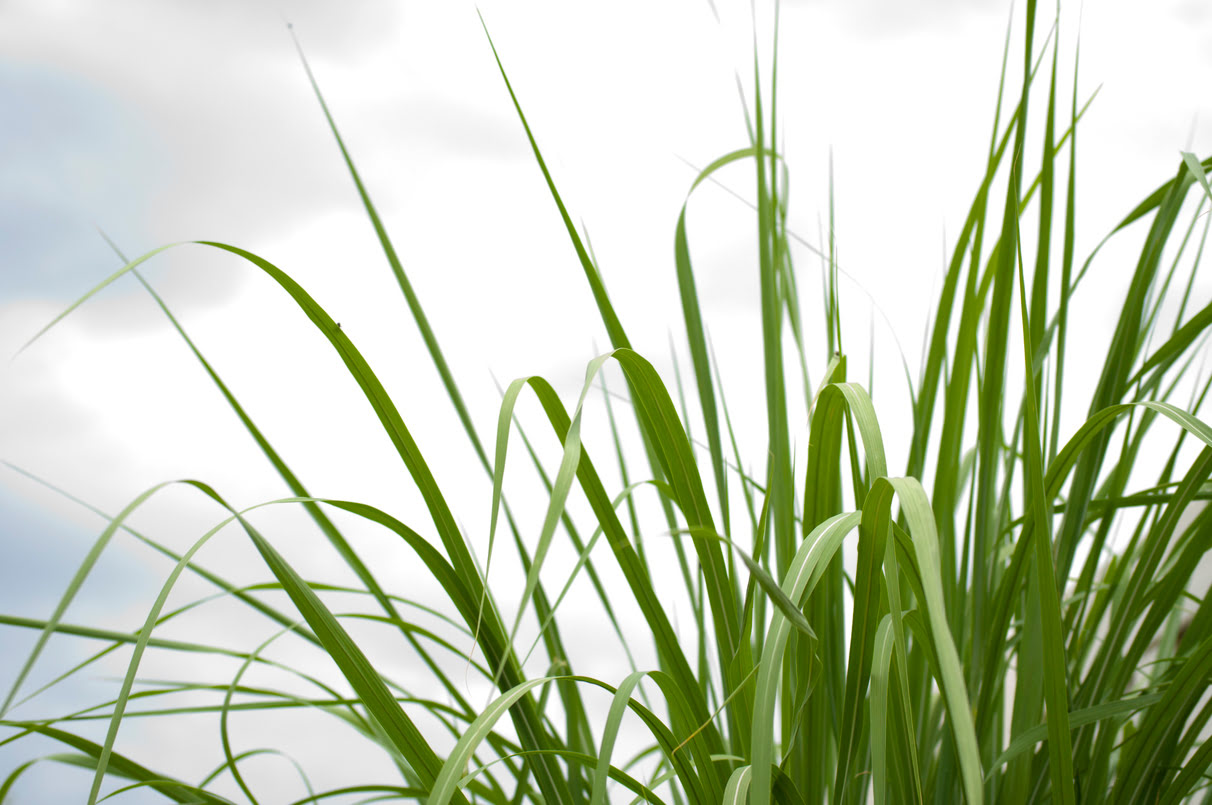
- Sweetgrass: This is the star of the show! Sweetgrass, also known as Muhlenbergia filipes, is a type of fragrant, long-bladed grass that grows in wetlands and marshy areas. It can be found in abundance in the coastal regions of the southeastern United States.
- Palm Leaves or Pine Needles: These materials are typically used as a foundation for the basket. Palm leaves or pine needles provide structure and stability to the basket’s base.
- Needles: You’ll need long, sturdy needles to weave the sweetgrass strands together. Basket making needles are usually made of steel or bone, and they come in various sizes.
- Thread: Strong, waxed linen thread is commonly used to secure the sweetgrass strands and add strength to the basket.
- Scissors: A sharp pair of scissors will come in handy for cutting the sweetgrass and trimming any excess material.
- Water: Having a small spray bottle filled with water can help keep the sweetgrass moist and pliable while you’re working on your basket.
- Optional Embellishments: If you want to add a personal touch to your sweetgrass basket, you can consider incorporating decorative elements like beads, shells, feathers, or colorful yarn.
Now that you have gathered all the necessary materials, it’s time to move on to the next step: gathering sweetgrass!
Gathering Sweetgrass
Gathering sweetgrass is an essential step in the process of making sweetgrass baskets. It’s important to approach this step with care and respect for the environment. Here’s a guide to help you gather sweetgrass responsibly:
- Locate a Suitable Habitat: Sweetgrass thrives in moist, marshy areas. Look for wetlands or coastal regions where sweetgrass is known to grow. Make sure you obtain any necessary permits or permissions if you are gathering sweetgrass from protected areas.
- Choose Healthy Plants: When selecting sweetgrass, choose plants that are healthy and vibrant. Avoid harvesting from plants that appear damaged or diseased.
- Harvesting Technique: To harvest sweetgrass, use a sharp knife or scissors to cut the grass blades near the base of the plant. It’s important to leave a substantial portion of the plant intact to allow for regrowth and sustainability.
- Respectful Harvesting: Take only what you need and avoid over-harvesting. Remember that sweetgrass plays a vital role in the ecosystem, and its preservation is crucial.
By gathering sweetgrass in a responsible and sustainable manner, you contribute to the long-term preservation of this valuable resource. Now that you have your sweetgrass, it’s time to prepare it for basket making!
Preparing Sweetgrass
Before you start weaving your sweetgrass basket, it’s important to prepare the sweetgrass strands to ensure they are pliable and ready for use. Here are the steps to prepare your sweetgrass:
- Clean the Sweetgrass: Begin by removing any dirt, debris, or excess moisture from the sweetgrass strands. Gently shake or brush off any loose particles.
- Soak the Sweetgrass: To make the sweetgrass more flexible and easier to work with, you can soak it in warm water for about 10-15 minutes. This step helps the sweetgrass become more supple and less prone to breaking.
- Pat Dry the Sweetgrass: After soaking, gently pat dry the sweetgrass strands using a clean towel or paper towels. Make sure they are slightly damp but not dripping wet.
- Sort the Sweetgrass: Take the time to sort the strands based on their thickness and length. This will allow you to easily select the appropriate strands for various parts of the basket.
By properly preparing the sweetgrass, you ensure that it is in optimal condition for weaving. The soaking process enhances its flexibility, making it easier to manipulate and create intricate patterns in your basket.
Now that your sweetgrass is prepared, you’re ready to dive into the fascinating world of sweetgrass basket making techniques!
Basket Making Techniques
Creating a sweetgrass basket involves mastering a few fundamental techniques. Understanding these techniques will allow you to weave intricate designs and construct a sturdy and visually appealing basket. Here are the primary basket making techniques:
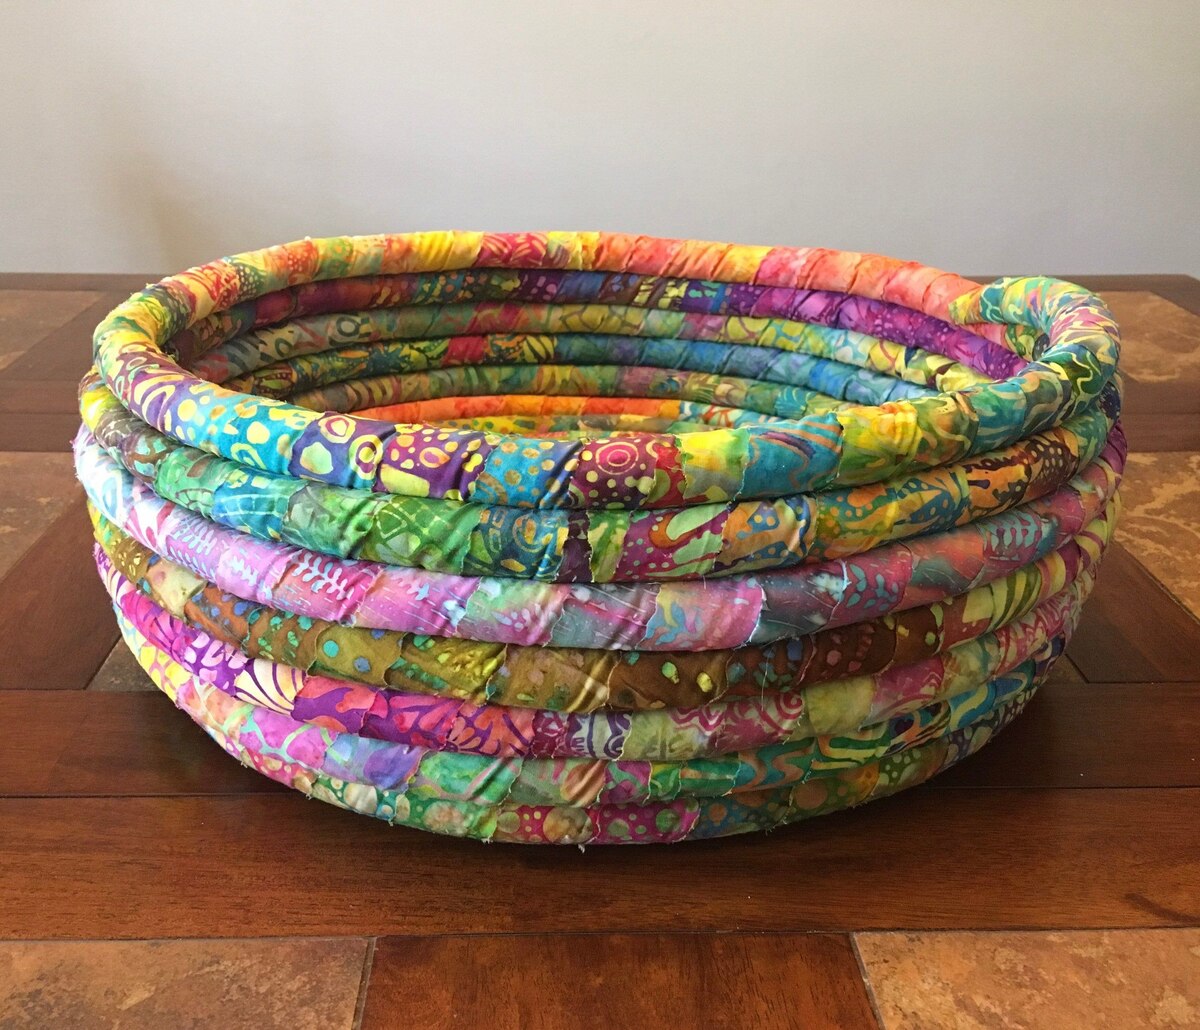
- Coiling: Coiling is the foundation of sweetgrass basket making. It involves wrapping the sweetgrass strands around a central core, often made of palm leaves or pine needles, to create the base of the basket. As you coil the sweetgrass, you will need to secure it with a needle and thread, stitching it in place.
- Packing: Packing refers to the technique of compressing the rows of sweetgrass together to ensure a tight and solid weave. You achieve this by pressing down on each row as you add more sweetgrass, creating a firm and sturdy structure.
- Plaiting: Plaiting is a technique used to create intricate patterns and designs by weaving multiple strands of sweetgrass together. It involves manipulating the sweetgrass strands over and under each other in a specific pattern to create a visually appealing design.
- Finishing: The finishing technique involves securing the final rows of sweetgrass and trimming any excess material. This step gives your sweetgrass basket a clean and polished look.
Mastering these basket making techniques may take time and practice, but with patience and dedication, you will soon be able to create beautiful and intricate sweetgrass baskets that showcase your skills and creativity.
Now, let’s dive into the step-by-step process of creating a sweetgrass basket, starting with the base!
When starting a sweetgrass basket, wet the sweetgrass to make it more pliable and easier to work with. This will help prevent the grass from breaking as you weave.
Read more: How To Make Felt Baskets
Starting the Base
The base is the foundation of your sweetgrass basket, providing stability and structure for the rest of the weaving process. Follow these steps to start building the base of your basket:
- Select a Foundation Material: Begin by selecting your choice of foundation material, such as palm leaves or pine needles. These materials will serve as the core over which you will coil your sweetgrass strands.
- Create a Center Coil: Take a few sweetgrass strands and wrap them around the center of your foundation material, creating a small coil. Secure the strands using a needle and strong thread, stitching them in place.
- Coil the Sweetgrass: Gradually add more sweetgrass strands to your initial coil. As you wrap the sweetgrass around the center, make sure to keep the coil tight and even. Use the needle and thread to stitch each row of sweetgrass in place, securing it to the previous rows.
- Continue Coiling: As you progress, the base of your sweetgrass basket will widen. Keep adding sweetgrass strands and coiling them around the previous rows, ensuring a tight weave. Use the packing technique to press down on each row, creating a compact and sturdy base.
- Shape the Base: Depending on the desired shape of your basket, you can start shaping the base as it grows wider. If you want a round basket, maintain a circular shape as you coil the sweetgrass. For an oval or rectangular basket, gently manipulate the shape as you add more sweetgrass.
Remember to use your fingers to keep the sweetgrass strands in place as you coil and stitch. The base of your sweetgrass basket should be firm and secure, setting the stage for the weaving of the sides.
Now that you have a solid base, let’s move on to building the sides of your sweetgrass basket!
Building the Sides
After successfully creating a sturdy base, it’s time to build the sides of your sweetgrass basket. This step will transform your basket from a flat coil into a three-dimensional structure. Follow these steps to build the sides:
- Continue Coiling: Start by adding more sweetgrass strands to the last row of the base. Coil the sweetgrass upwards, gradually building the height of the sides. Use the same coiling and stitching technique as you did for the base.
- Maintain the Size and Shape: Keep in mind the desired size and shape of your basket as you add more sweetgrass. If you want a taller basket, continue coiling the sweetgrass upwards. If you prefer a shallower basket, adjust the height accordingly.
- Pack and Press: As you add each row of sweetgrass, use the packing technique to press down on the previous rows. This will ensure a tight and compact weave, giving your basket a sturdy structure.
- Design and Patterns: This is your opportunity to get creative! You can incorporate different weaving patterns, such as checkerboard, spiral, or alternating colors, to add visual interest to your sweetgrass basket. Remember, plaiting and weaving techniques can be used to create intricate designs.
- Secure the Ends: Once you have reached the desired height for your basket, it’s time to secure the ends of the sweetgrass. Trim any excess material, leaving a tail of sweetgrass. Use the needle and thread to stitch the tail securely to the last row, ensuring that it is neatly tucked away.
Building the sides requires attention to detail and precision. Consistency in the size and shape of each row is key to achieving a well-balanced and visually pleasing sweetgrass basket.
Now that you have built the sides of your basket, let’s move on to adding a handle for added functionality and style!
Adding a Handle
Adding a handle to your sweetgrass basket not only enhances its functionality but also adds a touch of style and elegance. Follow these steps to incorporate a handle into your basket:
- Select the Handle Material: Choose a material for your handle that complements the overall design and theme of your sweetgrass basket. Common options include braided sweetgrass, twisted sweetgrass, or a combination of sweetgrass and other materials like rattan or leather.
- Determine Handle Placement: Decide where you want to position the handle on your basket. This can be at the center, on opposite sides, or multiple handles along the sides, depending on your design preference.
- Create Anchor Points: To secure the handle to the basket, you need to create anchor points. These can be small loops made of sweetgrass or additional stitches attaching the handle to the last row of the basket sides.
- Attach the Handle: Thread the needle with the strong thread and carefully sew the handle to the anchor points. Make sure to stitch it securely, using a crisscross pattern or other decorative techniques to ensure it stays in place.
- Strengthen the Handle: To reinforce the handle and add durability, consider stitching several rows of sweetgrass around the handle, coating it in a protective layer.
Adding a handle provides practicality, allowing you to carry and transport your sweetgrass basket with ease. It also adds a distinctive and personal touch, making your basket unique and visually appealing.
With the handle in place, you’re just a few steps away from completing your sweetgrass basket. Let’s move on to the finishing touches!
Finishing Touches
As you near the completion of your sweetgrass basket, it’s time to add the finishing touches that will bring your creation to life. These final steps will ensure a polished and professional look for your basket. Here’s what you need to do:
- Trim Excess Sweetgrass: Take a sharp pair of scissors and carefully trim any excess sweetgrass that extends beyond the last row of the basket. This will give your basket clean lines and a neat appearance.
- Secure Loose Ends: Check for any loose sweetgrass strands and securely stitch them to the adjacent rows. This will prevent unraveling and add structural integrity to your basket.
- Embellish (Optional): If you want to add decorative elements to your sweetgrass basket, now is the time to do so. Incorporate beads, shells, feathers, or colorful yarn by stitching them onto the basket using the needle and thread.
- Add a Finish (Optional): If you prefer a glossy or protective finish for your sweetgrass basket, you can lightly spray it with a clear varnish or sealant. This will enhance the shine of the sweetgrass and provide added durability.
Take your time with these final touches, ensuring that every aspect of your sweetgrass basket is thoughtfully attended to. Remember, these details can make all the difference in the overall appearance and longevity of the basket.
Congratulations! You’ve successfully completed your sweetgrass basket. Admire your handiwork and revel in the beauty of this traditional art form!
Now, as you continue on your journey as a sweetgrass basket maker, remember to share this treasured craft with others and preserve the cultural heritage it represents.
Happy weaving!
Read more: How To Make Gabion Baskets
Conclusion
Creating a sweetgrass basket is a captivating and rewarding experience. It allows you to connect with a rich cultural tradition while expressing your creativity through a beautiful and functional piece of art. As you have learned throughout this article, the key to making a stunning sweetgrass basket lies in gathering the right materials, preparing the sweetgrass strands, mastering basket weaving techniques, and adding the finishing touches.
By responsibly gathering sweetgrass, you contribute to the preservation of this valuable resource and respect the natural environment. Preparing the sweetgrass ensures that it is pliable and ready for weaving, while understanding the fundamental basket making techniques allows you to construct a sturdy and visually appealing basket.
Building the base and sides of your sweetgrass basket requires patience and attention to detail, while adding a handle and finishing touches enhance its functionality and aesthetic appeal. Remember to get creative with patterns, designs, and embellishments to make your sweetgrass basket truly unique.
Throughout this journey, don’t forget to embrace the spirit of this time-honored craft. Take pride in your work, share the knowledge with others, and cherish the cultural heritage that sweetgrass basket making represents.
Whether you’re a beginner starting on your first basket or a seasoned weaver refining your skills, may your sweetgrass baskets bring joy and inspiration to all who admire them. Happy weaving!
Frequently Asked Questions about How To Make Sweetgrass Baskets
Was this page helpful?
At Storables.com, we guarantee accurate and reliable information. Our content, validated by Expert Board Contributors, is crafted following stringent Editorial Policies. We're committed to providing you with well-researched, expert-backed insights for all your informational needs.


0 thoughts on “How To Make Sweetgrass Baskets”