Home>Storage Ideas>Storage Baskets>How To Make Cloth Baskets
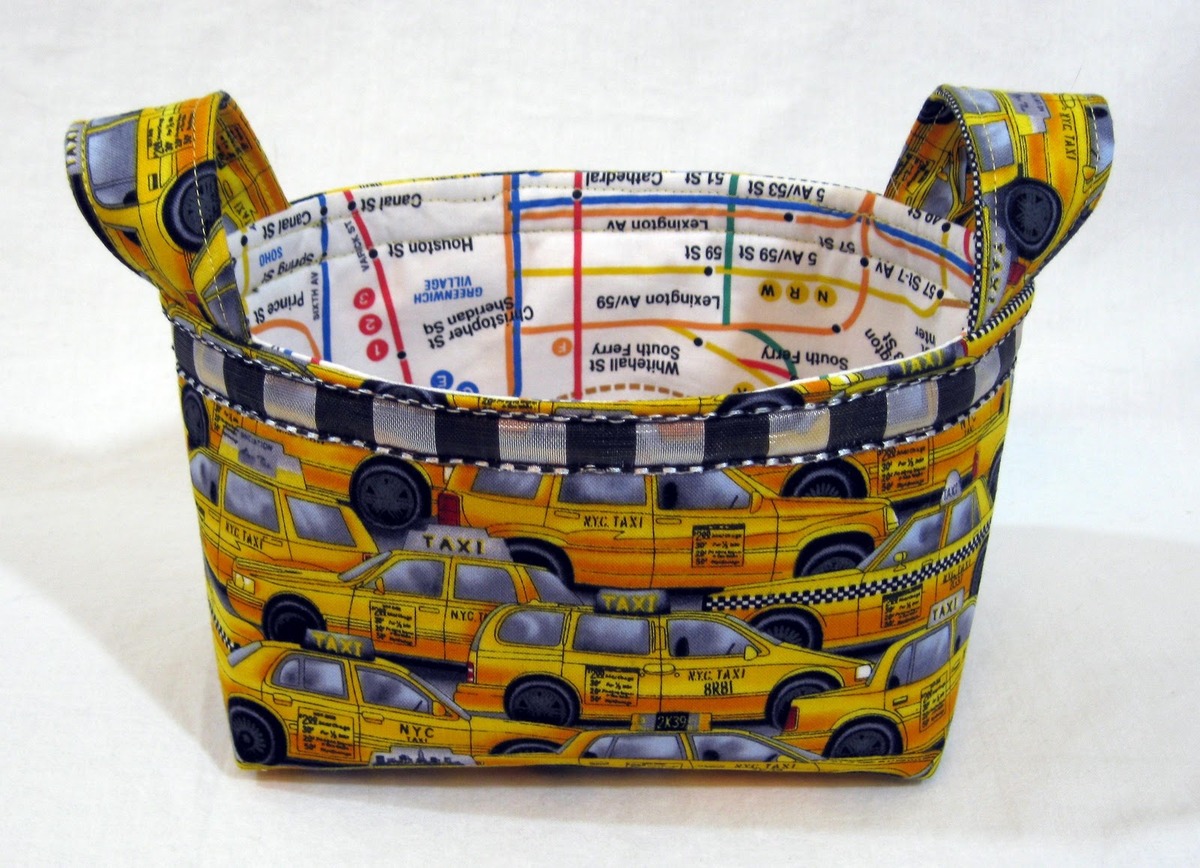

Storage Baskets
How To Make Cloth Baskets
Modified: December 7, 2023
Learn how to make stylish and functional storage baskets out of cloth in this step-by-step guide. Perfect for organizing and decluttering your home.
(Many of the links in this article redirect to a specific reviewed product. Your purchase of these products through affiliate links helps to generate commission for Storables.com, at no extra cost. Learn more)
Introduction
Welcome to the world of storage baskets! If you’re looking for a creative and practical way to organize your belongings, cloth baskets are the perfect solution. These versatile and stylish containers not only provide ample storage space, but they also add a touch of charm to any room.
In this article, we will guide you through the process of making your own cloth baskets. Whether you’re a seasoned DIY enthusiast or just starting out, this step-by-step tutorial will equip you with the knowledge and skills you need to create beautiful and functional storage baskets.
Before we dive into the exciting world of basket-making, let’s talk about the materials you’ll need for this project.
Key Takeaways:
- Unleash Your Creativity: Making cloth baskets is a fun and rewarding DIY project that allows you to express your style through fabric selection, handles, and finishing touches.
- Practical and Personalized Storage: Create beautiful and functional cloth baskets to keep your space organized while adding a touch of charm to any room. Experiment with fabrics, sizes, and handles for unique creations.
Read more: How To Make A Picnic Basket
Materials Needed
Before you start making your cloth baskets, gather the following materials:
- Fabric: Choose a sturdy fabric that will hold its shape, such as canvas, linen, or upholstery fabric. You will need enough fabric to create the base and sides of the basket. Consider using different fabrics for a more eclectic look.
- Thread: Select a thread that matches or complements the color of your fabric. This will ensure a seamless finish to your basket.
- Scissors: A good pair of fabric scissors will make cutting the fabric much easier.
- Measuring tape: This will help you accurately measure the dimensions of your basket.
- Pins: Use pins to hold the fabric pieces in place during sewing.
- Sewing machine or needle: Depending on your preference and skill level, you can use a sewing machine or sew by hand using a needle and thread.
- Iron and ironing board: Ironing the fabric before and after sewing will give your basket a polished and professional look.
- Handles (optional): If you want to add handles to your basket, you’ll need materials like leather strips, fabric strips, or pre-made handles.
Once you have gathered all these materials, you’re ready to embark on your cloth basket-making journey!
Step 1: Choosing Fabrics
The first step in making your cloth basket is selecting the fabrics you want to use. This is your chance to get creative and choose fabrics that suit your style and the room where the basket will be placed.
Consider the following factors when choosing your fabrics:
- Strength and durability: Since storage baskets are meant to hold items, it’s important to choose fabrics that are sturdy and can withstand the weight of the contents. Canvas, linen, or upholstery fabric are excellent choices.
- Color and pattern: Decide on a color scheme or pattern that complements the room’s decor. You can go for bold and vibrant colors to make a statement or opt for neutral tones for a more subtle look.
- Mix and match: Don’t be afraid to mix different fabrics to add visual interest. Consider using contrasting or coordinating fabrics for the base, sides, and handles (if applicable).
Before you start cutting the fabric, it’s a good idea to wash and iron it. This will pre-shrink the fabric and allow for easier sewing and handling.
Once you have chosen your fabrics and prepared them, you’re ready to move on to the next step: cutting the fabric.
Step 2: Cutting the Fabric
Now that you have selected your fabrics, it’s time to cut them into the necessary pieces for your cloth basket. Follow these steps to ensure accurate measurements:
- Measure the dimensions: Determine the size you want your basket to be. Measure the length, width, and height of the desired basket size. Take into consideration the seam allowance, which is typically around 1/2 an inch.
- Cut the base: Cut a rectangular piece of fabric for the base of the basket. The dimensions of the base should be the length and width measurements you took, adding the seam allowance.
- Cut the sides: Cut a long strip of fabric for the sides of the basket. The width of the strip should be equal to the height measurement you took, adding the seam allowance. The length of the strip should be the perimeter of the base plus seam allowance.
- If you’re using different fabrics for the base and sides, cut the corresponding pieces accordingly.
Once you have cut the fabric pieces, it’s a good idea to iron them to remove any wrinkles and make them easier to work with. Ironing the fabric will also help ensure precise sewing and a neat final result.
Now that you have your fabric pieces ready, it’s time to move on to the next step: sewing the base of the basket.
Step 3: Sewing the Base
With the fabric pieces cut and ironed, it’s time to sew the base of your cloth basket. Follow these steps to create a sturdy and secure base:
- Place the base fabric piece right side up on your workspace.
- Take one of the long sides of the side strip and align it with one of the long sides of the base fabric. The right sides of the fabric should be facing each other.
- Pin the side strip to the base fabric, ensuring the edges are aligned.
- Continue pinning the side strip to the base fabric, going around all four sides until the ends of the strip meet.
- Use a sewing machine or hand sewing needle to sew along the pinned edges, using a straight stitch. Remove the pins as you go along.
- Trim any excess fabric and seam allowance, leaving a small margin for finishing.
Once the base has been sewn, flip the fabric right side out to reveal the finished base of your cloth basket. Give it a quick press with an iron to ensure the seam is smooth and flat.
Now that you have successfully sewn the base, it’s time to move on to the next step: sewing the sides of the basket.
When making cloth baskets, choose a sturdy fabric like canvas or denim for durability. Consider adding interfacing to give the basket structure and stability.
Read more: How To Make Reed Baskets
Step 4: Sewing the Sides
With the base of your cloth basket complete, it’s time to sew the sides to create the structure for your basket. Follow these steps to sew the sides:
- Take the long strip of fabric that you cut for the sides and fold it in half lengthwise. The right sides of the fabric should be facing each other.
- Pin along the raw edges of the strip to secure the fold.
- Starting at one of the short ends, sew along the pinned edge using a straight stitch, making sure to backstitch at the beginning and end for added durability.
- Once you reach the other short end, backstitch again to secure the stitch.
- Trim any excess fabric and seam allowance.
- With the stitched side strip still inside out, place it around the base of the basket, aligning the raw edges.
- Pin the side strip to the base, ensuring that the edges are aligned.
- Starting at one of the side seams, sew the side strip to the base using a straight stitch.
- Continue sewing along the side strip until you reach the other side seam, making sure to backstitch at the beginning and end.
- Trim any excess fabric and seam allowance, leaving a small margin for finishing.
Once the sides have been sewn, turn the fabric right side out to reveal the structure of your basket. Press the seams with an iron to make them crisp and neat.
Now that you have successfully sewn the sides, it’s time to move on to the next step: adding handles, if desired.
Step 5: Adding Handles
Adding handles to your cloth basket can make it easier to carry and give it a stylish touch. Follow these steps to add handles to your basket:
- Decide on the type of handles you want to use. You can choose from pre-made handles, fabric strips, or even repurpose materials like leather belts or rope.
- If you’re using fabric strips, cut two strips to your desired handle length. You can make them longer for shoulder straps or shorter for handheld handles.
- Align the raw ends of each handle strip where you want them to be placed on the basket, making sure they are evenly spaced.
- Pin the handle ends to the inside of the basket, ensuring they are securely attached.
- Sew the handle ends to the basket using a straight stitch, reinforcing with backstitching for added strength.
Once the handles are securely attached, give them a gentle tug to make sure they are firmly in place. You can also sew an “X” pattern or box stitch for extra reinforcement.
Congratulations! You have successfully added handles to your cloth basket.
Now it’s time for the final step: adding finishing touches to complete your handmade creation.
Step 6: Finishing Touches
You’re almost done with your cloth basket! The final step involves adding some finishing touches to make your basket look polished and professional.
- Give the entire basket a good press with an iron to smooth out any wrinkles and creases.
- If desired, you can topstitch along the top edge of the basket to create a clean and finished look.
- Trim any loose threads or excess fabric to create a tidy appearance.
- Add any decorative elements you like, such as ribbons, buttons, or fabric appliques, to personalize your basket.
- Finally, give your basket a thorough inspection to ensure all seams are secure and there are no loose threads.
Now, step back and admire your handiwork. You have successfully created a beautiful and functional cloth basket!
Feel free to experiment with different fabric combinations, sizes, and handle styles to create baskets that suit your needs and style preferences. These versatile storage containers can be used in any room of your home to organize toys, blankets, accessories, and more.
Remember, practice makes perfect. The more baskets you make, the more your skills will develop, and you’ll be able to create unique and customized pieces.
Thank you for joining us on this cloth basket-making journey. We hope you enjoy the process and find joy in using your handmade creations to keep your space tidy and organized.
Happy basket-making!
Conclusion
Making your own cloth baskets is a rewarding and enjoyable DIY project that allows you to unleash your creativity while providing practical storage solutions. By following the steps outlined in this tutorial, you have learned how to select fabrics, cut and sew the pieces together, add handles, and put the finishing touches on your handmade baskets.
Creating your own cloth baskets allows you to customize them to suit your personal style and needs. Whether you choose bold and vibrant fabrics or opt for neutral tones, these baskets will not only help you stay organized but also add a touch of charm to any room.
As you gain more experience and confidence in your basket-making skills, feel free to experiment with different fabric combinations, sizes, and handle styles. Each basket you make can be a unique creation that reflects your individual style and tastes.
Remember, practice makes perfect. The more baskets you make, the more your skills will develop, and you’ll be able to create beautiful and functional baskets that are tailored to your specific needs.
Now it’s time to put your newfound knowledge into action. Gather your materials, select your fabrics, and start creating your own cloth baskets. Whether you make them for yourself or as thoughtful gifts for friends and family, these handmade storage solutions are sure to be cherished.
Thank you for joining us on this cloth basket-making journey. We hope you have found this tutorial helpful and inspiring. Happy basket-making!
Frequently Asked Questions about How To Make Cloth Baskets
Was this page helpful?
At Storables.com, we guarantee accurate and reliable information. Our content, validated by Expert Board Contributors, is crafted following stringent Editorial Policies. We're committed to providing you with well-researched, expert-backed insights for all your informational needs.




0 thoughts on “How To Make Cloth Baskets”