Home>Technology>Smart Home Devices>How To Make A Copy On A Printer
Smart Home Devices
How To Make A Copy On A Printer
Published: January 10, 2024
Learn how to make a copy on a printer with our step-by-step guide. Discover the best smart home devices for easy copying and printing. Unlock efficient printing solutions today!
(Many of the links in this article redirect to a specific reviewed product. Your purchase of these products through affiliate links helps to generate commission for Storables.com, at no extra cost. Learn more)
Introduction
Welcome to the world of modern printing technology! In this comprehensive guide, we will walk you through the simple and efficient process of making a copy on a printer. Whether you're a novice or an experienced user, understanding the step-by-step procedure for producing high-quality copies is essential for maximizing the functionality of your printer.
In today's fast-paced digital age, printers have evolved into versatile devices capable of performing various tasks beyond traditional document printing. With the ability to scan and replicate documents, printers have become indispensable tools for both personal and professional use. By following the instructions outlined in this guide, you will gain the confidence to effortlessly produce duplicates of important documents, photographs, and other materials.
Making a copy on a printer is a straightforward process that involves a few simple steps, and this guide aims to demystify the procedure, empowering you to harness the full potential of your printing equipment. Whether you need to duplicate a crucial contract, preserve a cherished family photo, or replicate any other type of document, this guide will equip you with the knowledge and skills to achieve your copying goals with ease.
So, without further ado, let's embark on this enlightening journey to discover the seamless process of creating copies on your printer. By the end of this guide, you will possess the expertise to make flawless copies efficiently, allowing you to streamline your document reproduction tasks and enhance your overall printing experience.
Key Takeaways:
- Making a copy on a printer is easy! Just turn on the printer, load the paper, place the document on the scanner, select copy settings, start the copy process, and retrieve the copy. It’s a simple and intuitive process for anyone to follow.
- By following the step-by-step guide, you can confidently produce high-quality copies of important documents and images. This empowers you to streamline your document reproduction tasks and enhance your overall printing experience.
Read more: How To Make A Copy On HP Printer
Step 1: Turn on the Printer
The initial step in the copy-making process is to ensure that your printer is powered on and ready to perform the task at hand. Start by locating the power button on your printer, which is typically situated on the front panel or the top surface of the device. Once you have identified the power button, press it to activate the printer. Depending on the model of your printer, you may observe a brief initialization sequence as the device powers up.
After turning on the printer, it is essential to verify that the device is in a ready state to execute copy commands. Most modern printers feature an intuitive control panel or a display screen that provides real-time status updates, including notifications related to the device's readiness for copying. Take a moment to confirm that the printer has completed its startup process and is awaiting your input.
For printers equipped with network or wireless connectivity, it is important to ensure that the printer is successfully connected to the desired network before proceeding with the copy operation. This is particularly relevant if you intend to initiate the copy job from a computer or mobile device that is wirelessly linked to the printer. By confirming the printer's connectivity status, you can preemptively address any network-related issues that may impede the copying process.
With the printer powered on and ready for use, you have successfully completed the first step in the journey to create a copy. This foundational step sets the stage for seamless interaction with the printer, laying the groundwork for the subsequent tasks involved in producing high-quality copies of your documents and images.
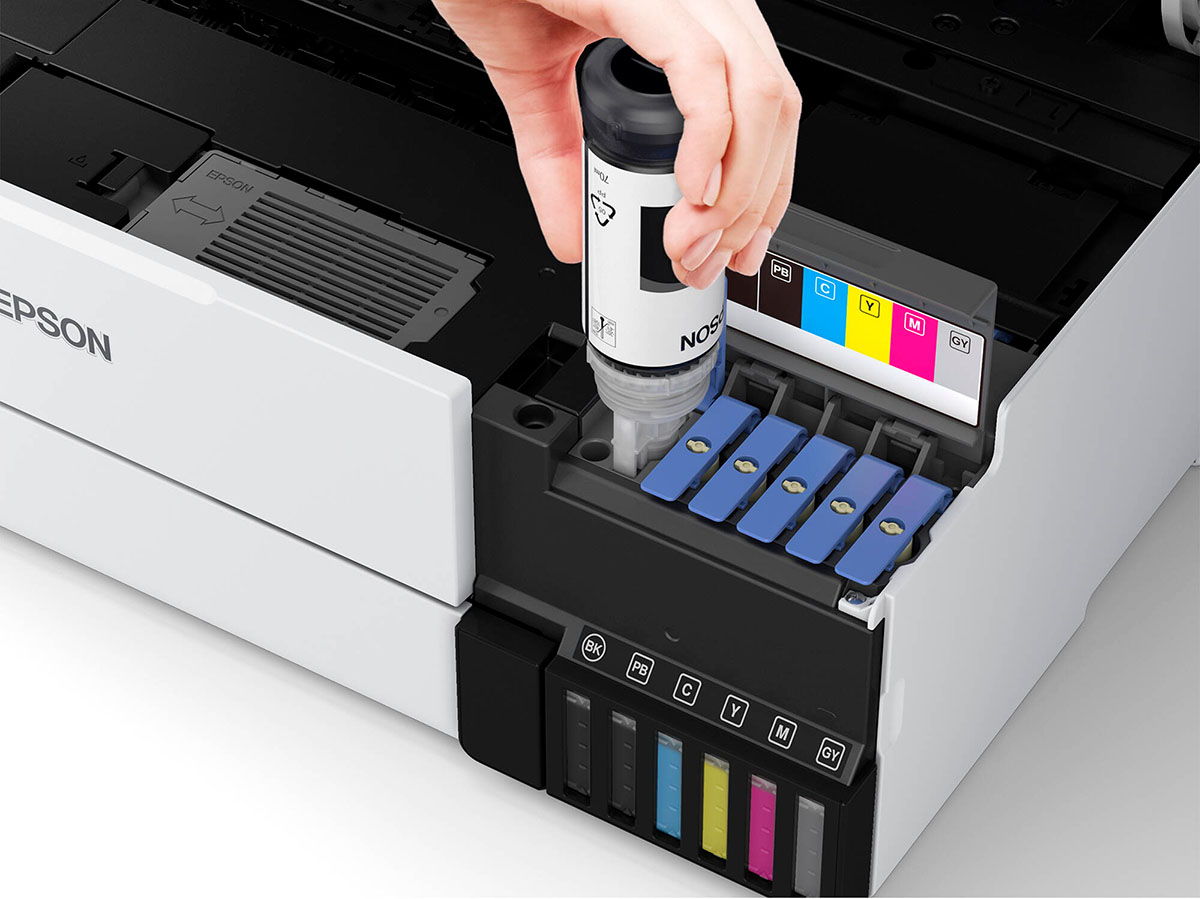
Step 2: Load Paper
Once the printer is powered on and prepared for operation, the next crucial step in the copy-making process is to ensure that the device is adequately stocked with paper. Loading the paper tray with the appropriate type and size of paper is essential for facilitating smooth and uninterrupted copying. Follow these simple guidelines to effectively load paper into your printer:
1. Prepare the Paper: Begin by selecting the type of paper that best suits your copying needs. Whether you require standard letter-size paper, legal-size paper, or specialized photo paper, ensure that the chosen paper is compatible with the printer's specifications. Additionally, inspect the paper for any visible damage or irregularities that may affect the copying process.
2. Adjust the Paper Guides: Most printers feature adjustable paper guides within the paper tray to accommodate different paper sizes. Before loading the paper, gently adjust the guides to align with the dimensions of the paper being used. This helps prevent misfeeds and ensures that the paper is correctly positioned for the copying process.
3. Load the Paper: Carefully place the stack of paper into the paper tray, ensuring that the stack is neatly aligned and does not exceed the maximum capacity specified for the tray. It is important to avoid overfilling the paper tray, as this can lead to paper jams and other operational issues during the copying process.
4. Confirm Paper Settings: Once the paper is loaded, take a moment to verify the paper settings on the printer's control panel or display screen. Ensure that the paper type and size settings correspond to the paper you have loaded into the tray. This step is crucial for optimizing the copying process and obtaining the desired output quality.
By meticulously following these steps to load paper into your printer, you are laying the groundwork for seamless and efficient copy production. With the paper properly loaded and the printer primed for action, you are now ready to proceed to the next steps in the copy-making process, bringing you closer to achieving accurate and high-quality reproductions of your documents and images.
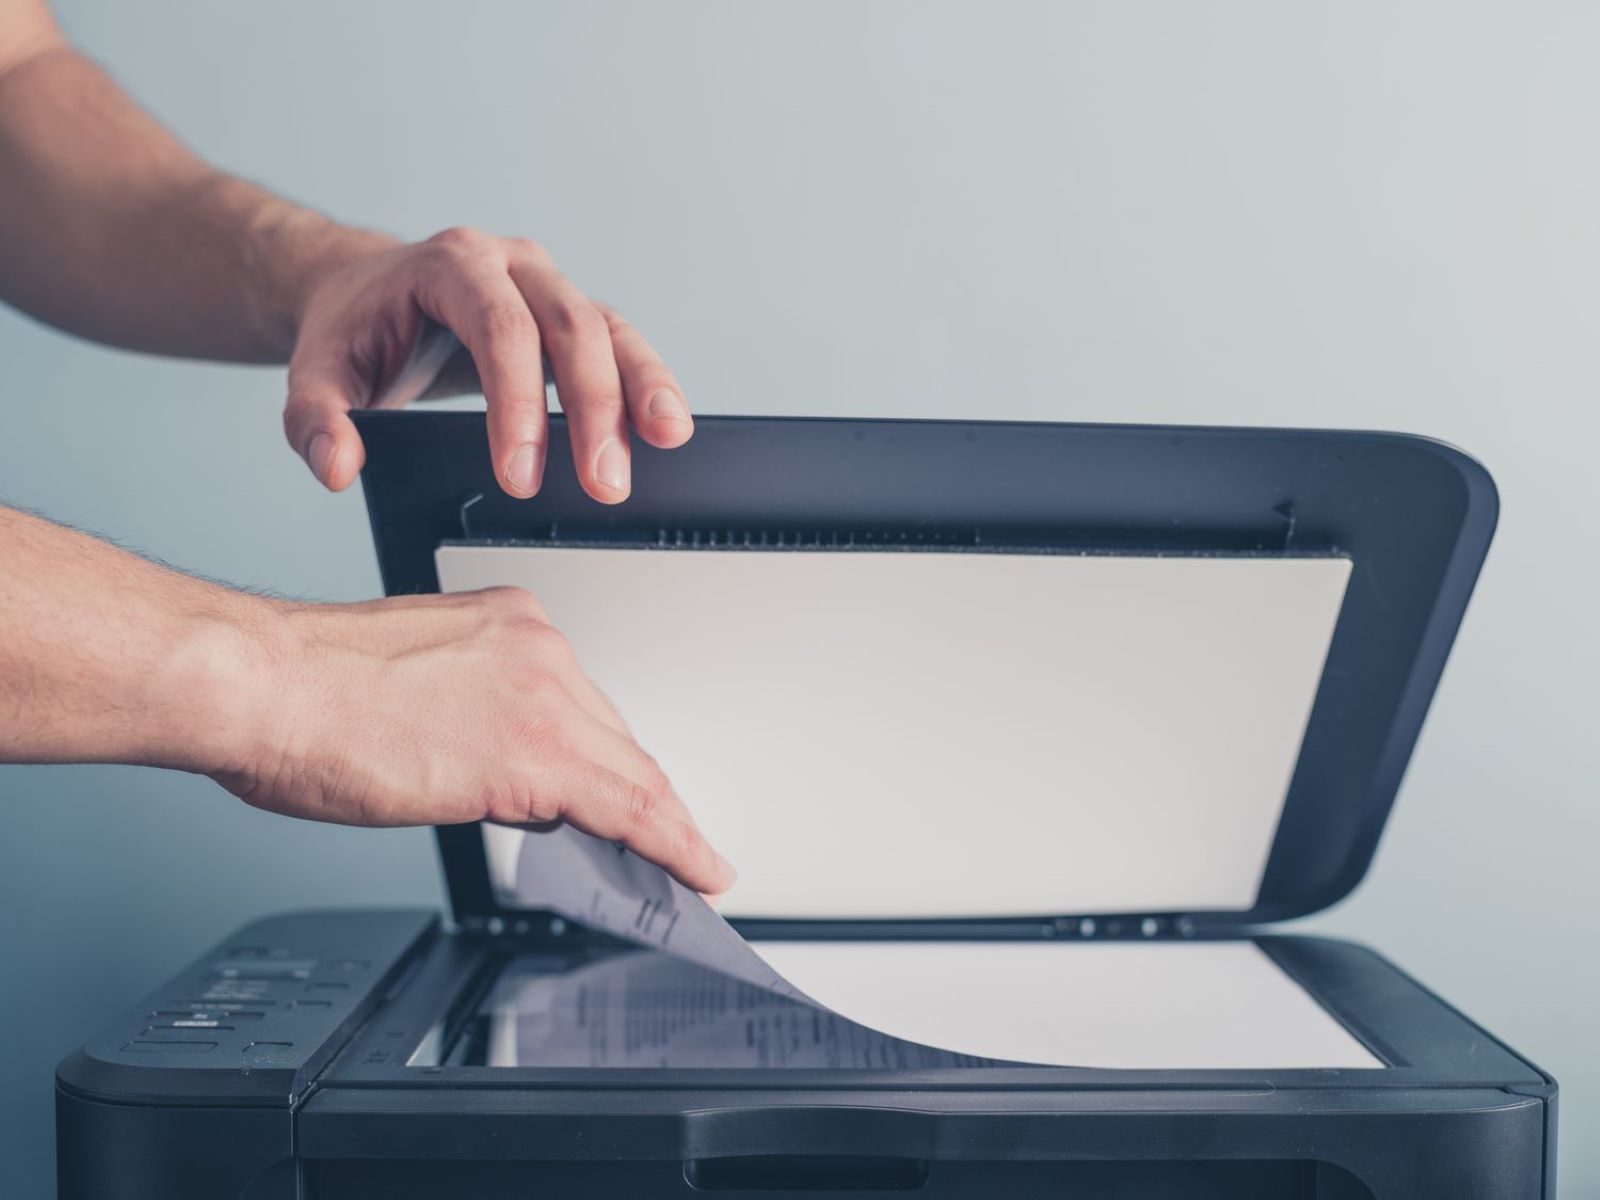
Step 3: Place the Document on the Scanner
As you embark on the journey to create a copy on your printer, the next pivotal step involves positioning the document or image that you wish to duplicate onto the scanner bed. This step is crucial for ensuring that the printer accurately captures the content of the original document, allowing for faithful reproduction in the copied output. Follow these guidelines to effectively place the document on the scanner:
1. Prepare the Document: Before placing the document on the scanner, ensure that it is free from wrinkles, creases, or any other imperfections that could impact the quality of the copy. If the document is excessively wrinkled or delicate, consider gently smoothing it out to facilitate a clean and precise scanning process.
2. Open the Scanner Lid: Access the scanner bed by lifting the scanner lid, which is typically located on the top of the printer. Some printers may feature an automatic document feeder (ADF) for scanning multiple pages, while others require you to position each page directly on the scanner bed. Familiarize yourself with the scanning mechanism of your specific printer to determine the appropriate method for placing the document.
3. Position the Document: Carefully place the document face-down on the scanner bed, aligning it with the designated markers or guides to ensure proper positioning. If you are scanning a two-sided document and your printer supports duplex scanning, follow the manufacturer’s instructions to utilize this feature for capturing both sides of the document in a single scan.
4. Close the Scanner Lid: Once the document is positioned on the scanner bed, gently lower the scanner lid to secure the document in place. Ensure that the lid is closed firmly but not forcefully, as excessive pressure could potentially damage the document or the scanner mechanism.
By meticulously following these steps to place the document on the scanner, you are setting the stage for a successful scanning process that will serve as the foundation for creating an accurate and high-fidelity copy. With the document securely positioned on the scanner bed, you are now prepared to proceed to the subsequent steps in the copy-making process, bringing you closer to achieving precise and faithful reproductions of your original materials.
To make a copy on a printer, place the original document face down on the scanner bed, select the number of copies you want, and press the “copy” button on the printer.
Step 4: Select Copy Settings
As you progress through the process of making a copy on your printer, the next pivotal step involves configuring the copy settings to align with your specific requirements. Selecting the appropriate copy settings allows you to tailor the output to meet your desired specifications, ensuring that the copied documents and images accurately reflect the characteristics of the original material. Follow these guidelines to effectively navigate the copy settings on your printer:
1. Access the Copy Menu: Begin by accessing the copy menu on the printer, typically through the control panel or display screen. Depending on the model of your printer, the copy menu may offer a range of customizable settings, including options for adjusting the number of copies, selecting color or monochrome copying, resizing the output, and optimizing the copy quality.
2. Specify the Number of Copies: Determine the quantity of copies you wish to produce and input this value into the designated field within the copy menu. Whether you need a single copy or multiple duplicates, ensure that the specified quantity aligns with your intended output. This step is essential for accurately replicating the desired number of copies without the need for manual intervention between each copy.
3. Choose the Copy Mode: If your printer offers different copy modes, such as black-and-white, color, or grayscale copying, select the appropriate mode that corresponds to the characteristics of the original document or image. This ensures that the copied output faithfully reflects the visual elements and color composition of the original material.
4. Adjust Additional Settings: Explore any supplementary copy settings available on your printer, such as image enhancement options, paper type selection, and resizing features. Depending on your specific copying needs, these settings can significantly impact the quality and appearance of the copied output, allowing you to fine-tune the reproduction to meet your exact preferences.
By meticulously navigating the copy settings on your printer, you are empowered to customize the copying process to align with your unique requirements, ensuring that the resulting output faithfully captures the essence of the original material. With the copy settings configured to your specifications, you are now poised to proceed to the subsequent steps in the copy-making process, bringing you closer to achieving precise and tailored reproductions of your documents and images.
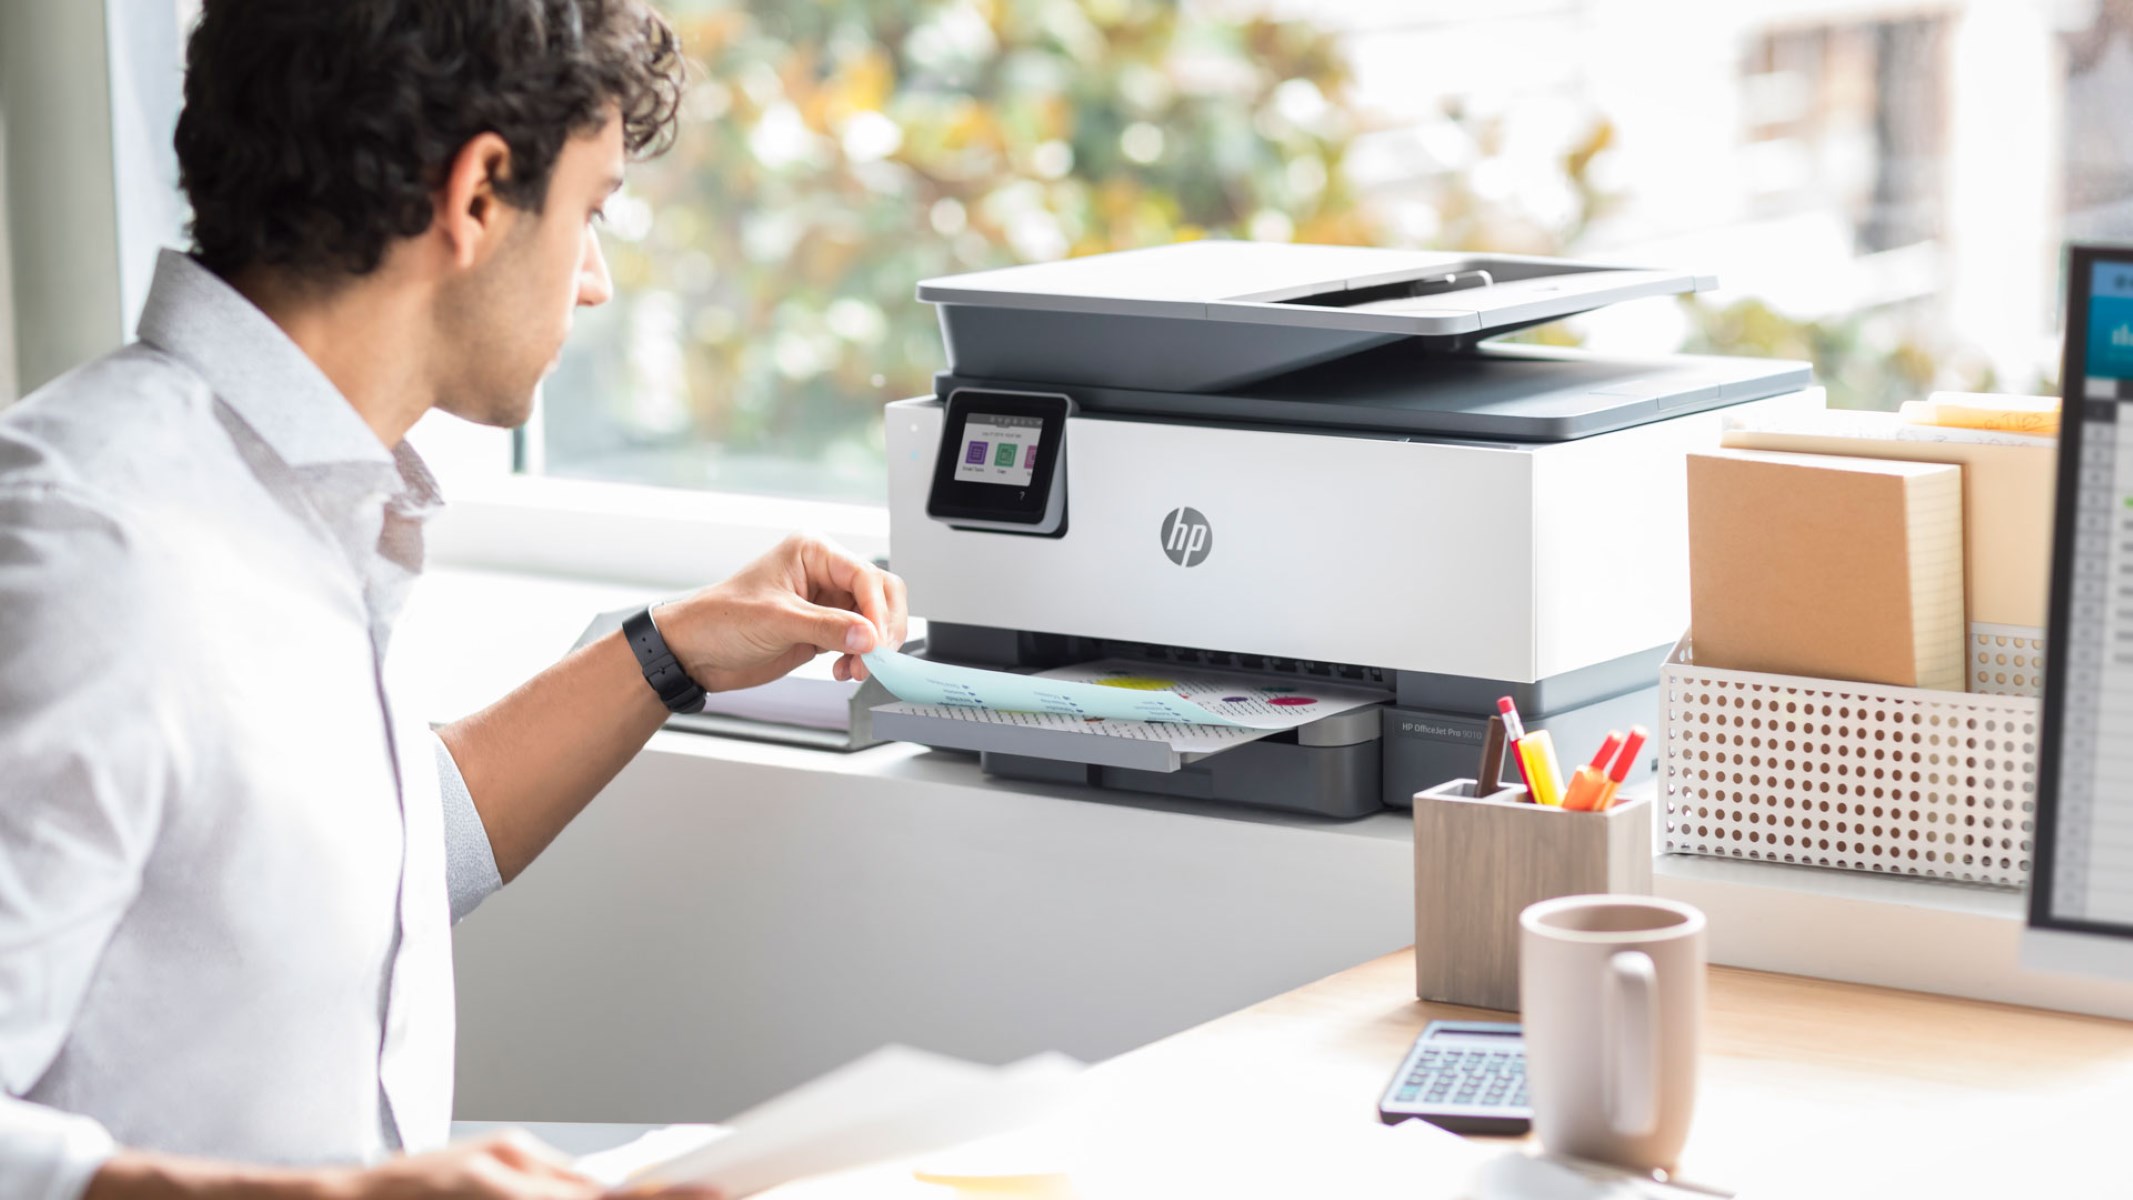
Step 5: Start the Copy Process
As you approach the culmination of the copy-making process on your printer, the next pivotal step involves initiating the copy job to commence the reproduction of your document or image. With the copy settings configured and the original material securely positioned on the scanner bed, you are now ready to set the copying process in motion. Follow these guidelines to seamlessly initiate the copy job on your printer:
1. Confirm Readiness: Before initiating the copy job, take a moment to ensure that all the necessary prerequisites are in place. Verify that the printer is in a ready state, the copy settings have been configured to your specifications, and the original document or image is correctly positioned on the scanner bed. This proactive confirmation helps mitigate potential issues and ensures a smooth copy job initiation.
2. Initiate the Copy Job: Depending on the interface of your printer, initiate the copy job by pressing the designated copy button, selecting the copy option on the control panel or display screen, or executing the copy command from a connected computer or mobile device. Follow the manufacturer’s instructions to seamlessly trigger the copy job, prompting the printer to begin the duplication process.
3. Monitor the Copy Progress: As the printer initiates the copy job, monitor the progress indicators on the control panel or display screen to track the status of the copying process. Some printers may provide real-time updates on the number of copies being produced, the status of the scanning and printing stages, and any relevant notifications pertaining to the copy job. Stay attuned to these indicators to ensure that the copy job progresses smoothly.
4. Exercise Patience: Depending on the complexity of the document or image being copied and the speed of your printer, the copy job may take a varying amount of time to complete. Exercise patience and allow the printer to execute the copy job at its optimal pace, refraining from interrupting the process to avoid potential errors or inconsistencies in the output.
By seamlessly initiating the copy process on your printer, you are poised to witness the transformation of the original document or image into a faithful and accurate reproduction. With the copy job underway, you are now prepared to progress to the final steps in the copy-making process, bringing you closer to obtaining precise and high-quality duplicates of your materials.
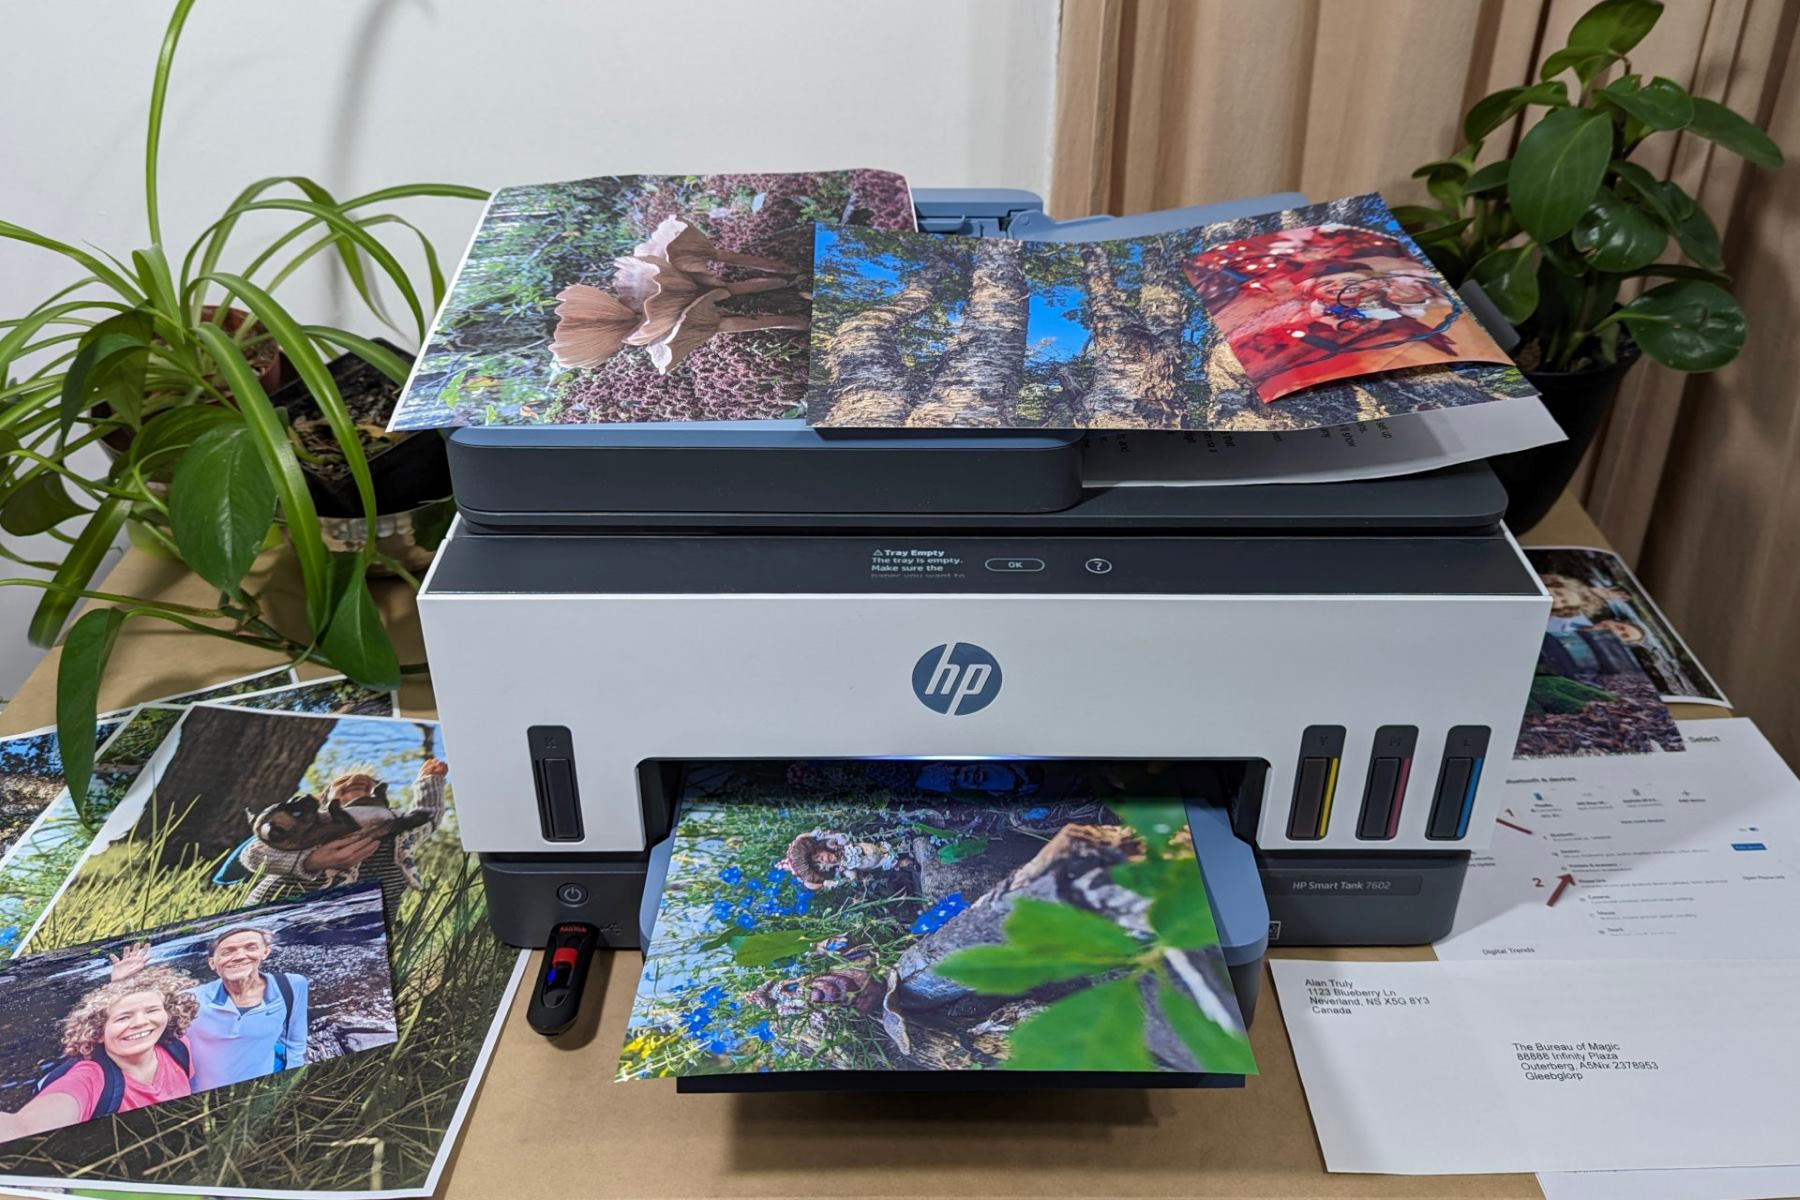
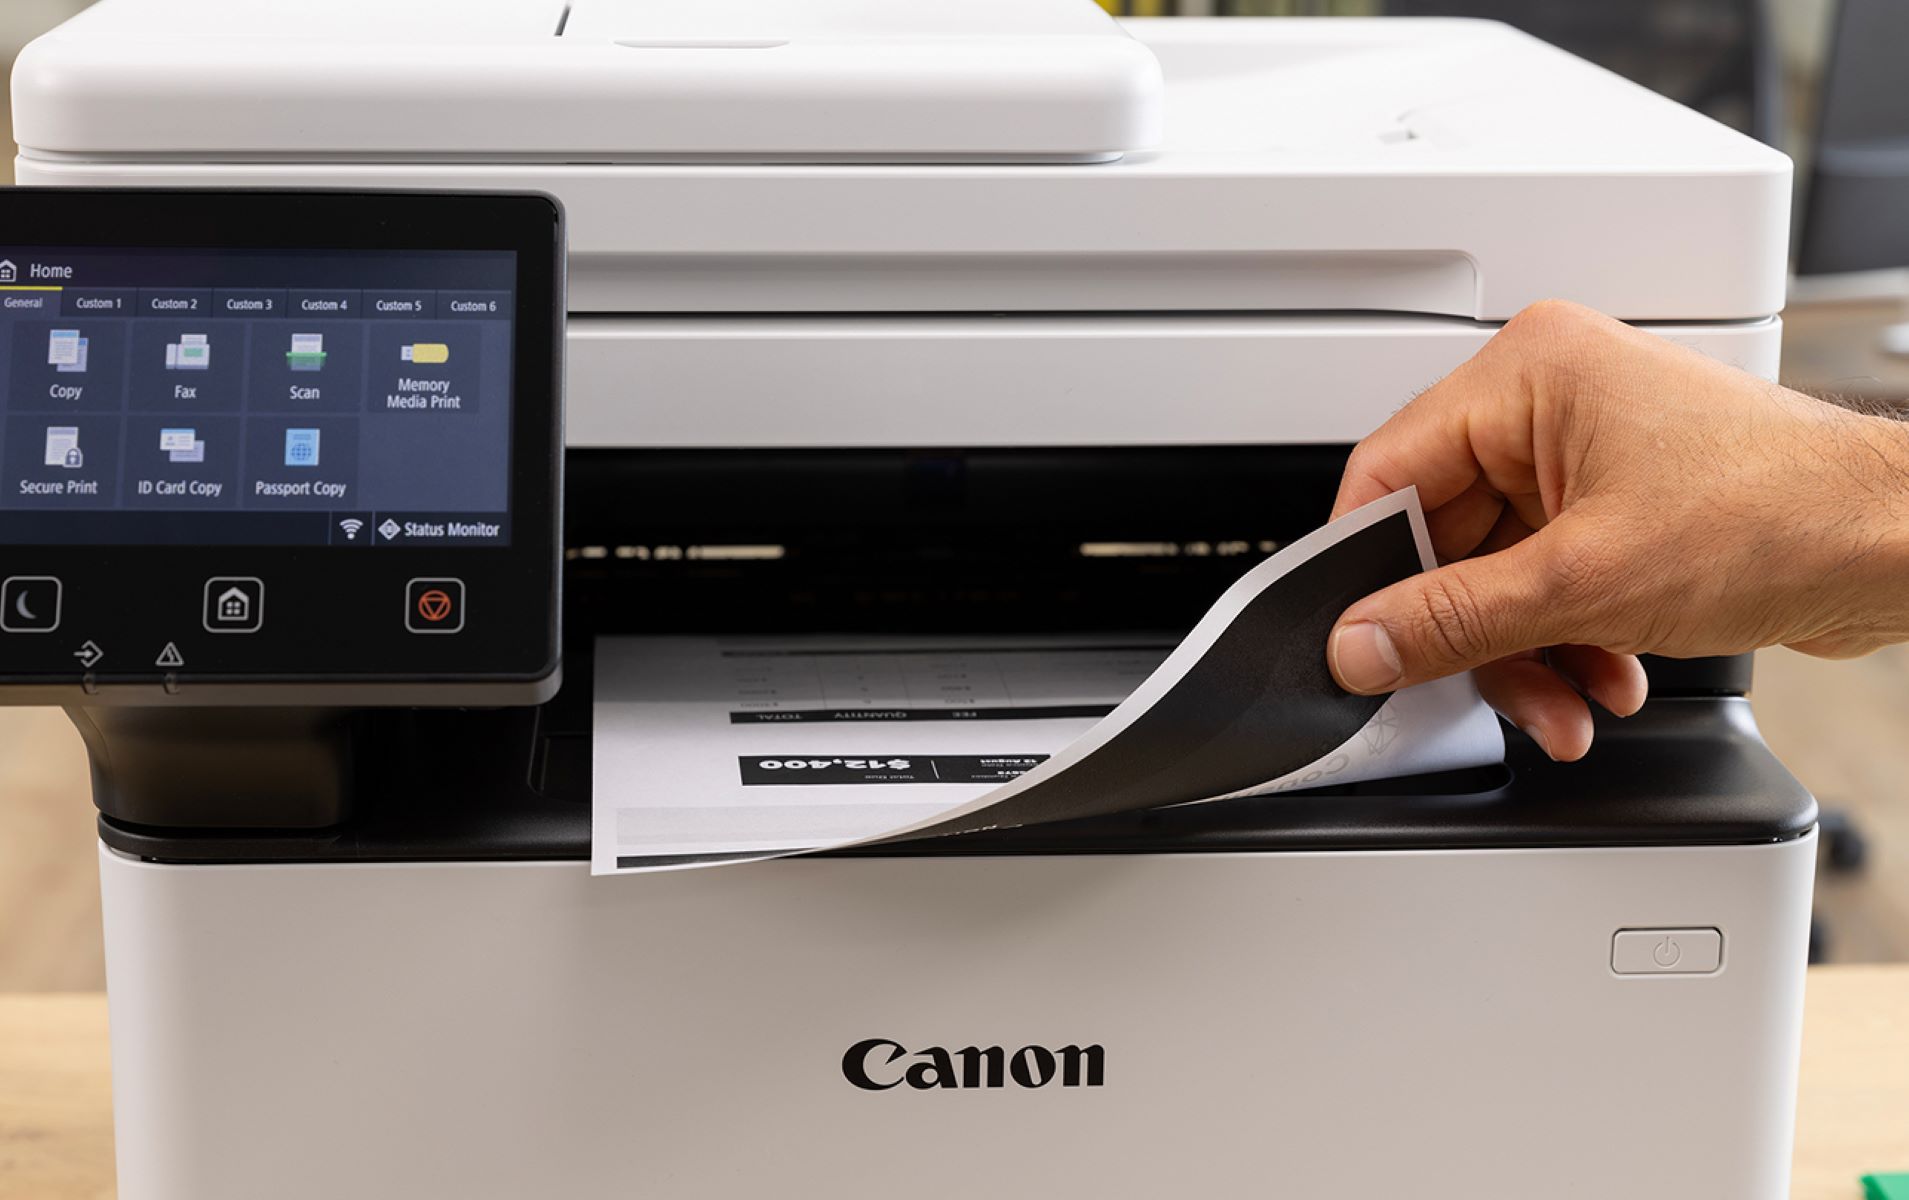
Step 6: Retrieve the Copy
As the copy job on your printer nears completion, the final and gratifying step involves retrieving the freshly produced copy, ready to serve your intended purpose. With the printer diligently replicating the original document or image, it is essential to approach the retrieval process with care and attention to detail to ensure that the copied output is handled and stored appropriately. Follow these guidelines to seamlessly retrieve the copy from your printer:
1. Wait for Completion: Exercise patience and allow the printer to complete the copy job before proceeding to retrieve the output. Depending on the speed and complexity of the copying process, the printer may require a varying amount of time to produce the final copy. Avoid prematurely accessing the copy to prevent potential smudging or disruption of the printing process.
2. Retrieve the Copy: Once the printer has completed the copy job, carefully access the output tray or collection area where the copied documents or images are dispensed. Gently retrieve the copies, handling them with care to avoid smudging or creasing the freshly printed material. If the printer features multiple output trays or sorting options, ensure that you retrieve the copies from the designated location.
3. Inspect the Output: Upon retrieving the copies, take a moment to inspect the output for quality and accuracy. Verify that the copied documents or images align with the characteristics of the original material, including clarity, color accuracy, and overall fidelity. If any discrepancies or issues are observed, consider reviewing the copy settings and reinitiating the copy job as needed.
4. Store the Copies: Once you have retrieved the copies and confirmed their quality, store them in a secure and organized manner to prevent damage or misplacement. Depending on the nature of the copied material, consider organizing the copies in a designated storage area, such as a folder, binder, or archival sleeve, to maintain their integrity and accessibility for future use.
By meticulously retrieving the freshly produced copies from your printer, you have successfully concluded the copy-making process, obtaining accurate and high-quality duplicates of your original documents and images. With the copies securely in your possession, you have achieved the culmination of the copy-making journey, equipped with the expertise to replicate a diverse range of materials with precision and efficiency.
Conclusion
Congratulations! You have successfully navigated the comprehensive process of making a copy on your printer, harnessing the full potential of modern printing technology to replicate your documents and images with precision and efficiency. By following the step-by-step guidelines outlined in this guide, you have gained valuable insights into the seamless and intuitive procedure for producing high-quality copies on your printer.
From the initial steps of powering on the printer and loading the paper to the pivotal tasks of placing the document on the scanner, configuring the copy settings, and initiating the copy job, you have acquired the knowledge and skills to execute each stage of the copy-making process with confidence and proficiency. By meticulously retrieving the final copies and ensuring their quality and integrity, you have demonstrated a keen attention to detail and a commitment to obtaining accurate and faithful reproductions of your original materials.
As you reflect on your journey through the copy-making process, it is evident that your newfound expertise has empowered you to streamline your document reproduction tasks and enhance your overall printing experience. Whether you need to duplicate crucial business documents, preserve cherished family memories, or replicate any other type of material, you now possess the proficiency to achieve your copying goals with ease and precision.
Furthermore, the knowledge and skills you have acquired extend beyond the realm of copying, providing you with a deeper understanding of the multifaceted capabilities of modern printers. As versatile devices capable of scanning, copying, and printing a diverse range of materials, printers have become indispensable tools for both personal and professional use, and your proficiency in utilizing these capabilities positions you as a savvy and resourceful user of printing technology.
Armed with this newfound expertise, you are well-equipped to embark on a wide array of printing and copying endeavors, leveraging the capabilities of your printer to meet your unique needs and preferences. Whether you are reproducing important documents for business purposes, creating duplicates of cherished photographs, or engaging in any other form of document reproduction, you can approach these tasks with confidence, knowing that you have mastered the art of making copies on your printer.
By embracing the seamless and intuitive process of creating copies on your printer, you have unlocked a world of possibilities, enabling you to efficiently replicate a diverse range of materials while optimizing the functionality of your printing equipment. As you continue to explore the boundless potential of modern printing technology, may your newfound expertise serve as a catalyst for enhanced productivity, creativity, and convenience in your printing endeavors.
Frequently Asked Questions about How To Make A Copy On A Printer
Was this page helpful?
At Storables.com, we guarantee accurate and reliable information. Our content, validated by Expert Board Contributors, is crafted following stringent Editorial Policies. We're committed to providing you with well-researched, expert-backed insights for all your informational needs.


0 thoughts on “How To Make A Copy On A Printer”