Articles
How Long Does It Take To Finish A Basement
Modified: October 20, 2024
Discover articles on how long it takes to finish a basement, including factors that can affect the timeline and tips for speeding up the process.
(Many of the links in this article redirect to a specific reviewed product. Your purchase of these products through affiliate links helps to generate commission for Storables.com, at no extra cost. Learn more)
Introduction
Finishing a basement is an exciting project that can dramatically increase the usable space in your home. Whether you’re planning to create a cozy family room, a home theater, a guest suite, or a personal gym, a finished basement can provide endless possibilities for enhancing your living space. However, one of the most common questions that homeowners have is, “how long will it take to finish my basement?”
The timeline for finishing a basement can vary depending on various factors such as the size and condition of the space, the complexity of the renovation, and the availability of contractors and materials. While it’s impossible to provide an exact timeframe for every project, understanding the different stages involved can help you estimate how long your basement finishing project might take.
In this article, we will explore the various factors that can affect the time it takes to finish a basement. From planning and permits to demolition, electrical work, and finishing touches, we’ll break down the different stages of the process and offer insights into how long each step typically requires.
By gaining a better understanding of these factors, you’ll be better equipped to plan and manage your basement finishing project effectively. So, let’s dive in and discover what it takes to transform your basement into a beautiful and functional living space.
Key Takeaways:
- Transforming a basement into a functional living space involves careful planning, skilled professionals, and attention to detail. Factors like size, permits, and material selection impact the timeline for completion.
- From demolition to finishing touches, each stage of basement finishing requires precision and expertise. Working with professionals and considering personal preferences can result in a beautiful and valuable home addition.
Read more: DIY: How To Finish A Basement
Factors Affecting the Time to Finish a Basement
Several factors can impact the overall timeline of finishing a basement. Understanding these factors can help you estimate how long your project might take. Here are the key factors that can affect the time it takes to finish a basement:
- Size and complexity: The size and complexity of the basement will play a significant role in determining the overall timeline. A smaller, straightforward basement with minimal modifications will generally take less time to finish compared to a larger basement with intricate layouts or structural changes.
- Structural issues: If your basement has any structural issues such as leaks, cracks, or insufficient support, these will need to be addressed before the finishing process can begin. Fixing these issues can add extra time to the project.
- Permits and approvals: Depending on your location, you may need to obtain permits and approvals from local authorities before starting the basement finishing project. The time required for this process can vary, so it’s essential to factor in any potential delays.
- Contractor availability: The availability of contractors can impact the timeline of your project. If the contractor you hire is busy with other projects, it may take longer to get started or complete the work. It’s important to discuss the timeline with your contractor upfront and ensure they can commit to the desired timeframe.
- Material selection and availability: The selection and availability of materials can also affect the project timeline. If you choose custom finishes or specialty materials that are not readily available, it may take longer to source and acquire them.
- Electrical and plumbing requirements: If your basement requires electrical and plumbing work, this can add extra time to the project. Additional time is needed to plan and install the wiring, outlets, lighting, and plumbing fixtures.
- Finishing details: The level of finishes and details you desire will also impact the overall timeline. Intricate trim work, custom cabinetry, or complex paint techniques will naturally take longer to complete compared to more straightforward finishes.
It’s important to remember that each basement finishing project is unique, and the timelines can vary based on these factors. Consulting with a professional contractor or designer can help provide a more accurate estimation of the time required for your specific project.
Planning and Permits
Proper planning is crucial for a successful basement finishing project. This stage involves assessing the space, determining your goals, and creating a detailed plan for the renovation. Besides, it is important to obtain the necessary permits before starting any work to ensure compliance with local building codes. Here’s what you need to know about planning and permits for finishing your basement:
1. Assessing the space: Begin by evaluating your basement and envisioning how you want to use the space. Consider factors such as natural light, ventilation, and existing features that may impact the layout and design possibilities.
2. Setting goals and budget: Determine your goals for the finished basement. Do you want to create a recreational area, a home office, or a guest suite? Set a budget that aligns with your goals, and consider all the expenses, including materials, labor, and permits.
3. Creating a detailed plan: Work with a professional contractor or designer to create a comprehensive plan for the basement renovation. This includes finalizing the layout, selecting finishes, and deciding on any structural modifications or additions.
4. Obtaining permits: Check with your local municipality about the necessary permits for finishing a basement. The requirements may vary depending on your location, but common permits include building permits, electrical permits, and plumbing permits. It’s important to submit the appropriate applications and pay any associated fees to ensure a legal and code-compliant renovation.
5. Permits processing time: Keep in mind that the processing time for permits can vary. It’s advisable to apply for permits well in advance to avoid delays in the project timeline. Some permits may require inspections at different stages of the renovation, so it’s crucial to comply with any inspection requirements.
By carefully planning and obtaining the necessary permits, you can ensure that your basement finishing project begins on the right track and adheres to all local regulations. Remember to consult with professionals and experts to guide you through the planning and permitting process and address any specific requirements for your area.
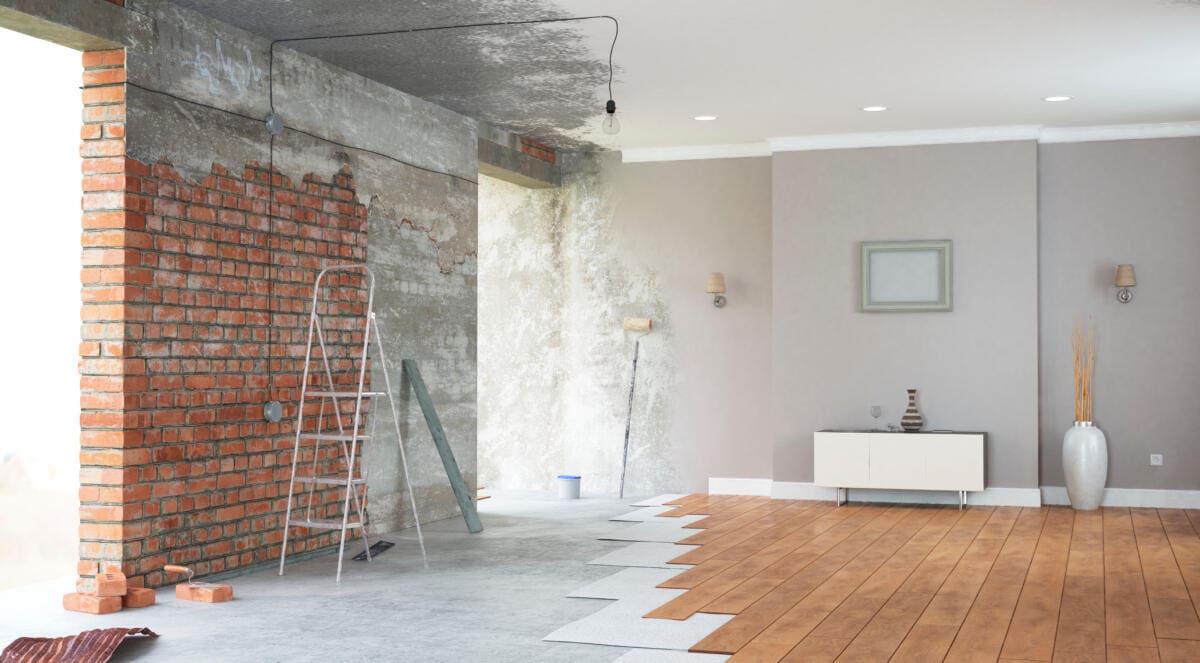
Demolition and Cleanup
Once the planning stage is complete and all necessary permits have been obtained, it’s time to move on to the exciting phase of demolition and cleanup. This stage involves removing any existing structures, walls, flooring, and fixtures to prepare the basement for the renovation. Here’s what you need to know about the demolition and cleanup process:
1. Clearing out the space: Start by removing any furniture, belongings, and debris from the basement. This will create a clear and open area for the demolition process.
2. Demolition: Begin by demolishing any walls, partitions, or built-in structures. This may involve using tools such as a sledgehammer, pry bars, or power tools to break down the existing structures. Take care to follow safety precautions and wear protective gear during the demolition process.
3. Flooring and ceiling removal: If there is existing flooring or ceiling in the basement, remove them carefully. This may involve pulling up carpet, removing tiles, or taking down suspended ceiling tiles. Dispose of the materials according to local regulations.
4. Structural modifications: If you have plans for structural modifications, such as adding or removing walls, this is the time to make those changes. It’s important to consult with a professional contractor or engineer to ensure that any structural modifications are safe and compliant with building codes.
5. Cleanup: After the demolition work is complete, thoroughly clean the space to remove any debris, dust, or remnants from the demolition process. This will create a clean and clear foundation for the next stages of the basement finishing project.
It’s worth noting that demolition and cleanup can be messy and time-consuming. It’s essential to take proper precautions, such as wearing protective gear and using appropriate tools, to ensure safety during this stage. Additionally, consider renting a dumpster or arranging for a debris removal service to efficiently dispose of the demolition waste.
By effectively managing the demolition and cleanup stage, you’ll be ready to move on to the next steps of your basement finishing project with a clean and blank canvas to create your desired living space.
Foundation and Framing
Foundation and framing are critical stages in the basement finishing process as they lay the groundwork for the structural integrity and layout of the space. These stages involve reinforcing the foundation, building walls, and installing structural components. Here’s what you need to know about the foundation and framing process:
1. Foundation assessment: Before starting the framing process, it’s important to assess the condition of the foundation. Check for any cracks, leaks, or structural issues that need to be addressed. If necessary, reinforce the foundation to ensure stability and prevent any future problems.
2. Wall framing: Start by framing the walls of the basement. This involves using lumber or steel studs to create a framework for the walls. Measure and cut the framing materials according to the layout plan, ensuring that all walls are securely connected and properly aligned.
3. Door and window openings: During the framing stage, create openings for doors and windows based on the design plan. Ensure proper measurements and alignment to accommodate the desired size and placement of doors and windows in the finished space.
4. Partition walls: If you’re planning to divide the basement into separate rooms or sections, install partition walls to create those divisions. These walls offer privacy and designated areas within the basement.
5. Structural components: Install any necessary structural components such as support beams, columns, or load-bearing walls according to engineering and building code requirements. These components ensure the stability and safety of the basement.
6. Plumbing and electrical rough-ins: If your basement will include plumbing fixtures or electrical outlets, this is the stage to rough-in the necessary lines. Consult with professionals to ensure proper placement and installation of plumbing and electrical elements.
It’s crucial to work with qualified professionals during the foundation and framing stage to ensure that the structural elements of your basement are built correctly and adhere to local building codes. Proper framing will provide the foundation for the rest of the basement finishing process, so attention to detail and precision are key.
Once the foundation and framing are complete, you can move forward with the next stages of the basement finishing project, such as electrical and plumbing work, insulation, and drywall installation.
Before starting a basement finishing project, consider factors such as the size of the basement, the scope of the project, and any necessary permits. On average, it can take 4-8 weeks to finish a basement, but this can vary based on individual circumstances.
Read more: How To Finish A Basement Window
Electrical and Plumbing Work
Electrical and plumbing work are essential components of any basement finishing project. These stages involve installing necessary wiring, outlets, fixtures, and plumbing systems to ensure functionality and convenience in the finished space. Here’s what you need to know about the electrical and plumbing work:
1. Electrical planning: Before starting the electrical work, it’s important to have a detailed plan for the placement of outlets, lighting, switches, and any other electrical components. Consult with a licensed electrician to ensure compliance with electrical codes and safety standards.
2. Wiring installation: Begin by running the electrical wiring through the basement walls and ceiling, connecting it to the main electrical panel. This includes wiring for outlets, lighting fixtures, and any additional electrical needs, such as entertainment systems or home offices.
3. Outlet and switch installation: Install outlets and switches based on the electrical plan. Ensure proper spacing and positioning to accommodate the functionality and design of the finished space.
4. Lighting installation: Plan and install the desired lighting fixtures, including overhead lighting, recessed lights, pendant lights, or wall sconces. Consider the overall design and purpose of each area in the basement to determine appropriate lighting placement.
5. Plumbing planning: Determine the plumbing requirements for your basement, such as adding a bathroom, wet bar, or laundry area. Consult with a licensed plumber to create a plumbing plan and ensure compliance with building codes.
6. Plumbing installation: Install the necessary plumbing fixtures, such as sinks, toilets, showers, or laundry connections, according to the plumbing plan. Connect the plumbing lines to the existing main water supply and drainage systems.
It’s important to hire qualified professionals for the electrical and plumbing work to ensure that all installations are done safely and comply with local codes. Working with licensed electricians and plumbers will also ensure the proper functioning of all systems in the finished basement.
Once the electrical and plumbing work is complete, you can move on to the next stages of the basement finishing project, such as insulation, drywall installation, and flooring. These stages will bring your vision to life and transform the basement into a comfortable and functional space.
Insulation and Drywall
Insulation and drywall installation are crucial components of finishing a basement as they provide comfort, energy efficiency, and a polished look to the space. Insulation helps maintain a comfortable indoor temperature, while drywall creates a smooth and finished surface for painting and decorating. Here’s what you need to know about insulation and drywall:
1. Insulation: Insulation is an essential step to ensure the energy efficiency and temperature control of your basement. It helps with thermal insulation, soundproofing, and moisture control. There are several types of insulation to choose from, including fiberglass batts, spray foam, or rigid foam boards. Consult with a professional to determine the best insulation material for your basement.
2. Insulating the walls: Install insulation between the framing studs of the basement walls. This will help regulate the temperature and prevent heat loss or gain. Ensure proper installation of the insulation, including covering all gaps and joints to create an effective thermal barrier.
3. Insulating the ceiling: If your basement has a suspended or drop ceiling, consider installing insulation above it to minimize sound transmission and increase energy efficiency. This will help maintain a comfortable environment in the finished space.
4. Drywall installation: Once the insulation is in place, it’s time to install the drywall. Measure, cut, and attach the drywall sheets to the walls and ceilings, ensuring a secure and level installation. Use drywall screws or nails to mount the drywall, and consider using joint compound and tape to create smooth, seamless seams between the panels.
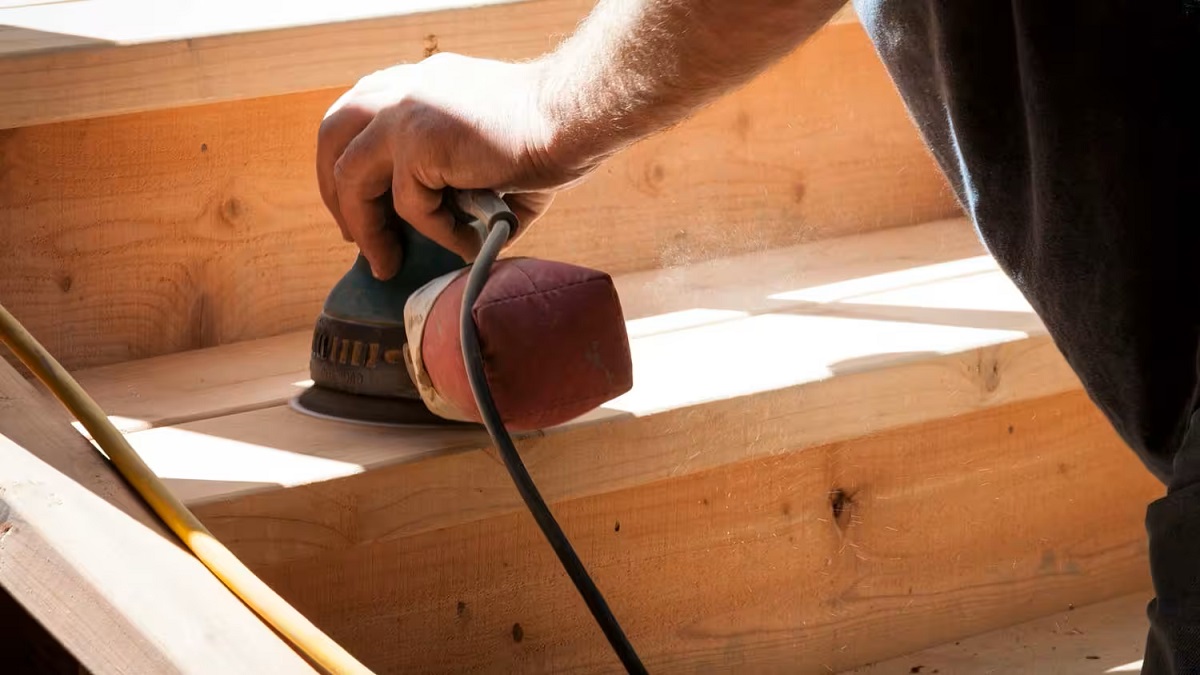
5. Finishing touches: After the drywall is installed, apply joint compound to fill in any gaps or imperfections in the seams. Sand the joint compound to create a smooth surface, ready for priming and painting. It’s also the stage to install any trim, such as baseboards or crown molding, to give the space a finished look.
Proper insulation and drywall installation are important for creating a comfortable and visually appealing finished basement. It’s recommended to enlist the services of professionals experienced in insulation and drywall installation to ensure a high-quality finish and maximize the energy efficiency of your space.
Once the insulation and drywall stages are complete, you can move on to the next steps of the basement finishing project, such as flooring installation, painting, and adding the final touches to create a functional and inviting living space.
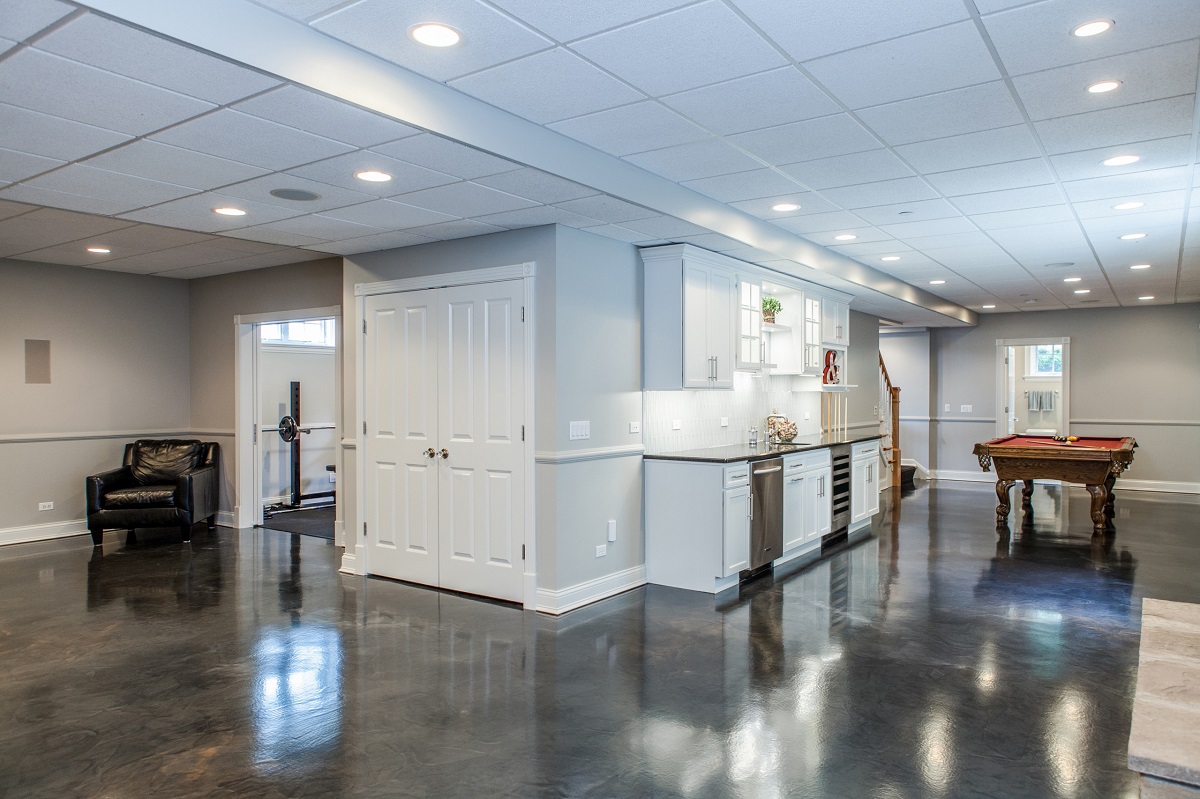
Flooring and Ceiling Installation
Flooring and ceiling installation are the final stages of finishing a basement that bring the space together and add a touch of style. Flooring sets the tone for the overall look and feel of the room, while the ceiling completes the aesthetic appeal and can provide additional functionality. Here’s what you need to know about flooring and ceiling installation:
1. Flooring options: There are various flooring options to consider for your basement, depending on your preferences, budget, and the intended use of the space. Common choices include carpet, laminate, vinyl, tile, or engineered wood. Each option has its advantages and considerations, such as moisture resistance and durability, so choose one that suits your needs and aesthetic preferences.
2. Preparing the subfloor: Before installing the flooring, properly prepare the subfloor by ensuring it is clean, level, and dry. This may involve removing any existing flooring or addressing any moisture issues. A smooth and sound subfloor will provide a stable base for your chosen flooring material.
3. Installing the flooring: Follow the manufacturer’s instructions to install the chosen flooring material. This may involve methods such as gluing, clicking, or nailing the flooring into place. Take care to ensure a precise and even installation, paying attention to the pattern and alignment of the flooring.
4. Ceiling options: The ceiling in your finished basement can be a simple drywall ceiling, a drop ceiling, or even an exposed ceiling with beams and pipes for an industrial look. Consider factors such as height, accessibility to utilities, and aesthetic appeal when choosing the ceiling design. If opting for a drop ceiling, you’ll need to install a grid system and attach ceiling tiles.
5. Lighting and fixtures: Install any desired lighting fixtures, such as recessed lights, pendant lights, or track lighting, to enhance the ambiance and functionality of the basement. Pay attention to the spacing and placement of the fixtures to ensure even illumination throughout the space.
Proper installation of flooring and ceiling materials is essential for achieving the desired look and functionality of your finished basement. If you’re unsure about the installation process, it’s recommended to engage the services of professionals who specialize in flooring and ceiling installation to ensure a high-quality finish.
With the flooring and ceiling installed, your basement will begin to take shape as a beautiful and functional living space. The final step is to add the finishing touches, such as painting, trim work, and furnishing, to transform your basement into the perfect extension of your home.
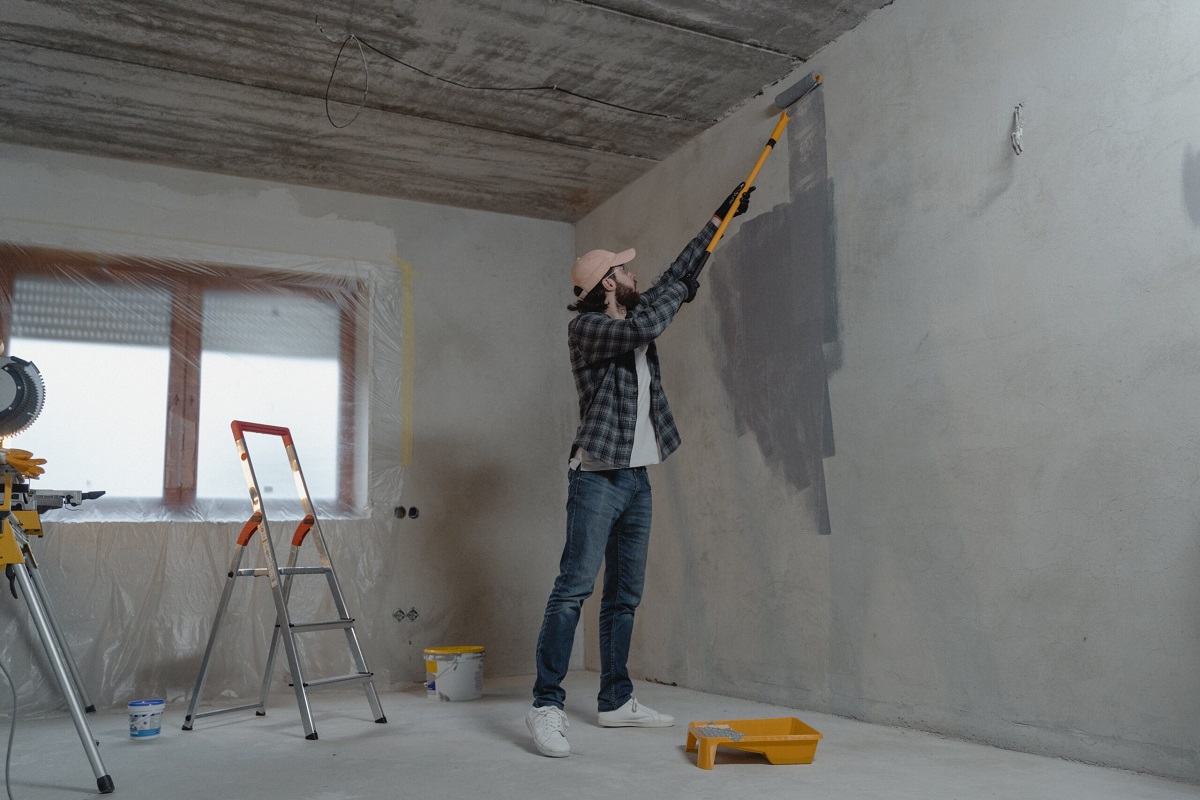
Painting and Finishing Touches
Painting and finishing touches are the exciting final steps in finishing your basement. These stages allow you to infuse your personal style, create a cohesive look, and add those special touches that make the space feel complete. Here’s what you need to know about painting and adding finishing touches to your basement:
1. Color selection: Choose a color palette that complements the overall aesthetic and desired atmosphere of your finished basement. Consider factors such as natural light, the purpose of the space, and your personal preferences. Lighter colors can make a small basement feel bigger, while darker hues add warmth and coziness.
2. Preparing the surfaces: Before painting, ensure that the walls and ceiling are properly prepared. Fill any holes or imperfections with spackle, sand the surfaces smooth, and clean away any dust or debris. Use painter’s tape to protect trim, windows, and other areas that shouldn’t be painted.
3. Priming: Apply a coat of primer to the walls and ceiling to create a smooth and even surface. This helps the paint adhere better and ensures consistent color across the entire space.
4. Painting: Once the primer is dry, start painting the walls and ceiling with your chosen colors. Use a roller for large areas and a brush for edges and corners. Apply multiple coats as needed, allowing sufficient drying time between each coat.
5. Adding texture and accents: Consider adding texture to the walls, such as a faux finish, wainscoting, or wallpaper, to create visual interest and depth. Additionally, incorporate decorative accents like wall art, mirrors, shelving, or a focal point like a fireplace or feature wall to personalize the space.
6. Installing trim and baseboards: Install trim and baseboards to create a polished and finished look. Choose a style that matches the overall design aesthetic of your basement and ensure precise measurements and cuts for a seamless installation.
7. Flooring protection: Take measures to protect your newly installed flooring during the finishing touches process. Cover the floors with drop cloths or protective sheets to avoid any accidental damage or spills.
With the painting and finishing touches complete, your basement will be transformed into a beautiful and inviting living space. Don’t forget to add furniture, decor, and lighting to maximize comfort and functionality. These final touches will truly make the space your own, reflecting your unique style and creating an area that you’ll love to spend time in.
Read more: How Much To Finish A Basement
Conclusion
Finishing a basement is an exciting and rewarding endeavor that can significantly enhance the functionality and value of your home. While the exact timeline for finishing a basement varies depending on several factors, understanding the different stages of the process can help you plan and manage the project effectively.
Factors like the size and complexity of the space, structural issues, permits, contractor availability, and material selection can influence the time it takes to finish a basement. Each stage of the process, from planning and permits to demolition, foundation and framing, electrical and plumbing work, insulation and drywall, flooring, and ceiling installation, painting, and finishing touches, requires careful attention and proper execution.
Throughout the project, it’s essential to work with qualified professionals who specialize in various aspects of basement finishing, such as contractors, electricians, plumbers, and painters. Their expertise will ensure that the work is done correctly, adheres to building codes, and meets your desired aesthetic and functional goals.
Remember, finishing a basement is an investment that can enhance your living space, provide additional functionality, and potentially increase the value of your home. Take the time to plan carefully, consider your preferences and needs, and work within your budget.
In conclusion, the journey of finishing a basement may require time, effort, and attention to detail, but it is well worth it. With proper planning, effective project management, and the guidance of skilled professionals, you can transform your basement into a beautiful and functional space that you and your family will enjoy for years to come.
Frequently Asked Questions about How Long Does It Take To Finish A Basement
Was this page helpful?
At Storables.com, we guarantee accurate and reliable information. Our content, validated by Expert Board Contributors, is crafted following stringent Editorial Policies. We're committed to providing you with well-researched, expert-backed insights for all your informational needs.


0 thoughts on “How Long Does It Take To Finish A Basement”