Articles
How Much To Finish A Basement
Modified: October 20, 2024
Discover articles that will help you determine how much it will cost to finish your basement. Get expert advice and estimates from trusted contractors.
(Many of the links in this article redirect to a specific reviewed product. Your purchase of these products through affiliate links helps to generate commission for Storables.com, at no extra cost. Learn more)
Introduction
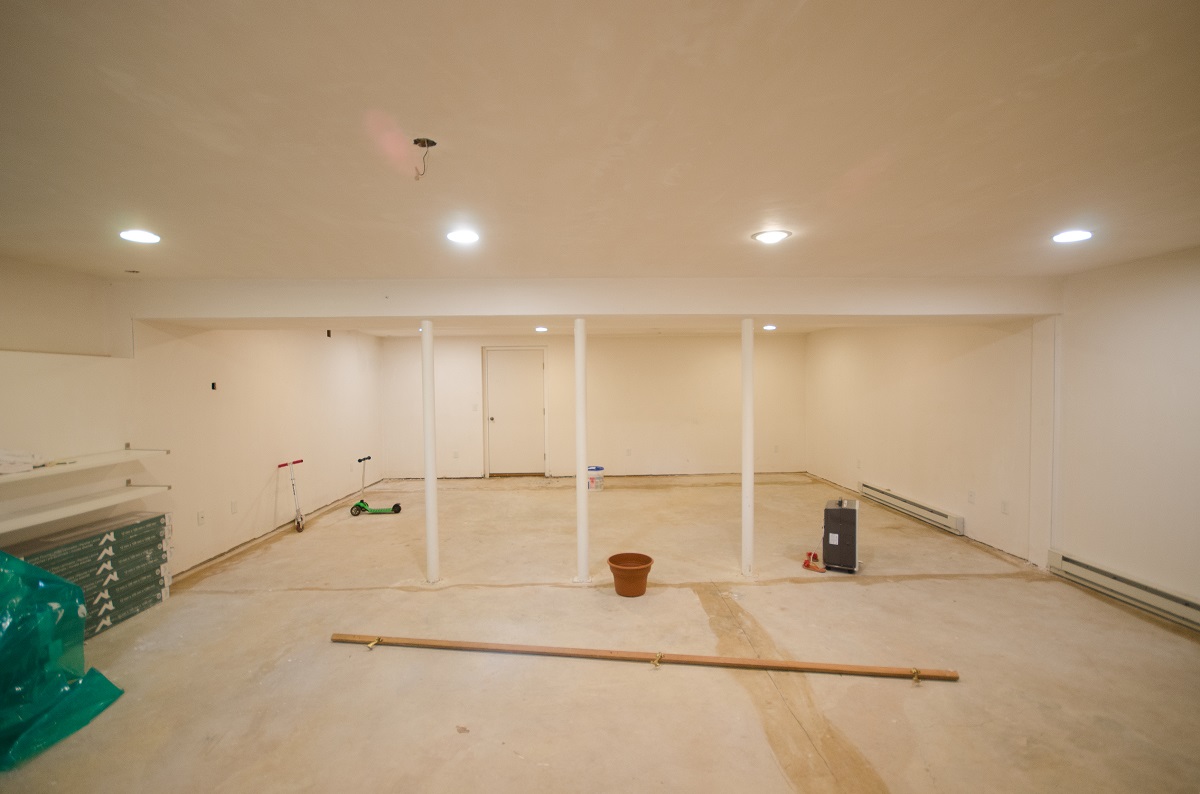
Finishing your basement is a great way to add functional space to your home. Whether you’re looking to create a home office, a guest suite, or a recreation room, a finished basement can provide the extra square footage you need. However, before you embark on this exciting project, there are several factors to consider.
The cost of finishing a basement can vary significantly depending on factors such as the size of the space, the level of customization, and the materials used. It’s important to have a clear understanding of what you want to achieve with your basement and to set a budget accordingly. By doing so, you can avoid unexpected expenses and ensure that the project stays within your financial means.
Another crucial consideration is the purpose of your finished basement. Are you planning to use it as a multipurpose space, or do you have a specific function in mind? This will help determine the layout, design, and features you’ll need to include. For example, if you’re creating a home office, you’ll need designated work areas, adequate lighting, and sufficient electrical outlets.
Before starting the project, it’s important to have a solid plan in place. This includes obtaining the necessary permits, understanding any building codes or regulations that may apply to your area, and hiring professionals or contractors if needed. Proper planning will ensure that your basement renovation is done safely and in compliance with local regulations.
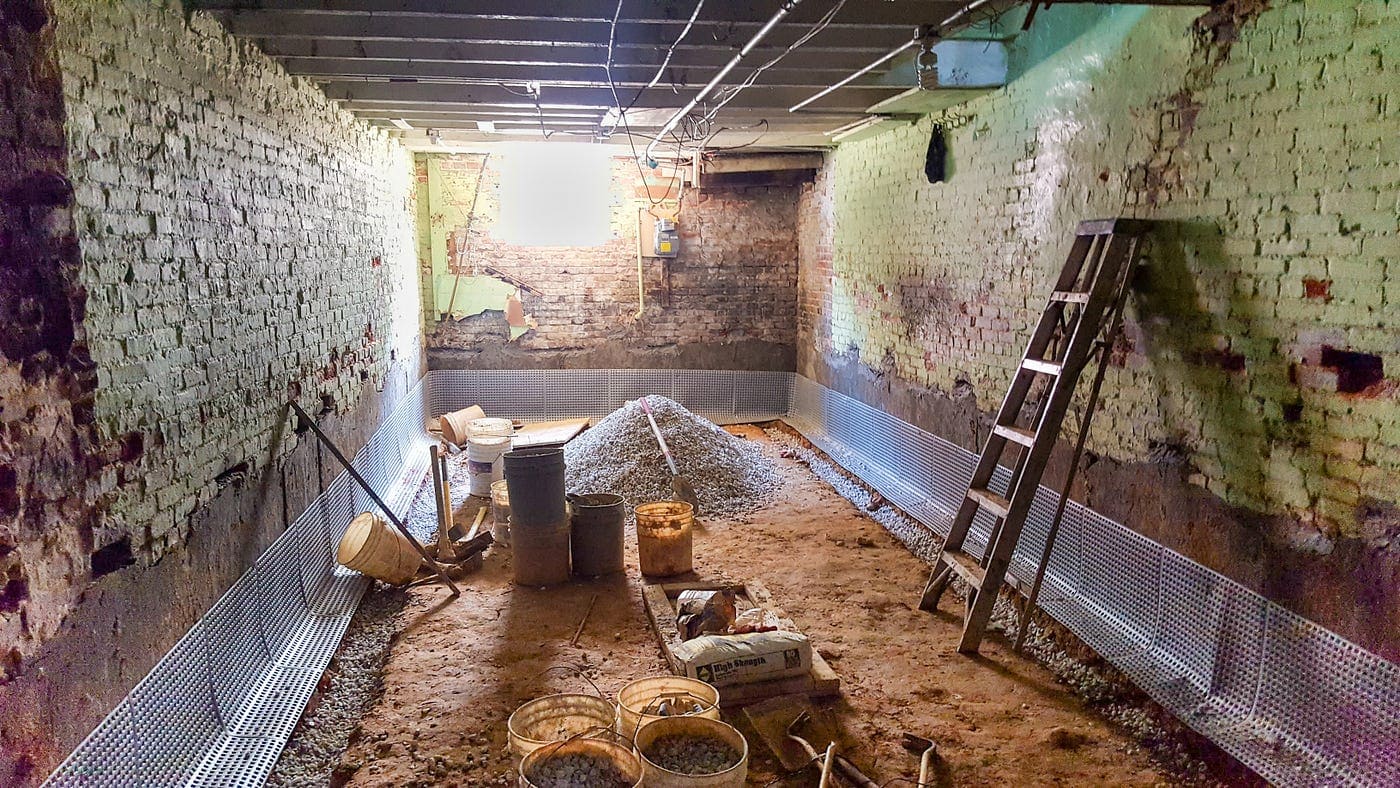
Additionally, it’s essential to assess the current condition of your basement. Is it prone to moisture or flooding? Are there any existing issues that need to be addressed, such as cracks in the foundation or inadequate insulation? Taking care of these issues before starting the finishing process will help prevent future problems and ensure the longevity of your basement renovation.
In this comprehensive guide, we will delve into the various aspects of finishing a basement, from the initial planning and design stages to the final decorating and furnishing. We will provide expert tips and advice on framing and insulating the basement, installing electrical and plumbing systems, choosing suitable flooring and ceiling options, and adding the finishing touches that will transform your basement into a beautiful and functional living space.
So, whether you’re looking to create a cozy family room, a stylish home theater, or a luxurious guest suite, read on to discover everything you need to know about finishing your basement.
Key Takeaways:
- Transform your basement into a valuable and functional living space by carefully considering factors like budget, function, and permits. Thorough planning and proper execution are key to a successful renovation.
- Infuse your personal style and create a warm, inviting space by adding the final touches and furnishing your finished basement. From lighting to decor, make it a reflection of your family’s interests and memories.
Read more: DIY: How To Finish A Basement
Factors to Consider Before Finishing Your Basement
Before diving into the exciting process of finishing your basement, it’s essential to consider a few key factors that will impact the success and functionality of the project. These factors will help you make informed decisions and ensure that your finished basement meets your needs and expectations.
- Budget: Finishing a basement can be a significant investment, so it’s crucial to determine your budget early on. Consider factors such as the size of the space, the complexity of the design, and the materials you plan to use. Remember to account for any unexpected costs that may arise during the renovation process.
- Function: Determine how you plan to use your finished basement. Will it serve as an entertainment area, a guest suite, a home office, or a combination of functions? This will help guide your design choices and ensure that the space is tailored to your specific needs.
- Permits and regulations: Check with your local building department to determine if you need any permits or if there are any building codes or regulations that you must follow. Failing to comply with these requirements can result in fines or the need to redo certain aspects of the project.
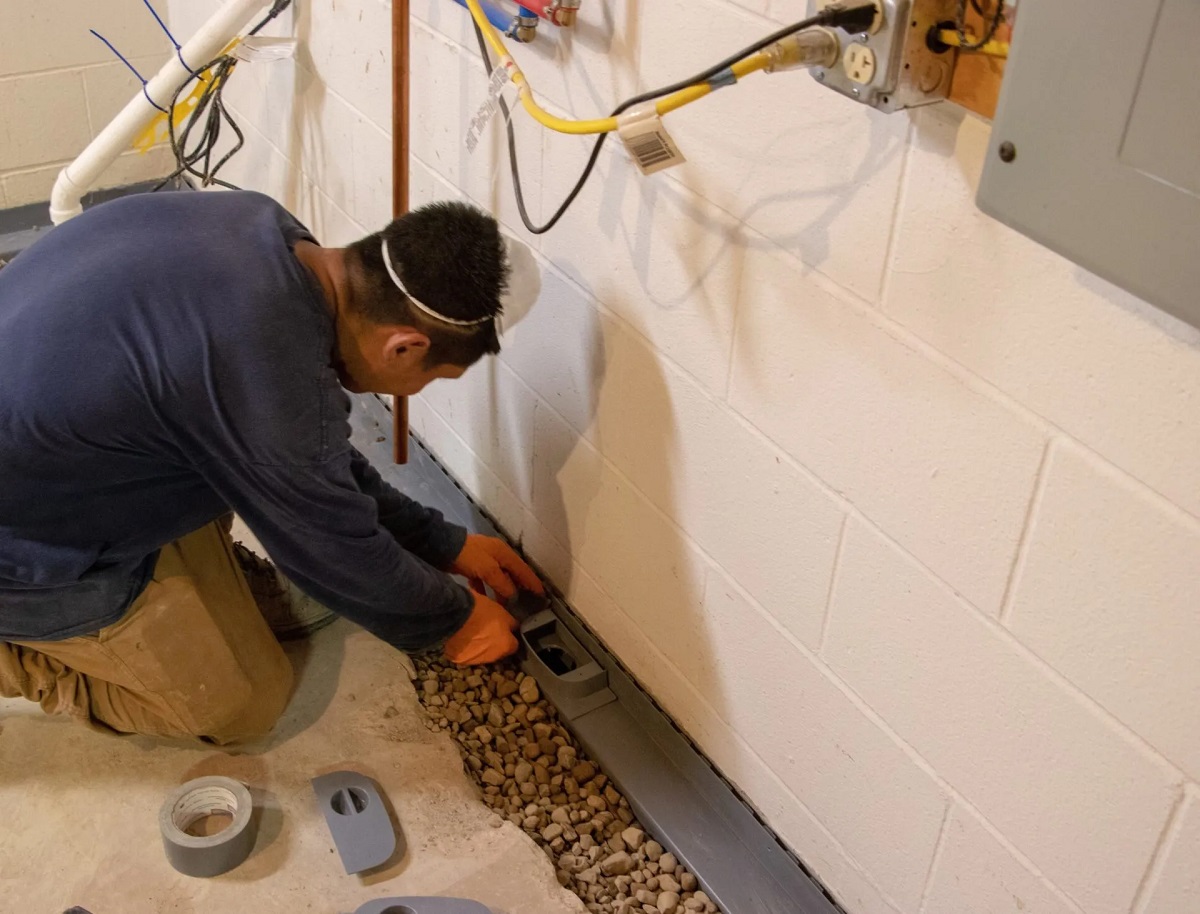
- Moisture and insulation: Basements are prone to moisture issues, so it’s crucial to address any existing problems before finishing the space. Ensure that your basement is properly waterproofed and insulated to prevent future damage or mold growth.
- Natural light: Consider the amount of natural light that enters your basement. If your basement has small windows or lacks natural light, you may need to incorporate additional lighting fixtures or choose lighter color schemes to create a bright and inviting space.
- Accessibility: Assess the access points to your basement. If you plan to use the space frequently or have guests staying in the basement, ensure there is a convenient and safe way to enter and exit the area.
- Utility placement: Take note of the location of utility systems such as electrical panels, water heaters, and HVAC units. These should be easily accessible and should not interfere with the planned layout of your finished basement.
- Future needs: Consider your long-term plans for your home. Will your basement need to accommodate additional bedrooms or bathrooms in the future? Planning for potential future expansions can save you time and money down the line.
By carefully considering these factors, you can ensure that your basement renovation is a success. It’s important to have a clear vision of your desired outcome and to consult with professionals if needed. With thorough planning and proper execution, you can transform your basement into a valuable and functional space that enhances the overall value of your home.
Planning and Designing Your Basement Space
One of the most exciting aspects of finishing your basement is planning and designing the layout and functionality of the space. This step is crucial in creating a finished basement that meets your specific needs and enhances the overall functionality of your home. Here are some key considerations to keep in mind during the planning and design phase:
- Identify the Purpose: Determine the primary function of your finished basement. Do you want to create a home theater, a playroom for the kids, a home gym, or a combination of different spaces? This will help guide your layout and design decisions.
- Consider Space Allocation: Assess the available square footage in your basement and consider how you want to allocate the space. Create separate zones or rooms for different activities, such as a media area, a workspace, or a storage area. Think about the flow and ease of movement between these areas.
- Maximize Natural Light: Since basements typically have limited natural light, incorporate strategies to maximize it. Consider enlarging existing windows, adding window wells, or even installing egress windows for safety and natural light. Additionally, opt for lighter paint colors and strategically place mirrors to brighten up the space.
- Optimize Storage: Basements offer ample opportunities for storage. Consider incorporating built-in shelving, cabinets, or closets to keep the space organized and clutter-free. Utilize under-the-stair storage or create custom storage solutions to make the most of every inch of space.
- Electrical and Plumbing Needs: Plan the placement of electrical outlets, light fixtures, and switches based on your intended use of the space. If you’re adding a bathroom or a kitchenette, identify the optimal locations for plumbing hookups. Consult with a licensed electrician and plumber to ensure proper installation.
- Aesthetics and Style: Choose a design theme or aesthetic that complements the overall style of your home. Consider factors such as color schemes, flooring options, and wall finishes. Opt for materials that are durable, moisture-resistant, and suitable for basement environments.
- Soundproofing: If you plan to create a media room, home theater, or music studio in your basement, consider incorporating soundproofing measures. This can include adding extra insulation, acoustic panels, or specialized soundproofing materials to ensure optimal sound quality and minimize noise transfer.
- Accessibility: Consider the needs of individuals with mobility limitations when designing your basement. Ensure that there are no barriers to access, such as steps or tight spaces. Install handrails, wider doorways, and non-slip flooring to create a safe and accessible environment.
By carefully considering these aspects during the planning and design phase, you can create a functional and visually appealing finished basement that perfectly aligns with your needs and enhances the overall value of your home. Don’t hesitate to consult with architects, interior designers, or basement finishing experts to ensure that your vision is executed flawlessly.
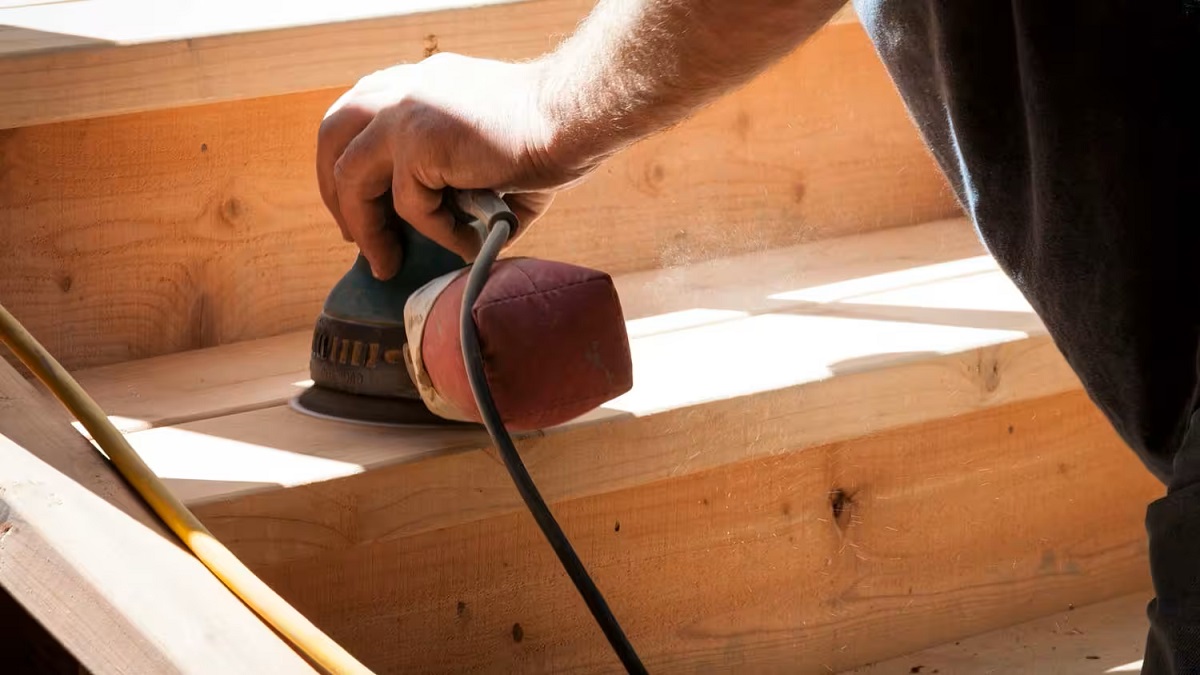
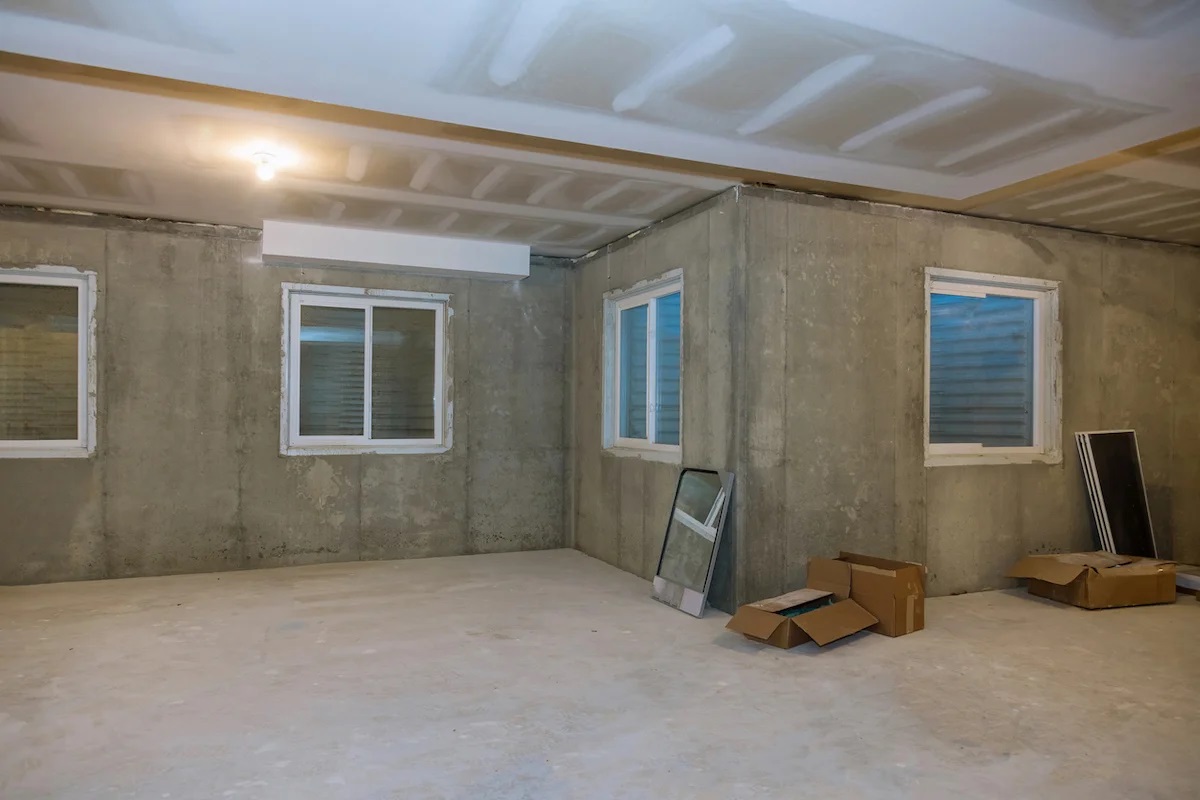
Framing and Insulating the Basement
Once you have finalized the layout and design of your finished basement, the next step is to begin the framing and insulation process. This step is crucial for creating a strong and durable foundation for your walls and ensuring that your basement is properly insulated for energy efficiency and comfort. Here are the key steps involved in framing and insulating your basement:
- Plan Your Wall Layout: Start by measuring and planning the placement of your walls. Use a chalk line or laser level to mark the locations on the floor and ceiling where the walls will be constructed. This will ensure that your walls are straight and properly aligned.
- Choose Your Framing Materials: Select the type of framing material that best suits your needs and budget. Common options include wood studs, metal studs, or engineered wood products. Ensure that the framing materials are treated for moisture resistance, as basements are prone to dampness.
- Install Bottom and Top Plates: Attach pressure-treated lumber to the basement floor and ceiling, creating the top and bottom plates. This provides a stable base for attaching the vertical studs.
- Erect the Vertical Studs: Install vertical studs at regular intervals along the bottom and top plates. Use a level to ensure that the studs are plumb and properly aligned. Leave adequate space for doorways, windows, and any electrical or plumbing fixtures that will be installed.
- Add Horizontal Blocking: Install horizontal blocks between the vertical studs, at the mid-point of the wall and above doors and windows. This provides additional stability and support for the walls.
- Insulate the Basement Walls: Insulation is essential for maintaining a comfortable temperature and reducing energy costs in your finished basement. Use insulation batts or rigid foam insulation boards to fill the spaces between the studs. Make sure to insulate both exterior walls and interior walls, as well as any walls shared with adjacent rooms.
- Vapor Barrier Installation: Install a vapor barrier on the warm side of the insulated basement walls. This helps prevent moisture from penetrating the walls and causing damage. Use a high-quality vapor barrier and ensure that all seams and joints are properly sealed.
- Fire Blocking: Install fire-blocking materials at the top and bottom of the framed walls to prevent the spread of fire between different areas of the basement.
- Soundproofing (Optional): If you plan to use your finished basement for activities that may generate noise, consider adding additional soundproofing measures. This can include using sound-absorbing insulation, resilient channels, or double layers of drywall to minimize sound transfer.
It is important to consult local building codes and regulations when framing and insulating your basement. Ensure that your framing and insulation techniques comply with these requirements and obtain any necessary permits before proceeding. Consider hiring professionals, such as contractors or carpenters, if you are not confident in your DIY abilities.
Proper framing and insulation are vital for creating a structurally sound and energy-efficient finished basement. By investing time and effort into this stage of the process, you can ensure the longevity and comfort of your newly transformed space.
Electrical and Lighting Installation
One of the most important aspects of finishing your basement is the electrical and lighting installation. Proper electrical planning and installation ensure that your finished basement is safe, functional, and properly illuminated. Here are the key steps involved in the electrical and lighting installation process:
- Assess Your Power Needs: Determine the electrical requirements of your finished basement, including the number and type of electrical outlets, light fixtures, and switches you’ll need. Consider the intended use of the space and plan accordingly.
- Hire a Licensed Electrician: Unless you have experience in electrical work, it’s recommended to hire a licensed electrician to handle the installation. They will ensure that all electrical work is done safely and in compliance with local building codes.
- Install the Electrical Panel: If your existing electrical panel is unable to accommodate the additional load from your finished basement, it may be necessary to upgrade or install a new panel. Consult with an electrician to assess your electrical needs and make the necessary modifications.
- Plan Outlet Placement: Determine the optimal locations for electrical outlets based on the layout and function of your finished basement. Consider placing outlets near workstations, entertainment areas, and any other spaces that will require electrical access.
- Install Lighting Fixtures: Decide on the type of lighting fixtures you want to incorporate into your finished basement. This may include recessed lights, pendant lights, track lighting, or wall sconces. Plan the placement and wiring of these fixtures to ensure even lighting throughout the space.
- Consider Natural Lighting: Maximize natural lighting in your basement by enlarging existing windows or adding egress windows. Additionally, consider installing light tubes or skylights to bring in more natural light. These additions can significantly enhance the ambiance and brightness of your finished basement.
- Control Systems: Think about implementing control systems for your lighting, such as dimmer switches or smart home automation. These features allow you to adjust the lighting levels and create different moods or settings in your finished basement.
- Install Ceiling Fans: If you want to improve air circulation and maintain a comfortable environment in your finished basement, consider installing ceiling fans. These fixtures not only provide ventilation but also add a decorative element to the space.
- Consider Safety: Install ground fault circuit interrupters (GFCIs) in areas where moisture is present, such as near sinks or in bathrooms. This helps protect against electrical hazards. Additionally, ensure that all electrical wiring is properly insulated and protected to prevent accidents and damage.
- Inspection and Testing: Once the electrical installation is complete, schedule an inspection by the appropriate local authority to ensure that everything is up to code and safe. Test all lighting fixtures, outlets, and switches to ensure they are functioning correctly.
Remember, electrical work can be complex and dangerous if not done correctly. It is strongly recommended to hire a licensed electrician to handle the installation to guarantee the safety and compliance of your finished basement. They have the expertise and knowledge to ensure that your electrical system is properly installed, reducing the risk of electrical issues and hazards.
Proper electrical planning and installation are essential for creating a functional and well-lit finished basement. By partnering with a professional electrician and following the necessary protocols, you can enjoy a safe, efficient, and aesthetically pleasing space.
Read more: How To Finish A Basement Window
Plumbing and HVAC Installation
When it comes to finishing your basement, plumbing and HVAC (Heating, Ventilation, and Air Conditioning) installation are crucial considerations. Proper plumbing and HVAC systems ensure that your finished basement is comfortable, functional, and equipped with essential amenities. Here are the key steps involved in plumbing and HVAC installation:
- Hire a Licensed Plumber: Unless you have experience in plumbing, it’s recommended to hire a licensed plumber to handle the installation. They will ensure that all plumbing work is done correctly and in compliance with building codes.
- Assess Plumbing Needs: Determine the plumbing requirements for your finished basement. Consider whether you will need a bathroom, a wet bar, or a laundry room. If so, plan the layout and placement of fixtures accordingly.
- Water Supply and Drainage: Ensure that there is proper water supply and drainage in your basement. If necessary, consult with a plumber to extend existing water supply lines and install new drainage lines to accommodate the additional fixtures.
- Bathroom Installation: If you plan to include a bathroom in your finished basement, consider the placement of the toilet, sink, and shower/bathtub. Ensure that sufficient space is allocated for each fixture, and consider factors such as ventilation, waterproofing, and access to the main sewer/DWV (Drain-Waste-Vent) stack.
- Permits and Regulations: Check with your local building department to determine if you need any permits or if there are any specific requirements for plumbing installations in basements. Complying with these regulations is essential to avoid issues in the future.
- HVAC Considerations: Assess the heating and cooling needs of your finished basement. Determine whether you need to extend your existing HVAC system or install a separate system for the basement. Consult with an HVAC technician to ensure that the system is appropriately sized to provide adequate comfort in the space.
- Ductwork and Ventilation: Plan the layout and installation of ductwork to distribute conditioned air throughout the basement. Ensure that the airflow is balanced and that each area of the basement receives proper ventilation and temperature control.
- Insulation and Moisture Control: Properly insulate the ductwork to prevent energy loss and ensure efficient heating and cooling. Additionally, implement moisture control measures, such as sealing air leaks and installing a dehumidifier if needed, to create a comfortable environment and prevent mold growth.
- Testing and Balancing: Once the plumbing and HVAC systems are installed, ensure that they are functioning correctly. Perform pressure tests on plumbing lines to check for leaks and verify that the HVAC system is delivering the desired airflow and temperature. Make any necessary adjustments or repairs as needed.
- Maintenance and Regular Inspections: Schedule regular maintenance for your plumbing and HVAC systems to keep them in optimal condition. This includes checking for leaks, cleaning or replacing filters, and inspecting for any potential issues that may arise over time.
By working with licensed professionals and ensuring compliance with building codes and regulations, you can have peace of mind knowing that your plumbing and HVAC systems are properly installed and functioning. These systems are essential for creating a comfortable and fully functional finished basement that meets your needs and enhances the overall value of your home.
Before starting to finish your basement, make sure to obtain any necessary permits from your local building department. This will ensure that your project is up to code and meets all safety requirements.
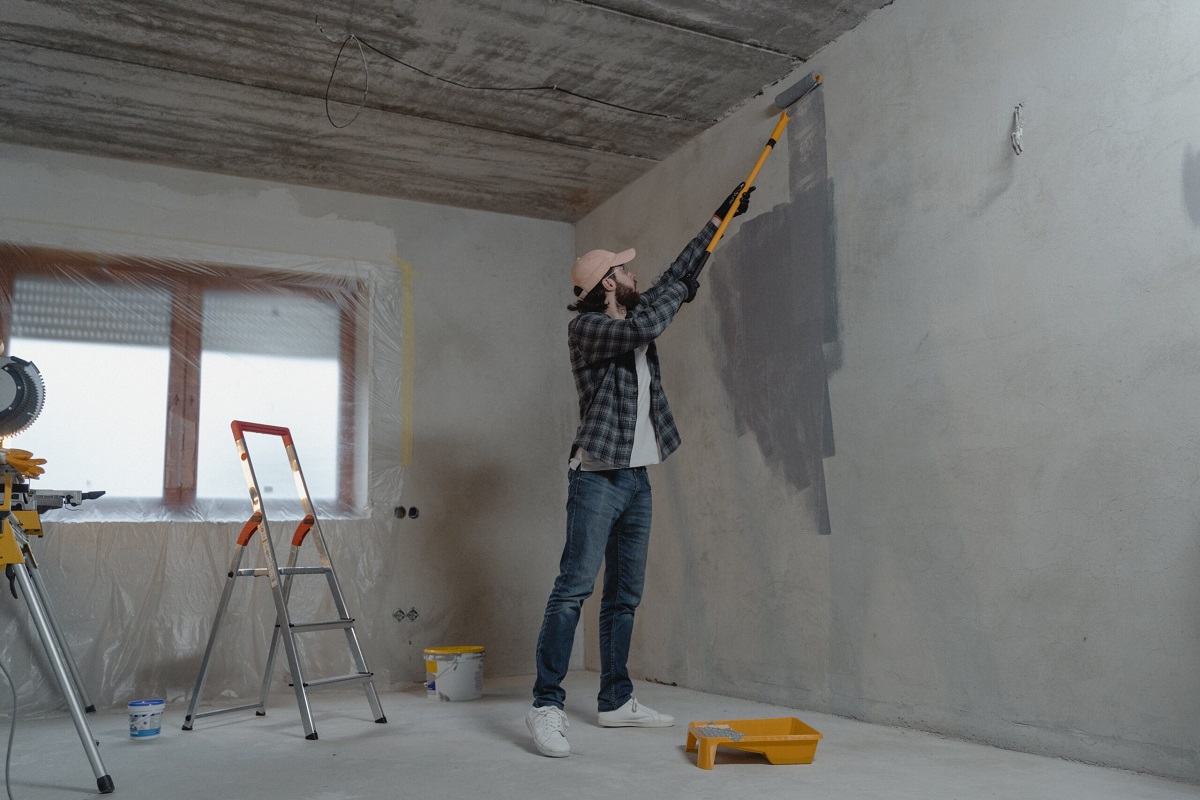
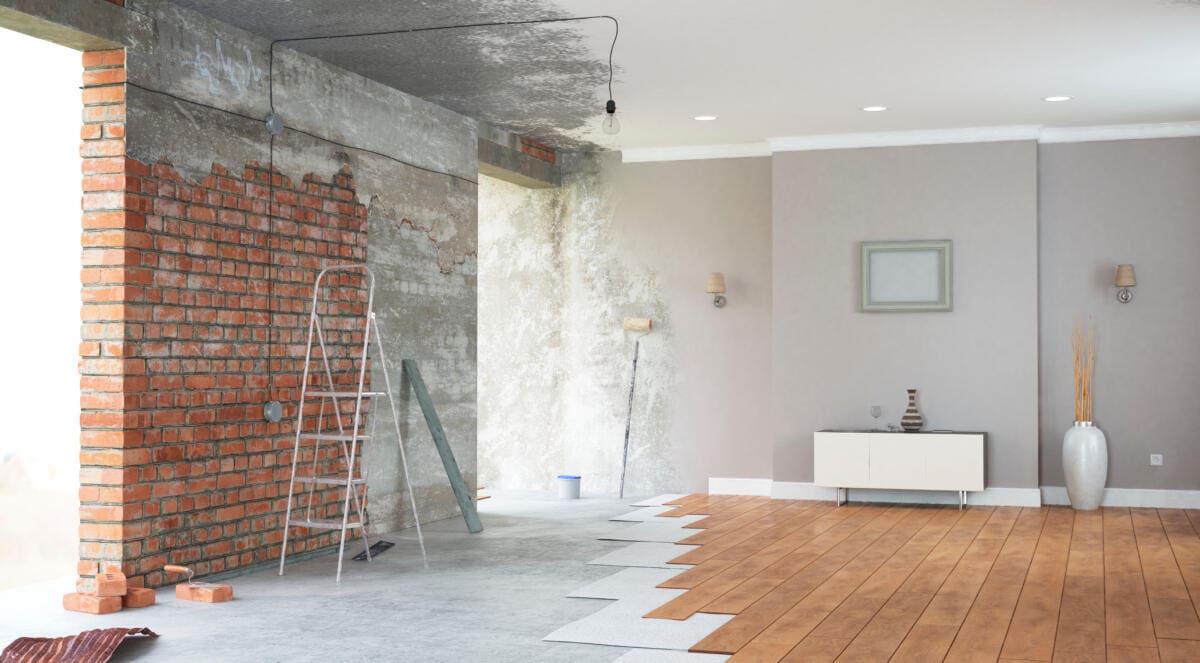
Drywall and Finishing
After the plumbing and HVAC installation in your basement is complete, the next step is to focus on drywall and finishing. Drywall is a critical element that provides a smooth and attractive surface for your walls and ceilings. The finishing touches that follow, such as taping, mudding, and sanding, are essential to achieve a professional and polished look. Here are the key steps involved in the drywall and finishing process:
- Measure and Cut Drywall Panels: Begin by measuring the walls and ceilings of your basement and cutting the drywall panels to the appropriate size. Make sure to leave space for any openings or fixtures, such as windows and electrical outlets.
- Install Drywall: Start with the ceiling and work your way down to the walls. Use appropriate drywall screws or nails to secure the panels to the framing. Leave a small gap between panels to allow for expansion and contraction.
- Taping and Mudding: Apply joint tape over the seams between the drywall panels. Use a wide putty knife or trowel to spread joint compound (also known as mud) over the tape and smooth it out. Repeat this process for all seams and corners. Apply multiple layers of mud to build up a smooth and seamless surface.
- Sanding: Once the joint compound is dry, use sandpaper or a drywall sander to carefully smooth and blend the seams and any rough areas. Be sure to wear a dust mask and eye protection during this process, as it can create a significant amount of dust.
- Corner Bead and Edges: Install metal corner bead on the outer corners of the walls to provide a clean and sharp edge. Use joint compound to cover the corner bead and feather the edges. Pay attention to the edges of the walls and ceilings to create a smooth transition.
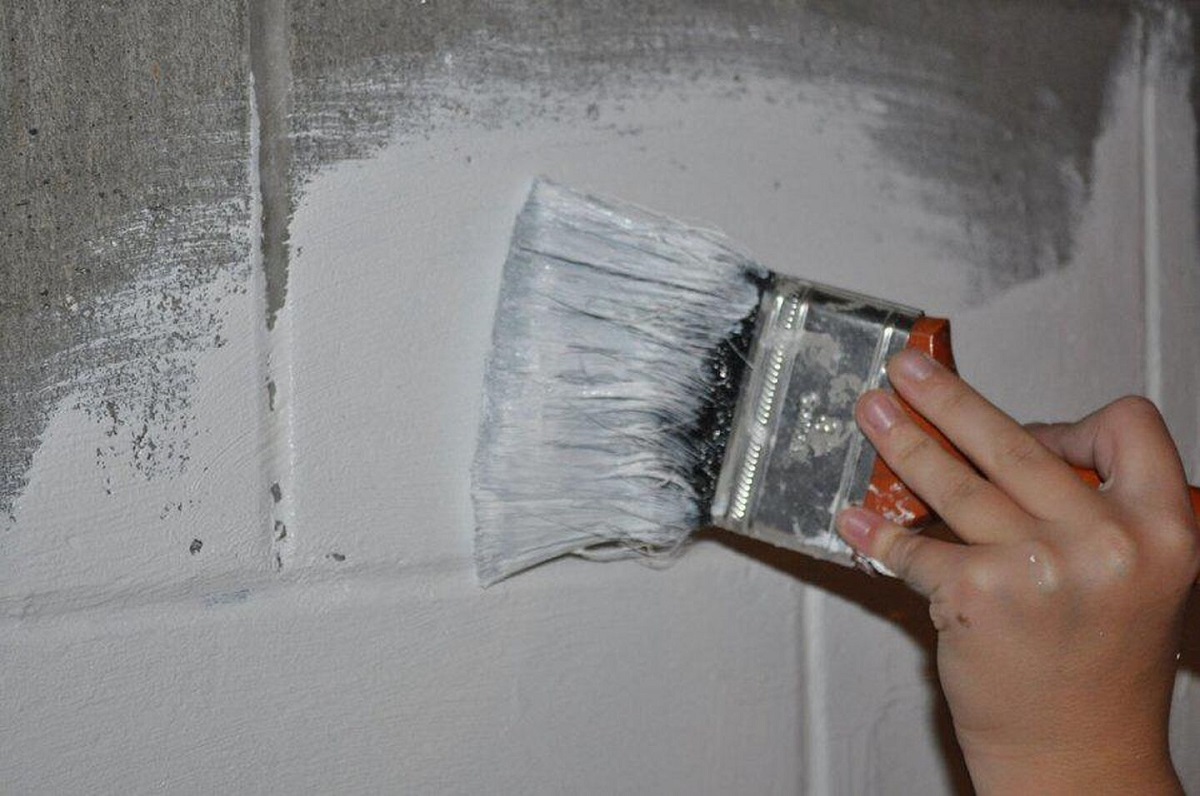
- Priming: Apply a coat of primer to the entire surface to seal and prepare the drywall for paint. A primer helps to improve the adhesion of the paint and provides a uniform surface for better color coverage.
- Painting: Once the primer is dry, apply the desired paint color to the walls and ceiling. Use a roller or brush for larger areas and a brush for cutting in at corners and edges. Apply multiple coats as necessary for a professional and even finish.
- Baseboards and Trim: Install baseboards and trim to enhance the visual appeal of your finished basement. Use a saw and appropriate tools to cut and secure the baseboards and trim around doors, windows, and other areas that require it.
- Finishing Touches: Consider additional finishing touches to complete your basement. This can include installing crown molding, adding decorative elements such as wainscoting or paneling, or incorporating other design features that suit your style and preferences.
- Final Inspection: Once the drywall and finishing are complete, conduct a final inspection of the walls, ceiling, and trim. Look for any imperfections or areas that need touching up. Make any necessary repairs or adjustments to ensure a flawless finish.
The drywall and finishing process requires patience, attention to detail, and some skill. It is crucial to take your time and ensure that each step is executed properly to achieve a professional result. If you are not confident in your abilities, consider hiring a professional contractor or drywall installer to handle this phase of the project.
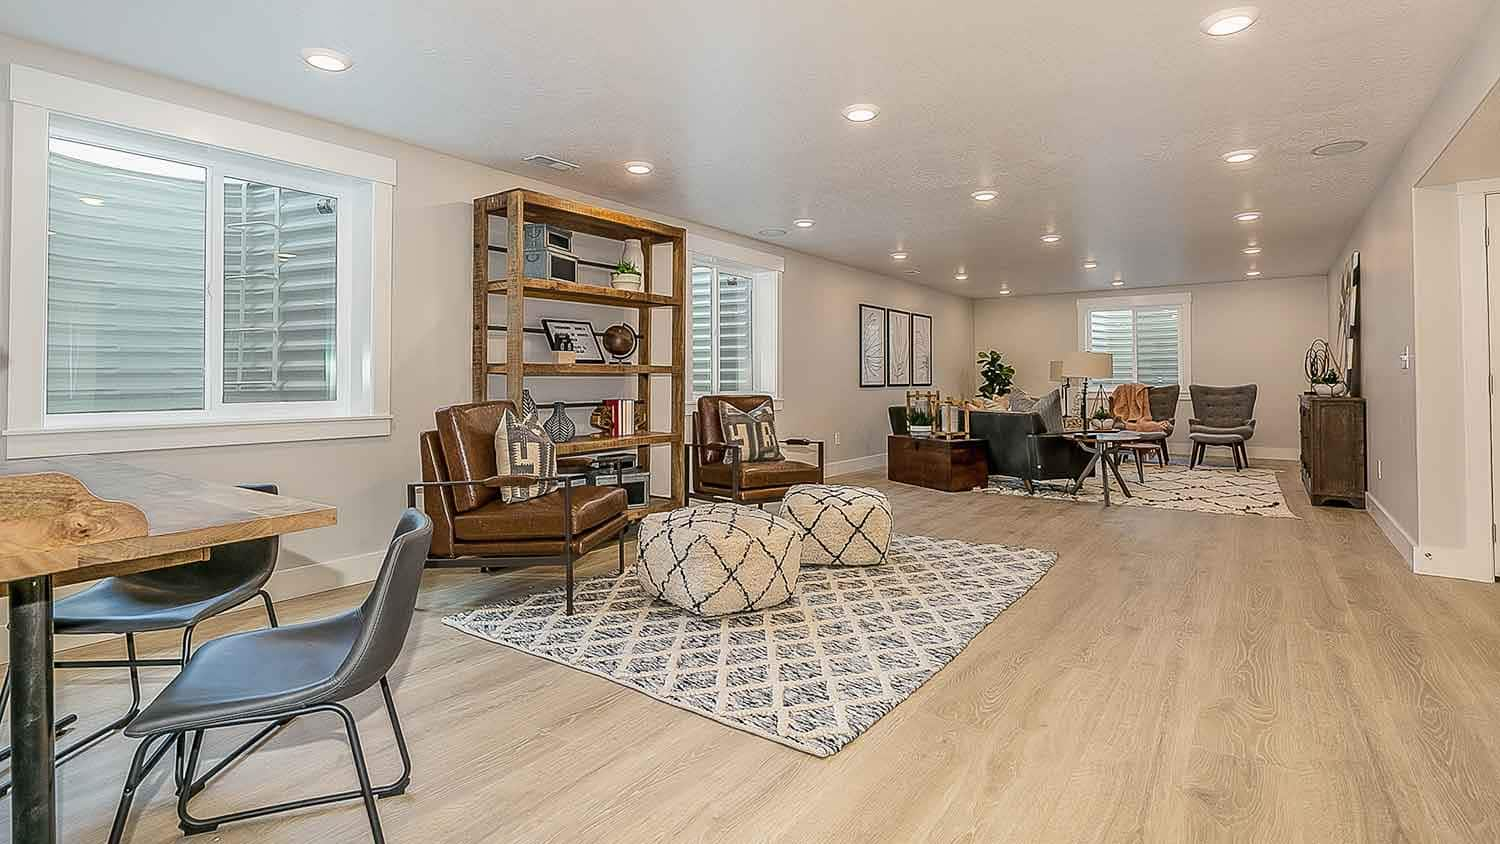
With well-executed drywall and finishing, your basement will be transformed into a visually appealing and inviting space, ready for the final touches of flooring, lighting, and decoration.
Flooring Options for Your Basement
Choosing the right flooring for your basement is crucial to create a comfortable, durable, and visually appealing space. Basements have unique considerations such as potential moisture issues and uneven subfloors, so it’s important to select flooring options that can handle these challenges. Here are some popular flooring options to consider for your basement:
- Engineered Hardwood: Engineered hardwood flooring combines the timeless beauty of real wood with enhanced durability. It consists of multiple layers, with a top layer of hardwood veneer and a core of plywood or high-density fiberboard (HDF). Engineered hardwood is more resistant to moisture than solid hardwood and can be installed directly on concrete subfloors.
- Luxury Vinyl Plank (LVP): LVP is an excellent choice for basements due to its water resistance, durability, and versatility. It replicates the look of hardwood or stone at a more affordable price point. LVP is available in a wide range of styles, colors, and textures, making it suitable for various design aesthetics.
- Laminate Flooring: Laminate flooring offers a cost-effective and practical solution for basements. It consists of a compressed fiberboard core with a high-resolution image layer that mimics the appearance of wood, stone, or tile. Laminate flooring is easy to install, durable, and resistant to moisture when properly sealed.
- Porcelain or Ceramic Tile: Porcelain or ceramic tiles are excellent choices for areas prone to moisture. They are non-porous, durable, and easy to clean. Tiles come in various sizes, colors, and patterns, allowing you to create a customized look for your basement. Consider using a waterproofing membrane and a high-quality grout to prevent water intrusion.
- Carpet: Carpet adds warmth and comfort to a basement, making it ideal for areas used for lounging or entertainment. However, it is important to use moisture-resistant carpet padding and choose carpets specifically designed for basements to prevent mold and mildew growth. Regular maintenance and cleaning are essential to keep the carpet in good condition.
- Epoxy or Concrete Stain: For a sleek and modern look, consider using epoxy or concrete stain for your basement floor. Epoxy provides a durable and low-maintenance surface that resists spills and stains. Concrete stain adds color and depth to the concrete floor while providing protection and easy cleaning.
- Cork Flooring: Cork flooring is an eco-friendly option that provides natural insulation and cushioning. It is resistant to moisture and can help reduce noise transfer between floors. Cork is available in a variety of styles and colors, offering a unique and textured look for your basement.
- Rubber Flooring: Rubber flooring is highly durable, slip-resistant, and easy to maintain. It offers excellent sound insulation, making it suitable for basement gyms or playrooms. Rubber flooring comes in various thicknesses, colors, and patterns to match your style and functional needs.
When selecting a flooring option for your basement, consider factors such as your budget, the level of foot traffic, the presence of moisture, and the overall aesthetic you want to achieve. It’s also important to properly prepare the subfloor before installation to ensure a smooth and even surface.
If you’re unsure about which flooring option is best for your basement, consult with flooring professionals or contractors who can guide you based on your specific requirements and budget. With the right flooring choice, your basement will become a welcoming and functional space that complements the overall design of your home.
Ceiling Installation
When finishing your basement, installing a ceiling is an important step that adds style, functionality, and a finished look to the space. A well-designed and properly installed ceiling can enhance the overall aesthetic appeal, conceal utilities, and improve acoustics. Here are the key considerations for ceiling installation in your basement:
- Determine Ceiling Height: Assess the height of your basement and consider the desired ceiling height. Take into account any necessary headroom requirements and building codes. If the basement has low ceilings, consider options that help maximize the space, such as a drop or suspended ceiling.
- Choose Ceiling Materials: There are various materials available for basement ceilings, including drywall, drop ceilings, wood planks, and tin tiles. Each material has its own unique appearance, installation process, and cost. Consider factors such as aesthetics, ease of installation, maintenance, and durability when choosing the right material for your basement.
- Drywall Ceiling: Drywall is a traditional and popular choice for basement ceilings. It provides a smooth and seamless look when properly installed. Determine if the entire ceiling or specific areas will be covered with drywall and consider adding access panels for future accessibility to pipes or wiring in the ceiling space.
- Drop or Suspended Ceiling: A drop or suspended ceiling consists of a grid system with removable ceiling tiles. This type of ceiling is easy to install and allows access to utilities above, such as plumbing or HVAC systems. It also provides excellent soundproofing and can help with concealing irregularities in the existing ceiling surface.
- Wood Plank Ceiling: Wood planks bring warmth and a natural element to your basement. They can be installed directly to the ceiling joists or to a furring strip system. Wood planks create a rustic or modern aesthetic, depending on the type and finish of the wood.
- Tin Ceiling Tiles: Tin ceiling tiles add a unique and decorative touch to your basement. They come in various patterns and finishes and can be installed directly to the ceiling or a furring strip system. Tin tiles are lightweight and durable, offering a vintage or industrial look.
- Insulation: Consider adding insulation to your basement ceiling to enhance energy efficiency and reduce noise transfer between floors. Insulation can help regulate the temperature and create a more comfortable living environment. Consult with professionals to determine the appropriate insulation type and thickness for your basement.
- Maintenance and Access: Depending on the ceiling material chosen, consider the maintenance requirements and future access needs. Drop ceilings and access panels provide easy access to utilities and plumbing, while other materials may require more effort and preparation for maintenance or repairs.
- Lighting and Fixtures: Plan the positioning and installation of lighting fixtures in conjunction with your ceiling choice. Recessed lights, pendant lights, or track lighting can be easily incorporated during ceiling installation. Determine the optimal placement and consult with an electrician to ensure proper wiring and installation.
When installing a ceiling in your basement, consider your personal style, budget, and the overall design theme of the space. It’s also essential to consult local building codes and regulations to ensure compliance and safety. If you are unsure about the best ceiling option for your basement or the installation process, consult with professionals or contractors who specialize in basement renovations.
A well-chosen and expertly installed ceiling will contribute to the overall ambiance and functionality of your finished basement, enhancing its appeal and value as a living space in your home.
Painting and Decorating the Finished Basement
Painting and decorating your finished basement is the final step in bringing your vision to life. This stage allows you to infuse your personal style and create a warm and inviting space. Here are some key considerations for painting and decorating your finished basement:
- Choose the Right Paint Colors: Select paint colors that complement the overall design and function of your finished basement. Lighter colors can make the space feel larger and brighter, while darker colors create a cozy and intimate atmosphere. Consider the natural and artificial lighting in the basement and how it may affect the color appearance.
- Prepare the Walls: Prior to painting, make sure the walls are properly prepared. Fill in any holes or imperfections with spackle or putty and sand them smooth. Clean the walls to remove any dust, dirt, or grease that could affect the paint’s adherence.
- Painting Techniques: Decide on the painting techniques you want to incorporate, such as solid colors, accent walls, or decorative finishes. Consider using techniques like color blocking, stenciling, or texture painting to add visual interest and depth to your finished basement.
- Consider Wall Treatments: Explore different wall treatments, such as wallpaper, wainscoting, or wood paneling, to add texture and personality to your basement. These treatments can enhance the overall style and create a focal point in the space.
- Choose Appropriate Flooring: Select flooring that complements the painted walls and enhances the overall aesthetic of your finished basement. Consider factors such as durability, comfort, and maintenance requirements. Coordinate the colors and textures of the flooring with the wall paint to create a cohesive and harmonious look.
- Lighting and Fixtures: Incorporate appropriate lighting fixtures that complement the style of your finished basement. Choose fixtures that provide adequate illumination for the different areas and activities in the space. Consider using dimmers or smart lighting systems to create different moods or lighting levels.
- Window Treatments: Install window treatments to add privacy, control natural light, and enhance the aesthetics of your finished basement. Consider options such as blinds, curtains, or shades that suit your style while providing functionality.
- Furniture and Decor: Choose furniture and decor pieces that complement the overall design and function of your finished basement. Opt for comfortable and functional furniture that suits the purpose of each area, whether it be a cozy seating arrangement for a family room or a functional desk and chair for a home office.
- Personal Touches: Infuse your finished basement with personal touches that reflect your interests and hobbies. Display artwork, photographs, or memorabilia that have sentimental value. Incorporate decorative accessories, such as rugs, throw pillows, and wall art, that showcase your personality and add warmth to the space.
- Maintain an Organized Space: Plan and implement storage solutions to keep your finished basement organized and clutter-free. Utilize shelving units, storage bins, or built-in cabinets to store items and maintain a clean and tidy aesthetic.
When painting and decorating your finished basement, consider the overall theme or style you want to achieve. Create a cohesive and harmonious space by coordinating colors, textures, and materials. Don’t be afraid to experiment with different combinations and seek inspiration from interior design magazines, websites, or professionals.
With careful planning and attention to detail, your finished basement will become a welcoming and functional space that reflects your personal style and enhances the overall value and enjoyment of your home.
Final Touches and Furnishing the Basement
As you reach the final stages of finishing your basement, it’s time to focus on the final touches and furnishing that will bring the space to life. This is where you can add your personal style, create a comfortable atmosphere, and make the basement truly feel like a part of your home. Here are some key considerations for adding the final touches and furnishing your basement:
- Lay the Flooring: Complete the installation of your chosen flooring option. Whether it’s carpet, hardwood, laminate, or another type of material, ensure that it is properly installed, cleaned, and ready for use. Consider adding area rugs or runners to add warmth and define specific areas within the space.
- Arranging Furniture: Place furniture strategically to create functional and inviting areas in your basement. Consider the flow of the space, the purpose of each area, and the needs of your household. Arrange seating areas, workspaces, and storage solutions to maximize both comfort and functionality.
- Lighting Fixtures and Lamps: Install and position lighting fixtures and lamps to provide the right ambiance and task lighting in your basement. Consider a combination of overhead lighting, floor lamps, table lamps, and task lighting for the different areas. Use dimmers or smart lighting systems to create a variety of lighting options and moods.
- Window Treatments: Install window treatments, such as blinds, curtains, or shades, to add privacy, control natural light, and enhance the overall aesthetic. Choose window treatments that fit the style of your basement and complement the color scheme and decor.
- Wall Art and Decor: Hang wall art, such as paintings, photographs, or decorative pieces, to add personality and visual interest to your finished basement. Consider the scale and proportion of the artwork in relation to the size of the wall and furniture. Don’t forget to incorporate mirrors to create the illusion of space and reflect light.
- Storage Solutions: Integrate storage solutions, such as shelving units, cabinets, or built-in bookcases, to keep your basement organized and clutter-free. Utilize storage baskets, bins, or boxes to neatly store items while adding an element of style to the space.
- Decorative Accessories: Incorporate decorative accessories, such as throw pillows, blankets, vases, sculptures, or plants, to add texture, color, and visual interest. Use these accessories to tie together the color scheme, enhance the overall design, and make the space feel cozy and inviting.
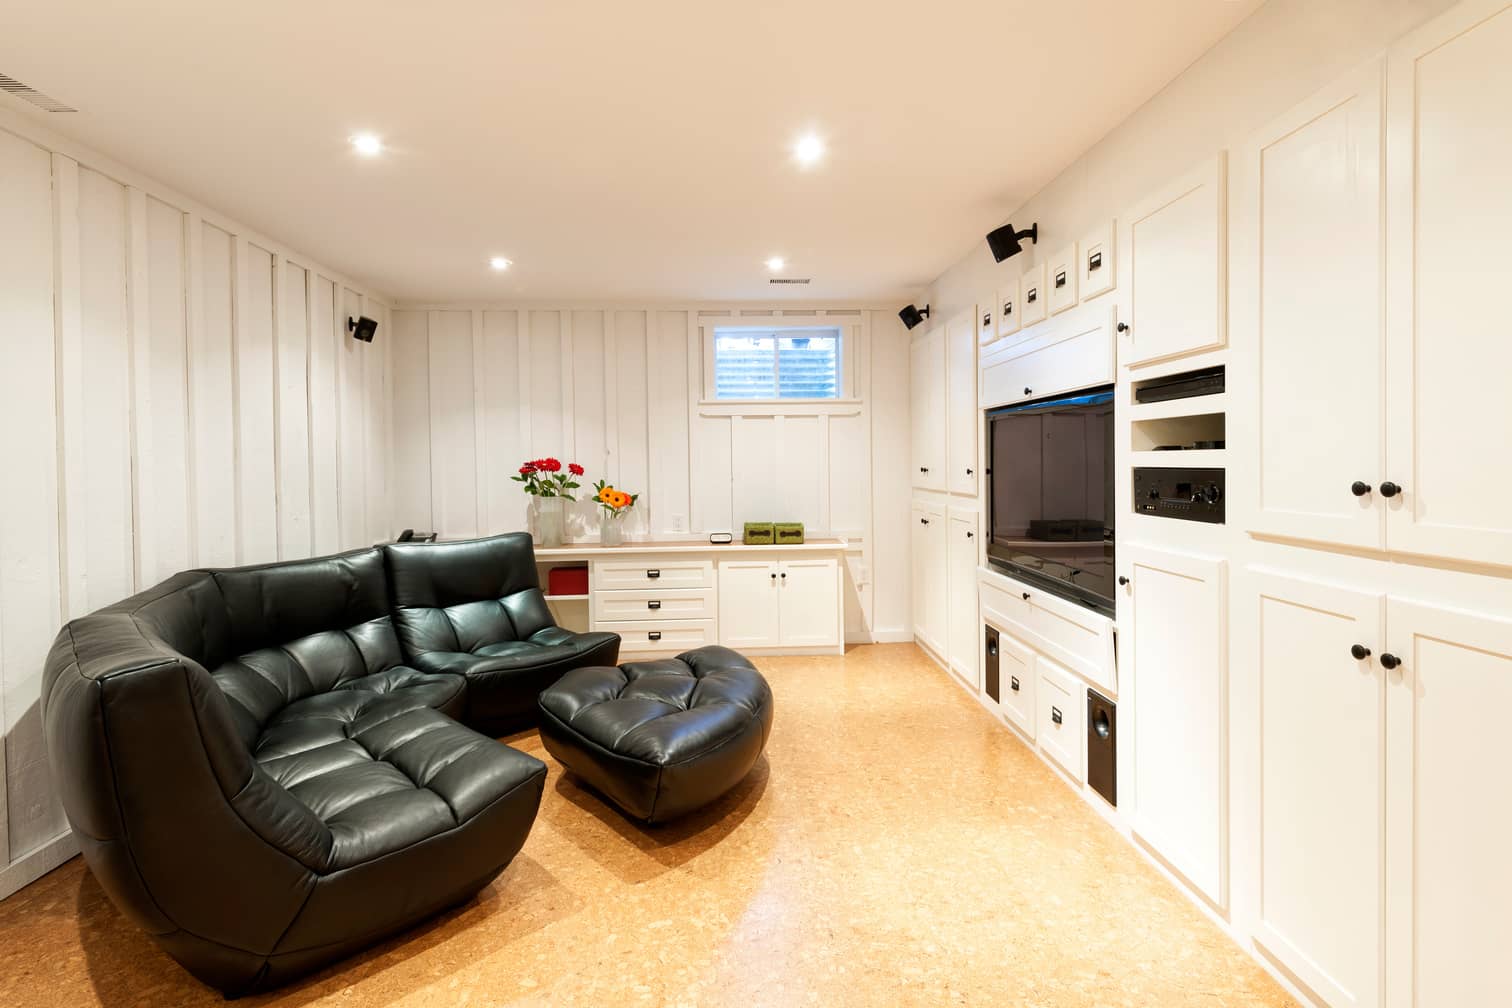
- Home Entertainment and Technology: If you plan to use your basement as a media or entertainment room, consider integrating audiovisual equipment, sound systems, or home theater setups. Wire and connect all necessary devices, ensuring they are properly mounted and hidden for a clean and uncluttered look.
- Finishing Touches: Pay attention to details such as baseboards, crown molding, trim, or other architectural elements that can enhance the overall look of your finished basement. Consider adding decorative hardware or unique fixtures to cabinets or doors to add a touch of personality.
- Personalize the Space: Add personal touches that reflect your family’s interests and hobbies. Display cherished photographs, artwork created by family members, or items collected during travels. Create a space that feels uniquely yours and that showcases your family’s memories and experiences.
Remember that the goal is to create a comfortable and functional living space that reflects your style and meets your family’s needs. Take your time when choosing furnishings and decor, ensuring that they work harmoniously with the overall design and functionality of the basement.
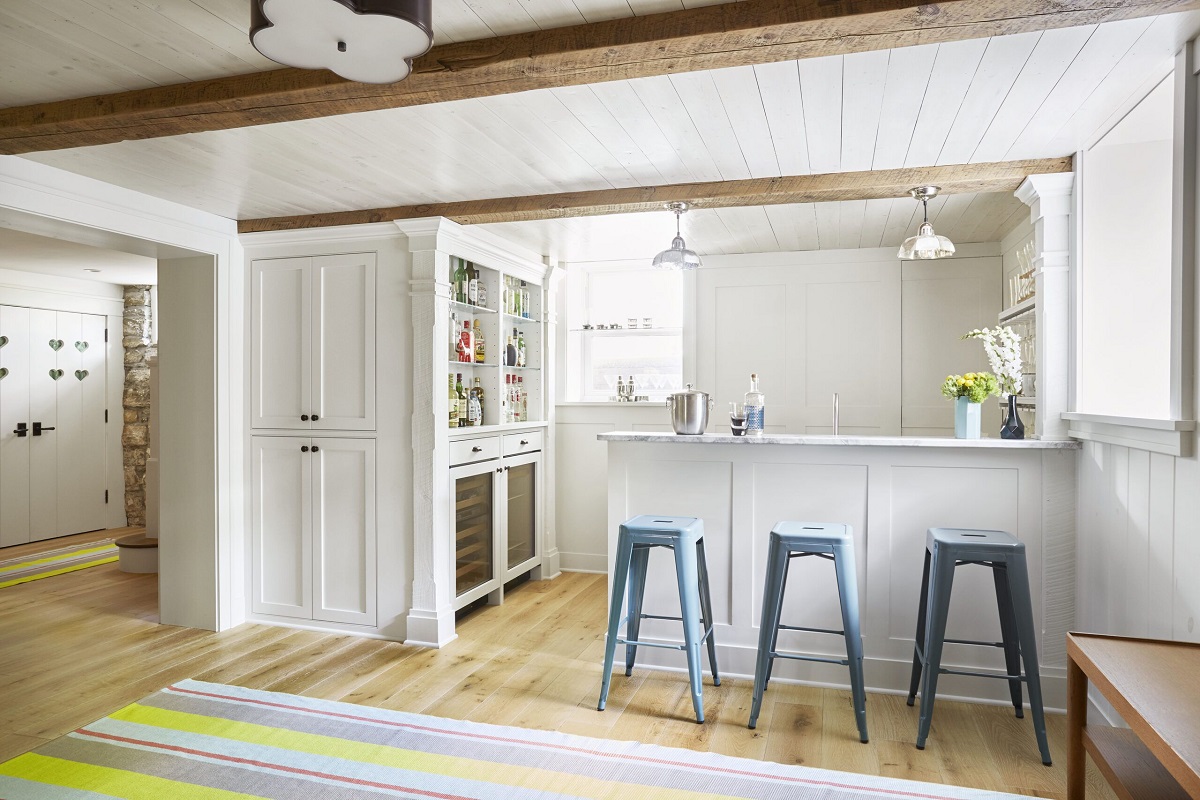
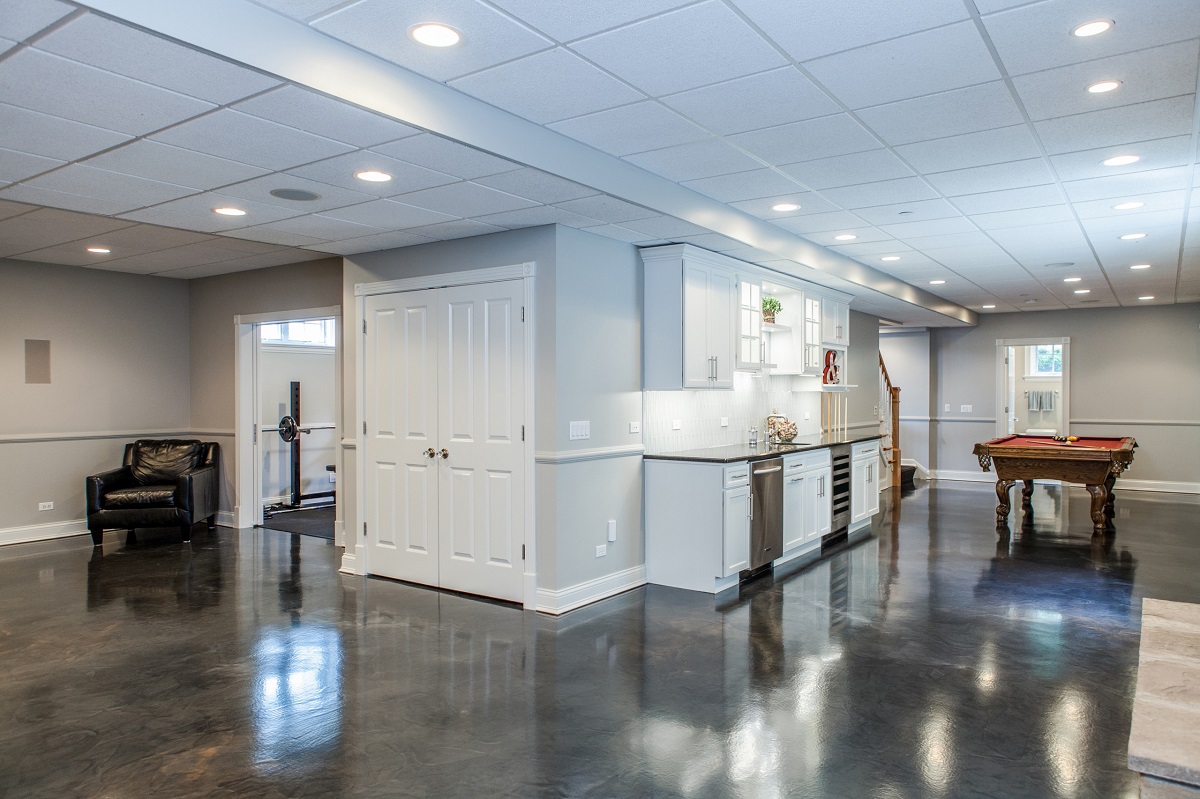
The final touches and furnishings in your finished basement will create a space that you and your family can enjoy and utilize to its fullest potential. Make it a reflection of your personal style and a place where lasting memories can be made.
Conclusion
Finishing your basement is an exciting endeavor that can add valuable living space to your home. By carefully considering all the factors involved, planning and designing the layout, and executing the necessary steps, you can transform your basement into a functional, comfortable, and visually appealing area.
From the initial considerations of budget, purpose, and permits, to the framing, insulation, and installation of electrical, plumbing, and HVAC systems, every step is essential. Each decision made during the process contributes to the success and functionality of the finished basement. Seamless drywall installation, suitable flooring options, and thoughtful ceiling and lighting choices all play a role in creating a truly exceptional space.
Once the basic elements of your basement are complete, it’s time to add the finishing touches and furnish the space. Painting the walls, incorporating decor and personal touches, and arranging furniture will bring your vision to life. This final stage allows you to infuse your personality, style, and interests, creating a basement that feels like an integral part of your home.
Remember to approach the project with patience, attention to detail, and a clear vision of your desired outcome. Consult professionals when needed, and ensure that all work is done in compliance with local building codes and regulations. Your finished basement should not only meet your functional needs but also enhance the overall value and enjoyment of your home.
In conclusion, finishing your basement is a rewarding undertaking that can significantly expand your living space and add value to your home. With thorough planning, careful execution, and thoughtful design, you can transform your basement into a beautiful, functional, and welcoming space that you and your family will enjoy for years to come.
Frequently Asked Questions about How Much To Finish A Basement
Was this page helpful?
At Storables.com, we guarantee accurate and reliable information. Our content, validated by Expert Board Contributors, is crafted following stringent Editorial Policies. We're committed to providing you with well-researched, expert-backed insights for all your informational needs.

0 thoughts on “How Much To Finish A Basement”