Articles
How To Finish Concrete Basement Floor
Modified: August 23, 2024
Learn how to finish your concrete basement floor with these informative articles. Transform your space with the help of our expert tips and advice.
(Many of the links in this article redirect to a specific reviewed product. Your purchase of these products through affiliate links helps to generate commission for Storables.com, at no extra cost. Learn more)
Introduction
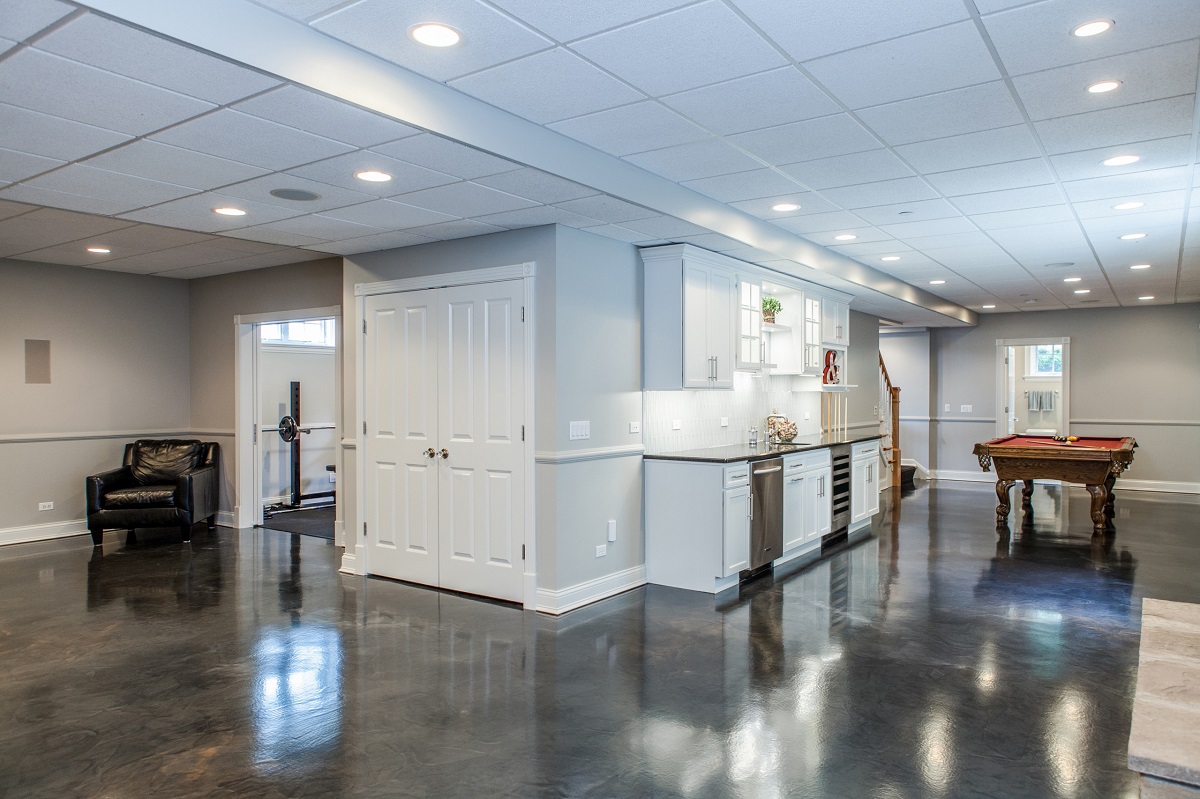
Welcome to the comprehensive guide on how to finish a concrete basement floor. If you’re looking to transform your basement into a functional and appealing space, properly finishing the concrete floor is a crucial step. A finished basement floor not only improves the aesthetics of the space but also adds durability and makes it more comfortable to walk on.
Finishing a concrete basement floor involves a series of steps to ensure a smooth and polished surface. This guide will walk you through the process, providing detailed instructions to help you achieve professional-looking results. Whether you plan to use your basement as a recreational area, a home gym, or extra living space, a finished concrete floor will create a solid foundation for your design ideas.
Before diving into the step-by-step instructions, it’s essential to highlight the importance of finishing a concrete basement floor. While the initial appearance of a bare concrete floor may seem acceptable, it lacks the necessary protection and aesthetic appeal for a comfortable living space. Unfinished concrete floors are porous, making them prone to moisture absorption, staining, and even structural damage over time.
By finishing your concrete basement floor, you create a barrier that protects against moisture infiltration, eliminates dust and allergens, and enhances the durability of the surface. Additionally, a finished floor provides a clean and polished appearance, adding value and visual appeal to your basement.
Now that you understand the importance of finishing a concrete basement floor, let’s dive into the step-by-step process to help you achieve a beautifully finished surface. From preparing the floor to applying the final touches, we’ll cover everything you need to know to make your concrete basement floor the envy of all.
Key Takeaways:
- Transform your basement into a functional and visually appealing space by following the step-by-step guide to finish a concrete basement floor. Protect against moisture, enhance durability, and increase home value.
- Personalize your finished basement floor with decorative touches such as stenciling, acid staining, epoxy coatings, or decorative sawcuts. Showcase your creativity and create a unique design aesthetic that complements your overall theme.
Read more: How Thick Is Basement Concrete Floor
The Importance of Finishing a Concrete Basement Floor
Finishing a concrete basement floor may seem like an optional step, but it offers numerous advantages that make it a worthwhile investment. Whether you’re planning to use your basement for storage, a home gym, or as additional living space, proper floor finishing is essential for a comfortable and functional environment. Let’s explore the key reasons why finishing your concrete basement floor is so important.
1. Moisture Protection
Basements are notorious for being damp and prone to moisture issues. Unfinished concrete floors can absorb moisture from the ground, leading to issues such as mold growth and musty odors. By finishing your basement floor, you create a moisture-resistant barrier that helps prevent water from seeping through and causing damage. This barrier not only protects your floor but also contributes to maintaining a healthy indoor environment.
2. Durability and Longevity
A finished concrete floor is more durable and resistant to wear and tear compared to an unfinished surface. The finishing process involves sealing the floor, creating a protective layer that enhances its strength and resilience. This makes the floor more resistant to scratches, stains, and abrasions, ensuring it withstands the test of time and regular use.
3. Improved Air Quality
Unfinished concrete floors can be dusty, as they tend to release fine particles into the air. This can negatively impact the air quality in your basement and potentially trigger allergies or respiratory issues. When you finish your concrete floor, you apply a sealant that minimizes dust and allergen accumulation, leading to cleaner and healthier air in your basement.
Read more: How To Seal Concrete Basement Floor
4. Aesthetic Appeal
Finishing your basement floor allows you to transform the space from a dull and industrial-looking area into a visually appealing and welcoming part of your home. You have the freedom to choose from various finishes, such as epoxy coatings, stains, or decorative overlays, that can enhance the appearance of your basement and complement your overall design aesthetic.
5. Increased Home Value
A well-finished basement floor adds value to your home, both in terms of market value and overall desirability. Potential buyers will be more attracted to a basement that has a polished and functional floor, as it showcases the potential for additional living space or a versatile entertainment area.
Now that you understand the importance of finishing your concrete basement floor, it’s time to move on to the next steps: preparing the floor and gathering the necessary tools and materials. By following the proper process, you can ensure a successful and professional-looking finish for your basement floor.
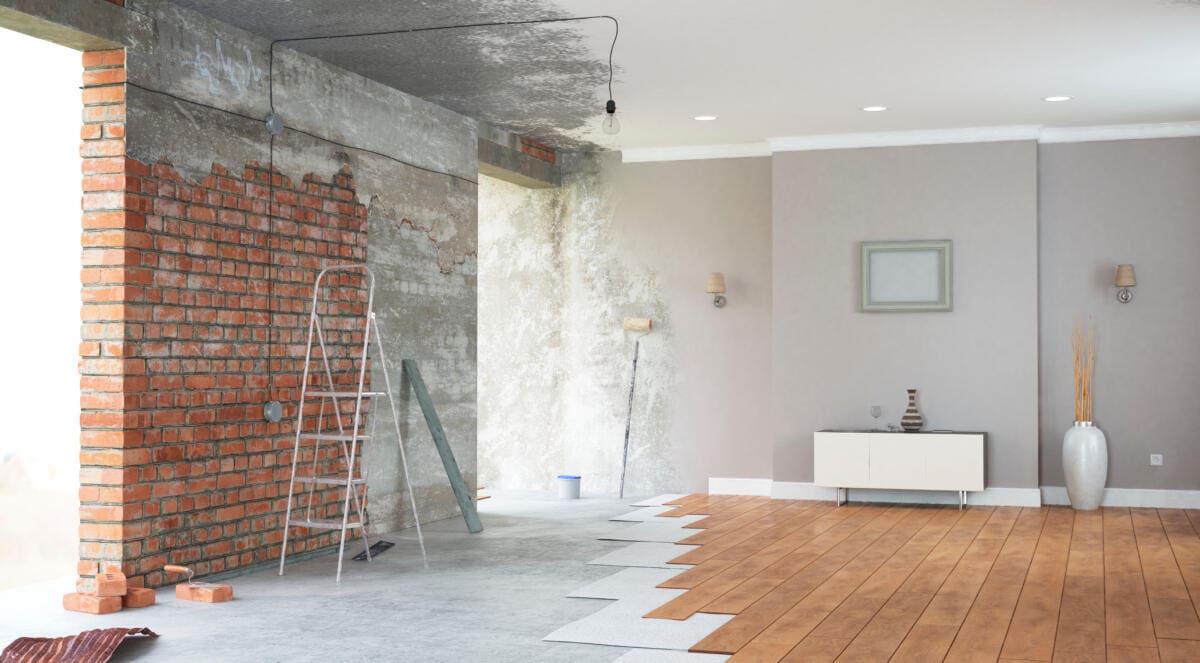
Preparing the Basement Floor for Finishing
Before you can start the process of finishing your basement floor, it is essential to properly prepare the surface. Preparing the basement floor ensures that the finishing materials adhere correctly and that any existing issues are addressed. Here are the steps to prepare your basement floor for finishing:
1. Clean thoroughly
Start by thoroughly cleaning the basement floor to remove any dirt, dust, or debris. Sweep the floor to remove loose particles, and then use a vacuum cleaner or a shop vac to remove any remaining dirt. Pay attention to corners and edges, as well as any cracks or crevices that may have accumulated grime.
Read more: How To Clean Concrete Basement Floors
2. Remove existing coatings or adhesives
If your basement floor has an existing coating or adhesive, it needs to be removed before applying a new finish. Use a floor grinder or a scraper to strip away any old paint, epoxy, or adhesive. Ensure that the surface is completely clean and free from any remnants of the previous coating.
3. Repair cracks and damages
Inspect the basement floor for any cracks or damages and repair them before proceeding. Small cracks can be filled with a concrete patching compound, while larger cracks may require more extensive repair work. Use a concrete repair kit or consult a professional if you’re unsure about the best approach.
4. Test for moisture
Moisture can be a common issue in basements, so it’s crucial to test the floor’s moisture levels. Place a plastic sheet on the floor and tape down the edges. Leave it for 24-48 hours and check for any condensation or moisture accumulation on the underside. If moisture is present, it may be necessary to install a moisture barrier before proceeding with the finishing process.
5. Level the floor
Use a self-leveling compound to address any uneven areas or low spots on the basement floor. Mix the compound according to the manufacturer’s instructions and pour it onto the floor. Use a trowel or a squeegee to spread it evenly, ensuring that it fills in any gaps or depressions. Allow the compound to dry completely before moving on to the next step.
By taking the time to properly prepare your basement floor, you set the foundation for a successful and long-lasting finish. Once the floor is clean, free from coatings, and repaired, you can move on to the next step: gathering the necessary tools and materials.
Gathering the Necessary Tools and Materials
Before you start the process of finishing your concrete basement floor, it’s important to gather all the necessary tools and materials. Having everything prepared in advance will save you time and ensure a smoother workflow. Here is a list of the tools and materials you’ll need:
Tools:
- Trowel
- Concrete grinder or floor sander
- Concrete patching compound
- Bucket and mixing paddle
- Paint roller and extension pole
- Paintbrush
- Shop vac or vacuum cleaner
- Squeegee
- Moisture testing kit
- Self-leveling compound
- Tape measure
- Protective gloves and goggles
- Dust mask
Materials:
- Bonding agent
- Concrete overlay or resurfacer
- Concrete sealer
- Decorative finishes (optional)
Make sure to have all the necessary tools and materials readily available before you begin the basement floor finishing process. This way, you can work efficiently and minimize any potential delays or interruptions.
It’s also essential to wear the appropriate protective gear, such as gloves, goggles, and a dust mask, to ensure your safety during the process. Concrete dust can irritate the skin, eyes, and respiratory system, so take the necessary precautions to protect yourself.
Once you have all the tools and materials at hand, you’re ready to move on to the next steps: cleaning the floor and repairing any cracks or damages. These steps are crucial for preparing the surface and ensuring a solid foundation for the rest of the finishing process.
Step 1: Cleaning the Floor
The first step to finishing your basement floor is to thoroughly clean the surface. Cleaning the floor ensures that the finishing materials adhere properly and that there are no loose particles that can affect the final result. Follow these steps to clean your basement floor effectively:
1. Clear the area
Remove any furniture, boxes, or other items from the basement to create an open space for cleaning. This will allow you to access all areas of the floor and ensure a thorough cleaning process.
2. Sweep the floor
Start by sweeping or using a broom to remove loose dirt, dust, and debris from the basement floor. Pay attention to corners, edges, and hard-to-reach areas where dirt can accumulate.
3. Vacuum the floor
After sweeping, use a vacuum cleaner or a shop vac to remove any remaining dirt, dust, or small particles. A vacuum cleaner with attachments can help you reach tight corners and crevices more easily.
4. Scrub the floor
For a more thorough clean, you can scrub the floor using a mild detergent or a concrete cleaner. Dilute the detergent in water according to the manufacturer’s instructions, then use a scrub brush or a mop to clean the floor surface. Pay extra attention to any areas with stains or spills.
5. Rinse the floor
After scrubbing, rinse the floor thoroughly with clean water to remove any residue from the detergent or cleaner. You can use a mop or a bucket of clean water to rinse the surface. Ensure that all the cleaning solution is removed to prevent any interference with the subsequent steps.
6. Allow the floor to dry
After cleaning and rinsing, give the basement floor sufficient time to dry completely before proceeding with the next steps. This is important because any moisture remaining on the surface can impact the adhesion of the bonding agent and the subsequent layers of finishing materials.
By following these steps to clean your basement floor, you ensure a clean slate for the finishing process. The next step is to repair any cracks or damages you may find before applying the bonding agent. Cleaning and repairing the floor are essential for achieving a smooth and flawless finish for your basement floor.
Step 2: Repairing any Cracks or Damages
Once you have thoroughly cleaned your basement floor, the next step in the finishing process is to repair any cracks or damages that may be present. Properly repairing the floor ensures a smooth and even surface for the subsequent layers of finishing materials. Follow these steps to effectively repair cracks and damages:
1. Inspect the floor
Carefully examine the basement floor for any visible cracks, chips, or other damages. Pay close attention to areas near the walls and corners, where cracks are more likely to occur. It’s important to address these issues before proceeding with the finishing process.
Read more: DIY: How To Finish A Basement
2. Clean out the cracks
Use a wire brush or a crack chaser to clean out any dirt, debris, or loose material from the cracks. This will ensure that the repair materials adhere properly and provide a durable and long-lasting repair.
3. Fill the cracks
Apply a concrete patching compound into the cleaned cracks, using a trowel or a putty knife. Smooth out the surface of the patch to make it level with the surrounding floor. Follow the manufacturer’s instructions for the specific product you’re using, including curing time and any additional steps required.
4. Level out uneven areas
If there are any low spots or uneven areas on the basement floor, you can use a self-leveling compound to create a more even surface. Mix the compound according to the manufacturer’s instructions and pour it onto the floor. Use a trowel or a squeegee to spread it evenly, filling in the low spots and creating a smooth, level surface.
5. Allow the repairs to cure
After repairing the cracks and leveling out any uneven areas, it’s important to allow the repairs to cure completely. Follow the recommended curing time provided by the manufacturer of the patching compound or self-leveling compound before proceeding with the next steps of the finishing process.
Repairing any cracks or damages in your basement floor is a critical step in achieving a professional and polished finish. By addressing these issues before moving forward, you ensure a solid foundation for the subsequent layers of finishing materials. The next step is to apply a bonding agent to enhance the adhesion of the concrete overlay or resurfacer, which will be covered in the following step.
Read more: How To Finish A Basement Window
Step 3: Applying a Bonding Agent
After cleaning and repairing any cracks or damages in your basement floor, the next step in the finishing process is to apply a bonding agent. A bonding agent helps enhance the adhesion between the existing concrete floor and the overlay or resurfacer that will be applied later. Follow these steps to effectively apply a bonding agent:
1. Prepare the surface
Ensure that your basement floor is clean and free from any dust or debris. If necessary, give it a final sweep or vacuum to remove any loose particles that could interfere with the bonding process.
2. Mix the bonding agent
Follow the manufacturer’s instructions to mix the bonding agent. Typically, this involves combining the bonding agent concentrate with water in a bucket. Use a mixing paddle attached to a drill to ensure a thorough and consistent mixture.
3. Apply the bonding agent
Using a paint roller or a sprayer, apply the bonding agent onto the entire surface of the basement floor. Make sure to create an even and thin coat, covering the entire area that will be resurfaced. Work in small sections, starting from one corner and working your way across the floor.
Read more: How Much To Finish A Basement
4. Allow the bonding agent to dry
Once you have applied the bonding agent, allow it to dry according to the manufacturer’s instructions. This typically takes around 1-2 hours, but it’s essential to check the specific drying time recommended for the bonding agent you’re using. The bonding agent should have a tacky texture when it’s ready.
Applying a bonding agent is a crucial step in ensuring a strong and long-lasting bond between the existing concrete floor and the overlay or resurfacer. The bonding agent enhances adhesion and promotes a cohesive bond between the layers, providing a solid foundation for the subsequent steps.
The next step in finishing your basement floor is pouring the concrete overlay or resurfacer, which will be discussed in detail in the following step.
Step 4: Pouring the Concrete Overlay
After applying the bonding agent, the next step in finishing your basement floor is to pour the concrete overlay. This overlay will serve as a new surface layer, providing a smooth and polished finish to your basement floor. Follow these steps to effectively pour the concrete overlay:
1. Prepare the concrete overlay
Start by thoroughly reading and following the instructions provided by the manufacturer of the concrete overlay product you’re using. Mix the overlay material according to the specified ratios and consistency indicated in the instructions. Use a bucket and a mixing paddle to ensure a uniform mixture.
2. Work in small sections
Divide your basement floor into smaller sections to make the pouring process more manageable. Begin by pouring the concrete overlay onto one section, spreading it evenly and smoothly with a trowel or a squeegee. Apply enough pressure to ensure that the overlay fills any low spots, but avoid applying excessive force that may cause unevenness.
Read more: How To Finish A Basement Ceiling
3. Use a gauge rake
As you pour and spread the concrete overlay, use a gauge rake to ensure a consistent thickness throughout the surface. A gauge rake has adjustable depth settings, allowing you to maintain a uniform layer of overlay as you work across the floor.
4. Work quickly
Concrete overlays have a limited working time, so it’s important to work efficiently. Pour small amounts of the overlay at a time and smooth it out immediately to prevent the mixture from drying or setting too quickly. Continuously monitor the consistency of the overlay and adjust your pouring and spreading speed accordingly.
5. Allow the overlay to dry and cure
After pouring and spreading the concrete overlay, allow it to dry and cure as per the manufacturer’s instructions. This typically involves a curing period of 24-48 hours, during which you should avoid any foot traffic or heavy objects on the surface. Follow the recommended curing time to ensure a proper bond and the desired strength of the overlay.
Now that you have successfully poured the concrete overlay, the next step is to proceed with applying a smooth finish to your basement floor. This will create a seamless and polished surface, enhancing the overall appearance and durability of your finished floor.
Step 5: Applying a Smooth Finish
After pouring the concrete overlay onto your basement floor, the next step in the finishing process is to apply a smooth finish. This will ensure a polished and seamless surface that enhances the overall appearance and durability of your basement floor. Follow these steps to achieve a smooth finish:
Read more: How To Finance Finishing A Basement
1. Wait for the overlay to partially set
Before attempting to smooth out the surface, wait for the concrete overlay to partially set. This typically occurs within 1-2 hours after pouring, but it’s important to consult the manufacturer’s instructions for specific drying times. The overlay should be firm enough to support your weight but still malleable for finishing.
2. Use a concrete trowel
Begin the smoothing process by using a concrete trowel. Hold the trowel at a slight angle and apply even pressure as you glide it across the surface of the overlay. Work in a back-and-forth motion, overlapping each pass to ensure a consistent and level finish. Pay special attention to any ridges or uneven areas, smoothing them out as you go.
3. Consider using a power trowel
If you’re working with a larger basement floor or prefer a more efficient method, you can use a power trowel instead of a hand trowel. A power trowel helps achieve a smooth finish more quickly and effectively, especially for larger areas. Follow the manufacturer’s instructions for operating the power trowel safely.
4. Avoid overworking the surface
While it’s important to achieve a smooth finish, be careful not to overwork the surface. Overworking can lead to an uneven or textured appearance. Once the surface is smooth, avoid further troweling or manipulation to prevent damaging the finish or disrupting the integrity of the overlay.
Read more: How To Finish Stairs To Basement
5. Address any imperfections
Inspect the surface for any imperfections or blemishes after achieving a smooth finish. If you notice any low spots, divots, or other flaws, you can use a patching or resurfacing compound to address them. Follow the manufacturer’s instructions for the specific product and allow ample time for curing before moving on to the next step.
By carefully applying a smooth finish to your basement floor, you will create a visually appealing and durable surface. The next step is to seal the floor, providing added protection and enhancing the longevity of your finished basement floor.
Step 6: Sealing the Floor
Once you have achieved a smooth finish on your basement floor, the next crucial step in the finishing process is to seal the floor. Sealing the floor provides an additional layer of protection, enhances the durability of the surface, and adds a beautiful sheen to the finished floor. Follow these steps to effectively seal your basement floor:
1. Choose the right sealer
There are various types of sealers available, including acrylic sealers, epoxy coatings, and polyurethane sealers. Consider the specific needs of your basement floor, such as level of foot traffic, desired sheen, and moisture resistance, when selecting the appropriate sealer. Read the instructions and specifications provided by the manufacturer to ensure compatibility with the concrete overlay and the desired finish.
2. Prepare the floor
Before applying the sealer, ensure that the basement floor is clean and free from any dust, debris, or residue. Sweep or vacuum the floor to remove any loose particles, and consider using a damp mop to eliminate any stubborn dirt. Allow the floor to dry completely before proceeding to the next step.
Read more: How To Finish A Garage Floor
3. Apply the sealer
Apply the sealer according to the manufacturer’s instructions. It is recommended to use a paint roller or a brush with synthetic bristles to evenly distribute the sealer over the entire floor. Work in small sections, ensuring that the sealer is applied in a thin and even layer without pooling or drips. Follow a consistent pattern to avoid any visible streaks or lines.
4. Allow the sealer to dry and cure
After applying the sealer, allow it to dry and cure as specified by the manufacturer. This typically involves a curing time of 24-48 hours, during which you should avoid any foot traffic or placing furniture on the surface. Ensure that the area is well-ventilated during the curing process to aid in the proper drying of the sealer.
5. Apply additional coats (optional)
Depending on the desired level of protection and sheen, you may choose to apply additional coats of sealer. Follow the manufacturer’s instructions for applying multiple coats, including the recommended curing time between each coat. Additional coats can enhance the durability and appearance of the sealed floor.
By sealing your basement floor, you add an extra layer of protection and enhance the overall aesthetic of the finished surface. The final step is to add any decorative touches or finishes to further personalize and elevate the look of your basement floor.
Step 7: Adding Decorative Touches (Optional)
Once you have completed the essential steps of finishing and sealing your basement floor, you have the option to add decorative touches to further enhance the overall look and style of the space. Adding decorative finishes can transform your basement into a unique and visually appealing area. Follow these steps to add decorative touches to your floor:
1. Stenciling or stamping
One popular way to add decorative flair to your basement floor is through stenciling or stamping. Stencils come in a variety of patterns, allowing you to create intricate designs or mimic the look of tiles. Alternatively, stamping involves using specialized stamps to create patterns or textures, such as a brick or stone appearance. Follow the manufacturer’s instructions to apply the stencils or stamps properly.
2. Acid staining
Acid staining is a technique that adds unique colors and patterns to your basement floor. Acid stains react with the concrete, creating rich and variegated hues that resemble natural stone. The result is a one-of-a-kind marbled effect that can elevate the aesthetic appeal of your basement. Consult the manufacturer’s instructions for proper application and curing.
3. Epoxy coatings
Epoxy coatings offer both decorative and functional benefits. These coatings can create a glossy, seamless, and durable finish for your basement floor. Additionally, epoxy coatings are available in a wide range of colors and can be customized with flakes or metallic pigments to achieve a stunning and unique look. Consult the manufacturer’s instructions for proper application and curing techniques.
4. Decorative sawcuts
Sawcuts can add a modern and geometric touch to your basement floor. By strategically cutting shallow grooves into the surface, you can create patterns, borders, or even custom designs. Sawcuts can be filled with contrasting colored compounds to further enhance the decorative effect. It is recommended to consult a professional for precise and accurate sawcutting techniques.
Read more: How To Waterproof A Concrete Floor
5. Enhancing with area rugs or mats
If you want to add decorative touches without permanently altering your basement floor, consider using area rugs or mats. These can provide a pop of color, pattern, or texture and help define specific areas within the space. Area rugs and mats are versatile, allowing you to change the look and feel of your basement without making permanent changes.
By adding decorative touches to your basement floor, you can personalize the space and make it truly your own. Whether through stenciling, acid staining, epoxy coatings, decorative sawcuts, or area rugs, these optional steps allow you to showcase your creativity and create a unique design aesthetic that complements your overall basement theme.
Remember to follow the manufacturer’s instructions and consult professionals as needed to ensure proper application and achieve the desired decorative results.
Conclusion
Congratulations on completing the comprehensive guide on how to finish a concrete basement floor. By following the step-by-step instructions and implementing the necessary techniques, you have transformed your basement into a functional and visually appealing space.
Finishing a concrete basement floor is not only about improving its appearance but also about protecting it from moisture, enhancing durability, and increasing the value of your home. The process of finishing a basement floor involves preparing the surface, repairing any cracks or damages, applying a bonding agent, pouring the concrete overlay, applying a smooth finish, sealing the floor, and optionally adding decorative touches.
Proper preparation, including cleaning and repairing the floor, ensures that the finishing materials adhere correctly and that any existing issues are addressed. Applying a bonding agent enhances the adhesion between the existing concrete floor and the overlay or resurfacer, creating a solid foundation for the finishing process. Pouring the concrete overlay and achieving a smooth finish provides a polished and seamless surface, while sealing the floor adds an additional layer of protection and improves its durability.
Adding decorative touches is optional but can greatly enhance the overall look and style of your basement. From stenciling and acid staining to epoxy coatings and decorative sawcuts, there are various methods to personalize your basement floor and make it a unique reflection of your taste and creativity.
Remember, throughout the entire process of finishing your basement floor, it is essential to follow the manufacturer’s instructions for the specific products and materials you are using. This will ensure the best results and ensure the longevity of your finished floor.
Now that you have successfully completed the process, it’s time to enjoy your transformed basement. Whether you plan to use it as a recreational area, a home gym, or an additional living space, your finished basement floor will provide a solid foundation for all your design ideas.
Thank you for investing the time and effort into finishing your concrete basement floor. We hope this guide has been informative and helpful in achieving the results you desire. Enjoy your newly finished basement!
Frequently Asked Questions about How To Finish Concrete Basement Floor
Was this page helpful?
At Storables.com, we guarantee accurate and reliable information. Our content, validated by Expert Board Contributors, is crafted following stringent Editorial Policies. We're committed to providing you with well-researched, expert-backed insights for all your informational needs.
0 thoughts on “How To Finish Concrete Basement Floor”