Articles
How To Finish Stairs To Basement
Modified: October 20, 2024
Learn how to finish stairs to your basement with these helpful articles. Transform your space with these step-by-step guides and expert advice.
(Many of the links in this article redirect to a specific reviewed product. Your purchase of these products through affiliate links helps to generate commission for Storables.com, at no extra cost. Learn more)
Introduction
When it comes to finishing the stairs leading to your basement, it’s not just about making them functional but also about adding a stylish touch to your home. The stairs to the basement often serve as an important transition point between different areas of the house, so it’s essential to give them the attention and care they deserve.
In this article, we will guide you through the process of finishing your basement stairs, from assessing their condition to selecting the right finishing method and adding those final finishing touches. Whether you choose to stain or paint your stairs, this comprehensive guide will provide you with the information and steps needed to achieve a professional-looking finish.
Before you begin, it’s important to assess the condition of your stairs. Are there any damages or repairs needed? Are they bare wood or covered with carpeting? These factors will influence the approach you take in finishing your stairs.
Once you have assessed the condition of your stairs, the next step is to clean and prepare them. This involves removing any existing carpeting, debris, or adhesive residues. You’ll also need to sand the surface to ensure a smooth, even finish. If there are any gaps or cracks, make sure to fill them with wood filler for a seamless look.
Now comes the fun part – choosing the finishing method. Do you prefer the natural beauty of stained wood or the versatility of painted stairs? Consider the style and color scheme of your home when making this decision. Once you’ve decided, choose the appropriate products and colors that will complement your overall aesthetic.
Before applying the stain or paint, you’ll want to sand the stairs once more to create an even surface. If you’re painting, it’s recommended to apply a primer coat to improve paint adherence and create a durable finish.
When it’s time to apply the stain or paint, make sure to follow the manufacturer’s instructions and apply in a consistent and uniform manner. Allow sufficient drying time between coats for the best results.
To protect the finish and ensure its longevity, seal the stairs with a clear coat or sealant that is compatible with your chosen stain or paint. As always, make sure to provide adequate ventilation during the drying process to allow for proper curing.
To add those final finishing touches, consider installing new stair treads or runners to enhance both the aesthetics and functionality of your stairs. If you have handrails, balusters, or other accessories, make sure to reattach them securely.
Finishing the stairs to your basement is a satisfying project that can transform the entire look and feel of your home. By following these steps and taking your time, you can create a stunning focal point that seamlessly blends with your overall interior design. So roll up your sleeves, gather your tools, and let’s get started on upgrading those stairs to the basement!
Key Takeaways:
- Transform your basement stairs into a stunning focal point by assessing their condition, choosing the right finishing method, and adding final touches for both aesthetics and functionality.
- Whether staining or painting, take your time to apply the finish uniformly, seal it for longevity, and add new treads or runners for a polished and safe staircase.
Read more: How To Finish Side Of Stairs
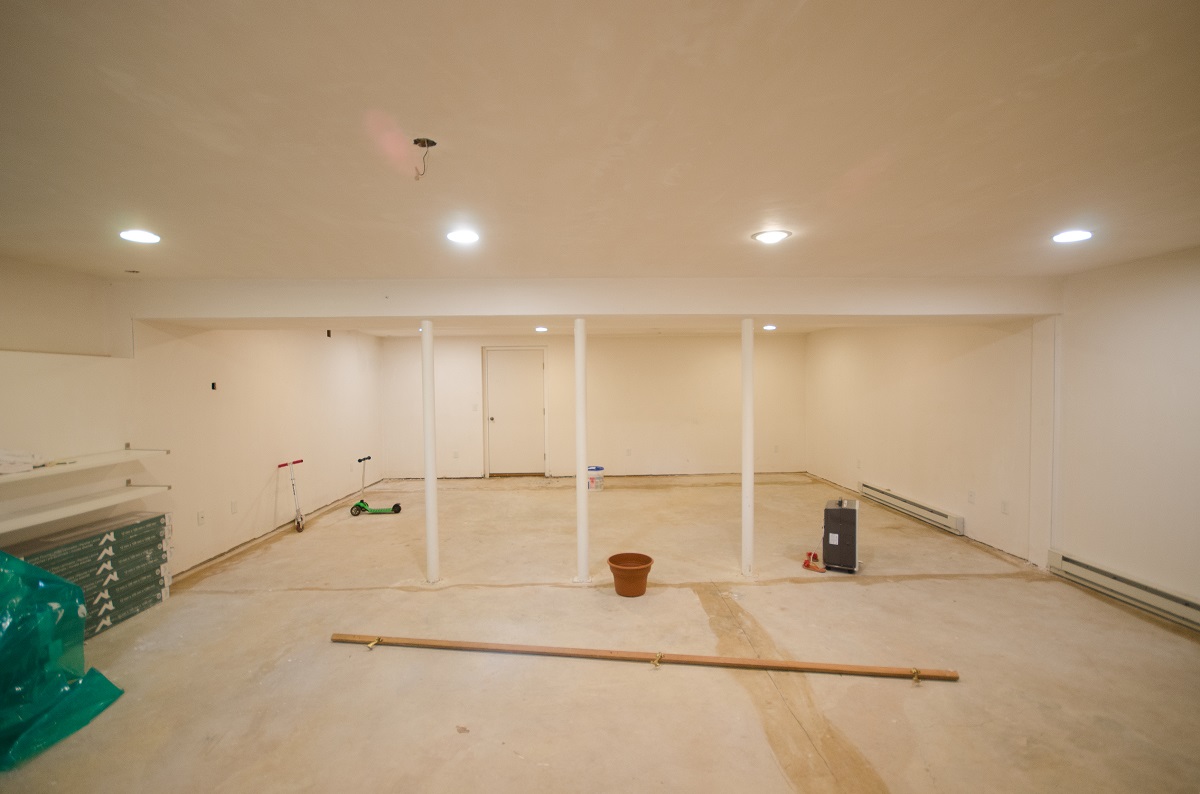
Step 1: Assessing the condition of the stairs
Before you begin the process of finishing your basement stairs, it’s crucial to assess their condition. This will help you determine the necessary repairs and the appropriate finishing method for your specific situation.
Start by inspecting the stairs for any damages or signs of wear and tear. Look for cracks, loose boards, or any structural issues that need attention. It’s important to address these problems before proceeding with the finishing process to ensure the longevity and safety of your stairs.
If you notice any loose or damaged boards, secure them by hammering or nailing them back into place. For more significant repairs, such as replacing a broken step or reinforcing a wobbly handrail, you may need to consult a professional carpenter or contractor.
Next, identify the type of stairs you have. Are they carpeted or bare wood? This will affect the steps you take in the overall finishing process. If your stairs are carpeted, you’ll need to remove the carpeting and adhesive before proceeding. Use pliers or a utility knife to carefully peel back the carpet, being cautious not to damage the underlying wood or structure.
Once the carpeting is removed, inspect the condition of the bare wood. Look for any stains, discoloration, or areas that may require extra attention, such as deep scratches or gouges. If there are any imperfections, you can use sandpaper to smooth them out later in the process.
If your stairs are already bare wood, take the time to examine the condition of the wood itself. Look for any signs of rot, moisture damage, or termite infestation. If you notice any of these issues, it’s crucial to address them before proceeding with the finishing process.
In addition to assessing the condition of the stairs, also consider the overall style and design of your home. Think about the color scheme and the aesthetic you want to achieve with your finished stairs. This will help guide your decisions when it comes to selecting the appropriate finishing method.
By thoroughly inspecting the condition of your stairs and identifying any necessary repairs, as well as understanding the type of stairs you have, you can ensure a smooth and successful finishing process. Taking the time to assess the condition of your stairs will set the foundation for creating beautiful, functional, and safe stairs that enhance the overall design of your home.
Step 2: Cleaning and preparing the stairs
Once you have assessed the condition of your basement stairs, it’s time to clean and prepare them for the finishing process. This step is crucial in ensuring a smooth and flawless finish that will enhance the overall appearance of your stairs.
The first task is to remove any existing carpeting, debris, or adhesive residues from the stairs. Start by using pliers or a utility knife to carefully lift the edges of the carpeting. Peel it back slowly, taking care not to damage the underlying wood. Dispose of the carpet and padding properly.
Next, examine the stairs for any remaining adhesive residues. Adhesive removal solutions are available at home improvement stores and can help soften and remove stubborn residues. Follow the product instructions and use a scraper or putty knife to gently scrape away the adhesive.
After removing the carpeting and adhesive residues, it’s time to give the stairs a thorough cleaning. Use a broom or vacuum cleaner to remove any loose dirt, dust, or debris from the surface and the corners. This will ensure a clean working area and prevent any imperfections from being sealed in during the finishing process.
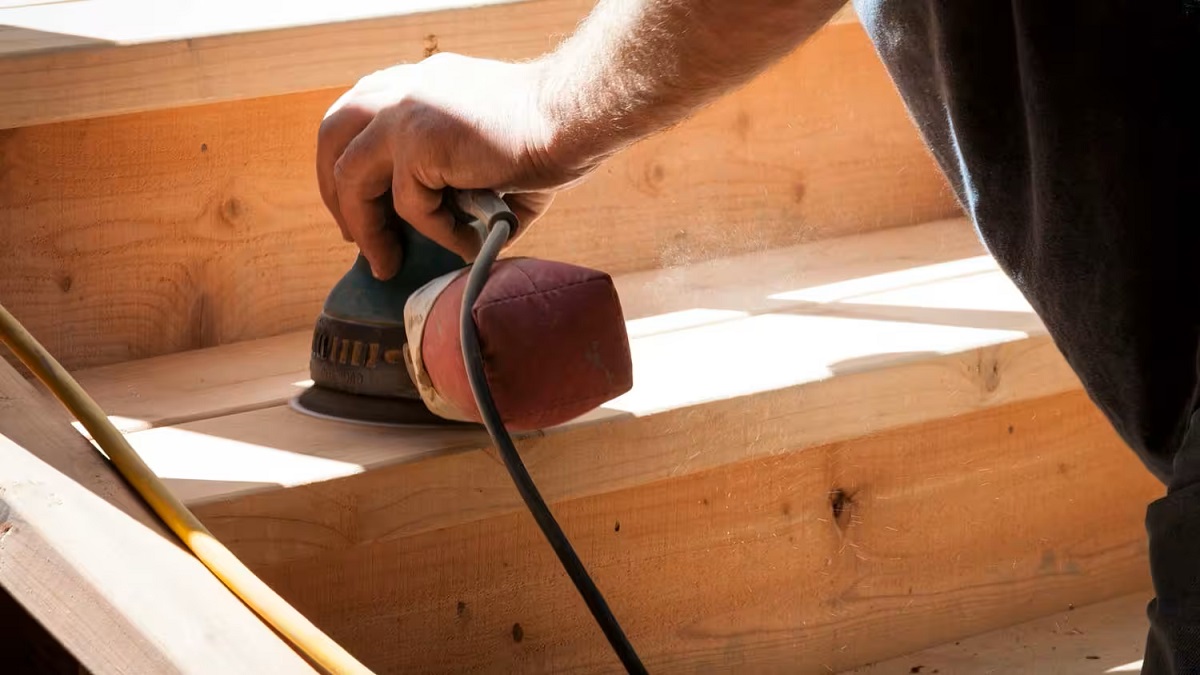
Once the stairs are clean, it’s time to sand the surface. Sanding helps to smooth out any rough patches, scratches, or imperfections on the wood. Start by using coarse-grit sandpaper to remove any stubborn stains or uneven surfaces. Then, switch to finer-grit sandpaper to achieve a smooth finish.
When sanding, make sure to follow the natural grain of the wood and sand in even strokes. Pay extra attention to the edges and corners to ensure a consistent finish. Remember to wear protective goggles and a mask to avoid inhaling dust particles. Proper ventilation is also important when sanding to ensure a healthier work environment.
After sanding, it’s time to fill any gaps or cracks with wood filler. Wood filler is a putty-like substance that is available in various colors to match your staircase’s wood tone. Use a putty knife to apply the wood filler, smoothing it into the gaps and cracks. Allow the filler to dry completely before proceeding to the next step.
By removing any existing carpeting, debris, or adhesive residues, sanding the surface for a smooth finish, and filling any gaps or cracks with wood filler, you have prepared your basement stairs for a flawless finishing process. These steps will ensure a clean and even surface, providing an excellent foundation for your chosen finishing method.
Step 3: Choosing the finishing method
Deciding on the finishing method is an essential step in the process of finishing your basement stairs. The choice between staining and painting will depend on your personal preference, the style of your home, and the desired look you want to achieve.
Staining the stairs is an excellent choice if you want to enhance the natural beauty of the wood and create a warm, rich look. Stains come in various shades, from light and natural to dark and deep, allowing you to find the perfect color to complement your interior design. Staining also allows the wood grain to show through, adding visual texture and character to your stairs.
If you opt for staining, it’s important to choose a stain specifically formulated for interior wood surfaces. Look for a stain that is easy to apply and offers durability. Water-based stains are popular for their low odor and quick drying time, while oil-based stains provide a more traditional finish and often offer better protection.
Prior to applying the stain, it’s a good idea to test it on a small, inconspicuous area of the stairs or on a scrap piece of wood. This will help you determine if the color is to your liking and if it complements your interior design. Once you have selected the perfect stain, make sure to follow the manufacturer’s instructions for proper application and drying time.
On the other hand, painting the stairs can offer a more versatile and customizable look. With paint, you have a wide array of color options to choose from, allowing you to match the stairs to your overall color scheme or create a striking contrast. Painting the stairs can also help cover up any imperfections or inconsistencies in the wood.
When choosing paint for your stairs, opt for a high-quality interior paint that is specifically formulated for high traffic areas. Look for paints that are durable, easy to clean, and resistant to chipping and scuffing. It’s also a good idea to choose a paint with a semi-gloss or satin finish, as these finishes are more resistant to wear and tear.
Before applying the paint, make sure to prime the surface with a high-quality primer specifically designed for wood. Priming not only improves paint adherence but also helps to prevent the wood from absorbing moisture and reduces the chances of staining.
Whether you choose to stain or paint your basement stairs, take your time to select the appropriate products and colors. Consider the style and color scheme of your home, as well as your personal preferences, to create a finished look that complements your overall interior design.
By making an informed decision on the finishing method and selecting the right products and colors, you will create a stunning and customized look for your basement stairs that enhances the beauty and functionality of your home.
Step 4: Sanding and priming
After choosing the finishing method for your basement stairs, the next step is to prepare the surface by sanding and priming. This crucial step ensures a smooth and durable finish that will enhance the overall appearance and longevity of your stairs.
Start by sanding the stairs once more to achieve an even surface. Sanding removes any rough patches, imperfections, or raised wood fibers from the previous steps. Use a fine-grit sandpaper or a sanding block to gently sand the entire surface of the stairs, paying particular attention to any areas that may require extra smoothing.
When sanding, follow the direction of the wood grain to avoid creating scratches or marks on the surface. Sand in even strokes, applying gentle pressure. Be meticulous in your sanding, ensuring that the entire surface is smooth and ready for the finishing process.
Once you have finished sanding, it’s time to apply a primer coat to enhance paint adherence, specifically if you have chosen to paint your stairs. Priming is an essential step that promotes better paint coverage, improves durability, and helps the paint adhere to the surface more effectively.
Choose a high-quality primer that is specifically formulated for wood surfaces and is compatible with the type of paint you have selected. Apply the primer evenly using a brush or roller, following the manufacturer’s instructions. Ensure that you cover every surface, including the sides and the edges of the stairs.
Allow the primer to dry completely before proceeding to the next step. The drying time will vary depending on the product and the environmental conditions. It’s essential to be patient and allow sufficient time for the primer to cure before applying the paint.
By sanding the stairs once more for an even surface and applying a primer coat for improved paint adherence, you are ensuring a smooth and long-lasting finish for your basement stairs. These steps contribute to the overall durability and professional appearance of the final result.
Remember to take your time during this step to achieve a quality finish. Properly sanding and priming the stairs sets the foundation for the subsequent paint or stain application and helps to create a beautiful and enduring finish.
When finishing stairs to the basement, make sure to use a durable and non-slip material for the treads and consider adding a handrail for safety.
Read more: DIY: How To Finish A Basement
Step 5: Staining or painting the stairs
Now that you have prepared the stairs by sanding and priming, it’s time to apply the chosen stain or paint to achieve the desired finish for your basement stairs. This step allows you to showcase your style and create a beautiful and durable look.
If you have chosen to stain the stairs, it’s important to apply the stain in a consistent and uniform manner. Stir the stain thoroughly to ensure an even distribution of color. Use a brush, cloth, or applicator pad to apply the stain along the grain of the wood. Work in small sections, making sure to blend the stain smoothly between strokes.
As you apply the stain, keep an eye out for any drips, pooling, or uneven spots. Use a clean cloth or brush to remove any excess stain to achieve a more even finish. Remember to follow the manufacturer’s recommended drying time between coats, allowing the stain to penetrate and enhance the natural beauty of the wood.
If you have opted to paint the stairs, the key is to apply the paint in a consistent and uniform manner. Use a high-quality brush or roller that is appropriate for the type of paint you are using. Start at the top of the stairs and work your way down, applying the paint in smooth, even strokes.
Make sure to cover the entire surface of the stairs, including the sides and edges. Take your time to achieve a clean and flawless paint application. Allow the first coat to dry completely before applying additional coats, following the manufacturer’s recommended drying time.
While applying the stain or paint, be mindful of proper ventilation to ensure a healthier work environment. Open windows or use fans to promote airflow and aid in the drying process.
Allow sufficient drying time between coats to ensure that each coat properly adheres to the surface. Rushing the drying process can lead to uneven finishes or paint that easily chips or flakes off.
By applying the chosen stain or paint in a consistent and uniform manner and allowing sufficient drying time between coats, you are taking crucial steps to create a stunning and professional finish for your basement stairs. These steps help achieve a durable and visually appealing result that will enhance the overall look and feel of your home.
Step 6: Sealing and protecting the finish
After applying the stain or paint to your basement stairs, it’s important to seal and protect the finish to ensure its longevity and durability. This step safeguards your hard work from everyday wear and tear and helps maintain the beauty of your finished stairs.
One way to protect the finish is by applying a clear coat or sealant. Clear coats act as a protective barrier, shielding the stairs from scratches, scuffs, and moisture. They also enhance the overall appearance of the finish, adding depth and shine to stained wood or providing a smooth and even surface to painted stairs.
Choose a clear coat or sealant specifically designed for interior wood surfaces. Water-based polyurethane is a popular option that provides excellent protection and a clear, non-yellowing finish. Apply the clear coat or sealant using a brush or roller, following the manufacturer’s instructions for application and drying time.
Ensure proper ventilation during the drying process to facilitate a smooth and even curing of the clear coat or sealant. Open windows or doors and utilize fans to promote airflow. This helps prevent the formation of bubbles, streaks, or uneven drying.
Depending on the product, you may need to apply multiple coats to achieve the desired level of protection. Allow sufficient drying time between coats, ensuring each coat is completely dry and cured before proceeding to the next one.
During this step, it’s essential to be patient and take the necessary time to properly seal and protect the finish. Rushing or skipping this step may result in a less durable and long-lasting finish.
By applying a clear coat or sealant to protect the stairs from wear and tear, and ensuring proper ventilation during the drying process, you are safeguarding the beauty and integrity of your finished basement stairs. This crucial step helps maintain the quality of your work and ensures that your stairs will withstand the test of time.
Step 7: Adding finishing touches
With the majority of the finishing work done, it’s time to focus on the final details that will add the perfect finishing touches to your basement stairs. These steps will help complete the overall look and ensure that your stairs are not only beautiful but also functional and safe.
If you desire a fresh look or added traction, consider installing new stair treads or runners. Stair treads come in various materials, such as wood, carpet, or rubber, and can be easily attached to the steps. They not only provide an aesthetic upgrade but also help protect the stairs from wear and tear, reduce noise, and add traction to prevent slipping.
Measure the dimensions of each tread and choose treads that fit your stairs properly. Follow the manufacturer’s instructions for installation, whether it involves adhesive, nails, or other attachment methods. Ensure that the treads are securely fastened to the stairs and that there are no loose edges.
Additionally, reattach any handrails, balusters, and other accessories that were removed during the finishing process. Make sure to align them properly and secure them tightly using screws or other appropriate hardware. This step is crucial to ensure the safety and functionality of your stairs.
When reattaching, check each component for any damages or wear and replace them if necessary. Properly secured handrails and balusters provide support and stability when ascending or descending the stairs, so it’s important to ensure they are in good condition.
Take the time to make any necessary adjustments to ensure a seamless and secure installation. Tighten screws, readjust angles, or make any modifications needed to achieve a professional and finished look.
By installing new stair treads or runners (if desired) and reattaching handrails, balusters, and other accessories, you are completing the final touches of your basement stairs. These steps not only enhance the aesthetics of the stairs but also contribute to their safety and functionality.
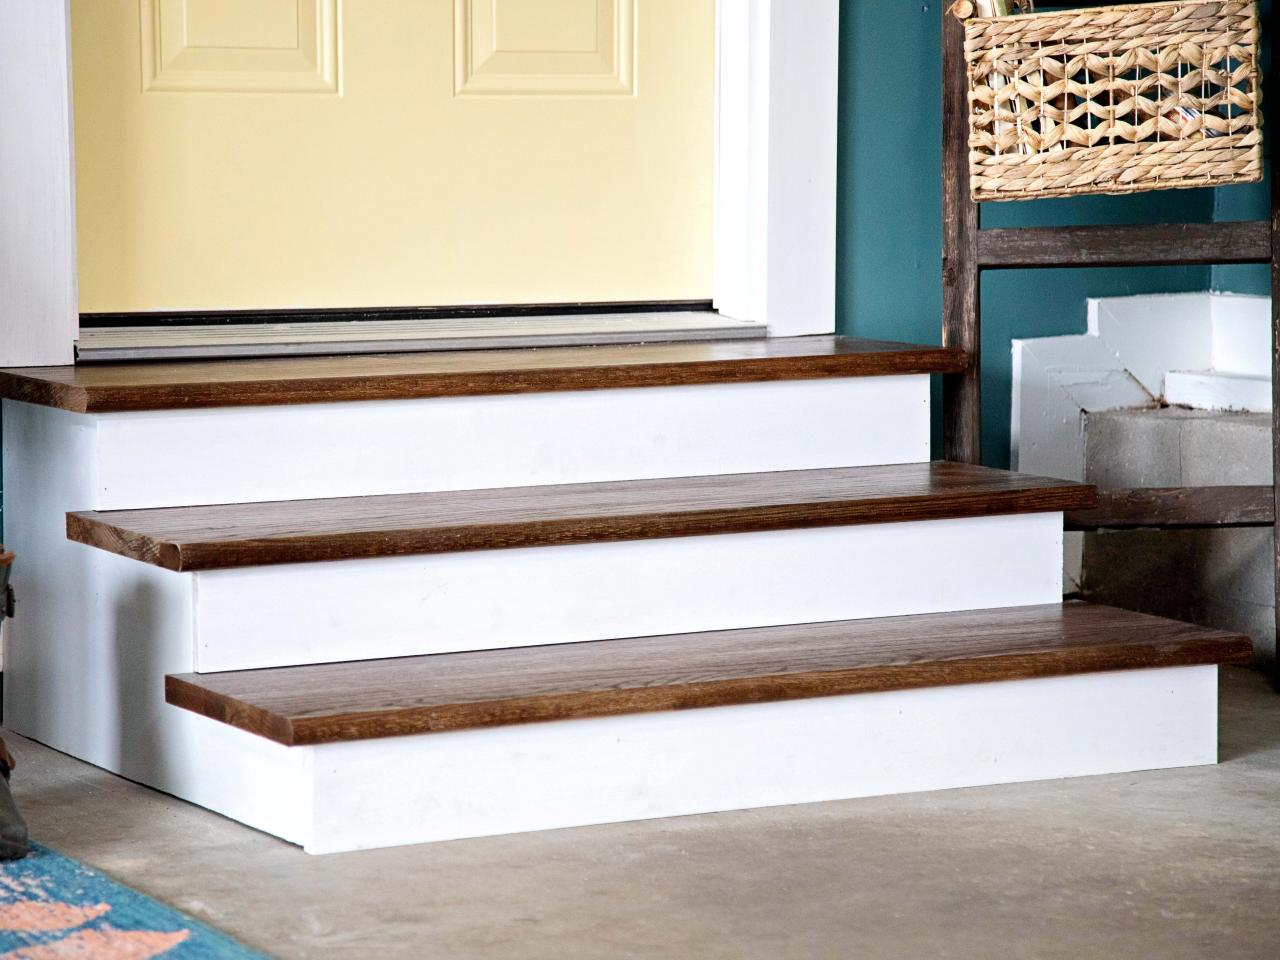
With the finishing touches complete, step back and admire your beautifully finished basement stairs. These steps have taken you from assessing the condition of the stairs to selecting the finishing method, applying the stain or paint, and protecting the finish. The result is stunning stairs that enhance the overall look and value of your home.
You have successfully transformed your basement stairs into a focal point of your home, showcasing your style and attention to detail. Enjoy the satisfaction of a job well done and appreciate the beauty and functionality of your finished stairs for years to come.
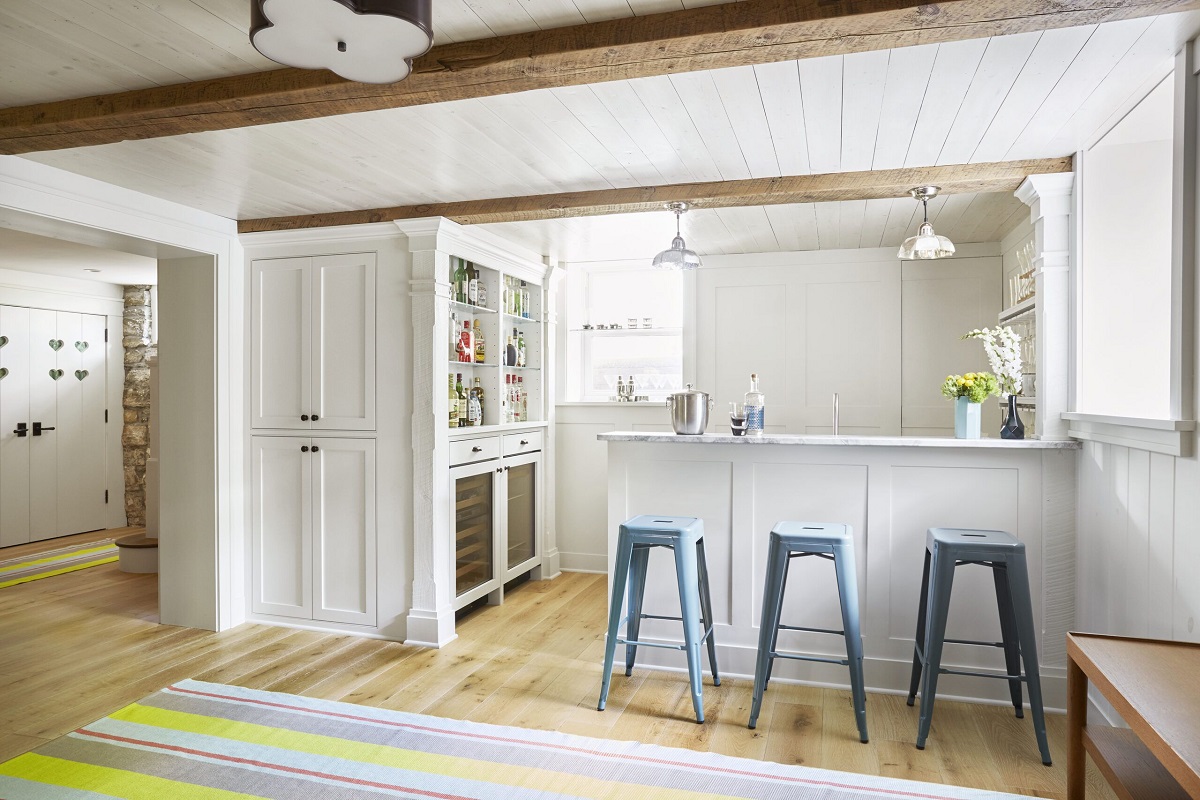
Conclusion
Finishing the stairs leading to your basement is an exciting project that can significantly enhance the overall look and feel of your home. By following the steps outlined in this comprehensive guide, you can achieve a professional and polished finish that complements your interior design while ensuring the durability and functionality of your stairs.
Throughout the process, it’s important to assess the condition of your stairs, clean and prepare them, and choose the appropriate finishing method. Whether you decide to stain or paint your stairs, the key is to apply the chosen finish in a consistent and uniform manner, allowing sufficient drying time between coats for the best results. Sealing and protecting the finish with a clear coat or sealant will ensure its longevity and resistance to wear and tear.
Don’t forget the final touches, such as installing new stair treads or runners and reattaching handrails, balusters, and other accessories. These finishing touches add both visual appeal and functional safety to your stairs.
Throughout the entire process, take the time to consider your personal style and the overall aesthetic of your home. This will guide your decisions in choosing the right finishing method, colors, and accessories to create a cohesive and harmonious look.
As you embark on this project, remember to have patience and attention to detail. Take pride in the progress you make with each step. Whether you are a seasoned DIY enthusiast or tackling this as your first major project, enjoy the satisfaction of transforming your basement stairs into an inviting and impressive feature of your home.
Now, armed with all the knowledge and guidance provided in this article, it’s time to start the journey of finishing your basement stairs. Embrace the creativity, embrace the process, and in the end, revel in the beauty and functionality of your completed staircase. Wishing you success and enjoyment in your stair finishing endeavor!
Frequently Asked Questions about How To Finish Stairs To Basement
Was this page helpful?
At Storables.com, we guarantee accurate and reliable information. Our content, validated by Expert Board Contributors, is crafted following stringent Editorial Policies. We're committed to providing you with well-researched, expert-backed insights for all your informational needs.


0 thoughts on “How To Finish Stairs To Basement”