Articles
How To Install HardieBacker On Floor
Modified: January 24, 2024
Learn how to install Hardibacker on your floor with our informative articles. Find step-by-step instructions and expert tips to ensure a successful installation.
(Many of the links in this article redirect to a specific reviewed product. Your purchase of these products through affiliate links helps to generate commission for Storables.com, at no extra cost. Learn more)
Introduction
Welcome to this comprehensive guide on how to install Hardibacker on a floor. Hardibacker, also known as cement board, is a durable and water-resistant material that is commonly used as a subfloor or underlayment for tile installations. It provides a stable base for tile installations, ensuring that your floors are sturdy and long-lasting.
Installing Hardibacker on a floor is a straightforward process that can be done by DIY enthusiasts with basic handyman skills. This article will walk you through each step of the installation process, from gathering the necessary materials to completing the final touches. Let’s dive in!
Before we get started, it’s important to note that safety should always be a priority when working on any home improvement project. Be sure to use appropriate safety gear, such as gloves and goggles, and follow all manufacturer instructions for the materials you are using.
Now, let’s take a look at the materials you will need for installing Hardibacker on your floor.
Key Takeaways:
- Proper preparation is key. Clean, repair, and ensure a dry subfloor before installing Hardibacker. This sets the stage for a stable and long-lasting tile installation, providing a reliable foundation for your floors.
- Consider adding a waterproofing membrane for extra protection, especially in moisture-prone areas. This optional step can enhance the longevity of your tile installation and safeguard against water damage, ensuring a durable and resilient floor.
Read more: How To Install Flooring
Step 1: Gather the Materials
Before you begin installing Hardibacker on the floor, it’s important to gather all the necessary materials. By having everything prepared in advance, you can streamline the installation process and avoid any unnecessary delays. Here are the materials you will need:
- Hardibacker boards: Measure the area of the floor and purchase enough Hardibacker boards to cover the entire surface. It’s a good idea to buy some extra boards to account for any waste or mistakes.
- Utility knife: You’ll need a sharp utility knife to cut the Hardibacker boards to size.
- Screws: Choose screws that are specifically designed for use with Hardibacker boards. These screws should be corrosion-resistant and have a flat head to ensure a flush installation.
- Drill or screwdriver: This tool is necessary for driving the screws into the Hardibacker boards.
- Measuring tape: Accurate measurements are crucial for a successful installation, so make sure you have a measuring tape on hand.
- Safety gear: Protect yourself with gloves, goggles, and a dust mask when cutting and handling the Hardibacker boards.
- Thinset mortar: This is used to adhere the Hardibacker boards to the floor and create a solid bond.
- Trowel: A notched trowel is needed to spread the thinset mortar evenly.
- Grout: If you plan on installing tile on top of the Hardibacker boards, you’ll need grout to fill the gaps between the tiles.
Ensure that you have all these materials readily available before starting the installation process. This will save you time and effort as you progress through the steps.
Step 2: Prepare the Subfloor
Before you can install Hardibacker on the floor, it’s crucial to properly prepare the subfloor. The subfloor must be clean, dry, and free of any debris or imperfections that could affect the installation and adhesion of the Hardibacker boards. Follow these steps to prepare the subfloor:
- Clean the subfloor: Remove any existing flooring materials, such as carpet or laminate, and thoroughly clean the subfloor. Use a broom or vacuum to remove dust, dirt, and debris. It’s important to have a clean and smooth surface for the Hardibacker boards to adhere to.
- Repair any damages: Inspect the subfloor for any cracks, holes, or uneven areas. If you find any, use an appropriate filler or patching compound to level and repair the subfloor. Allow the repairs to dry completely before proceeding.
- Check for moisture: It’s important to make sure the subfloor is dry before installing Hardibacker. Test the moisture level using a moisture meter or by taping a plastic sheet to the subfloor and leaving it for 24 hours. If there is condensation or moisture present, address the underlying issue and allow the subfloor to dry completely before proceeding.
By properly preparing the subfloor, you create a solid foundation for the Hardibacker boards, ensuring a strong and durable installation.
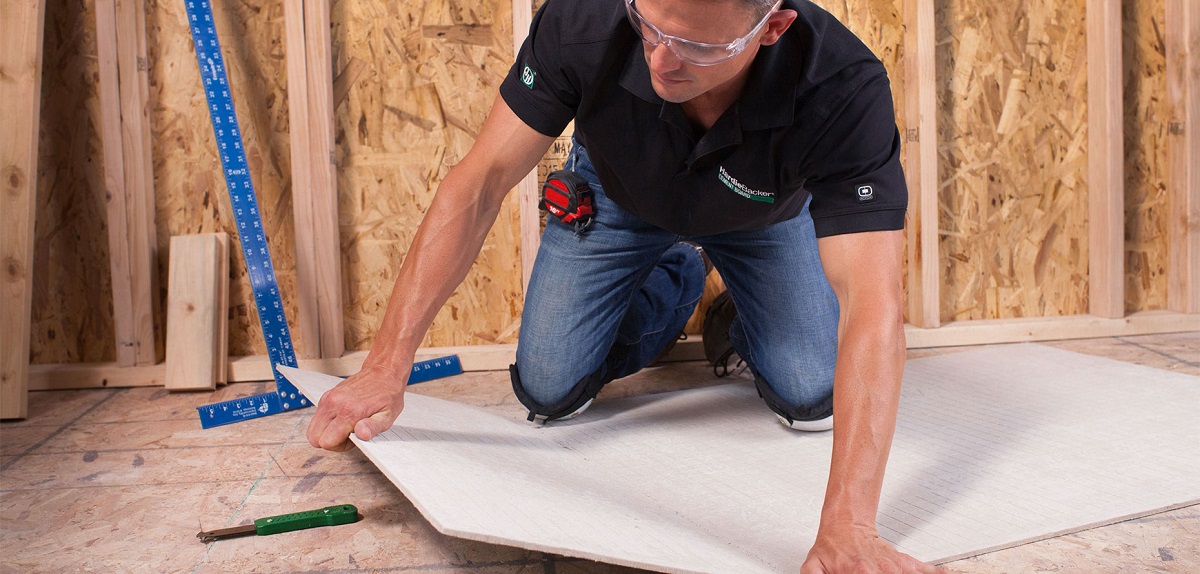
Step 3: Measure and Cut the Hardibacker Boards
Once the subfloor is properly prepared, it’s time to measure and cut the Hardibacker boards to fit the floor space. Follow these steps:
- Measure the floor: Use a measuring tape to determine the dimensions of the floor area where you will install the Hardibacker boards. Take accurate measurements to ensure a precise fit.
- Transfer the measurements: Transfer the measurements onto the Hardibacker boards. Use a straight edge or T-square to draw straight lines on the boards, marking the areas that need to be cut.
- Score the boards: Score along the marked lines using a utility knife. Apply firm pressure to ensure a clean and precise cut. Score the boards multiple times to cut through the entire thickness.
- Break the boards: Once the boards are scored, place them over an edge or along a straight edge, and apply pressure to break them along the scored lines. Be careful not to apply too much pressure, as it can cause the boards to break unevenly.
- Fine-tune the cuts: After breaking the boards, use the utility knife to fine-tune the cuts and ensure a perfect fit.
It’s important to note that Hardibacker boards can produce dust when cut. To minimize the dust, score and cut the boards outdoors or in a well-ventilated area. Wear a dust mask to protect yourself from inhaling the dust particles.
Once you have measured and cut the Hardibacker boards, you are ready to move on to the next step: dry fitting the boards.
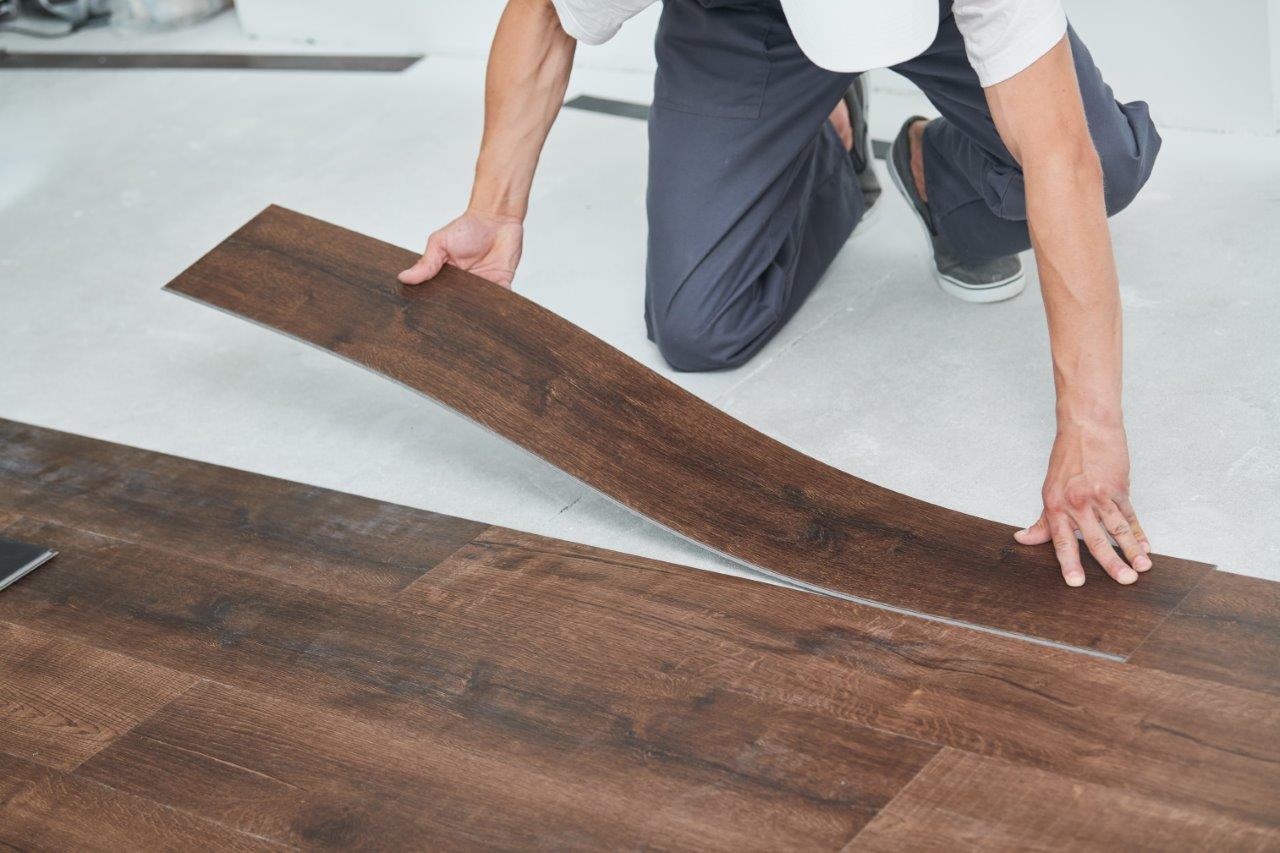
Step 4: Dry Fit the Hardibacker Boards
Before applying any adhesive, it’s important to dry fit the Hardibacker boards on the floor to ensure they fit properly and make any necessary adjustments. Follow these steps:
- Lay out the boards: Place the cut Hardibacker boards on the subfloor in their intended positions. Make sure to leave a small gap between each board and the perimeter walls to allow for expansion.
- Check for fit: Ensure that the boards fit snugly together without any gaps or overlaps. Use a straight edge or T-square to align the edges of the boards. If any adjustments are needed, mark the areas that require trimming.
- Remove the boards: Once you have checked the fit, carefully remove the Hardibacker boards from the floor and set them aside.
Dry fitting the Hardibacker boards allows you to make precise adjustments before permanently installing them. This step ensures that you achieve the best possible fit and minimize any potential issues during the installation process.
With the dry fit complete, it’s time to move on to the next step: applying the thinset mortar.
Read more: How To Install Hardwood Floors
Step 5: Apply Thinset Mortar
After dry fitting the Hardibacker boards, it’s time to apply the thinset mortar. Thinset is a type of adhesive that creates a strong bond between the subfloor and the Hardibacker boards. Follow these steps to apply the thinset mortar:
- Mix the thinset: Follow the manufacturer’s instructions to mix the thinset mortar. Use a mixing paddle and a drill to achieve a smooth and lump-free consistency.
- Apply the thinset: Using a notched trowel, spread a layer of thinset mortar on the subfloor. Start in one corner and work your way across the floor, ensuring an even layer of mortar is applied.
- Create ridges: After spreading the thinset, use the notched edge of the trowel to create ridges in the mortar. This helps provide better adhesion between the subfloor and the Hardibacker boards.
It’s important to work in small sections when applying thinset to ensure that it doesn’t dry out before laying down the Hardibacker boards.
With the thinset mortar applied, you are now ready to move on to the next step: installing the Hardibacker boards.
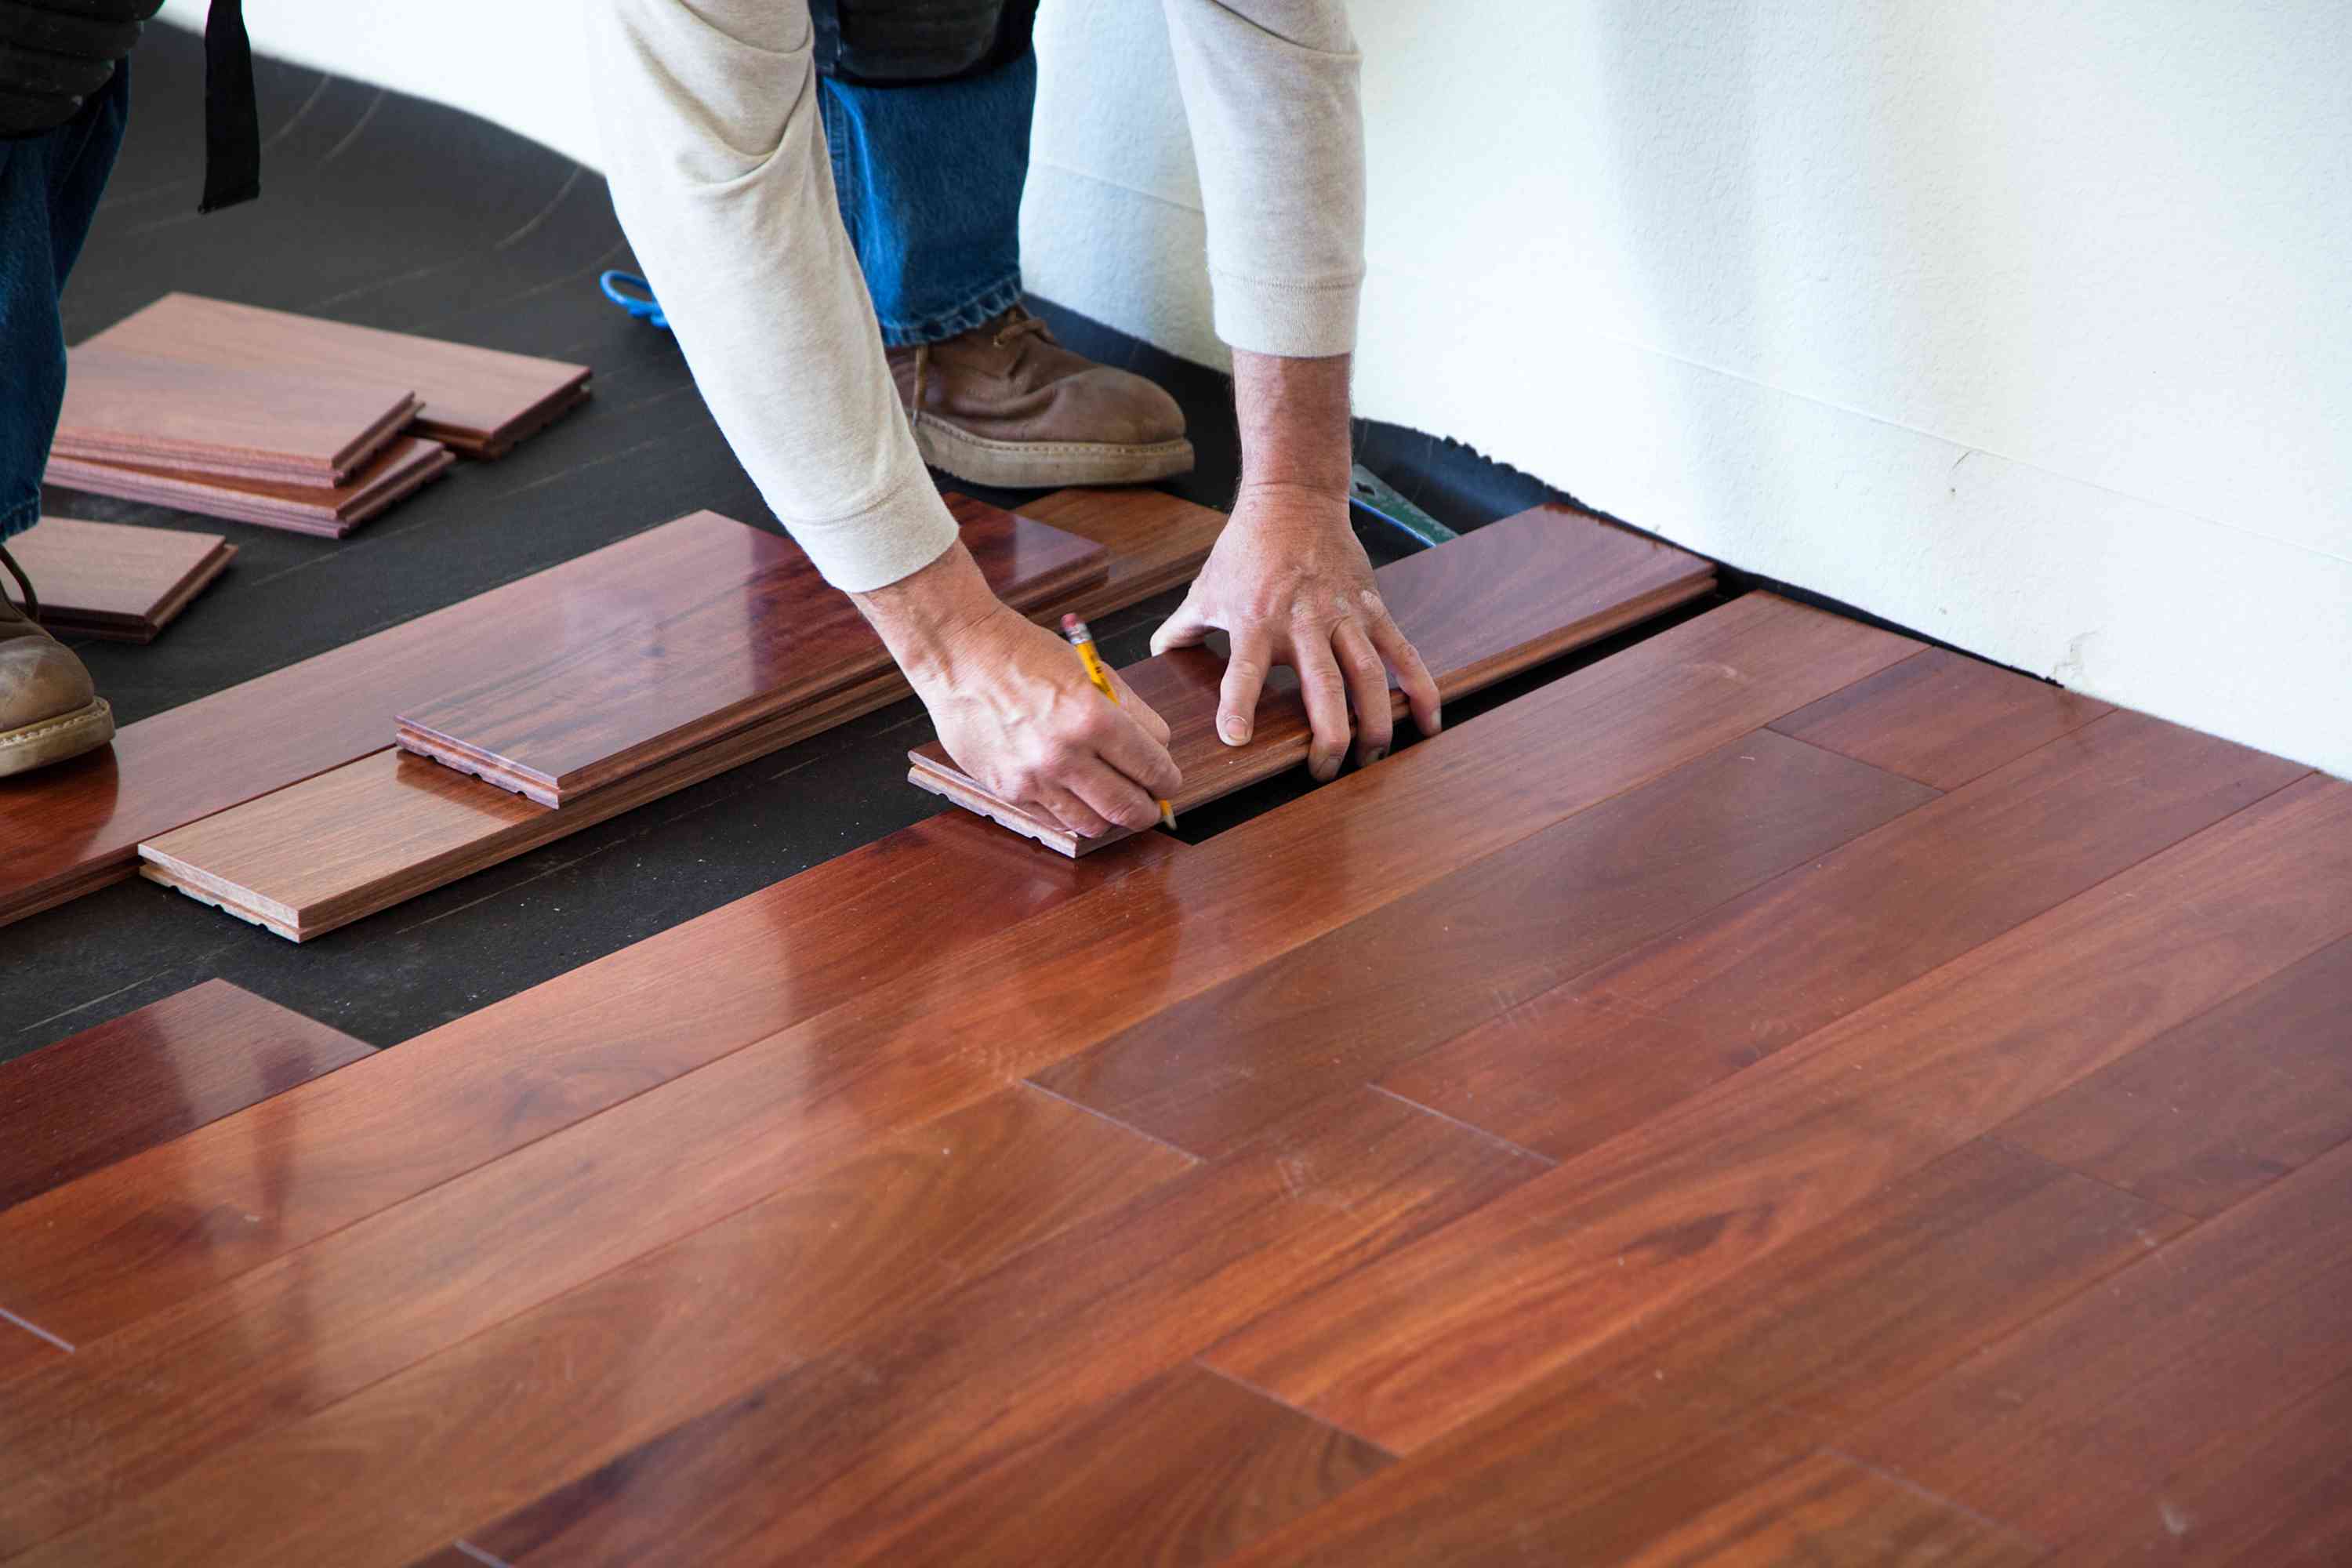
Step 6: Install the Hardibacker Boards
With the thinset mortar in place, it’s time to install the Hardibacker boards onto the subfloor. Follow these steps to ensure a proper installation:
- Begin in one corner: Start in one corner of the room and place the first Hardibacker board onto the thinset mortar, pressing it firmly into place.
- Align the edges: Use a straight edge or T-square to align the edges of the board with the layout lines you previously marked. Ensure that the board is positioned correctly before moving on to the next step.
- Embed the board: Using a slight twisting motion, embed the Hardibacker board into the thinset mortar. This helps ensure a strong bond between the board and the subfloor.
Repeat this process for each Hardibacker board, working your way across the room. Make sure to leave a small gap between each board to allow for expansion. Press each board firmly into the thinset mortar, and ensure that they are aligned properly.
If you encounter any areas that require trimming, use a utility knife to make the necessary adjustments to the Hardibacker boards. It’s important to create a seamless and snug fit between the boards.
Once all the Hardibacker boards are installed, you can move on to the next step: securing the boards with screws.
Before installing Hardibacker on the floor, make sure the subfloor is clean, dry, and free of any debris. Use the appropriate screws and spacing recommended by the manufacturer to secure the Hardibacker in place. Always follow the manufacturer’s installation guidelines for best results.
Step 7: Secure the Boards with Screws
Now that the Hardibacker boards are installed, the next step is to secure them to the subfloor using screws. This helps reinforce the bond between the boards and ensures a stable, long-lasting installation. Follow these steps to properly secure the boards:
- Pre-drill holes: Use a power drill or screwdriver to pre-drill holes into the Hardibacker boards. Make sure the holes are evenly spaced and positioned near the edges and corners of each board.
- Insert the screws: Insert the corrosion-resistant screws into the pre-drilled holes. Drive them in until they are flush with the surface of the Hardibacker boards.
It’s important to refer to the manufacturer’s guidelines to determine the appropriate size and type of screws to use for securing the Hardibacker boards.
Repeat this process for each Hardibacker board, ensuring that they are all securely fastened to the subfloor. As you work, be mindful of any specific placement requirements mentioned by the manufacturer, such as spacing recommendations for the screws.
Once all the boards are secured with screws, you can move on to the next step: repeating the process for the remaining boards.
Step 8: Repeat for Remaining Boards
With the first Hardibacker board secured, it’s time to repeat the installation process for the remaining boards. Follow these steps:
- Apply thinset mortar: Apply an even layer of thinset mortar to the subfloor in the area where the next Hardibacker board will be placed. Use a notched trowel to create ridges in the mortar.
- Position the board: Place the next Hardibacker board onto the thinset mortar, aligning its edges with the layout lines you marked earlier.
- Embed the board: With a slight twisting motion, embed the board into the thinset mortar. Ensure that it is well seated and pressed firmly into place.
- Secure with screws: Pre-drill holes into the board and secure it to the subfloor using corrosion-resistant screws. Drive the screws until they are flush with the surface of the board.
Repeat this process for each remaining Hardibacker board, working your way across the floor. Apply thinset mortar, position the board, embed it, and secure it with screws. Ensure that each board is aligned properly and securely fastened to the subfloor.
As you work with the remaining boards, be mindful of any adjustments or trimming that may be required to achieve a seamless and snug fit. Use a utility knife to make any necessary cuts or adjustments to ensure a professional-looking installation.
With all the Hardibacker boards installed and secured, you can proceed to the next step: filling gaps and joints.
Read more: How To Install A Floor Safe
Step 9: Fill Gaps and Joints
Once the Hardibacker boards are securely installed, it’s important to fill any gaps and joints to create a smooth and even surface. This helps prevent any movement or shifting of the tiles that will be installed on top of the Hardibacker. Follow these steps to fill the gaps and joints:
- Clean the surface: Remove any debris or excess thinset mortar from the surface of the Hardibacker boards using a brush or vacuum.
- Apply joint compound: Use a putty knife or a joint compound applicator to fill the gaps between the Hardibacker boards. Press the joint compound into the gaps, ensuring that it is filled completely.
- Smooth the joints: Use the putty knife to smooth the joint compound, ensuring that it is level with the surface of the Hardibacker boards. This will create a seamless transition between the boards.
- Allow it to dry: Follow the manufacturer’s instructions to allow the joint compound to dry completely. This typically takes several hours or overnight.
- Sand and clean the surface: Once the joint compound is dry, use sandpaper or a sanding block to smooth any rough edges or imperfections. Clean the surface again to remove any dust or debris.
By filling the gaps and joints between the Hardibacker boards, you ensure a solid and even surface for the tile installation. This helps prevent any unevenness or movement in the tiles, resulting in a professional-looking and long-lasting tile floor.
With the gaps and joints filled, it’s time to allow the thinset mortar and joint compound to cure before proceeding to the next step.
Step 10: Allow Thinset Mortar to Cure
After completing the installation of the Hardibacker boards and filling the gaps and joints, it is essential to allow the thinset mortar to cure before proceeding with any further steps. Curing is the process in which the mortar dries and hardens, creating a stable base for the tile installation. Follow these guidelines to ensure proper curing:
- Refer to manufacturer instructions: Different types of thinset mortar may have varying curing times. It’s crucial to refer to the manufacturer’s instructions to determine the recommended curing period for the specific product you’re using.
- Create a curing environment: To facilitate proper curing, maintain the installation area at a consistent temperature and avoid excessive moisture. Keep the room well-ventilated and avoid direct exposure to sunlight or extreme temperatures.
- Monitor the curing time: Regularly check the thinset mortar for signs of drying and hardening. Depending on the product and environmental conditions, curing can take anywhere from 24 to 48 hours or longer.
During the curing period, it is important to avoid walking or applying any weight on the Hardibacker boards to prevent damage. Adhering to the recommended curing time ensures that the mortar properly sets and provides a strong foundation for the tile installation.
Once the thinset mortar is fully cured, you can proceed with any additional steps, such as applying a waterproofing membrane or preparing for the tile installation.
Remember to consult the manufacturer’s instructions for any specific guidelines related to the curing process of the thinset mortar you are using.
Step 11: Apply Waterproofing Membrane (Optional)
Applying a waterproofing membrane to the Hardibacker boards is an optional but highly recommended step, especially if you are installing tiles in areas prone to moisture, such as bathrooms or kitchens. The waterproofing membrane adds an extra layer of protection against water damage and helps maintain the integrity of the tile installation. Follow these steps to apply a waterproofing membrane:
- Clean the surface: Ensure that the surface of the Hardibacker boards is clean and free from any dust or debris. Use a brush or vacuum to remove any loose particles.
- Choose the membrane: Select a waterproofing membrane that is compatible with your specific project and tile installation. There are various types of membranes available, including liquid-applied and sheet membranes.
- Follow manufacturer instructions: Read and follow the manufacturer’s instructions for the waterproofing membrane you have chosen. Each product may have specific application guidelines and drying times.
- Apply the membrane: Using a brush or roller, apply the waterproofing membrane evenly over the surface of the Hardibacker boards. Ensure that the entire area is covered, including seams and joints between the boards.
- Allow it to dry: Follow the recommended drying time specified by the manufacturer. This can range from a few hours to a full day, depending on the product and environmental conditions.
- Inspect and test: Once the waterproofing membrane is dry, visually inspect the surface for any missed spots or inconsistencies. Perform a water test by pouring water on the membrane and checking for any signs of leakage or seepage.
Applying a waterproofing membrane adds an extra layer of protection to your tile installation, helping to prevent water damage and potential issues over time. It is especially important in areas where moisture is present, such as showers or near sinks.
Remember to consult the manufacturer’s instructions for the specific waterproofing membrane you are using, as application methods and drying times may vary.
With the waterproofing membrane applied and tested, you are now ready to proceed with the tile installation process.
Conclusion
Installing Hardibacker on a floor is a manageable and rewarding DIY project that can provide a solid foundation for tile installations. By following the step-by-step guide outlined in this article, you can ensure a successful and professional-looking installation.
We started by gathering all the necessary materials, including Hardibacker boards, screws, thinset mortar, and safety gear. Through proper subfloor preparation, including cleaning, repairing, and checking for moisture, we set the stage for a stable installation.
Next, we measured and cut the Hardibacker boards to fit the floor space, ensuring precision and accuracy. Dry fitting the boards allowed for adjustments to be made before permanently securing them in place.
The application of thinset mortar provided a strong bond between the Hardibacker boards and the subfloor, while securing the boards with screws ensured stability and reinforcement.
We then filled any gaps and joints with joint compound, achieving a smooth and seamless surface. Allowing the thinset mortar to cure provided the necessary time for it to set and harden properly.
Applying a waterproofing membrane, though optional, added an extra layer of protection against moisture and enhanced the longevity of the tile installation, especially in areas prone to water exposure.
In conclusion, by following these steps and taking the time to properly install Hardibacker on a floor, you can create a reliable and durable base for your tile installation. Remember to always refer to the manufacturer’s instructions for specific guidelines and recommendations on the products you are using.
Now it’s time to move forward with confidence, knowing that you have the knowledge and skills to install Hardibacker on your floor and create a beautiful tiled space.
Frequently Asked Questions about How To Install HardieBacker On Floor
Was this page helpful?
At Storables.com, we guarantee accurate and reliable information. Our content, validated by Expert Board Contributors, is crafted following stringent Editorial Policies. We're committed to providing you with well-researched, expert-backed insights for all your informational needs.


0 thoughts on “How To Install HardieBacker On Floor”