Home>Articles>How To Build Storage Under Basement Stairs In Only A Few Hours
Articles
How To Build Storage Under Basement Stairs In Only A Few Hours
Modified: August 16, 2024
Discover step-by-step articles on constructing efficient storage spaces under your basement stairs. Transform wasted space into organized, accessible storage in just a few hours.
(Many of the links in this article redirect to a specific reviewed product. Your purchase of these products through affiliate links helps to generate commission for Storables.com, at no extra cost. Learn more)
Introduction
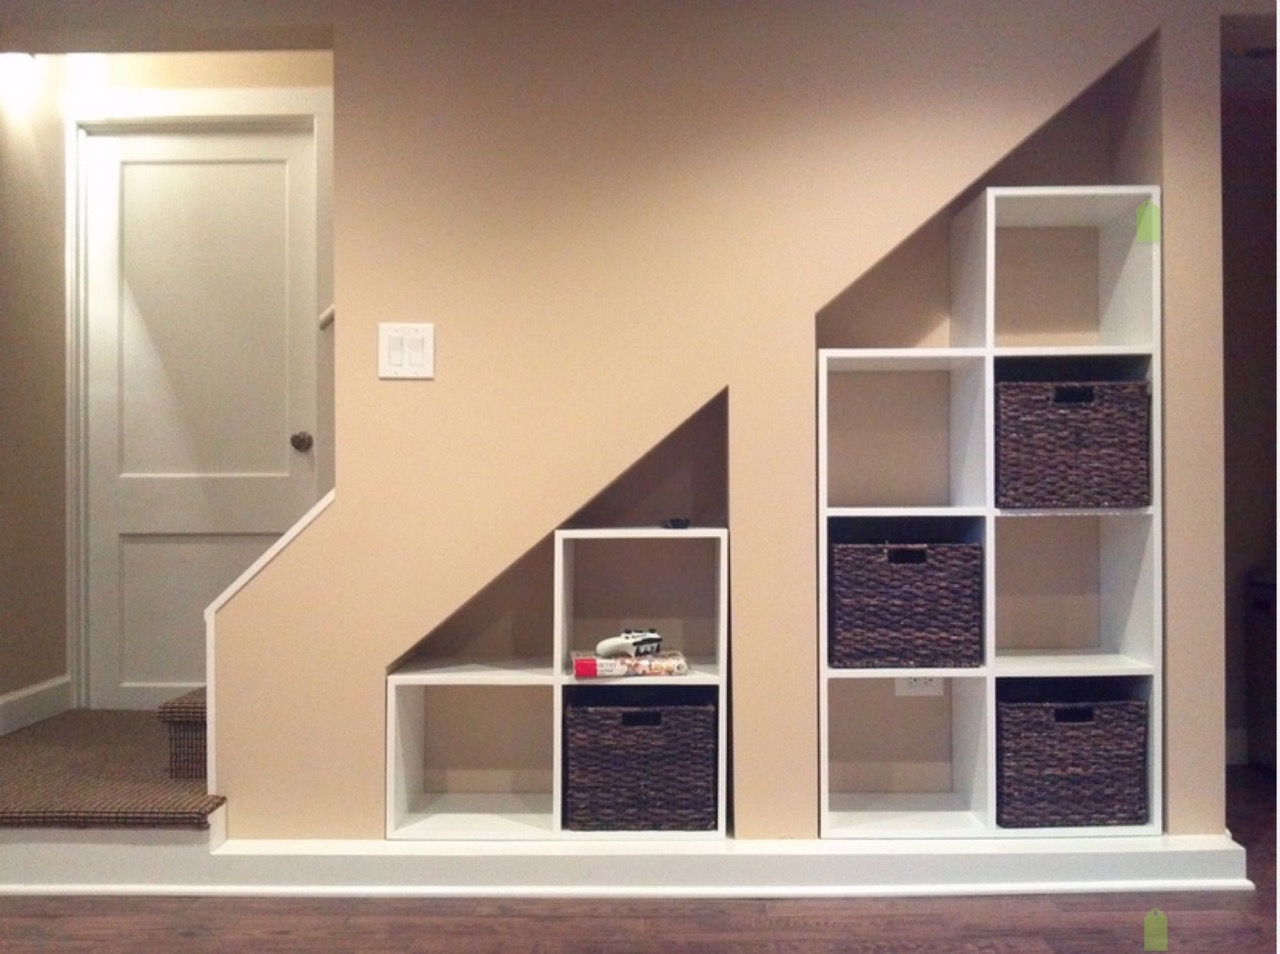
Welcome to our comprehensive guide on how to build storage under basement stairs in only a few hours. If you’re looking to maximize the space in your basement and create a storage solution that is both practical and aesthetically pleasing, this article is for you.
Basement stairs often go unused, leaving valuable space untapped. By implementing storage under these stairs, you can declutter your basement and make the most of every square inch. Not only will this project help you stay organized, but it will also add functionality and value to your home.
In this step-by-step guide, we will walk you through the process of building storage under your basement stairs. We will cover everything from the materials needed to the final touches, ensuring that you have all the information necessary to complete this project successfully.
Before we begin, it’s important to note that this project can be adapted to fit different basement layouts and stair configurations. The instructions provided here are a general guideline, so be sure to take precise measurements and adjust accordingly for your specific space.
Now, let’s dive into the materials needed to get started on this exciting DIY endeavor.
Key Takeaways:
- Maximize basement space by building storage under stairs in a few hours. Declutter, organize, and add value to your home with this practical and aesthetically pleasing DIY project.
- Personalize your storage space with sturdy shelves, doors, and finishing touches. Create a well-designed, functional area that optimizes basement use and keeps belongings organized.
Read more: How To Build Storage Under Stairs
Materials Needed
Before you begin building storage under your basement stairs, gather the following materials:
- Measuring tape
- Level
- Plywood sheets
- 2×4 lumber
- Screws
- Drill
- Circular saw or table saw
- Wood glue
- Hinges
- Handles
- Sandpaper
- Paint or stain
- Paintbrushes or rollers
These materials are readily available at your local hardware store. Make sure to choose high-quality materials that will withstand the test of time and provide stability for your storage shelves.
Additionally, consider the size and configuration of your basement stairs when purchasing the plywood sheets and 2×4 lumber. Measure the height, width, and depth of the space under your stairs to ensure the materials you buy fit perfectly.
Once you have gathered all the necessary materials, you’re ready to move on to the first step of the construction process: preparation.
Step 1: Preparation
Before you start building the storage under your basement stairs, it’s crucial to prepare the space properly. Follow these steps to ensure a smooth construction process:
- Clear the area: Remove any items or obstructions from the space under your basement stairs. This will give you a clean slate to work with and make it easier to measure and build.
- Clean: Take the time to clean the area thoroughly, removing any dust, debris, or spiderwebs. This will ensure that your storage space is clean and ready for use.
- Inspect: Examine the existing structure of your basement stairs. Look for any signs of damage or weakness that may need to be addressed before proceeding. It’s important to have a sturdy foundation for your storage shelves.
- Plan: Take measurements of the space under your stairs and create a rough sketch or plan. This will help you visualize the layout and dimensions of your storage shelves. Consider the height, width, and depth of the shelves, as well as any additional features like doors or drawers.
By properly preparing the space, you will have a solid foundation to begin building your storage under the basement stairs. With a clear plan in place, you can proceed to the next step: measuring and marking.
Step 2: Measuring and Marking
Accurate measurements are key to ensuring that your storage shelves fit perfectly under your basement stairs. Follow these steps to measure and mark the space:
- Measure the height: Measure the height of the space under your basement stairs from the floor to the bottom of the stair stringers. This measurement will determine the maximum height of your storage shelves.
- Measure the width: Measure the width of the space under your stairs. Take into account any unevenness or irregularities in the walls or floor. This measurement will determine the overall width of your storage shelves.
- Measure the depth: Measure the depth of the space under your stairs. This measurement will determine how far out the shelves can extend without obstructing the stairs. Keep in mind any clearance requirements for safe passage on the stairs.
- Mark the measurements: Use a level and a pencil to mark the height, width, and depth measurements on the walls or floor. This will serve as a guide during the construction process.
Take your time with the measuring and marking process, as accuracy is key to a successful build. Double-check your measurements before proceeding to the next step. Once you have completed this step, you are ready to move on to building the shelves.
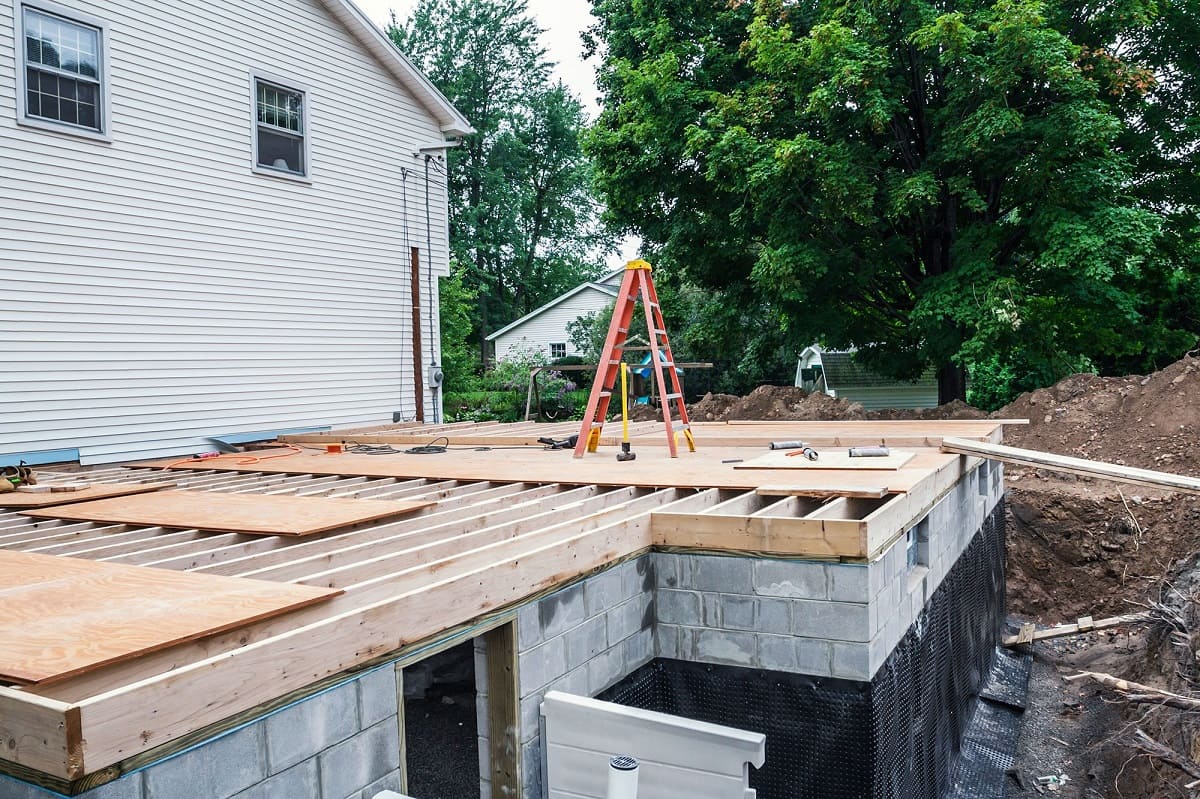
Step 3: Building the Shelves
Now that you have prepared the space and made accurate measurements, it’s time to start building the shelves for your basement storage. Follow these steps:
- Cut the plywood: Use a circular saw or table saw to cut the plywood sheets to the desired dimensions of your shelves. Cut pieces for the sides, back, and individual shelves. Remember to account for the width of the 2×4 lumber that will be used as supports.
- Attach the 2×4 supports: Position the 2×4 lumber vertically along the sidewalls of the storage space. Make sure they are level and secure them to the walls using screws. These will serve as supports for the shelves.
- Install the shelves: Attach the plywood shelves to the 2×4 supports using screws. Make sure they are level and secure. Use a level to ensure that the shelves are straight and at the desired height.
- Secure the back panel: Attach the plywood back panel to the sides and shelves using screws. This will provide stability and prevent items from falling out the back of the storage space.
- Reinforce the shelves: To add extra support, consider adding additional 2×4 lumber underneath the shelves. This will help prevent sagging over time.
Be sure to follow proper safety precautions when using power tools and handling materials. Double-check your measurements and take your time during the construction process to ensure sturdy and secure shelves. Once the shelves are in place, you can move on to the next step: installing the doors.
When building storage under basement stairs, make sure to measure the space accurately and use sturdy materials to maximize the storage capacity.
Read more: How To Build Basement Stairs
Step 4: Installing the Doors
Installing doors on your basement storage space adds a clean and finished look while also keeping your belongings concealed. Follow these steps to install the doors:
- Measure and cut the doors: Measure the height and width of your storage space opening and cut the doors from the plywood sheets to fit these dimensions. You can have a single door or multiple smaller doors depending on your preference.
- Attach hinges: Position the doors on the front of the storage space and mark where the hinges will be attached. Use a screwdriver or drill to attach the hinges to both the doors and the storage space.
- Install handles or knobs: Choose handles or knobs that complement your overall basement decor. Measure and mark the door fronts for placement, then securely attach the handles or knobs.
- Test the doors: Open and close the doors to ensure they operate smoothly and align properly. Make any necessary adjustments to the hinges or hardware as needed.
Installing doors on your storage space not only enhances its functionality but also adds a polished and professional touch. The doors will keep your items neatly tucked away and provide easy access when needed.
Once the doors are installed, it’s time to move on to the next step: painting or finishing the storage space.
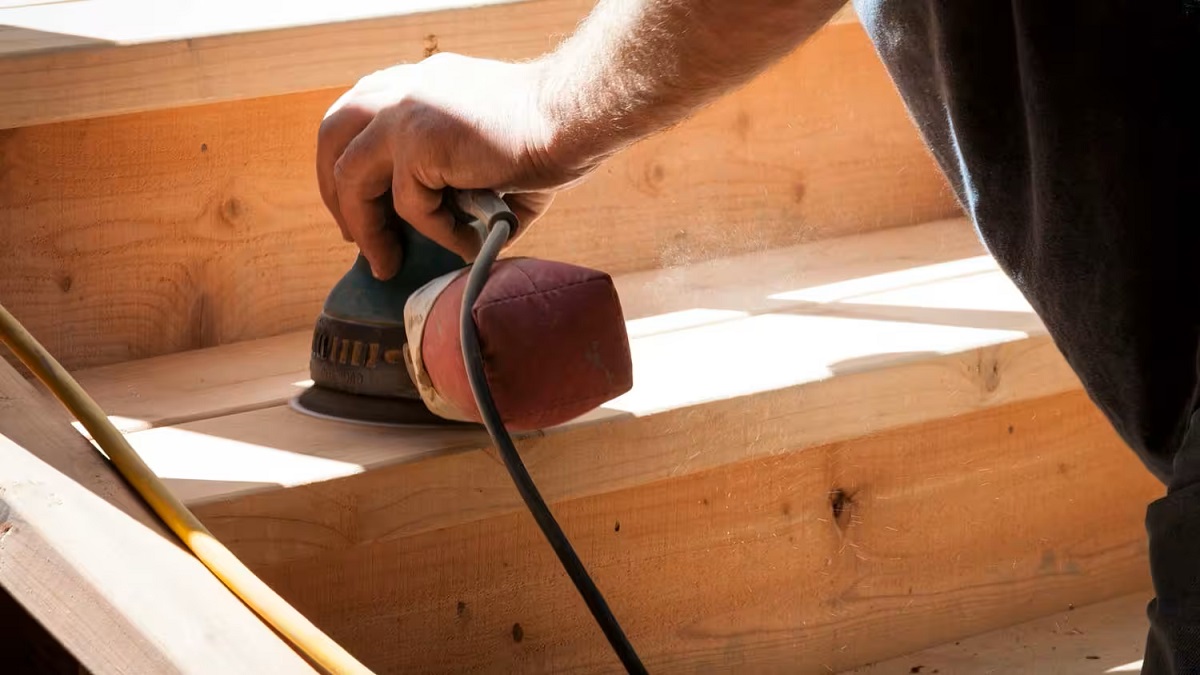
Step 5: Painting or Finishing
Painting or finishing your basement storage space is an essential step to enhance its appearance and protect the materials used. Follow these steps to paint or finish your storage space:
- Prepare the surface: Sand down any rough edges or imperfections on the plywood shelves and doors. This will create a smooth surface for paint or finish application.
- Choose a paint or finish: Select a paint color or finish that complements the overall aesthetics of your basement. Consider using a waterproof or moisture-resistant paint or finish, especially if your basement tends to be damp.
- Apply the paint or finish: Using a paintbrush or roller, apply the paint or finish to the plywood shelves and doors. Start with a primer coat if needed, and then follow up with one or two additional coats for full coverage. Allow sufficient drying time between coats as recommended by the manufacturer.
- Add any decorative touches: If desired, you can add additional decorative elements such as stenciling, decals, or trim to personalize your storage space.
Paying attention to the painting or finishing process will not only make your basement storage space visually appealing but also help to protect the wood from moisture and wear over time.
Once the paint or finish has properly dried, you can move on to the final step: adding the finishing touches to your storage space.
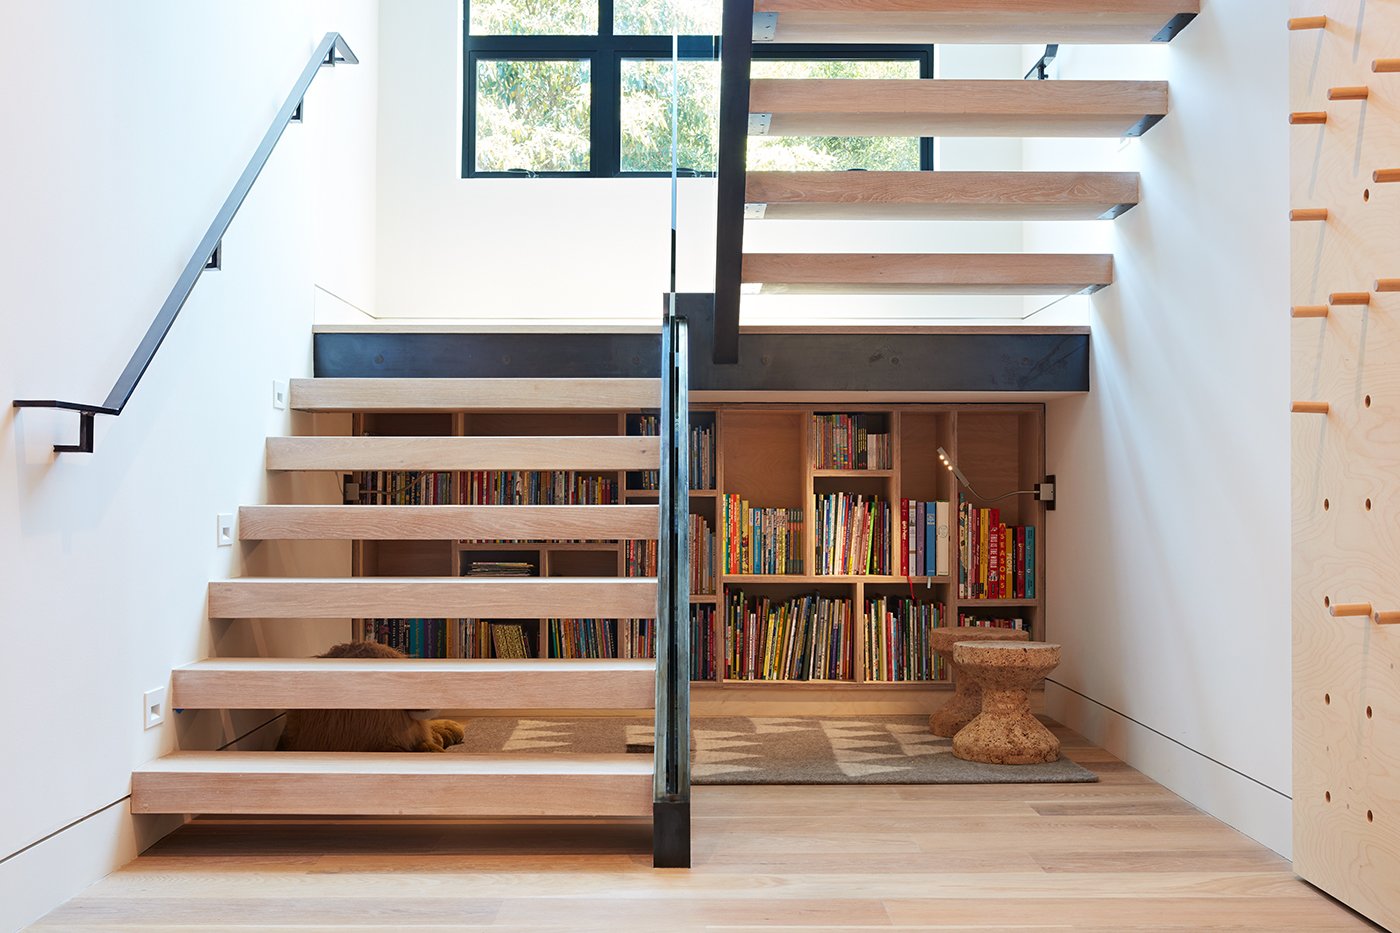
Step 6: Final Touches
As you reach the final stage of building storage under your basement stairs, it’s time to add those finishing touches that will elevate the functionality and aesthetics of the space. Follow these steps:
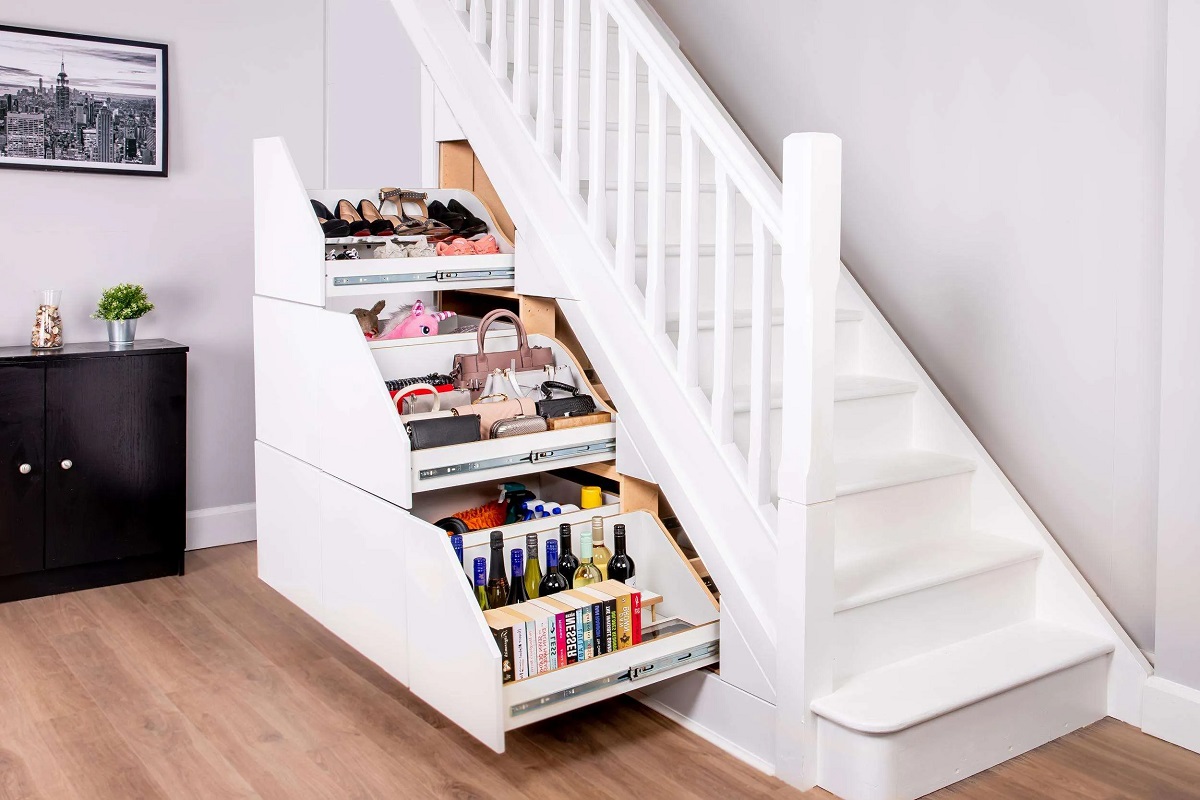
- Install additional storage solutions: Consider adding hooks, racks, or shelves on the sides or inside the doors to maximize storage space and keep smaller items organized.
- Label your storage: Use labels, tags, or a labeling system to categorize and identify the contents of each storage area. This will make it easier to find items when you need them.
- Clean and organize: Take the time to clean up any dust or debris that may have accumulated during the construction process. Arrange your belongings neatly on the shelves for a tidy and organized storage area.
- Add lighting: If your basement lacks sufficient lighting, consider adding battery-powered LED lights or light fixtures to illuminate the storage space. This will make it easier to see and access your stored items.
By implementing these final touches, you will create a well-designed and functional storage area under your basement stairs. Your newly built storage space will not only optimize the use of your basement but also provide a clutter-free and organized environment.
Congratulations! You have successfully completed the process of building storage under your basement stairs in just a few hours. Enjoy the increased storage capacity and the benefits that come with a well-utilized space.
Remember to periodically check and maintain your storage area to ensure it remains clean, organized, and in optimal condition.
Thank you for following our guide, and we hope this project has been a success for you. Happy organizing!
Conclusion
Building storage under your basement stairs is a rewarding DIY project that allows you to maximize the space in your home while adding functionality and value. With just a few hours of work and the right materials, you can create a storage solution that is tailored to your needs and complements the overall aesthetics of your basement.
Throughout this comprehensive guide, we have walked you through each step of the process, from preparation and measuring to building the shelves, installing doors, painting or finishing, and adding the final touches. By following these steps and paying attention to detail, you can create a quality storage space that is not only practical but visually appealing as well.
Remember to adapt the instructions to your specific basement layout and stair configuration. Take accurate measurements, choose high-quality materials, and ensure that the shelves and doors are sturdy and secure. Additionally, don’t forget to personalize the space with your preferred paint or finish, and consider adding hooks, labels, lighting, and other storage solutions to enhance functionality.
By building storage under your basement stairs, you can declutter your basement, organize your belongings, and make the most of every inch of space in your home. This project will not only improve your daily life but also add value to your property.
We hope that this guide has provided you with the knowledge and inspiration to embark on your own storage building journey. Remember to enjoy the process and take pride in your accomplishments. Happy building and organizing!
Ready for more handy storage solutions or curious about tackling a bigger project? If maximizing space intrigues you, our guide on building storage under stairs offers even more creative ideas. For those considering a more extensive upgrade, our insights on the duration of basement renovations can help set realistic expectations and planning.
Frequently Asked Questions about How To Build Storage Under Basement Stairs In Only A Few Hours
Was this page helpful?
At Storables.com, we guarantee accurate and reliable information. Our content, validated by Expert Board Contributors, is crafted following stringent Editorial Policies. We're committed to providing you with well-researched, expert-backed insights for all your informational needs.


0 thoughts on “How To Build Storage Under Basement Stairs In Only A Few Hours”