Articles
How To Build A Bathroom Vanity With Drawers
Modified: October 26, 2024
Learn how to build a bathroom vanity with drawers in this comprehensive step-by-step guide. Discover expert tips and tricks for creating your own stunning vanity.
(Many of the links in this article redirect to a specific reviewed product. Your purchase of these products through affiliate links helps to generate commission for Storables.com, at no extra cost. Learn more)
Introduction
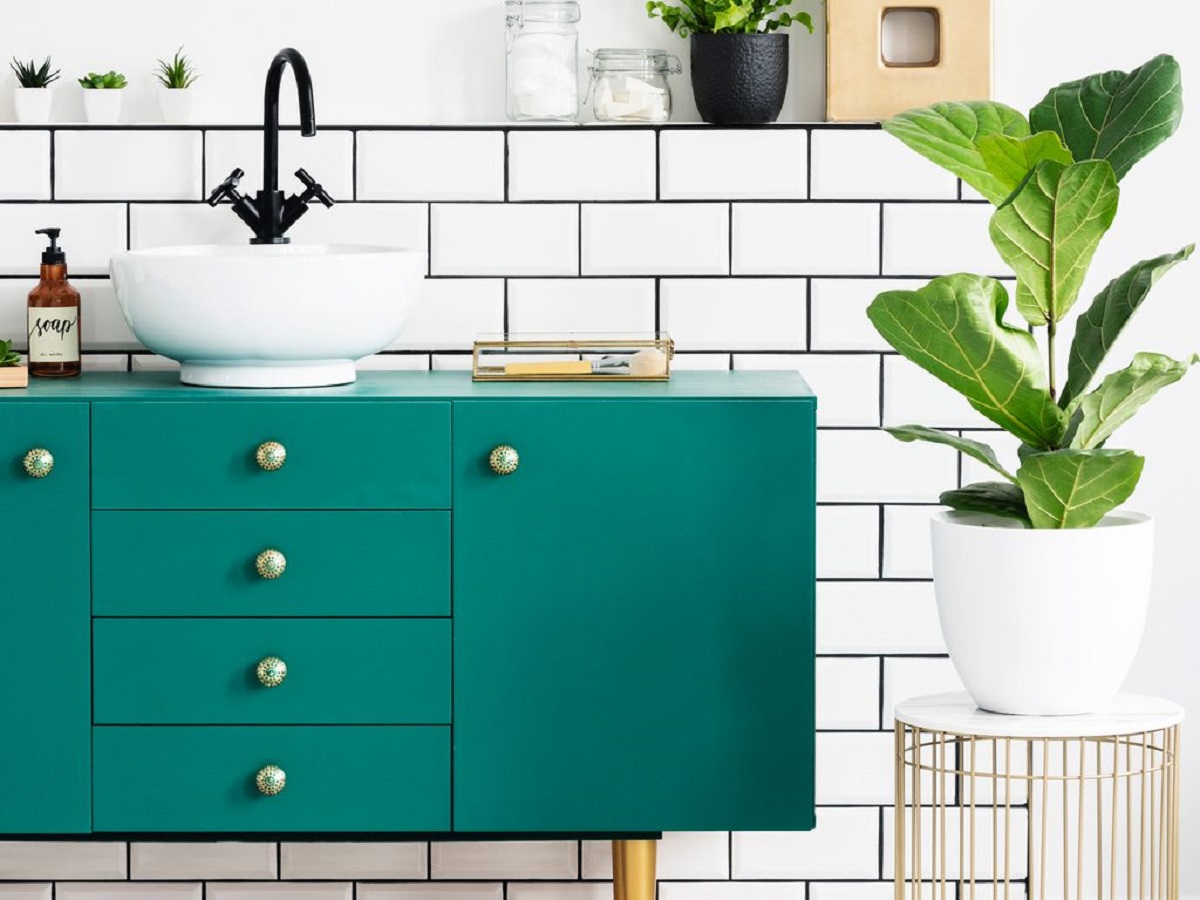
Building your own bathroom vanity with drawers can be a rewarding and cost-effective project that adds a touch of personalization to your bathroom space. Not only does it provide you with a practical storage solution, but it also allows you to showcase your creativity and craftsmanship. Whether you’re a seasoned DIY enthusiast or a beginner looking to embark on a new project, this guide will walk you through the step-by-step process of building a bathroom vanity with drawers.
Before diving into the construction process, it’s important to note that building a bathroom vanity requires careful planning and attention to detail. You’ll need to consider the size of your bathroom, your desired storage needs, and the overall aesthetic you wish to achieve. Additionally, you’ll need to gather the necessary materials and tools to ensure a smooth and successful project.
In this article, we’ll cover everything from measuring and planning your vanity to constructing the frame, building the drawers, and installing the sink and faucet. By following these steps, you’ll be able to create a custom bathroom vanity that suits both your functional and aesthetic preferences.
So, let’s get started on this exciting DIY journey and learn how to build a bathroom vanity with drawers that will be the envy of all your friends and family!
Key Takeaways:
- Building a bathroom vanity with drawers is a rewarding DIY project that allows for personalization, practical storage, and the opportunity to showcase creativity and craftsmanship. Careful planning, precise construction, and attention to detail are essential for a successful and durable vanity.
- From gathering materials and tools to constructing the frame, building drawers, and installing the sink and faucet, each step in the process contributes to creating a custom bathroom vanity that meets both functional and aesthetic preferences. The satisfaction of completing a unique and personalized piece for the bathroom space is a rewarding experience.
Read more: How To Organize Vanity Drawers
Step 1: Gather Materials and Tools
Before you can begin constructing your bathroom vanity with drawers, it’s essential to collect all the necessary materials and tools. Having everything prepared in advance will help streamline the construction process and ensure a smoother workflow. Here’s a list of the materials and tools you’ll need:
Materials:
- 3/4-inch plywood sheets
- Wood screws
- Drawer slides
- Drawer fronts
- Cabinet hardware
- Vanity top
- Sink and faucet
- Paint or stain
- Wood glue
- Sanding paper
- Wood filler
Tools:
- Tape measure
- Saw (circular or table saw)
- Cordless drill
- Screwdriver
- Clamps
- Square ruler
- Level
- Paintbrush
- Sanding block
- Wood chisel
Make sure to choose high-quality materials that will provide durability and longevity to your vanity. Plywood is a popular choice for the vanity frame due to its strength and stability. Consider the size and style of your desired vanity top and select one that complements your overall bathroom aesthetics.
When it comes to tools, having the right equipment is crucial for precision and efficiency. Invest in a reliable saw to accurately cut the plywood sheets according to your vanity dimensions. A cordless drill will come in handy for securing screws and attaching hardware. Don’t forget to have sanding paper and wood filler on hand to smoothen any rough edges and fill in imperfections.
By gathering all the necessary materials and tools before you start, you’ll be well-prepared to tackle the construction process. This initial step will set the foundation for a successful and enjoyable DIY project.
Step 2: Measure and Plan the Vanity
Before you start building the vanity, it’s important to accurately measure your bathroom and plan out the design. This step is crucial to ensure that the vanity fits seamlessly into your space and meets your storage needs. Here’s how to effectively measure and plan your vanity:
1. Measure the space: Use a tape measure to determine the dimensions of the area where you plan to install the vanity. Measure the width, height, and depth of the space, taking into account any obstacles such as plumbing pipes or electrical outlets.
2. Determine the vanity size: Based on the measurements of your bathroom space, decide on the size of the vanity that will fit comfortably. Consider the available floor space and any other fixtures in the bathroom to ensure proper placement.
3. Sketch the design: Use graph paper or a design software to create a scaled drawing of your vanity. Include the dimensions and placement of each component, such as the vanity frame, drawers, and cabinet doors.
4. Consider storage needs: Think about the items you’ll be storing in the vanity and plan the drawer and cabinet configurations accordingly. Determine the number of drawers and shelves you’ll need and allocate space for specific items like cosmetics, towels, and toiletries.
5. Choose the drawer layout: Decide on the drawer layout based on your storage needs and personal preference. You can opt for standard drawers, deep drawers, or a combination of both. Consider the height and width of the drawers to accommodate items of various sizes.
6. Ensure proper clearance: Check that there is enough clearance space around the vanity for easy movement within the bathroom. Allow for proper opening and closing of drawers and cabinet doors without obstruction.
By taking the time to measure and plan your vanity, you’ll have a clear vision of what you want to create. This step helps prevent any costly mistakes and ensures that your bathroom vanity will perfectly fit your space and meet your storage requirements. Once you have finalized your design, you’re ready to move on to the construction phase.
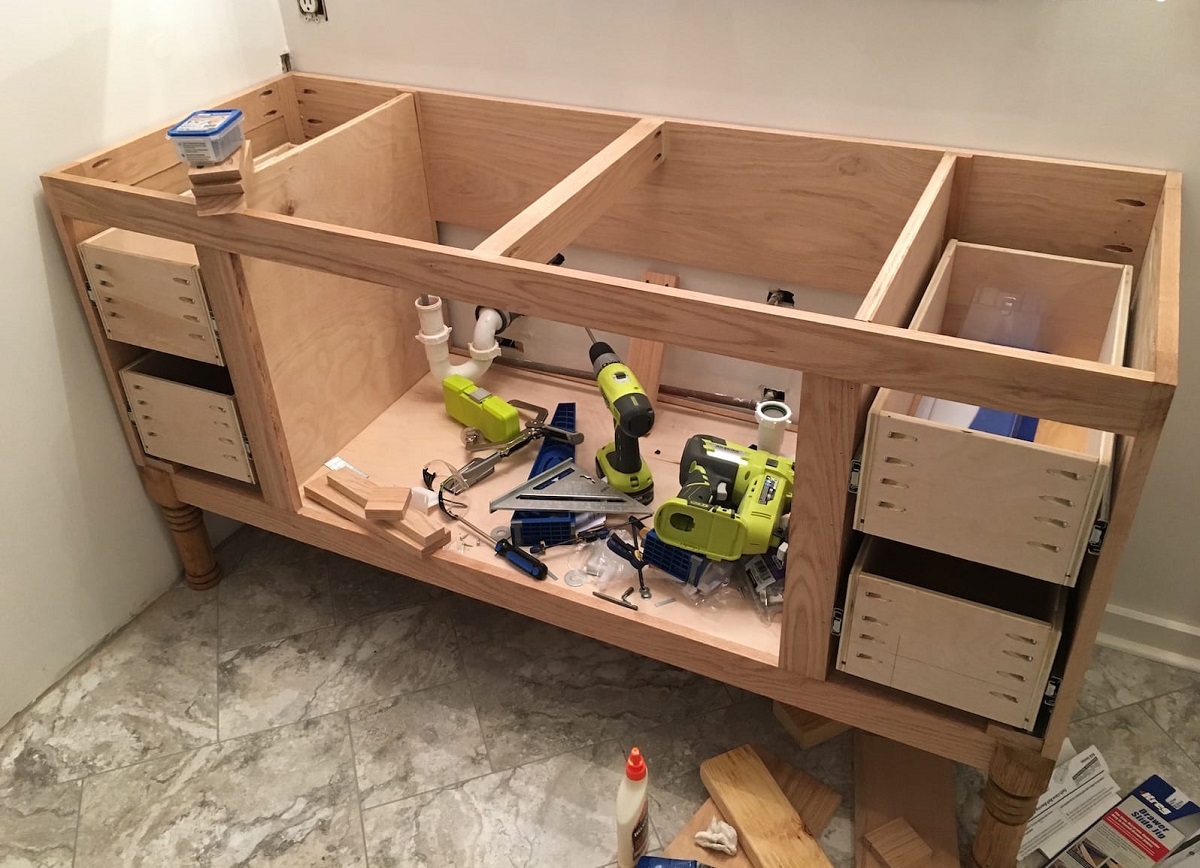
Step 3: Build the Vanity Frame
Once you have measured and planned your bathroom vanity, it’s time to start constructing the frame. The vanity frame provides the structure and support for the drawers and cabinet doors. Follow these steps to build the vanity frame:
1. Cut the plywood: Using a saw, cut the plywood sheets according to the dimensions of your vanity design. Cut the pieces for the top, bottom, sides, and back of the frame. Make sure to double-check your measurements before cutting.
2. Assemble the frame: Begin by attaching the sides to the top and bottom pieces using wood screws. Use clamps to hold the pieces in place as you screw them together. Ensure that the corners are square and the frame is sturdy.
3. Reinforce with braces: To strengthen the frame, add corner braces or brackets at each corner. These braces will provide additional support and stability to the vanity. Secure them in place using screws.
4. Install the center support: If your vanity is large or has a long span, you may need to add a center support for added stability. Cut a piece of plywood to the appropriate width and screw it into place in the center of the frame.
5. Attach the back panel: Cut a plywood sheet to the size of the back of the vanity frame. Attach it using screws, ensuring that it is flush with the edges of the frame. The back panel adds structural integrity and helps keep the frame square.
6. Check for level: Use a level to ensure that the vanity frame is straight and level. Make any necessary adjustments by adding shims or sanding down uneven areas.
7. Add supports for drawers: Within the frame, add additional pieces of plywood to serve as supports for the drawers. These supports should be evenly spaced and securely attached to the sides of the frame.
Building the vanity frame is a critical step in the construction process. It establishes the foundation for the rest of the vanity components and ensures a sturdy and durable structure. Take your time during this step to ensure accuracy and precision. With the frame complete, you’re ready to move on to constructing the drawers.
Step 4: Construct the Drawers
The drawers are an essential component of your bathroom vanity, providing convenient storage for your toiletries and other bathroom supplies. Building sturdy and well-constructed drawers is crucial for their functionality and longevity. Follow these steps to construct the drawers for your vanity:
1. Measure and cut the drawer pieces: Measure the dimensions of the openings within the vanity frame where the drawers will be placed. Cut pieces of plywood to the appropriate size for the front, back, and sides of the drawers. The front piece should be slightly larger to account for the drawer face.
2. Create dado joints: Using a table saw, create dado joints on the sides of the drawer pieces. These joints will allow the drawer bottom to slide into place. Make sure the dado cuts are accurate and fit snugly.
3. Attach the drawer sides to the front and back: Apply wood glue to the edges of the drawer front and back pieces. Attach the side pieces, ensuring they are aligned with the front and back. Use clamps to hold the pieces together and let the glue dry. Secure them with screws for added stability.
4. Add the drawer bottom: Cut a piece of plywood to the size of the drawer bottom. Slide it into the dado joints on the drawer sides. Use wood glue and small finishing nails to secure the drawer bottom in place.
5. Sand and finish the drawers: Use sandpaper to smooth any rough edges or surfaces of the drawers. Apply a coat of paint or stain to match the desired aesthetic of your vanity. Allow the paint or stain to dry completely before proceeding.
6. Attach the drawer slides: Install drawer slides on both sides of the vanity frame, following the manufacturer’s instructions. Make sure they are level and properly aligned for smooth operation. Attach the corresponding part of the drawer slides to the sides of the drawers.
7. Test the drawer operation: Slide the drawers into place on the vanity frame and test their operation. Ensure that they glide in and out smoothly without any obstructions or friction. Adjust the drawer slides if necessary.
Constructing the drawers requires precision and attention to detail. By following these steps, you’ll create sturdy and functional drawers that seamlessly fit within your vanity. Once the drawers are complete, you can move on to installing the drawer slides to allow for easy movement and access to your stored items.
Read more: How To Remove Vanity Drawers
Step 5: Install Drawer Slides
Installing drawer slides is an important step in the construction process of your bathroom vanity. These slides allow the drawers to glide smoothly in and out, providing easy access to your items. Follow these steps to properly install the drawer slides:
1. Measure and mark the slide placement: Begin by measuring and marking the placement of the drawer slides inside the vanity frame. Use a tape measure and a pencil to ensure accuracy. Take into account the size and type of drawer slides you are using.
2. Attach the slides to the frame: Following the manufacturer’s instructions, attach the drawer slides to the inside of the vanity frame. Make sure they are level and aligned properly. Use screws or other fasteners provided with the slides to secure them in place.
3. Install the slides on the drawers: Attach the corresponding part of the drawer slides to the sides of the drawers, again following the manufacturer’s instructions. Ensure that they are aligned with the slides on the vanity frame for smooth operation.
4. Test the drawer slides: Slide the drawers into the frame to test the drawer slides. Check that they glide in and out smoothly without any resistance or wobbling. Make any necessary adjustments to ensure proper alignment and smooth movement.
5. Adjust as needed: If the drawers do not slide smoothly or seem misaligned, adjust the slides or make slight modifications as necessary. This may involve loosening and repositioning the screws or making slight alterations to the slides.
6. Repeat for each drawer: Repeat the installation process for each drawer in the vanity. Take your time to ensure that each drawer is properly aligned and operates smoothly.
Installing the drawer slides correctly is crucial for the functionality and longevity of your vanity drawers. Taking the time to measure accurately, follow the instructions, and make any necessary adjustments will ensure that your drawers slide effortlessly and provide easy access to your bathroom essentials.
With the drawer slides installed, you’re one step closer to completing your bathroom vanity. Next, you’ll learn how to build the vanity top to complete the overall look and functionality of your DIY project.
When building a bathroom vanity with drawers, make sure to use high-quality drawer slides to ensure smooth and reliable operation. Cheaper slides can lead to frustration and potential issues down the line.
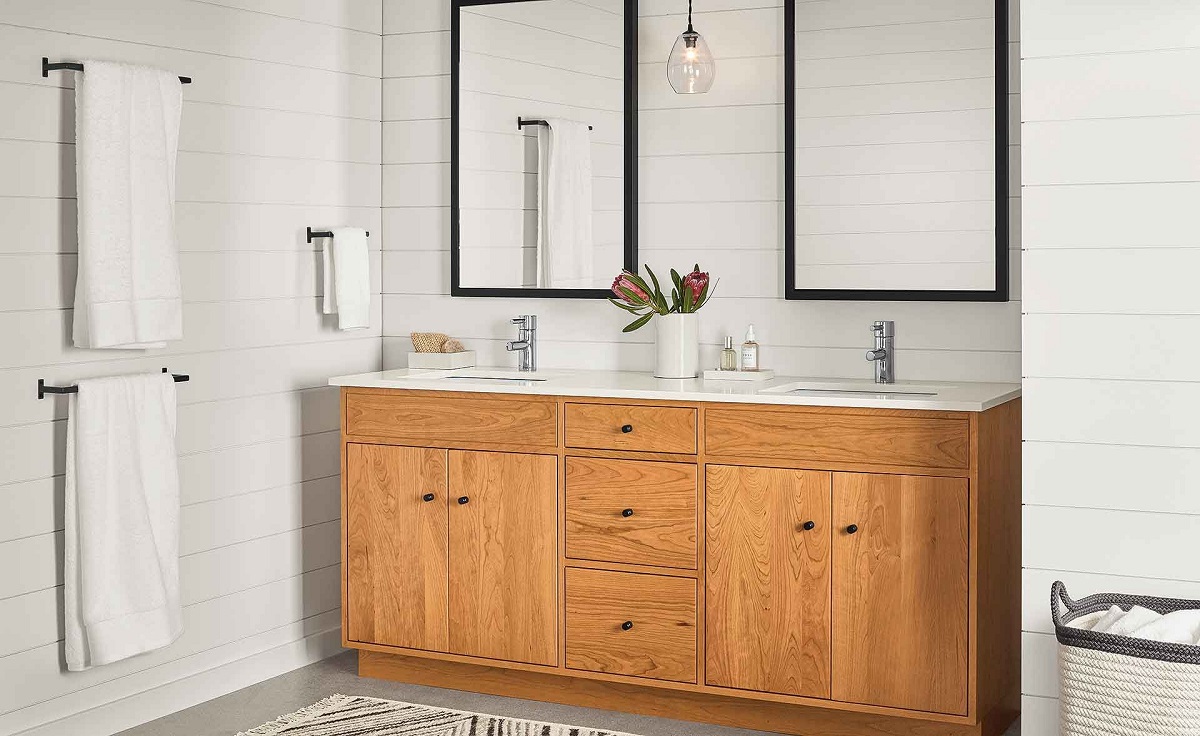
Step 6: Build the Vanity Top
The vanity top is not only a functional surface but also a focal point of your bathroom vanity. It provides the finishing touch and ties the entire design together. Follow these steps to build a beautiful and durable vanity top:
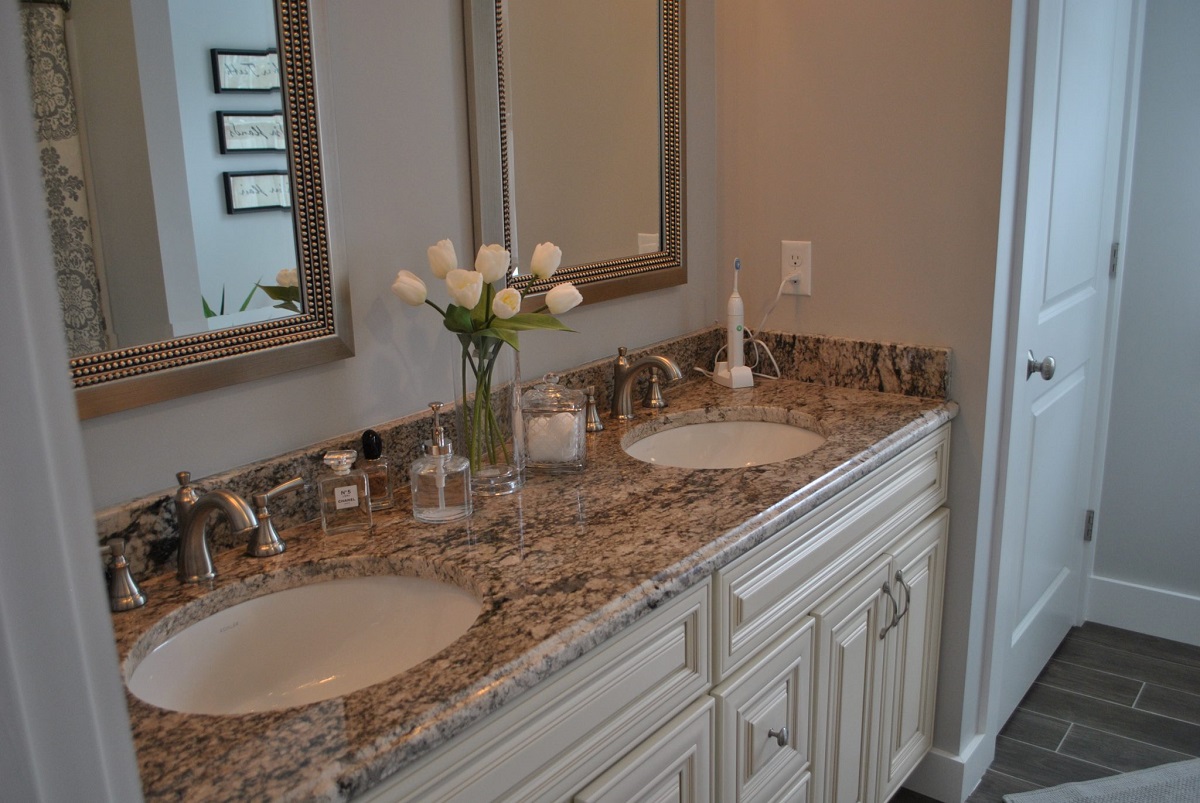
1. Choose your material: Select a material that suits your style and budget. Common choices for vanity tops include marble, granite, quartz, or even solid surface materials like laminate or wood. Consider the durability, maintenance requirements, and aesthetic appeal of each option.
2. Measure and cut the material: Measure the dimensions of your vanity frame to determine the size of the vanity top. Mark these measurements on the chosen material and use a saw to carefully cut it to the desired size. Ensure clean, accurate cuts to achieve a professional and polished look.
3. Cut out openings for sinks and faucets: If your vanity top will accommodate sinks and faucets, use hole saws or appropriate cutting tools to create openings for these fixtures. Ensure accurate measurements and precise cuts to ensure a proper fit for the sinks and faucets.
4. Sand and finish the edges: Use sandpaper to smooth any rough edges or surfaces of the vanity top. Pay attention to the edges and corners, ensuring they are smooth and free from any imperfections. Take your time during this step, as it can significantly enhance the overall appearance of the vanity top.
5. Apply sealant or finish: Depending on the material you chose for the vanity top, you may need to apply a sealant or finish to protect it from moisture, staining, and damage. Follow the manufacturer’s instructions for the specific material you are working with to ensure proper application and coverage.
6. Install the vanity top: Carefully place the vanity top onto the vanity frame. Ensure a proper fit and alignment with the drawers and cabinet doors below. Use appropriate fasteners or adhesive to secure the top to the frame, following the manufacturer’s recommendations.
7. Connect sinks and faucets: If you have chosen to incorporate sinks and faucets into your vanity top, follow the manufacturer’s instructions to properly install and connect them. Ensure tight seals and check for any leaks or issues before proceeding.
By following these steps, you can create a stunning and functional vanity top that complements the overall aesthetic of your bathroom. Take your time during the construction process and pay attention to the details to ensure a high-quality result.
With the vanity top in place, your DIY bathroom vanity is really starting to take shape. In the next step, we’ll explore the options for painting or staining your vanity to give it a personalized and finished look.
Step 7: Paint or Stain the Vanity
Once the construction of your bathroom vanity is complete, it’s time to add the finishing touches by painting or staining it. This step allows you to customize the vanity’s appearance to match your desired style and aesthetic. Follow these steps to paint or stain your vanity:
1. Prep the surface: If you’re painting the vanity, start by sanding the entire surface to create a smooth, even texture. Remove any dust or debris with a clean cloth. If you’re staining the vanity, ensure the surface is clean and free from any old finishes or residue.
2. Choose your paint or stain: Select a high-quality paint or stain that is suitable for the material of your vanity. Consider the color or tone you want to achieve and test a sample on a small, inconspicuous area to ensure you are happy with the result.
3. Apply the paint or stain: If you’re painting the vanity, use a brush or roller to apply a thin and even coat of paint. Let it dry completely according to the manufacturer’s instructions, and then apply additional coats as necessary for full coverage. If you’re staining the vanity, use a clean cloth or brush to evenly apply the stain in the direction of the wood grain. Wipe off any excess stain with a clean cloth.
4. Allow for proper drying or curing: Whether you’re painting or staining, it’s important to allow the finish to fully dry or cure. Follow the manufacturer’s recommended drying time before proceeding with the next step.
5. Apply a protective finish: For added durability and to protect the painted or stained surface, consider applying a clear protective finish. This can be in the form of a varnish, polyurethane, or sealer. Follow the manufacturer’s instructions for the specific product you choose.
6. Reattach hardware and accessories: Once the paint or stain is fully dry, reattach the hardware and accessories to the vanity. Ensure they are properly aligned and securely fastened.
The paint or stain you choose can greatly impact the overall look and feel of your bathroom vanity. Whether you opt for a bold and vibrant color or a natural wood finish, this step allows you to personalize your vanity and tie it into the overall design of your bathroom.
With the vanity now beautifully painted or stained, it’s time to move on to the final steps of installing the sink and faucet and attaching the vanity top.
Step 8: Install the Sink and Faucet
Installing the sink and faucet is the next crucial step in completing your bathroom vanity. This step requires careful attention to detail to ensure proper installation and functionality. Follow these steps to install the sink and faucet:
1. Prepare the vanity top: If you haven’t already done so, ensure that the vanity top has the necessary openings and cutouts for the sink and faucet. Use a hole saw or appropriate cutting tools to create these openings if they haven’t been done already.
2. Position and secure the sink: Carefully position the sink over the opening in the vanity top. Make sure it is centered and level. Use clamps or a mounting bracket, depending on the sink type, to secure the sink to the vanity top. Follow the manufacturer’s instructions for your specific sink model.
3. Attach the drain: Install the drain assembly for the sink according to the manufacturer’s instructions. Apply plumber’s putty or silicone sealant to create a watertight seal. Tighten the drain nut securely, but be careful not to overtighten.
4. Connect the water supply lines: Connect the water supply lines from the faucet to the water shutoff valves. Use adjustable wrenches to tighten the connections, making sure they are snug but not overly tightened. If necessary, use plumber’s tape on the threaded connections for added security.
5. Check for leaks: Turn on the water supply valves and carefully check for any leaks around the connections. If there are any leaks, tighten the connections or apply additional sealant as needed.
6. Test the sink and faucet: Run water in the sink and check for proper drain operation and faucet functionality. Ensure that the water flows smoothly and drains without any issues. Test both hot and cold water to ensure proper temperature control.
7. Make any necessary adjustments: If there are any issues with the sink or faucet, make the necessary adjustments. This may involve tightening connections, correcting water flow, or addressing any leaks.
Installing the sink and faucet completes the functional aspect of your bathroom vanity. It’s essential to ensure proper installation to prevent any leaks or problems down the line. Take your time during this step to ensure a well-installed and functioning sink and faucet.
With the sink and faucet in place, it’s time to move on to the final step of attaching the vanity top to complete your bathroom vanity project.
Read more: How To Build Vanity Table
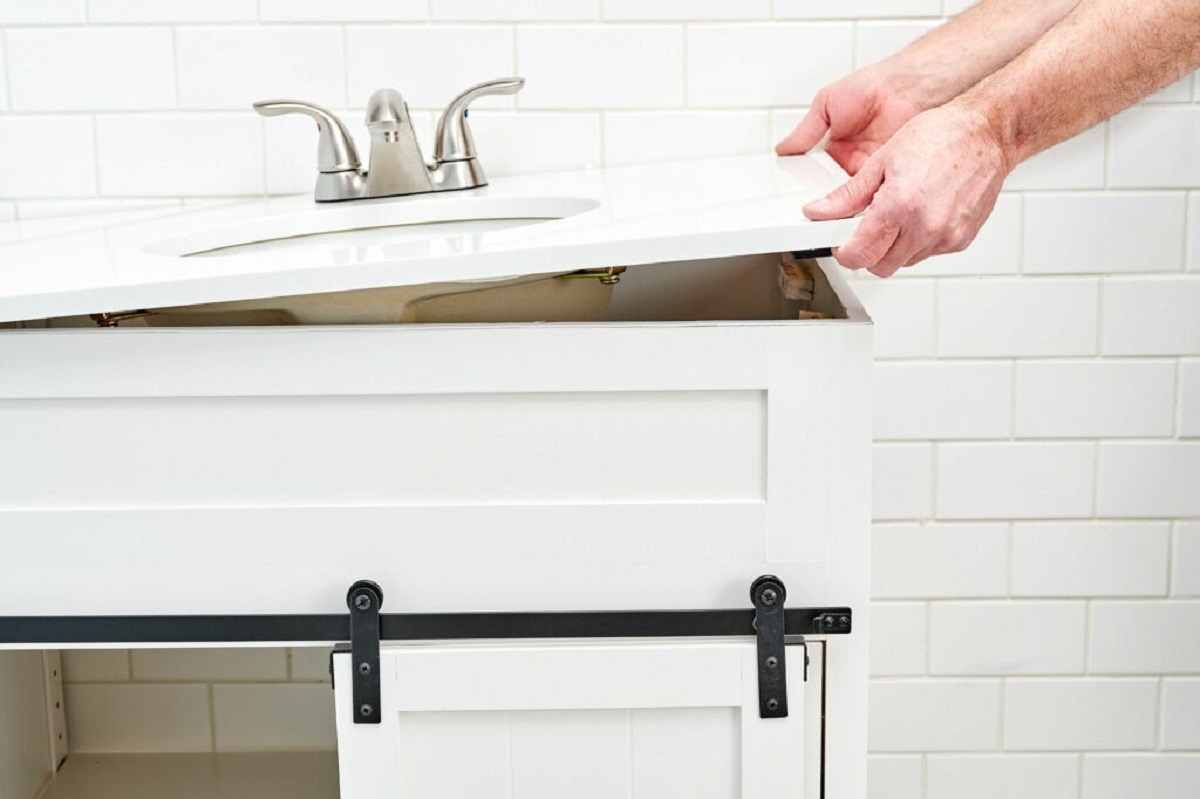
Step 9: Attach the Vanity Top
The final step in completing your bathroom vanity project is attaching the vanity top. This step ensures that the vanity top is securely in place and provides a polished and finished look. Follow these steps to attach the vanity top:
1. Prepare the vanity base: Ensure that the vanity base, including the frame and drawers, is clean and free from any debris. Make sure all hardware and accessories are properly attached and tightened.
2. Apply adhesive: Apply a bead of construction adhesive or silicone caulk along the top edges of the vanity base. This will help secure the vanity top and create a strong bond.
3. Lift and position the vanity top: With the help of a friend or family member, carefully lift the vanity top and position it onto the vanity base. Ensure that it is aligned properly with the edges of the base and centered over the drawers and cabinet openings.
4. Press down firmly: Once the vanity top is in position, press down firmly on all areas to ensure good contact with the adhesive. Use clamps or heavy objects to provide additional pressure if needed. Allow the adhesive to dry according to the manufacturer’s instructions.
5. Clean up any excess adhesive: Wipe away any excess adhesive or caulk that may have squeezed out from under the vanity top. Use a damp cloth or sponge to clean up any residue, ensuring a neat and finished appearance.
6. Reconnect plumbing: If necessary, reconnect the plumbing connections under the sink. Ensure that all connections are secure and tight to prevent leaks. Test the plumbing again to ensure proper functionality.
7. Check for proper alignment: Check that the vanity top is level and aligned properly with the vanity base. Make any necessary adjustments to ensure a seamless and professional-looking installation.
Attaching the vanity top is the final step in bringing your bathroom vanity project to completion. Take your time during this step to ensure a secure and well-fitted vanity top that adds the perfect finishing touch to your bathroom.
Congratulations! You have successfully built and installed your very own bathroom vanity with drawers. Enjoy the satisfaction of completing a DIY project that not only adds functionality but also showcases your creativity and craftsmanship.
Remember to admire your finished product and take pride in the hard work you’ve put into creating a unique and personalized piece for your bathroom space.
Conclusion
Building your own bathroom vanity with drawers is a rewarding and fulfilling DIY project that allows you to customize your bathroom space and showcase your creativity. By following the step-by-step process outlined in this guide, you can construct a functional and visually appealing vanity that meets your storage needs and complements your personal style.
Throughout the process, we discussed the importance of measuring and planning the vanity, gathering the necessary materials and tools, constructing the vanity frame, building the drawers, installing drawer slides, building the vanity top, and painting or staining the vanity. Each step contributes to the overall functionality and aesthetic of your bathroom vanity.
By taking the time to measure accurately, plan thoughtfully, and pay attention to detail during construction, you can create a sturdy and durable vanity that will last for years to come. The addition of drawers provides practical storage solutions for your bathroom essentials, while the vanity top completes the overall look and functionality of the project.
Remember to select high-quality materials, follow manufacturer’s instructions, and test for proper functionality at each stage of the process. Take pride in the personalized and unique nature of your DIY vanity, knowing that you have built a piece of furniture that reflects your personal style and meets your specific needs.
Lastly, don’t forget to enjoy the process of creating something with your own hands and the satisfaction of seeing your project come to life. Whether you’re an experienced DIY enthusiast or a beginner, building a bathroom vanity with drawers is a wonderful opportunity to showcase your skills and add a touch of individuality to your home.
So, gather your materials, grab your tools, and embark on this exciting DIY journey to create a bathroom vanity that combines functionality, style, and your craftsmanship. Enjoy the satisfaction of knowing that you have transformed your bathroom space through your own creativity and effort.
Happy building!
Frequently Asked Questions about How To Build A Bathroom Vanity With Drawers
Was this page helpful?
At Storables.com, we guarantee accurate and reliable information. Our content, validated by Expert Board Contributors, is crafted following stringent Editorial Policies. We're committed to providing you with well-researched, expert-backed insights for all your informational needs.


0 thoughts on “How To Build A Bathroom Vanity With Drawers”