Articles
How To Caulk Bathroom Vanity
Modified: December 7, 2023
Learn how to properly caulk your bathroom vanity with our informative articles. Improve the look and function of your bathroom with these helpful tips and techniques.
(Many of the links in this article redirect to a specific reviewed product. Your purchase of these products through affiliate links helps to generate commission for Storables.com, at no extra cost. Learn more)
Introduction
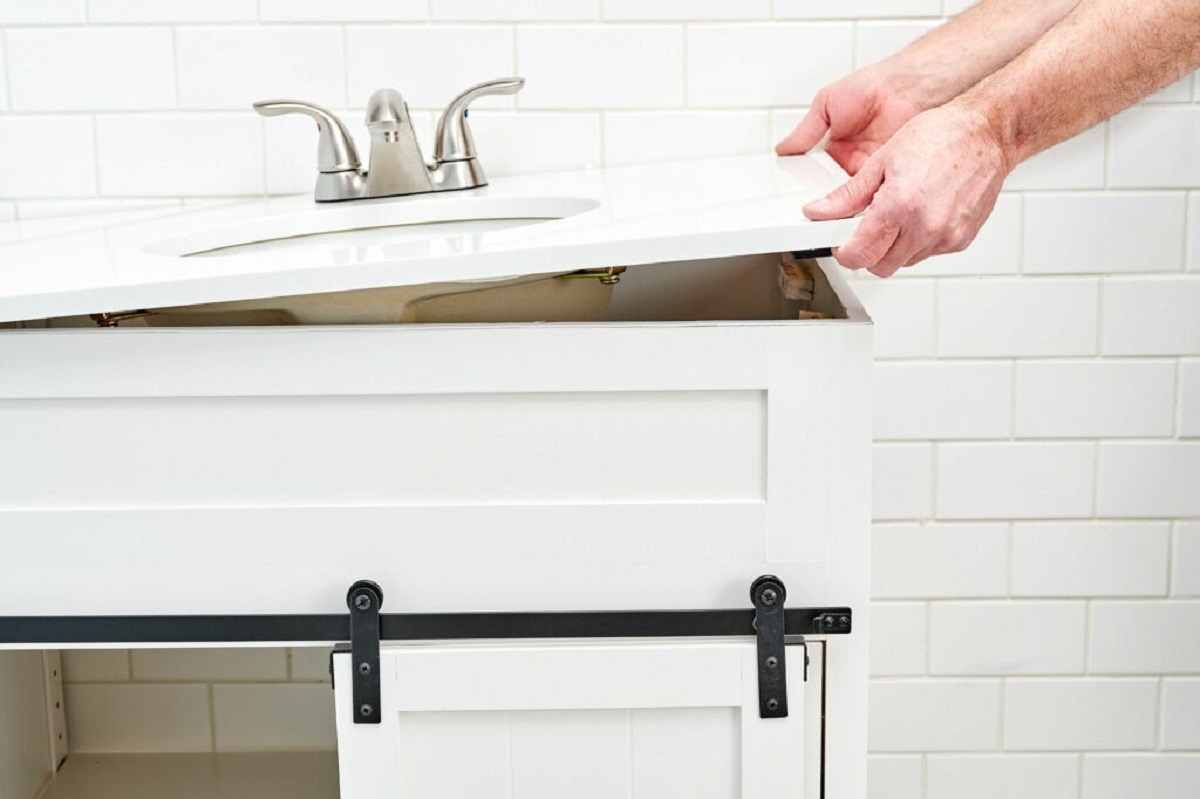
Welcome to our guide on how to caulk a bathroom vanity! If you’re noticing water seepage or unsightly gaps around your bathroom vanity, caulking is a simple and effective solution. Caulk not only helps to prevent water damage but also gives your vanity a finished and polished look.
Gathering the necessary materials and properly preparing the vanity surface are key steps in achieving a successful caulk job. Applying the caulk and ensuring smooth, clean lines are also important for a professional-looking result. In this article, we will walk you through each step of the process, providing you with the knowledge and confidence to tackle this DIY project.
Before we dive into the process, let’s quickly go over the materials you’ll need:
- Caulk gun
- Tube of caulk (choose a waterproof and mold-resistant silicone caulk for bathroom use)
- Caulk removal tool (if there is old caulk that needs to be removed)
- Rag or paper towels
- Masking tape
- Utility knife
- Mild soap and water
Once you have gathered these materials, you’re ready to get started. Before applying the caulk, it’s important to properly prepare the vanity surface to ensure a clean and secure bond. Let’s move on to the next step: preparing the vanity.
Key Takeaways:
- Properly preparing the vanity surface and using the right materials, such as waterproof silicone caulk and a caulking gun, are crucial for achieving a professional-looking and long-lasting caulk job on your bathroom vanity.
- Regular cleaning and maintenance, along with prompt repair of any cracks or gaps, are essential for preserving the integrity and appearance of the caulked areas on your bathroom vanity.
Read more: What Type Of Caulk For A Vanity Top
Gathering Materials
Before you begin caulking your bathroom vanity, it’s important to gather all the necessary materials. This will ensure that you have everything you need to complete the project efficiently and effectively.
The first item you’ll need is a caulking gun. This is a handheld tool used to dispense the caulk from the tube. Make sure the caulking gun is in good working condition and fits the size of the caulk tube you’ll be using. A well-functioning caulking gun will help you control the flow of the caulk and achieve smooth, even lines.
Next, you’ll need a tube of caulk. When choosing caulk for your bathroom vanity, opt for a waterproof and mold-resistant silicone caulk. Silicone caulk is durable, flexible, and designed to withstand the moisture and humidity levels typically found in bathrooms. Additionally, silicone caulk is resistant to mold and mildew, ensuring a long-lasting seal.
If you’re replacing old caulk or need to remove existing caulk, a caulk removal tool will come in handy. This tool helps you safely and effectively remove old caulk without damaging the vanity surface. Simply run the caulk removal tool along the caulk line to loosen it, then peel away the old caulk using your fingers or a putty knife.
Having a rag or paper towels on hand is essential for keeping your workspace clean and wiping away any excess caulk. Use them to wipe your hands, remove any smudges or spills, and ensure a neat and professional finish.
Masking tape is a valuable tool for achieving clean lines and preventing the caulk from spreading to areas where you don’t want it. Apply masking tape along the edges of the vanity, creating a barrier between the surface and the caulk. This will make the cleanup process easier and help you achieve precise lines.
A utility knife can be used to cut the tip of the caulk tube at a 45-degree angle. This angle allows for precise control when applying the caulk and ensures a smooth bead. The utility knife can also be useful for removing any excess caulk after it has been applied.
Lastly, mild soap and water are essential for cleaning the vanity surface before applying the caulk. Use a mild detergent or soap and warm water to remove any dirt, grease, or debris. This step is important for ensuring proper adhesion between the vanity and the caulk.
With these materials in hand, you’re ready to move on to the next step: preparing the vanity surface.
Preparing the Vanity
Before you start applying caulk to your bathroom vanity, it’s important to take the time to properly prepare the surface. This step will ensure that the caulk adheres well and provides a long-lasting seal.
First, make sure the vanity surface is clean and free of any dirt, dust, or residue. Use a mild soap and warm water to clean the surface thoroughly. This will remove any grease, grime, or oils that can prevent the caulk from bonding properly. Wipe down the surface with a clean cloth or paper towel to dry it completely.
If there is old caulk present on the vanity, it will need to be removed before applying the new caulk. Using a caulk removal tool, carefully scrape away the old caulk from the joint lines. Be gentle to avoid damaging the vanity surface. Once the old caulk has been removed, use a clean cloth or paper towel to wipe away any remaining residue.
Next, inspect the vanity for any cracks or gaps that need to be addressed before caulking. If you notice any areas where the vanity is not tightly sealed or where water can potentially seep through, now is the time to fix them. Depending on the nature of the issue, you may need to use wood filler or adhesive to fill in the gaps and create a smooth surface.
Once you have cleaned the surface and addressed any necessary repairs, it’s time to prepare the caulk tube. Use a utility knife to carefully cut off the tip of the caulk tube at a 45-degree angle. This angled tip will allow for better control when applying the caulk and ensure a cleaner, more precise line.
Now that the vanity surface is clean and prepped and the caulk tube is ready, it’s time to move on to applying the caulk itself. In the next section, we will walk you through the steps to evenly and smoothly apply caulk to your bathroom vanity.
Applying Caulk
Now that you have prepared the vanity surface, it’s time to apply the caulk. Proper application is crucial for achieving a tight seal and a professional-looking finish. Follow these steps to ensure a successful caulking job:
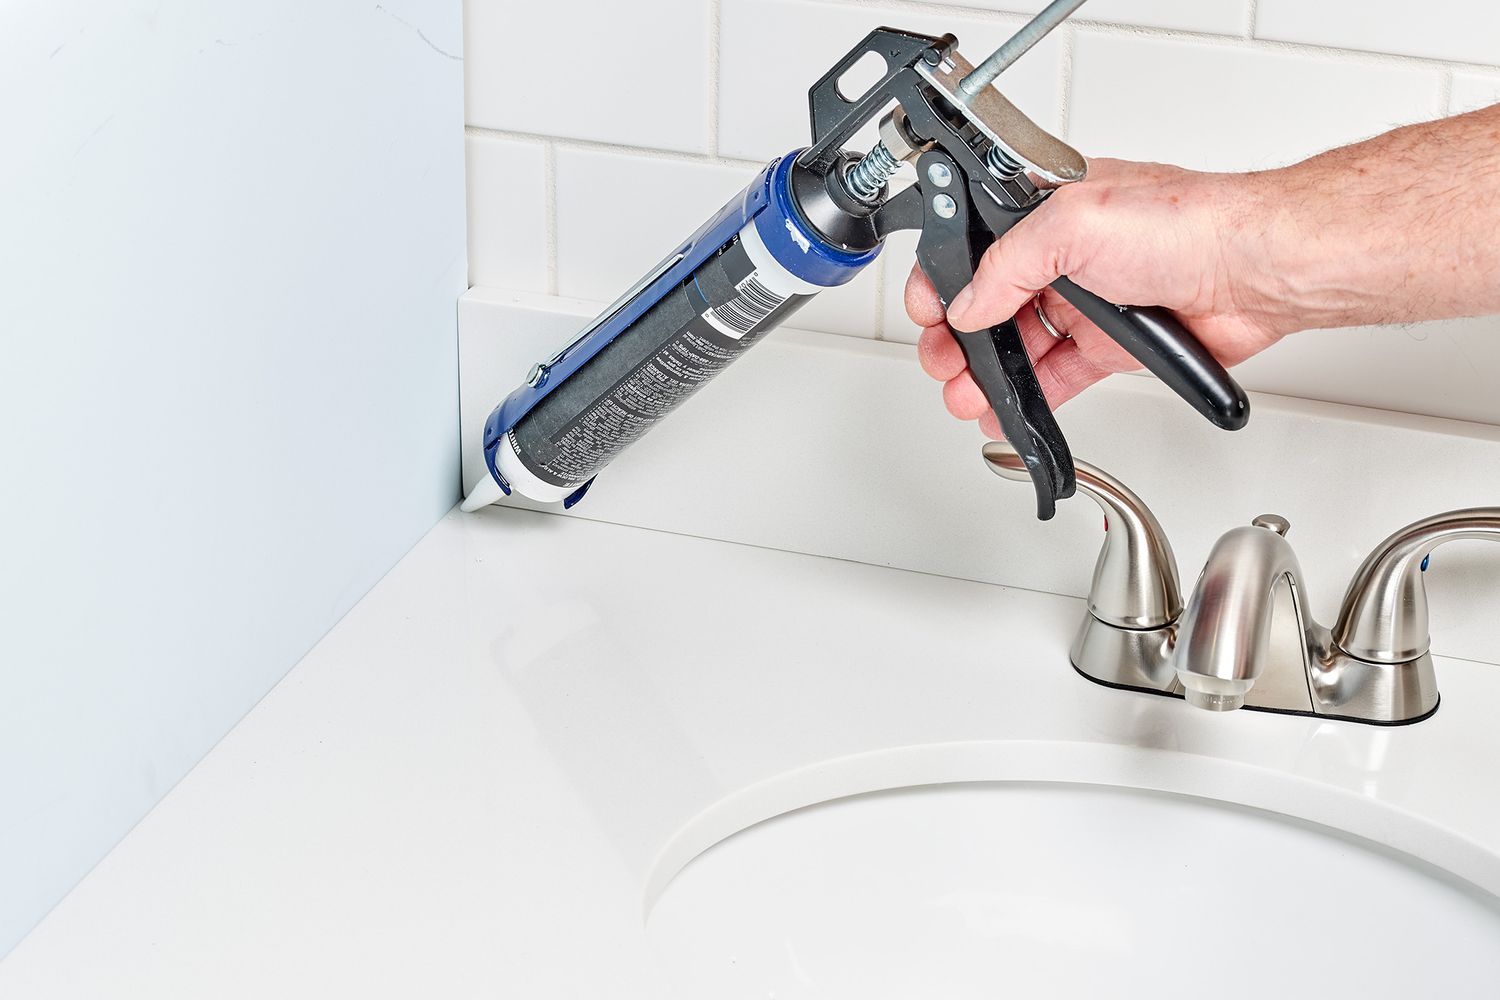
- Load the caulk tube into the caulk gun. Insert the caulk tube into the gun, ensuring that the nozzle aligns with the opening at the front of the gun. Then, push the lever or trigger on the caulk gun to engage the plunger and create pressure in the tube.
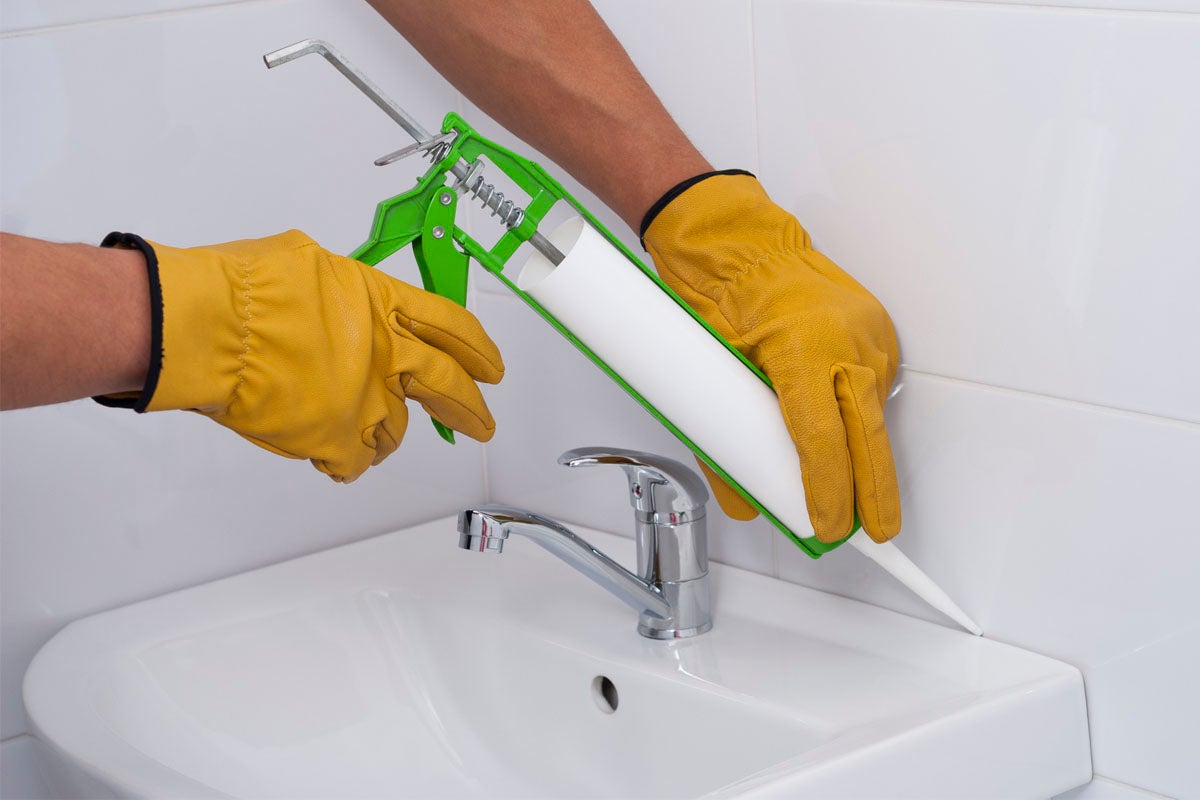
- Hold the caulk gun at a 45-degree angle. Position the caulk gun nozzle at the starting point of the caulk line on the vanity. Holding the caulk gun at a 45-degree angle allows for better control and smoother application.
- Squeeze the trigger and apply a steady, even bead of caulk along the joint line. Begin by slowly squeezing the trigger to release the caulk. Use steady pressure to ensure a consistent flow of caulk. Move the caulk gun along the joint line, releasing the caulk as you go. Aim for a continuous bead of caulk that fills the entire joint evenly.
- Continue applying caulk until you reach the end of the joint line. Be mindful of any corners or curves and adjust the speed and pressure accordingly to maintain a consistent bead.
- If you need to stop mid-way through the caulk line, release the trigger and gently pull the caulk gun away from the surface. This will prevent any excess caulk from oozing out.
Once the caulk has been applied along the joint line, take a moment to inspect for any missed gaps or uneven areas. Use the caulk gun or a caulk smoothing tool to fill in and smooth out any imperfections. This will ensure a tight seal and a professional-looking finish.
Remember, it’s better to start with a smaller bead of caulk and add more if needed. It’s easier to apply additional caulk than it is to remove excess caulk.
With the caulk applied, you’re one step closer to completing your bathroom vanity caulking project. In the next section, we’ll guide you through the process of smoothing and finishing the caulk to achieve clean, seamless lines.
When caulking a bathroom vanity, be sure to clean and dry the area thoroughly before applying the caulk. Use a high-quality silicone caulk for better durability and water resistance. Smooth the caulk with a wet finger for a clean finish.
Smoothing and Finishing the Caulk
Once you have applied the caulk to your bathroom vanity, it’s time to smooth and finish the caulk to achieve clean and seamless lines. Properly smoothing the caulk will not only enhance the appearance of your vanity but also help create a tight seal. Follow these steps to ensure a professional-looking finish:
- Dip your finger or a caulk smoothing tool into a bowl of warm water. Wetting your finger or the smoothing tool will prevent the caulk from sticking to it, allowing for easier and smoother application.
- Starting at one end of the caulk line, gently press your finger or the smoothing tool against the caulk. Use smooth, consistent strokes to glide along the caulk line, smoothing and shaping the caulk as you go. Continue moving along the entire length of the caulk line, applying even pressure.
- If you’re using your finger, periodically wipe away any excess caulk on a rag or paper towel. This will prevent the excess caulk from mixing back into the caulk line and creating a mess.
- If you’re using a caulk smoothing tool, clean off any excess caulk on the tool as you go. This will help you maintain a clean and neat finish.
- After the caulk has been smoothed, remove the masking tape carefully. Peel it away at a 45-degree angle to avoid pulling up the caulk or creating jagged edges.
Once you have completed the smoothing and removal of the masking tape, take a step back and inspect your work. Look for any areas that may need touch-ups or additional smoothing. You can use your finger or a damp cloth to lightly brush over the caulk to achieve a seamless finish.
Allow the caulk to dry fully according to the manufacturer’s instructions. This usually takes anywhere from 24 to 48 hours, depending on the type of caulk used and the temperature and humidity of your bathroom.
With the caulk smoothed and dried, your bathroom vanity should now have a clean, professional appearance. In the next section, we’ll cover some cleaning and maintenance tips to keep your caulk looking great for years to come.
Read more: How To Caulk Bathroom Vanity Backsplash
Cleaning and Maintenance
Proper cleaning and maintenance of your caulked bathroom vanity are essential to ensure its longevity and keep it looking its best. Follow these tips to keep your caulked vanity clean and well-maintained:
- Regularly wipe down the caulked areas with a mild soap and water solution. This will help remove any dirt, grime, or soap residue that may have accumulated. Use a soft cloth or sponge to gently scrub the caulked lines.
- Avoid using harsh abrasive cleaners or scouring pads on the caulked areas, as these can damage or degrade the caulk over time. Stick to gentle cleaning solutions and non-abrasive materials.
- If the caulked areas become stained or discolored, apply a mild bleach solution to the affected areas. Mix one part bleach with three parts water, carefully apply the solution to the stain, and let it sit for a few minutes. Then, rinse thoroughly with clean water and wipe dry.
- To prevent mold or mildew growth, ensure that your bathroom is well-ventilated. Use fans or open windows to allow for proper air circulation, especially during and after showering.
- If you notice any cracks or gaps forming in the caulked lines, it’s important to address them promptly. Remove any loose or damaged caulk and reapply fresh caulk to maintain a tight seal.
- Inspect the caulked areas periodically to ensure that the caulk is intact and firmly adhered. If you notice any signs of deterioration or failure, such as crumbling or peeling caulk, remove and replace it as soon as possible.
By following these cleaning and maintenance tips, you can keep your caulked bathroom vanity in excellent condition and prolong the lifespan of the caulk.
Now that you have learned the steps to caulk a bathroom vanity, you’re equipped with the knowledge and skills to tackle this DIY project. With proper techniques and regular maintenance, your caulked vanity will not only look great but also serve its purpose of preventing water damage and maintaining a clean and polished appearance.
Remember, if you’re unsure or uncomfortable taking on this project yourself, it’s always a good idea to seek the assistance of a professional. They have the expertise and tools to ensure a flawless caulk job.
Happy caulking!
Conclusion
Caulking your bathroom vanity is a simple yet important maintenance task that can help prevent water damage and give your vanity a polished appearance. With the steps outlined in this guide, you can confidently tackle this DIY project and achieve professional-looking results.
Starting with gathering the necessary materials and properly preparing the vanity surface, to applying the caulk and smoothing it for a seamless finish, each step plays a crucial role in achieving a tight seal and an aesthetically pleasing outcome. With regular cleaning and maintenance, you can ensure the longevity of your caulked vanity.
Remember to choose a waterproof and mold-resistant silicone caulk, and always use a caulking gun to control the flow of caulk. Take your time while applying the caulk, ensuring an even and consistent bead along the joint line. Use a wet finger or a caulk smoothing tool to create smooth lines and remove any excess caulk.
Cleaning the caulked areas regularly and promptly addressing any cracks or gaps will help maintain the integrity of the caulk. Avoid harsh cleaners and abrasive materials that can damage the caulk. Instead, use mild soap and water solutions for cleaning, and mild bleach solutions for stubborn stains.
By following these guidelines and incorporating regular maintenance into your routine, your caulked bathroom vanity will remain in excellent condition and provide an attractive and functional element in your bathroom.
Remember, if you’re unsure or uncomfortable tackling this project yourself, don’t hesitate to seek the assistance of a professional. They have the expertise and tools to ensure a flawless caulk job.
We hope this guide has been helpful, and we wish you success in caulking your bathroom vanity!
Frequently Asked Questions about How To Caulk Bathroom Vanity
Was this page helpful?
At Storables.com, we guarantee accurate and reliable information. Our content, validated by Expert Board Contributors, is crafted following stringent Editorial Policies. We're committed to providing you with well-researched, expert-backed insights for all your informational needs.


0 thoughts on “How To Caulk Bathroom Vanity”