

Articles
How To Build A Cement Porch
Modified: August 27, 2024
Learn how to build a cement porch with our informative articles. Discover step-by-step guides, tips, and tricks for a successful project.
(Many of the links in this article redirect to a specific reviewed product. Your purchase of these products through affiliate links helps to generate commission for Storables.com, at no extra cost. Learn more)
Introduction
Building a cement porch is a great way to enhance the curb appeal and functionality of your home. Whether you want to create a welcoming entrance, extend your outdoor living space, or add value to your property, a well-constructed cement porch is a durable and attractive option.
In this article, we will guide you through the step-by-step process of building a cement porch. From gathering the necessary materials to curing and sealing the finished porch, we will cover all the essential aspects to ensure a successful and long-lasting project.
Before you begin, it’s important to note that building a cement porch requires some basic construction skills and knowledge of working with concrete. It’s always a good idea to consult with a professional or experienced contractor if you’re unsure about any step in the process.
Now, let’s dive into the exciting world of cement porch construction and get started on creating a beautiful addition to your home!
Key Takeaways:
- Building a cement porch requires careful preparation, precise construction, and proper finishing. From gathering materials to curing and sealing, attention to detail is crucial for a durable and attractive result.
- Prioritize safety, consult local building codes, and consider professional assistance if needed. With the right knowledge and guidance, you can transform your outdoor space into a beautiful and functional area to enjoy for years to come.
Read more: How To Build Cement Stairs
Step 1: Gathering Materials
Before you can start building your cement porch, you’ll need to gather all the necessary materials. Here’s a list of items you’ll typically need:
- Cement: Purchase the appropriate amount of cement for your project. Consider factors such as the size of your porch and any decorative features you plan to incorporate.
- Gravel or crushed stone: This will serve as the base for your porch and provide stability to the cement. Calculate the amount needed based on the dimensions of your porch.
- Wood boards: These will be used to create the formwork, which is essentially a temporary mold that holds the cement in place while it sets. Make sure to have enough boards to outline the shape and dimensions of your porch.
- Rebar or wire mesh: Reinforcing your cement with either rebar or wire mesh will add strength and prevent cracking. Determine the quantity needed based on the size of your porch and the spacing recommended in your local building codes.
- Concrete mixers or wheelbarrows: Depending on the size of your project, you’ll need a way to mix and transport the cement. Concrete mixers are ideal for large projects, while wheelbarrows can suffice for smaller ones.
- Trowels and floats: These tools are essential for spreading and finishing the cement. Invest in both a trowel for applying the cement and a float for smoothing out the surface.
- Level and measuring tools: Ensuring that your porch is level and accurately measured is crucial for a professional-looking result. Have a level, measuring tape, and other necessary tools on hand.
- Protective equipment: Safety should always be a priority. Wear gloves, safety glasses, and a dust mask when handling cement and other construction materials.
It’s crucial to gather all the necessary materials before you begin your project. This will save you time and minimize the risk of interruptions during construction. Additionally, double-check your local building codes to ensure you comply with any specific regulations regarding cement porch construction.
Once you have all the materials ready, you can move on to the next step: preparing the ground.
Step 2: Preparing the GroundProperly preparing the ground is essential for the stability and longevity of your cement porch. Follow these steps to ensure a solid foundation:
- Clear the area: Remove any vegetation, rocks, or debris from the site where you plan to build your porch. This will create a clean and level surface for your project.
- Mark the boundaries: Use stakes and string or spray paint to outline the exact dimensions and shape of your porch. This will serve as a guide when excavating and building the formwork.
- Excavate the area: Dig a trench about 8-10 inches deep within the marked boundaries. Ensure the base is level by using a level or a long straight board across the trench.
- Add a gravel base: Fill the trench with a layer of gravel or crushed stone and compact it using a tamper or a mechanical compactor. This base will provide drainage and stability for the cement.
- Install edging: If desired, you can install edging materials, such as plastic or metal, along the perimeter of the porch. This will help contain the cement and prevent it from spreading beyond the desired area.
- Check for proper slope: It’s important to ensure that your porch has a slight slope away from your house to prevent water pooling. To achieve this, use a level and adjust the gravel base as needed.
Keep in mind that the exact steps for preparing the ground may vary depending on your specific project and local regulations. It’s always a good idea to check with your local building department to ensure compliance with any specific requirements.
With the ground properly prepared, you’re now ready to move on to the next step: building the formwork for your cement porch.
Step 3: Building the Formwork
Building the formwork is an important step in creating the shape and structure of your cement porch. Follow these guidelines to properly construct the formwork:
- Measure and cut the boards: Start by measuring the dimensions of your porch and cutting the wood boards accordingly. Use a saw to create the necessary lengths and angles.
- Secure the boards: Place the cut boards along the outline of your porch, ensuring they are level and properly aligned. Secure them in place using stakes or screws.
- Add support braces: Depending on the size and shape of your porch, you may need to add support braces to the formwork. These additional pieces of wood will provide stability and prevent the boards from bowing under the weight of the cement.
- Check for levelness and squareness: Use a level to ensure that the formwork is level and a square to confirm that it is properly squared. Adjust as needed.
- Seal gaps and joints: Prevent cement leakage by sealing any gaps or joints in the formwork. Use caulk or duct tape to create a watertight seal.
Building the formwork is a critical step that will determine the final shape and dimensions of your porch. Take your time to ensure it is sturdy, properly aligned, and meets your desired specifications.
Once the formwork is in place, you are ready to move on to the next step: mixing the cement.
Step 4: Mixing the Cement
Mixing the cement is a crucial step in the construction of your porch. Follow these steps to properly mix the cement:
- Gather your tools and materials: Make sure you have all the necessary equipment, including a cement mixer, wheelbarrow, shovel, and water source.
- Calculate the correct proportions: Follow the instructions on the cement bag to determine the correct ratio of cement, sand, and water. Alternatively, consult a concrete calculator to ensure accurate measurements.
- Start with the dry ingredients: In a wheelbarrow or cement mixer, combine the dry ingredients – usually cement and sand. Use a shovel to mix them until they are evenly distributed.
- Add water gradually: Slowly add water to the dry mixture while continuously stirring. Aim for a workable consistency that is not too dry or too watery. The cement should hold its shape but still be easy to spread.
- Continue mixing: Mix the cement thoroughly, ensuring there are no clumps or dry pockets. Use a shovel, hoe, or mixer to achieve a uniform consistency.
It’s important to follow the instructions on the cement bag and pay attention to the recommended mixing time and water-to-cement ratio. Deviating from these guidelines can result in weakened concrete or other complications.
Once the cement is properly mixed, it’s time to move on to the next step: pouring and leveling the cement onto the prepared ground.
When building a cement porch, make sure to properly prepare the ground by compacting the soil and adding a layer of gravel for drainage before pouring the concrete. This will help ensure a stable and long-lasting porch.
Read more: How To Build A Deck Porch
Step 5: Pouring and Leveling the Cement
Pouring and leveling the cement is a critical step that requires precision and attention to detail. Follow these steps to ensure a smooth and even surface for your porch:
- Prepare the area: Before pouring the cement, moisten the ground with water. This will prevent the ground from absorbing moisture from the cement too quickly.
- Start pouring: Begin pouring the mixed cement into the formwork, starting from one corner and working your way to the opposite corner. Use a shovel or a wheelbarrow to transfer the cement.
- Spread the cement: Use a trowel or a shovel to evenly distribute the cement within the formwork. Make sure to fill the corners and edges, ensuring that the entire surface is covered.
- Level the cement: Use a screed board, which is a long, straight board, to level the cement. Start from one end of the porch and move the board back and forth in a sawing motion, using the formwork as guides. This will remove any excess cement and create a flat surface.
- Smooth and finish: Use a float or a trowel to smooth out the surface of the cement. Work in a circular or back-and-forth motion to eliminate any bumps or imperfections. For a decorative touch, you can create textures or patterns with the float.
While pouring and leveling the cement, it’s important to work efficiently to ensure the entire porch is poured at once. This will help achieve a seamless finish with consistent color and texture.
After pouring and leveling the cement, allow it to set and cure according to the manufacturer’s instructions. This typically involves covering the porch with plastic sheeting or wet burlap and letting it cure for a few days. This step ensures the cement reaches its full strength and durability.
With the cement poured and leveled, you’re one step closer to completing your beautiful cement porch.
Step 6: Finishing the Surface
To achieve a polished and professional appearance, it’s important to properly finish the surface of your cement porch. Follow these steps to give your porch a refined look:
- Remove the formwork: Once the cement has cured and hardened, carefully remove the formwork. Take your time to avoid damaging the newly poured porch.
- Clean the surface: Use a broom or a brush to sweep away any loose debris or dirt from the surface of the porch. Make sure the surface is clean and free of any objects that may interfere with the finishing process.
- Repair any imperfections: Inspect the surface for any cracks or blemishes. Use a cement patching compound to fill in any small imperfections. For larger cracks or damage, consult with a professional for repair options.
- Apply a sealer: To protect your porch from moisture, stains, and damage, apply a concrete sealer. Choose a sealer that is suitable for outdoor use and follow the manufacturer’s instructions for application. This will enhance the appearance and longevity of your porch.
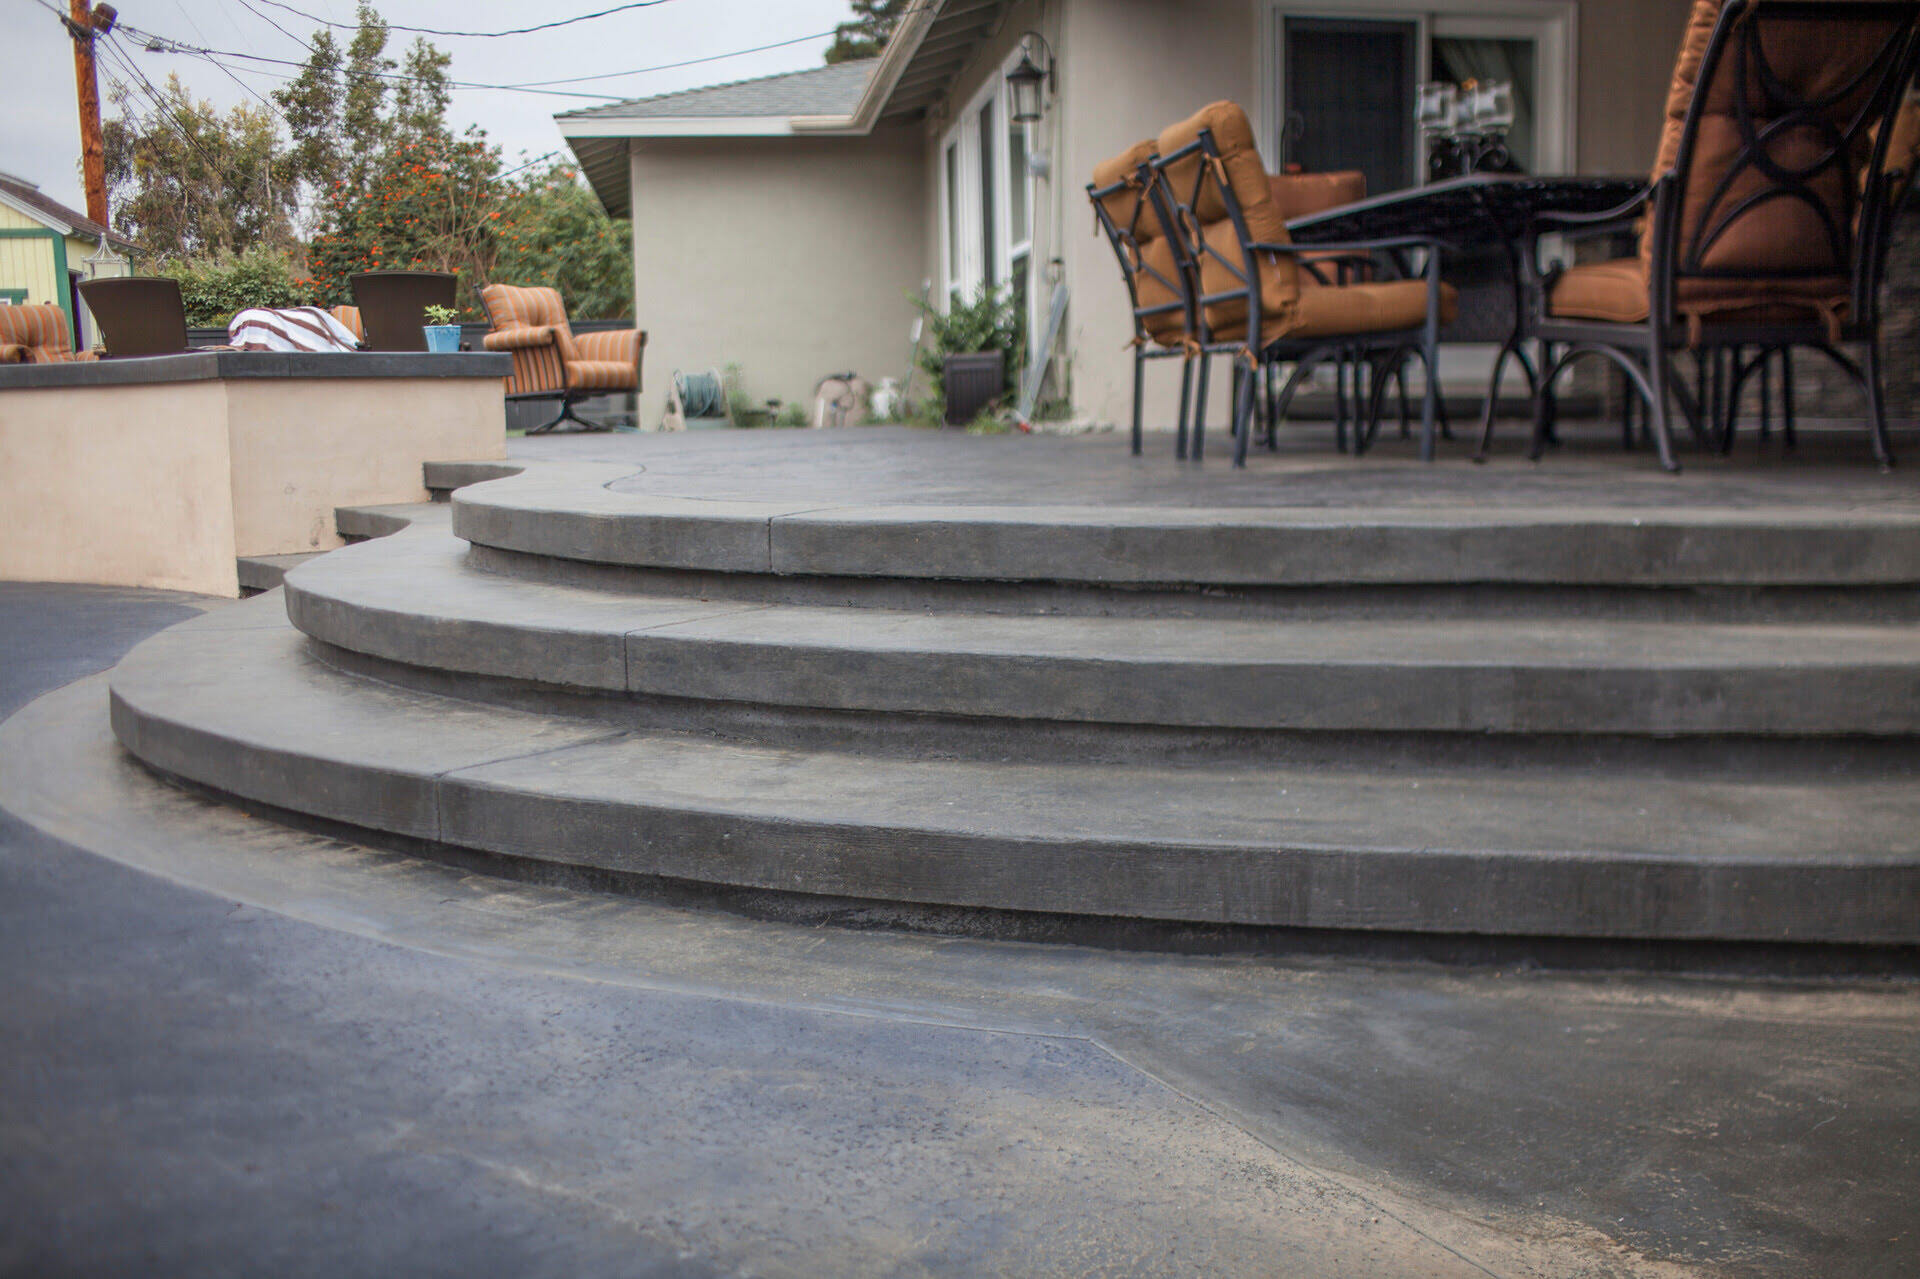
- Add finishing touches: Depending on your desired aesthetic, consider adding decorative elements to your porch. This could involve adding color with a concrete stain, imprinting patterns with stamping tools, or incorporating other design elements that complement your home’s architecture.
By properly finishing the surface, you can ensure that your cement porch not only looks great but also withstands the test of time. Regular maintenance, such as cleaning and reapplying the sealer as needed, will help preserve the beauty and integrity of your porch for years to come.
With the surface of your cement porch complete, it’s time to move on to the final step: curing and sealing the porch to ensure its long-term durability.
Step 7: Curing and Sealing the Porch
Curing and sealing your cement porch is a crucial step that enhances its strength, durability, and appearance. Follow these steps to properly cure and seal your porch:
- Cover the porch: After finishing the surface, cover the entire porch with plastic sheeting or wet burlap. This prevents moisture from evaporating too quickly and helps the cement cure properly.
- Maintain moisture: Keep the covered porch moist by periodically spraying it with water. This helps in the curing process and encourages the cement to reach its maximum strength.
- Allow for sufficient curing time: The curing time for cement can vary depending on factors such as weather conditions and the type of cement used. Follow the manufacturer’s recommendations for the appropriate curing time.
- Remove the cover: Once the curing period is complete, remove the plastic sheeting or wet burlap. Allow the porch to air dry for a day or two before proceeding with the sealing process.
- Choose a suitable sealer: Select a high-quality concrete sealer that is specifically formulated for outdoor use. There are various types of sealers available, including acrylic, epoxy, and penetrating sealers. Choose the one that best fits your needs and the specific requirements of your porch.
- Apply the sealer: Follow the manufacturer’s instructions for applying the sealer. Use a brush or a roller to evenly coat the surface of the porch. Ensure that the sealer reaches all areas, including edges and corners.
- Allow the sealer to dry: Give the sealer ample time to dry and cure. This typically takes a few days, but it’s important to reference the instructions provided by the manufacturer.
Curing and sealing the porch is essential for protecting it from moisture, stains, and wear. The sealer creates a protective barrier and enhances the color and finish of the cement. Regularly reapply the sealer as recommended by the manufacturer to maintain its effectiveness over time.
Once the curing and sealing process is complete, your cement porch is ready to be enjoyed. Take pride in your hard work and enjoy the enhanced beauty and functionality of your new outdoor space!
Conclusion
Building a cement porch is a rewarding project that can add value and beauty to your home. By following the steps outlined in this guide, you can create a durable and inviting entrance or outdoor living space that will stand the test of time.
Remember to gather all the necessary materials, properly prepare the ground, build a sturdy formwork, mix the cement accurately, and pour and level it with precision. Take your time to finish the surface meticulously and allow for proper curing and sealing to ensure the porch’s long-term durability.
Throughout the process, prioritize safety by wearing protective gear and following local building codes. If you have any concerns or uncertainties, consider consulting a professional contractor or seeking expert advice.
Once your cement porch is complete, maintain it by regularly cleaning and reapplying the sealer as needed. This will help preserve its appearance and protect it from the elements.
Now that you have the knowledge and guidance, it’s time to embark on your cement porch building project. Enjoy the satisfaction and pride that comes with transforming your outdoor space into a beautiful and functional area that you can enjoy for years to come!
Frequently Asked Questions about How To Build A Cement Porch
Was this page helpful?
At Storables.com, we guarantee accurate and reliable information. Our content, validated by Expert Board Contributors, is crafted following stringent Editorial Policies. We're committed to providing you with well-researched, expert-backed insights for all your informational needs.







0 thoughts on “How To Build A Cement Porch”