Articles
How To Build A Screened-In Porch On A Deck
Modified: October 18, 2024
Looking for articles on how to build a screened-in porch on a deck? Discover step-by-step guides and expert tips to create your dream outdoor living space.
(Many of the links in this article redirect to a specific reviewed product. Your purchase of these products through affiliate links helps to generate commission for Storables.com, at no extra cost. Learn more)
Introduction
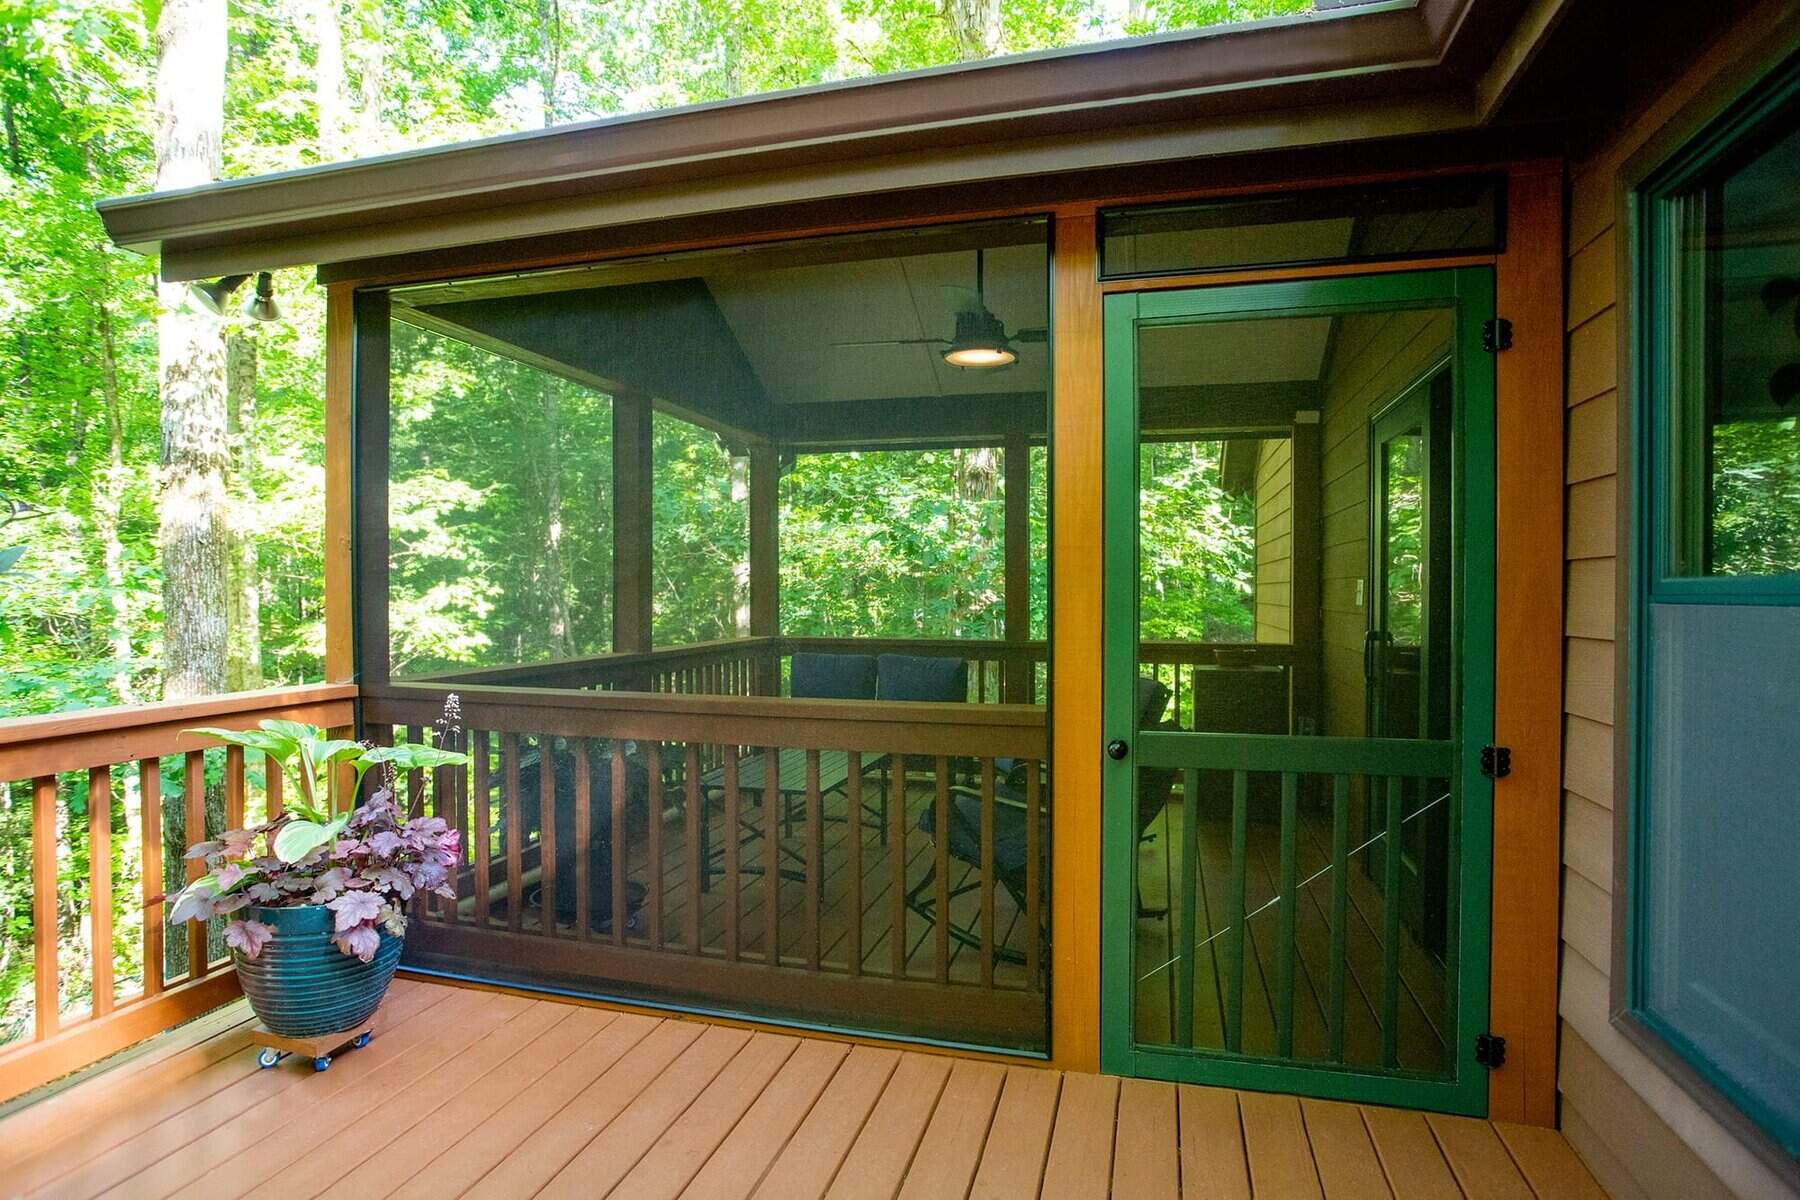
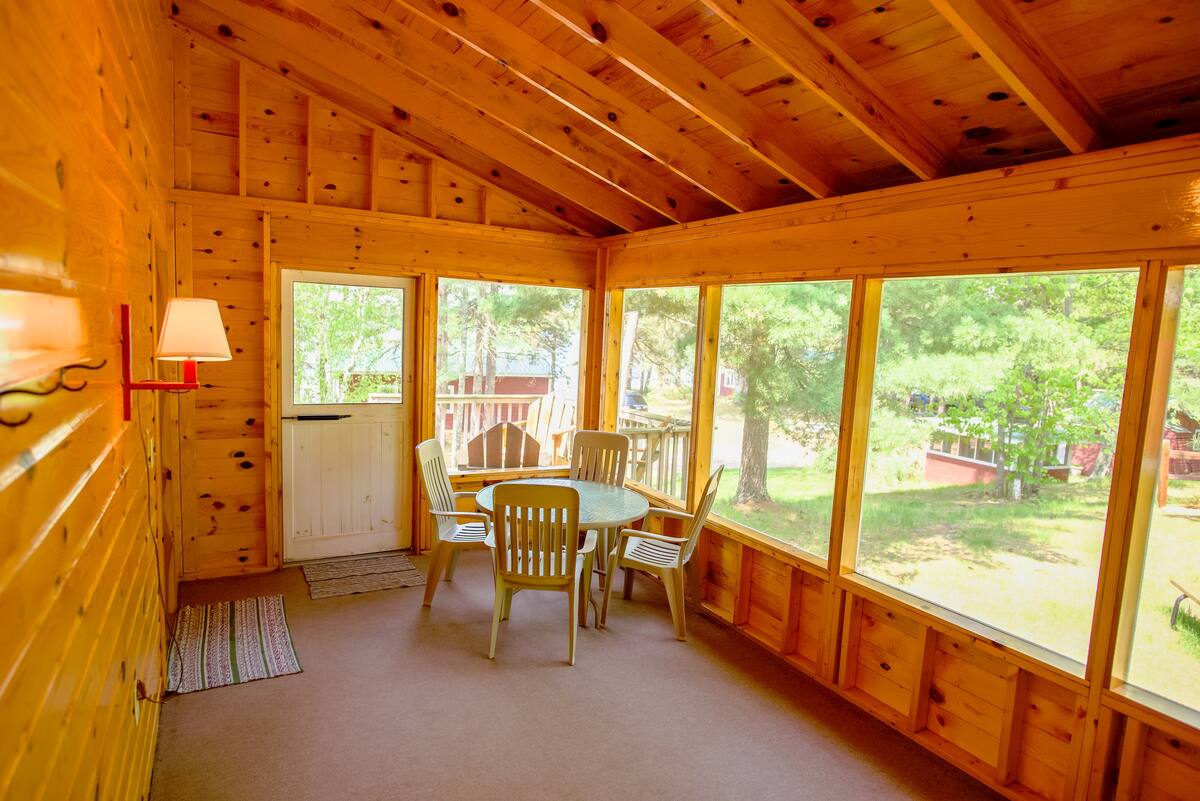
Adding a screened-in porch to your deck is a great way to create a comfortable and enjoyable outdoor space that protects you from pesky insects and inclement weather. Whether you want to relax and enjoy the fresh air or entertain friends and family, a screened-in porch provides the perfect solution.
In this article, we will guide you through the step-by-step process of building a screened-in porch on your deck. From planning and designing to installing the screen panels and adding finishing touches, we will cover all the essential aspects of this project. So, grab your tools and let’s get started!
A screened-in porch not only extends your outdoor living area but also adds value to your home. It allows you to enjoy the beauty of nature while providing a shield against rain, wind, and bugs. Whether you have an existing deck or are building one from scratch, converting it into a screened-in porch is a relatively straightforward DIY project.
Before diving into the construction process, it’s important to consider your specific needs and requirements. Think about how you plan to use the porch and what features you would like to include. Will it be a cozy retreat for reading and relaxation or a space for entertaining guests? Consider factors such as the porch’s size, location, and desired amenities to ensure you create a functional and inviting space.
Planning the design of your screened-in porch is key to achieve the desired outcome. Take measurements of your existing deck and determine how much space you want to allocate for the porch. Consider factors such as the orientation of the sunlight and the direction of prevailing winds to optimize the porch for comfort.
Once you have a clear vision of your screened-in porch, it’s time to move on to the next step: gathering the necessary materials and tools. In the following sections, we’ll guide you through each stage of the construction process to help you realize your dream of having a beautiful and functional screened-in porch.
Key Takeaways:
- Building a screened-in porch on your deck involves careful planning, precise construction, and attention to detail. From framing the porch to installing screen panels, each step contributes to creating a bug-free and comfortable outdoor space.
- The completion of a screened-in porch project marks the transformation of a simple deck into a functional and inviting sanctuary. With the right materials, tools, and maintenance, your porch becomes a valuable extension of your home, offering comfort and enjoyment for years to come.
Read more: How To Build Screens For A Porch
Step 1: Planning and Designing Your Screened-In Porch
The first step in building a screened-in porch on your deck is careful planning and designing. This stage sets the foundation for a successful project and ensures that your porch meets your functional and aesthetic requirements.
Begin by considering the size and layout of your deck. Measure the available space and determine how much of it you want to allocate for the screened-in porch. Think about how you plan to use the porch and what activities you will be doing there. This will help you determine the ideal size and shape for your porch.
Next, think about the location of your porch. Consider factors such as the amount of sunlight you want, the prevailing winds, and any existing structures or trees that may impact the placement of your porch. Ideally, you want to maximize natural light and ventilation while minimizing exposure to harsh weather conditions.
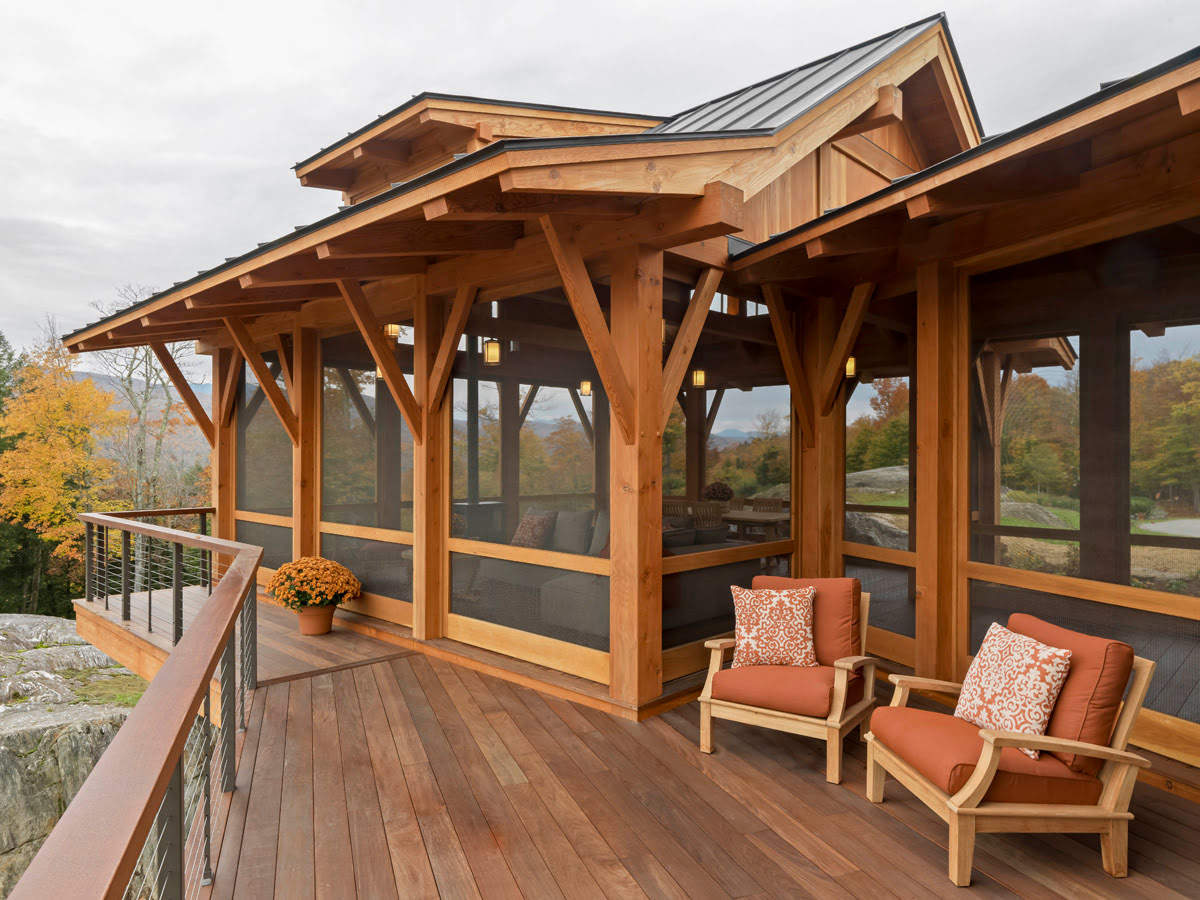
Once you have determined the size and location of your porch, it’s time to think about the design elements. Consider the style and materials that will complement your home’s architecture and your personal taste. You can choose from a range of porch styles, including traditional, rustic, contemporary, or even a combination of styles.
When selecting materials, focus on durability and maintenance requirements. Decking materials such as composite, pressure-treated wood, or cedar are popular choices for the floor. For the walls and roof, opt for materials that can withstand outdoor conditions and provide adequate insulation.
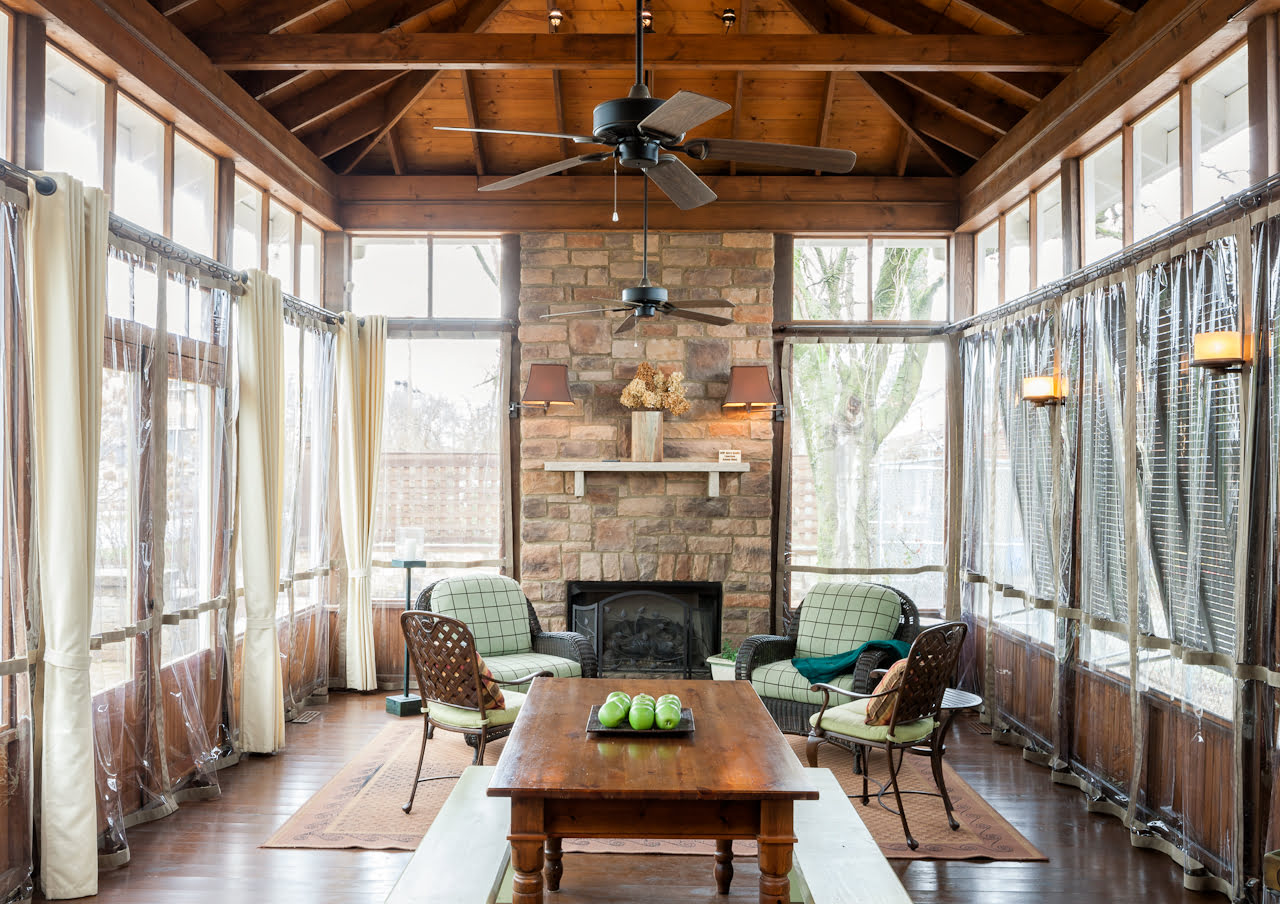
Think about the details that will enhance your porch’s functionality and aesthetic appeal. Will you include a ceiling fan for added comfort? Do you want built-in seating or storage? Consider special features such as lighting, electrical outlets, and even a fireplace or outdoor kitchen if you plan to entertain guests.
As you plan and design your porch, it’s also important to consider any local building codes and permits that may be required. Check with your local authorities to ensure compliance with regulations and to obtain any necessary permits before starting construction.
Lastly, create a detailed plan or blueprint of your screened-in porch design. This will serve as a guide throughout the construction process and help you communicate your vision to contractors or builders if you decide to hire professional help.
Once you have completed the planning and design phase, you are ready to move on to the next step: gathering the materials and tools necessary for building your screened-in porch.
Step 2: Gather Materials and Tools
Before you begin constructing your screened-in porch, it’s important to gather all the necessary materials and tools. Having everything you need at hand will ensure a smooth and efficient building process.
Here is a list of materials you will typically need for building a screened-in porch:
- Pressure-treated lumber for framing
- Decking materials for the floor (such as composite or wood)
- Screws, nails, and other fasteners
- Screen frames
- Screen panels
- Screen spline and roller tool
- Roofing materials (such as shingles or metal sheets)
- Exterior-grade plywood or beadboard for the ceiling
- Trim and molding
- Door hardware (if adding access doors)
- Paint, stain, or sealant for finishing touches
In addition to the materials, you will also need a variety of tools to complete the construction process. Here are some essential tools you should have on hand:
- Tape measure
- Level
- Circular saw
- Power drill
- Hammer
- Screwdriver
- Chalk line
- Utility knife
- Screen installation tools (spline roller, screen installation tool)
- Ladder or scaffolding (depending on the height of your porch)
- Paintbrushes or rollers
- Safety equipment (goggles, gloves, ear protection, dust mask)
It’s important to gather high-quality materials that are suitable for outdoor use. Opt for durable and weather-resistant materials that will withstand the elements and provide long-lasting performance.
Before purchasing or ordering your materials, double-check your measurements and make a comprehensive list to ensure you have everything you need. Consider any additional items you may require, such as hardware for access doors or special features you plan to include in your porch.
Once you have gathered all the necessary materials and tools, you are now ready to move on to the next step: preparing your deck for the construction of the screened-in porch.
Step 3: Preparing the Deck
Before you can begin constructing the screened-in porch, it’s important to properly prepare your deck. This involves cleaning the deck surface, inspecting for any structural issues, and making necessary repairs.
Start by removing all furniture, plants, and other items from the deck. Sweep away any debris, leaves, or dirt that may have accumulated. Next, thoroughly clean the deck surface using a pressure washer or a deck cleaner and scrub brush. This will help remove any stains, mildew, or dirt that may hinder the adhesion of paint or other coatings.
Once the deck is clean, inspect it carefully for any signs of damage or decay. Check for loose or rotted boards, damaged railings, or unstable support posts. If any issues are found, repair or replace the damaged components to ensure the structural integrity of the deck.
If your deck has existing railing, determine whether you want to keep it or replace it with a screened-in porch design. If replacing the railing, remove it carefully and store it for future use or discard it if it is no longer needed.
After repairing and inspecting the deck, you may choose to apply a protective coating or stain to enhance its appearance and prolong its lifespan. Select a high-quality deck sealant or stain that is suitable for your deck’s material and follow the manufacturer’s instructions for application.
It’s important to allow the sealer or stain to fully dry before moving on to the next steps of building the screened-in porch. This may take anywhere from a few hours to a few days depending on the product and weather conditions.
If your deck has an existing roof or overhang, inspect it for any leaks or damage. Repair any issues before proceeding with the construction of the porch to ensure proper protection from the elements.
Once your deck is clean, repaired, and adequately prepared, you are ready to start framing your screened-in porch. This is the next step in the construction process and involves creating the structure that will support the porch.
Stay tuned for Step 4: Framing the Screened-In Porch, where we will guide you through the process of framing the porch and creating a sturdy and stable structure.
Step 4: Framing the Screened-In Porch
With the deck prepared, it’s time to move on to the next step: framing the screened-in porch. Framing forms the structure of your porch and provides a sturdy and stable foundation for the rest of the construction process.
Before starting the framing process, make sure you have the necessary materials and tools on hand. This includes pressure-treated lumber, galvanized screws or nails, a tape measure, a level, a circular saw, and a power drill.
First, decide on the height of your porch walls. Measure and mark this height on the existing deck posts or the outer edge of the deck surface, depending on your design preference. This will serve as a reference point for building the porch walls.
Next, begin constructing the framework for the porch walls. Start by installing vertical support posts at each corner of the porch. Use the circular saw to cut the pressure-treated lumber to the desired lengths and secure them to the deck or existing deck posts using galvanized screws or nails.
Once the corner posts are in place, attach horizontal beams between them using galvanized screws or nails. These beams will provide structural support for the porch walls. Make sure to check the levelness and alignment of the beams as you secure them.
Continue adding vertical support posts and horizontal beams along the remaining walls of the porch, spacing them according to your design plans. Ensure that each post and beam is securely fastened to the deck or existing posts.
After the wall framework is complete, it’s time to install a rim joist or top plate along the top of the walls. This will provide additional stability and support for the roof structure. Cut the pressure-treated lumber to size and attach it securely to the top of the vertical posts using galvanized screws or nails.
For added stability and to prevent any sagging, consider adding diagonal bracing between the corner support posts. This will help distribute the load evenly and strengthen the overall structure of the porch.
Once the framing is complete, double-check all the dimensions, alignment, and levelness of your porch walls. Make any necessary adjustments before proceeding to the next steps of the construction process.
With the porch walls framed, you are now ready to move on to Step 5: Installing the Screen Frames. Stay tuned for the next installment where we’ll guide you through the process of adding the screens to your porch and creating a bug-free space to enjoy.
Read more: How To Turn Deck Into Screened-In Porch
Step 5: Installing the Screen Frames
Now that you have successfully framed your screened-in porch, it’s time to move on to the next step of the construction process: installing the screen frames. The screen frames will provide the structure for attaching the screen panels, allowing you to create a bug-free and comfortable outdoor space.
Before starting the installation, gather all the necessary materials and tools. You will need screen frame material (such as aluminum or vinyl), a tape measure, a miter saw or hacksaw, a screen spline roller, a utility knife, and a power drill with screws or nails.
Start by measuring the dimensions of each opening in your porch wall. Make sure to account for any overlap or excess material needed to secure the frame properly. Take accurate measurements to ensure a precise fit.
Once you have your measurements, cut the screen frame material to the appropriate lengths using a miter saw or a hacksaw. Ensure that the corners are cut at a 45-degree angle to allow for mitre joints when assembling the frames.
Next, assemble the screen frames by joining the cut pieces at the corners. Apply pressure to firmly connect the corners and ensure a tight fit. You may use screws or nails to secure the corners, depending on the type of frame material you are using.
With the frames assembled, it’s time to install them into the porch walls. Begin with one frame at a time and position it in the corresponding opening. Ensure that the frame fits snugly and aligns with the edges of the porch walls.
Secure the frame in place using screws or nails. Space them evenly along all sides of the frame to ensure a secure attachment. Make sure to avoid overtightening, as it may distort or damage the frame material.
Repeat this process for each opening in your screened-in porch walls, installing the screen frames one by one. Double-check the alignment and stability of each frame as you go along.
Once all the screen frames are installed, it’s time to move on to Step 6: Adding the Roofing and Ceiling. This will provide protection from the elements and complete the structure of your screened-in porch. Stay tuned for the next installment where we’ll guide you through this process.
When building a screened-in porch on a deck, make sure to use pressure-treated lumber for the framing to prevent rot and insect damage. This will ensure the longevity of your porch.
Step 6: Adding the Roofing and Ceiling
With the screen frames installed, it’s time to move on to the next step of building your screened-in porch: adding the roofing and ceiling. The roofing and ceiling will provide protection from the elements and complete the overall structure of your porch.
Before starting this step, gather all the necessary materials and tools. You will need roofing materials (such as shingles or metal sheets), exterior-grade plywood or beadboard for the ceiling, a circular saw, a power drill with screws or nails, a tape measure, and a level.
Begin by measuring and cutting the roofing materials to fit the dimensions of your porch. Follow the manufacturer’s instructions for cutting and installation. Generally, you will need to start at the bottom edge of the roof and work your way up, overlapping each row of roofing materials to ensure proper water drainage.
Secure the roofing materials in place using the appropriate fasteners. Make sure to follow the manufacturer’s guidelines for spacing and attachment methods. Take the necessary precautions to ensure a watertight seal and proper ventilation to prevent any issues with moisture or condensation.
With the roof in place, it’s time to move on to installing the ceiling. Measure and cut the exterior-grade plywood or beadboard to fit the dimensions of your porch ceiling. Make sure to account for any openings or fixtures that need to be accommodated.
Position the first piece of plywood or beadboard against the ceiling and secure it in place using screws or nails. Use a level to ensure a straight and even installation. Continue adding the remaining pieces, making sure to align the edges and secure them tightly together.
If using plywood, you may choose to paint or stain it to enhance its appearance and protect it from moisture and UV damage. Consider using an exterior-grade paint or stain that is suitable for outdoor use.
With the roofing and ceiling installed, you have completed the major structural components of your screened-in porch. The next step will bring it all together as you add the screen panels to create a bug-free and comfortable outdoor space.
Stay tuned for Step 7: Installing the Screen Panels, where we will guide you through the process of attaching the screen material to the frames and completing the enclosure of your screened-in porch.
Step 7: Installing the Screen Panels
Now that you have completed the roofing and ceiling of your screened-in porch, it’s time to move on to Step 7: installing the screen panels. The screen panels will provide the enclosure that keeps bugs out while still allowing you to enjoy the fresh air and outdoor views.
Before you begin, gather all the necessary materials and tools. You will need screen panels, screen spline, a screen spline roller, a utility knife, a tape measure, a power drill with screws, and a ladder or scaffolding (depending on the height of your porch).
Start by measuring the dimensions of each screen frame opening. Make sure to account for any excess material needed for attachment and overlapping. Measure accurately to ensure a proper fit for the screen panels.
Next, cut the screen panels to size using a utility knife or scissors. Make sure to leave a bit of excess screen material on all sides to ensure a secure attachment to the screen frames.
Once your screen panels are prepared, it’s time to begin installing them. Begin with one screen frame at a time and position the screen panel on top of it, ensuring that the screen material covers the entire frame opening.
Using a screen spline roller, insert the screen spline into the groove of the screen frame, pressing it firmly to hold the screen in place. Work your way around the frame, gradually securing the screen panel. Trim any excess screen material using a utility knife.
Continue this process for each screen frame, installing and securing the screen panels one by one. Double-check the tightness and proper alignment of the screens as you go along.
As you install the screens, pay attention to any access doors or windows you may have planned for your porch. Make sure to cut and install screens for these openings accordingly, ensuring that they function properly when opened or closed.
Once all the screen panels are installed, take a moment to inspect the entire porch to ensure that the screens are securely attached and free of any tears or damages. Make any necessary adjustments or repairs before moving on.
Congratulations! You have successfully installed the screen panels, transforming your deck into a bug-free and comfortable screened-in porch. The next step will guide you through the process of adding access doors to your porch.
Stay tuned for Step 8: Adding Access Doors, where we will provide step-by-step instructions on how to install access doors to your screened-in porch.
Step 8: Adding Access Doors
As you near the completion of your screened-in porch, Step 8 involves adding access doors to ensure easy entry and exit from the space. Installing access doors will enhance the functionality and convenience of your porch, allowing you to seamlessly transition between indoor and outdoor living areas.
Before you begin, gather the necessary materials and tools for this step. You will need access doors (pre-made or custom-built), hinges, a tape measure, a level, a power drill with screws, a screwdriver, and door hardware (such as handles and locks).
To start, determine the ideal location for your access doors. Consider factors such as traffic flow, proximity to the main house, and ease of access to outdoor areas.
Measure the dimensions of the door openings, ensuring that the doors will fit properly. Take into account the size of the pre-made doors or, if building custom doors, cut the door materials to the appropriate size.
Using a power drill, attach the hinges to the doorframe and the doors. Ensure that the hinges are properly aligned and secure. You may need assistance to hold the doors in place while attaching the hinges.
Next, position the doors in the doorframe and use a level to confirm that they are plumb (vertically level) and square. Make any necessary adjustments to ensure a proper fit.
Attach the hinges to the doorframe, ensuring that the doors swing open and closed smoothly. Test the functionality of the doors to ensure proper operation.
Install door hardware, such as handles and locks, according to the manufacturer’s instructions. This will provide security and ease of use for your access doors.
Take the time to test the doors thoroughly to ensure they open and close smoothly and latch securely. Make any necessary adjustments or repairs to ensure proper functionality.
Once the access doors are installed and functioning properly, your screened-in porch is almost complete! The final step involves adding some finishing touches and implementing maintenance tips to ensure the longevity and enjoyment of your new outdoor space.
Stay tuned for Step 9: Finishing Touches and Maintenance Tips, where we will provide valuable insights on how to put the final touches on your screened-in porch and keep it in top shape for years to come.
Read more: How To Build A Deck Porch
Step 9: Finishing Touches and Maintenance Tips
Congratulations on reaching the final step of building your screened-in porch! Step 9 involves adding the finishing touches to enhance the aesthetic appeal and functionality of your space, as well as providing maintenance tips to ensure its longevity.
To put the final touches on your porch, consider the following ideas:
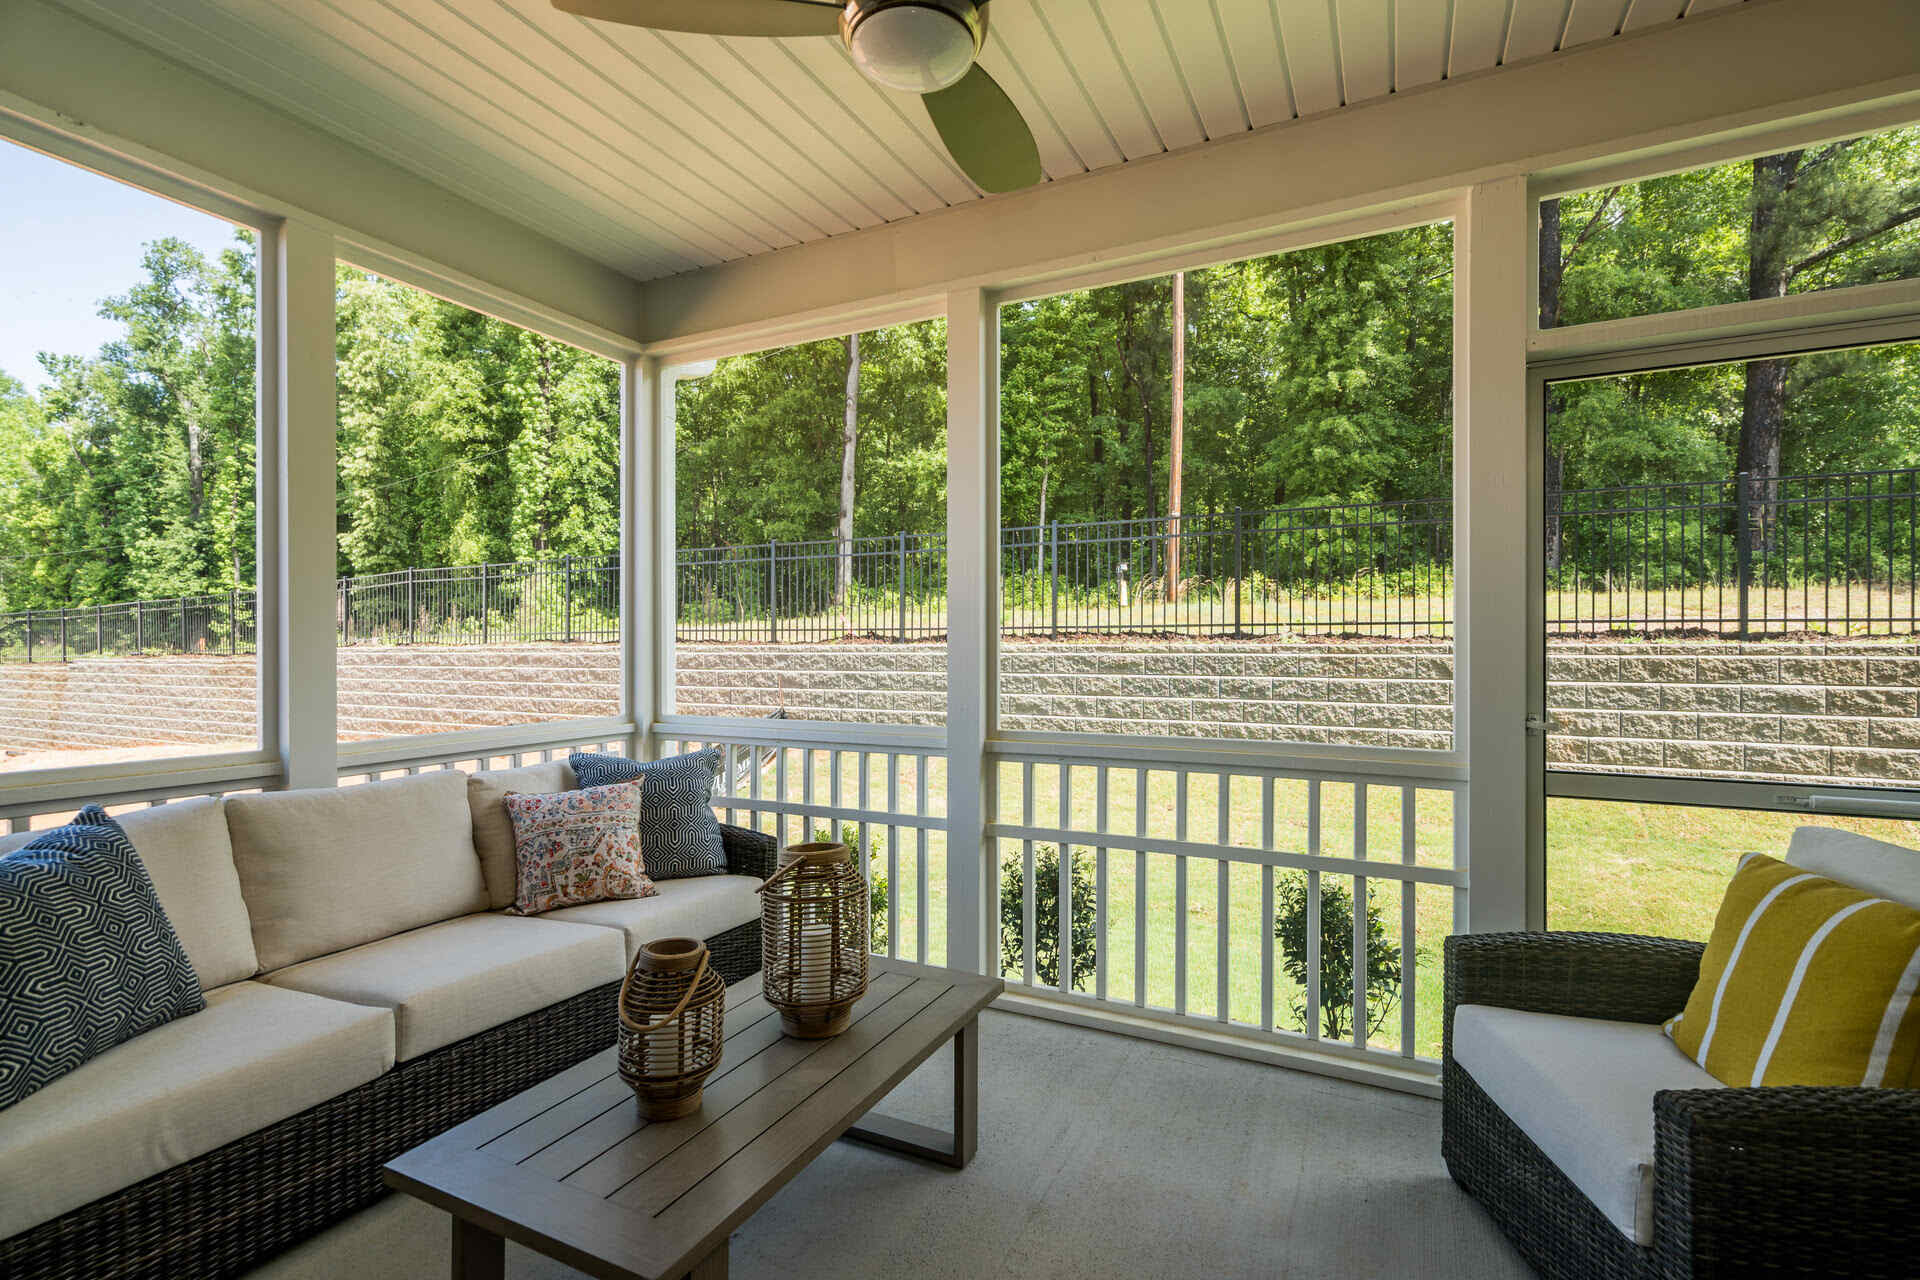
- Add comfortable outdoor furniture, such as chairs, sofas, and tables, to create a cozy and inviting seating area.
- Incorporate decorative elements, such as plants, rugs, and outdoor curtains, to add personality and style to your porch.
- Install lighting fixtures to create a warm and welcoming ambiance for evening gatherings.
- Add accessories like throw pillows, blankets, and outdoor cushions to make your porch space more comfortable and inviting.
- Consider installing a ceiling fan or outdoor heater to enhance comfort and extend the usability of your porch throughout the year.
Now that your porch is complete, it’s important to implement a regular maintenance routine to keep it in top shape. Follow these maintenance tips:
- Regularly clean the screens and frames with mild soap and water to remove dirt, dust, and debris. Rinse thoroughly and allow them to dry completely.
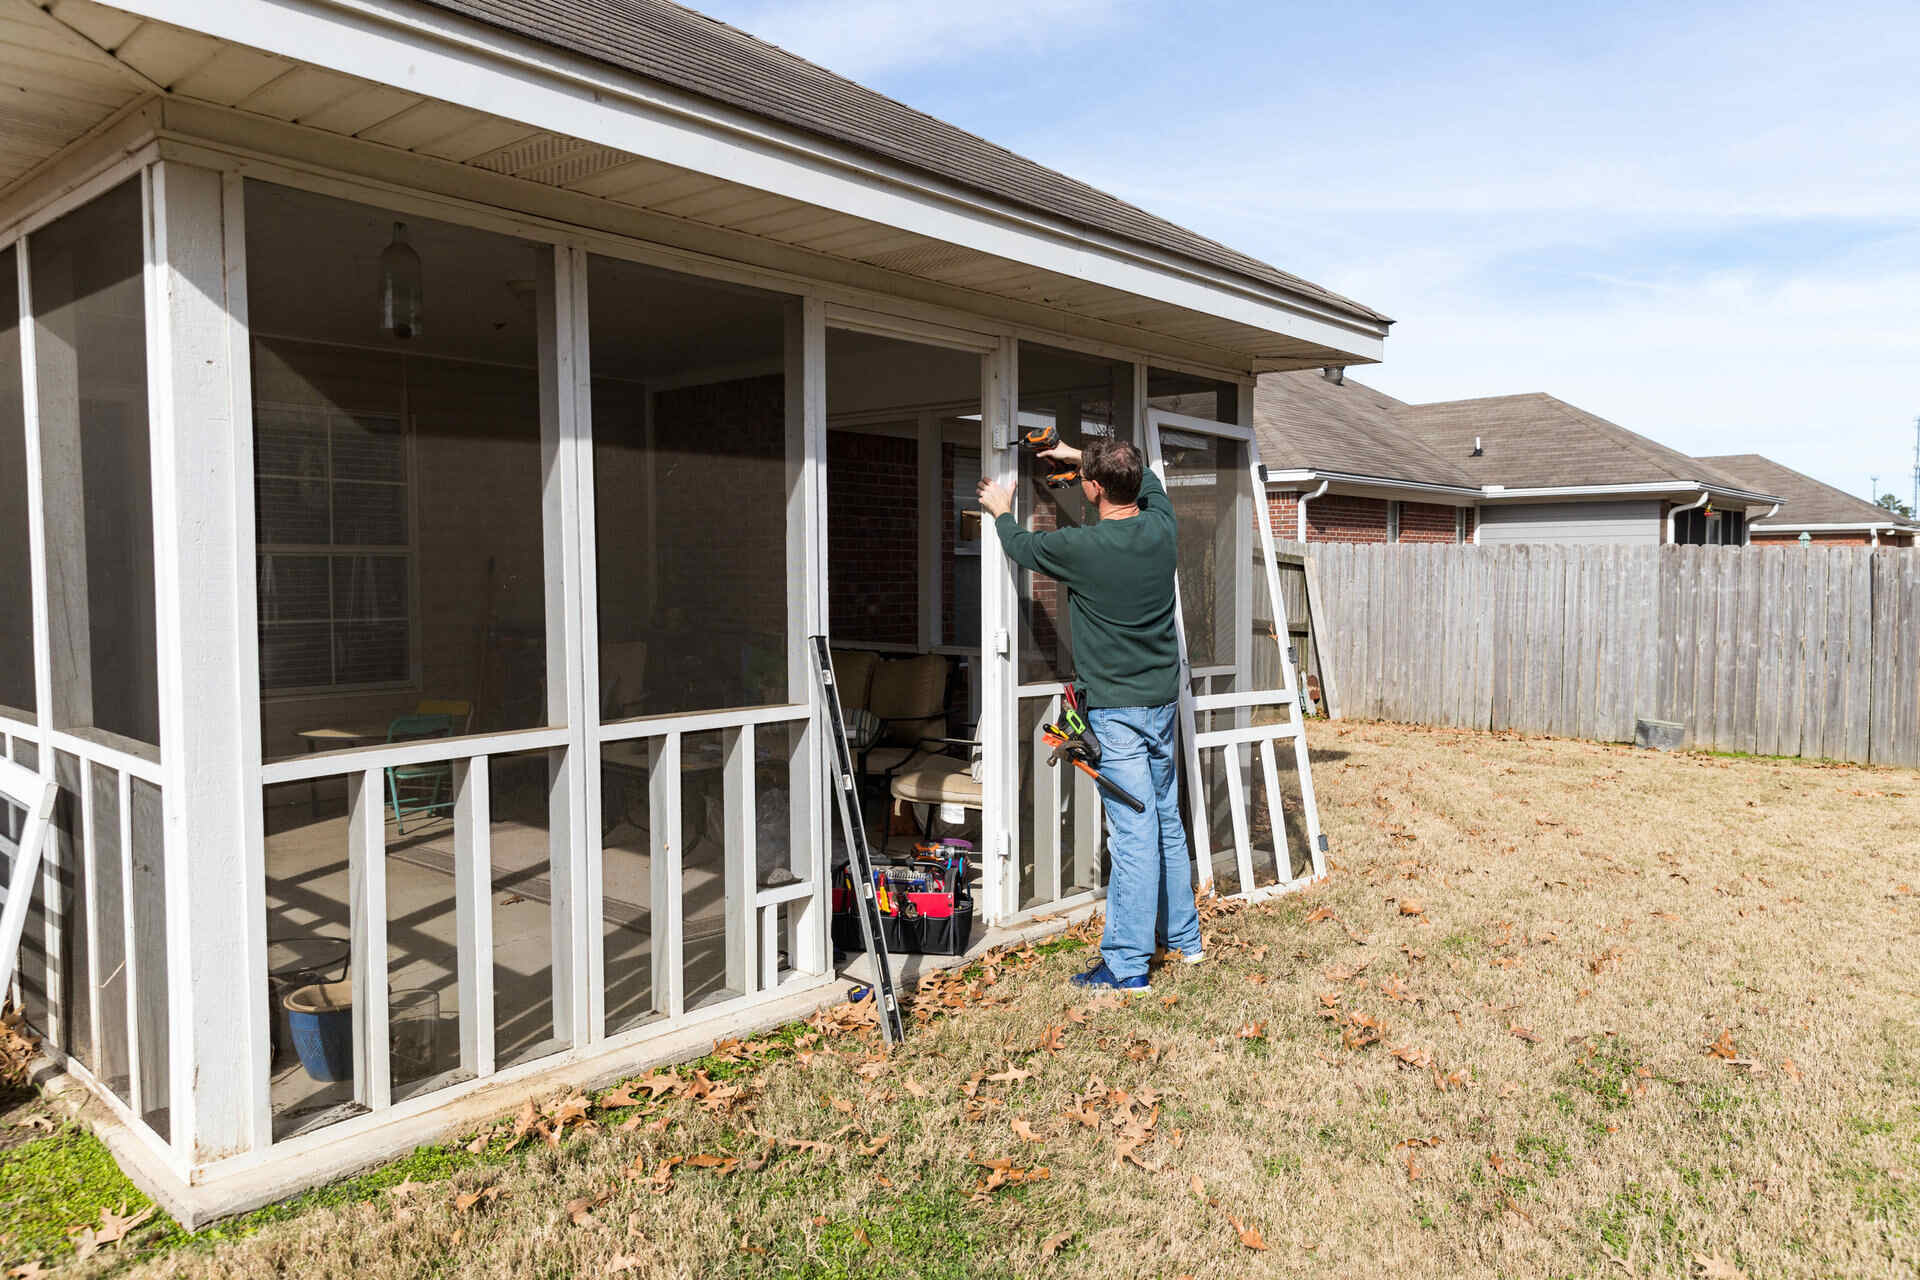
- Check for any signs of damage or wear on the screens, frames, and doors. Replace any damaged or torn screens promptly to maintain the integrity of your porch.
- Inspect the roofing materials regularly for any loose or damaged shingles. Make repairs or replacements as necessary to prevent leaks and prolong the lifespan of your porch.
- Remove any debris, such as leaves and branches, from the roof and gutters to prevent clogging and drainage issues.
- Keep the area around the porch clear of vegetation and debris to minimize the risk of pests and maintain proper airflow.
- Consider applying a protective coating or sealant to the decking and framing materials to enhance their durability and resistance to weathering.
By following these maintenance tips, your screened-in porch will remain in excellent condition, allowing you to enjoy its comfort and beauty for years to come.
With the completion of Step 9, you have successfully built a screened-in porch on your deck. Congratulations on your achievement! Now, it’s time to sit back, relax, and fully enjoy your new outdoor sanctuary.
Conclusion
Building a screened-in porch on your deck is a rewarding project that adds value, comfort, and functionality to your outdoor living space. Throughout the step-by-step process, you have learned how to plan and design your porch, gather materials and tools, prepare the deck, frame the porch, install screen frames, add roofing and a ceiling, install screen panels, and add access doors. Finally, you learned about the importance of finishing touches and ongoing maintenance.
A screened-in porch offers a multitude of benefits. It provides a bug-free environment, protecting you from pesky insects while allowing you to enjoy fresh air and outdoor views. It offers shelter from inclement weather, allowing you to relax and entertain in comfort. It extends your living space, enabling you to make the most of your deck and enjoy the outdoors for a longer period throughout the year.
As you built your screened-in porch, you gained valuable knowledge and developed new skills. From planning and designing to construction and maintenance, you honed your abilities and transformed your deck into a beautiful and functional space.
Remember, proper planning and attention to detail are essential for a successful project. Take the time to consider your needs and preferences, gather high-quality materials, and employ proper construction techniques. This ensures a durable and well-built porch that will withstand the test of time.
Lastly, don’t forget to personalize your porch with finishing touches such as furniture, decor, and lighting. These personal touches will make your porch a reflection of your style and create a warm and inviting atmosphere.
Now that you have completed the construction of your screened-in porch, it’s time to enjoy the fruits of your labor. Whether you use it for relaxation, entertaining guests, or simply spending quality time with loved ones, your new porch will undoubtedly become a cherished space within your home.
We hope that this comprehensive guide has helped you successfully build your screened-in porch and that you derive many years of enjoyment from your transformed outdoor area. So, sit back, take a deep breath of fresh air, and savor every moment in your newly created screened-in porch retreat.
Ready to elevate your deck's aesthetic? Our guide on outdoor living will show you how to infuse charm and color with simple decor and add-ons, transforming your space into a perfect setting for relaxation and entertainment. Curious about the benefits and features of a screened porch? Our detailed overview will give you all the insights needed to appreciate this lovely addition to any home. For those who thrive on creating and building, our discussion on why DIY projects are so rewarding is a must-read, packed with inspiring ideas and practical benefits.
Frequently Asked Questions about How To Build A Screened-In Porch On A Deck
Was this page helpful?
At Storables.com, we guarantee accurate and reliable information. Our content, validated by Expert Board Contributors, is crafted following stringent Editorial Policies. We're committed to providing you with well-researched, expert-backed insights for all your informational needs.


0 thoughts on “How To Build A Screened-In Porch On A Deck”