Articles
How To Build A Hip Roof Porch
Modified: October 21, 2024
Learn how to build a hip roof porch with our informative articles. Discover step-by-step instructions and expert tips to create the perfect addition to your home.
(Many of the links in this article redirect to a specific reviewed product. Your purchase of these products through affiliate links helps to generate commission for Storables.com, at no extra cost. Learn more)
Introduction
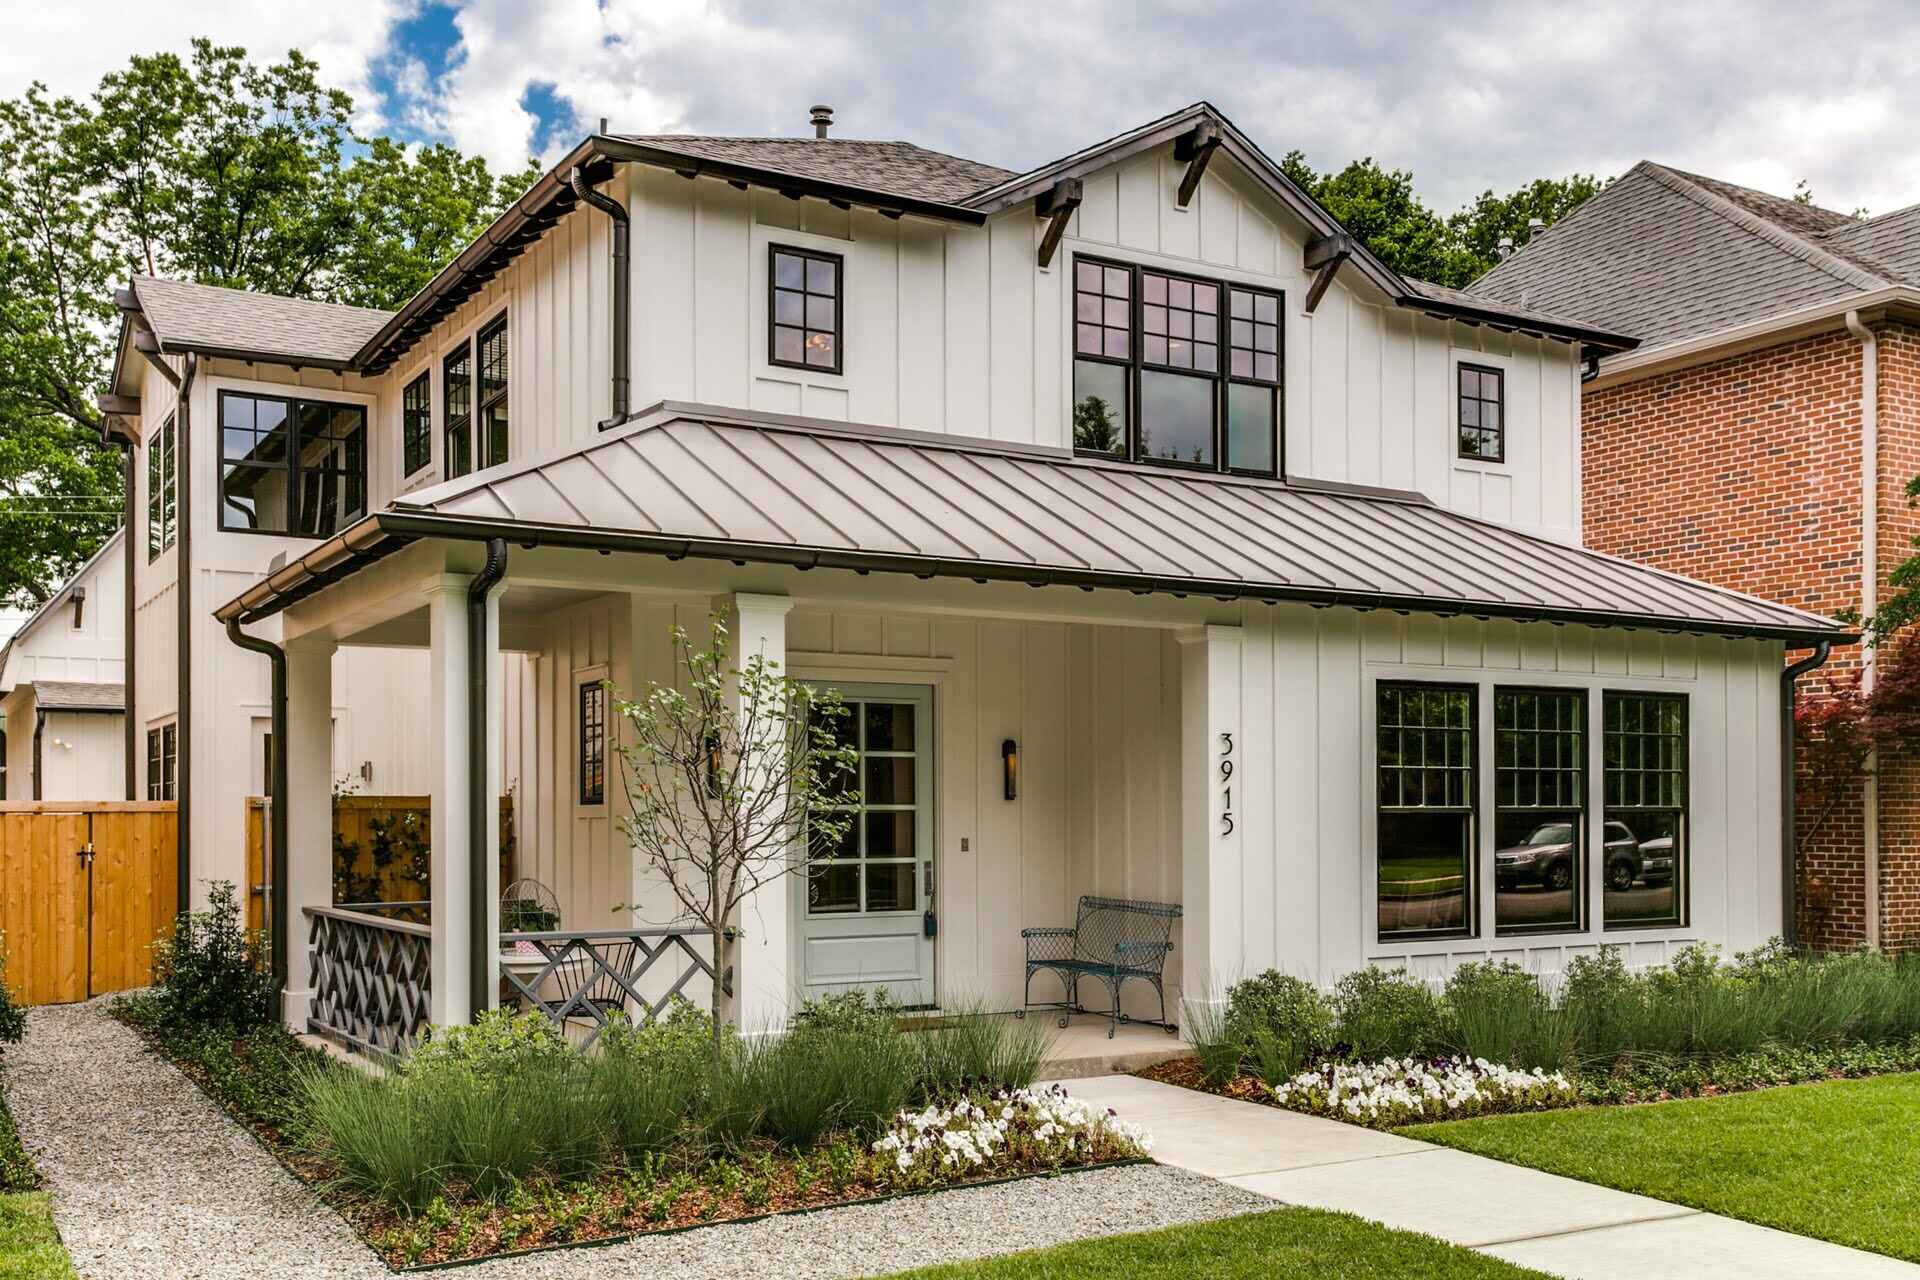
Welcome to the world of hip roof porches! If you’re looking to add style and functionality to your home, building a hip roof porch is a fantastic option. A hip roof porch is a type of roofing system that features slopes on all sides, providing a visually pleasing and structurally sound addition to your property.
Not only does a hip roof porch create extra space for outdoor living and entertaining, but it also adds value and curb appeal to your home. Whether you’re looking to create a cozy nook for relaxing or an expansive area for hosting gatherings, a hip roof porch can be customized to suit your specific needs and preferences.
Building a hip roof porch may seem like a daunting task, but with the right planning, preparation, and materials, you can successfully complete this project. In this comprehensive guide, we will take you through the step-by-step process of building a hip roof porch, providing you with all the information you need to bring your vision to life.
Before we dive into the nitty-gritty details, it’s important to note that building a hip roof porch requires a solid understanding of construction principles, as well as the use of appropriate tools and safety precautions. If you’re unsure about any aspect of the project, it’s always a good idea to consult with a professional contractor or carpenter.
Now, let’s begin our journey to building your very own hip roof porch. From planning and preparation to the final finishing touches, we’ll walk you through each step of the process, ensuring that you have the knowledge and confidence to successfully complete this project.
So grab your hard hat and tool belt, and let’s get started on creating a hip roof porch that will elevate your home’s aesthetics and functionality.
Key Takeaways:
- Building a hip roof porch requires careful planning, precise measurements, and attention to detail. From framing the base to adding finishing touches, each step contributes to a functional and visually appealing outdoor space.
- The installation of flashing, waterproofing, gutters, and downspouts is essential for protecting a hip roof porch from water damage. Adding personal touches such as lighting, seating, and decor enhances the porch’s usability and aesthetic appeal.
Read more: How To Build A Front Porch Roof
Planning and Preparation
Before you start building your hip roof porch, it’s crucial to spend some time on careful planning and preparation. This stage is essential for ensuring a smooth construction process and a successful end result. Here are some key steps to consider:
- Set a Budget: Determine how much you are willing to invest in your hip roof porch project. This will help you make informed decisions when it comes to selecting materials and hiring contractors, if necessary.
- Check Local Regulations: Check with your local building department to ensure that you adhere to any relevant building codes and regulations. Obtain any necessary permits before you start construction.
- Design and Layout: Consider the size and shape of your hip roof porch, as well as its overall design and style. Take into account factors such as the existing architecture of your home, available space, and your personal preferences.
- Considerations for Utilities: If you plan to incorporate electrical outlets, lighting, or plumbing into your hip roof porch, consult with a professional to ensure that you have the necessary infrastructure in place.
- Materials and Tools: Make a list of all the materials and tools you will need for the construction process. This may include lumber, roofing materials, fasteners, hand tools, power tools, and safety equipment.
- Timeline: Determine a realistic timeline for your project, taking into consideration factors such as weather conditions, availability of materials, and your own schedule.
- Safety Measures: Prioritize safety throughout the construction process. Ensure that you have necessary safety equipment, such as hard hats, gloves, safety glasses, and sturdy footwear. Familiarize yourself with safety protocols and take necessary precautions to avoid accidents.
By taking the time to plan and prepare for your hip roof porch project, you will set a solid foundation for success. Careful consideration of your budget, design, regulations, and safety measures will help you avoid costly mistakes and ensure a smooth construction process.
Now that you have your plan in place, it’s time to gather your materials and tools and move on to the next step of the process – measuring and marking the area where your hip roof porch will be built.
Gathering Materials and Tools
Now that you have completed the planning and preparation stage, it’s time to gather all the necessary materials and tools for your hip roof porch project. Here are some key items you’ll need:
- Lumber: You’ll need lumber for framing and structural support. Purchase pressure-treated wood that is suitable for outdoor use.
- Roofing Materials: Depending on your preferences and budget, you can choose from various roofing materials such as shingles, metal, or tiles. Consider factors like durability, aesthetics, and the climate in your area when making your selection.
- Fasteners: Purchase appropriate screws, nails, and bolts for fastening the lumber and roofing materials. Make sure you select corrosion-resistant options for outdoor use.
- Flashing and Waterproofing Materials: To ensure that your hip roof porch is protected from leaks and water damage, you’ll need flashing and waterproofing materials. This includes items like roof underlayment, flashing tape, and caulk.
- Tools: Gather the necessary tools for the construction process. This may include a circular saw, hammer, drill, level, measuring tape, framing square, roofing nail gun, and a ladder. Ensure that your tools are in good working condition and, if needed, purchase or rent any additional tools required.
- Safety Equipment: Prioritize safety by ensuring you have safety glasses, gloves, a hard hat, and sturdy footwear. Consider using knee pads and a back brace for added comfort and protection during extended periods of construction.
It’s important to note that the specific materials and tools you’ll need may vary depending on the design and size of your hip roof porch, as well as any unique features or functionalities you plan to incorporate. Refer to your construction plans and consult with a professional if you have any doubts about the materials and tools required.
Once you have gathered all the necessary materials and tools, you’re ready to move on to the next stage of the process – measuring and marking the area where your hip roof porch will be built.
Measuring and Marking the Area
With your materials and tools in hand, it’s time to measure and mark the area where your hip roof porch will be built. This step is crucial for ensuring that your porch is properly aligned and fits seamlessly with your existing home. Here’s what you need to do:
- Identify the Location: Determine where you want your hip roof porch to be located. Consider factors such as the layout of your property, access points, and the desired functionality of the porch.
- Measure the Area: Measure the dimensions of the area where your porch will be constructed. Use a measuring tape to accurately determine the width, length, and height of the porch.
- Create a Plan: Sketch a rough plan of your porch design, taking into consideration the measurements you have taken. This will help you visualize the layout and ensure that everything fits properly.
- Mark the Perimeter: Use stakes and string to mark the perimeter of your porch area. Make sure the corners are squared off by using a framing square to create right angles.
- Check for Level: Use a level to ensure that the marked area is level and even. Adjust the stakes and strings as needed to achieve a level surface.
- Plan for Support: Determine the placement of support posts and footings based on your design and the load-bearing requirements of the porch. Mark these locations within the perimeter of the porch area.
By taking the time to measure and mark the area accurately, you will ensure that your hip roof porch is precisely aligned and fits seamlessly with your existing home. Remember to double-check measurements and make any necessary adjustments before moving on to the next step.
Now that you have the area measured and marked, it’s time to move on to the next stage of the process – framing the porch base.
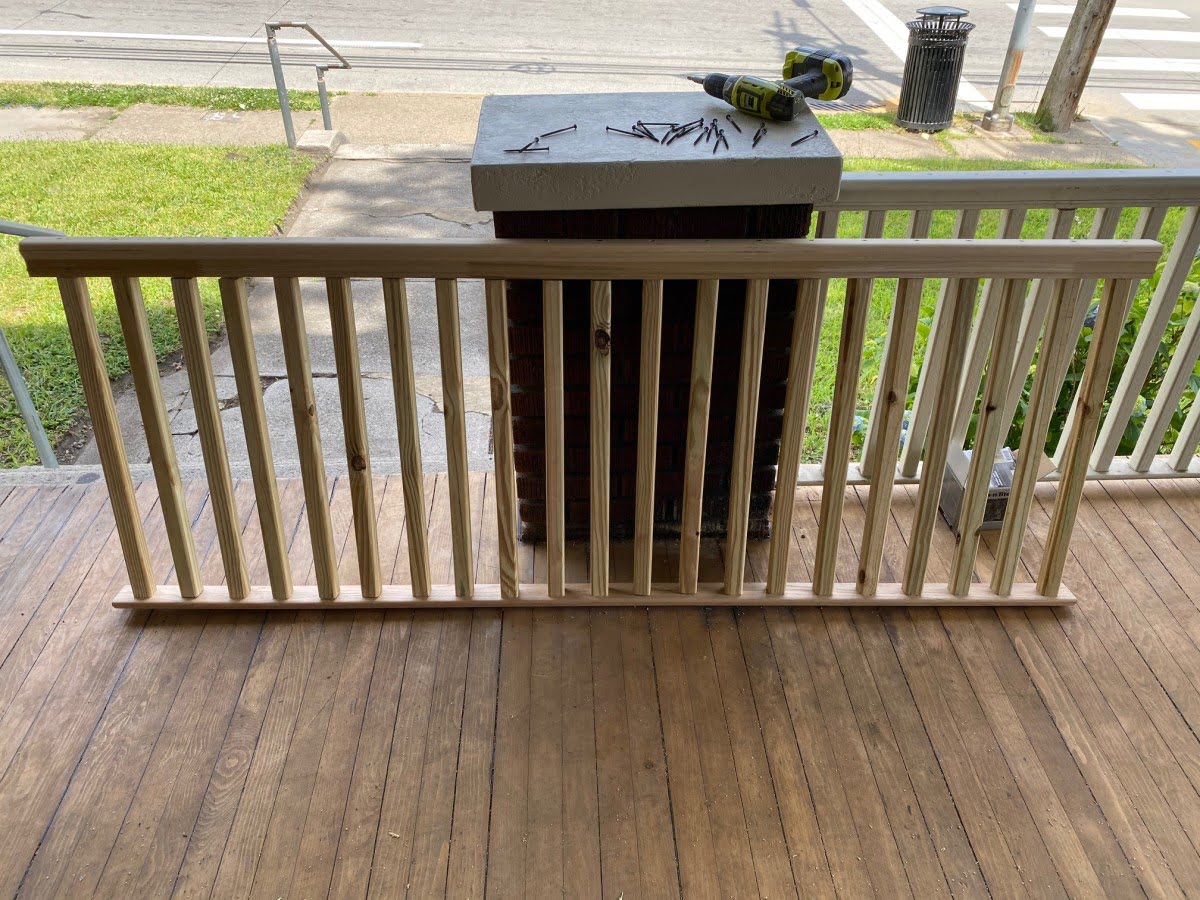
Framing the Porch Base
Once you have measured and marked the area for your hip roof porch, it’s time to start framing the porch base. The framing serves as the foundation for your porch and provides structural support. Here’s how to frame the porch base:
- Prepare the Footings: Dig holes for the support post footings within the marked perimeter of the porch area. The size and depth of the footings will depend on the local building codes and the load-bearing requirements. Place concrete footings in the holes and allow them to cure according to the manufacturer’s instructions.
- Attach Ledger Board: Locate the ledger board, which will serve as the attachment point between the porch floor and the existing home. Secure the ledger board to the home’s exterior wall using lag screws or nails. Ensure that the ledger board is level and securely attached.
- Install Rim Joists: Cut and position rim joists along the outer edge of the porch, connecting them to the ledger board. Secure them to the footings using anchor brackets or hangers. Make sure the rim joists are level and properly aligned with the perimeter markings.
- Install Floor Joists: Cut and position floor joists, spaced according to your design plans and local building codes. Attach the floor joists to the rim joists using joist hangers. Make sure the floor joists are level and securely fastened.
- Add Blocking: Install blocking between the floor joists to provide additional support and stability. This is especially important if you plan to install heavy decking material or if your porch design requires specific load-bearing capabilities.
- Secure Decking Material: Once the framing is complete, secure your chosen decking material to the top of the floor joists. This can include options such as wood planks, composite decking, or concrete pavers. Follow the manufacturer’s instructions for proper installation.
As you frame the porch base, ensure that all connections are secure and properly fastened. Double-check for levelness and make any necessary adjustments before proceeding to the next step.
With the porch base framed and secured, it’s time to move on to the next stage – installing the hip rafters to create the distinctive roof structure of your hip roof porch.
Read more: How To Build A Porch Deck With Roof
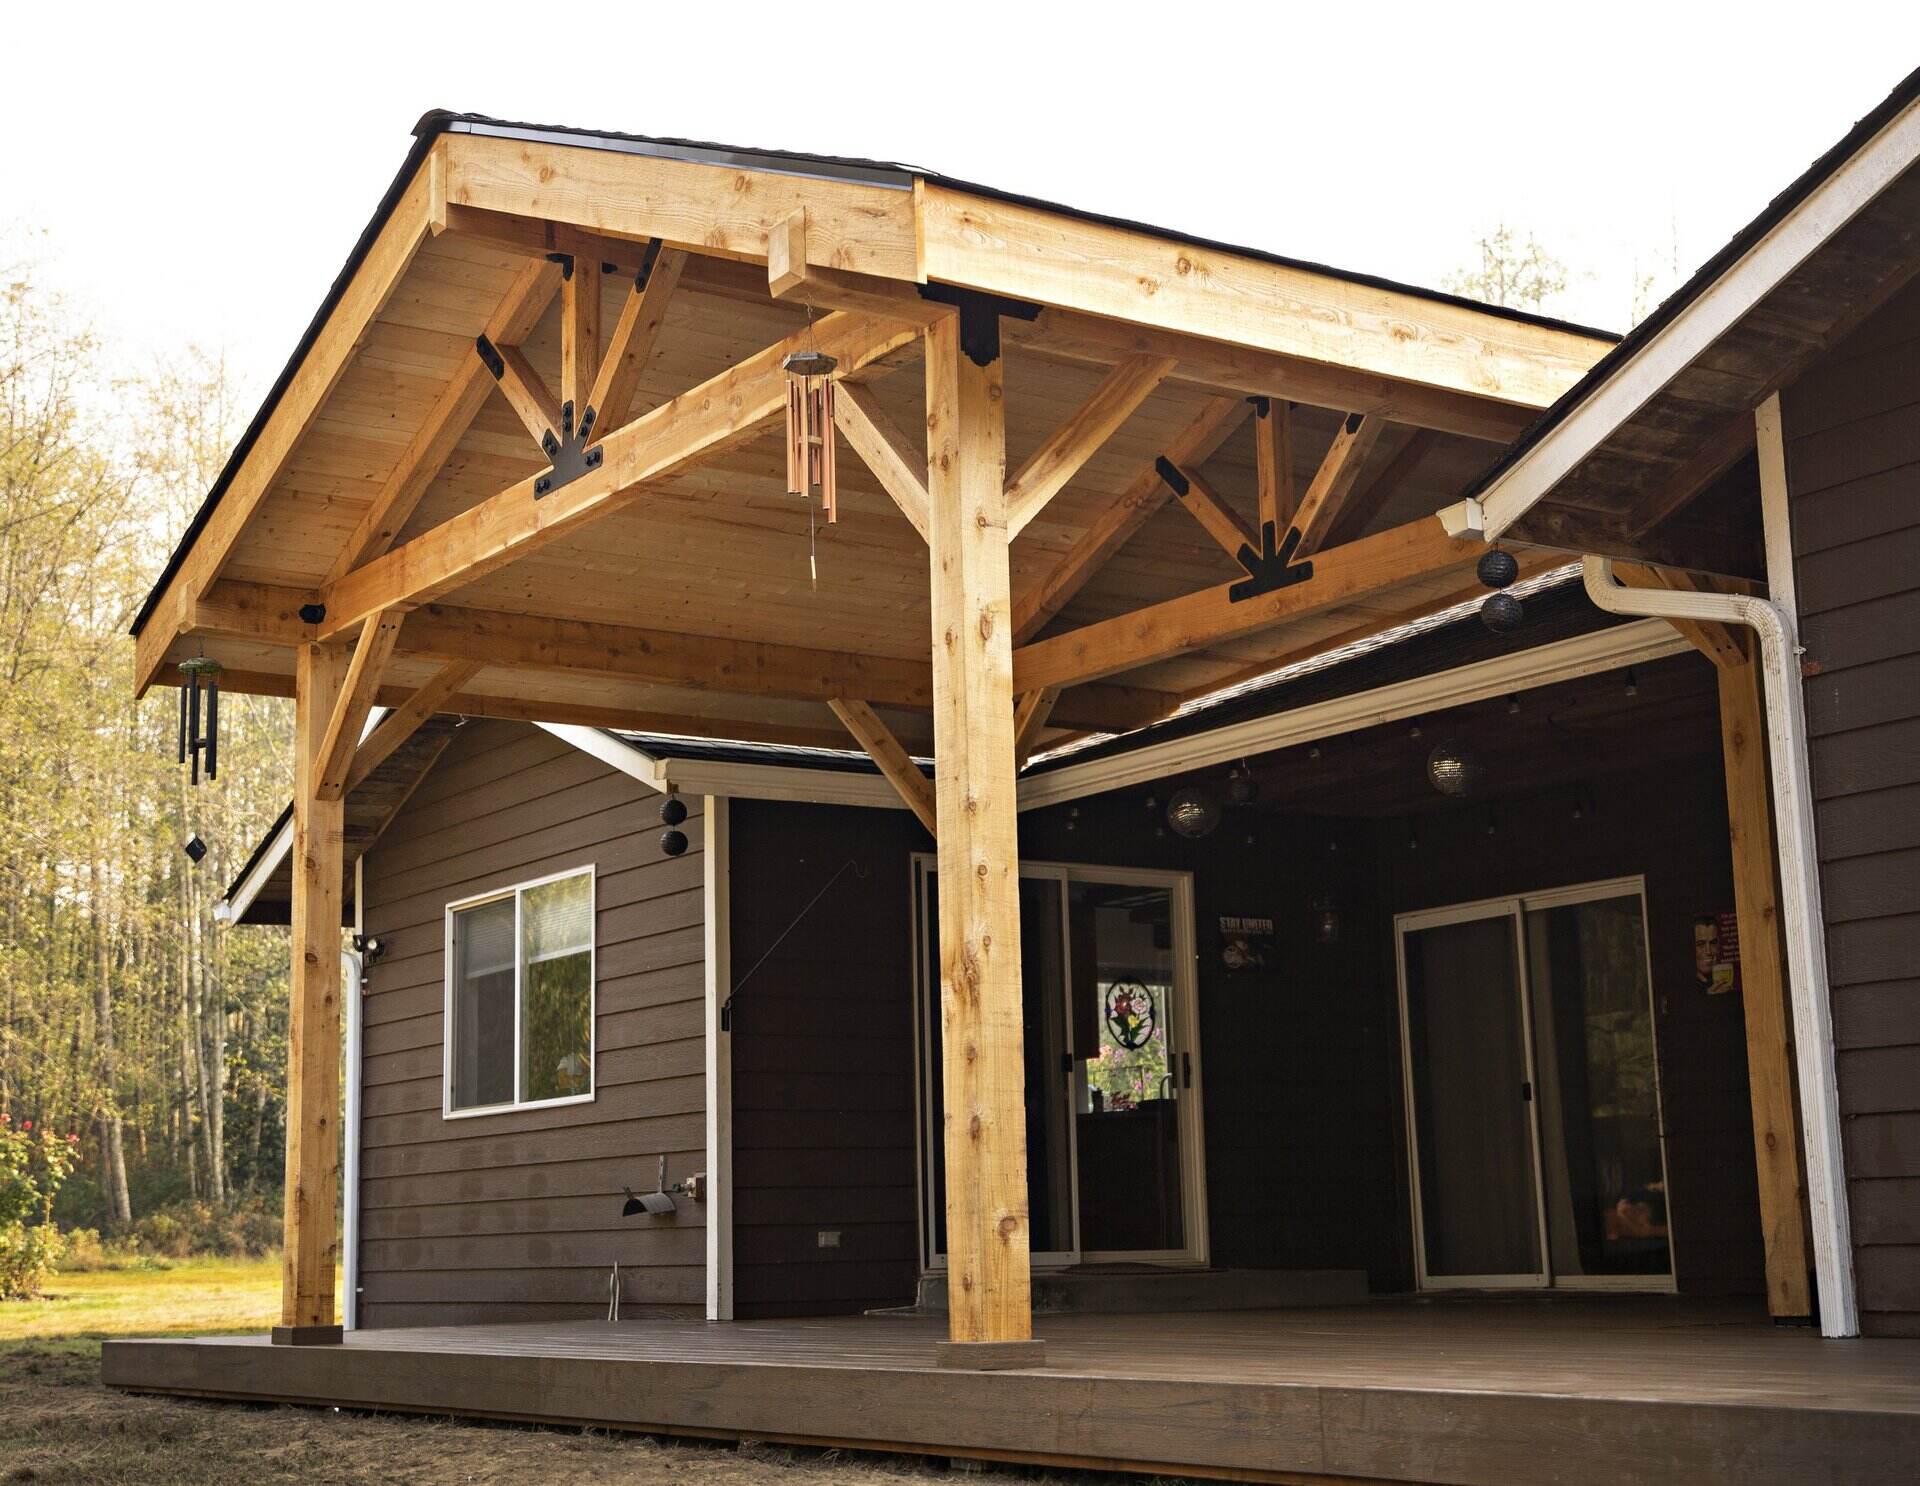
Installing the Hip Rafters
Now that you have framed the porch base, it’s time to install the hip rafters to create the distinctive roof structure of your hip roof porch. The hip rafters provide support and stability to the roof while adding visual appeal to your porch. Here’s how to install the hip rafters:
- Measure and Cut Rafters: Measure and cut the hip rafters to the appropriate length, considering the pitch and dimensions of your porch roof. It’s important to ensure accuracy in your measurements to ensure a proper fit.
- Attach Rafters to the Porch Base: Position the hip rafters on the top of the porch base, aligning them with the corners of the porch and securing them with appropriate connectors or hangers. Make sure the rafters are plumb and evenly spaced.
- Create Ridge Beam: Cut and install a ridge beam along the top of the hip rafters to provide additional support and stability to the roof structure. Secure the ridge beam to the hip rafters using connectors or hardware specified by your design plans.
- Add Collar Ties: Install collar ties between opposing pairs of rafters to further strengthen the roof structure. Collar ties prevent the rafters from spreading and help distribute the weight evenly. Secure the collar ties using appropriate connectors.
- Check for Accuracy: Use a level and a measuring tape to ensure that the hip rafters are installed correctly and are properly aligned. Make any necessary adjustments to ensure a precise and balanced roof structure.
- Secure Connections: Double-check all connections and ensure that they are properly secured. Use appropriate fasteners and hardware to reinforce the joints and ensure the stability of the hip rafters.
As you install the hip rafters, it’s important to maintain accuracy and ensure that the roof structure is level and balanced. Take your time to carefully position and secure each rafter, making necessary adjustments along the way.
Once the hip rafters are installed, you’re ready to move on to the next stage – installing the roof decking to provide a solid foundation for your roofing materials.
Installing the Roof Decking
With the hip rafters in place, it’s time to move on to installing the roof decking. The roof decking forms the solid foundation that supports the roofing materials and provides stability to your hip roof porch. Here’s how to install the roof decking:
- Prepare the Decking Materials: Calculate the amount of decking material needed based on the size and pitch of your roof. Cut the decking boards to the appropriate length, ensuring they fit snugly between the hip rafters.
- Start at the Bottom Corner: Begin installing the roof decking at the bottom corner of your hip roof porch. Align the first board with the edge of the porch base and secure it in place using appropriate fasteners, such as decking screws or nails.
- Continue Installing the Decking: Work your way up the roof, installing one row of decking boards at a time. Leave a small gap between each board to allow for expansion and contraction. Use a carpenter’s square to ensure the boards are properly aligned and straight.
- Secure the Decking Boards: As you install each row of decking, make sure to securely fasten the boards to the hip rafters using appropriate fasteners. Drive the fasteners at the designated spots on the decking boards to ensure a secure connection.
- Double-Check Alignment and Levelness: Regularly check the alignment and levelness of the decking as you progress. This will help ensure that your hip roof porch has a smooth and even surface for the roofing materials to be installed.
- Trim and Finish the Decking: Once you reach the top of the roof, trim the last row of decking boards to fit properly. Make sure to leave a small gap for ventilation and prevent moisture buildup. Finish the edges of the decking as desired using trim boards or fascia.
When installing the roof decking, it’s important to work carefully and accurately to ensure a sturdy and level surface. Taking the time to properly align and secure each decking board will contribute to the overall strength and longevity of your hip roof porch.
With the roof decking installed, you’re now ready to move on to the next stage – adding flashing and waterproofing to protect your porch from leaks and water damage.
When building a hip roof porch, make sure to properly calculate the pitch of the roof to ensure proper drainage and stability. Use a framing square to accurately measure and cut the rafters for a precise fit.
Adding Flashing and Waterproofing
After installing the roof decking, it’s essential to add flashing and waterproofing to protect your hip roof porch from potential leaks and water damage. Flashing and waterproofing materials create a barrier that prevents water from penetrating the roof and ensures the longevity of your porch. Here’s how to add flashing and waterproofing:
- Install Underlayment: Begin by installing a roof underlayment over the roof decking. Use a waterproof underlayment material, such as roofing felt or synthetic membrane, to create a protective layer that enhances the water resistance of your porch roof.
- Apply Roofing Cement or Membrane: Spread roofing cement or apply a self-adhesive membrane along the edges and seams of the roof decking. This helps create a watertight seal and prevents water from seeping into the underlying structure.
- Add Step Flashing: Install step flashing around roof penetrations, such as chimneys or vents. Step flashing consists of small metal pieces that are layered between the shingles and the vertical surfaces of the roof, effectively diverting water away from potential leakage points.
- Install Valley Flashing: If your hip roof porch has valleys where two roof planes meet, install valley flashing. Valley flashing consists of metal strips that are placed in the valleys to direct water towards the gutters and prevent pooling.
- Seal Roofing Joints: Seal any joints or gaps in the roofing materials with roofing sealant to ensure complete waterproofing. Pay close attention to areas where different roof planes meet or where the roof meets the existing home.
- Inspect and Maintain Flashing: Regularly inspect the flashing on your hip roof porch to ensure it remains in good condition. Replace any damaged or worn-out flashing promptly to maintain the integrity of the waterproofing system.
By adding flashing and waterproofing to your hip roof porch, you provide an essential layer of protection against water intrusion. This step is crucial for preserving the structural integrity of your porch and preventing potential costly repairs in the future.
With the flashing and waterproofing in place, you’re now ready to install the roofing materials that will complete the protective and aesthetic aspects of your hip roof porch.
Installing Roofing Materials
With the flashing and waterproofing in place, it’s time to install the roofing materials that will provide the final layer of protection and complete the aesthetic appeal of your hip roof porch. Here’s how to install the roofing materials:
- Select the Roofing Material: Choose the roofing material that best suits your design preferences, budget, and the climate in your area. Common options include asphalt shingles, metal roofing, clay tiles, or composite materials. Follow the manufacturer’s instructions for proper installation.
- Start at the Bottom: Begin at the bottom of your hip roof porch and work your way up as you install the roofing material. Position the first row of roofing material, such as shingles, at the bottom of the roof and secure it using appropriate nails or screws.
- Overlap the Rows: For most roofing materials, overlap each subsequent row with the one below it. This helps create a water-resistant barrier and prevents water from seeping through the joints. Follow the manufacturer’s guidelines for the specific overlap requirements.
- Cut and Shape the Roofing Material: Trim and shape the roofing material as needed to fit around roof penetrations, such as vents or chimneys. Use appropriate tools like a utility knife or tin snips to achieve clean and precise cuts.
- Ensure Proper Ventilation: Install roof vents or ridge vents to allow for proper ventilation. Ventilation is important for preventing moisture buildup and maintaining the longevity of your hip roof porch. Follow the manufacturer’s instructions for the specific type and placement of vents.
- Secure the Roofing Material: Use roofing nails or screws to securely fasten the roofing material to the roof decking. Follow the recommended fastening pattern and spacing provided by the manufacturer to achieve a secure and durable installation.
- Check for Proper Alignment: Regularly check and adjust the alignment of the roofing material as you progress to ensure it is straight and properly positioned. This will help create a visually appealing and structurally sound hip roof porch.
Proper installation of the roofing materials is crucial for the long-term functionality and aesthetics of your hip roof porch. Ensure that you follow the manufacturer’s instructions and best practices to achieve the best results.
With the roofing materials installed, you’re almost near the finish line. The next step is to add the finishing touches to your hip roof porch, including the installation of fascia, soffit, gutters, and downspouts.
Read more: How To Build A Gable Porch Roof
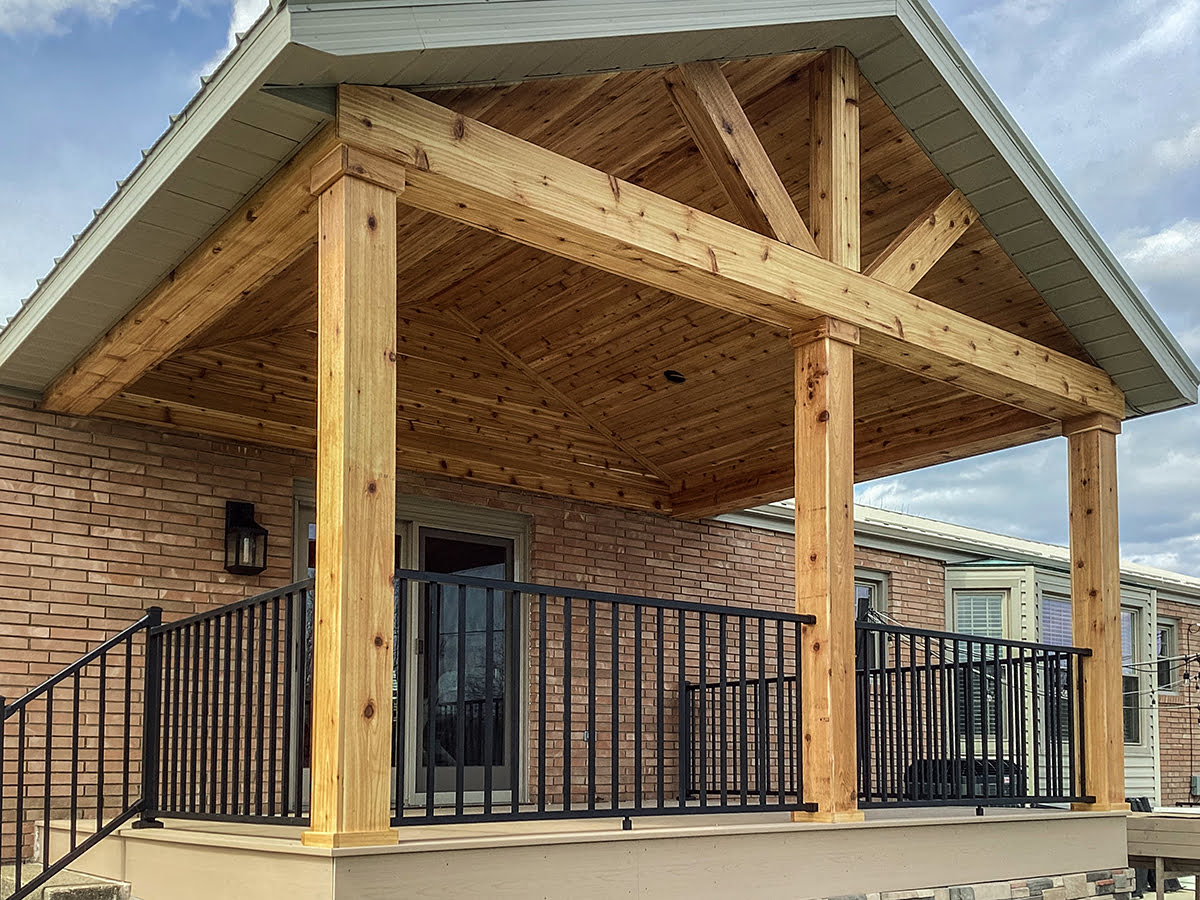
Installing Fascia and Soffit
As you near the completion of your hip roof porch project, it’s time to install the fascia and soffit to provide the finishing touches. The fascia and soffit not only enhance the aesthetics of your porch but also serve important functional purposes. Here’s how to install the fascia and soffit:
- Measure and Cut Fascia: Measure the length of the eaves of your porch and cut the fascia boards to match. The fascia is the vertical board that covers the end of the rafters and provides a clean, finished look to your porch.
- Attach Fascia to the Rafters: Secure the fascia boards to the end of the rafters using appropriate fasteners, such as screws or nails. Ensure that the fascia boards are level and properly aligned with the roofline.
- Install Soffit Panels: Soffit panels are the horizontal or angled boards that cover the space between the fascia and the sidewall of your porch. Measure and cut the soffit panels to the appropriate dimensions, ensuring proper ventilation for your porch.
- Attach Soffit Panels: Install the soffit panels along the underside of the roofline, starting from one end and working your way across. Secure the panels to the rafters or support structure using appropriate fasteners and spacing.
- Ensure Ventilation: In certain areas, you may need to install vented soffit panels to allow air circulation and prevent moisture buildup. Ensure that the vented panels are properly positioned to provide adequate ventilation for your porch.
- Finish with Trim: Add trim pieces, such as corner caps or molding, to provide a polished and decorative touch to your fascia and soffit installation. These additional trim pieces can further enhance the visual appeal of your hip roof porch.
Installing the fascia and soffit not only adds the final touches to your hip roof porch but also protects the underlying structures from moisture damage and pests. Proper installation of the fascia and soffit ensures a clean and durable finish.
Now that the fascia and soffit are in place, you’re almost done with your hip roof porch project. The final step is to install gutters and downspouts to effectively manage water runoff from your porch.
Installing Gutters and Downspouts
The installation of gutters and downspouts is the final step in completing your hip roof porch project. Gutters and downspouts play a crucial role in managing water runoff and protecting your porch and foundation from potential water damage. Here’s how to install gutters and downspouts:
- Measure and Plan: Measure the length of the roofline where the gutters will be installed. Determine the appropriate slope for the gutters to ensure proper water flow towards the downspouts. Plan the placement of downspouts at strategic points along the porch.
- Install Gutter Hangers: Begin by installing gutter hangers or brackets along the roofline, attaching them to the fascia or rafter tails. Ensure that the hangers are spaced according to the manufacturer’s recommendations to provide proper support for the gutters.
- Attach Gutter Sections: Install the gutter sections one by one, connecting them at the hanger points. Use gutter connectors or sealant to securely join the sections together. Ensure that the gutters are properly aligned and have a slight slope towards the downspouts.
- Secure Gutters: Once the gutter sections are connected, secure them to the hangers using screws or nails. Make sure that the gutters are level and have a consistent downward slope towards the downspouts to facilitate proper water drainage.
- Install Downspouts: Position and secure the downspouts at the predetermined locations, ensuring they are securely attached to the fascia or exterior walls. Use appropriate brackets and fasteners to hold the downspouts in place.
- Create Downspout Extensions: If necessary, install downspout extensions to direct water away from the foundation of your home. These extensions can be buried underground or routed above ground, ensuring that water is effectively directed away from your porch and the surrounding areas.
- Test for Proper Water Flow: After installation, test the gutters and downspouts by pouring water into them. Check for any leaks, proper water flow, and drainage away from your porch and foundation. Make any necessary adjustments to ensure optimal performance.
The installation of gutters and downspouts is crucial for directing water away from your hip roof porch and protecting the structural integrity of your home. Ensure that the gutters and downspouts are properly installed and maintained to prevent water damage and potential issues in the future.
With the gutters and downspouts in place, you have now completed the installation of your hip roof porch project. Take a step back, admire your work, and enjoy your new functional and aesthetically pleasing outdoor space!
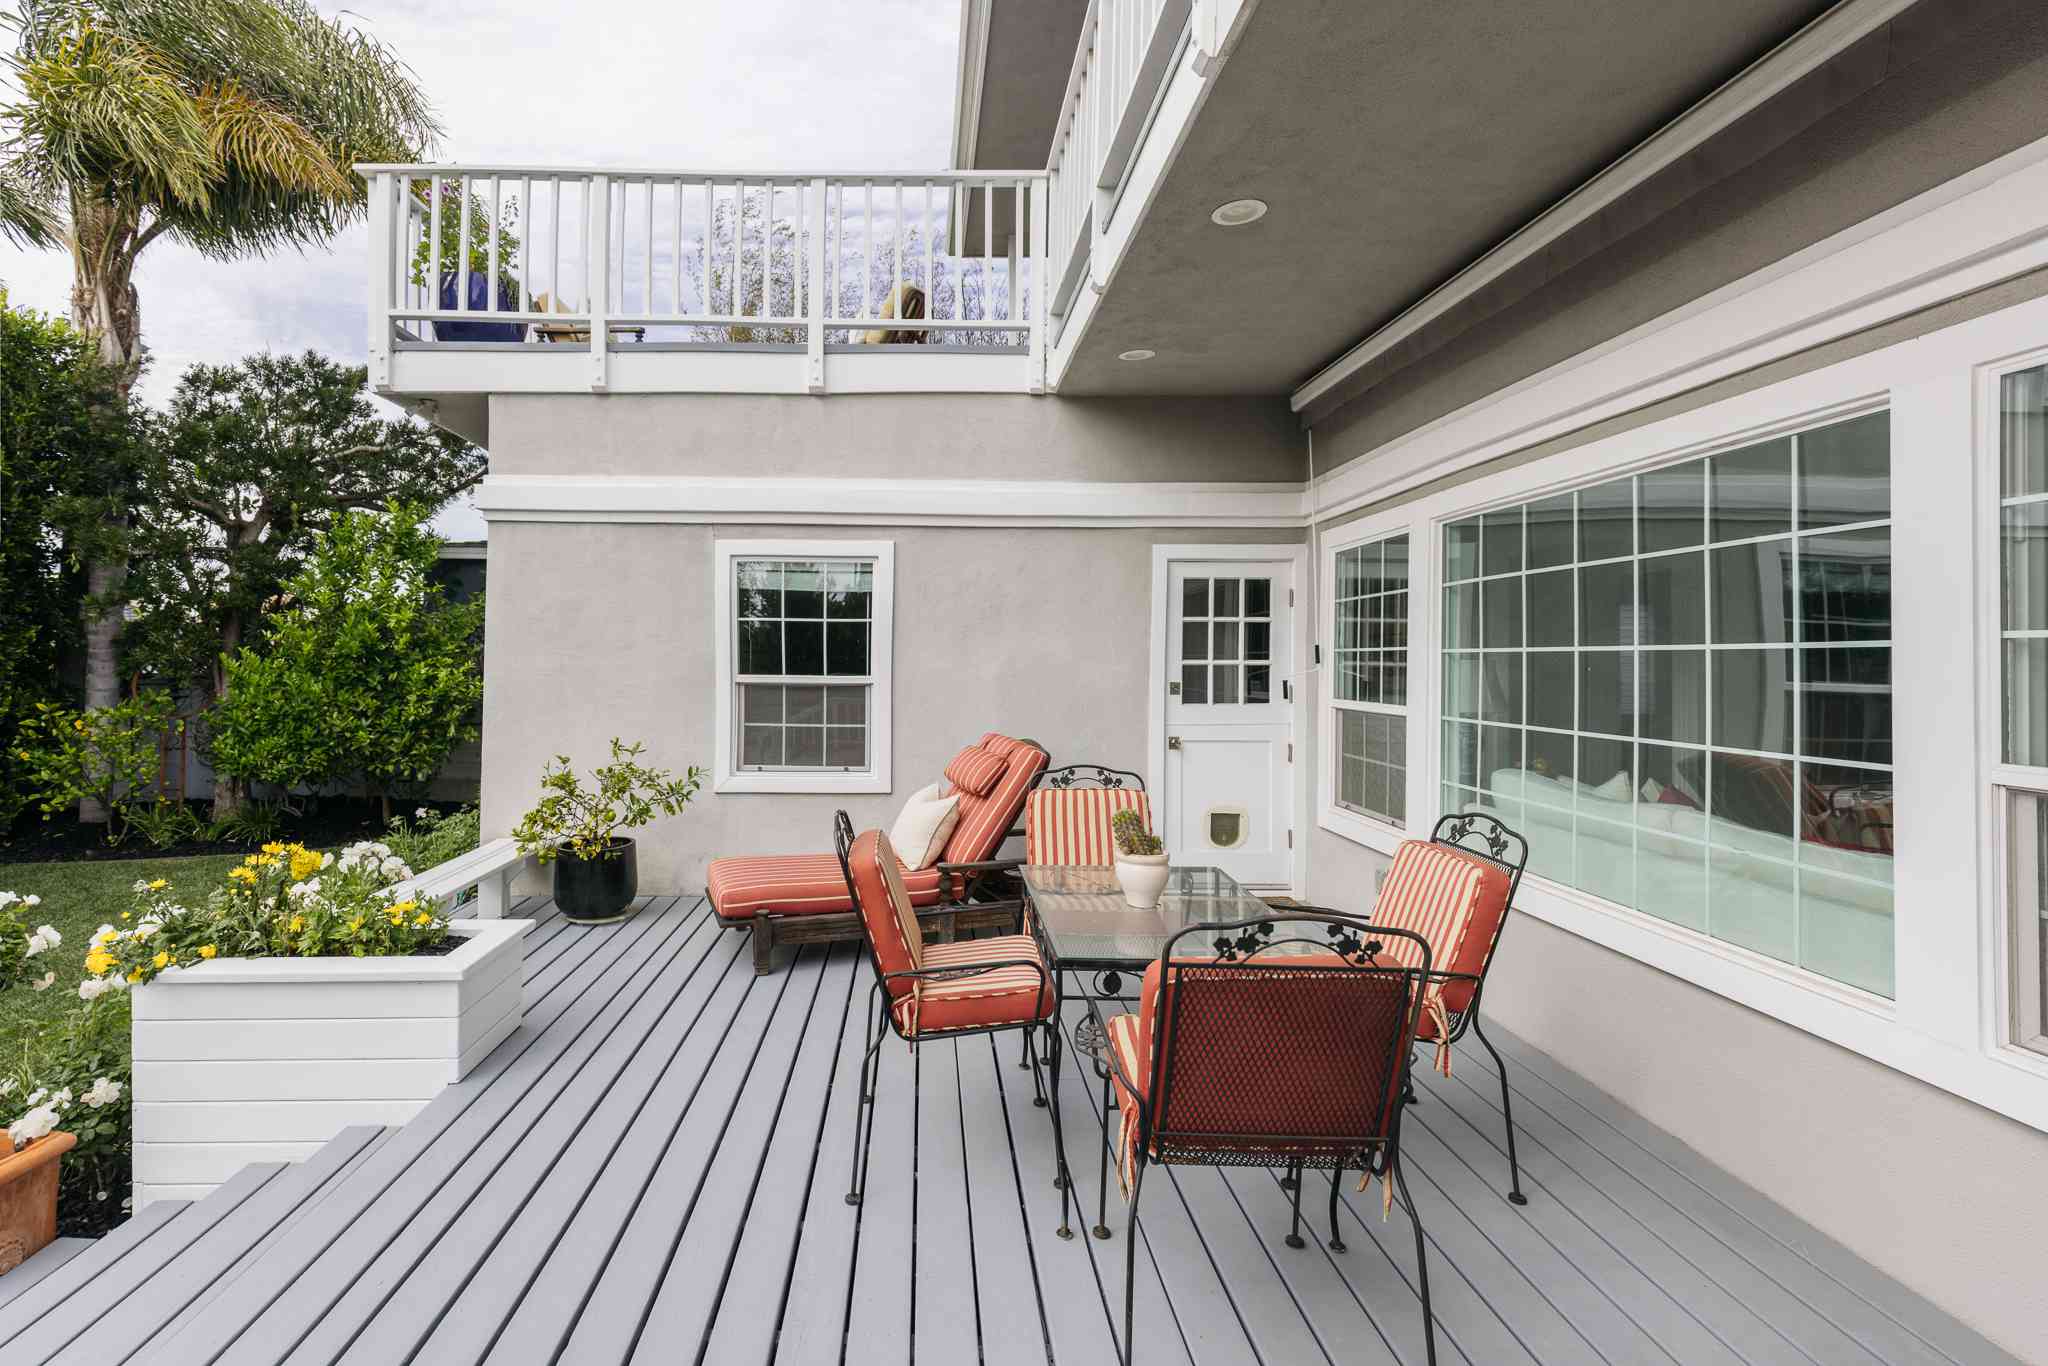
Adding Finishing Touches
Congratulations on completing your hip roof porch project! While the main construction is finished, there are still a few finishing touches that can elevate the overall look and functionality of your porch. Here are some ideas for adding those final details:
- Paint or Stain: Consider adding a fresh coat of paint or stain to the porch base, fascia, and soffit to enhance the overall appearance. Choose colors that complement your home’s exterior and blend well with the surrounding environment.
- Install Lighting: Enhance the ambiance and usability of your porch by installing outdoor lighting fixtures. Consider options such as overhead lights, wall sconces, or string lights to create a warm and inviting atmosphere for evening gatherings or relaxing nights.
- Add Seating and Decor: Furnish your hip roof porch with comfortable seating options such as lounge chairs, benches, or outdoor sofas. Incorporate weather-resistant cushions, pillows, and blankets to add coziness and style. Take the opportunity to decorate with potted plants, outdoor rugs, and small decorative items that reflect your personal taste.
- Consider Outdoor Shades or Curtains: Install outdoor shades or curtains to provide shade and privacy when needed. This allows you to control the amount of sunlight and create a more intimate and secluded space on your porch.
- Include Outdoor Accessories: Add functionality and convenience to your porch with accessories like a built-in grill, mini-fridge, or a small outdoor kitchen station. These additions will make your porch a versatile space for entertaining guests and enjoying meals outdoors.
- Ensure Proper Drainage: Check that the correct grading and proper drainage are in place to prevent water pooling on your porch. Ensure that rainwater flows away from the porch and that the surrounding landscaping facilitates proper drainage.
- Maintain Regular Cleaning and Maintenance: Keep your hip roof porch looking its best by regularly cleaning and maintaining its components. This includes clearing debris from the gutters, sweeping the porch base, and checking for any wear or damage that requires attention.
By adding these finishing touches, you can truly personalize and maximize the functionality of your hip roof porch. Creating a welcoming and comfortable outdoor space will encourage you and your loved ones to spend more time enjoying the beauty of your porch throughout the year.
Now that you’ve added the finishing touches, it’s time to sit back, relax, and relish in the satisfaction of a well-executed hip roof porch project!
Conclusion
Congratulations on successfully completing your hip roof porch project! By following the step-by-step process outlined in this guide, you have transformed your outdoor space into a functional and stylish extension of your home. From the initial planning and preparation to the final finishing touches, every step was crucial in achieving a well-built and visually appealing hip roof porch.
A hip roof porch not only adds value and curb appeal to your property but also creates a versatile space for outdoor living, entertaining, and relaxation. The careful measurement and marking of the area, the precise framing of the porch base, the installation of the hip rafters, and the addition of roofing materials all contributed to the structural integrity and aesthetic beauty of your porch.
By incorporating flashing and waterproofing, you ensured that your hip roof porch is protected from leaks and water damage. The installation of fascia and soffit added the finishing touches, enhancing the overall look of your porch while providing necessary functionality. Finally, installing gutters and downspouts ensures proper drainage and protects your porch and home from water-related issues.
With the addition of paint or stain, lighting fixtures, furniture, and outdoor accessories, you have customized your hip roof porch to suit your unique style and needs. Maintaining regular cleaning and maintenance will ensure its longevity and continued enjoyment for many years to come.
Whether you’re using your hip roof porch to relax with a book, host gatherings with friends and family, or simply enjoy the beauty of the outdoors, it will undoubtedly become a beloved space in your home.
Remember, if you ever feel unsure about any aspect of building or maintaining your porch, it’s always a good idea to consult with a professional contractor or carpenter. They can provide expert guidance and ensure that your hip roof porch is built to the highest standards of quality and safety.
Now, go ahead and kick back on your newly constructed hip roof porch, surrounded by the natural beauty of your surroundings, and enjoy the fruits of your labor. Cheers to the countless memories you’ll create in this remarkable space!
Ready to take your newly built hip roof porch to the next level of style and function? Dive into our next article on enriching your deck for year-round enjoyment. Discover simple yet vibrant decor ideas that transform any outdoor area into a charming retreat for relaxation and entertainment. Learn how to choose accessories that not only withstand the elements but also create inviting spaces for friends and family. Whether you're hosting a summer barbecue or enjoying a quiet autumn evening, these tips will ensure your porch becomes a beloved part of your home.
Frequently Asked Questions about How To Build A Hip Roof Porch
Was this page helpful?
At Storables.com, we guarantee accurate and reliable information. Our content, validated by Expert Board Contributors, is crafted following stringent Editorial Policies. We're committed to providing you with well-researched, expert-backed insights for all your informational needs.


0 thoughts on “How To Build A Hip Roof Porch”