Articles
How To Build A Carport Cheap
Modified: January 8, 2024
Looking for affordable articles on how to build a carport? Check out our helpful guides and tips to construct a carport at a budget-friendly price.
(Many of the links in this article redirect to a specific reviewed product. Your purchase of these products through affiliate links helps to generate commission for Storables.com, at no extra cost. Learn more)
Introduction
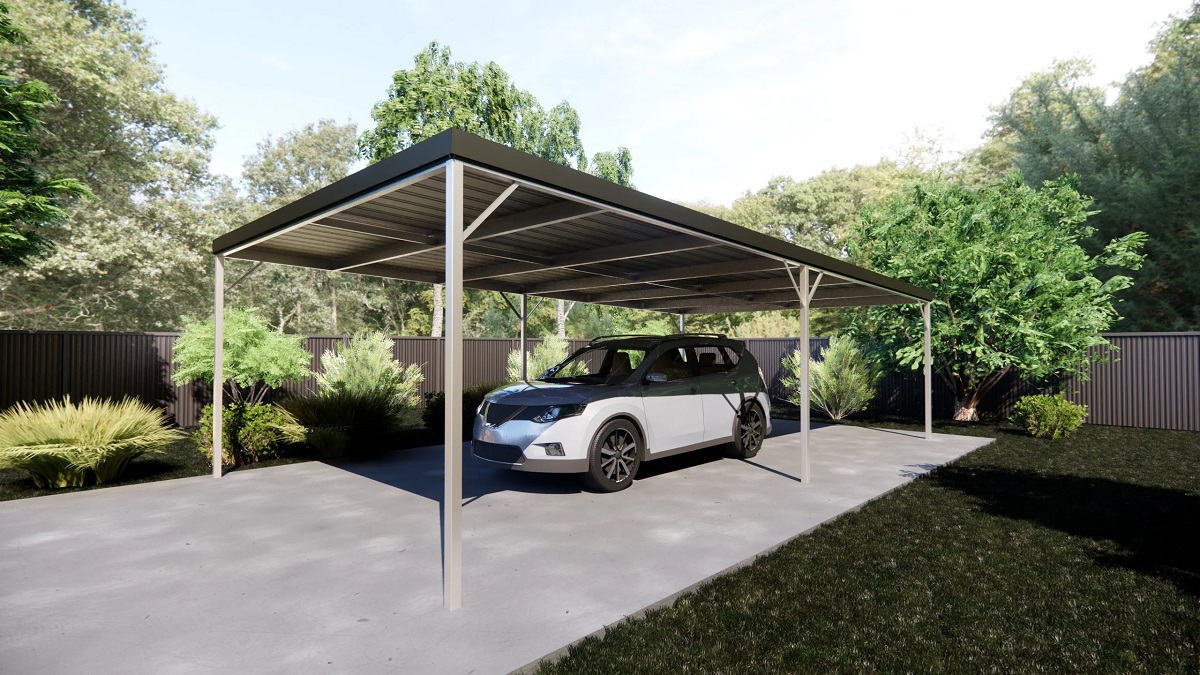
Building a carport is a cost-effective solution for protecting your vehicles from the elements, providing shade, and adding value to your property. While there are various carport options available in the market, constructing one cheaply can be a rewarding DIY project. By following some simple steps, you can build a carport that not only meets your budget but also fulfills your specific needs.
In this article, we will guide you through the process of building a carport on a budget. From choosing a suitable location to selecting materials and completing the construction, we will provide you with all the necessary information and tips to make your project a success.
Keep in mind that the cost and complexity of the project may vary depending on the size and design of the carport you desire. However, with proper planning and the right approach, you can achieve an affordable and functional structure.
So, let’s get started on your journey to building a carport that is both practical and easy on the wallet. Whether you need a shelter for your cars, RV, or boat, this guide will help you create a space that offers protection and peace of mind.
Key Takeaways:
- Building a cost-effective carport involves careful planning, from choosing the right location and size to selecting affordable materials. Following the step-by-step process ensures a functional and budget-friendly DIY project.
- Adding finishing touches, such as lighting, storage solutions, and landscaping, enhances the functionality and visual appeal of the carport. Regular maintenance ensures the longevity of the structure, making it a valuable addition to your property.
Read more: How To Build A Cheap Carport
Choosing a Suitable Location
When selecting a location for your carport, there are a few factors to consider to ensure functionality and convenience. Here are some guidelines to help you choose a suitable location:
- Accessibility: Place your carport in a location that provides easy access for your vehicles. Consider the distance and pathway from your driveway or main entrance to the carport. Make sure there is ample space for maneuvering.
- Clearance: Ensure that there is enough vertical clearance for your vehicles. Take into account the height of your tallest vehicle and factor in additional clearance for any roof overhangs or accessories.
- Orientation: Pay attention to the direction of the sun and prevailing winds. Orienting your carport to maximize shade and minimize exposure to strong winds can contribute to a more comfortable parking experience.
- Drainage: Choose a location with proper drainage to prevent water accumulation around and under the carport. This helps protect your vehicles from potential water damage and extends the lifespan of the carport.
- Property Regulations: Check your local building codes and homeowner’s association rules regarding the placement of carports on your property. Ensure that you comply with any restrictions and obtain the necessary permits before proceeding with construction.
By considering these factors, you can select a location that optimizes the functionality and longevity of your carport. Once you have identified the ideal spot, move on to determining the size and design that best suits your needs.
Determining the Size and Design
Before you start building your carport, it is important to determine the size and design that will meet your requirements. Here are some considerations to keep in mind:
- Vehicles: Take into account the number and size of vehicles you plan to park under the carport. Measure the length, width, and height of your vehicles to ensure adequate space.
- Additional Storage: If you need extra storage space for tools, equipment, or other items, consider incorporating a storage area into the design of your carport. This can be achieved by adding enclosed panels or a separate storage section.
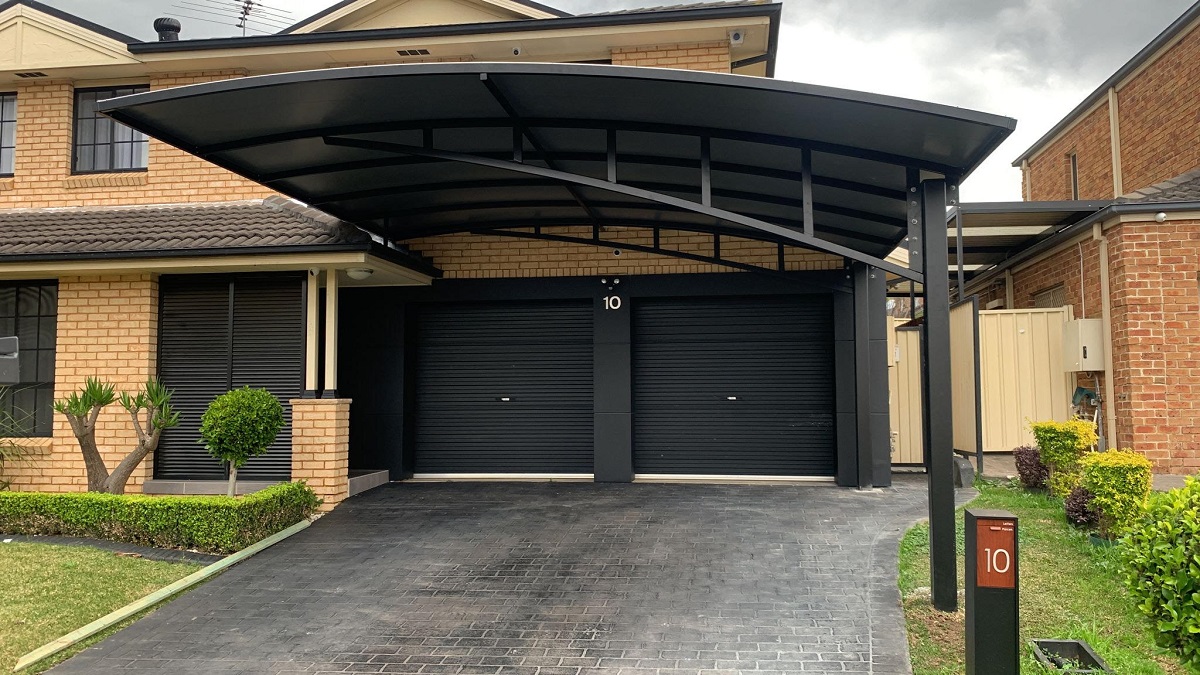
- Roof Pitch: The roof pitch determines the angle and slope of the carport’s roof. A steeper pitch can provide better water drainage, but it may increase the cost and complexity of construction. Consider your climate and rainfall patterns when deciding on the roof pitch.
- Material Options: The material you choose for your carport will impact its cost, durability, and aesthetics. Common materials include wood, metal, and aluminum. Understand the pros and cons of each material and select one that suits your budget and requirements.
- Style and Appearance: Consider the architectural style of your home and choose a carport design that complements its aesthetic appeal. Whether you prefer a traditional, modern, or rustic design, ensure that it harmonizes with the overall look of your property.
By carefully assessing your needs and preferences, you can determine the appropriate size and design for your carport. Remember to take accurate measurements and consult with professionals if needed to ensure that your carport meets local building codes and regulations.
With the size and design decided, you are ready to move on to shopping for materials to build your carport.
Shopping for Materials
When it comes to building a carport on a budget, selecting the right materials is crucial. Here are some tips to help you shop for cost-effective yet durable materials:
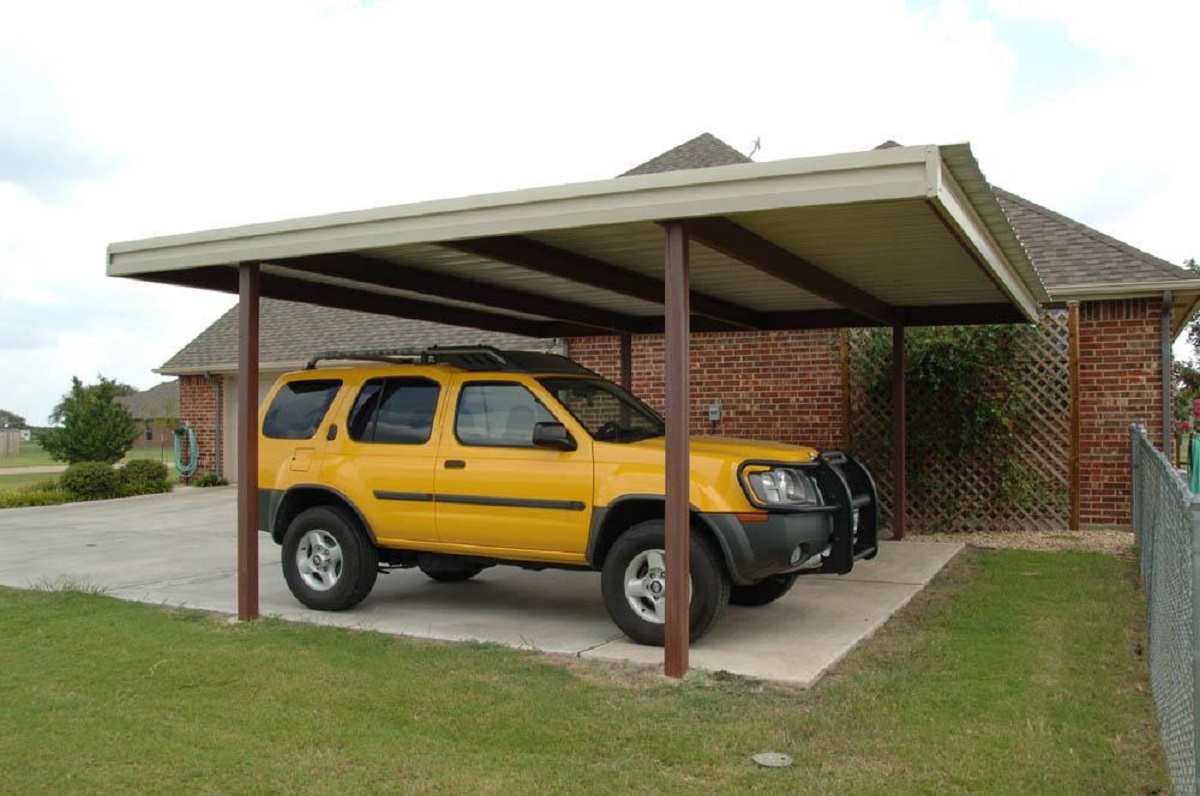
- Roofing Material: Consider using corrugated metal sheets or polycarbonate panels for the roof. These materials are affordable, lightweight, and provide adequate protection against the elements.
- Frame Material: Wood is a popular choice for the carport’s frame due to its affordability and versatility. Pressure-treated lumber is recommended for its resistance to rot and decay. Alternatively, steel or aluminum frames can be used for a more durable and low-maintenance option.
- Fasteners: Use galvanized screws or nails to secure the components. These are corrosion-resistant and will provide long-lasting stability to your carport structure.
- Concrete or Gravel: Depending on your preference and the local regulations, you may need to choose between a concrete or gravel foundation. Concrete is more durable but can be costlier, while gravel is more affordable and easier to install.
- Additional Accessories: Consider any additional accessories such as gutters, downspouts, or lighting fixtures that you may want to incorporate into your carport design. Shop around for the best deals and look for cost-effective options that meet your needs.
Take the time to compare prices, quality, and warranties when shopping for materials. Consider both local hardware stores and online suppliers to find the best deals. It is also advisable to consult with professionals or experienced DIYers who can provide guidance on selecting the right materials for your project.
Once you have gathered all the necessary materials, you can proceed to the next step of preparing the site for construction.
Preparing the Site
Preparing the site is a crucial step in building a carport. By properly preparing the area, you will ensure a stable foundation and a smooth construction process. Here are the steps to follow:
- Clear the Area: Remove any vegetation, debris, or obstacles from the site where the carport will be installed. This includes grass, rocks, tree stumps, or any other items that could interfere with the construction process.
- Mark the Boundaries: Use stakes and string to mark the boundaries of the carport area. This will provide a clear visual guide for the construction process.
- Excavate the Site: Use a shovel or rent a mini excavator to dig out the area where the carport will be placed. Excavate to a depth that allows for the recommended foundation depth, taking into consideration any local building codes or regulations.
- Level the Ground: After excavation, use a leveler or a rake to ensure that the ground is level. This will provide a solid and even surface for the foundation.
- Compact the Soil: Use a compactor or tamper to compact the soil. This helps to prevent settling and ensures stability for the foundation and the carport structure.
- Add a Weed Barrier: To prevent weed growth under the carport, lay a weed barrier fabric over the prepared site. This will help maintain a cleaner and more organized appearance.
By following these steps, you will have a well-prepared site that is ready for the next phase of construction. It is important to note that site preparation requirements may vary depending on your specific location and soil conditions. It is recommended to consult with local professionals or building authorities to ensure compliance with any specific regulations.
Next, we will move on to the foundation installation, which is a critical part of the carport construction process.
Read more: How To Build A Carport
Installing the Foundation
The foundation of a carport provides stability and support for the structure. The type and design of the foundation will depend on various factors, such as the size of the carport, soil conditions, and local building codes. Here’s a general guide on the installation process:
- Concrete Foundation: If you choose to install a concrete foundation, start by digging holes at the designated spots for the foundation footings. The depth and diameter of the holes will depend on the local building requirements and the size of your carport. Pour the concrete into the holes and insert post anchors or brackets to secure the carport’s posts.
- Gravel Foundation: For a gravel foundation, start by laying a geotextile fabric over the prepared site. This fabric prevents weed growth and helps with drainage. Next, spread a layer of compacted gravel over the fabric, ensuring a level and stable surface for the carport frame.
- Pier Foundation: A pier foundation is an alternative option and is suitable for carports with smaller footprints. Dig holes for the piers at the designated spots, and install concrete or precast pier blocks in each hole. Ensure that the piers are level and secure, and then attach the carport frame to the piers.
During the foundation installation process, it’s important to check for levelness and adjust as needed. This will ensure that your carport is stable and properly aligned.
It is essential to consult with local building authorities or professionals to determine the specific foundation requirements for your area. They can provide guidance on factors such as frost depth, concrete mix ratios, and other regional considerations that may affect the foundation installation.
With the foundation in place, you are ready to move on to constructing the frame of your carport.
Consider using a metal carport kit, which is often more affordable than building a traditional wooden carport. You can also save money by doing the installation yourself.
Building the Frame
The frame of a carport provides the structural support for the entire structure. It is crucial to ensure that the frame is sturdy, properly aligned, and meets all safety requirements. Here’s a step-by-step guide to building the frame:
- Assemble the Posts: Start by attaching the vertical posts to the foundation. This can be done by securing them with post brackets or anchoring them into the concrete footings. Ensure that the posts are plumb and level using a spirit level.
- Install the Beams and Headers: Attach the beams and headers to the tops of the vertical posts. These horizontal components will provide stability and support for the roof. Secure them tightly with appropriate brackets or fasteners.
- Construct the Roof Trusses: Depending on the design of your carport, you may need to construct roof trusses. These triangular-shaped support structures distribute the weight of the roof evenly. Follow the design specifications and measurements to build and install the trusses securely.
- Attach Roofing Materials: Once the frame is completed, it’s time to attach the roofing materials. Whether you choose corrugated metal sheets, polycarbonate panels, or another option, make sure to follow the manufacturer’s instructions for proper installation. Secure the roofing materials tightly to prevent any movement or damage during strong winds.
- Reinforce and Brace: As you proceed with the frame assembly, make sure to reinforce and brace the structure as necessary. This involves adding diagonal braces and additional supports to prevent any swaying or instability.
It’s important to work carefully and accurately during the frame construction process, ensuring proper alignment and attachment of all components. Taking the time to double-check measurements and follow the instructions will result in a sturdy and durable carport frame.
Remember to consult with professionals or experienced DIYers if you have any doubts or questions regarding the frame construction. They can provide valuable guidance and advice based on their expertise.
With the frame in place, the next step is to install the roof, providing protection from the elements.
Installing the Roof
The roof is a crucial component of a carport, providing protection from the elements and ensuring the longevity of the structure. Here’s a step-by-step guide to installing the roof:
- Prepare the Roofing Material: If you’re using corrugated metal sheets or polycarbonate panels, measure and cut the panels to fit the dimensions of your carport roof. Make sure to follow the manufacturer’s instructions for cutting and handling the roofing material.
- Start at One End: Begin installing the roofing material at one end of the carport. Align the first sheet or panel, ensuring that it overlaps with the edge of the carport frame as specified in the manufacturer’s instructions.
- Secure the Roofing Material: Use appropriate screws or roofing nails to attach the roofing material to the frame. Place the fasteners in the pre-drilled holes or as directed by the manufacturer. Be mindful of spacing and placement to maintain the structural integrity of the roof.
- Overlap and Seal: As you progress with the installation, make sure to overlap each subsequent sheet or panel according to the manufacturer’s instructions. This ensures proper water drainage and prevents leakage. Apply sealant or weatherproof tape to the overlapping joints to further enhance weather protection.
- Trim and Finish: Once all the roofing material is installed, trim any excess material using appropriate tools. Be careful to follow safety precautions when cutting and handling sharp objects. Additionally, add any necessary finishing touches to ensure a clean and polished appearance.
During the roof installation process, take care to work steadily and methodically. Double-check measurements and alignments to ensure a properly sealed and weathertight roof. If you encounter any challenges or are uncertain about any aspect of the installation, seek guidance from professionals or experienced individuals who can provide assistance.
With the roof successfully installed, your carport is now protected from rain, snow, and excessive sunlight. Depending on your preferences and needs, you may also consider adding walls to your carport.
Adding the Walls (optional)
While carports are traditionally open structures, you may choose to add walls for additional protection, privacy, or storage space. Adding walls is an optional step that can further enhance the functionality of your carport. Here’s a guide to adding walls:
- Determine the Type of Walls: Decide on the type of walls you want to install. Options include solid walls made of wood or metal, or mesh panels that allow airflow while providing some privacy. Consider your specific needs and preferences.
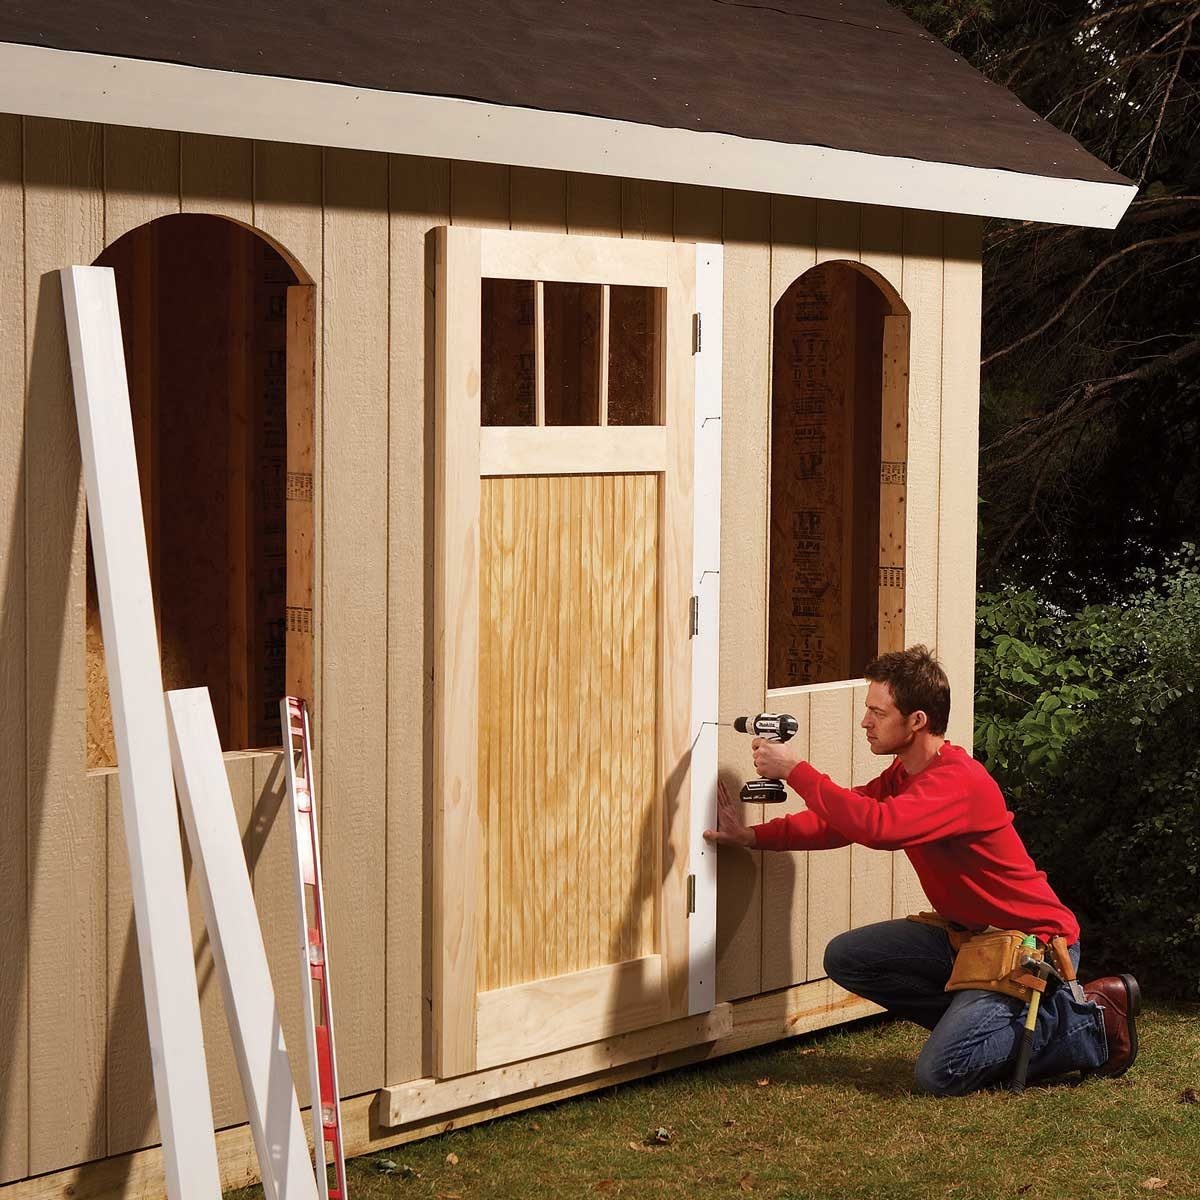
- Frame the Walls: Build a frame using wooden or metal studs to support the wall panels. Ensure that the framing is sturdy and properly aligned. Use appropriate fasteners to connect the frame to the carport structure securely.
- Install Wall Panels: Attach the chosen wall panels to the frame, ensuring proper alignment and secure installation. If using wooden panels, treat them with appropriate sealant or paint to protect against moisture and damage.
- Add Doors and Windows: If desired, incorporate doors and windows into your wall design. This enhances accessibility and allows natural light to enter the enclosed space. Make sure to install them properly and weatherproof as needed.
- Seal Gaps and Joints: Check for any gaps or joints in the walls and use weatherproof sealant or caulk to seal them. This prevents water or pests from entering the enclosed space.
- Finishing Touches: Once the walls are installed, add any finishing touches such as trim, paint, or decorative elements that match the aesthetic of your carport and home.
Remember that adding walls to your carport may require additional permits or comply with specific regulations in your area. Consult local building codes and regulations or seek advice from professionals to ensure compliance and avoid any issues.
Adding walls can transform your carport into a versatile space that provides additional protection and storage options. Evaluate your needs and budget to determine if walls are a suitable addition for your carport project.
Now that you have completed the construction of your carport, there are a few final touches to consider to make it fully functional and visually appealing.
Read more: How To Build A Lean To Carport
Finishing Touches
With the main construction of your carport complete, it’s time to add the finishing touches that will enhance its functionality and aesthetic appeal. Here are some final details to consider:
- Lighting: Install appropriate lighting fixtures to ensure visibility and safety in and around the carport. Options include overhead lights, wall-mounted fixtures, or solar-powered lights for energy efficiency.
- Gutters and Downspouts: Consider adding gutters and downspouts to divert rainwater away from the carport’s foundation. This helps protect the structure and prevents water damage.
- Storage Solutions: If you require additional storage space, incorporate shelves, hooks, or cabinets into the carport design. This will keep your tools, equipment, or other items organized and easily accessible.
- Paint or Stain: Apply a coat of paint or stain to the carport’s wooden components to protect them from the elements and enhance their appearance. Choose a color that complements your home or the surrounding environment.
- Landscaping: Consider landscaping around the carport to blend it seamlessly into your property. Plant shrubs, flowers, or decorative elements to create an inviting and visually appealing space.
- Accessories: Add personal touches to your carport with accessories such as signs, decorative accents, or seating areas. This will create a welcoming atmosphere and make the carport feel like an extension of your home.
By paying attention to these finishing touches, you can create a well-rounded and attractive carport. Remember to consider safety measures, such as proper lighting and securing any loose items, to ensure a functional and secure space.
Finally, regularly maintain and inspect your carport to address any repairs or adjustments needed. By keeping up with maintenance, you can extend the lifespan of your carport and continue to enjoy its benefits for years to come.
Congratulations on completing your carport construction project and creating a valuable addition to your property!
Conclusion
Building a carport on a budget is a rewarding DIY project that provides numerous benefits. Whether you want to protect your vehicles from the elements, create extra storage space, or add value to your property, constructing a carport is a cost-effective solution.
In this article, we have guided you through the process of building a carport cheaply while maintaining functionality and aesthetics. From choosing a suitable location to determining the size and design, shopping for materials, preparing the site, installing the foundation, building the frame, installing the roof, considering optional walls, and adding finishing touches, we have covered the key steps involved in the construction process.
By following the tips and guidelines provided, you can successfully build a carport that meets your specific needs and budget. Remember to consult with professionals or experienced DIYers when needed, especially regarding local building codes and regulations.
Additionally, do not forget that safety should be a top priority throughout the construction process. Use appropriate tools, follow proper safety protocols, and consult with professionals if you are unsure about any aspect of the project.
With your carport now complete, take the time to enjoy and utilize the space you have created. Whether it’s providing protection for your vehicles, offering additional storage space, or becoming a functional extension of your home, your carport is sure to add value and convenience to your daily life.
Thank you for embarking on this DIY journey with us, and we wish you success in your carport building project!
Frequently Asked Questions about How To Build A Carport Cheap
Was this page helpful?
At Storables.com, we guarantee accurate and reliable information. Our content, validated by Expert Board Contributors, is crafted following stringent Editorial Policies. We're committed to providing you with well-researched, expert-backed insights for all your informational needs.


0 thoughts on “How To Build A Carport Cheap”