Articles
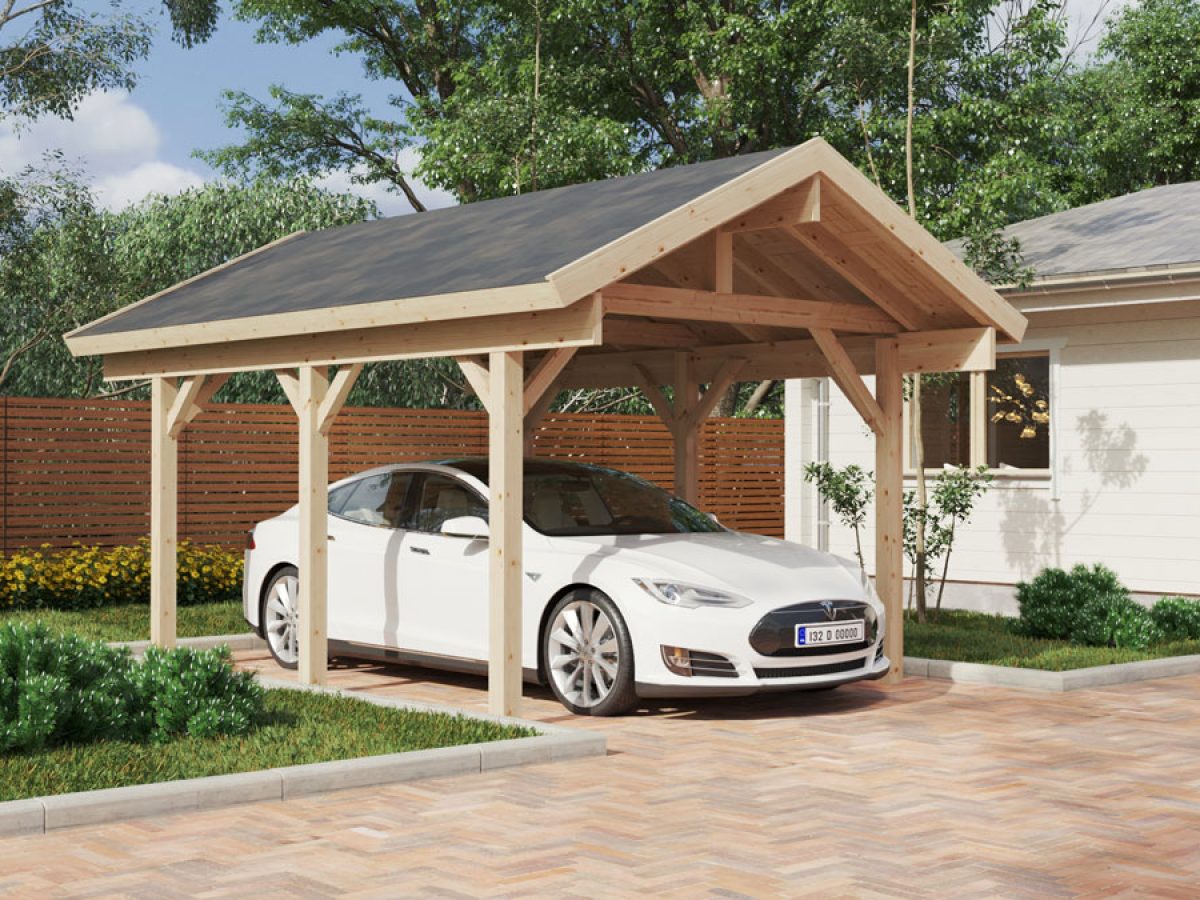
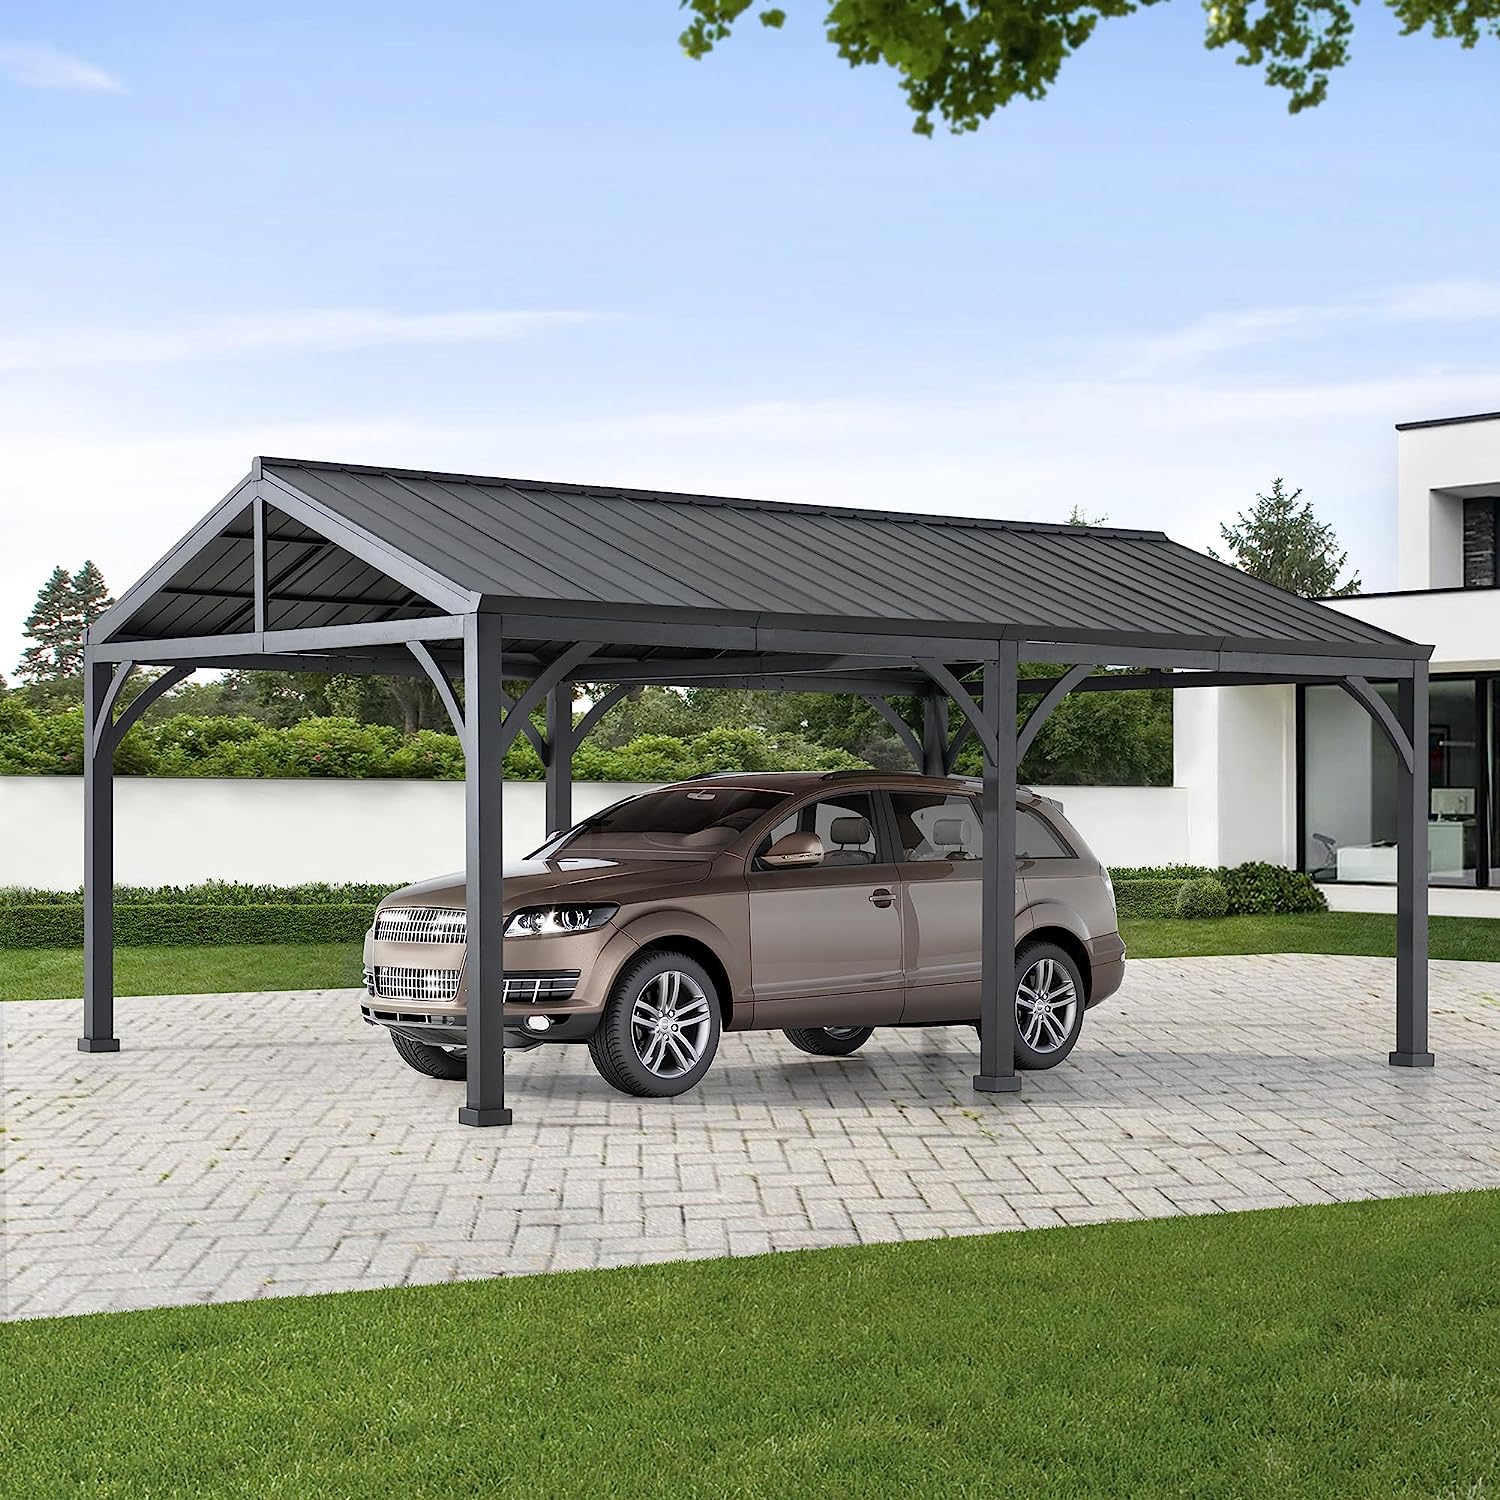
How To Build A Cheap Carport
Modified: October 19, 2024
Looking for articles on how to build a cheap carport? Check out our comprehensive guides and tips to save money while creating your own carport structure.
(Many of the links in this article redirect to a specific reviewed product. Your purchase of these products through affiliate links helps to generate commission for Storables.com, at no extra cost. Learn more)
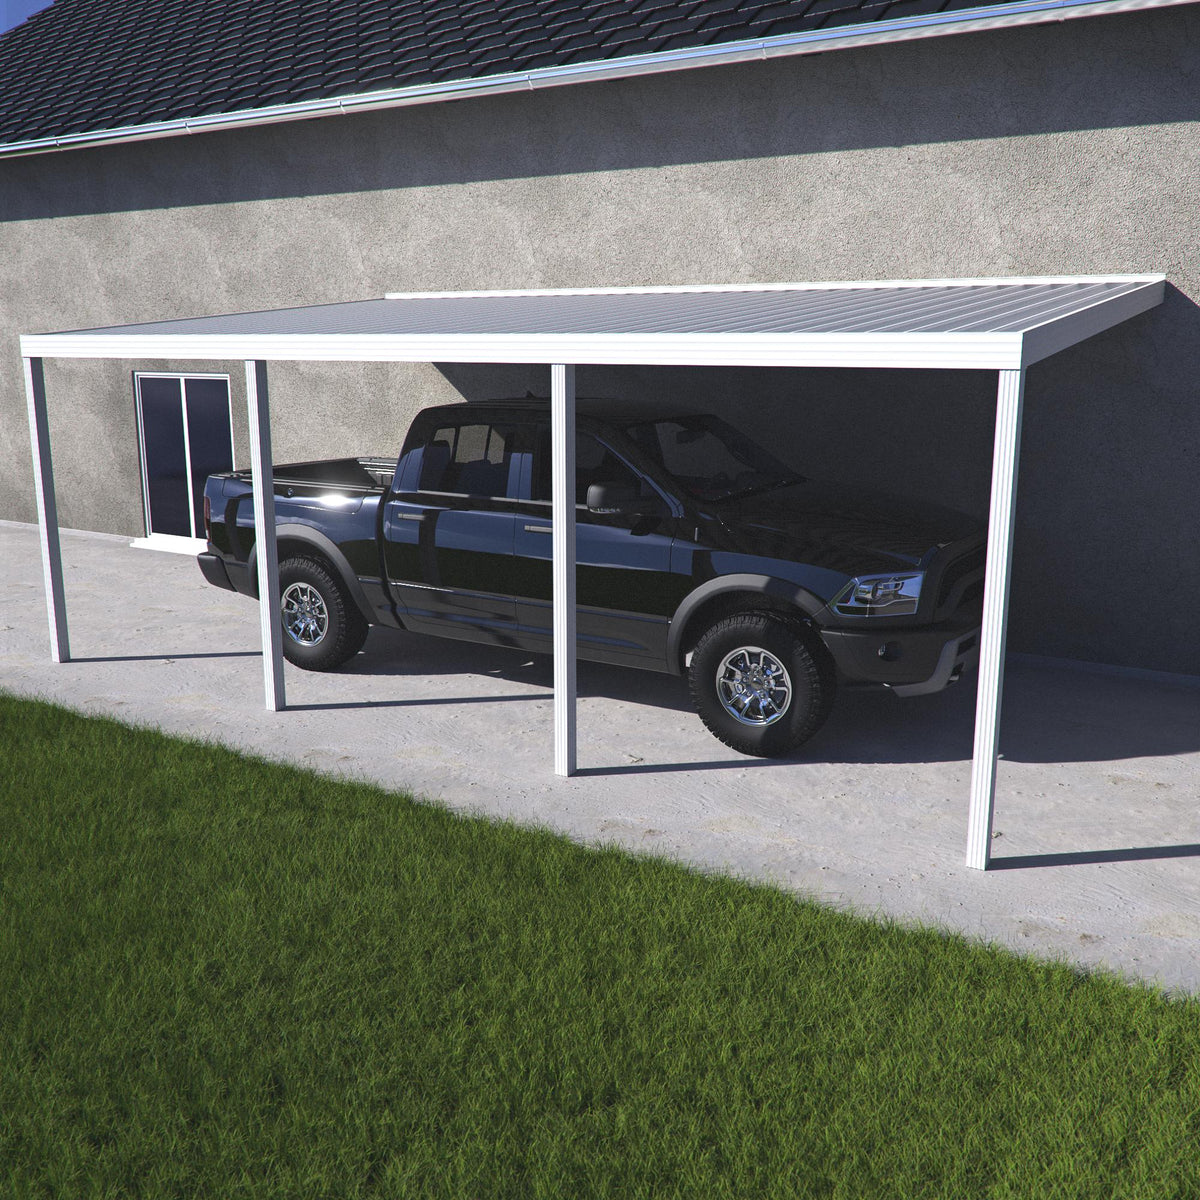
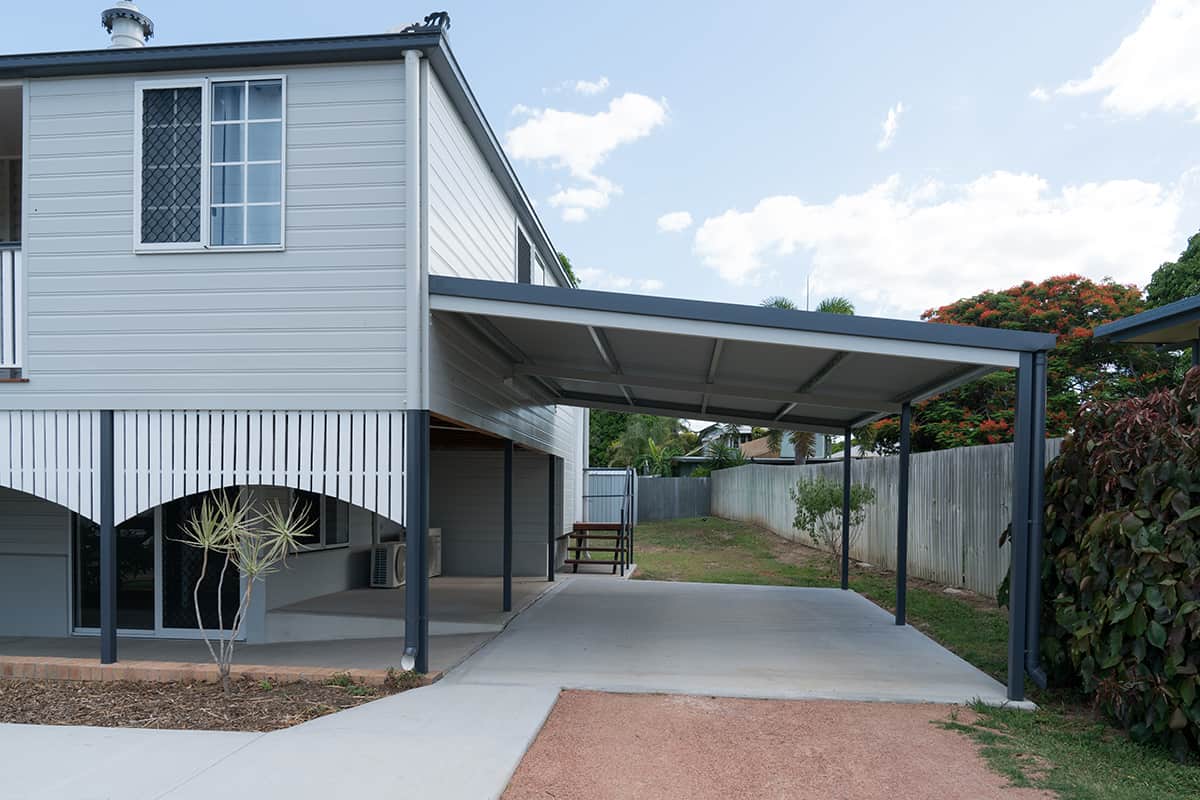
How to Build a Cheap Carport
Are you in need of a carport but don’t want to spend a fortune? Building a cheap carport is a great option. With careful planning and resourcefulness, you can create a functional and affordable carport that will protect your vehicle from the elements. In this article, we will guide you through the process of building a cheap carport step by step.
Key Takeaways:
- Building a cheap carport requires careful planning, resourcefulness, and DIY skills. From foundation to finishing touches, creating a functional and affordable carport is achievable with the right approach.
- By following the steps outlined, you can build a sturdy and visually appealing carport that protects your vehicles without exceeding your budget. Prioritize safety, compliance, and regular maintenance for long-lasting benefits.
Read more: How To Build A Lean To Carport
Planning and Preparation
Before you start building your carport, there are a few things you need to consider.
First, choose a suitable location for your carport. Look for a spot that is convenient and easily accessible. It should also have enough space to accommodate your vehicle.
Next, determine the size and dimensions of your carport. Measure your vehicle and add extra space for ease of movement. Consider the height of the carport to ensure it can accommodate taller vehicles if needed.
Check your local building codes and regulations to ensure compliance. Some areas may have specific requirements for carports, such as setbacks or permits. It is important to know these regulations before you start construction.
Gather all the necessary tools and materials for the project. This may include posts, beams, roofing material, and anchoring hardware. Shop around and compare prices to find the best deals and discounts.
Set a budget for your carport project. Having a clear budget in mind will help you make cost-effective decisions throughout the construction process.
Foundation and Anchoring
A solid foundation is crucial for the stability and durability of your carport.
Start by digging post holes at the determined locations. These holes should be deep enough to accommodate the height of the posts. Make sure they are spaced evenly according to your carport’s dimensions.
Pour concrete footings into the post holes to provide stability. Use a level to ensure that the footings are perfectly aligned.
Set the posts in the footings, making sure they are plumb and securely fixed. Allow the concrete to cure according to the manufacturer’s instructions.
To anchor the carport to the ground, use anchoring hardware such as anchors or straps. These will prevent the carport from shifting or being blown away during strong winds.
Frame Construction
The frame of the carport will provide the structure and support for the roof.
Start by installing the beams and headers according to your carport’s design. Use appropriate connectors and fasteners to ensure a secure fit.
Next, attach the cross braces to increase the stability and strength of the frame. These braces should be placed diagonally between the beams for optimal support.
Roofing
Select a suitable roofing material for your carport. Popular options include metal sheets, polycarbonate panels, or asphalt shingles. Choose a material that is durable, weather-resistant, and within your budget.
Install the roof panels or sheets according to the manufacturer’s instructions. Make sure to leave adequate overhang to protect the sides of the carport from rain and sun.
Add flashing around the edges of the roof to prevent leaks. Seal all joints and connections to ensure a watertight structure.
Read more: How To Build A Wood Carport
Sidewall Installation
If desired, you can install sidewalls to provide extra protection and privacy for your vehicle.
Choose the type of sidewalls that suit your needs, such as open-air lattice panels or solid walls. Consider adding windows or ventilation options for air circulation.
Install sidewall frames or panels according to your carport design. Make sure they are securely attached to the frame.
Finishing Touches
Once the structure is complete, you can add finishing touches to enhance the appearance and functionality of your carport.
Consider painting or staining the carport to protect it from the elements and give it a polished look. Choose a paint color that complements your home’s exterior.
Add decorative elements such as garden trellises or hanging plants to personalize your carport.
Before using the carport, ensure its structural stability and safety. Regularly inspect and maintain the carport to prevent any potential issues.
By following these steps, you can build a cheap carport that provides protection for your vehicle without breaking the bank. With some planning, resourcefulness, and a little bit of DIY spirit, you can have a functional and affordable carport in no time.
Introduction
Having a carport is a practical and cost-effective solution for protecting your vehicles from the elements. It provides shelter from harsh weather conditions such as rain, snow, and sun, while also adding value to your property. However, buying a pre-built carport can be quite expensive, especially if you’re on a tight budget. That’s where building a cheap carport comes in.
Building a cheap carport doesn’t mean compromising on quality or functionality. With careful planning, resourcefulness, and some DIY skills, you can create a carport that not only serves its purpose but also fits within your budget. Whether you need a temporary or permanent structure, a single-vehicle or multiple-vehicle shelter, building a cheap carport is a feasible option that can save you a significant amount of money.
One of the first steps in building a cheap carport is planning and preparation. This involves choosing a suitable location for your carport, determining the size and dimensions, and checking local building codes and regulations. By doing so, you can ensure that the carport meets your needs and complies with any legal requirements.
The foundation and anchoring of the carport are crucial for its stability and longevity. Digging post holes, pouring concrete footings, and securely setting the posts are essential steps in building a solid foundation. Adding anchoring hardware such as anchors or straps will further secure the carport to the ground, preventing any movement or damage during strong winds.
The frame construction of the carport involves installing beams, headers, and cross braces to provide strength and support for the structure. This is followed by roofing installation, where you can choose from a variety of materials such as metal sheets, polycarbonate panels, or asphalt shingles. Selecting a durable and weather-resistant roofing material is vital to ensure optimal protection for your vehicles.
If desired, you can also install sidewalls to provide additional protection and privacy. Whether you prefer open-air lattice panels or solid walls, adding sidewalls can further enhance the functionality and aesthetics of your carport.
To complete the construction process, add finishing touches such as painting, staining, and decorative elements. These not only improve the appearance of your carport but also help to protect it from the elements and make it more visually pleasing.
Building a cheap carport requires careful planning, attention to detail, and resourcefulness. By following the steps outlined in this guide, you can create a functional, affordable, and long-lasting carport that meets your needs and fits within your budget. Whether you’re looking to protect your vehicles, create additional storage space, or simply enhance the curb appeal of your property, building a cheap carport is a worthwhile investment that provides numerous benefits for years to come.
Key Takeaways:
- Building a cheap carport requires careful planning, resourcefulness, and DIY skills. From foundation to finishing touches, creating a functional and affordable carport is achievable with the right approach.
- By following the steps outlined, you can build a sturdy and visually appealing carport that protects your vehicles without exceeding your budget. Prioritize safety, compliance, and regular maintenance for long-lasting benefits.
Read more: How To Build A Lean To Carport
Planning and Preparation
Building a cheap carport requires careful planning and preparation to ensure a successful and cost-effective project. Here are the key steps involved in the planning and preparation process:
Read more: How Much To Build A Carport
Choosing the Location
The first step in building a carport is to choose a suitable location. Consider factors such as convenience, accessibility, and available space on your property. Look for an area that can accommodate the size of the carport and provides easy access for your vehicles.
Determining the Size and Dimensions
Once you have chosen the location, it’s important to determine the size and dimensions of your carport. Consider the number and size of vehicles you want to park under the carport, as well as any additional space you may require for storage or other purposes. Measure the dimensions carefully to ensure the carport will adequately accommodate your needs.
Checking Local Building Codes and Regulations
Before starting the construction, it’s crucial to check the local building codes and regulations in your area. This will ensure that your carport complies with any requirements or restrictions set by the authorities. Failure to adhere to the regulations can result in fines or even the need to dismantle and rebuild the carport.
Gathering Necessary Tools and Materials
Once you have finalized the location, size, and design of your carport, it’s time to gather the necessary tools and materials. Make a comprehensive list of items required for the construction, including posts, beams, roofing materials, hardware, and any additional features you may want to incorporate. Look for affordable options at local hardware stores or consider online sources for competitive prices.
Read more: How To Build A Metal Carport
Setting a Budget
Before embarking on the construction process, it’s important to set a budget for your carport project. Determine how much you are willing to spend and consider any cost-saving measures you can implement. This may include opting for more affordable materials, seeking out sales or discounts, or repurposing materials you already have on hand. Having a budget in mind will help guide your decisions throughout the project and ensure you stay within your financial limits.
By carefully planning and preparing for your carport construction, you can ensure that the project goes smoothly and stays within your budget. Choosing the right location, determining the size, checking local regulations, gathering the necessary tools and materials, and setting a budget are vital steps to successfully building a cheap carport.
Foundation and Anchoring
The foundation and anchoring of your carport are crucial for its stability and durability. Follow these steps to ensure a solid foundation for your cheap carport:
Digging Post Holes
Start by determining the locations where the posts will be placed. Use a post hole digger or an auger to dig holes at these predetermined spots. The depth and diameter of the holes will depend on the size and height of your carport, as well as the type of soil in your area. Aim for a depth of at least 2-3 feet to provide sufficient stability.
Pouring Concrete Footings
To reinforce the foundation and provide a sturdy base for the posts, pour concrete footings in each post hole. Follow the directions on the concrete mix for the appropriate water-to-mix ratio. Fill the bottom of each hole with a few inches of gravel for drainage before pouring the concrete. Use a level to ensure that the footings are aligned and level. Allow the concrete to set and cure according to the manufacturer’s instructions.
Read more: How To Build A Freestanding Carport
Setting the Posts
Once the concrete footings have cured, it’s time to set the posts in place. Place each post vertically in the center of its respective hole. Use a level to ensure that the posts are plumb, both vertically and horizontally. Temporarily brace the posts in position to keep them steady while the next steps are completed.
If needed, cut the posts to the desired height, ensuring they are tall enough to accommodate the roof slope and provide adequate clearance for the vehicles.
Securing the Carport to the Ground
To ensure that your carport is securely anchored to the ground, use appropriate anchoring hardware. Options may include ground anchors, auger-style anchors, or metal straps. The specific type of anchoring system will depend on your soil type and local building codes.
Attach the selected anchoring hardware to the posts, following the manufacturer’s instructions for placement and installation. This will help prevent the carport from shifting or being lifted by strong winds.
It’s essential to periodically inspect and maintain the foundation and anchoring of your carport. Check for any signs of movement, damage, or loosening of the posts or anchoring hardware. Make any necessary repairs or adjustments to ensure the continued stability and safety of your carport.
By following these steps for foundation and anchoring, you can ensure a strong and secure base for your cheap carport. The solid foundation will provide the necessary support and stability for the rest of the construction process, ensuring your carport stands strong against various weather conditions for years to come.
Frame Construction
The frame construction of your cheap carport is essential for providing the structure and support necessary to withstand various weather conditions. Follow these steps to build a sturdy frame:
Installing the Beams and Headers
Start by installing the horizontal beams, also known as rafters or joists, that will form the main support for the roof. Position these beams parallel to each other, spaced equally along the length of the carport. Attach the beams to the top of the posts using appropriate hardware, such as brackets or metal connectors. Ensure that the beams are level and securely fastened to the posts.
Next, install the headers at the ends of the carport. These headers will provide additional support and stability. Attach them perpendicular to the beams, forming the sides of the carport. Again, use suitable hardware to secure the headers to the posts and the beams. Check that the headers are level and flush with the beams.
Read more: How To Build A Carport Attached To House
Attaching the Cross Braces
To enhance the strength and stability of the frame, attach cross braces between the beams. These braces will help distribute the weight evenly and prevent sagging or shifting of the structure. Install the cross braces diagonally, connecting the corner of one beam to the opposite corner of another beam. Secure them with appropriate hardware, such as metal brackets or straps. Repeat this process for each pair of beams, ensuring the cross braces form an X-shaped pattern across the carport.
Make sure the cross braces are tightly fastened and provide sufficient tension to strengthen the frame. This will ensure that your carport maintains its stability and structural integrity.
Framing the Roof Structure
With the beams, headers, and cross braces in place, it’s time to frame the roof structure. Start by attaching additional beams or purlins perpendicular to the existing beams. Space them according to your chosen roofing material’s requirements or local building codes.
The number of beams or purlins you add will depend on the size and design of your carport. The goal is to create adequate support for the roofing material and maintain stability. Attach the roofing material directly to these beams or purlins, following the manufacturer’s instructions for installation.
Ensure that all connections and joints are secure and tight. Use appropriate fasteners, such as screws or nails, to minimize the risk of loosening or shifting over time. Double-check that the entire frame is level and plumb throughout the construction process.
By following these steps for frame construction, you will create a strong and stable foundation for your cheap carport. The beams, headers, cross braces, and roof framing will ensure that your carport can withstand various weather conditions while providing reliable protection for your vehicles.
Roofing
The roofing of your cheap carport is crucial for ensuring the protection of your vehicles from the elements. Here are the key steps for successful roofing installation:
Selecting the Roofing Material
When it comes to selecting the roofing material for your carport, there are several options to consider. Common choices include metal sheets, polycarbonate panels, or asphalt shingles. Each material has its advantages and considerations. Metal sheets are durable, low-maintenance, and provide excellent protection. Polycarbonate panels offer transparency and can allow natural light to enter the carport. Asphalt shingles are a popular choice for their affordability and versatility. Consider your budget, climate, and personal preference when selecting the roofing material.
Read more: How To Build A Carport Out Of Wood
Installing Roof Panels or Sheets
Once you have chosen the roofing material, it’s time to install the roof panels or sheets. Follow the manufacturer’s instructions for proper installation techniques.
If you have selected metal sheets or polycarbonate panels, start by measuring and cutting them to fit the dimensions of your carport roof. Begin the installation at one end, securing the first sheet or panel to the roof frame with appropriate fasteners. Ensure that each subsequent sheet or panel overlaps the previous one to prevent leaks. Continue this process until the entire roof is covered.
If you are using asphalt shingles, start by installing an underlayment to provide an extra layer of protection against moisture. Then, begin at the bottom edge of the roof and lay the shingles in rows, working your way up. Use roofing nails or staples to secure each shingle, following the manufacturer’s guidelines for spacing and fastening.
Adding Flashing and Sealing
To prevent water from penetrating the seams and edges of your carport roof, it’s essential to add flashing and seal all joints and connections.
Attach metal flashing to the edges of the roof, such as the eaves and ridge, to ensure a watertight seal. Make sure the flashing overlaps the roofing material and extends beyond the edges to direct water away from vulnerable areas.
Seal all gaps, joints, and seams with appropriate sealant or caulking. Pay particular attention to areas where the roofing material meets the beams, headers, and sidewalls. Use a waterproof sealant that is compatible with the selected roofing material. This step will help prevent leaks and ensure the longevity of your carport roof.
Regularly inspect the roof for any signs of damage or wear, such as loose panels, missing shingles, or deteriorating sealant. Make necessary repairs as soon as possible to maintain the integrity of the roof and prolong its lifespan.
By following these steps for roofing installation, you can ensure that your cheap carport provides reliable protection for your vehicles against various weather conditions, allowing you to enjoy peace of mind knowing your vehicles are safe and sheltered.
Read more: How To Build A Wood Carport
Sidewall Installation
Installing sidewalls on your cheap carport can provide additional protection, privacy, and versatility. Here are the key steps to successfully install sidewalls:
Choosing the Type of Sidewalls (if desired)
Before starting the installation process, you need to decide on the type of sidewalls you want for your carport. Consider factors such as the level of privacy desired, the amount of airflow needed, and the overall aesthetics you’re aiming for. Options for sidewalls include open-air lattice panels, solid walls made of materials like wood or metal, or a combination of both.
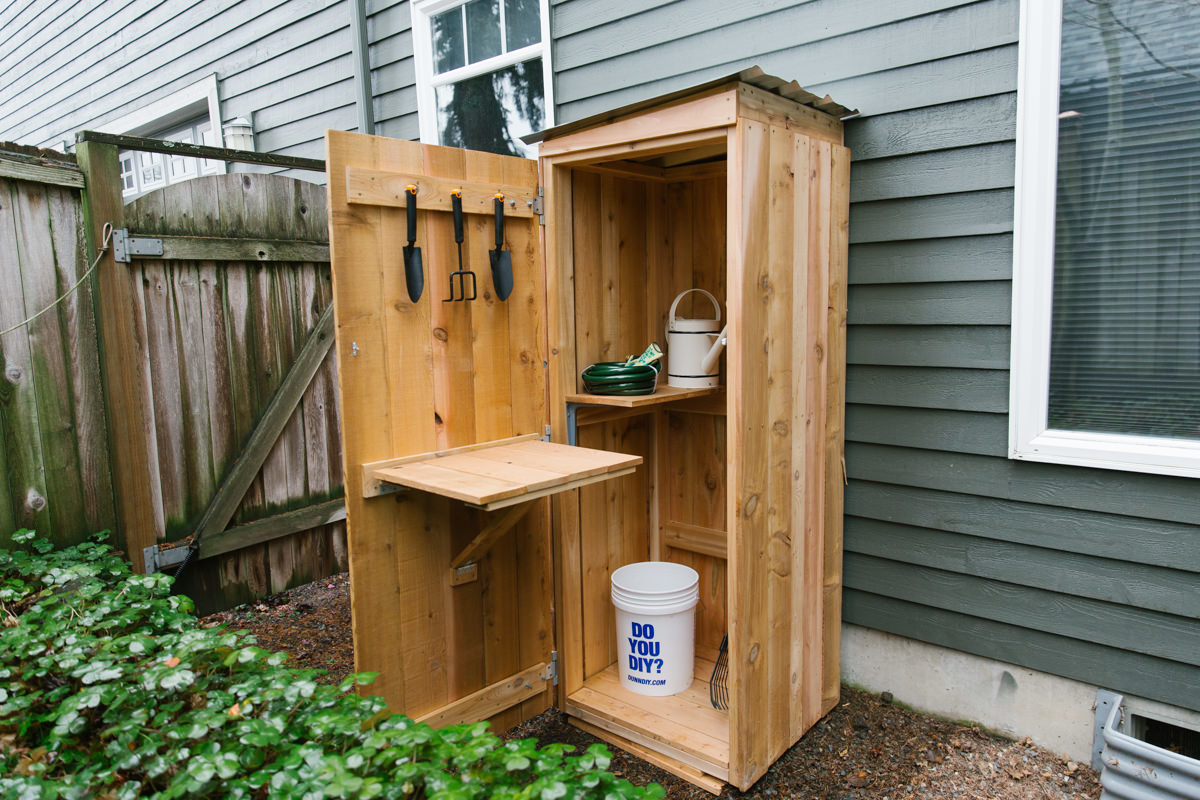
Read more: How To Build A Shed For Cheap
Installing Sidewall Frames or Panels
Once you’ve decided on the type of sidewalls, it’s time to install the frames or panels. If you’ve chosen lattice panels or framed screens, start by attaching the frames to the posts or headers of the carport. Use screws or nails to secure the frames, ensuring they are level and properly aligned. Then, insert the lattice panels or screens into the frames, making sure they are securely held in place.
If you’ve opted for solid walls, start by measuring and cutting the panels to fit the desired height and width. Attach the panels to the frames or directly to the posts, using appropriate fasteners for the chosen material. Make sure the panels are level, flush, and securely attached. Repeat this process for each side of the carport where you want to install sidewalls.
Adding Windows or Ventilation Options
To enhance the functionality and airflow within your carport, consider adding windows or ventilation options to the sidewalls. This can help improve air circulation and prevent condensation buildup. Options for windows include sliding windows, awning windows, or fixed windows. You can also install vents or louvers to allow for increased airflow.
Make sure to properly measure and cut openings for windows or ventilation options in the sidewalls before installing them. Follow the manufacturer’s instructions for the installation of windows or ventilation components and ensure they are securely fastened and sealed to prevent leaks and drafts.
The addition of windows or ventilation options provides not only practical benefits but also enhances the overall appearance of your carport.
By following these steps for sidewall installation, you can customize your cheap carport to meet your specific needs. Whether you’re aiming for privacy, extra protection, or improved ventilation, installing sidewalls adds versatility and functionality to your carport structure.
Finishing Touches
After completing the construction of your cheap carport, it’s time to add the finishing touches. These final steps will not only enhance the appearance of your carport but also ensure its structural stability and safety. Here’s what you need to do:
Painting or Staining the Carport
One of the most effective ways to add a polished look to your carport is by painting or staining it. Choose a paint color or stain that complements the existing aesthetic of your property or matches your personal preference. Make sure to use weather-resistant paint or stain that can withstand the outdoor elements. Apply multiple coats, following the manufacturer’s instructions, for a long-lasting finish.
Painting or staining not only enhances the appearance of your carport but also provides an extra layer of protection against the sun, rain, and other weather conditions.
Adding Decorative Elements
To personalize your carport and make it more visually appealing, consider adding decorative elements. This can include hanging plants, wind chimes, garden trellises, or other ornaments. Choose elements that align with your style preferences and create a welcoming atmosphere. However, ensure that any decorative additions do not compromise the structural integrity or functionality of the carport.
Adding decorative elements allows you to infuse your personal touch into the design and transform your carport into a visually appealing space.
Ensuring Structural Stability and Safety
Before you start using your carport, it’s essential to ensure its structural stability and safety. Regularly inspect the carport for any signs of wear, damage, or loose connections. Check that all beams, posts, headers, and fasteners are secure and in good condition.
Remove any debris or dirt that may accumulate on the roof or in gutters to prevent potential damage. Also, ensure that the anchoring of the carport to the ground is secure and that no shifting or movement has occurred.
Periodic maintenance and inspections go a long way in preserving the structural integrity and safety of your carport. Taking these steps will help prolong the lifespan of the carport and ensure a safe and functional structure for years to come.
By paying attention to the finishing touches and ensuring structural stability and safety, you can complete your cheap carport project with confidence. The application of paint or stain, the addition of decorative elements, and regular maintenance will not only improve the aesthetics of your carport but also provide long-lasting functionality and peace of mind.
Conclusion
Building a cheap carport is a rewarding project that provides numerous benefits. By following the steps outlined in this guide, you can create a functional and affordable carport that protects your vehicles from the elements while fitting within your budget.
Starting with careful planning and preparation, you will select the ideal location, determine the size and dimensions, check local building codes, gather necessary tools and materials, and set a budget. These initial steps lay the foundation for a successful carport construction project.
Once you have prepared the groundwork, you will move on to foundation and anchoring. Digging post holes, pouring concrete footings, setting the posts, and securing the carport to the ground ensure stability and durability.
The frame construction is a crucial step in creating a sturdy carport. Installing beams and headers, attaching cross braces, and framing the roof structure provide the necessary support and strength for the carport.
Roofing is a vital aspect of the carport construction process. Selecting the appropriate roofing material, such as metal sheets, polycarbonate panels, or asphalt shingles, ensures protection from the elements. Installing roof panels or sheets and adding flashing and sealing prevent leaks and maintain the integrity of the carport.
Adding sidewalls to the carport enhances protection, privacy, and versatility. Depending on your preference, choose lattice panels, solid walls, or a combination and install them securely. Consider adding windows or ventilation options for improved airflow and comfort.
Lastly, the finishing touches provide the final touches of customization and safety. Painting or staining the carport adds a polished look while also protecting the structure. Adding decorative elements, such as hanging plants or garden trellises, brings a personal touch to the carport. Regular maintenance and inspections ensure ongoing structural stability and safety.
By successfully completing each step, you can create a functional and visually appealing carport that meets your specific needs. Whether you’re looking to protect your vehicles, create additional storage space, or enhance the curb appeal of your property, a cheap carport is an excellent investment.
Remember to always prioritize safety throughout the construction process and follow local regulations to ensure compliance. Regular maintenance and inspections will prolong the lifespan of your carport and ensure consistent protection for your vehicles.
With determination, resourcefulness, and attention to detail, building a cheap carport is an achievable project that provides long-lasting benefits. Enjoy the satisfaction and convenience of having a dedicated space to protect your vehicles without breaking the bank.
Frequently Asked Questions about How To Build A Cheap Carport
Was this page helpful?
At Storables.com, we guarantee accurate and reliable information. Our content, validated by Expert Board Contributors, is crafted following stringent Editorial Policies. We're committed to providing you with well-researched, expert-backed insights for all your informational needs.
0 thoughts on “How To Build A Cheap Carport”