Articles
How To Screen In A Porch
Modified: August 31, 2024
Learn how to screen in your porch with our informative articles. Transform your outdoor space into a bug-free oasis and enjoy the fresh air all year round!
(Many of the links in this article redirect to a specific reviewed product. Your purchase of these products through affiliate links helps to generate commission for Storables.com, at no extra cost. Learn more)
Introduction
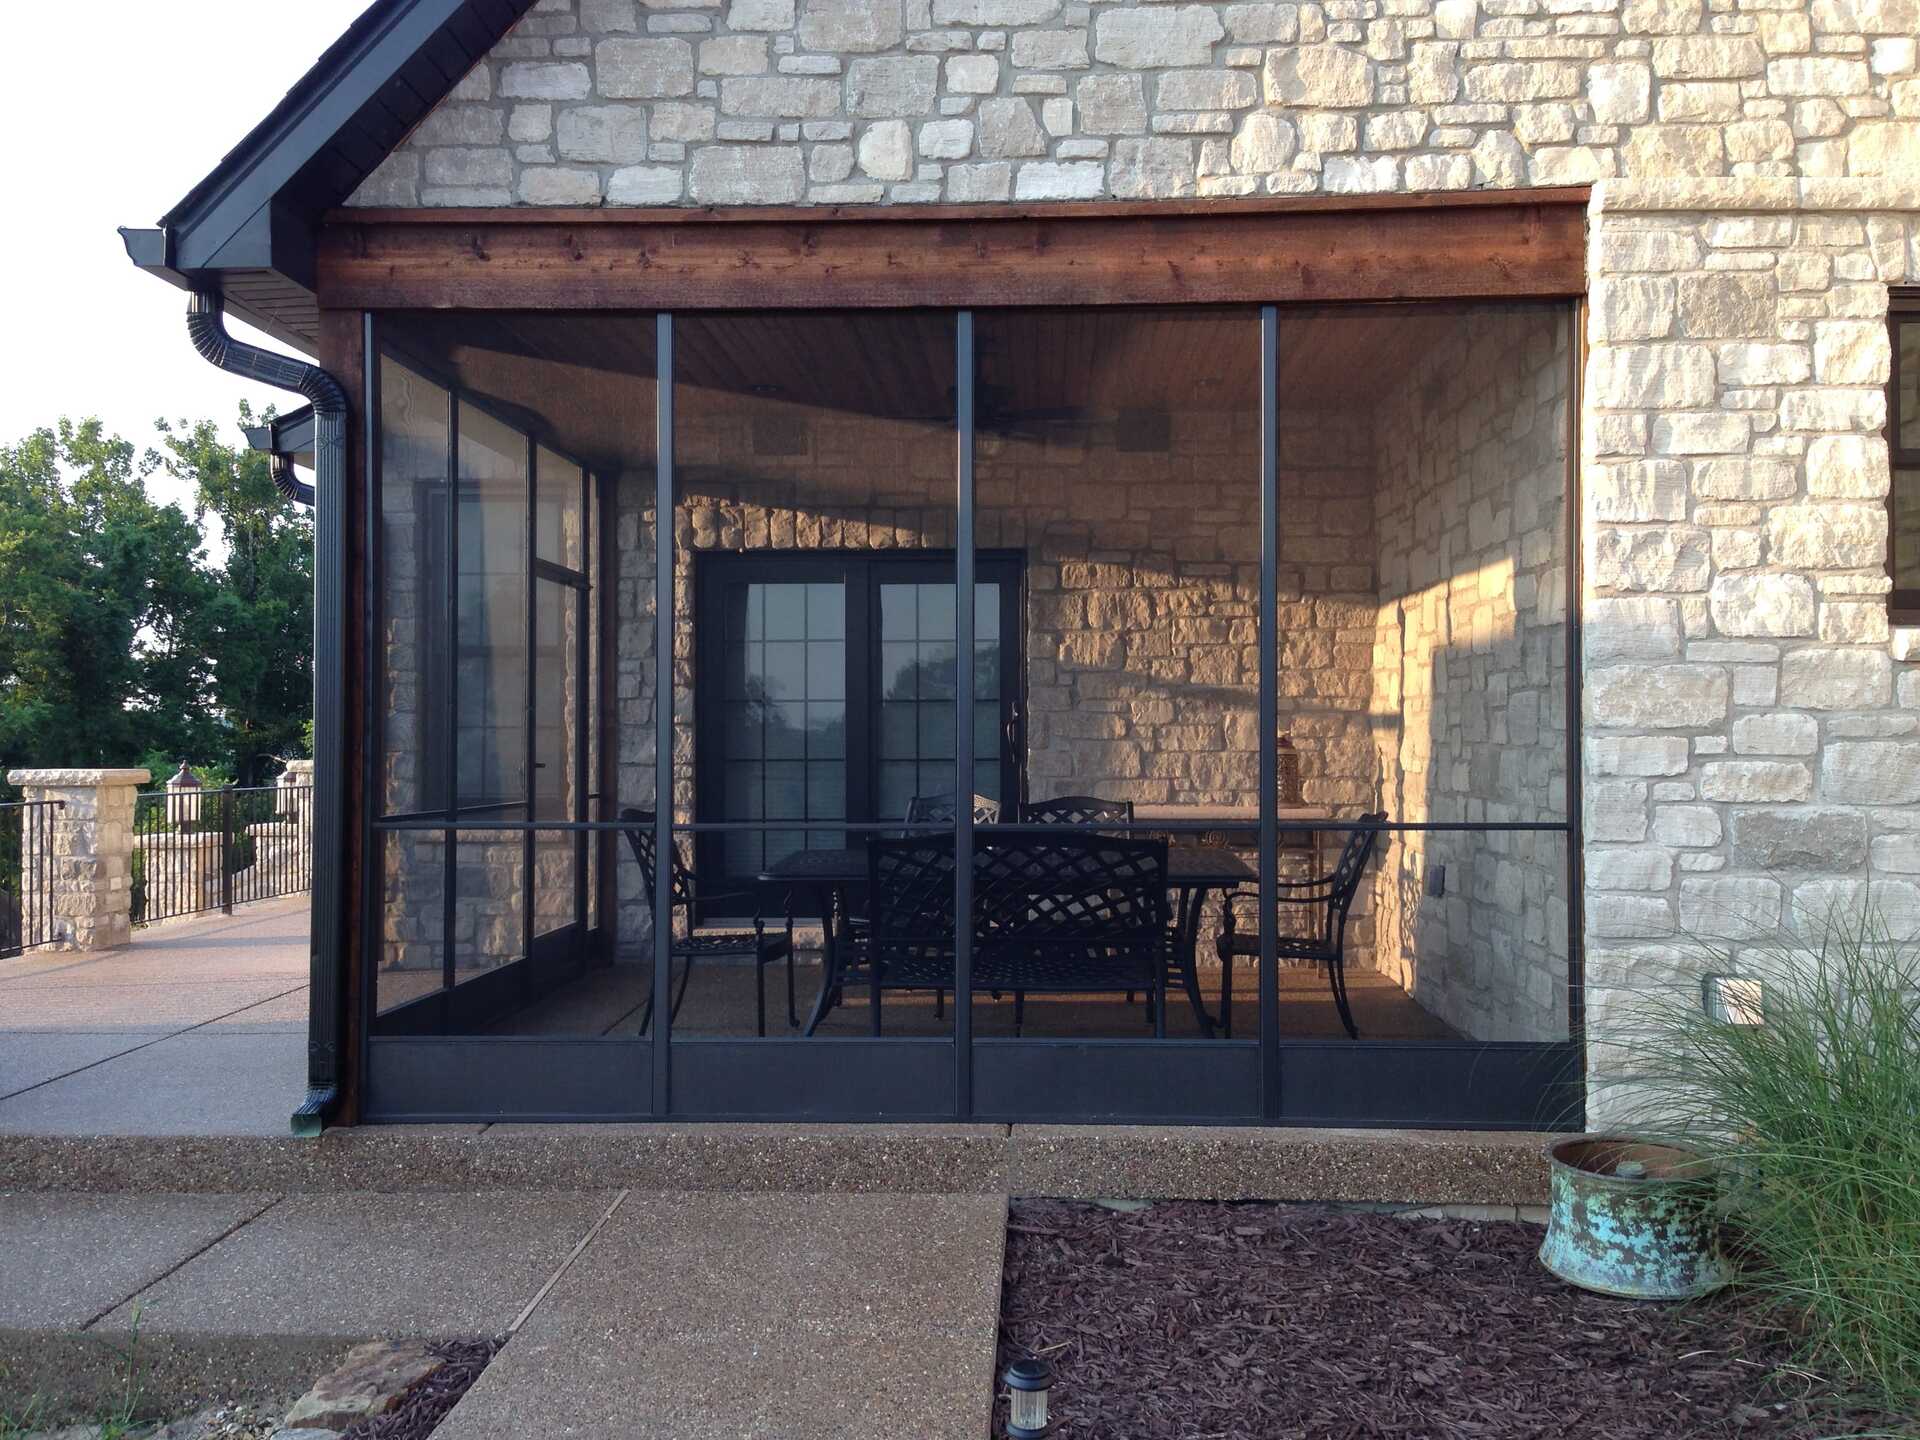
Welcome to our comprehensive guide on how to screen in a porch. If you love spending time outdoors but want to avoid pesky insects and bugs, then screening in your porch is the perfect solution. A screened-in porch not only provides protection from unwanted visitors but also adds a touch of charm and functionality to your outdoor space.
In this article, we will walk you through the step-by-step process of screening in your porch. Whether you have an existing porch or are planning to build a new one, this guide will provide all the information you need to complete the project successfully.
Before we begin, it’s important to gather the necessary materials. You will need:
Key Takeaways:
- Create a bug-free oasis by screening in your porch with the right materials and careful planning. Enjoy a comfortable and inviting outdoor space with added charm and functionality.
- Personalize your screened-in porch to reflect your style and preferences, considering factors like climate, privacy, lighting, and decor. Regular maintenance ensures long-lasting enjoyment of your bug-free retreat.
Read more: What Is A Screened Porch
Materials Needed
- Screening material (such as fiberglass or aluminum)
- Screen frame components (aluminum or PVC)
- Spline (a flexible cord used to hold the screen in place)
- Screws or nails
- Hinges
- Latch
- Sealant
- Measuring tape
- Saw
- Drill
- Screwdriver
Now that we have our materials ready, let’s dive into the step-by-step process of screening in your porch.
Key Takeaways:
- Create a bug-free oasis by screening in your porch with the right materials and careful planning. Enjoy a comfortable and inviting outdoor space with added charm and functionality.
- Personalize your screened-in porch to reflect your style and preferences, considering factors like climate, privacy, lighting, and decor. Regular maintenance ensures long-lasting enjoyment of your bug-free retreat.
Read more: What Is A Screened Porch
Materials Needed
Before you start screening in your porch, it’s important to gather all the necessary materials. Here’s a list of the items you will need:
- Screening material: The type of screening material you choose will depend on your personal preference and budget. Common options include fiberglass, aluminum, and pet-resistant screens. Make sure to measure the dimensions of your porch to determine the amount of screening material required.
- Screen frame components: You will need aluminum or PVC components to build the frame for the screened-in porch. These include vertical posts, horizontal rails, and crossbars that will hold the screening material in place. Take accurate measurements of your porch’s dimensions to ensure you purchase the correct amount of frame components.
- Spline: Spline is a flexible cord that is used to secure the screening material to the frame. It is typically made of rubber or vinyl. Make sure to choose the appropriate size of spline based on the thickness of your screening material and the groove in the frame.
- Screws or nails: You will need screws or nails to attach the frame components together. Use rust-resistant screws or galvanized nails to prevent corrosion and ensure the longevity of your screened-in porch.
- Hinges: If you plan to have a hinged door for your screened-in porch, you will need hinges to attach the door to the frame. Choose hinges that can support the weight of the door and provide smooth operation.
- Latch: A latch is essential for securing the door of your screened-in porch. There are various types of latches available, such as hook and eye latches or magnetic latches. Select a latch that suits your needs and provides a secure closure.
- Sealant: To ensure the durability and weather resistance of your screened-in porch, it’s important to use a high-quality sealant. Look for a sealant that is specifically designed for outdoor use and can withstand the elements.
- Measuring tape: Accurate measurements are crucial for a successful porch screening project. A measuring tape will help you determine the dimensions of your porch and ensure you purchase the correct amount of materials.
- Saw: A saw will be needed to cut the frame components to the appropriate lengths. Choose a saw that is suitable for cutting metal or PVC, depending on the material of your frame.
- Drill: A drill will be required to create pilot holes for screws or to attach hardware to the frame. Make sure to have the appropriate drill bits for your specific needs.
- Screwdriver: A screwdriver will be necessary for attaching screws or tightening screws and bolts. Have both a flathead and a Phillips-head screwdriver on hand.
Once you have gathered all the necessary materials, you’ll be ready to move on to the next steps of screening in your porch. Make sure to double-check your measurements and ensure you have all the required tools before you begin the project.
Step 1: Measure and Plan
Before you start screening in your porch, it is essential to accurately measure your space and plan out the project. This step is crucial to ensure that you purchase the right amount of materials and create a well-fitting screened-in porch.
To begin, gather your measuring tape and take precise measurements of the dimensions of your porch. Measure the length, width, and height of each wall, as well as the distance between any existing columns or posts. These measurements will help you determine the amount of screening material and frame components you will need.
Once you have the measurements, it’s time to plan out the layout of your screened-in porch. Consider the placement of doors, windows, and any other features you may want to incorporate. Planning ahead will help you visualize the final result and ensure that the screening process goes smoothly.
When designing the layout, keep in mind the functionality of your porch. Will it be used for dining, lounging, or as a play area? This will help you determine the size and arrangement of furniture and other items within the screened-in space.
Additionally, consider the orientation of your porch in relation to the sun and prevailing winds. You may want to position the screening for maximum shade or to take advantage of cool breezes. Understanding the environmental factors will contribute to creating a comfortable and enjoyable space.
Take into account any local building codes or homeowner association rules that may dictate the size, placement, or style of your screened-in porch. It’s important to ensure compliance with these regulations to avoid any issues down the line.
Once you have measured and planned out your porch, you can proceed to purchase the necessary materials. Be sure to account for any extra screening material or frame components to accommodate for mistakes or replacements in the future.
With the measurements and plans in hand and the materials ready, you are now well-prepared for the next steps of screening in your porch. So let’s move on to Step 2: Prep the Area.
Step 2: Prep the Area
Once you have measured and planned out your porch, it’s time to prepare the area for screening. This step involves clearing the space, removing any obstacles, and making necessary repairs or modifications.
Start by removing any furniture, decorations, or plants from the porch. Set them aside in a safe location to protect them from dust and debris during the prepping process. If there are any large or immovable items, consider covering them with plastic sheets or drop cloths to keep them clean.
Next, thoroughly clean the porch to remove any dirt, grime, or cobwebs. Sweep the floor, wipe down the walls, and clean the windows. This will create a clean and fresh surface for your screened-in porch.
Inspect the porch for any damages or structural issues that need attention. Check for loose or rotting boards, damaged columns or posts, and any signs of water damage. Repair or replace any compromised elements to ensure the stability and longevity of your screened-in porch.
If necessary, apply a fresh coat of paint or stain to the porch surfaces. This will not only improve the overall appearance but also provide added protection against the elements.
In addition to preparing the area of the porch, it’s also crucial to assess the exterior of your home. Check for any gaps, cracks, or openings that may allow insects or pests to enter. Seal these areas with caulk or weatherstripping to create a barrier between your home and the screened-in porch.
Lastly, gather all the materials and tools you will need for the screening process. Having everything organized and readily accessible will make the installation smoother and more efficient.
By prepping the area thoroughly, you set the foundation for a successful screening project. With a clean and repaired porch, you’re now ready to move on to Step 3: Install the Frame.
Read more: How To Frame A Screen Porch
Step 3: Install the Frame
Now that you have prepped the area, it’s time to install the frame for your screened-in porch. The frame will provide the structure and support for the screening material. Follow these steps to install the frame:
1. Start by measuring and marking the locations for the vertical posts. These posts will be the main support for the frame. Make sure they are evenly spaced and aligned with the dimensions of your porch.
2. Cut the vertical posts to the appropriate height using a saw. If you are using aluminum or PVC frame components, make sure to use a saw that is suitable for cutting these materials.
3. Attach the vertical posts to the porch floor using screws or nails. Use a level to ensure they are plumb and straight. Reinforce the connection by adding additional screws or brackets if necessary.
4. Next, install the horizontal rails between the vertical posts. These rails will provide additional support for the frame. Cut the rails to the desired length and attach them to the posts using screws or brackets. Again, use a level to ensure they are level and straight.
5. Depending on the size and design of your porch, you may need to add crossbars for added stability. Measure and cut the crossbars to the appropriate length, and attach them between the vertical posts or along the horizontal rails.
6. As you install each component of the frame, continuously check for levelness and make any necessary adjustments. This will ensure that the frame is structurally sound and properly aligned.
7. Once the frame is fully installed, go back and reinforce all the connections with additional screws or brackets. This will provide extra stability and prevent any movement or wobbling.
With the frame securely in place, you have completed the installation of the structural support for your screened-in porch. The next step is to attach the screens to the frame, which we will cover in Step 4: Attach Screens.
When screening in a porch, make sure to use durable materials such as aluminum or fiberglass for the screen to withstand outdoor elements and last longer.
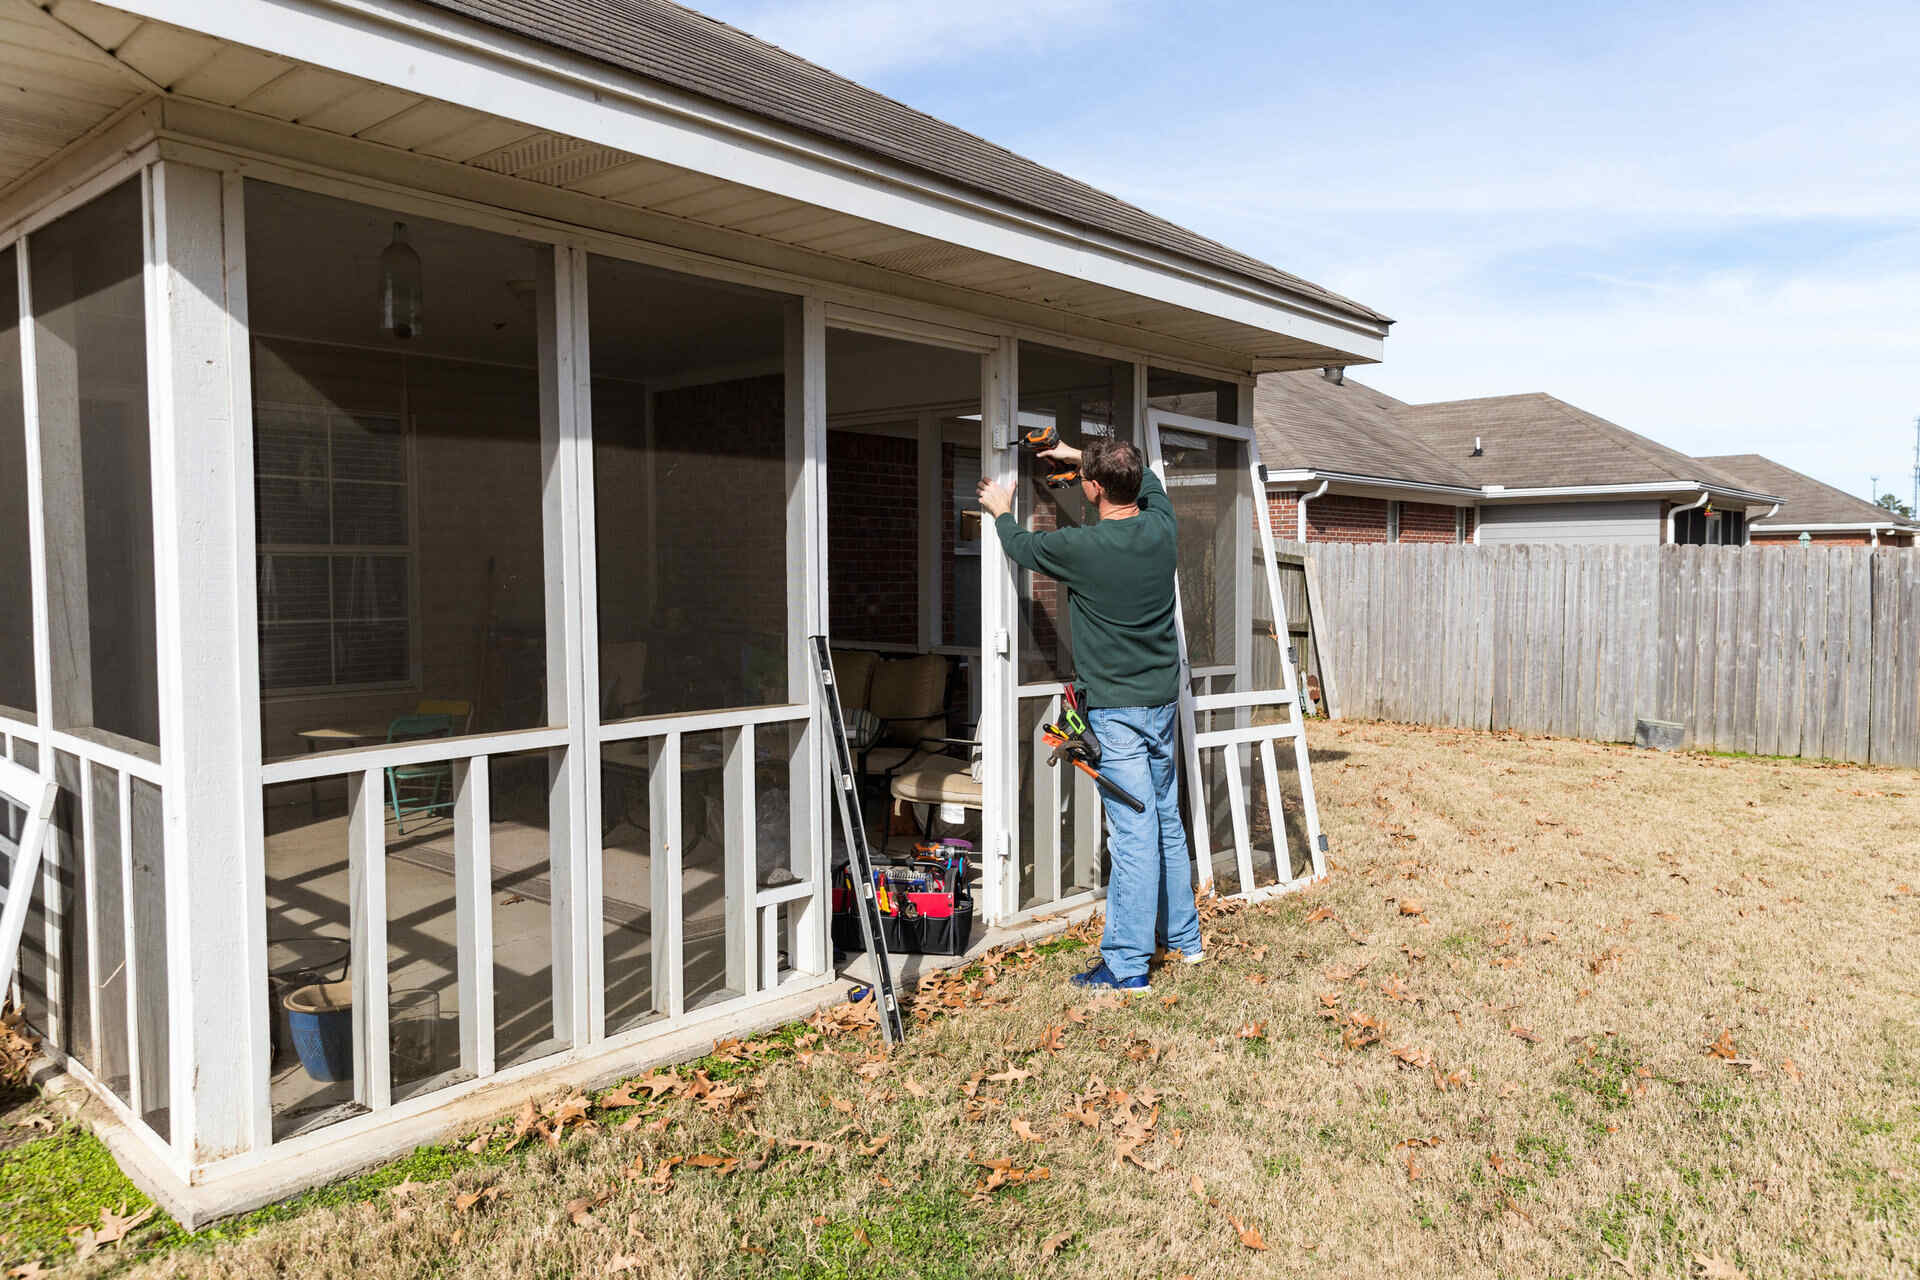
Step 4: Attach Screens
With the frame for your screened-in porch in place, it’s time to attach the screens. This step involves securing the screening material onto the frame and ensuring a tight and bug-resistant fit. Here are the steps to follow:
1. Measure the dimensions of each section of the frame where the screens will be installed. Add a few inches to each measurement to allow for overlap and secure attachment.
2. Using a sharp utility knife or scissors, cut the screening material to the appropriate size for each section of the frame. Make clean, straight cuts to ensure a neat and professional appearance.
3. Starting at one corner, place the cut screening material over the frame. Make sure it aligns with the edges of the frame and has enough excess to wrap around to the back of the frame.
4. Using a spline roller or a flat-edged object like a credit card, press the screening material into the groove of the frame. This will secure the material in place and create a tight, wrinkle-free fit.
5. As you work your way around the frame, continue pressing the screening material into the groove. Make sure to pull the material taut as you go to eliminate any sagging or loose areas.
6. Periodically check the tension of the screen by gently pressing on it with your hand. It should feel firm and not give easily when pressed.
7. Once the screening material is secured in the groove, trim off the excess material using a utility knife or scissors. Be careful to cut close to the frame without damaging the screen itself.
8. Repeat this process for each section of the frame until all the screens are installed.
When attaching the screens, pay attention to any doors or windows that are part of your screened-in porch. Make sure to properly size and attach screens to these openings, using hinges for doors and creating a snug fit for windows.
With the screens securely attached, you have successfully completed Step 4. In the next step, we will cover how to install the door for your screened-in porch in Step 5: Install the Door.
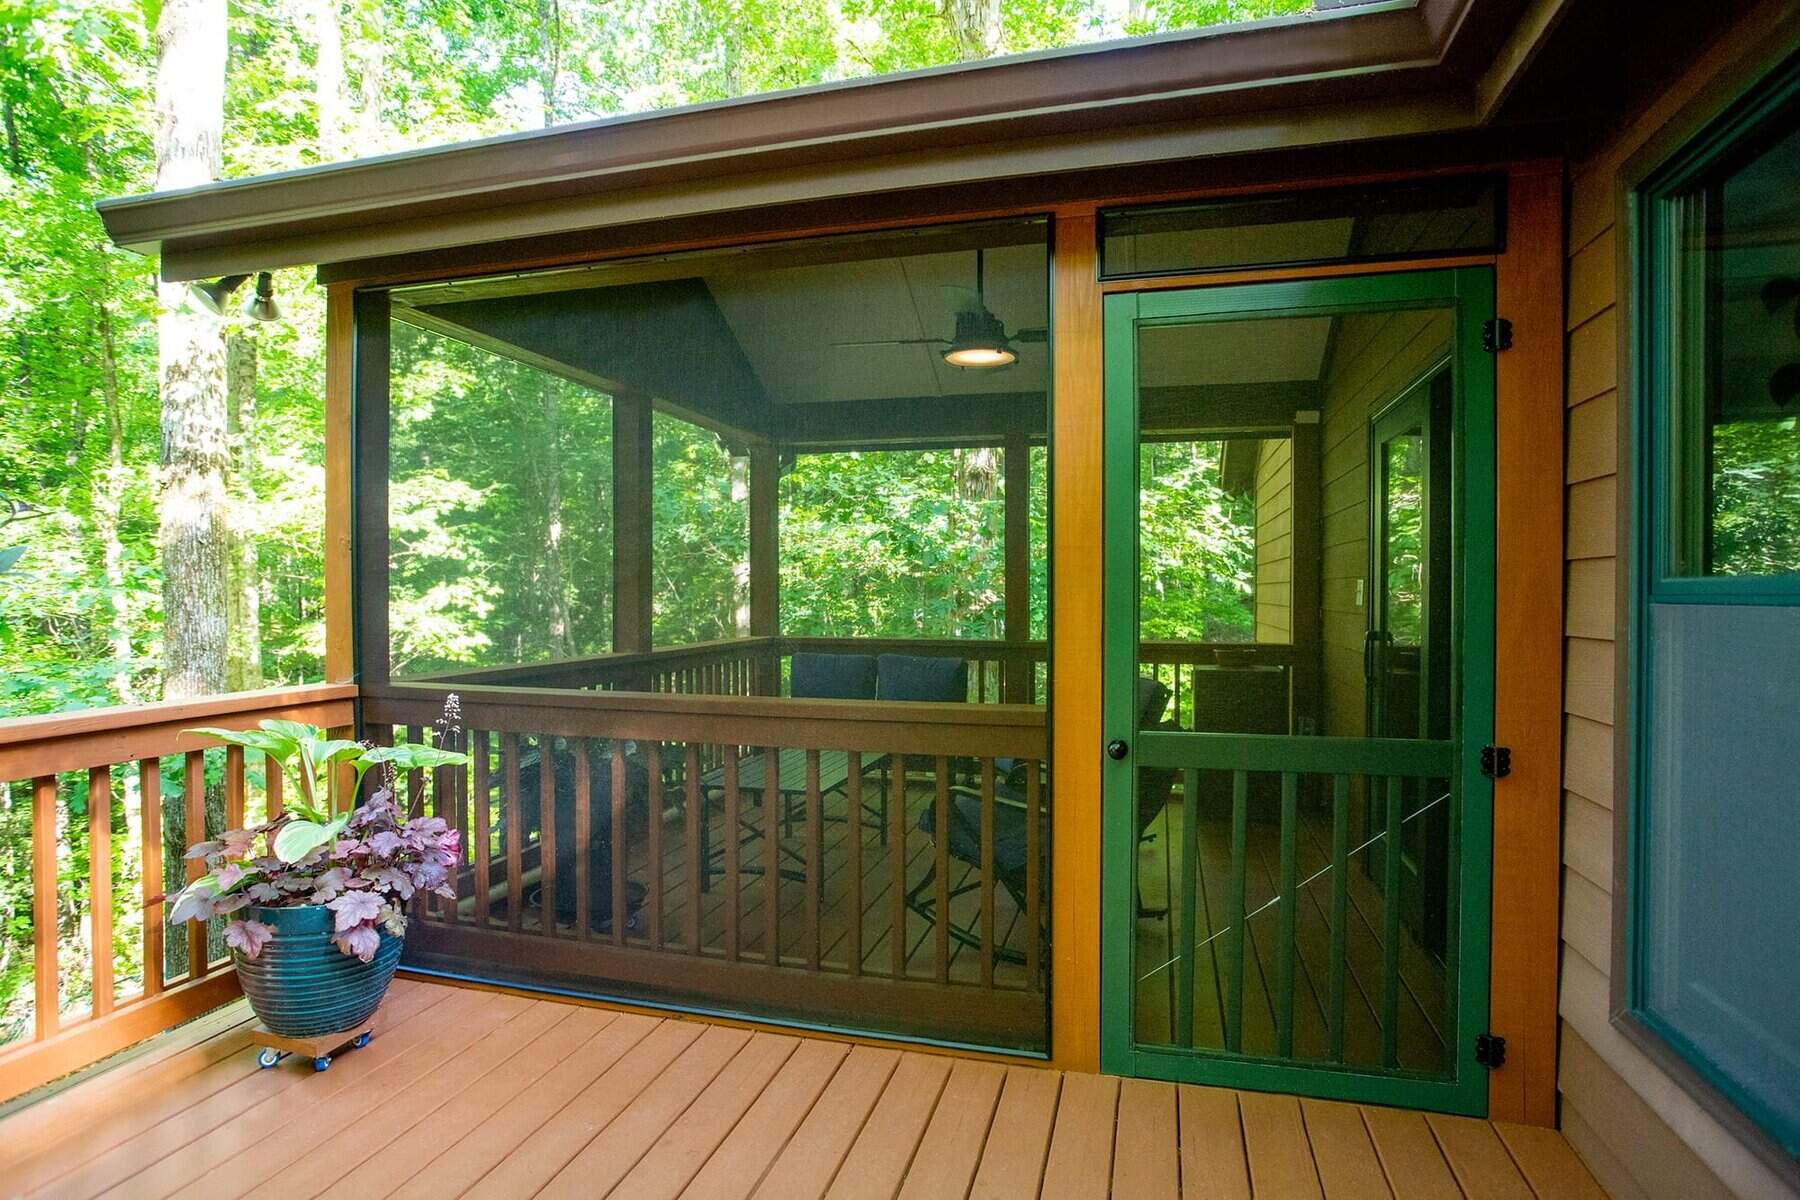
Step 5: Install the Door
Installing a door for your screened-in porch adds convenience and accessibility to your outdoor space. Whether you’re building a custom door or using a pre-made option, here are the steps to follow:
1. Measure the opening where the door will be installed. Take into account the dimensions of the door and any hardware that will be attached, such as hinges and a latch.
2. If you’re using a pre-made door, follow the manufacturer’s instructions for installation. Make sure the door is properly sized to fit the opening of your screened-in porch.
3. If you’re building a custom door, gather the necessary materials, including wood or a preferred door material, hinges, latch, and any decorative elements you wish to add.
4. Measure and cut the door material to the appropriate size. Remember to leave a small gap around the edges to allow for smooth opening and closing. Sand the edges to ensure a smooth finish.
5. Attach the hinges to the door, following the manufacturer’s instructions. Make sure they are properly aligned and securely fastened.
6. With the help of another person, position the door in the opening. Check for proper alignment and make any adjustments as needed.
7. Once the door is aligned correctly, secure the hinges to the frame using screws. Use a level to ensure that the door is plumb and straight.
8. Attach a latch or lock mechanism to the door, following the manufacturer’s instructions. Test the latch to ensure it engages smoothly and securely.
9. If desired, add any decorative elements such as trim or paint to enhance the appearance of the door.
10. Test the door for smooth operation. Open and close it a few times to ensure it functions properly and swings smoothly within the opening.
By following these steps, you can successfully install a door for your screened-in porch. Adding a door provides easy access to your outdoor space while keeping it bug-free and secure.
In the final step, we will cover how to finish and seal your screened-in porch in Step 6: Finish and Seal.
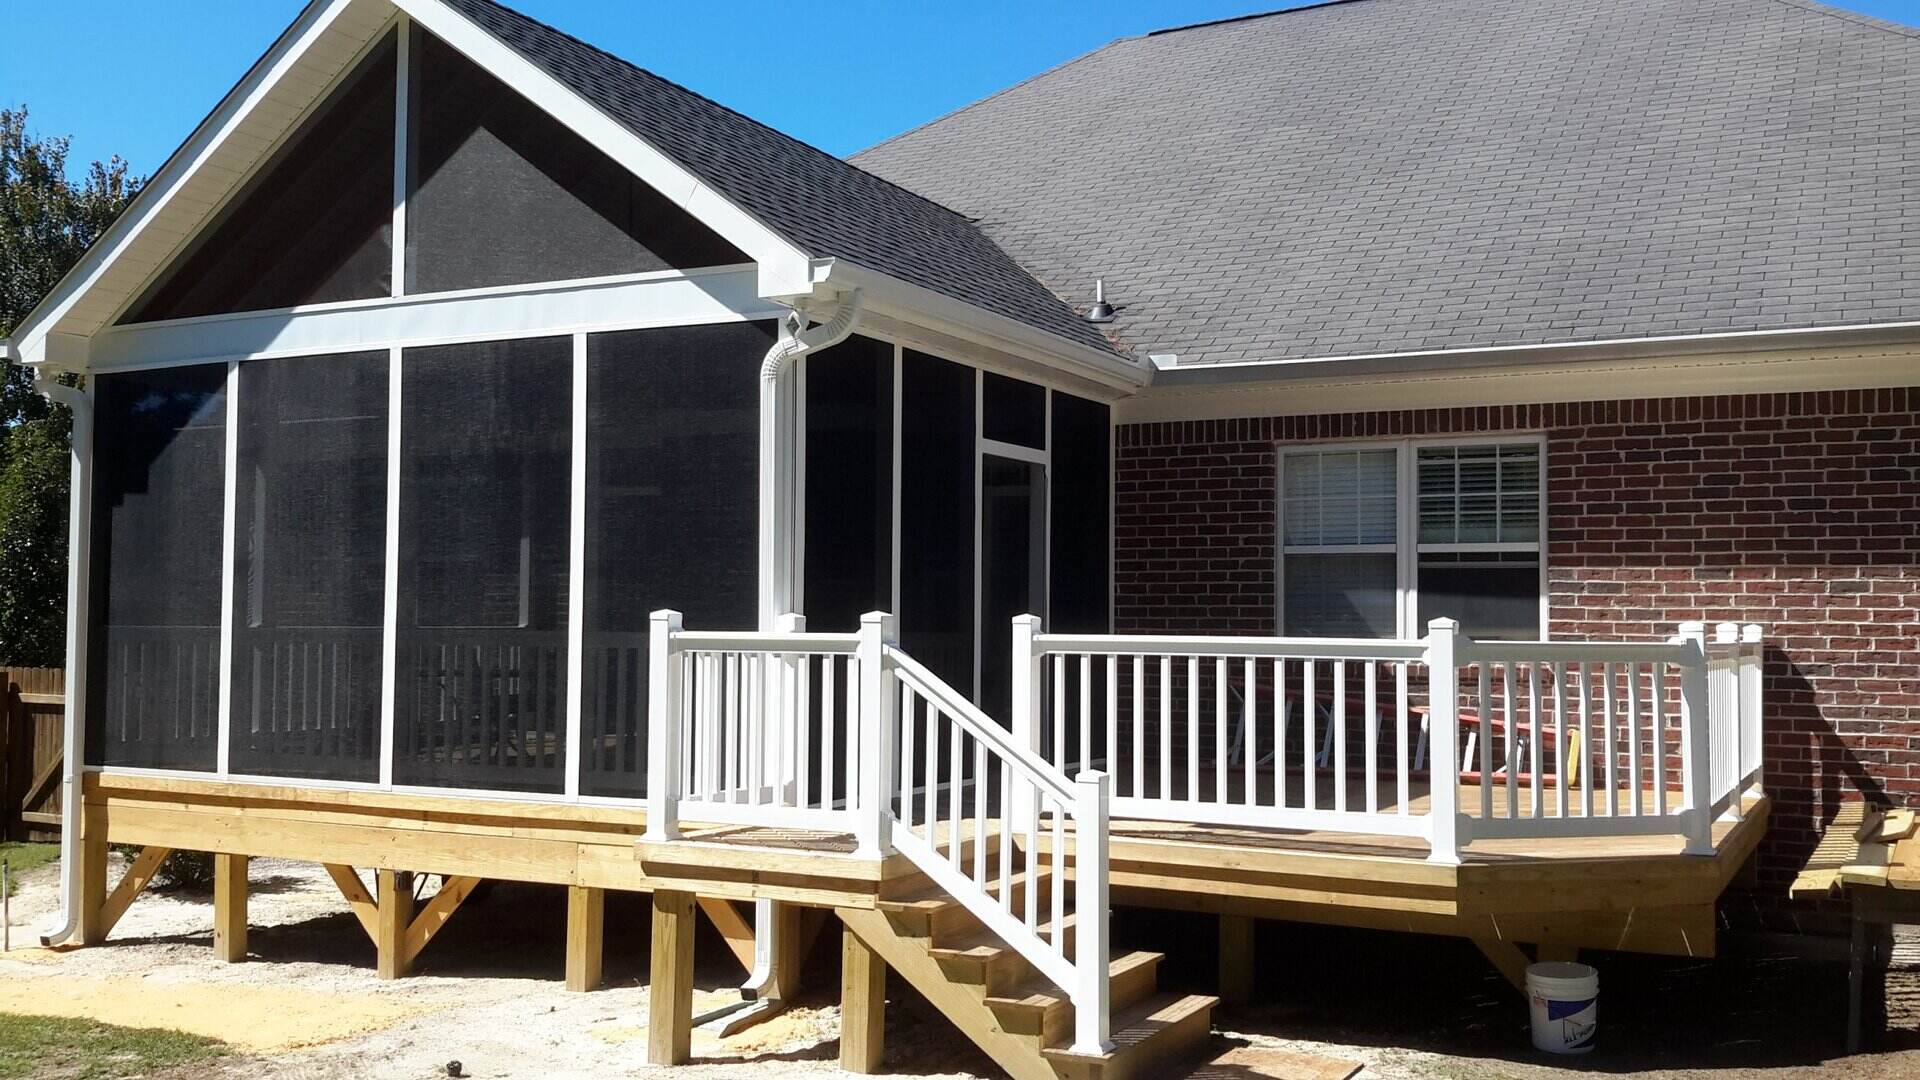
Step 6: Finish and Seal
After you have installed the screens and door for your screened-in porch, it’s important to finish and seal the project to ensure its longevity and optimal functionality. This final step will help protect the materials and provide a polished look. Follow these guidelines to complete the finishing touches:
1. Inspect the entire screened-in porch to ensure that all the components are securely in place. Check for any loose screws, nails, or frame pieces, and tighten or replace them as necessary.
2. If you have used aluminum or PVC frame components, consider applying a coat of paint or a protective finish to enhance durability and improve the appearance. Choose a paint or finish that is suitable for outdoor use and compatible with the material of your frame.
3. Apply a high-quality sealant to all the seams, joints, and connections of the screened-in porch. This will help prevent moisture infiltration and extend the lifespan of the materials. Use a caulking gun to apply the sealant, ensuring that it forms a watertight barrier.
4. Pay special attention to the areas where the screening material meets the frame. Apply sealant along the edges to create a secure bond and prevent insects from entering through any gaps or openings.
5. Inspect the door for any gaps, and apply weatherstripping or door sweeps to ensure a tight seal. This will further enhance the bug-resistant nature of your screened-in porch.
6. Clean the porch thoroughly, removing any debris or dust that may have accumulated during the installation process. A clean and tidy porch will enhance its overall appearance and comfort.
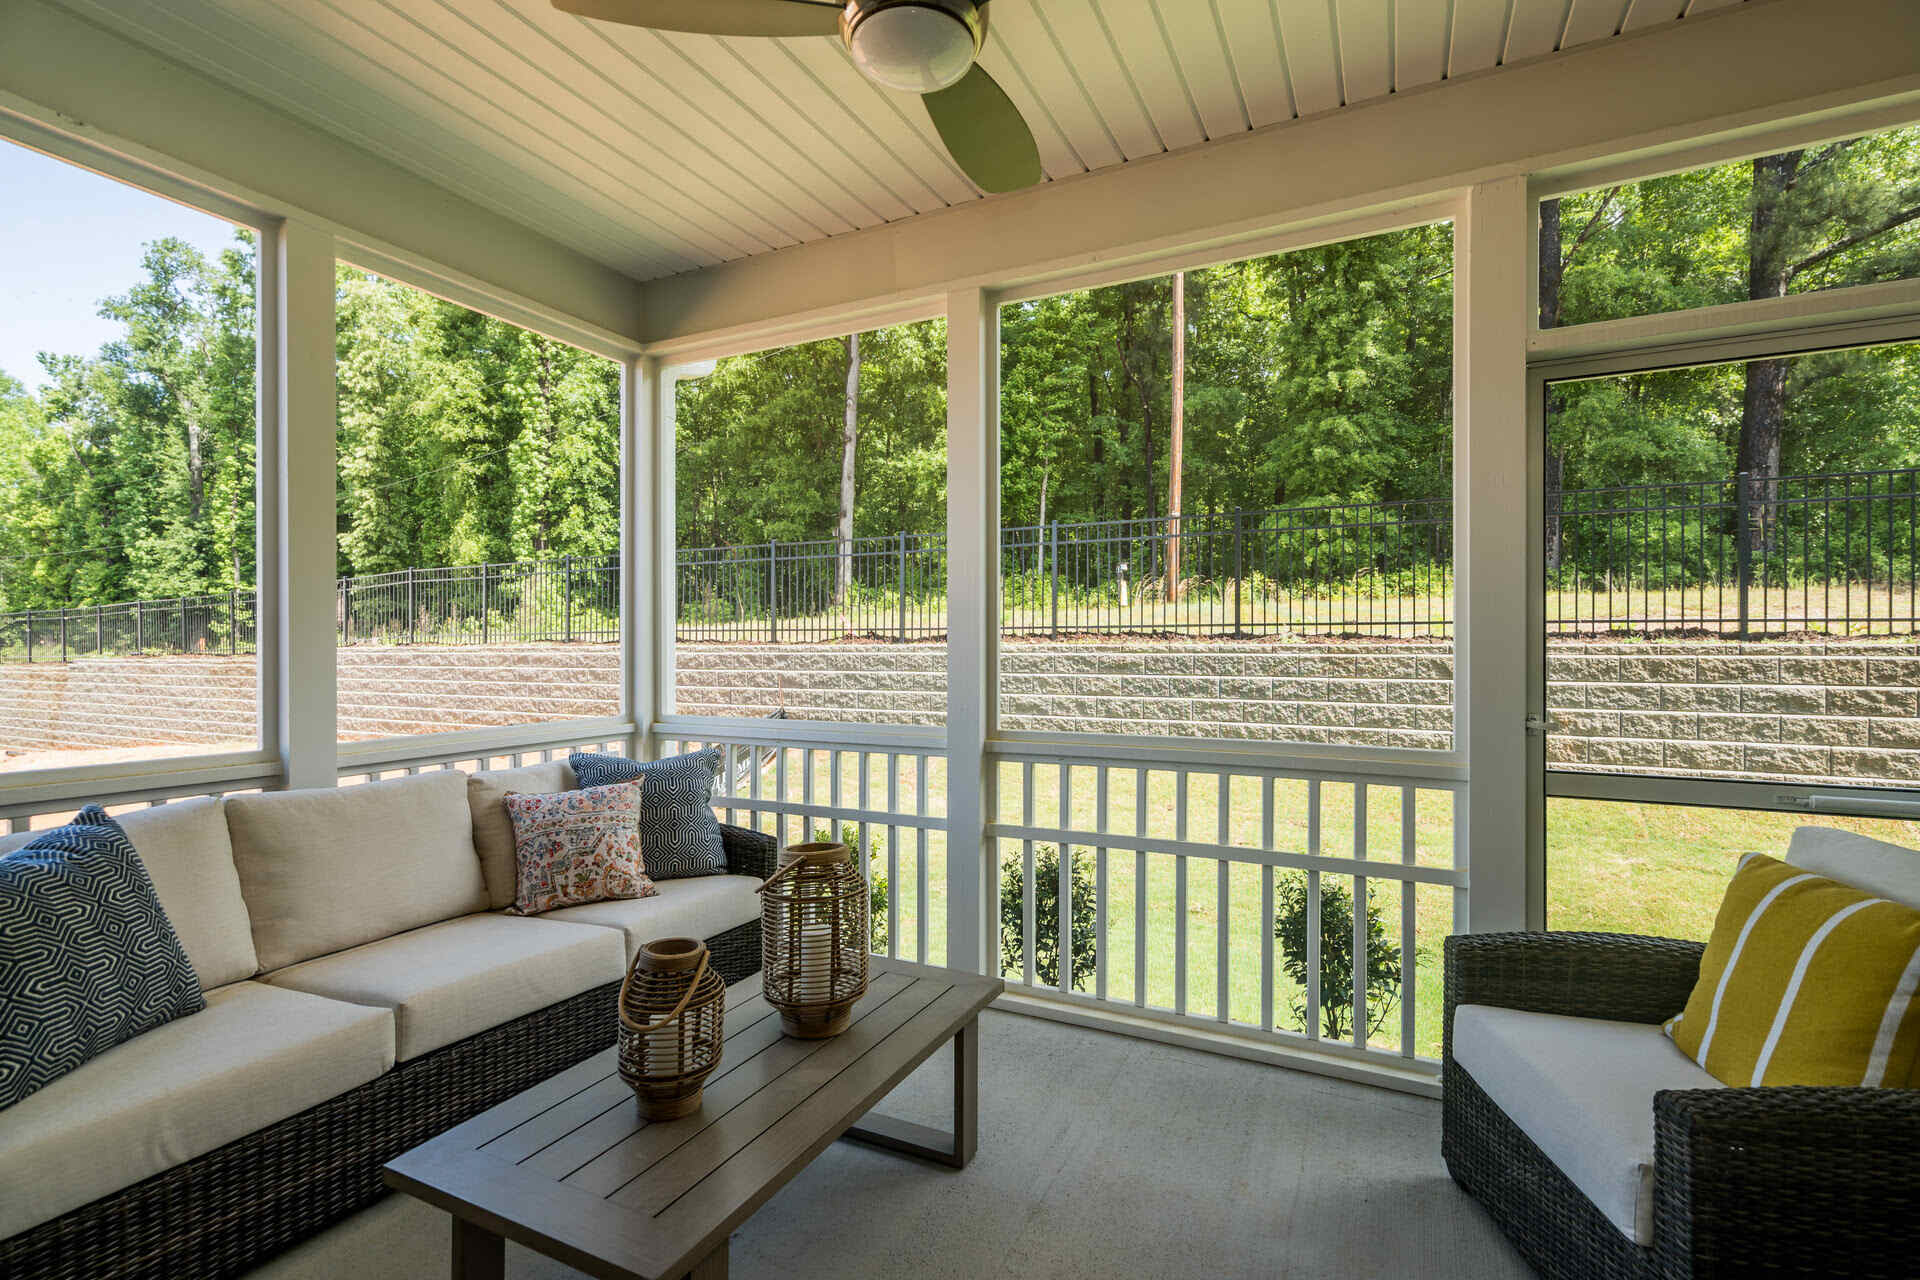
7. Consider adding furnishings, such as outdoor furniture, rugs, and plants, to make the space comfortable and inviting. Personalize your screened-in porch to suit your style and needs.
8. Finally, take some time to enjoy and make the most of your newly screened-in porch. Relax, entertain, and soak in the benefits of having a bug-free and versatile outdoor space.
By completing these steps, you will finish and seal your screened-in porch, giving it a polished look while ensuring its longevity and functionality. Regularly inspect and maintain your porch to keep it in top shape and enjoy the benefits for years to come.
With Step 6 completed, you have successfully learned how to screen in a porch. Congratulations on creating a wonderful outdoor space that will bring you joy and relaxation!
If you have any additional tips or considerations, feel free to include them. Otherwise, we can move on to the Additional Tips and Considerations section.
Read more: How To Build Screens For A Porch
Additional Tips and Considerations
As you complete your screened-in porch project, here are some additional tips and considerations to keep in mind:
- Consider your climate: Depending on your location and weather conditions, you may need to choose screening material that is more resistant to elements like strong winds, rain, or UV rays. Consult with local experts or professionals to determine the best options for your specific climate.
- Maintain regular upkeep: Regularly clean and inspect your screened-in porch to maintain its integrity. Remove any debris, dirt, or leaves that may accumulate on the screens or inside the porch. Consider scheduling routine maintenance to inspect the frame, screens, and hardware for any signs of wear or damage.
- Consider privacy: If privacy is a concern, you can install privacy screens or curtains to shield your screened-in porch from prying eyes. These additional features offer both privacy and an aesthetic appeal to your outdoor space.
- Add lighting: Incorporating outdoor lighting fixtures can enhance the ambiance of your screened-in porch and extend its usability into the evening. Options include string lights, lanterns, or wall-mounted fixtures.
- Personalize with decor: Personalize your screened-in porch with decorative elements such as cushions, rugs, artwork, or potted plants. Choose items that are weather-resistant and can withstand outdoor conditions.
- Consider electrical outlets: If you plan to use electronic devices or appliances on your porch, consider adding electrical outlets for convenience. Consult with an electrician to ensure proper installation and safety measures.
- Check local regulations: Verify if any permits or approvals are required for screening in your porch. Local building codes and homeowner association rules may have specific guidelines that need to be followed.
- Invite professional help if needed: If you’re unsure about any aspect of the process or if you prefer not to take on the project yourself, consider hiring a professional contractor. They can ensure the proper installation of the screens, frame, and door, giving you peace of mind.
Remember, your screened-in porch is a valuable addition to your home that can provide year-round enjoyment. Take the time to make it a comfortable, inviting space that reflects your style and enhances your outdoor living experience.
With these additional tips and considerations in mind, you’re well-equipped to make the most of your screened-in porch and enjoy all the benefits it brings.
Do you need any further assistance or have any specific questions? Feel free to let us know!
Conclusion
Congratulations! You have successfully learned how to screen in a porch—an exciting project that adds both functionality and charm to your outdoor living space. By following the step-by-step guide outlined in this article, you have gained the knowledge and confidence to create a bug-free and comfortable retreat.
Throughout the process, you learned about the necessary materials, including screening material, frame components, spline, and hardware. You learned how to measure and plan your porch, ensuring a proper fit. You also discovered the importance of prepping the area, installing the frame, attaching the screens, and installing a door for easy access.
Finishing and sealing your screened-in porch offers protection and enhances its longevity. Regular maintenance and upkeep will ensure that your porch remains in top condition for years to come. Additionally, considering factors such as climate, privacy, lighting, and decor allows you to personalize your outdoor space and create an oasis that suits your style and preferences.
Remember to check local regulations and obtain any necessary permits or approvals before beginning your project, and always prioritize safety throughout the process. If you encounter any challenges or feel uncertain at any point, don’t hesitate to consult with professionals who can provide guidance and assistance.
Now, it’s time to enjoy the fruits of your labor. Spend time relaxing on your screened-in porch, entertaining friends and family, or simply savoring moments of solitude. Embrace the peace and tranquility of your bug-free outdoor sanctuary.
Thank you for joining us on this journey as we explored how to screen in a porch. We hope you found this guide informative and inspiring. If you have any further questions or need additional assistance, feel free to reach out. Cheers to a beautiful and enjoyable screened-in porch!
Frequently Asked Questions about How To Screen In A Porch
Was this page helpful?
At Storables.com, we guarantee accurate and reliable information. Our content, validated by Expert Board Contributors, is crafted following stringent Editorial Policies. We're committed to providing you with well-researched, expert-backed insights for all your informational needs.


0 thoughts on “How To Screen In A Porch”