Articles
How To Turn Deck Into Screened-In Porch
Modified: October 18, 2024
Learn how to transform your deck into a cozy screened-in porch with our informative articles. Discover expert tips and step-by-step instructions for this fantastic home improvement project.
(Many of the links in this article redirect to a specific reviewed product. Your purchase of these products through affiliate links helps to generate commission for Storables.com, at no extra cost. Learn more)
Introduction
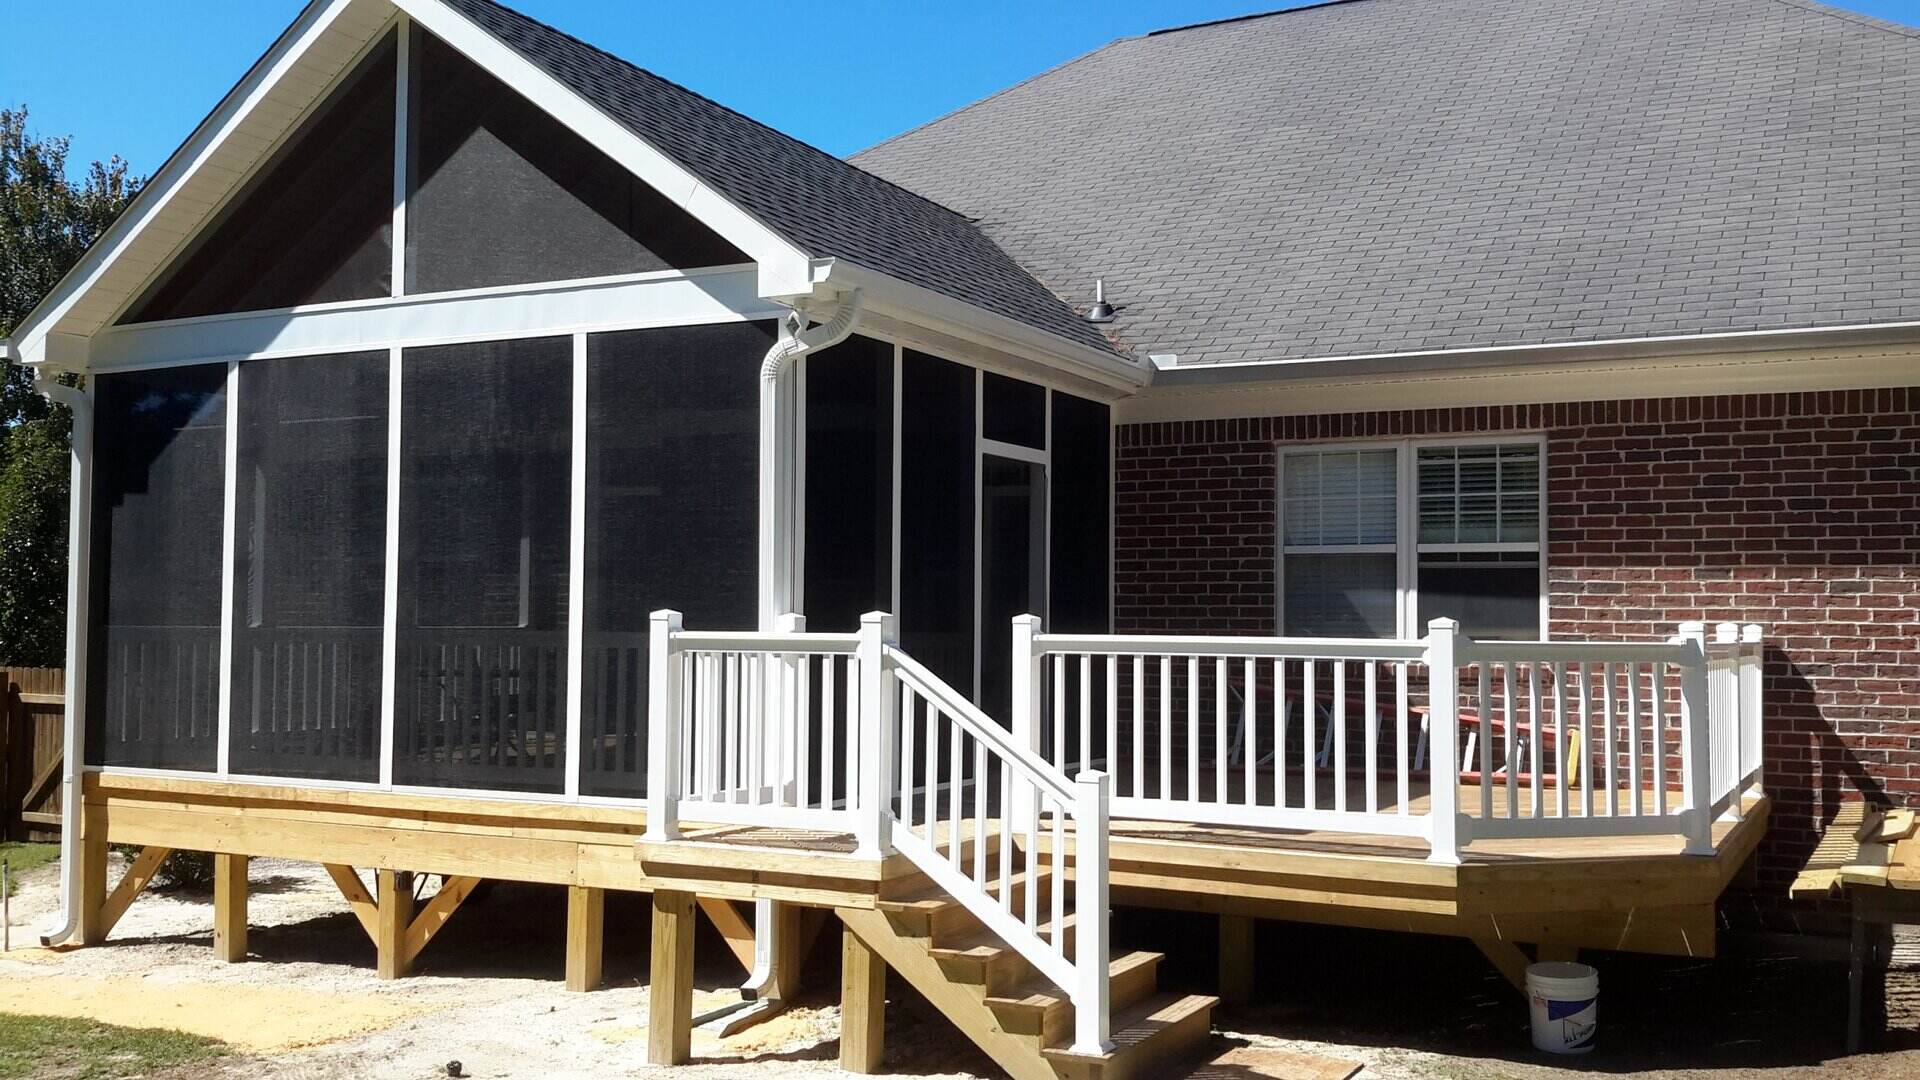
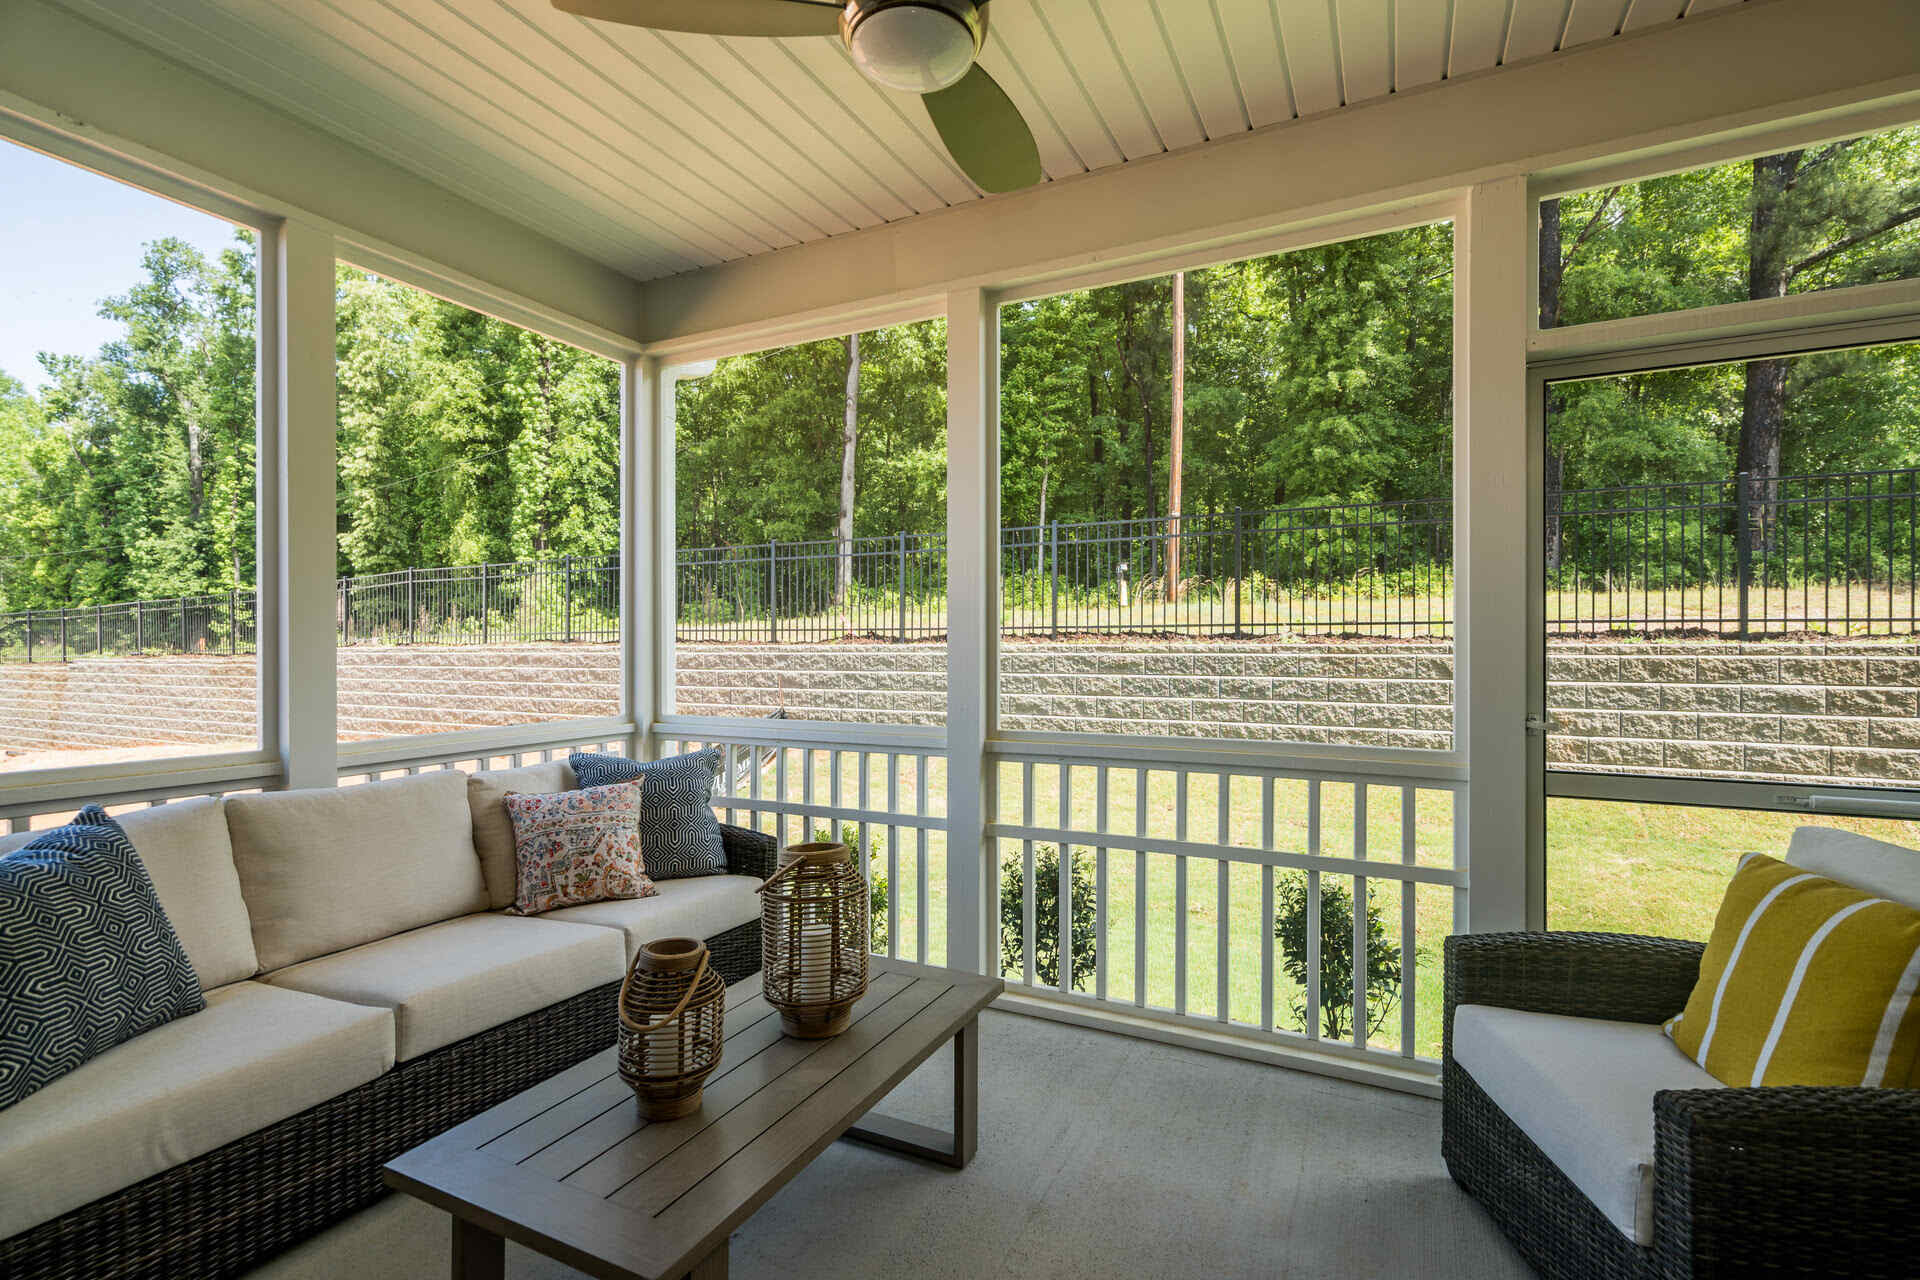
Welcome to our comprehensive guide on how to turn your deck into a screened-in porch! If you love spending time outdoors but want to enjoy the fresh air without pesky insects or harsh weather, converting your deck into a screened-in porch is the perfect solution. This conversion not only adds functional living space to your home but also enhances its aesthetic appeal.
Whether you’re looking to create a cozy reading nook, a space for entertaining guests, or simply an area to unwind and relax, a screened-in porch provides the ideal setting. In this article, we will walk you through the step-by-step process of transforming your deck into a screened-in porch, from assessing the suitability of your deck to adding the finishing touches.
Before we dive into the details, it’s important to note that converting your deck into a screened-in porch requires careful planning and preparation. You’ll need to consider factors such as the size of your deck, local building codes, permits, and your desired functionality for the porch. By following the guidelines we provide, you’ll be well on your way to creating a beautiful and functional space that you can enjoy throughout the year.
So let’s get started and explore the exciting world of transforming your deck into a screened-in porch!
Key Takeaways:
- Transforming your deck into a screened-in porch involves careful assessment, planning, and preparation. From obtaining permits to framing walls and adding doors and windows, each step contributes to creating a functional and inviting outdoor space.
- Maintenance and care are crucial for preserving the beauty and functionality of your screened-in porch. Regular cleaning, inspections, and seasonal maintenance ensure that your porch remains a comfortable and enjoyable extension of your home.
Read more: How To Build A Screened-In Porch On A Deck
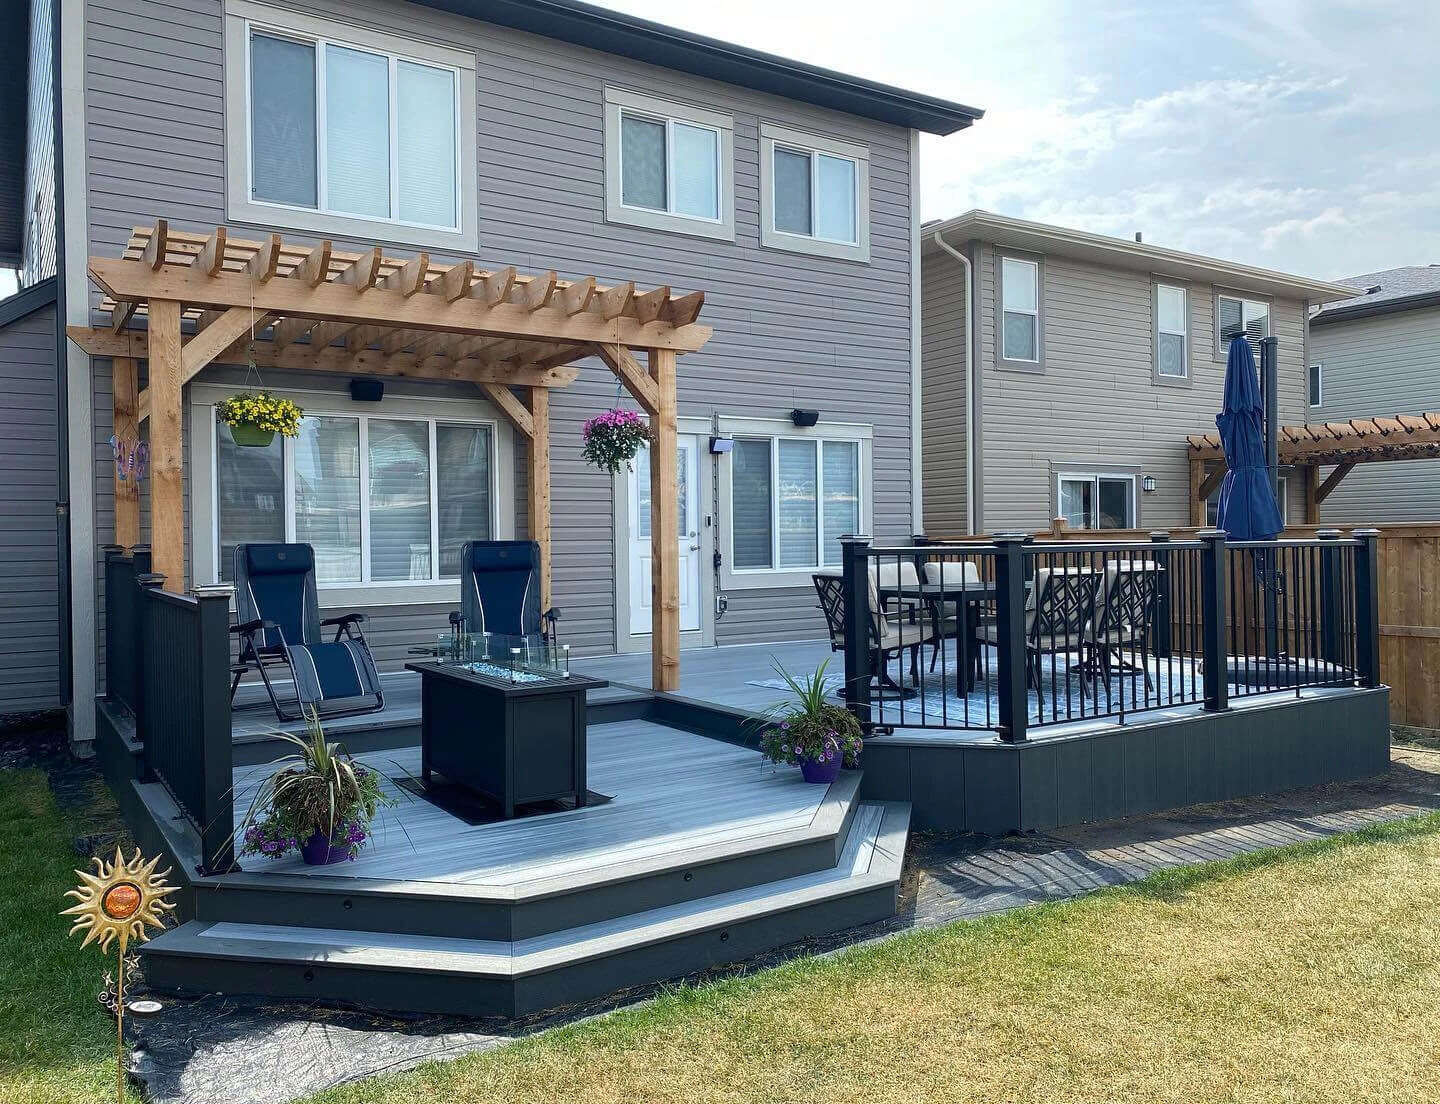
Assessing Your Deck
The first step in converting your deck into a screened-in porch is to assess its condition and suitability for the project. Here are the key factors to consider:
- Structural Integrity: Examine the deck to ensure it is structurally sound and can support the additional weight of walls and screens. Look for signs of rot, damage, or deterioration, such as soft spots, loose boards, or wobbly railings. If you have any concerns about the deck’s stability, consult a professional for a thorough inspection.
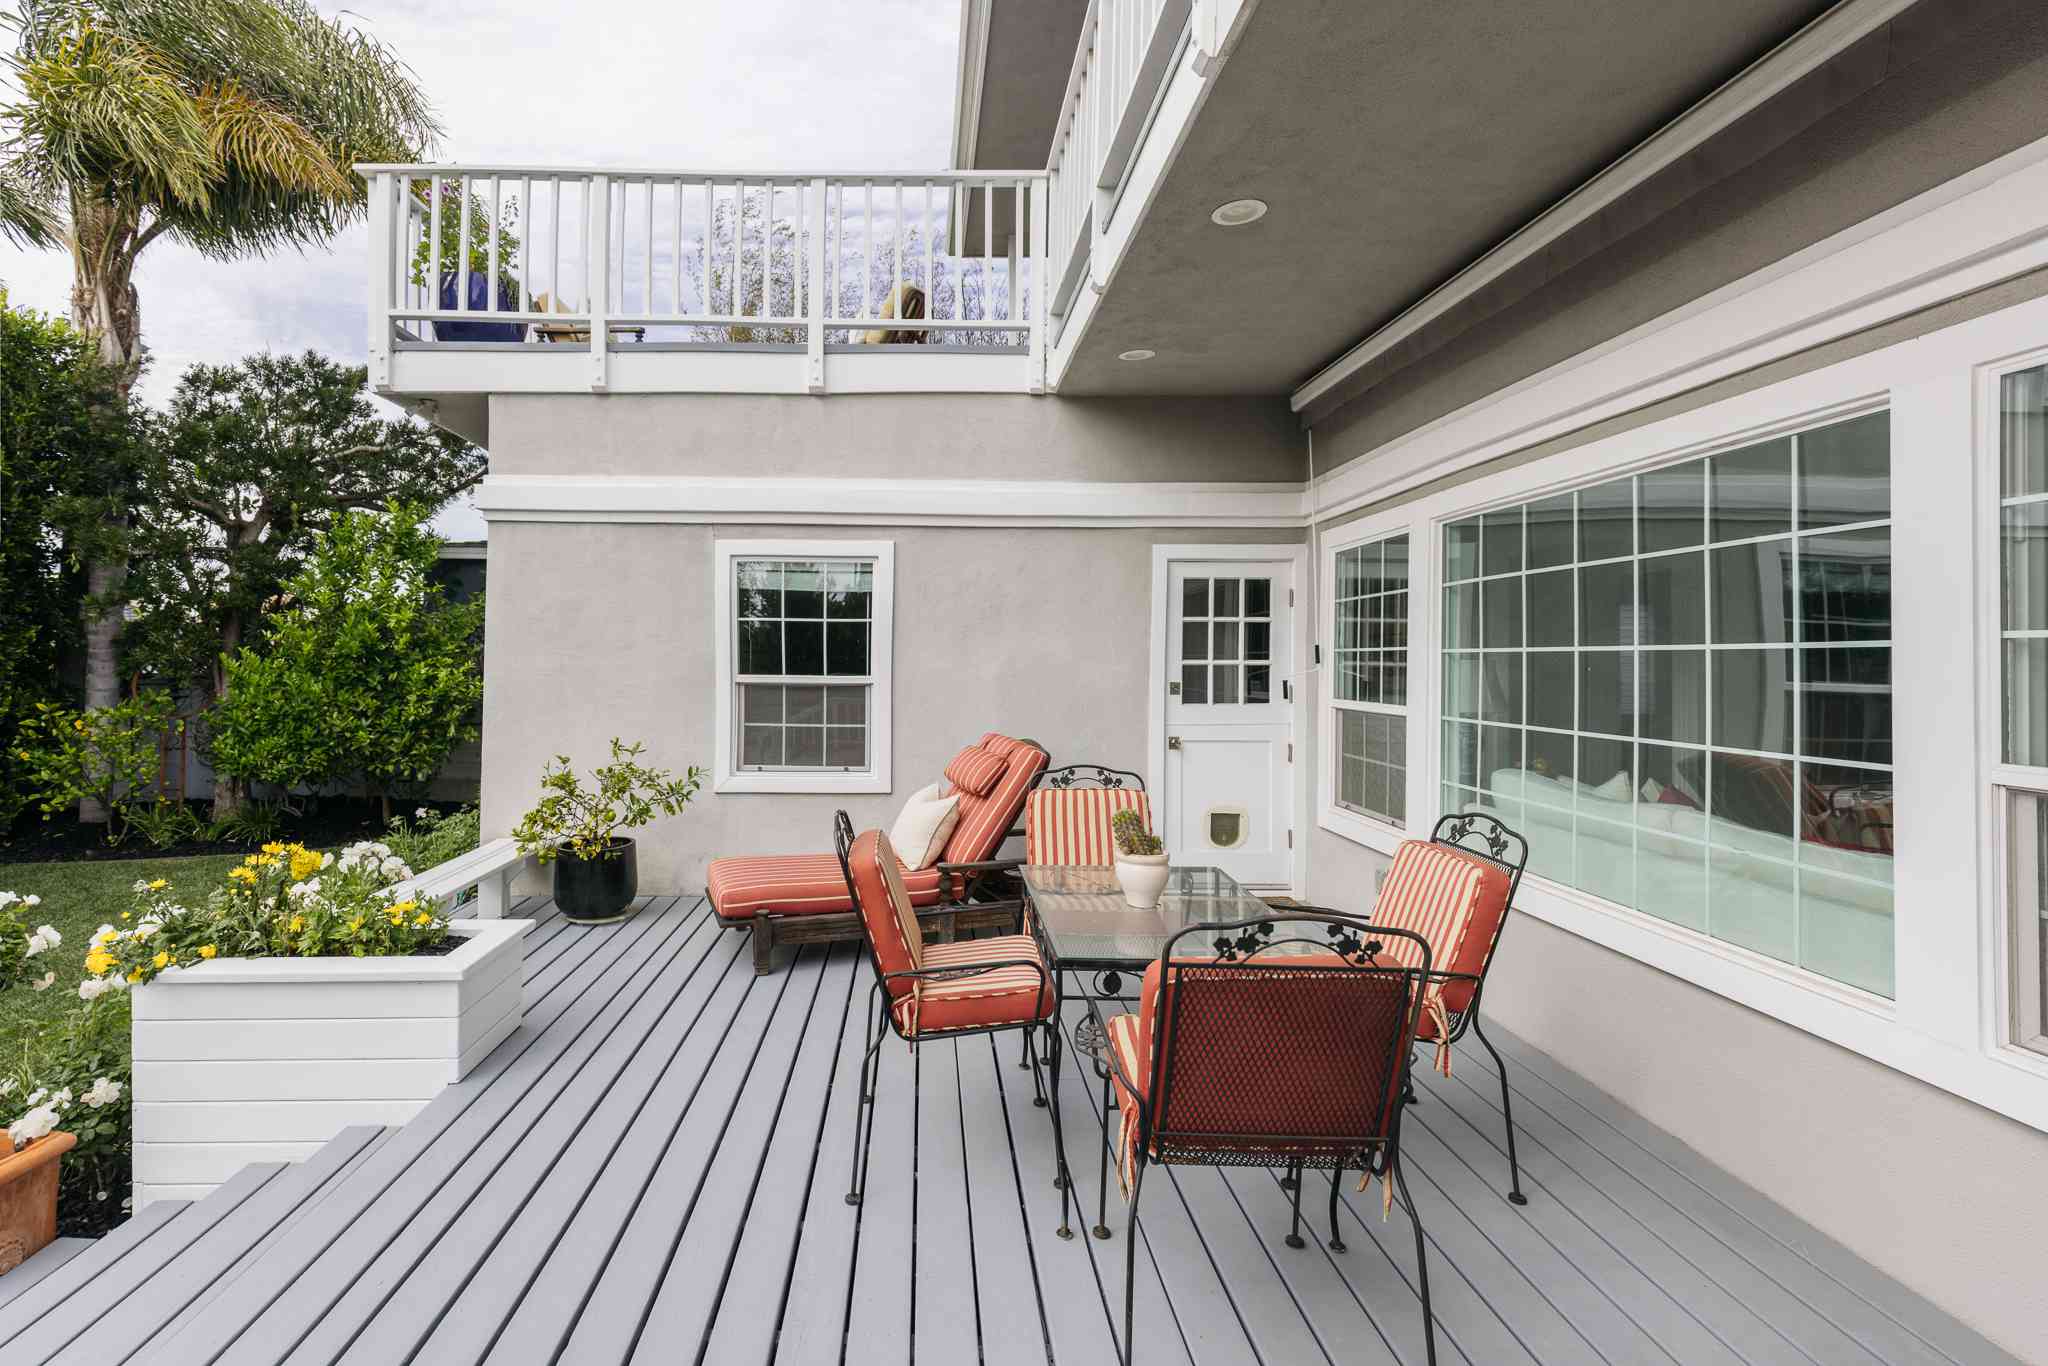
- Size and Layout: Evaluate the size and layout of your deck to determine if it provides enough space to accommodate a screened-in porch. Consider the dimensions, shape, and accessibility of the deck. Is it large enough to comfortably fit furniture and allow for proper circulation? Will there be enough room for the desired activities within the screened-in area?
- Orientation and Sun Exposure: Take note of the deck’s orientation in relation to the sun. Consider factors such as the amount of natural light you want in your porch, the direction of prevailing winds, and any nearby trees or structures that may affect shade or privacy.
- Surrounding Environment: Assess the surrounding environment to determine if there are any potential distractions or nuisances that could affect your enjoyment of the screened-in porch. Consider elements such as noise from nearby roads or neighbors, views you want to preserve or block, and the proximity to outdoor features like gardens or swimming pools.
By thoroughly evaluating these factors, you can determine whether your deck is a suitable candidate for converting it into a screened-in porch. It’s important to be realistic about the potential limitations and challenges associated with your deck’s current condition and configuration. In some cases, you may need to make adjustments or renovations to ensure a successful conversion. In the next section, we will discuss the planning and preparation process for your screened-in porch project.
Planning and Preparing for a Screened-in Porch
Now that you have assessed your deck and determined its suitability for a screened-in porch, it’s time to start planning and preparing for the project. The following steps will guide you through this crucial phase:
- Define Your Purpose: First, decide how you plan to use your screened-in porch. Will it be a place for relaxation, entertaining guests, or a multipurpose space? Understanding your desired functionality will help you make important design decisions later on.
- Create a Design: Envision the look and feel of your screened-in porch. Consider the architectural style of your home and how you want the porch to blend with its surroundings. Think about the materials, color schemes, and overall aesthetic that will complement your home’s exterior. Browse design inspiration online or consult with a professional to help bring your ideas to life.
- Set a Budget: Determine your budget for the project, taking into account not only the construction costs but also any additional features or furnishings you plan to include. Be realistic about what you can afford and prioritize the elements that are most important to you.
- Hire Professionals: Depending on the complexity of the project, you may need to hire professionals such as architects, contractors, or interior designers. They can provide valuable expertise and ensure that the project is executed smoothly.
- Gather Necessary Materials: Compile a list of materials needed for the construction of your screened-in porch. This may include framing materials, screening materials, doors, windows, and other accessories. Research suppliers and obtain cost estimates for the materials.
- Consider Building Codes: Familiarize yourself with local building codes and permit requirements. Contact your local building department to find out about any specific regulations or restrictions that may apply to your project. Ensuring compliance with building codes will help avoid any legal issues down the line.
- Finalize Your Plans: Once you have gathered all the necessary information and made key decisions, finalize your plans for the screened-in porch. This includes creating detailed construction drawings and obtaining any required permits.
By meticulously planning and preparing for your screened-in porch project, you will set a solid foundation for its successful execution. In the next section, we will explore the process of obtaining permits and meeting building codes.
Obtaining Permits and Meeting Building Codes
Before you start the construction of your screened-in porch, it’s crucial to obtain all the necessary permits and ensure compliance with building codes. Here are the key steps to follow:
- Contact Your Local Building Department: Reach out to your local building department to inquire about the specific permits and approvals required for your screened-in porch project. They will provide you with the necessary application forms and guide you through the process.
- Submit Permit Applications: Fill out the permit applications, providing detailed information about your project, such as the dimensions and materials used. Ensure that you include all the required documentation, such as construction drawings and site plans.
- Pay Permit Fees: Pay the applicable permit fees, which vary depending on the scope and complexity of your project. Keep in mind that the fees may include separate charges for building permits, electrical permits, and plumbing permits, if applicable.
- Review and Approval Process: Once you have submitted your permit applications, the building department will review your plans to ensure compliance with local building codes. This process may take some time, so be prepared for potential delays.
- Address Any Required Modifications: If the building department identifies any issues or modifications required for your project to meet the building codes, make the necessary adjustments and resubmit the revised plans. This iterative process continues until your plans are approved.
- Receive Permits: Once your plans are approved, you will be issued the necessary permits. These permits authorize you to proceed with the construction of your screened-in porch and ensure that it meets the required safety standards.
- Building Inspections: Throughout the construction process, you will need to schedule inspections at various stages, such as foundation, framing, electrical, and final inspection. These inspections verify that the construction is in compliance with the approved plans and building codes.
- Comply with Building Codes: Throughout the construction process, make sure to adhere to all relevant building codes and regulations. This includes following guidelines for structural integrity, electrical wiring, ventilation, and other safety considerations.
Obtaining permits and meeting building codes ensures the safety and legality of your screened-in porch construction. It’s essential to follow these steps and work closely with your local building department to ensure a smooth and compliant construction process. In the next section, we will discuss framing the walls for your screened-in porch.
Framing the Walls
Now that you have obtained the necessary permits and ensured compliance with building codes, it’s time to start framing the walls for your screened-in porch. The framing process forms the structural skeleton of your porch and provides support for the screens and other components. Here are the key steps to follow:
- Gather Materials: Collect all the materials needed for framing, including pressure-treated lumber, nails, joist hangers, and any required hardware. Ensure that you have the correct dimensions and measurements for your porch’s walls.
- Mark the Wall Locations: Use a chalk line or string to mark the desired locations of the walls on the deck. Double-check the measurements and make any adjustments if necessary.
- Install the Sill Plates: Attach pressure-treated lumber, known as sill plates, to the deck floor along the marked wall lines. Use galvanized or stainless steel anchors to secure the sill plates firmly to the deck surface.
- Measure and Cut the Wall Studs: Measure and cut vertical wall studs, ensuring they are the correct height for your desired wall height. Space the studs according to your local building codes, typically at 16-inch or 24-inch intervals.
- Secure the Wall Studs: Attach the wall studs vertically between the sill plates and secure them using nails or screws. Ensure that the studs are plumb and properly aligned.
- Add Horizontal Plates: Install horizontal plates, known as top plates and bottom plates, on top of the wall studs. These plates provide additional stability and support. Secure them using nails or screws.
- Frame Openings: If your porch includes doorways or windows, frame these openings by adding headers and cripple studs. Consult with the appropriate building codes and guidelines to ensure proper framing techniques.
- Frame the Roof Rafters: If you plan to have a roof over your screened-in porch, frame the roof rafters using appropriate materials. Ensure that the roof slope allows for adequate drainage and consult with a structural engineer if needed.
- Inspect and Reinforce: Once the framing is completed, inspect the walls for any structural issues or weaknesses. Reinforce any areas that may require additional support or bracing.
Properly framing the walls of your screened-in porch is crucial for its structural stability and longevity. Take the time to ensure accurate measurements, precise alignment, and secure fastening of all framing components. In the next section, we will discuss the process of installing screened panels to enclose your porch.
Installing Screened Panels
With the walls framed and ready, it’s time to install the screened panels that will enclose your porch. These panels not only provide protection from insects and debris but also allow for ventilation and unobstructed views. Here’s a step-by-step guide on how to install the screened panels:
- Measure and Cut the Screen Panels: Measure the dimensions of each wall section where the screening will be installed. Add a couple of inches to the measurements to provide some overlap for attaching the screen. Use a utility knife or screen cutting tool to cut the screen panels to the required size.
- Attach the Screen: Starting at one corner, secure the screen panel to the outside of the wall studs using staples or screen clips. Stretch the screen tightly as you continue attaching it along the perimeter, making sure there are no wrinkles or sagging. Trim any excess screen with a utility knife.
- Install Horizontal and Vertical Battens: To reinforce the screen and create a neater appearance, install horizontal and vertical battens over the screen panels. Use nails or screws to secure the battens to the wall studs, ensuring they are evenly spaced.
- Seal the Joints: To prevent insects from entering through gaps, seal the joints and edges of the screen panels using silicone caulk or weatherstripping. Pay special attention to areas where the panels meet the walls, floor, and ceiling.
- Inspect and Repair: Once all the screen panels are installed, carefully inspect each panel for tears, holes, or loose attachments. Repair any damages or reinforce weak spots to ensure the integrity of the screened enclosure.
- Consider Additional Features: Depending on your preferences and needs, you may consider adding features such as kick plates or pet doors to your screened panels. These additions can enhance the functionality and convenience of your screened-in porch.
- Clean the Screens: Regularly clean the screens using a soft brush or vacuum to remove any dust, pollen, or debris. This will help maintain the clarity of the screens and ensure optimal airflow.
Installing the screened panels is a critical step in creating a functional and enjoyable screened-in porch. Take the time to properly secure and maintain the screens to ensure their longevity and effectiveness. In the next section, we will discuss the process of adding doors and windows to your screened-in porch.
Adding Doors and Windows
Adding doors and windows to your screened-in porch not only enhances its accessibility but also allows for better airflow and natural light. Here’s a step-by-step guide on how to incorporate these elements into your porch:
- Decide on Door and Window Types: Determine the type of doors and windows that best suit your needs and design preferences. Common options include hinged doors, sliding doors, and various styles of windows such as casement or awning.
- Measure and Mark the Locations: Measure and mark the desired locations for the doors and windows on your porch’s framed walls. Take into consideration factors such as the porch’s layout, traffic flow, and the placement of furniture.
- Prepare the Openings: Using appropriate tools, carefully cut out the openings for the doors and windows on the framed walls. Ensure that the openings are level and square to facilitate the installation.
- Install Door and Window Frames: Follow the manufacturer’s instructions to install the door and window frames into the prepared openings. Secure them tightly using screws or nails, ensuring they are plumb and level.
- Add Weatherstripping and Insulation: Install weatherstripping around the doors and windows to prevent drafts and improve energy efficiency. Additionally, apply insulation around the frames to enhance thermal performance.
- Attach Screens to Windows: If desired, attach screen material to the window frames using staples or the appropriate fasteners. This will allow you to open the windows while still keeping insects out.
- Hang Doors: Install the doors in their respective frames, making sure they open and close smoothly. Adjust the hinges if needed to ensure proper alignment and functionality.
- Test and Adjust: Test the doors and windows to ensure they seal properly and operate smoothly. Make any necessary adjustments to the hardware or weatherstripping to achieve a secure and watertight fit.
- Consider Security Measures: Depending on your location and security concerns, you may want to install additional security features such as locks, deadbolts, or window screens for added protection.
By adding doors and windows to your screened-in porch, you can create a seamless transition between indoor and outdoor spaces while enjoying the benefits of natural light and ventilation. Take care to select high-quality doors and windows that are suitable for exterior use and consider energy-efficient options to maximize comfort and sustainability. In the next section, we will discuss important electrical and lighting considerations for your screened-in porch.
Before starting the project, make sure to check local building codes and obtain any necessary permits. Consider using a screen system that can easily be installed and removed, allowing you to switch between a screened-in porch and an open deck.
Electrical and Lighting Considerations
To make your screened-in porch functional and comfortable, it’s important to consider the electrical and lighting aspects of the space. Here are some key considerations to keep in mind:
- Determine Power Source: Decide on the power source for your porch. If your deck already has an electrical outlet nearby, you may be able to extend the wiring to your porch. Otherwise, consult with a licensed electrician to determine the best way to connect your porch to the electrical grid.
- Plan for Outlets and Switches: Identify the areas where you’ll need electrical outlets for powering appliances, electronics, or outdoor lighting. Consider the convenience and accessibility of the outlets and install them at appropriate heights. Additionally, plan for light switches to control the porch’s lighting.
- Install Weatherproof Outlets and Covers: It’s vital to ensure that all electrical outlets installed in your screened-in porch are weatherproof and come with appropriate covers. These safeguards protect the outlets from water and moisture damage and reduce the risk of electrical hazards.
- Choose Suitable Lighting: Select lighting fixtures that are suitable for outdoor use and can withstand the elements. Depending on your porch’s design and intended use, consider options such as ceiling-mounted fixtures, wall sconces, string lights, or recessed lighting.
- Consider Dimmers and Smart Lighting: Incorporate dimmers or smart lighting controls into your porch’s lighting design to create ambiance and allow for more customizable lighting options. This allows you to adjust the brightness and mood of the space according to different activities and preferences.
- Ensure Proper Wiring and Safety: It’s essential to have all electrical work done by a qualified electrician to ensure compliance with local building codes and safety standards. The electrician will ensure proper wiring, grounding, and installation techniques, reducing the risk of electrical accidents.
- External Lighting: Consider external lighting options to enhance the ambiance and safety of your porch. Install fixtures such as spotlights, pathway lights, or post lights around the perimeter of your porch to illuminate the surrounding area.
- Integrate Technology: If desired, integrate technology into your porch’s electrical system. This can include features such as outdoor speakers, Wi-Fi connectivity, or smart home automation. Consult with professionals in these respective fields to ensure proper integration and functionality.
By carefully considering the electrical and lighting aspects of your screened-in porch, you can create a well-lit and functional space that meets your specific needs. Working with a licensed electrician is crucial for safety and compliance. In the next section, we will explore various flooring options for your screened-in porch.
Flooring Options
When it comes to flooring options for your screened-in porch, you’ll want to choose a material that is durable, visually appealing, and suitable for both indoor and outdoor use. Here are some popular flooring options to consider:
- Pressure-Treated Wood: Pressure-treated wood is a common choice for outdoor decks and can also be used for screened-in porches. It is resistant to rot and decay, making it a durable option. However, regular maintenance, such as staining and sealing, is necessary to maintain its appearance and longevity.
- Composite Decking: Composite decking is a synthetic alternative to traditional wood. It is made from a mixture of wood fibers and recycled plastic, offering the look of wood without the maintenance. Composite decking is highly resistant to rot, splintering, and fading, making it a low-maintenance option. It is available in various colors and finishes to suit your aesthetic preferences.
- Porcelain or Ceramic Tile: Porcelain or ceramic tiles are another popular choice for screened-in porch flooring. They are durable, easy to clean, and come in a wide range of styles and designs. However, bear in mind that the tiles should be slip-resistant, especially if your porch is exposed to water or prone to moisture.
- Natural Stone: Natural stone, such as slate or travertine, can add an elegant and timeless look to your screened-in porch. It is durable and resistant to wear and tear. However, it can be more expensive than other options and may require periodic sealing to maintain its appearance.
- Concrete: Concrete flooring is a versatile and cost-effective choice for a screened-in porch. It can be stained, stamped, or painted to achieve a variety of finishes and designs. Concrete is highly durable and can withstand heavy foot traffic. It is important to ensure proper sealing to prevent water penetration and cracking.
- Outdoor Carpet: If you’re looking for a softer and more comfortable flooring option, outdoor carpet is worth considering. It is available in various styles and colors, providing a cozy and inviting feel to your porch. Look for carpets specifically designed for outdoor use, as they are resistant to mold and mildew.
- Deck Tiles: Deck tiles are a convenient and easy-to-install option for transforming your porch’s flooring. These interlocking tiles come in various materials, such as wood, composite, or rubber, and can be laid directly over the existing deck surface. They offer a quick and temporary solution that can be easily replaced or changed if desired.
Consider your preferences, budget, and maintenance requirements when choosing the flooring for your screened-in porch. Remember to factor in the climate and weather conditions in your area to ensure the longevity of the chosen material. In the next section, we will discuss insulation and ventilation considerations for your porch.
Read more: How To Screen In A Porch
Insulation and Ventilation
When transforming your deck into a screened-in porch, it’s important to consider the insulation and ventilation options to ensure a comfortable and well-regulated environment. Here are some key factors to consider:
- Insulation: Adding insulation to your porch’s walls, ceiling, and floors can help regulate the temperature and improve energy efficiency. Insulation materials such as fiberglass batts or spray foam insulation can be installed between the wall studs and in the ceiling and floor cavities to provide thermal resistance.
- Vapor Barrier: Consider installing a vapor barrier in the walls and ceiling to prevent moisture buildup and protect the insulation from damage. The vapor barrier helps ensure that moisture from the outdoor environment does not penetrate the structures of your porch.
- Window and Door Seals: Properly sealing the windows and doors in your screened-in porch is crucial for preventing air leakage and maintaining a comfortable indoor temperature. Weatherstripping or caulk can be used to seal gaps and cracks around the windows and doors.
- Ventilation: Adequate ventilation is essential for preventing condensation buildup and maintaining air circulation in your screened-in porch. Consider installing vent openings, such as screened vents or ceiling fans, to promote airflow. These also help to expel excess heat and humidity during hot summer months.
- Solar Shades or Blinds: Installing solar shades or blinds on windows can help control sunlight and heat gain, especially during the peak hours of the day. This can reduce the need for excessive air conditioning and improve the overall comfort of your porch.
- Consider HVAC Options: If you plan to use your screened-in porch as a year-round living space, you may want to explore options for extending your home’s HVAC system to include the porch. Consult with an HVAC professional to determine the feasibility and requirements of incorporating heating and cooling solutions.
- Ceiling Insulation: Consider insulating the ceiling of your porch to reduce heat transfer from the sun. Insulation materials can be added above the ceiling, preventing direct heat gain during warm months and heat loss during colder months.
By properly insulating and ventilating your screened-in porch, you can create a comfortable and enjoyable space throughout the year. Consider consulting with professionals in insulation and HVAC to ensure the most effective and efficient solutions for your specific needs. In the next section, we will discuss the finishing touches and decoration options for your screened-in porch.
Finishing Touches and Decoration
Once you have transformed your deck into a screened-in porch, it’s time to add the finishing touches and decoration to make it a truly inviting and personalized space. Here are some ideas to consider:
- Furniture: Choose furniture that suits your desired function and style for the porch. Opt for outdoor furniture made of materials that are resistant to weather elements, such as wicker, aluminum, or teak. Include comfortable seating options, tables, and other accessories that enhance the functionality and comfort of your porch.
- Rugs and Floor Coverings: Add rugs or floor coverings to define different areas within your porch and provide a cozy underfoot feel. Look for outdoor rugs made of durable materials that are resistant to fading and easy to clean.
- Lighting Fixtures: Choose lighting fixtures that complement the style and mood of your porch. Consider a combination of overhead lighting, wall sconces, string lights, and lanterns to create a warm, inviting ambiance during the evenings. Use dimmers to adjust the lighting level according to your preferences and activities.
- Window Treatments: Install window treatments, such as curtains or blinds, to provide privacy and shade when needed. Opt for materials that can withstand outdoor conditions and choose colors or patterns that coordinate with your porch’s overall design.
- Accessorize: Enhance the aesthetics of your porch by incorporating decorative accessories such as throw pillows, outdoor cushions, artwork, and plants. Choose items that are weather-resistant and can withstand outdoor exposure.
- Entertainment and Technology: Consider integrating entertainment features into your porch, such as an outdoor sound system, television, or Wi-Fi connectivity. This allows you to enjoy music, movies, or even work in your outdoor oasis.
- Greenery and Plants: Bring the beauty of nature into your porch by adding potted plants, hanging baskets, or a vertical garden. These natural elements not only add visual appeal but also contribute to a calming and refreshing atmosphere.
- Themed Decor: Consider a specific theme or design style for your porch to create a cohesive and curated look. Whether it’s coastal, rustic, modern, or bohemian, choose decor elements that align with your chosen theme for a harmonious aesthetic.
By adding these finishing touches and decoration, you can transform your screened-in porch into a personalized and inviting space that reflects your style and enhances your outdoor living experience. Remember to consider both aesthetics and functionality when selecting furnishings and accessories. In the final section, we will discuss maintenance and care tips to keep your screened-in porch looking its best.
Maintenance and Care Tips
To ensure that your newly transformed screened-in porch remains in great condition and continues to provide a comfortable space for relaxation and enjoyment, regular maintenance and proper care are essential. Here are some important tips to keep in mind:
- Clean Regularly: Regularly sweep or use a leaf blower to remove debris, dirt, and leaves from the floor and screens. Wipe down surfaces with a damp cloth and mild detergent to remove any stains or spills.
- Inspect for Damage: Routinely inspect the screens, doors, windows, and flooring for any signs of wear, damage, or deterioration. Repair or replace damaged components as soon as possible to prevent further issues.
- Maintain the Screens: Inspect the screens for any tears or holes and promptly repair them using patch kits or screen repair materials. This will keep insects and debris out while allowing for optimal airflow.
- Seal and Stain Wood: If you have a wooden deck or furnishings, regularly seal the wood with a weather-resistant sealant to protect it from moisture, sunlight, and pests. Stain the wood periodically to enhance its appearance and prevent color fading.
- Trim Vegetation: Trim any overhanging branches or vegetation near your porch to minimize leaves and debris falling onto the area. This will help reduce the amount of maintenance required and prevent potential damage to the screens or roof.
- Address Water Drainage: Ensure that the porch has proper water drainage to prevent water from pooling or seeping into the flooring. Remove any standing water and redirect downspouts or gutters away from the porch area.
- Protect from Harsh Weather: During severe weather conditions or extended periods of non-use, consider using protective covers or tarps to shield your porch’s furnishings and flooring from rain, snow, or excessive sun exposure.
- Perform Seasonal Maintenance: Perform specific maintenance tasks based on the season. This may include cleaning out gutters, inspecting for mold or mildew, and ensuring that the HVAC or heating systems are functioning correctly for year-round use.
- Follow Manufacturer’s Instructions: Always follow the manufacturer’s instructions for care and maintenance of the different materials used in your porch, from screens to furniture. This will ensure you are using the appropriate cleaning methods and products, keeping them in optimal condition.
- Reapply Sealant and Paint: Over time, the seals or paint on your porch’s materials may wear down. Regularly reapply sealants, stains, or paint as needed to protect surfaces and maintain their visual appeal.
By following these maintenance and care tips, you can extend the lifespan of your screened-in porch and keep it looking beautiful and inviting for years to come. Maintenance should be performed regularly, especially after harsh weather conditions or during seasonal changes. With proper care, your screened-in porch will continue to provide a wonderful space for relaxation and enjoyment.
Conclusion
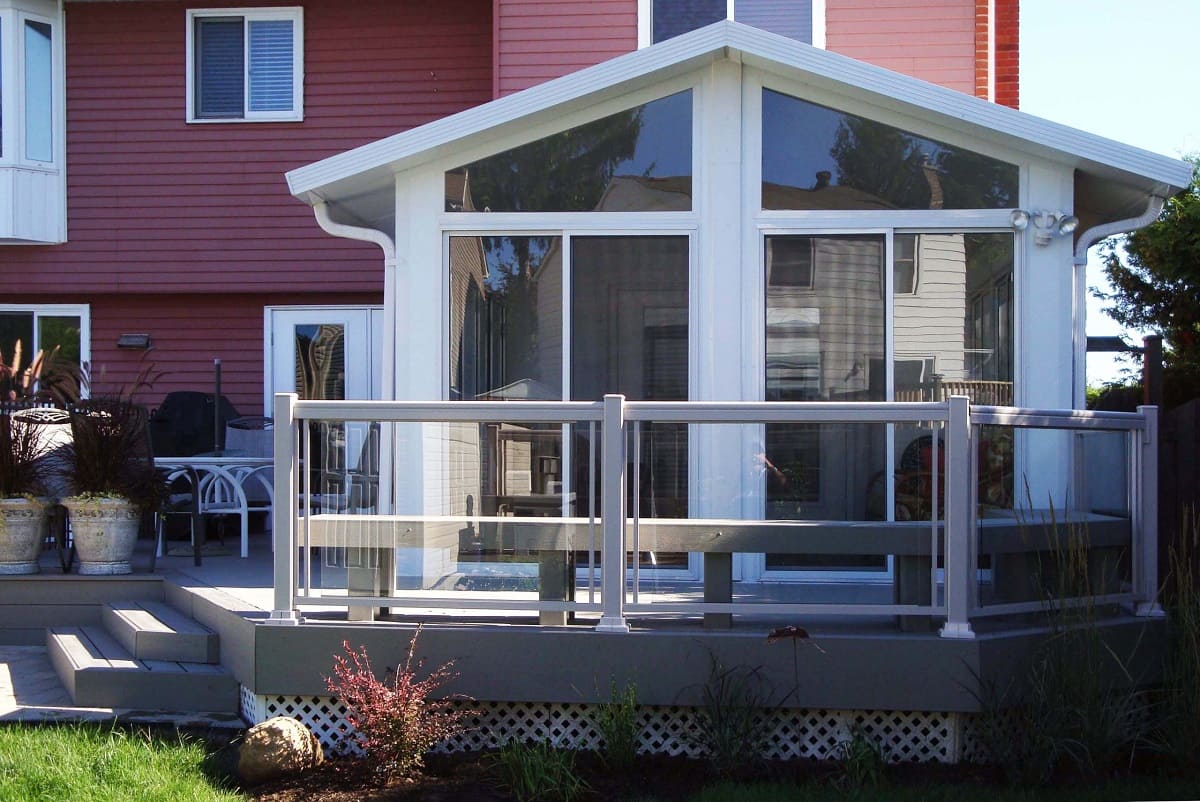
Congratulations on successfully transforming your deck into a screened-in porch! By following the steps outlined in this comprehensive guide, you’ve created a functional and inviting addition to your home. Your new screened-in porch provides a versatile space to enjoy the outdoors while being protected from insects, harsh weather, and other elements.
Through careful assessment, planning, and preparation, you ensured that your deck was suitable for the conversion into a screened-in porch. By obtaining the necessary permits and meeting building codes, you guaranteed a safe and legal construction process. Framing the walls, installing screened panels, adding doors and windows, and addressing insulation and ventilation considerations have provided you with a comfortable and functional space.
With the addition of appropriate flooring, electrical and lighting fixtures, and thoughtful decoration, you’ve personalized your screened-in porch to reflect your style and create a welcoming ambiance. Regular maintenance and proper care practices will help keep your porch in optimal condition, ensuring its longevity and enjoyment for years to come.
Whether you use your porch for relaxing, entertaining, or spending quality time with loved ones, your transformed deck now serves as a seamless extension of your home’s living space. Enjoy the fresh air, natural light, and uninterrupted views while being sheltered in the comfort of your screened-in porch.
Thank you for embarking on this journey of creating your dream screened-in porch with us. We hope this guide has been informative and inspiring, guiding you through each step of the process. Now, it’s time to sit back, relax, and enjoy the fruits of your labor in your beautiful new screened-in porch!
Frequently Asked Questions about How To Turn Deck Into Screened-In Porch
Was this page helpful?
At Storables.com, we guarantee accurate and reliable information. Our content, validated by Expert Board Contributors, is crafted following stringent Editorial Policies. We're committed to providing you with well-researched, expert-backed insights for all your informational needs.


0 thoughts on “How To Turn Deck Into Screened-In Porch”