Articles
How To Build An Angled Deck Step-by-Step
Modified: May 6, 2024
Learn how to build an angled deck step by step with our comprehensive articles. Transform your outdoor space with expert guidance and create a stunning deck today.
(Many of the links in this article redirect to a specific reviewed product. Your purchase of these products through affiliate links helps to generate commission for Storables.com, at no extra cost. Learn more)
Introduction
Welcome to this comprehensive guide on building an angled deck step-by-step. Whether you want to create a stunning outdoor entertainment area or expand your existing deck, constructing an angled deck can add a unique touch and maximize your available space. In this article, we will walk you through the process of planning, materials and tools required, preparation, frame building, and finishing touches to create your dream angled deck.
Building a deck can be a rewarding and fulfilling project, but it requires careful planning and execution to ensure structural integrity and safety. By following the steps outlined in this guide, you’ll gain the knowledge and confidence to take on this project. So let’s dive right in!
Note: Before you begin any construction project, always check with your local building authorities to ensure compliance with building codes, permits, and regulations.
Step 1: Planning
Proper planning is crucial to the success of any construction project, and building an angled deck is no exception. Start by determining the purpose of your deck and its dimensions. Consider factors such as the number of people it will accommodate, the furniture you’ll be placing on it, and any additional features, like a barbecue area or a hot tub.
Next, choose an ideal location for your deck, taking into account sun exposure, privacy, and accessibility. Consider the terrain of your yard and any potential challenges you may need to overcome, such as uneven ground or trees that need to be cleared.
Once you have a clear vision of your deck’s design and location, it’s time to move on to the next step.
Step 2: Materials and Tools
Now that you have a plan in place, it’s time to gather the necessary materials and tools. The materials you’ll need will depend on the size, height, and design of your deck, as well as personal preferences and budget constraints. Typically, you will require pressure-treated lumber for the frame and joists, as well as decking boards, railings, and balusters.
It’s important to choose materials that are durable, weather-resistant, and suited for outdoor use. Visit your local home improvement store or lumber yard to gather the necessary supplies. Additionally, ensure that you have the right tools on hand, such as a circular saw, drill, level, tape measure, and safety equipment.
With the materials and tools ready, it’s time to move on to the next step in the construction process.
Step 3: Preparing the Area
Before you start building the deck, it’s crucial to prepare the area where it will be constructed. Clear the ground of any debris, rocks, or vegetation. If necessary, level the ground or create a foundation using concrete footings or deck blocks. Ensure that the area is properly cleared and leveled to guarantee a sturdy and stable deck structure.
After preparing the area, it’s time to move on to building the deck frame. Follow the next step to learn how to construct a solid and secure frame for your angled deck.
Key Takeaways:
- Proper planning, precise measurements, and careful material selection are essential for building a sturdy and visually appealing angled deck. Following the step-by-step guide ensures a successful and rewarding construction process.
- Attention to detail, from installing the frame and joists to adding finishing touches, is crucial for creating a safe, functional, and beautiful angled deck. Regular maintenance will preserve its longevity and enjoyment.
Step 1: Planning
Proper planning is essential when it comes to building an angled deck. This step lays the foundation for the entire project and ensures that you have a clear vision of your deck design and its purpose. Here are some key considerations to keep in mind during the planning phase:
- Define the Purpose: Think about how you want to use your deck. Will it be a space for entertaining guests, relaxing with your family, or both? Determining the primary purpose will help you make informed decisions about the deck’s layout, size, and features.
- Consider Your Needs: Take into account the number of people the deck will accommodate, as well as any specific features or accessories you want to include. Outdoor kitchens, seating areas, fire pits, and hot tubs are all popular additions that can enhance the functionality and enjoyment of your deck.
- Assess the Space: Evaluate your outdoor space to determine the best location for your angled deck. Consider factors such as privacy, sun exposure, views, and the existing layout of your yard. Take measurements and identify any potential obstacles, such as slopes, trees, or underground utilities.
- Determine the Dimensions: With a clear understanding of the purpose and constraints of your deck, decide on its size and shape. An angled deck can be an excellent solution for maximizing space or creating visual interest. Determine the angle and dimensions that will best fit your layout and preferences.
- Check Building Codes and Permits: Before proceeding with your deck construction, it’s crucial to check local building codes and obtain any required permits. Building codes vary from region to region and dictate requirements for structural integrity, safety, and compliance. Make sure to follow all regulations to avoid costly fines and ensure the safety of your deck.
Once you have completed the planning phase, you will have a clear vision of your deck design and its specifications. This will serve as a guide throughout the construction process and help you make informed decisions when selecting materials and tools.
Remember that planning is an iterative process, and it’s often helpful to consult with a professional or experienced deck builder to ensure you haven’t overlooked any important details. Take the time to thoroughly plan your angled deck, and you’ll be well-prepared to move on to the next phase of construction: gathering materials and tools.
Step 2: Materials and Tools
Now that you have a clear plan in place, it’s time to gather the necessary materials and tools for building your angled deck. The materials you’ll need can vary depending on the size, height, and design of your deck, as well as your personal preferences and budget. Here are some common materials and tools you’ll likely need:
- Lumber: Pressure-treated lumber is commonly used for deck construction as it is durable, resistant to rot and insects, and affordable. The specific sizes and quantities will depend on your deck’s dimensions and design.
- Decking Boards: Choose from a variety of decking materials, such as wood, composite, or PVC. Consider factors such as maintenance requirements, durability, and appearance. Ensure that the decking boards are suitable for outdoor use and can withstand the elements.
- Railings and Balusters: If your deck is elevated or requires safety features, you’ll need railings and balusters. These components provide support and prevent accidents. Options include wood, metal, glass, or composite materials.
- Fasteners: Use corrosion-resistant nails, screws, or deck clips to secure the deck boards and other components. Stainless steel or coated fasteners are highly recommended for durability.
- Concrete: Depending on your deck’s design, you may need concrete for footings or as a base for deck blocks. Follow local building codes and guidelines for proper installation.
- Tools: Essential tools for building an angled deck include a circular saw, drill, level, tape measure, speed square, framing square, chisel, miter saw, and safety equipment such as gloves and goggles. Having the right tools on hand will make the construction process much smoother.
When choosing materials, consider factors such as durability, aesthetics, maintenance requirements, and budget. It’s important to strike a balance between cost-effectiveness and ensuring long-term performance and satisfaction with your deck.
Visit your local home improvement store or lumber yard to gather the necessary supplies. Seek advice from professionals to ensure you’re making informed decisions and selecting materials that suit your needs and preferences.
By gathering the appropriate materials and tools, you’ll be prepared to move on to the next step: preparing the area where your angled deck will be constructed.
Step 3: Preparing the Area
Before you begin building your angled deck, it’s essential to properly prepare the area where it will be constructed. This step ensures a stable and level foundation for your deck. Follow these guidelines to prepare the area:
- Clear the Space: Remove any obstacles, including vegetation, rocks, and debris, from the area where your deck will be built. This will create a clean and clear space to work with and prevent any interference during construction.
- Level the Ground: If the ground is uneven, you may need to level it before proceeding. Use a shovel or a rented power compactor to remove any high spots and fill any low spots. A level surface is crucial for the structural integrity of your deck.
- Create Footings or Deck Blocks: Depending on the design of your angled deck, you may need to create footings or use deck blocks as the foundation. Consult with local building codes and regulations to determine the necessary depth and dimensions for footings. If using deck blocks, ensure they are level and properly spaced to support the weight of your deck.
- Check for Utility Lines: Before digging for footings, contact your local utility company to identify the location of any underground utility lines. This will help prevent accidents and ensure the safety of your construction project.
- Apply Weed Barrier: To prevent weed growth under your deck, consider installing a weed barrier or landscaping fabric. This will help maintain a clean and low-maintenance deck area.
Taking the time to properly prepare the area will ensure a solid foundation for your angled deck. A level surface and sturdy foundation are key to the overall stability and longevity of the structure. It’s important to adhere to local building codes and regulations throughout this stage to ensure compliance and safety.
Once the area is cleared and prepared, you’re ready to move on to the next step: constructing the frame of your angled deck. Stay tuned for detailed instructions on how to build a strong and secure deck frame.
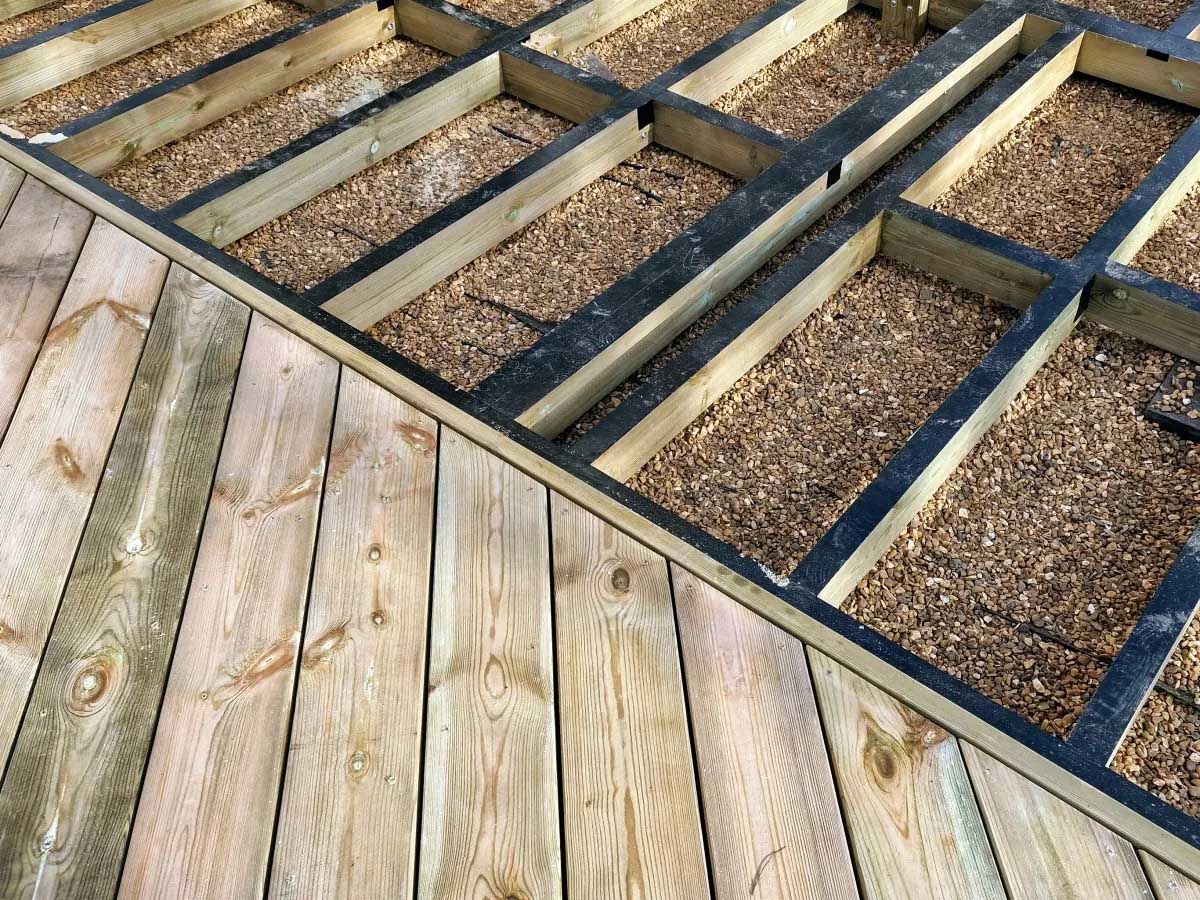
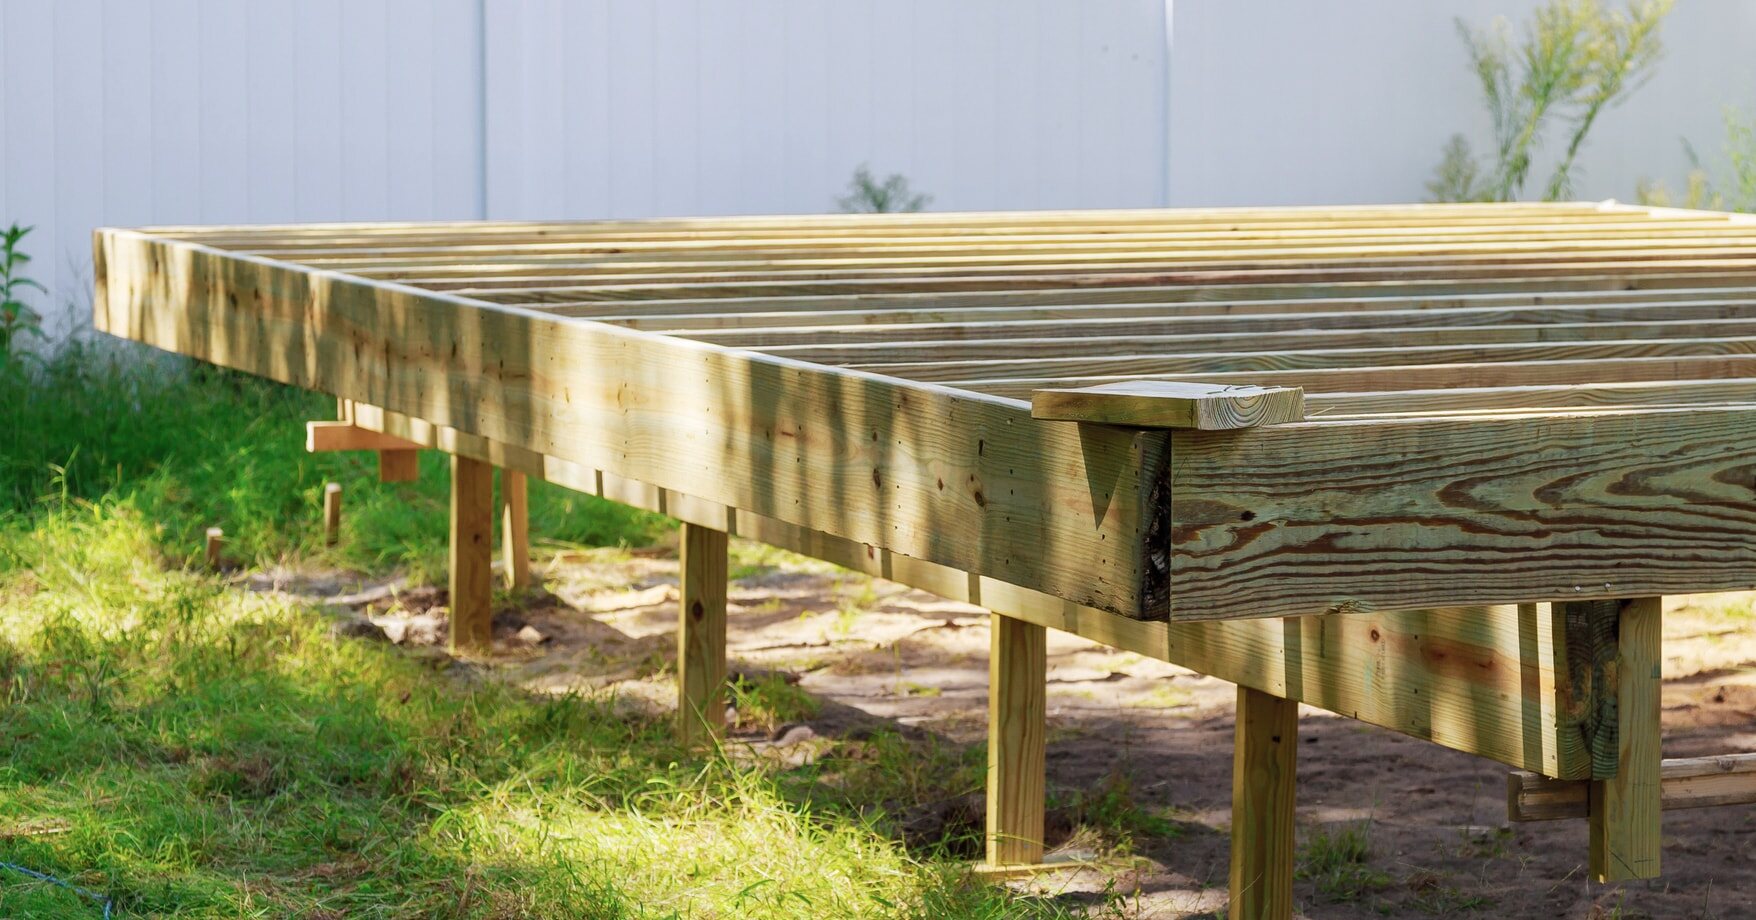
Step 4: Building the Frame
Building a sturdy and secure frame is crucial when constructing an angled deck. The frame provides the structural support for the deck, ensuring its strength and stability. Here’s a step-by-step guide on how to build the frame for your angled deck:
- Measure and Mark: Start by measuring and marking the outline of your deck frame on the prepared area. Use a tape measure and stakes to indicate the corners and perimeter of the deck.
- Install Ledger Board (if applicable): If your deck will be attached to the house, you’ll need to install a ledger board. Position the ledger board against the house, ensuring it is level and properly secured with lag bolts or structural screws. Make sure to follow local building codes and guidelines for ledger board installation.
- Attach Rim Joists: Cut your rim joists to the desired length and attach them to the ledger board (if applicable) and the corner stakes using galvanized nails or structural screws. Ensure that the rim joists are level and properly aligned.
- Install Joists: Measure and cut your joists according to the dimensions of your deck. The spacing between joists will depend on the requirements outlined by local building codes and the material used for the decking. Attach the joists to the ledger board (if applicable) and rim joists using hangers or double joist hangers for added support.
- Secure and Reinforce: To enhance the strength of your deck’s frame, consider installing blocking between the joists at regular intervals. This will provide additional support and prevent any lateral movement of the joists.
- Check for Level: Use a level to ensure that the frame is perfectly level and adjust as necessary. A level frame will ensure a smooth and even surface for your decking boards.
- Double-check Measurements: Before proceeding to the next step, double-check all measurements to ensure accuracy. Mistakes at this stage can impact the rest of the construction process, so it’s essential to be thorough.
Building the frame requires precise measurements, accurate cuts, and proper fastening techniques. Take your time during this step to ensure that the frame is solid and level. By following these steps, you’ll have a strong foundation for your angled deck.
Now that the frame is in place, it’s time to move on to the next step: attaching the joists. Stay tuned for detailed instructions on how to properly install the joists for your angled deck.
When building an angled deck, be sure to carefully measure and mark the angles for accurate cuts. Use a miter saw to make precise cuts for a professional finish.
Step 5: Attaching the Joists
Once the frame of your angled deck is built, the next step is to attach the joists. Joists provide additional support and stability to the deck structure, ensuring it can withstand the weight of the decking boards and any added load. Follow these steps to properly attach the joists to the frame:
- Measure and Cut Joists: Measure the distance between the rim joists or ledger board (if applicable) to determine the length of each joist. Cut the joists to the appropriate size, ensuring they are accurately aligned with the frame.
- Install Joist Hangers: Attach joist hangers to the inside faces of the rim joists or ledger board. These metal brackets will securely hold the joists in place. Make sure the joist hangers are properly aligned and level.
- Position Joists: Place each cut joist into the corresponding joist hanger, starting from one end of the deck. Ensure that the joists are aligned and properly seated in the hangers. Use a level to confirm that the joists are horizontal.
- Screw or Nail Joists: Secure the joists to the frame by using either galvanized screws or nails. Insert them through the holes provided in the joist hangers and into the joists. Be sure to follow the manufacturer’s instructions for proper fastening techniques.
- Check Alignment and Levelness: As you attach each joist, continuously check the alignment and levelness of the joists. This will ensure a uniform and stable framework for your angled deck.
- Add Additional Support (if necessary): Depending on the size and span of your deck, you may need to install additional intermediate beams or posts for added support between the joists. This will enhance the strength and stability of the deck.
- Double-check for Accuracy: Before proceeding to the next step, double-check all measurements, alignment, and levelness of the joists. Any discrepancies should be addressed and corrected before moving forward.
Properly attaching the joists is crucial to ensure the stability and longevity of your angled deck. Take the time to accurately measure, cut, and secure each joist, paying close attention to alignment and levelness. By following these steps, you’ll have a solid foundation for the decking boards and the next stage of construction.
Now that the joists are securely in place, it’s time to move on to the next step: installing the decking boards. Stay tuned for detailed instructions on how to properly add the decking boards to your angled deck.
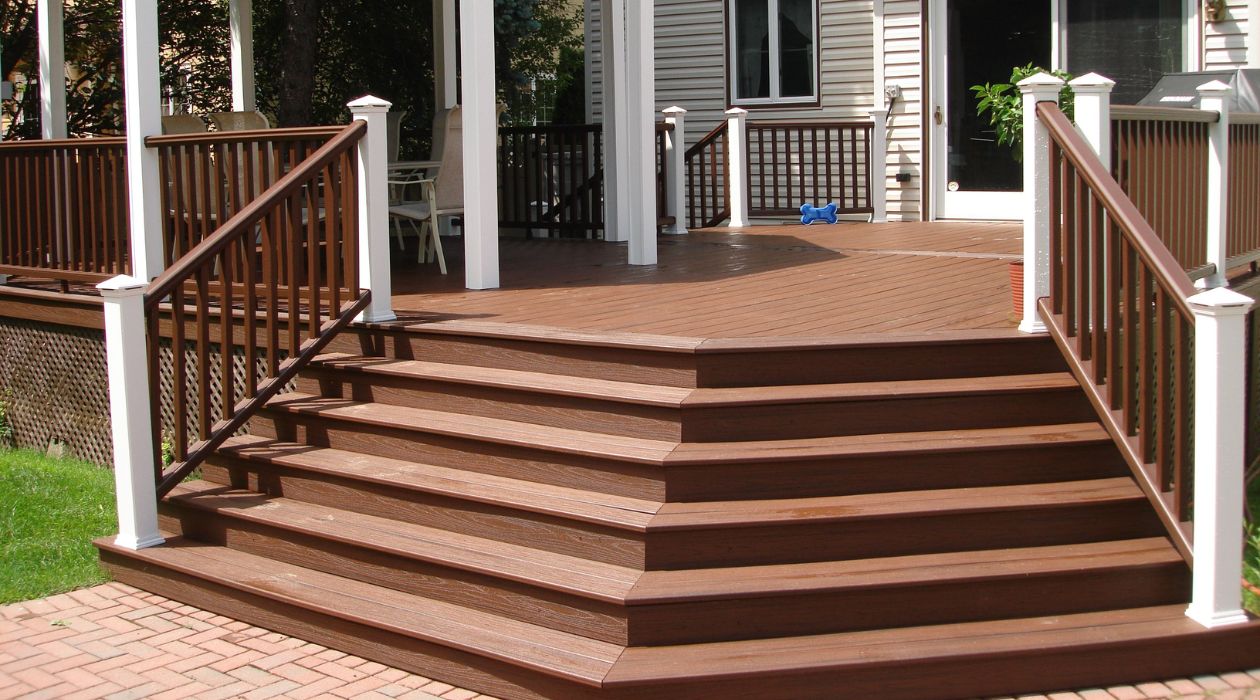
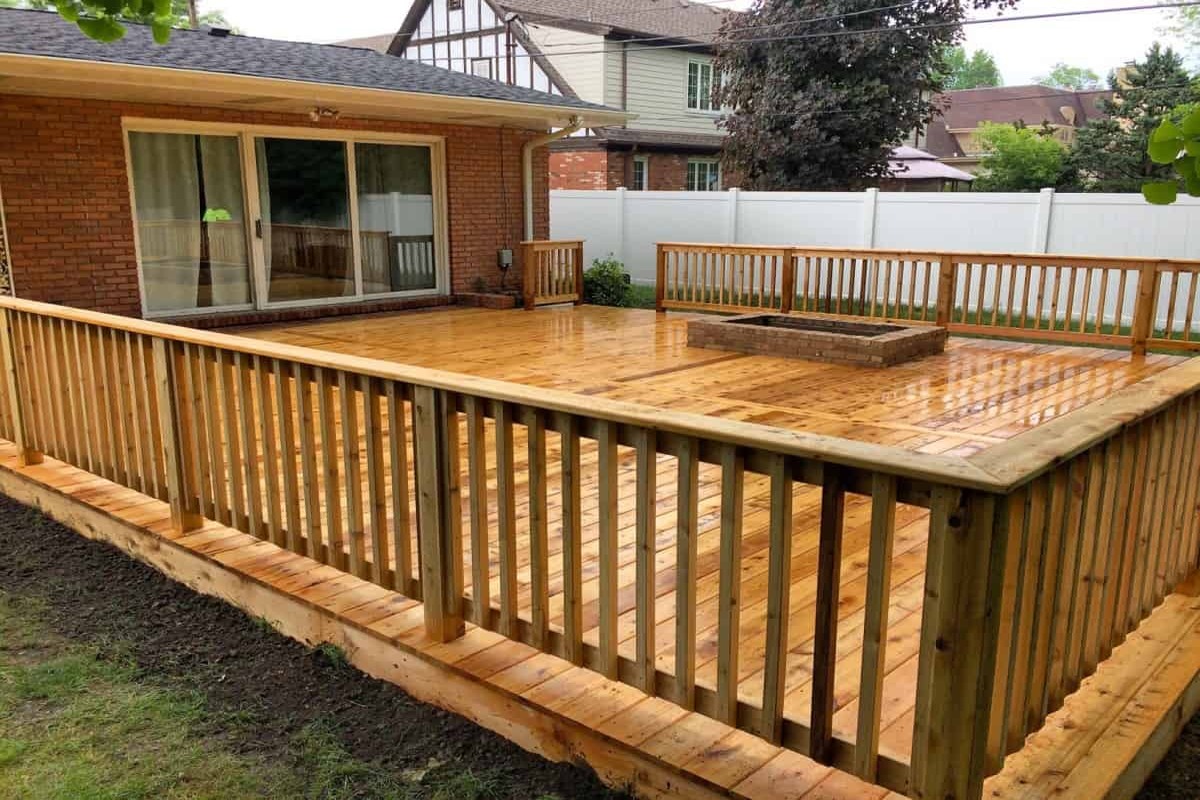
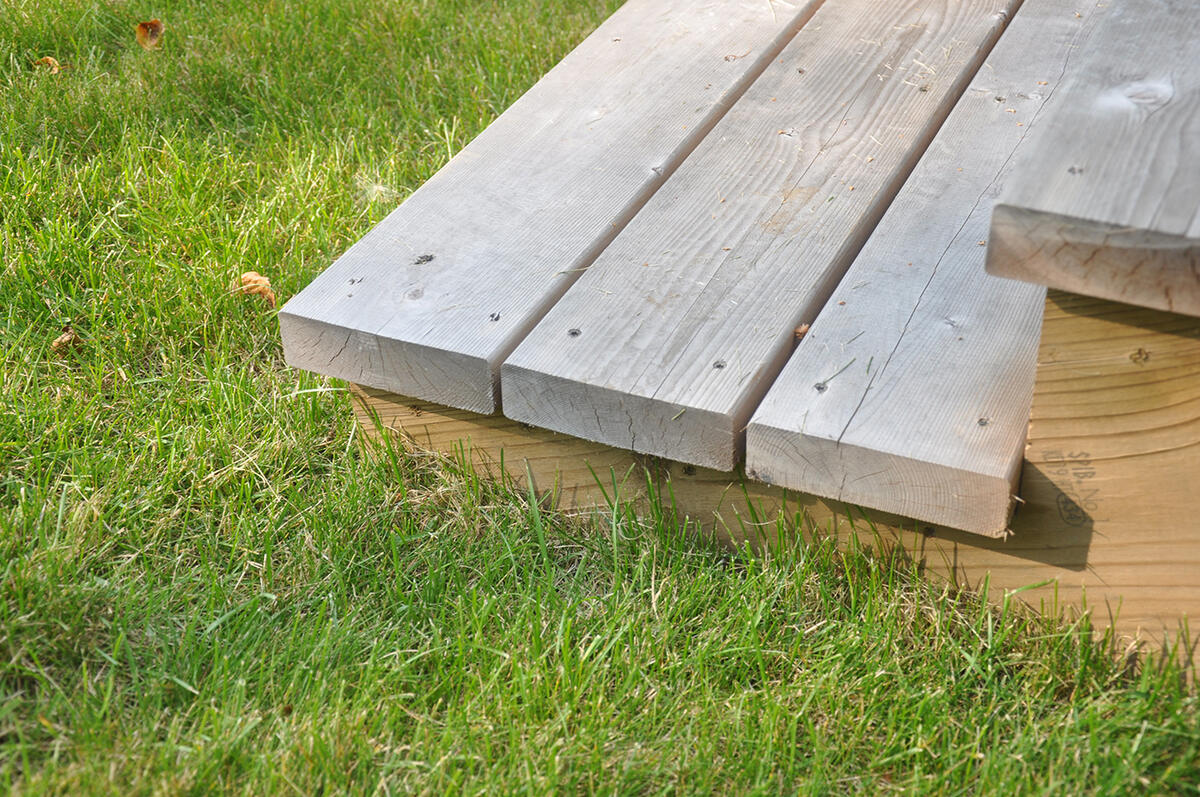
Step 6: Installing the Decking Boards
With the frame and joists securely in place, it’s time to move on to installing the decking boards for your angled deck. The decking boards not only provide a functional surface for your deck, but they also play a significant role in the overall aesthetics and durability of the structure. Follow these steps to properly install the decking boards:
- Plan the Layout: Before installation, carefully plan the layout and orientation of the decking boards. Take into consideration any patterns, angles, or design elements you want to incorporate. This will help ensure a visually appealing and well-organized deck surface.
- Start with a Starter Board: Begin installation by placing a starter board along the edge of the deck, ensuring it is aligned and squared with the frame. Secure it in place using galvanized deck screws or nails, making sure to leave a small gap between the board and the frame for expansion and drainage.
- Install the Decking Boards: Place successive decking boards, running them perpendicular to the joists. Leave a small gap (about 1/8 inch) between each board to allow for expansion and contraction. Secure each board with screws or nails, using enough fasteners to ensure a secure attachment to the joists.
- Trimming and Angling: As you progress with the installation, you may encounter situations where you need to trim or angle the decking boards to fit the shape of your angled deck. Use a circular saw or a jigsaw to make precise cuts or angles as needed.
- Check for Levelness and Alignment: Continuously check for levelness and alignment as you install each board. Use a level and a straight edge to ensure that the decking is level and the boards are properly aligned with each other and the frame.
- Properly Secure the End Boards: Pay special attention to the end boards, ensuring that they are securely attached to the frame to prevent any lifting or movement. Add additional screws or nails if necessary to reinforce the stability of the end boards.
- Consider Hidden Fastening Systems: If desired, you can opt for a hidden fastening system, which eliminates visible screws or nails on the surface of the deck. This provides a sleek, clean look and minimizes potential trip hazards.
- Use Protective Sealant or Stain: To further enhance the durability and appearance of your decking boards, consider applying a protective sealant or stain. This will help protect the wood from moisture, UV rays, and wear and tear, while also adding color and character to your deck.
Properly installing the decking boards is crucial for the overall functionality and aesthetics of your angled deck. Take your time during this step to ensure accurate alignment, levelness, and secure attachment of the boards. By following these steps, you’ll be on your way to completing your angled deck.
Now that the decking boards are in place, it’s time to move on to the next step: adding railings and balusters to your angled deck. Stay tuned for detailed instructions on how to properly install these safety features.
Step 7: Adding Railings and Balusters
Adding railings and balusters to your angled deck is an important step in ensuring the safety and aesthetics of your outdoor space. Railings provide support and prevent accidents, while balusters add visual appeal and serve as a barrier between the deck and the surrounding area. Follow these steps to properly install railings and balusters:
- Determine Railing Design: Decide on the design and style of railings that best suit your deck. Common options include wood, metal, glass, or composite materials. Consider factors such as durability, maintenance requirements, and the overall look you want to achieve.
- Measure and Cut Railings: Measure the distance between the posts or designated areas where the railings will be installed. Cut the railing sections to the appropriate lengths, ensuring a proper fit and alignment.
- Secure Bottom Rail: Install the bottom rail first, positioning it at the desired height and ensuring it is level. Use screws or brackets to securely attach it to the posts or structural elements of the deck frame.
- Attach Balusters: Install the balusters between the bottom and top rails, evenly spacing them to meet local building codes. Use baluster connectors or screws to secure them in place. Consider using a baluster jig or spacing tool to ensure consistent spacing between each baluster.
- Install Top Rail: Once the balusters are in place, attach the top rail. Ensure it is level and properly aligned with the bottom rail. Secure it using screws or brackets, ensuring a strong and secure connection.
- Check for Stability: Test the stability of the railings by applying pressure in various areas. They should be secure and not wobble or move easily. Make any necessary adjustments or reinforcements to ensure a stable and safe railing system.
- Finishing Touches: Consider adding decorative elements, such as post caps or trim pieces, to enhance the appearance of the railings. Add any additional features, such as handrails or lighting, that you desire to make your deck even more functional and appealing.
Properly installing railings and balusters is essential for the safety and visual appeal of your angled deck. Take the time to accurately measure, cut, and secure each component, ensuring that they are level, aligned, and meet local building codes. By following these steps, you’ll have a beautiful and secure railing system.
Now that the railings and balusters are in place, it’s time to move on to the final step: adding the finishing touches to your angled deck. Stay tuned for detailed instructions on how to complete your deck with those final touches.
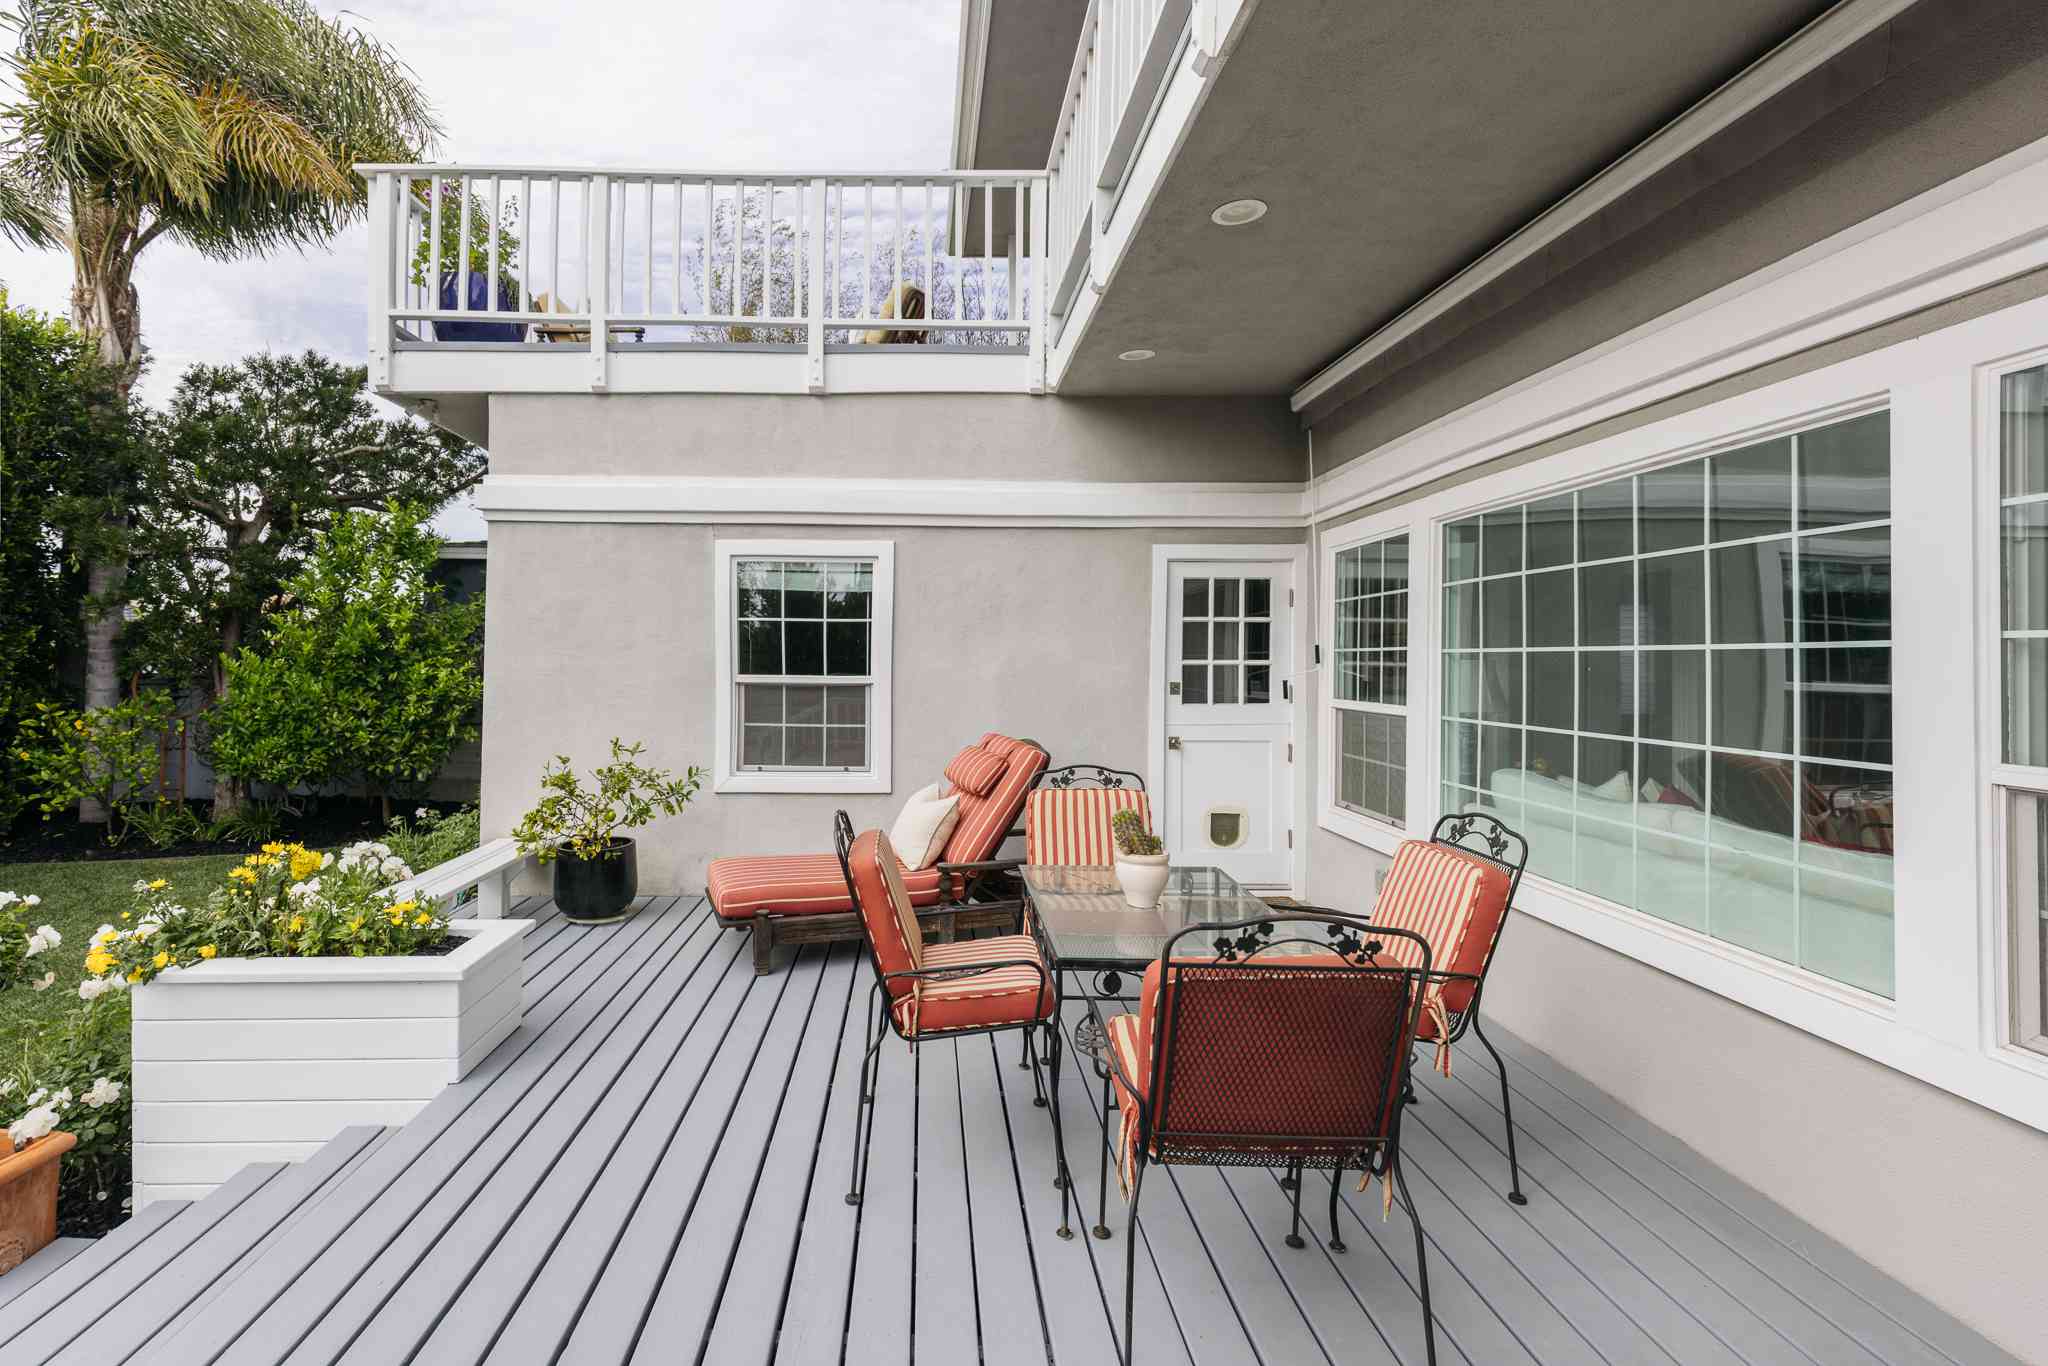
Step 8: Finishing Touches
Congratulations! You’re in the final step of building your angled deck. Adding finishing touches not only enhances the overall look of your deck but also contributes to its functionality and longevity. Here are some key finishing touches to consider:
- Trim and Edging: Install trim boards along the outer edges of your deck for a polished and professional look. This will also help protect the ends of the decking boards from moisture and wear.
- Stain or Paint: Apply a protective stain or paint to your deck to protect it from the elements. Choose a color that complements your outdoor space and consider using a product with UV inhibitors to prevent fading.
- Seal Joints and Gaps: Seal any gaps between the decking boards with appropriate sealant or caulk. This will help prevent water penetration and prolong the life of your deck.
- Add Lighting: Consider incorporating deck lighting to create a welcoming and functional outdoor space. Install post cap lights, recessed lights, or stair lights to enhance safety and ambiance.
- Install a Handrail (if needed): Depending on local building codes and the height of your deck, you may need to install a handrail for added safety. Follow guidelines to ensure proper placement and attachment.
- Accessorize: Add furniture, plants, and other accessories to make your deck inviting and comfortable. Consider adding an umbrella or shade structure to provide relief from the sun on hot days.
- Maintenance: Regular maintenance is essential to keep your deck looking its best. Sweep away debris regularly and clean the surface using appropriate cleaning products. Check for any loose screws or nails, and tighten or replace as needed.
- Enjoy Your Finished Deck: Once all the finishing touches are complete, take the time to relax and enjoy your beautifully constructed angled deck. Host gatherings, spend time with family and friends, and create lasting memories in your outdoor oasis.
By giving attention to these finishing touches, you’ll elevate the appearance and functionality of your angled deck. Regular maintenance and care will ensure its longevity and continued enjoyment for years to come.
Now that your deck is complete, it’s time to sit back, relax, and enjoy the fruits of your hard work. Take pride in your craftsmanship and create lasting memories on your beautiful angled deck.
Read more: How To Build A Decking
Conclusion
Congratulations on completing your journey to build an angled deck step-by-step! By following the planning, preparation, construction, and finishing steps outlined in this guide, you have successfully created a stunning outdoor space that combines functionality, safety, and aesthetics.
Throughout the process, you have learned the importance of careful planning, gathering the right materials and tools, preparing the area, constructing a solid frame, attaching joists, installing decking boards, adding railings and balusters, and adding the final finishing touches. Each step contributed to the overall success and beauty of your angled deck.
Remember that proper maintenance and care are crucial for preserving the longevity and appearance of your deck. Regularly inspect the structure, clean the surface, and address any repairs or maintenance tasks as needed. By doing so, you will ensure that your deck remains a welcoming and functional outdoor space for years to come.
Now it’s time to reap the rewards of your hard work and enjoy your angled deck. Whether you’re hosting backyard gatherings, relaxing with a book, or savoring meals al fresco, your deck will provide the perfect setting to create lasting memories.
Thank you for joining us on this comprehensive journey to build an angled deck step-by-step. We hope this guide has provided you with the necessary knowledge and confidence to bring your deck construction project to life. Cheers to many enjoyable moments ahead on your beautiful angled deck!
Excited about your new angled deck? Keep that DIY spirit alive with more creative projects! Next up, dive into our guide on Woodworking Projects. This article is packed with ideas guaranteed to inspire and challenge your crafting skills throughout the year. Whether you're looking to create something small and simple or a more elaborate piece, these woodworking plans have got you covered. Start your next masterpiece today!
Frequently Asked Questions about How To Build An Angled Deck Step-by-Step
Was this page helpful?
At Storables.com, we guarantee accurate and reliable information. Our content, validated by Expert Board Contributors, is crafted following stringent Editorial Policies. We're committed to providing you with well-researched, expert-backed insights for all your informational needs.


0 thoughts on “How To Build An Angled Deck Step-by-Step”