Home>Articles>How To Make A Picture Frame Out Of Wood With Hand Tools
Articles
How To Make A Picture Frame Out Of Wood With Hand Tools
Modified: December 7, 2023
Learn how to create beautiful wooden picture frames using only hand tools. Read our articles for step-by-step instructions and valuable tips.
(Many of the links in this article redirect to a specific reviewed product. Your purchase of these products through affiliate links helps to generate commission for Storables.com, at no extra cost. Learn more)
Introduction
Creating a picture frame out of wood with hand tools is a rewarding and satisfying project that allows you to showcase your creativity and craftsmanship. Whether you want to display a cherished photograph, piece of artwork, or even a motivational quote, a handmade wooden picture frame adds a touch of authenticity and beauty to any space.
In this article, we will guide you through the step-by-step process of making a picture frame using hand tools. This project is ideal for woodworking enthusiasts who prefer the simplicity and precision of using traditional tools. By following these instructions, you will be able to create a unique and personalized wooden frame that suits your style and complements your cherished memories.
Before we begin, it’s important to gather all the necessary materials and tools. Additionally, it’s essential to set up a well-organized workspace where you can comfortably work on your project. Let’s dive into the first step.
Key Takeaways:
- Embrace your creativity and craftsmanship by making a personalized wooden picture frame with hand tools. Enjoy the process and showcase your cherished memories in a unique and authentic way.
- Attention to detail and precision are key in creating a high-quality wooden picture frame. From gathering materials to applying the finish, each step contributes to a visually appealing and durable end product.
Read more: How To Make Picture Frames From Barn Wood
Step 1: Gather Materials and Tools
Before starting any woodworking project, it’s crucial to gather all the necessary materials and tools. Here’s a list of what you’ll need:
- Wood: Choose a high-quality wood that suits your preference and style. Common options include oak, pine, walnut, or cherry. Make sure the wood is thick enough to provide stability to the frame.
- Saw: A hand saw or a miter saw will be needed to cut the wood to the desired length and angles.
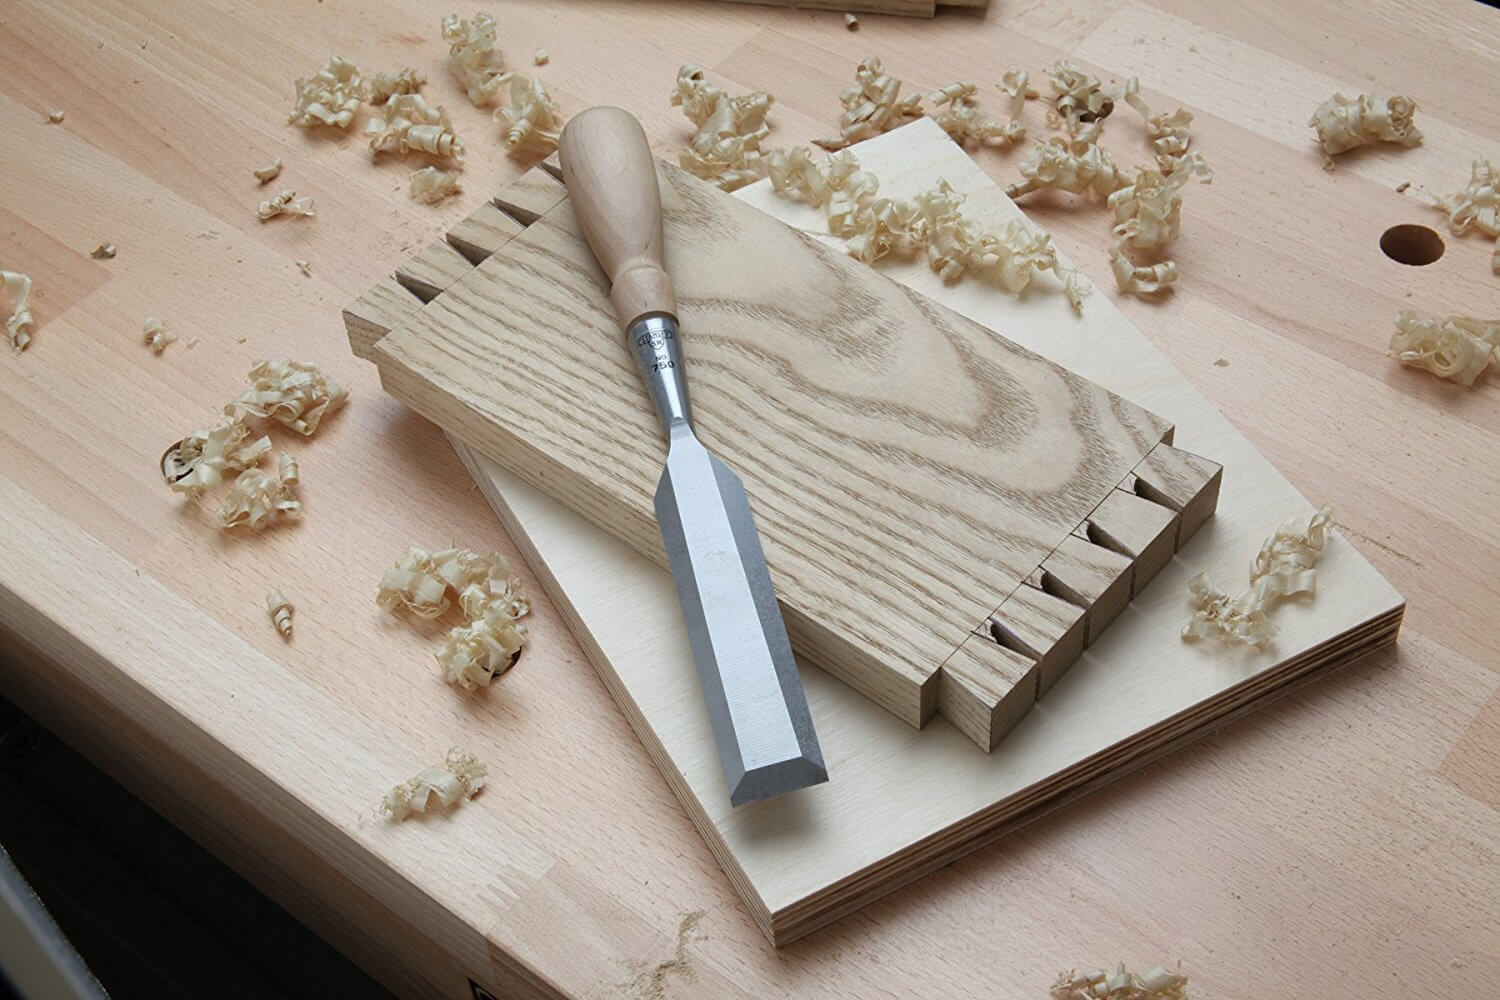
- Chisels: Chisels are essential for creating clean and precise joints in the corners of the frame.
- Sandpaper: Different grits of sandpaper will be necessary for smoothing and refining the wood surfaces.
- Miter Box or Miter Saw: A miter box or a miter saw will help you achieve accurate and clean mitered corners.
- Clamps: Clamps will hold the wood pieces in place when you are assembling the frame.
- Wood Glue: Use high-quality wood glue to join the frame pieces together securely.
- Square: A square will ensure that all the corners are perfectly aligned.
- Measuring Tape or Ruler: Accurate measurements are essential in creating a properly fitting frame.
- Pencil: Use a pencil to mark the measurements and where you will be making your cuts.
- Finish: Depending on your preference, you can choose between paint, stain, or varnish to finish the frame. This will help protect the wood and enhance its natural beauty.
- Brushes or Cloth: Brushes or cloth will be needed to apply the finish to the frame.
Once you have gathered all the materials and tools, you’ll be ready to move on to the next step: preparing the wood.
Step 2: Prepare the Wood
Preparing the wood is an essential step in creating a picture frame. This involves cutting the wood to the desired lengths and ensuring that all surfaces are smooth and free from imperfections. Here’s how you can prepare the wood:
- Measure and mark: Use a measuring tape or ruler to determine the dimensions of your frame. Mark the lengths on the wood with a pencil, ensuring accuracy in your measurements.
- Cut the wood: Using a hand saw or a miter saw, carefully cut the wood pieces to the desired lengths. Remember to follow your markings and make clean, straight cuts.
- Sand the wood: After cutting the wood, sand the surfaces to remove any rough edges or splinters. Start with a coarse-grit sandpaper and gradually move to finer grits for a smooth finish. Sanding also helps to ensure that all the pieces fit together snugly.
- Check for imperfections: Inspect the wood for any knots, cracks, or other imperfections that may affect the aesthetics or strength of the frame. Remove or fill these imperfections as necessary.
By properly preparing the wood, you will set a solid foundation for creating a beautiful and durable picture frame. The next step will involve measuring and marking the cuts for the frame pieces. Let’s move on.
Step 3: Measure and Mark the Cuts
Accurate measurements and precise cuts are crucial for creating a well-fitted picture frame. In this step, you will measure and mark the cuts on the prepared wood pieces. Here’s how to do it:
- Determine the frame dimensions: Decide on the overall dimensions of your frame. Measure the length and width of your photo or artwork, and add an additional margin to determine the frame size.
- Calculate the length of each frame piece: Subtract twice the width of the frame material from the total length and width. This will give you the length of each side piece.
- Mark the measurements: Using a measuring tape or ruler, mark the measurements on the prepared wood pieces. Double-check your measurements to ensure accuracy.
- Indicate the mitered corners: To create a seamless and professional look, mark the points where you will be making the mitered cuts for the corners. Ensure that the angles are consistent for a neat and tight fit.
Taking the time to measure and mark the cuts accurately will help you achieve precise and well-aligned frame pieces. Once you have marked the measurements, you can proceed to the next step: cutting the wood pieces.
Step 4: Cut the Wood Pieces
With the measurements and markings in place, it’s time to cut the wood pieces according to the desired dimensions. Cutting the wood accurately is essential for creating clean and seamless joints. Here’s how to cut the wood pieces:
- Secure the wood: Place the wood securely on a stable surface or clamp it down to prevent any movement during the cutting process. This will ensure straight and accurate cuts.
- Use a miter saw or hand saw: Depending on your preference and the availability of tools, use a miter saw or a hand saw to make the cuts. If using a miter saw, set the angle according to your markings for the mitered corners.
- Make the cuts: Carefully guide the saw along the marked lines, applying consistent pressure and maintaining a steady hand. Ensure that the cuts are clean and straight.
- Check the fit: After cutting all the pieces, test the fit by dry-assembling the frame. Ensure that the corners are flush and the joints are snug. If necessary, trim or adjust the pieces accordingly.
By cutting the wood pieces accurately, you will lay the foundation for creating a well-constructed picture frame. The next step will involve creating the mitered corners to join the frame pieces together. Let’s proceed.
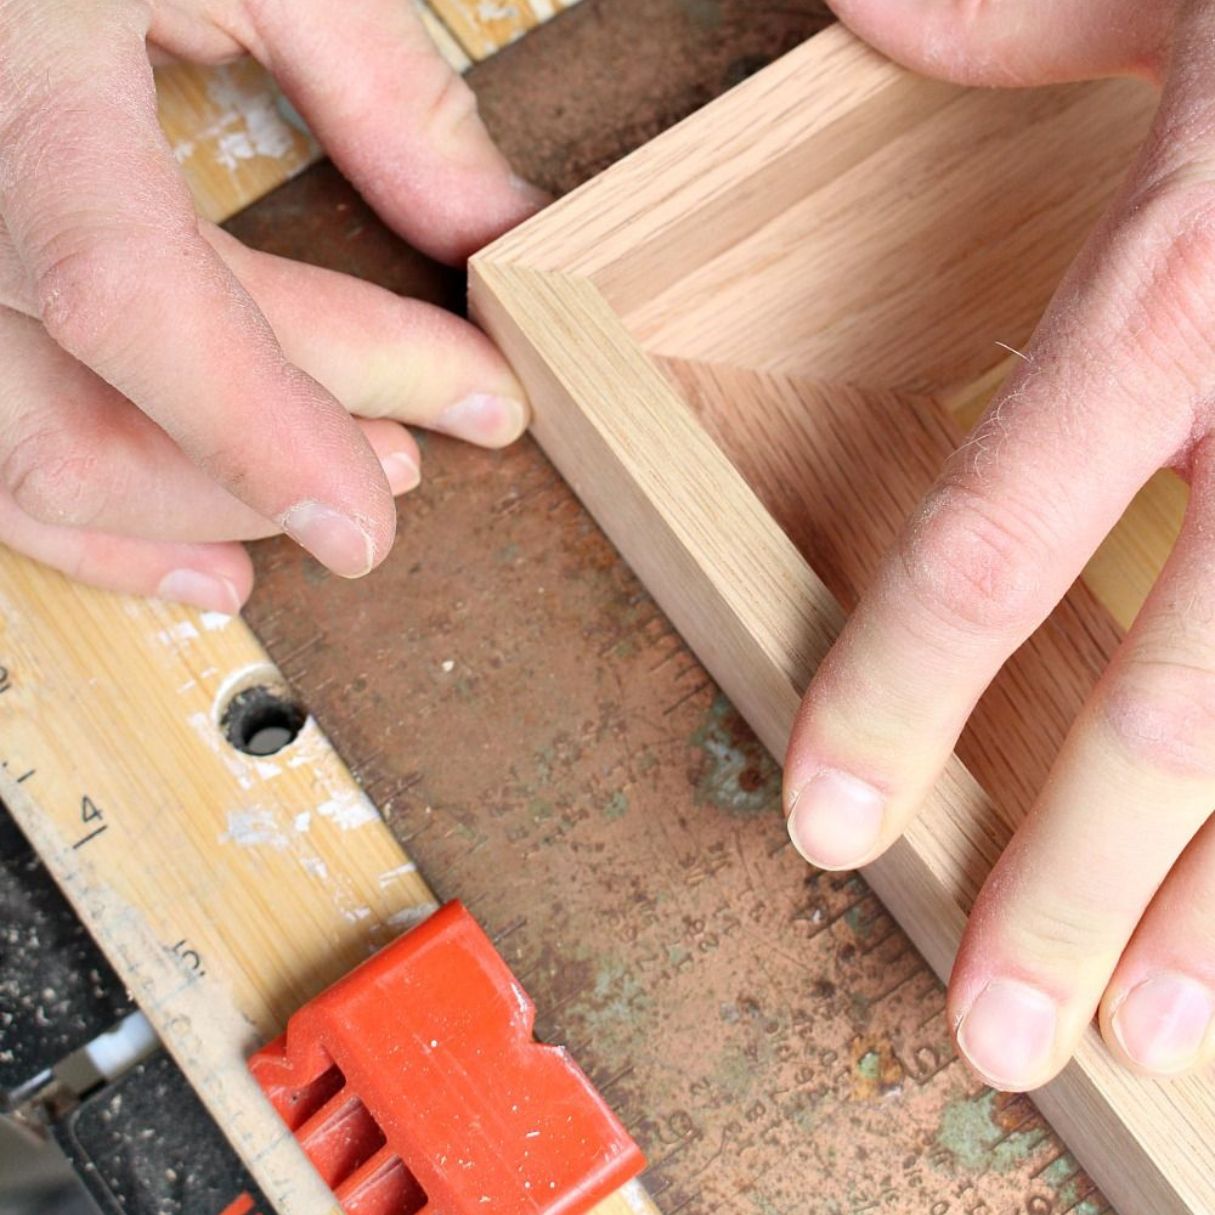
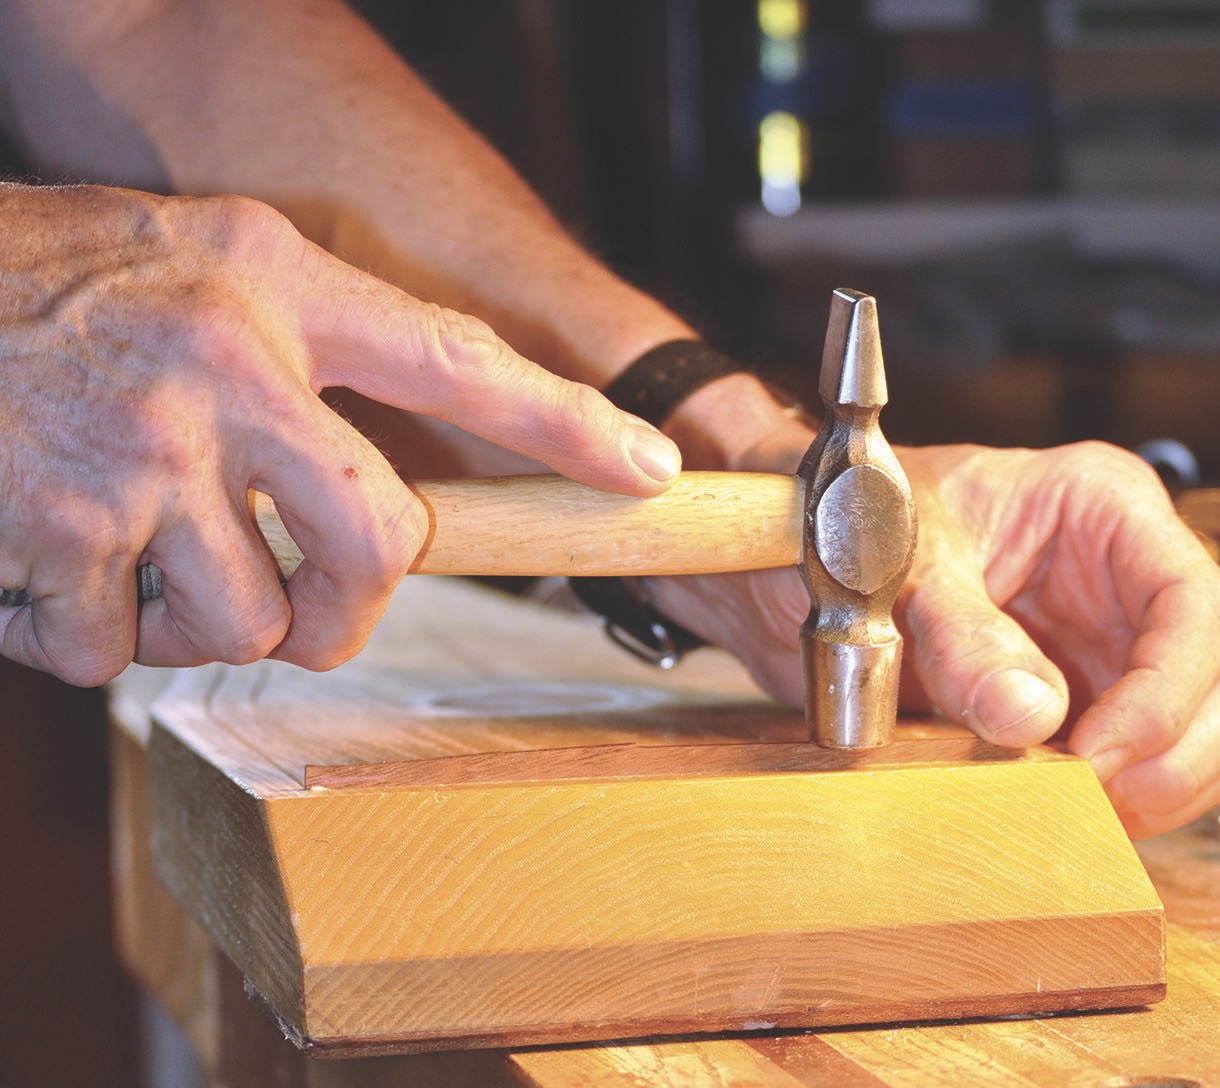
Step 5: Create the Mitered Corners
To achieve a seamless and professional look, mitered corners are commonly used in picture frame construction. In this step, you will create the mitered corners that will join the frame pieces together. Here’s how you can do it:
- Set up a miter box or adjust the miter saw: If using a hand tool, set up a miter box with the desired angle according to your markings. If using a miter saw, adjust the angle accordingly.
- Secure the wood: Position one of the frame pieces securely in the miter box or against the back fence of the miter saw. Ensure that the piece is stable and will not move during the cutting process.
- Make the cuts: Using either a backsaw or a miter saw, carefully cut along the marked lines. Ensure that the cuts are clean, straight, and aligned with the desired angle for the mitered corner.
- Repeat for all corners: Repeat the process for each frame piece, creating consistent and accurate mitered corners. Ensure that the angles and cuts align to achieve a tight and seamless fit.
- Dry assemble the frame: Test the fit of the frame pieces by dry assembling them. Ensure that the corners align properly and the joints are snug.
- Make any necessary adjustments: If the fit is not perfect, make minor adjustments to the cuts as needed to achieve clean and tight mitered corners.
Creating the mitered corners requires precision and attention to detail. Taking the time to ensure accurate cuts will result in a well-constructed and visually pleasing picture frame. The next step will involve sanding and smoothing the edges of the frame. Let’s proceed.
When cutting the wood for your picture frame, use a miter box and hand saw to ensure precise 45-degree angles for perfect corners.
Step 6: Sand and Smooth the Edges
After creating the mitered corners, it’s time to sand and smooth the edges of the frame pieces. This step is essential for achieving a polished and professional finish. Here’s how you can sand and smooth the edges:
- Start with coarse-grit sandpaper: Begin by using coarse-grit sandpaper to remove any rough edges, burrs, or imperfections along the cut edges of the frame pieces. Sand in a smooth, even motion, following the grain of the wood.
- Move to finer-grit sandpaper: Gradually move to finer-grit sandpaper as you progress. This will help in refining the edges and achieving a smoother finish. Continue sanding until the edges feel smooth to the touch.
- Round the edges (optional): If desired, you can further enhance the appearance of the frame by rounding the edges using sandpaper or a chamfering tool. This gives a softer and more finished look to the frame.
- Remove any dust or debris: After sanding, wipe down the frame pieces with a clean cloth to remove any dust or debris. This ensures a clean surface for the next step of the process.
Sanding and smoothing the edges of the frame not only improves its aesthetics but also ensures a comfortable and safe handling experience. Once you have completed this step, you can proceed to the next one: assembling the frame. Let’s continue.
Step 7: Assemble the Frame
With the frame pieces prepared, cut, and sanded, it’s time to assemble them together to create the final structure. In this step, you will join the frame pieces to form the complete frame. Here’s how you can assemble the frame:
- Apply wood glue: Begin by applying a small amount of wood glue to the mitered corners of one of the frame pieces. Use a brush or a small applicator to evenly spread the glue along the joint.
- Join the pieces: Carefully bring the other frame piece with a corresponding mitered corner and press it firmly against the glue. Make sure the corners align perfectly, creating a tight and secure joint.
- Secure with clamps: Use clamps to hold the frame pieces together while the glue dries. This will help maintain pressure and ensure a strong bond between the joints. Follow the manufacturer’s instructions for proper clamping techniques.
- Wipe off excess glue: Immediately wipe off any excess wood glue with a damp cloth. It’s important to remove the excess glue before it dries, as it can affect the finish and appearance of the frame.
- Repeat for other corners: Repeat the process for the remaining corners, applying wood glue, joining the pieces, and securing them with clamps. Ensure that all corners are aligned and the joints are tight.
Allow the glued frame pieces to dry as per the instructions mentioned on the wood glue packaging. Once the glue has completely cured, you can remove the clamps and move on to the next step: attaching the backing. Let’s proceed.
Step 8: Attach the Backing
Attaching the backing to the frame provides stability and support, as well as a surface to secure your artwork or photo. In this step, you will secure the backing material to the frame. Here’s how you can attach the backing:
- Choose the backing material: There are various options for backing material, such as thin plywood, hardboard, or even foam board. Select a material that is sturdy and able to support the weight of your artwork or photo.
- Measure and cut the backing: Measure the dimensions of the frame and cut the backing material to fit accordingly. Ensure that the backing is slightly smaller than the frame to allow for a snug fit.
- Position the backing on the frame: Place the cut piece of backing material onto the back of the frame, aligning it with the edges. Ensure that it is centered and evenly positioned.
- Secure the backing: Use small nails, staples, or even screws to secure the backing material to the frame. Space them evenly along the edges, ensuring a secure attachment. Be careful not to damage the frame or split the wood while securing the backing.
- Test the attachment: Once the backing is secure, gently press on it to ensure that it is firmly in place and there are no loose or weak areas.
After attaching the backing, your picture frame will have the necessary support and structure to hold your artwork or photo securely. In the next step, you will learn how to apply a finish to the frame to enhance its appearance. Let’s move on.
Read more: How To Make Picture Frames
Step 9: Apply Finish to the Frame
Applying a finish to the frame not only enhances its appearance but also protects the wood and adds a layer of durability. In this step, you will learn how to apply a finish to the frame. Here’s how:
- Select your desired finish: There are various options for finishes, including paint, stain, or varnish. Choose a finish that complements your style and enhances the natural beauty of the wood.
- Prepare the frame: Before applying the finish, ensure that the frame is clean and free from any dust or debris. Use a soft cloth or brush to remove any particles that may affect the finish.
- Apply the finish: Use a brush, cloth, or spray to apply the finish evenly onto the frame. Follow the manufacturer’s instructions for the specific finish product you are using. Apply multiple thin coats rather than one thick coat for a more even and professional result.
- Allow the finish to dry: Set the frame aside in a well-ventilated area and allow the finish to dry completely. This may take a few hours or even overnight, depending on the type of finish used.
- Inspect and touch up: Once the finish has dried, inspect the frame for any uneven areas or imperfections. If necessary, lightly sand those areas and apply another coat of finish to achieve a smooth and consistent appearance.
By applying a finish to the frame, you not only protect the wood but also add a touch of elegance and personalization to your picture frame. Once the finish is fully dried, you can proudly display your favorite artwork or photograph in your handmade wooden frame.
Congratulations! You have successfully completed all the steps to make a picture frame out of wood with hand tools. Your hard work and attention to detail have resulted in a beautiful and customized frame that will showcase your cherished memories for years to come.
Remember, embrace your creativity and make the frame uniquely yours by experimenting with different types of wood, finishes, and even embellishments. Have fun and enjoy the process of creating something truly special!
Thank you for following this guide, and happy framing!
Conclusion
Creating a picture frame out of wood with hand tools is a rewarding and fulfilling project that allows you to showcase your woodworking skills and add a personal touch to your cherished memories. By following the step-by-step guide outlined in this article, you have learned how to gather the necessary materials and tools, prepare the wood, measure and mark the cuts, cut the wood pieces, create mitered corners, sand and smooth the edges, assemble the frame, attach the backing, and apply a finish to the frame.
Throughout this process, attention to detail, precision, and patience are key. By taking the time to ensure accurate measurements, make clean cuts, and join the frame pieces securely, you have created a high-quality and visually appealing wooden picture frame. The application of a finish adds the final touch, protecting the wood and enhancing its natural beauty.
Remember, this guide serves as a foundation for your woodworking journey, and you can always add your personal flair to the project. Experiment with different types of wood, finishes, and even decorative elements to create a frame that aligns with your unique style and preferences. Whether you choose to display family photos, artwork, or motivational quotes, your handmade wooden frame will add a touch of elegance and authenticity to any space.
Now that you have the knowledge and skills to create a picture frame with hand tools, unleash your creativity and embark on new woodworking projects. With practice, your craftsmanship will continue to evolve, and you’ll be able to tackle more complex woodworking ventures.
Enjoy the process, have fun honing your skills, and continue to explore the world of woodworking. Happy crafting!
Frequently Asked Questions about How To Make A Picture Frame Out Of Wood With Hand Tools
Was this page helpful?
At Storables.com, we guarantee accurate and reliable information. Our content, validated by Expert Board Contributors, is crafted following stringent Editorial Policies. We're committed to providing you with well-researched, expert-backed insights for all your informational needs.


0 thoughts on “How To Make A Picture Frame Out Of Wood With Hand Tools”