
Articles
How To Change A Sink Drain
Modified: December 7, 2023
Learn how to change your sink drain with step-by-step articles. Find expert advice and DIY tips for a hassle-free plumbing project.
(Many of the links in this article redirect to a specific reviewed product. Your purchase of these products through affiliate links helps to generate commission for Storables.com, at no extra cost. Learn more)
Introduction
Changing the sink drain may seem like a daunting task, but with the right tools and a little bit of know-how, you can easily tackle this project. Whether you’re replacing a worn-out drain or upgrading to a new one, this step-by-step guide will walk you through the process.
Having a properly functioning sink drain is essential for the smooth operation of your kitchen or bathroom. Over time, drains can become clogged, develop leaks, or simply wear out. By replacing the drain, you can ensure efficient water flow, prevent leaks, and improve the overall functionality of your sink.
Before diving into the process, gather all the necessary tools and materials. This will make the job easier and more efficient. You’ll need a pair of pliers, an adjustable wrench, a screwdriver, plumber’s putty, a new drain assembly, and Teflon tape. Having these items on hand will save you time and prevent any unnecessary trips to the hardware store.
Now that you’re fully prepared, it’s time to get started. Follow the steps outlined below to successfully change your sink drain and enjoy a properly functioning sink in no time.
Key Takeaways:
- Easily replace your sink drain by following simple steps and using the right tools and materials. Enjoy improved water flow, prevent leaks, and enhance sink functionality with a DIY approach.
- Clear the area, remove the old drain, install the new assembly, test for leaks, and add final touches for a successful sink drain replacement. Achieve a polished look and enjoy a smoothly functioning sink.
Tools and Materials Needed
To change a sink drain, you’ll need the following tools and materials:
- Pliers
- Adjustable wrench
- Screwdriver
- Plumber’s putty
- New drain assembly
- Teflon tape
The pliers will be useful for gripping and loosening various components of the drain. An adjustable wrench is essential for tightening and loosening nuts and bolts. A screwdriver is needed to remove screws and other fasteners. Plumber’s putty is a versatile and waterproof sealant used to create a watertight seal between the sink and drain components.
The most crucial material you’ll need is a new drain assembly. This typically includes the drain flange, drain body, and other necessary components. Make sure to choose a drain assembly that is compatible with your sink model and size. Additionally, Teflon tape is a helpful material for ensuring a leak-free connection between threaded pipes.
Having these tools and materials at your disposal will make the installation process much smoother. It’s always a good idea to gather everything before starting to avoid any unnecessary delays or interruptions.
Step 1: Clearing the Area
Before you begin changing the sink drain, it’s essential to clear the area and prepare your workspace. Follow these steps to ensure a clean and organized work environment:
- Empty the sink: Remove any dishes, utensils, or other items from the sink to create an empty workspace. This will prevent any objects from getting in the way or accidentally falling into the drain during the process.
- Turn off the water supply: Locate the shut-off valves under the sink and turn them clockwise to shut off the water supply. This step is crucial to avoid any water leakage or accidents while working on the drain.
- Place towels or a bucket underneath: Position a towel or bucket beneath the sink to catch any water that may drain out when disconnecting the pipes. This will help minimize mess and make cleanup easier.
- Remove any obstructions: Check for any objects or debris that may be blocking access to the drain assembly. Clear away any obstacles to ensure easy removal and installation of the new drain.
By clearing the area and preparing your workspace, you’ll have a clean and organized environment to work in. This will make the process more efficient and help prevent any unnecessary complications or hazards.
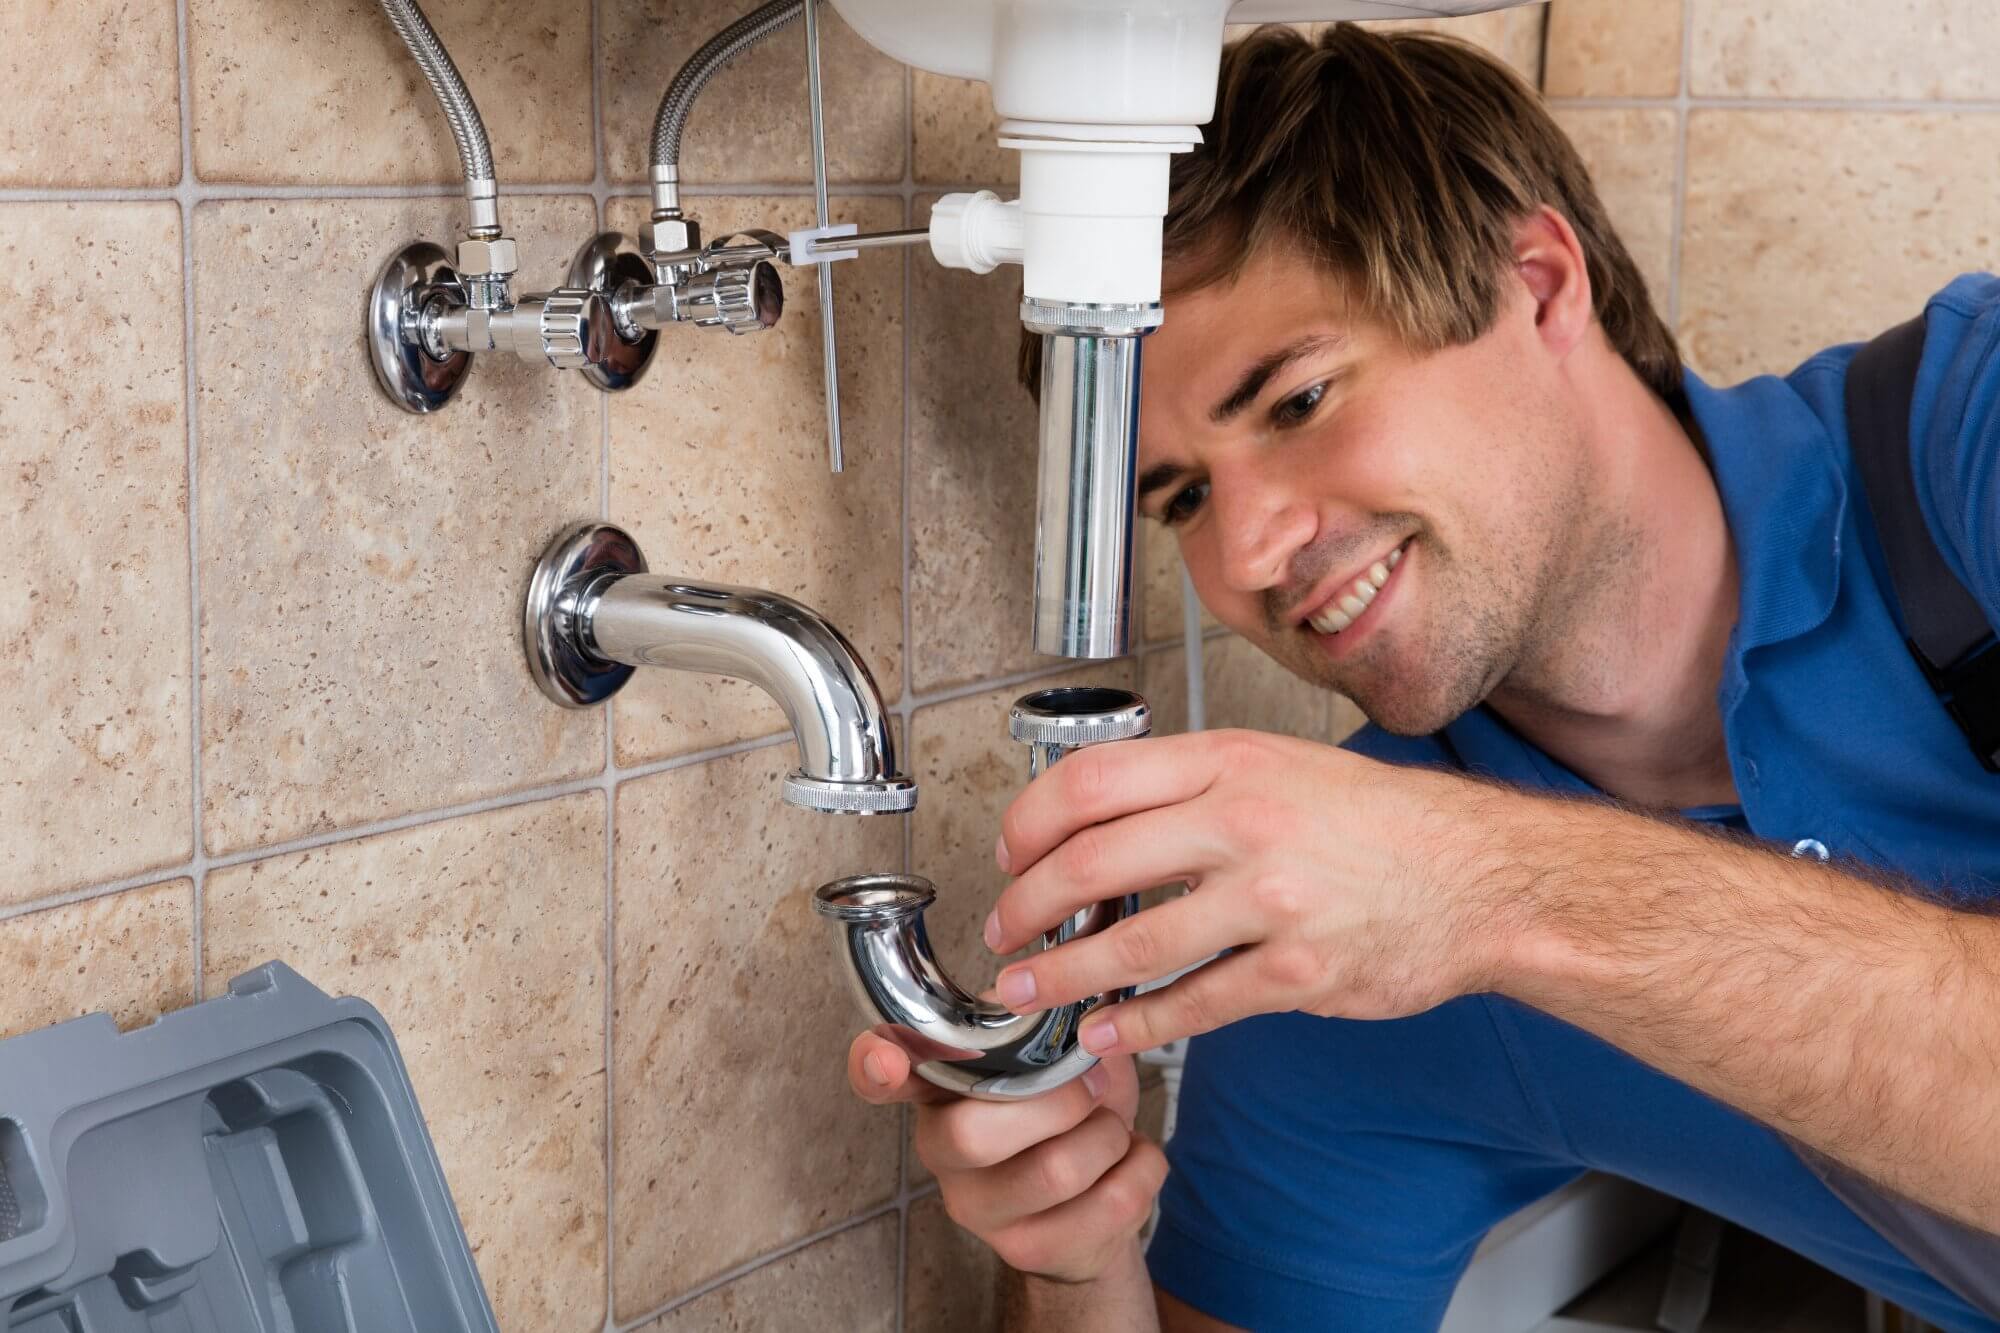
Step 2: Removing the Old Drain
With the area cleared and prepared, it’s time to remove the old drain. Follow these steps to safely and effectively remove the old drain:
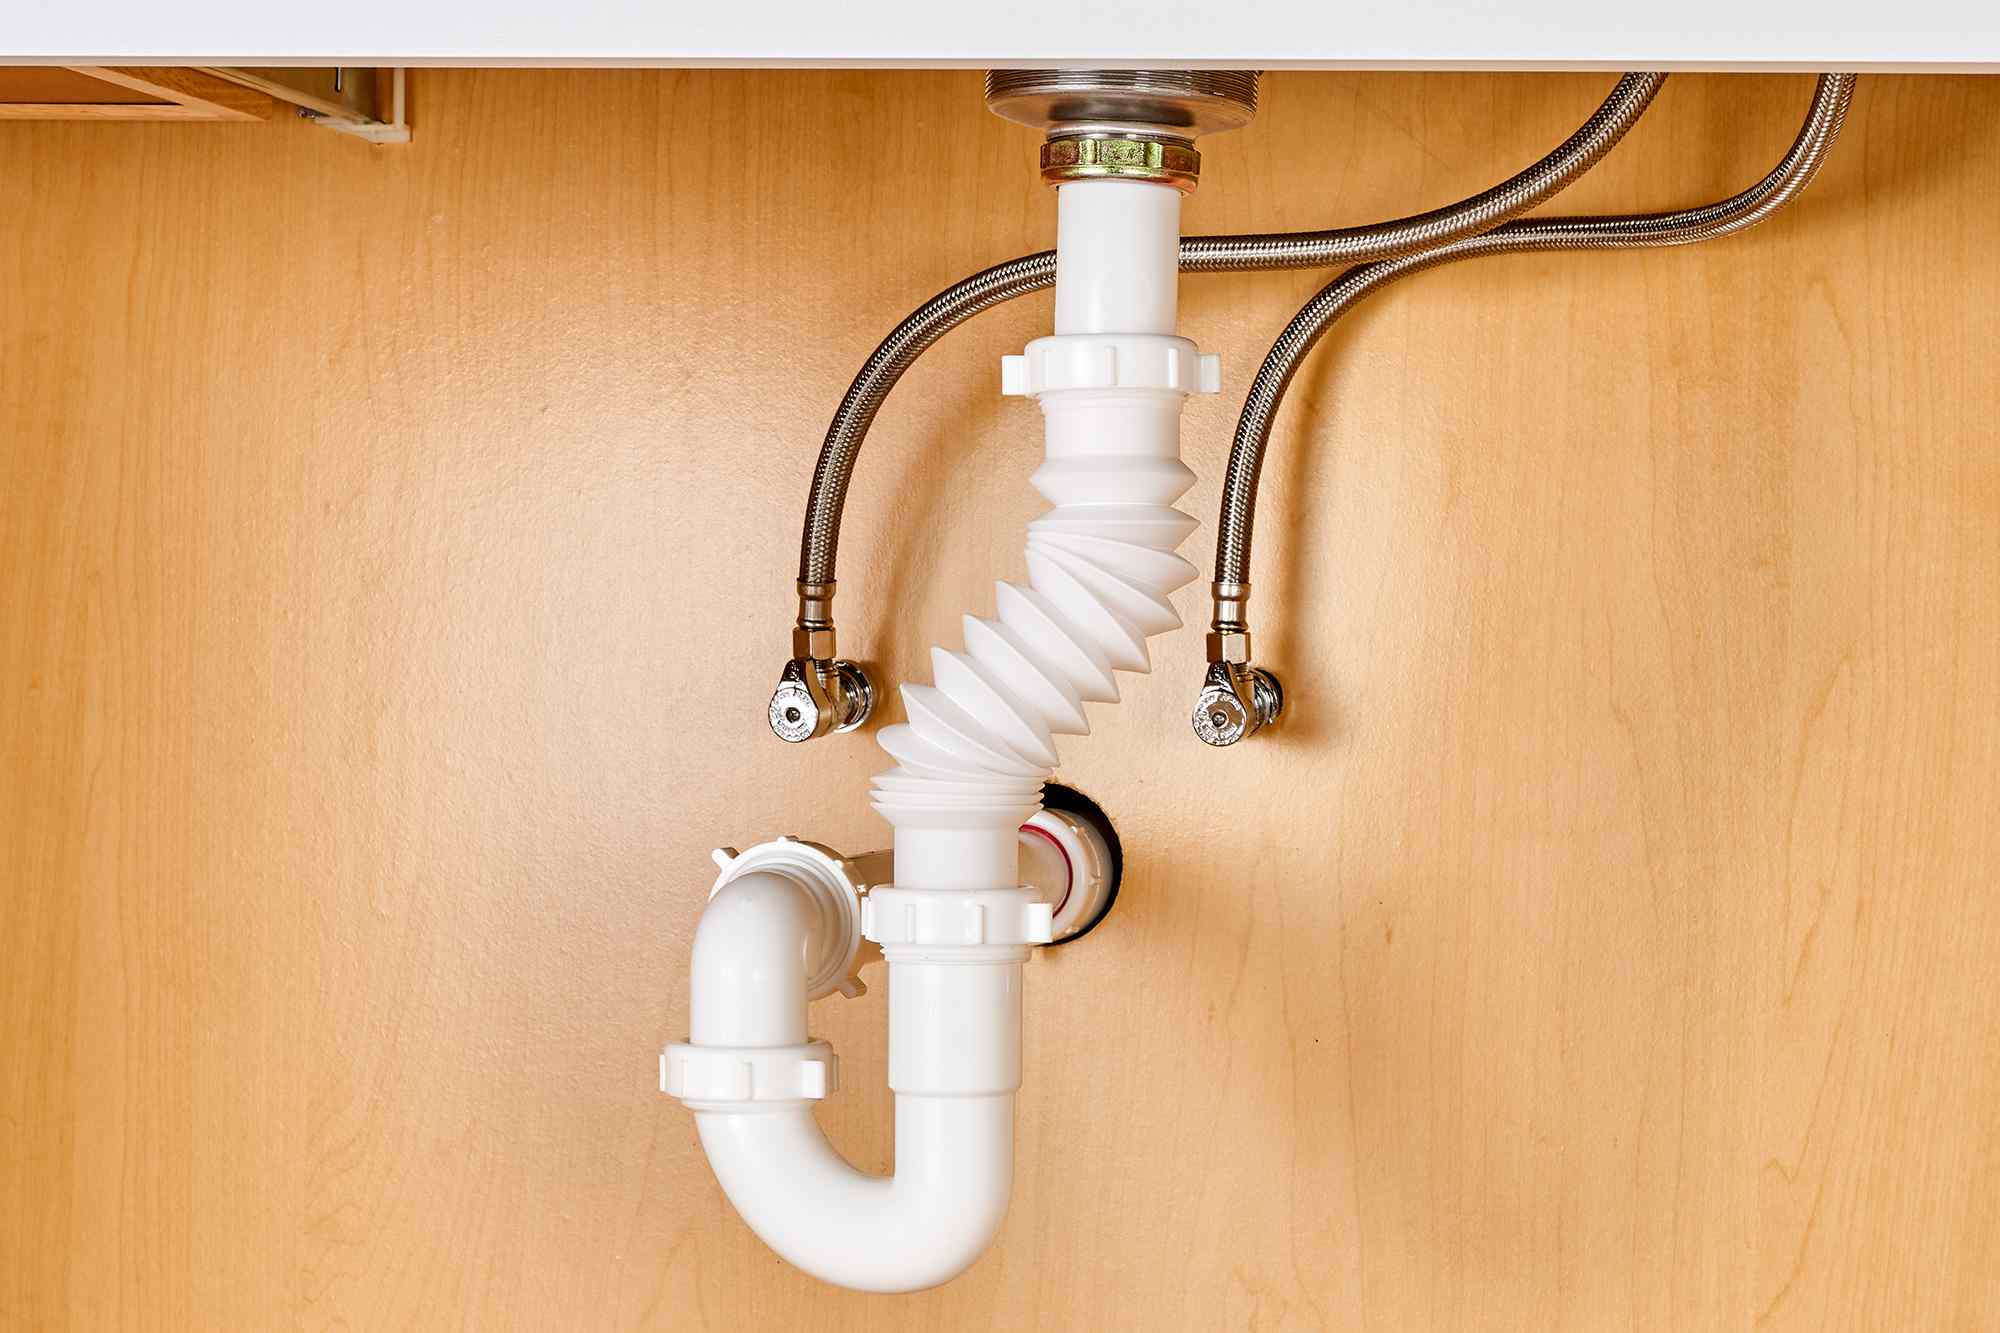
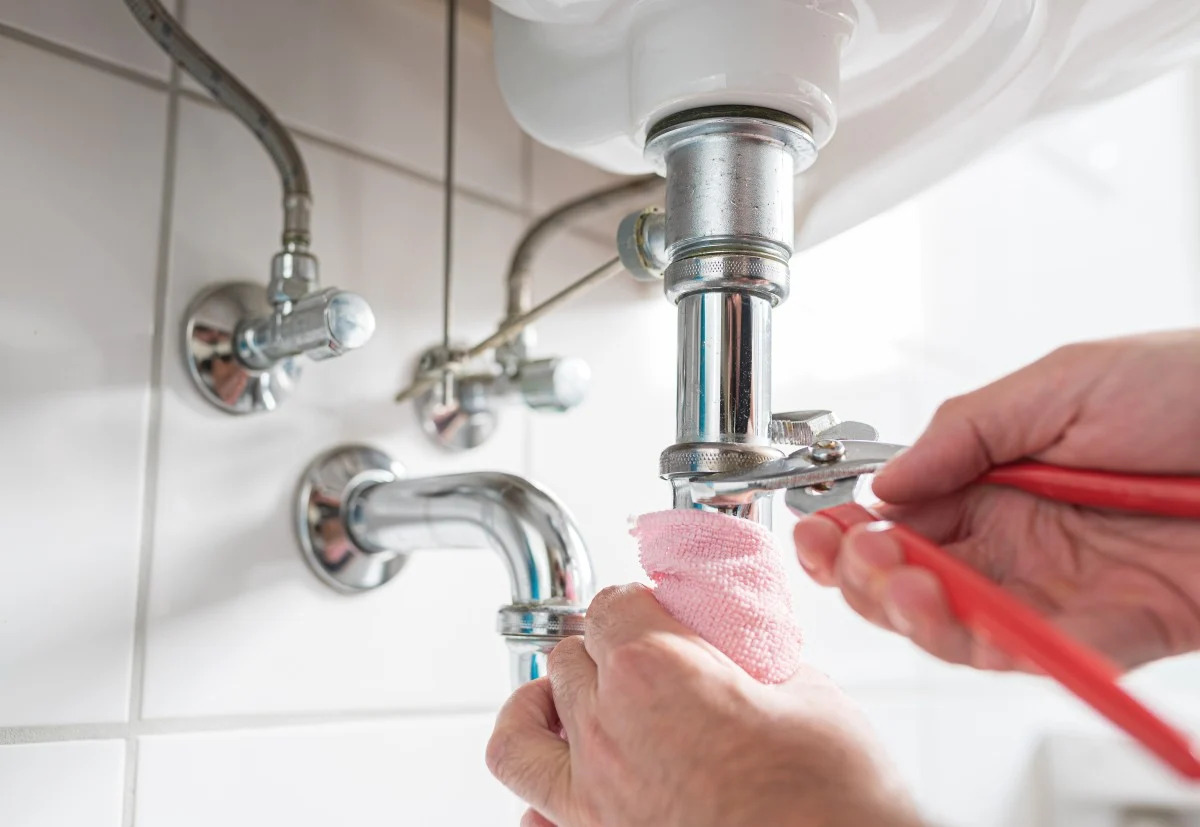
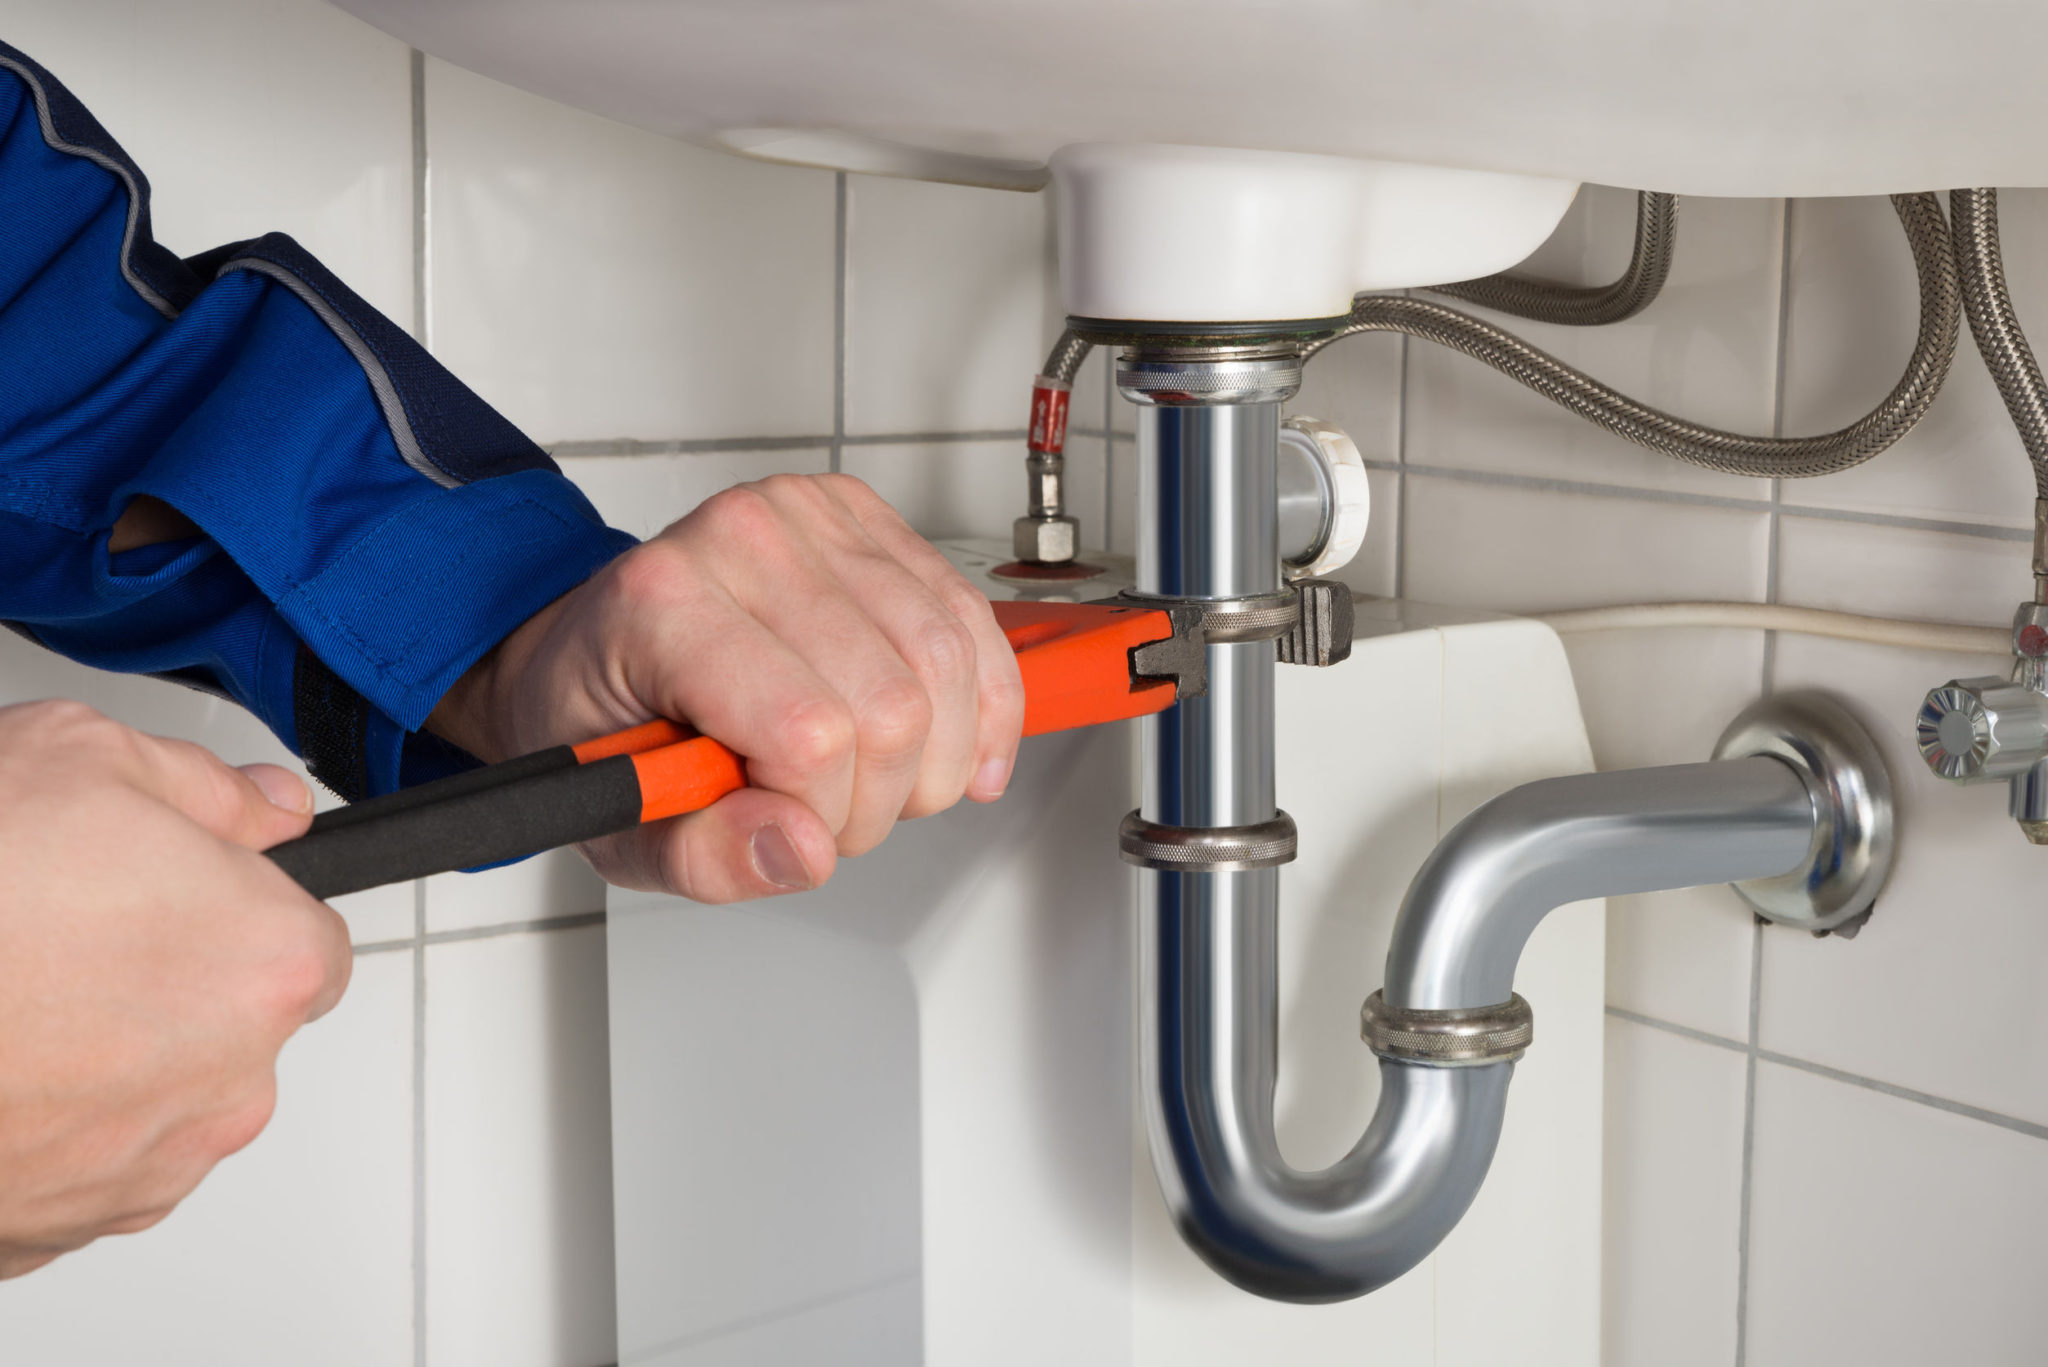
- Disconnect the P-trap: Locate the P-trap, a curvy pipe underneath the sink, and use pliers or an adjustable wrench to loosen the slip nuts. Carefully remove the P-trap and set it aside.
- Unscrew the locknut: Locate the locknut securing the drain flange to the sink. Use pliers or an adjustable wrench to loosen and unscrew the locknut in a counterclockwise direction.
- Remove the drain flange: Once the locknut is removed, gently lift and wiggle the drain flange to loosen it from the sink. If the flange is stuck, use a screwdriver to pry it loose. Once the drain flange is free, pull it out from the top of the sink.
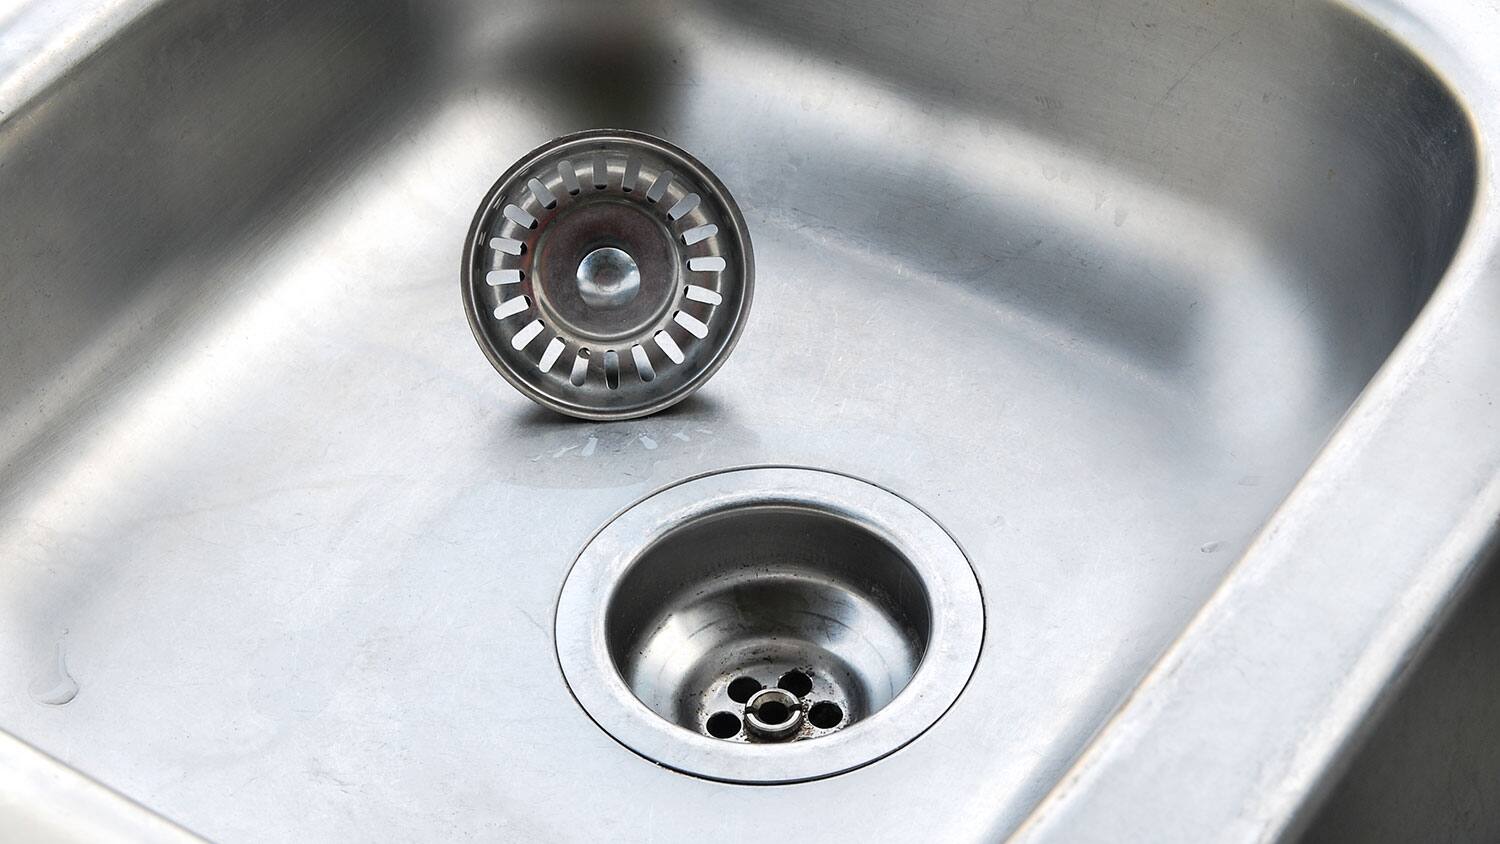
- Clean the sink opening: After removing the drain flange, clean any remaining residue or old plumber’s putty from the sink opening. Use a sponge or cloth to wipe away any debris and ensure a clean surface for the new drain installation.
By following these steps, you can effectively remove the old drain and prepare the sink for the installation of the new drain assembly. Take your time and be gentle to avoid causing any damage to the sink or surrounding areas.
When changing a sink drain, make sure to turn off the water supply and place a bucket underneath to catch any remaining water. Use a wrench to loosen the slip nut and remove the old drain, then install the new drain and tighten the slip nut securely.
Step 3: Installing the New Drain
Now that the old drain has been removed, it’s time to install the new drain assembly. Follow these steps to properly install the new drain:
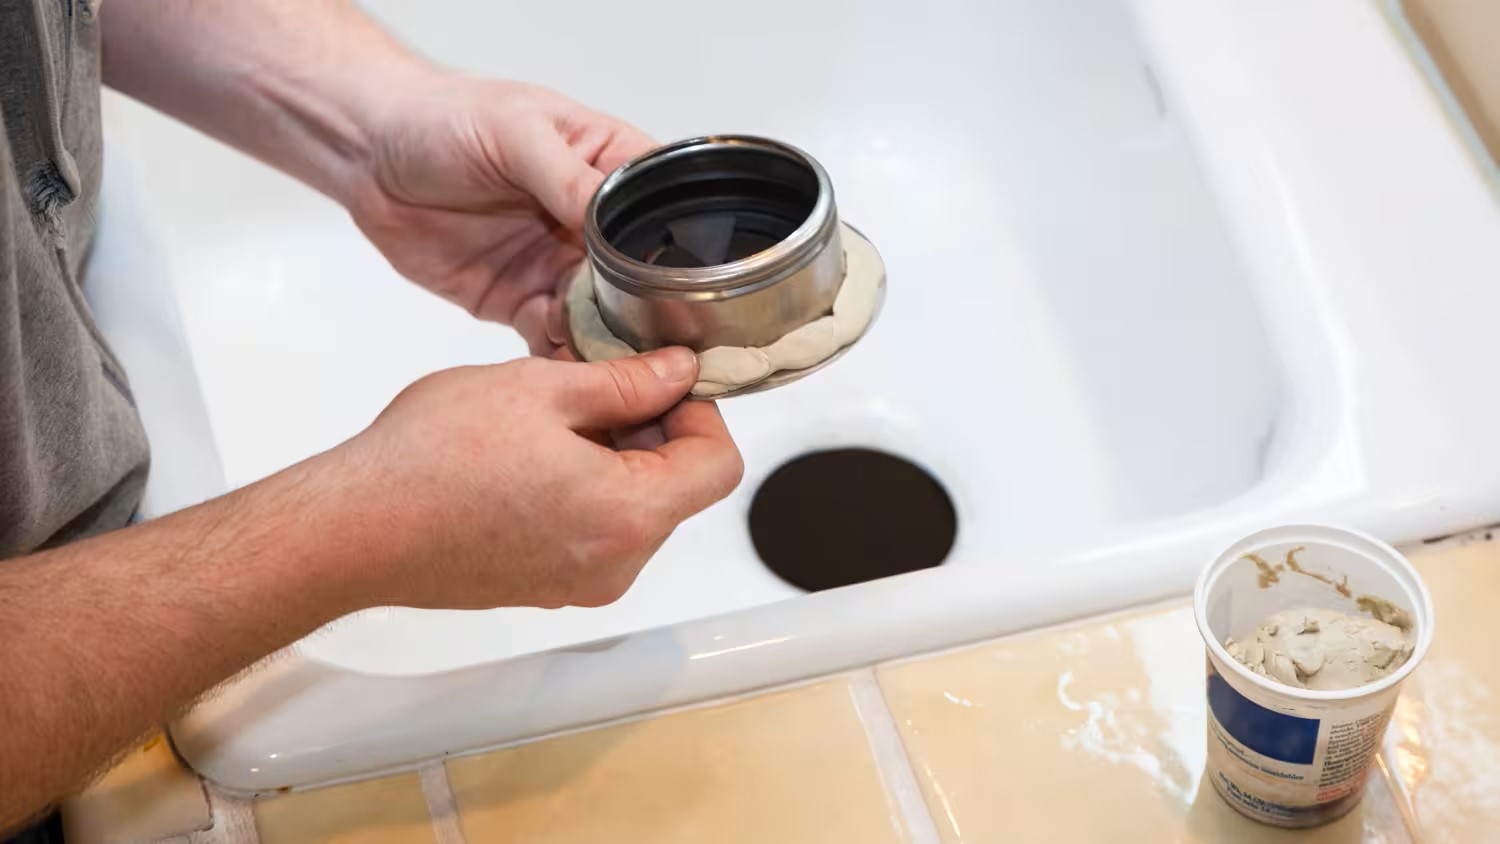
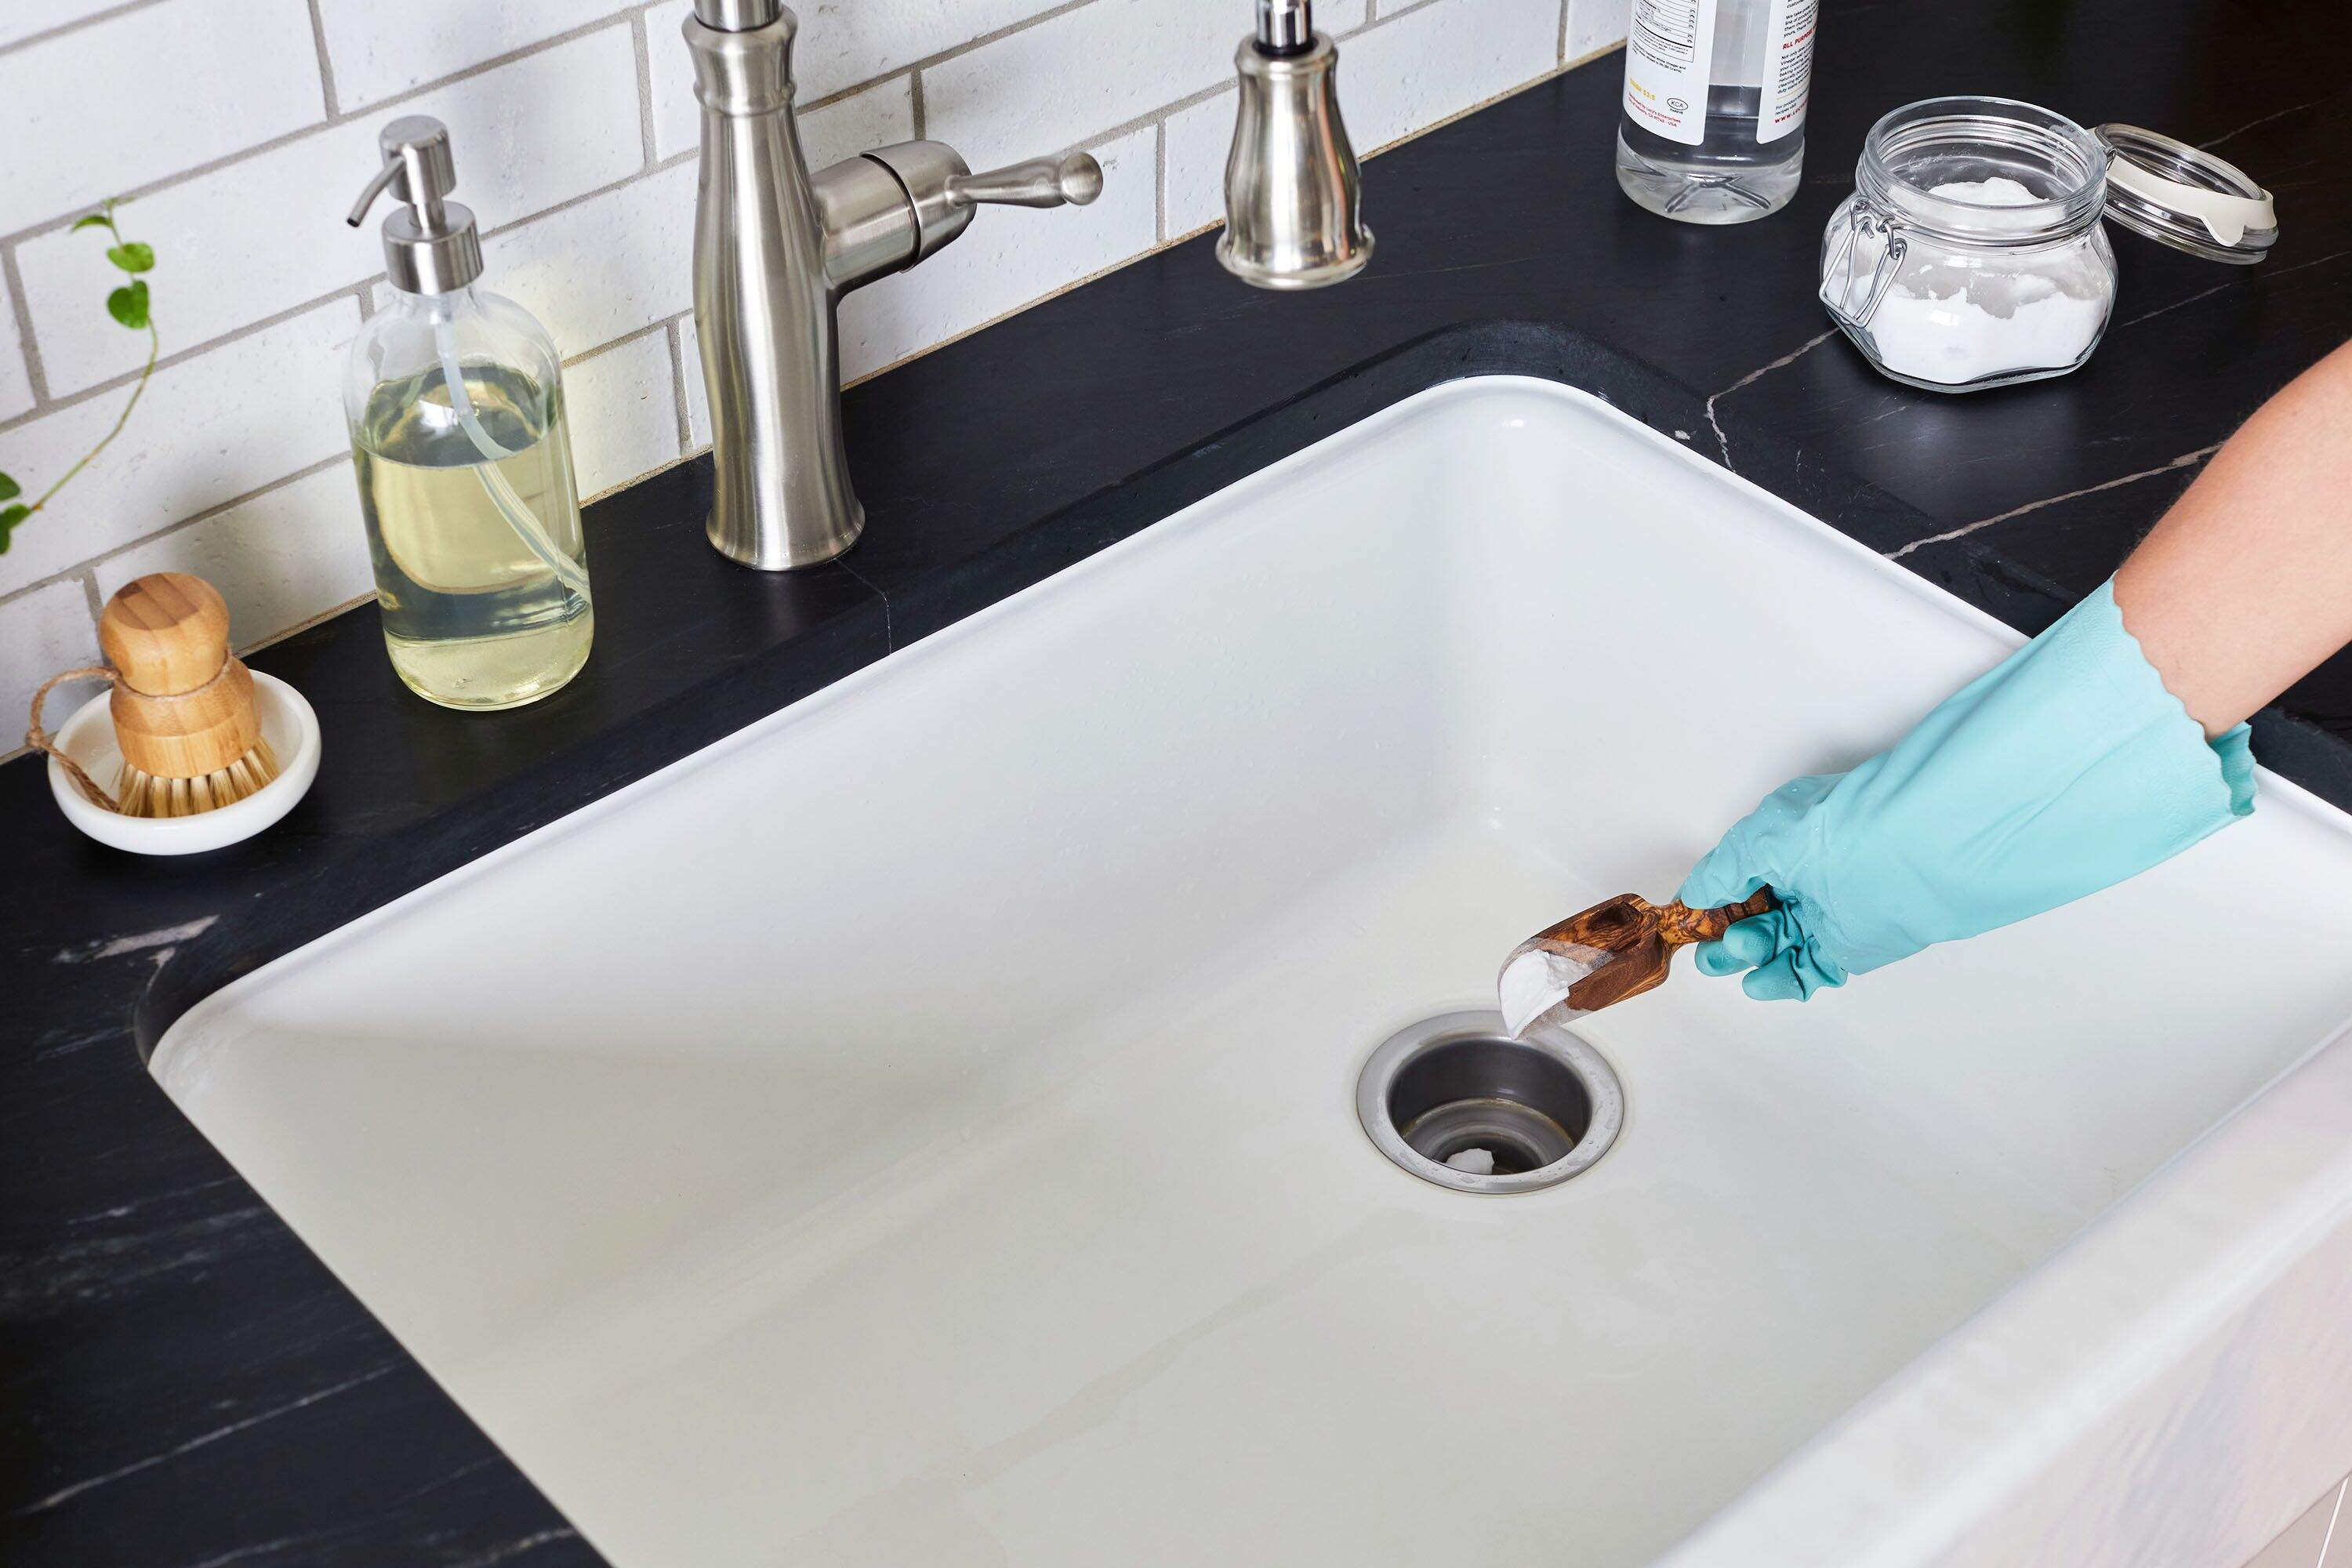
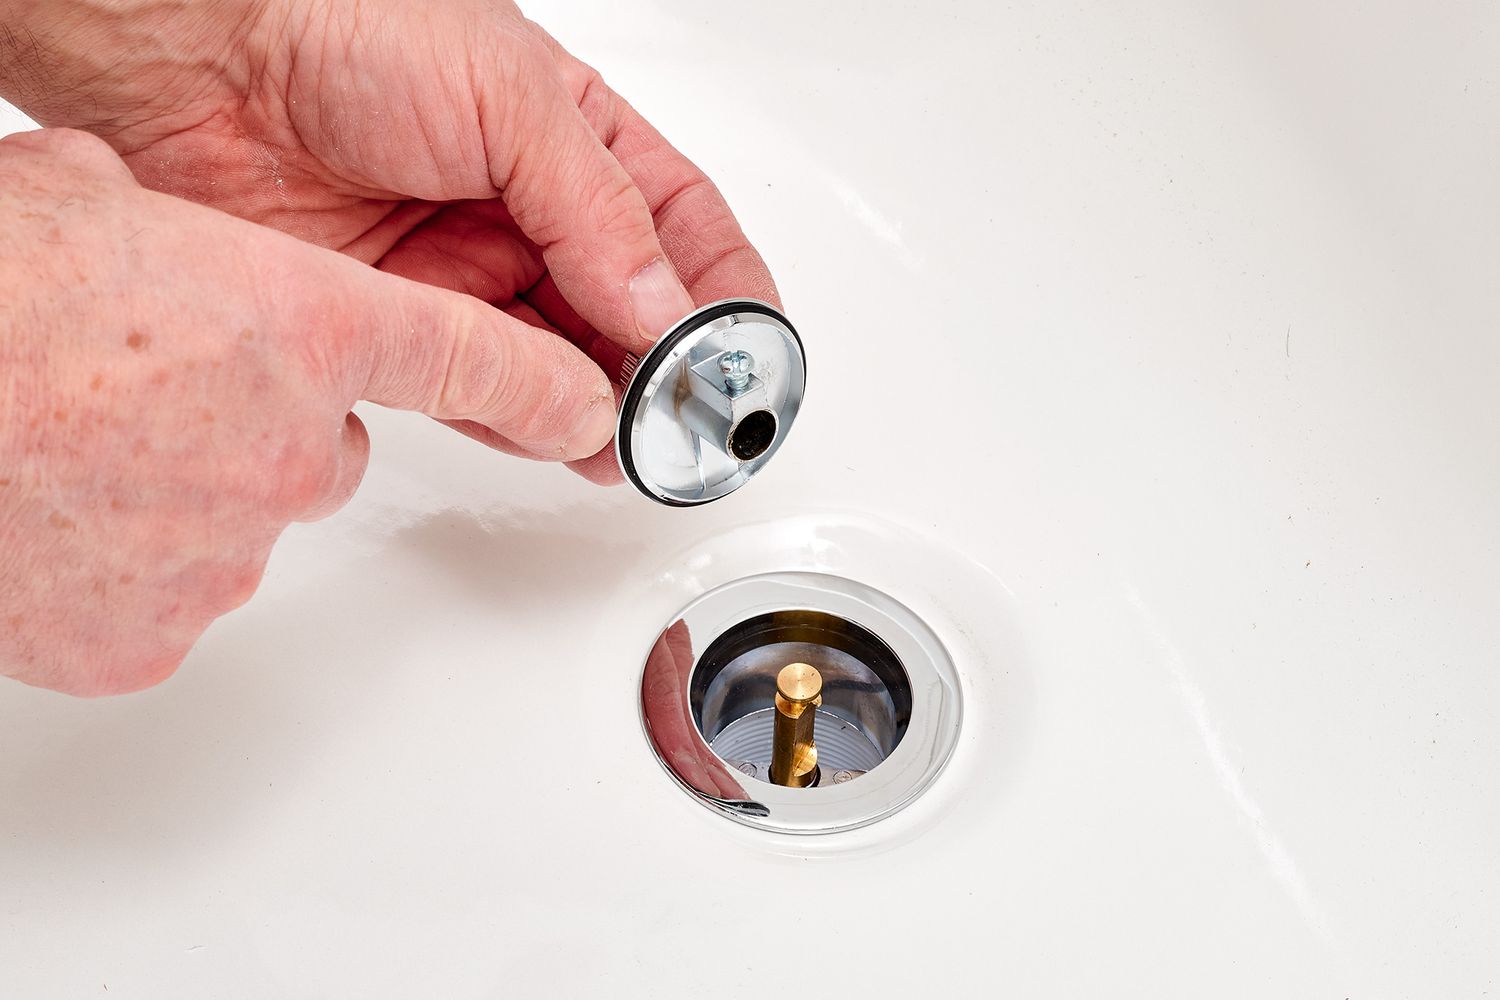
- Apply plumber’s putty: Take a small amount of plumber’s putty and roll it into a thin rope shape. Gently press the putty around the bottom edge of the new drain flange. This will create a watertight seal between the flange and the sink.
- Insert the new drain flange: Carefully insert the new drain flange into the sink opening. Ensure that it sits flush with the sink surface and press down firmly to create a good seal with the plumber’s putty.
- Tighten the locknut: From underneath the sink, thread the locknut onto the drain body and tighten it by hand. Use pliers or an adjustable wrench to further tighten the locknut in a clockwise direction. Be careful not to overtighten and damage the flange or sink.
- Connect the P-trap: Reattach the P-trap to the new drain assembly. Use pliers or an adjustable wrench to tighten the slip nuts, ensuring a secure connection. Make sure the P-trap is properly aligned with the drain and sink pipes.
- Apply Teflon tape: Wrap Teflon tape around the threaded connections of the drain pipes. This will create a tight and leak-free seal when the pipes are connected.
- Connect the drain pipes: Join the drain pipes by aligning the threaded connections and twisting them together. Use pliers or an adjustable wrench to tighten the connections, ensuring they are secure but not overly tight.
By following these steps, you can successfully install the new drain assembly. Take your time to ensure all connections are secure and properly sealed to prevent any leaks or issues in the future.
Read more: How To Change A Sink
Step 4: Testing for Leaks
After installing the new drain, it’s crucial to test for any potential leaks. Follow these steps to ensure that the drain is properly installed and functioning:
- Turn on the water supply: Locate the shut-off valves under the sink and turn them counterclockwise to restore the water supply. This will allow water to flow through the newly installed drain.
- Check for leaks: Observe the drain connections and pipes for any signs of leaks. Look for drips, puddles, or wet spots around the drain area. If you notice any leaks, tighten the connections using pliers or an adjustable wrench as needed.
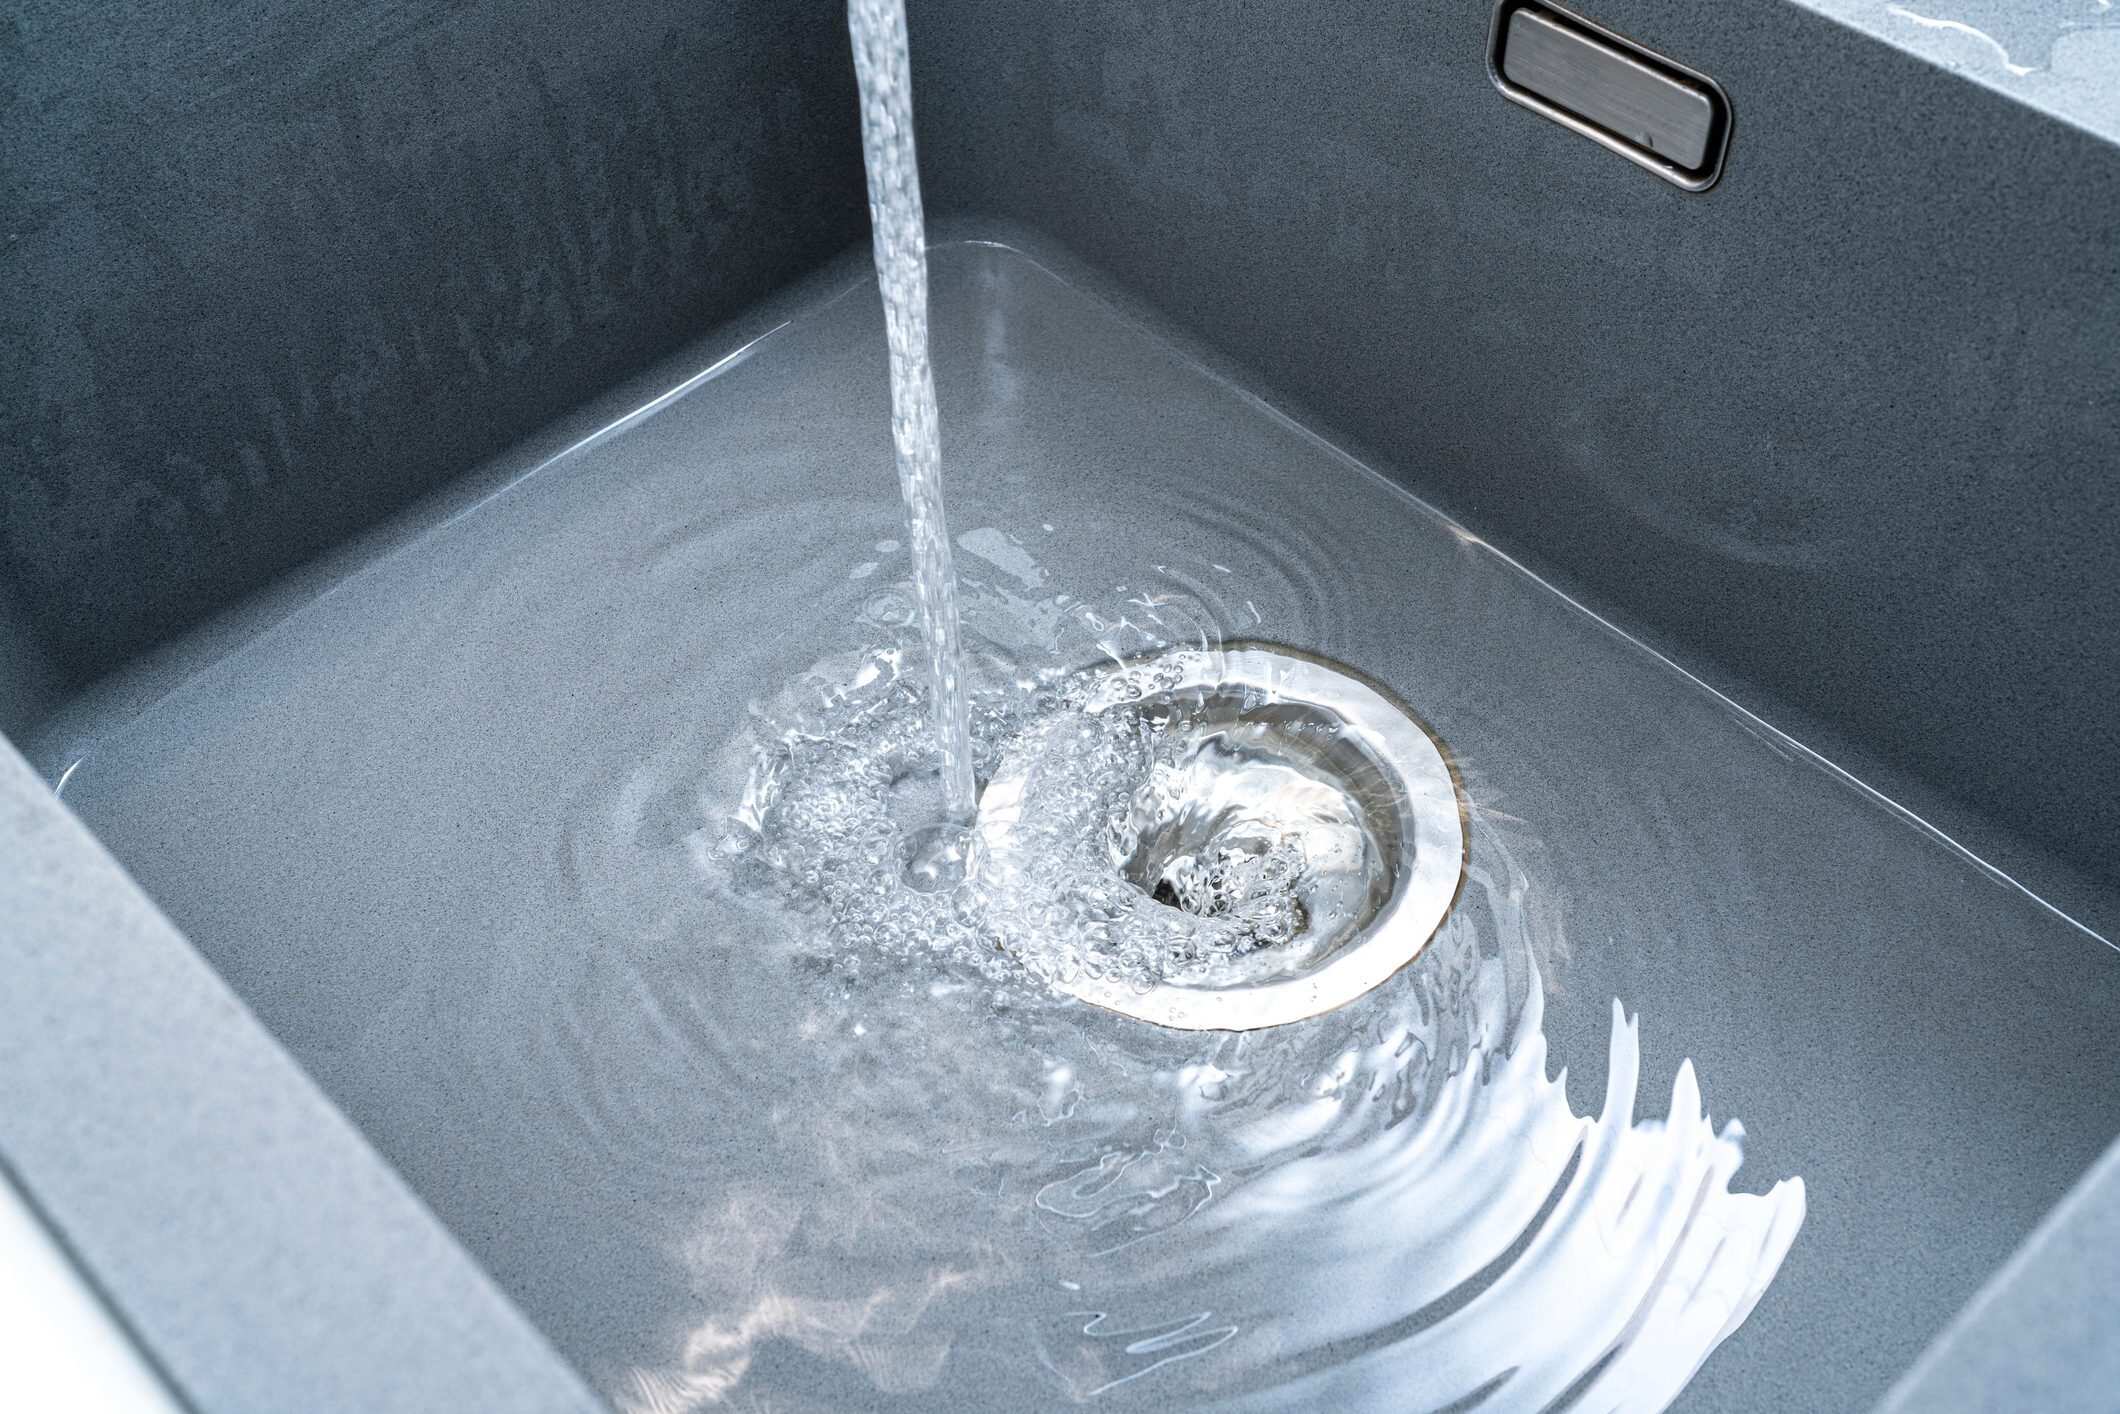
- Run water: Turn on the faucet and let water run through the sink. Fill the sink with water and then release it, allowing it to drain completely. Monitor the drain for any signs of leakage during this process.
- Inspect the P-trap: Pay particular attention to the P-trap connection to ensure it is not leaking. Tighten the slip nuts if necessary to secure a proper seal.
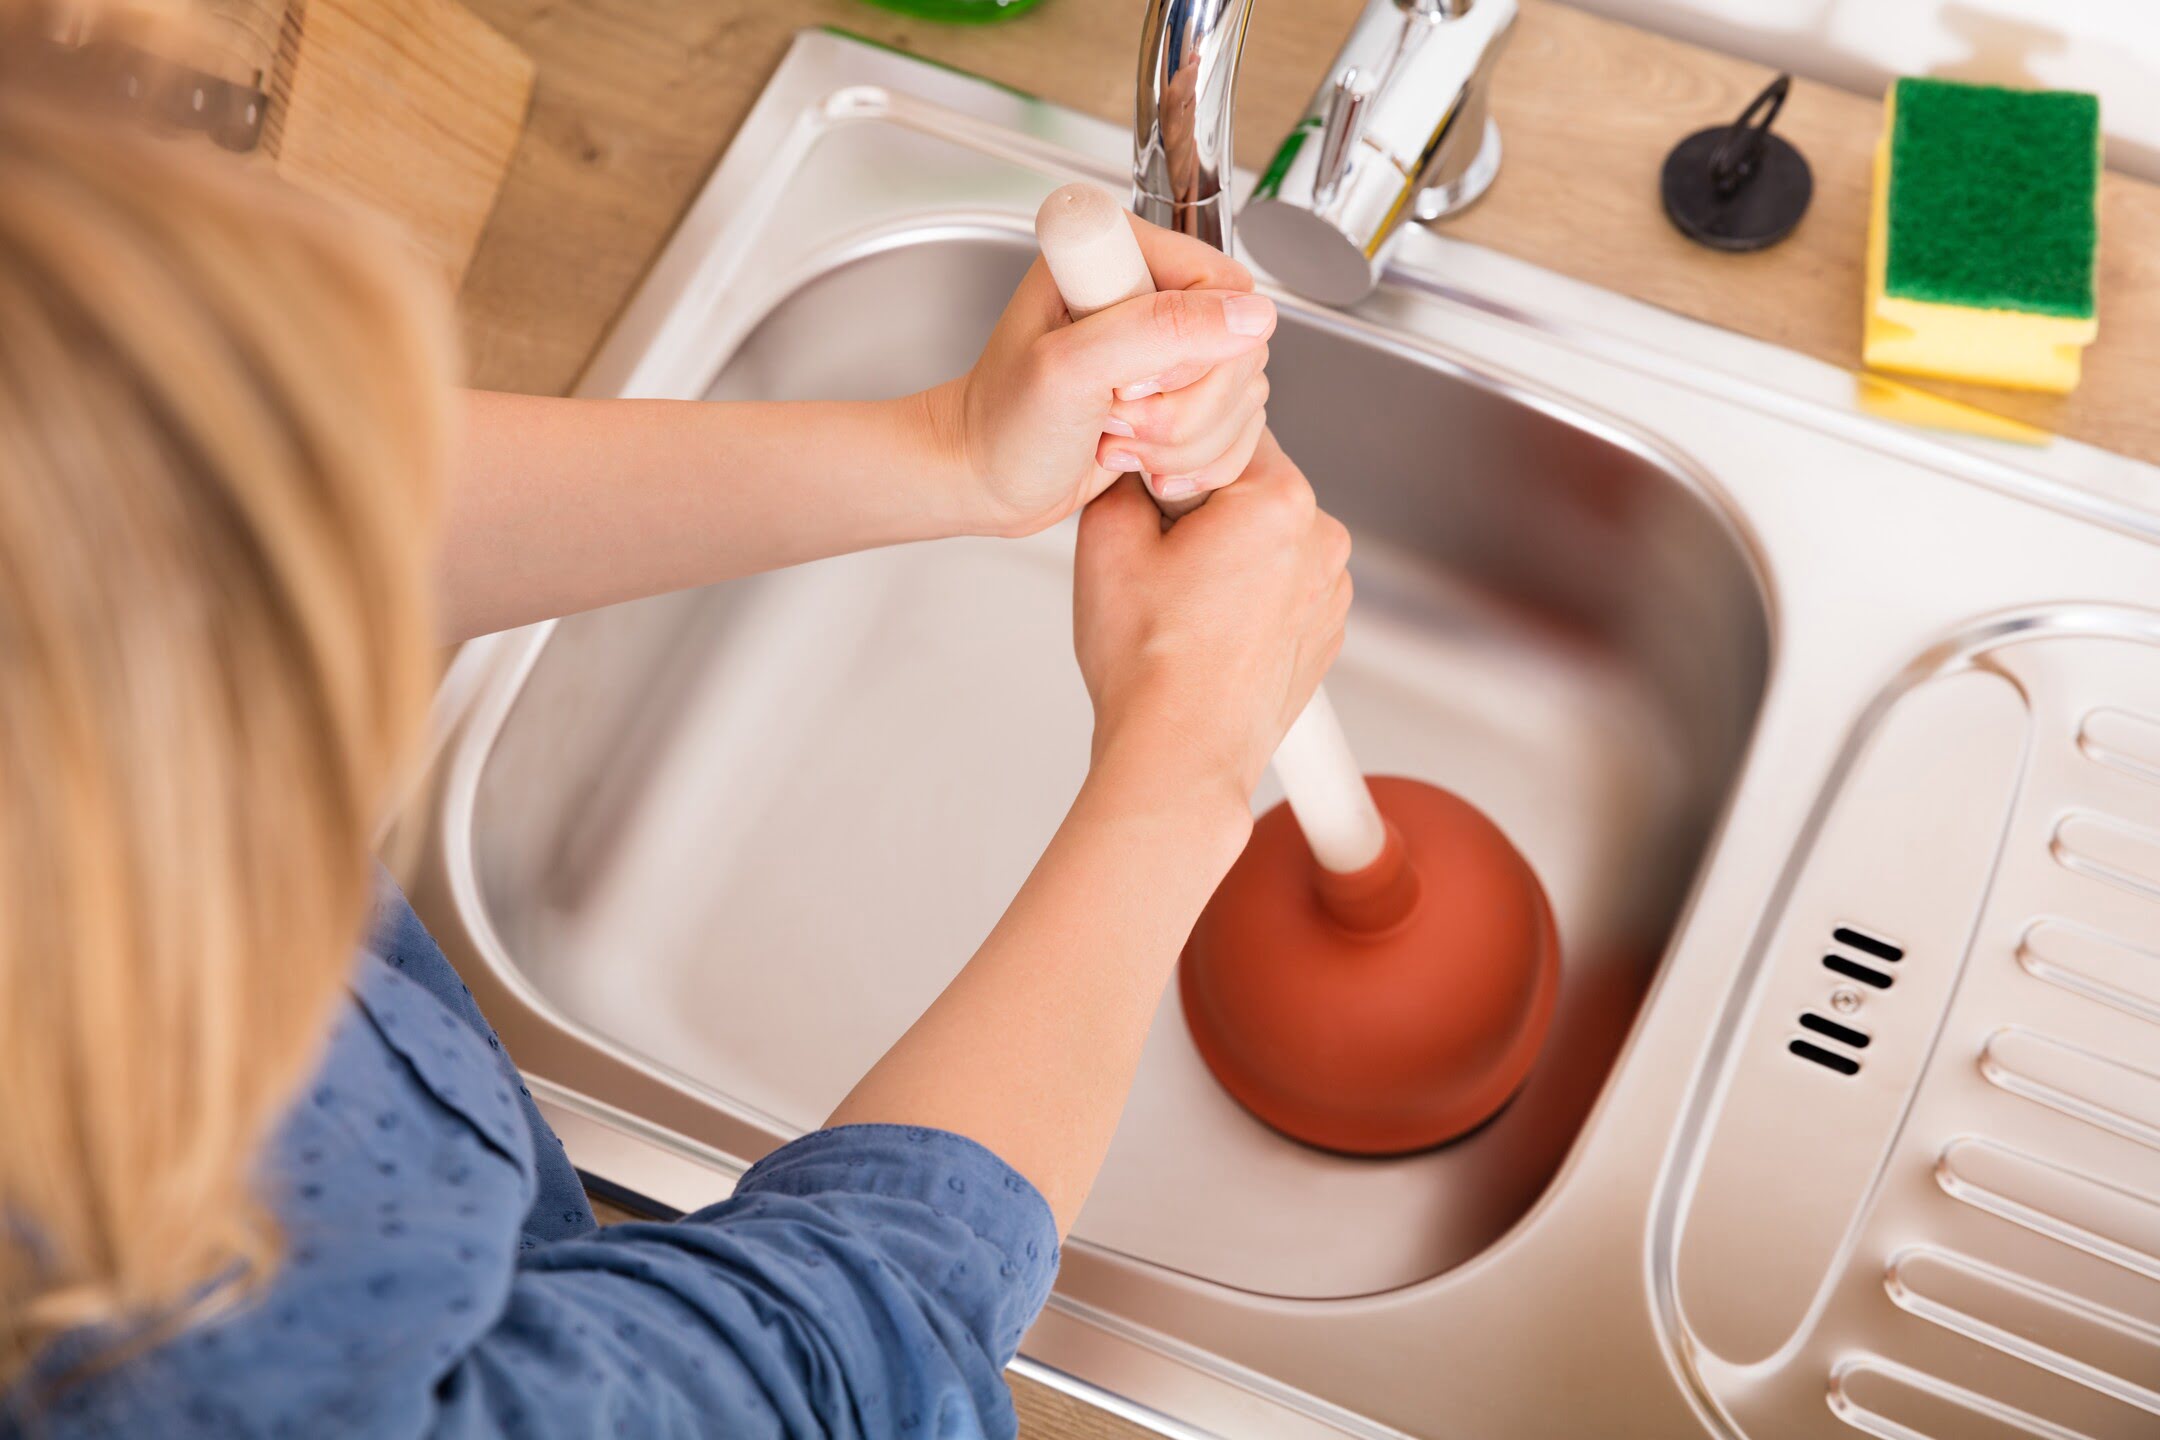
- Verify proper drainage: Observe how the water drains from the sink. Ensure there are no clogs or slow drainage issues. If you notice any problems, double-check the installation and make any necessary adjustments.
By thoroughly testing the drain for leaks and proper drainage, you can identify and address any issues before they become bigger problems. Take the time to carefully inspect and test the drain to ensure its functionality and prevent any future inconvenience.
Step 5: Clean-up and Final Touches
Once you have confirmed that the new drain is properly installed and functioning, it’s time to complete the project with some clean-up and final touches. Follow these steps to wrap up the process:
- Remove excess plumber’s putty: Gently wipe away any excess plumber’s putty that may have squeezed out around the drain flange. Use a damp cloth or sponge to clean the area and leave a neat and tidy finish.
- Clean the sink: Give the sink a thorough cleaning to remove any dirt, debris, or residue that may have accumulated during the installation process. Use a mild detergent or cleaner and a sponge or cloth to wipe down the sink surface.
- Restore the area: Return any items that you removed from the sink back to their original location. This includes dishes, utensils, or any other items that were temporarily relocated during the project.
- Dispose of waste materials: Properly dispose of any old drain components, plumber’s putty tubes, or other waste materials generated from the installation. Follow your local waste disposal guidelines for proper disposal methods.
- Inspect for a finished look: Take a final look at the newly installed drain to ensure it is visually appealing and free from any visible imperfections. Make any adjustments or touch-ups as necessary.
Completing these clean-up and final touches will not only give your sink a polished appearance but will also ensure that everything is in order and ready for use. Take pride in your work and enjoy the satisfaction of a successfully installed new sink drain.
Conclusion
Changing a sink drain may seem like a daunting task, but with the right tools, materials, and guidance, it can be a manageable DIY project. By following the step-by-step instructions outlined in this guide, you can successfully replace your sink drain and enjoy a properly functioning sink.
Remember to clear the area, gather the necessary tools and materials, and remove the old drain before proceeding with the installation of the new drain assembly. Take your time during each step to ensure proper connections, apply plumber’s putty and Teflon tape, and test for leaks and proper drainage.
Once the new drain is installed and functioning flawlessly, make sure to clean up the area and add the final touches to achieve a clean and polished look. Dispose of any waste materials responsibly and take pride in your workmanship.
By changing the sink drain, you can improve water flow, prevent leaks, and enhance the overall functionality of your sink. Whether you’re upgrading to a new drain or replacing a worn-out one, following these steps will help you achieve a successful and satisfying result.
Remember, if you encounter any challenges or are unsure about any step of the process, it’s best to consult a professional plumber who can provide expert guidance and assistance.
Now that you have the knowledge and confidence to tackle a sink drain change, go ahead and enjoy the benefits of a smoothly functioning sink!
Frequently Asked Questions about How To Change A Sink Drain
Was this page helpful?
At Storables.com, we guarantee accurate and reliable information. Our content, validated by Expert Board Contributors, is crafted following stringent Editorial Policies. We're committed to providing you with well-researched, expert-backed insights for all your informational needs.


0 thoughts on “How To Change A Sink Drain”