Home>Storage Ideas>Kitchen Storage>How To Change A Kitchen Sink Drain: In Four Easy Steps
Kitchen Storage
How To Change A Kitchen Sink Drain: In Four Easy Steps
Modified: February 28, 2024
Learn how to change a kitchen sink drain in four easy steps with our handy guide. Discover kitchen storage ideas to optimize your space.
(Many of the links in this article redirect to a specific reviewed product. Your purchase of these products through affiliate links helps to generate commission for Storables.com, at no extra cost. Learn more)
Introduction
Welcome to the exciting world of kitchen sink drain replacement! Whether you’ve noticed a leak, want to update your sink, or simply enjoy tackling DIY projects, changing a kitchen sink drain can be a rewarding and cost-effective endeavor. In this article, we will guide you through the process in four easy steps, ensuring that your new drain is installed correctly and functions smoothly.
Before we begin, it’s important to note that changing a kitchen sink drain does require some basic plumbing knowledge and the use of common tools. If you’re unsure or have any concerns, it’s always a good idea to consult a professional plumber. With that said, let’s dive in and discover how to change a kitchen sink drain!
Key Takeaways:
- Easily change your kitchen sink drain in four steps with basic plumbing knowledge and common tools. Ensure a watertight seal and proper functionality for a rewarding DIY project.
- Gather necessary tools and materials, remove the old drain, install the new one, and test for proper functionality. Enjoy the satisfaction of a job well done and a smoothly functioning kitchen sink drain!
Read more: How To Change A Sink
Step 1: Gathering the necessary tools and materials
Before you start changing your kitchen sink drain, it’s essential to gather all the necessary tools and materials. Having everything on hand will make the process much smoother. Here’s a list of what you’ll need:
- Adjustable wrench
- Plumber’s putty or silicone caulk
- Plunger
- Bucket or container
- Screwdriver (either flathead or Phillips, depending on the screws)
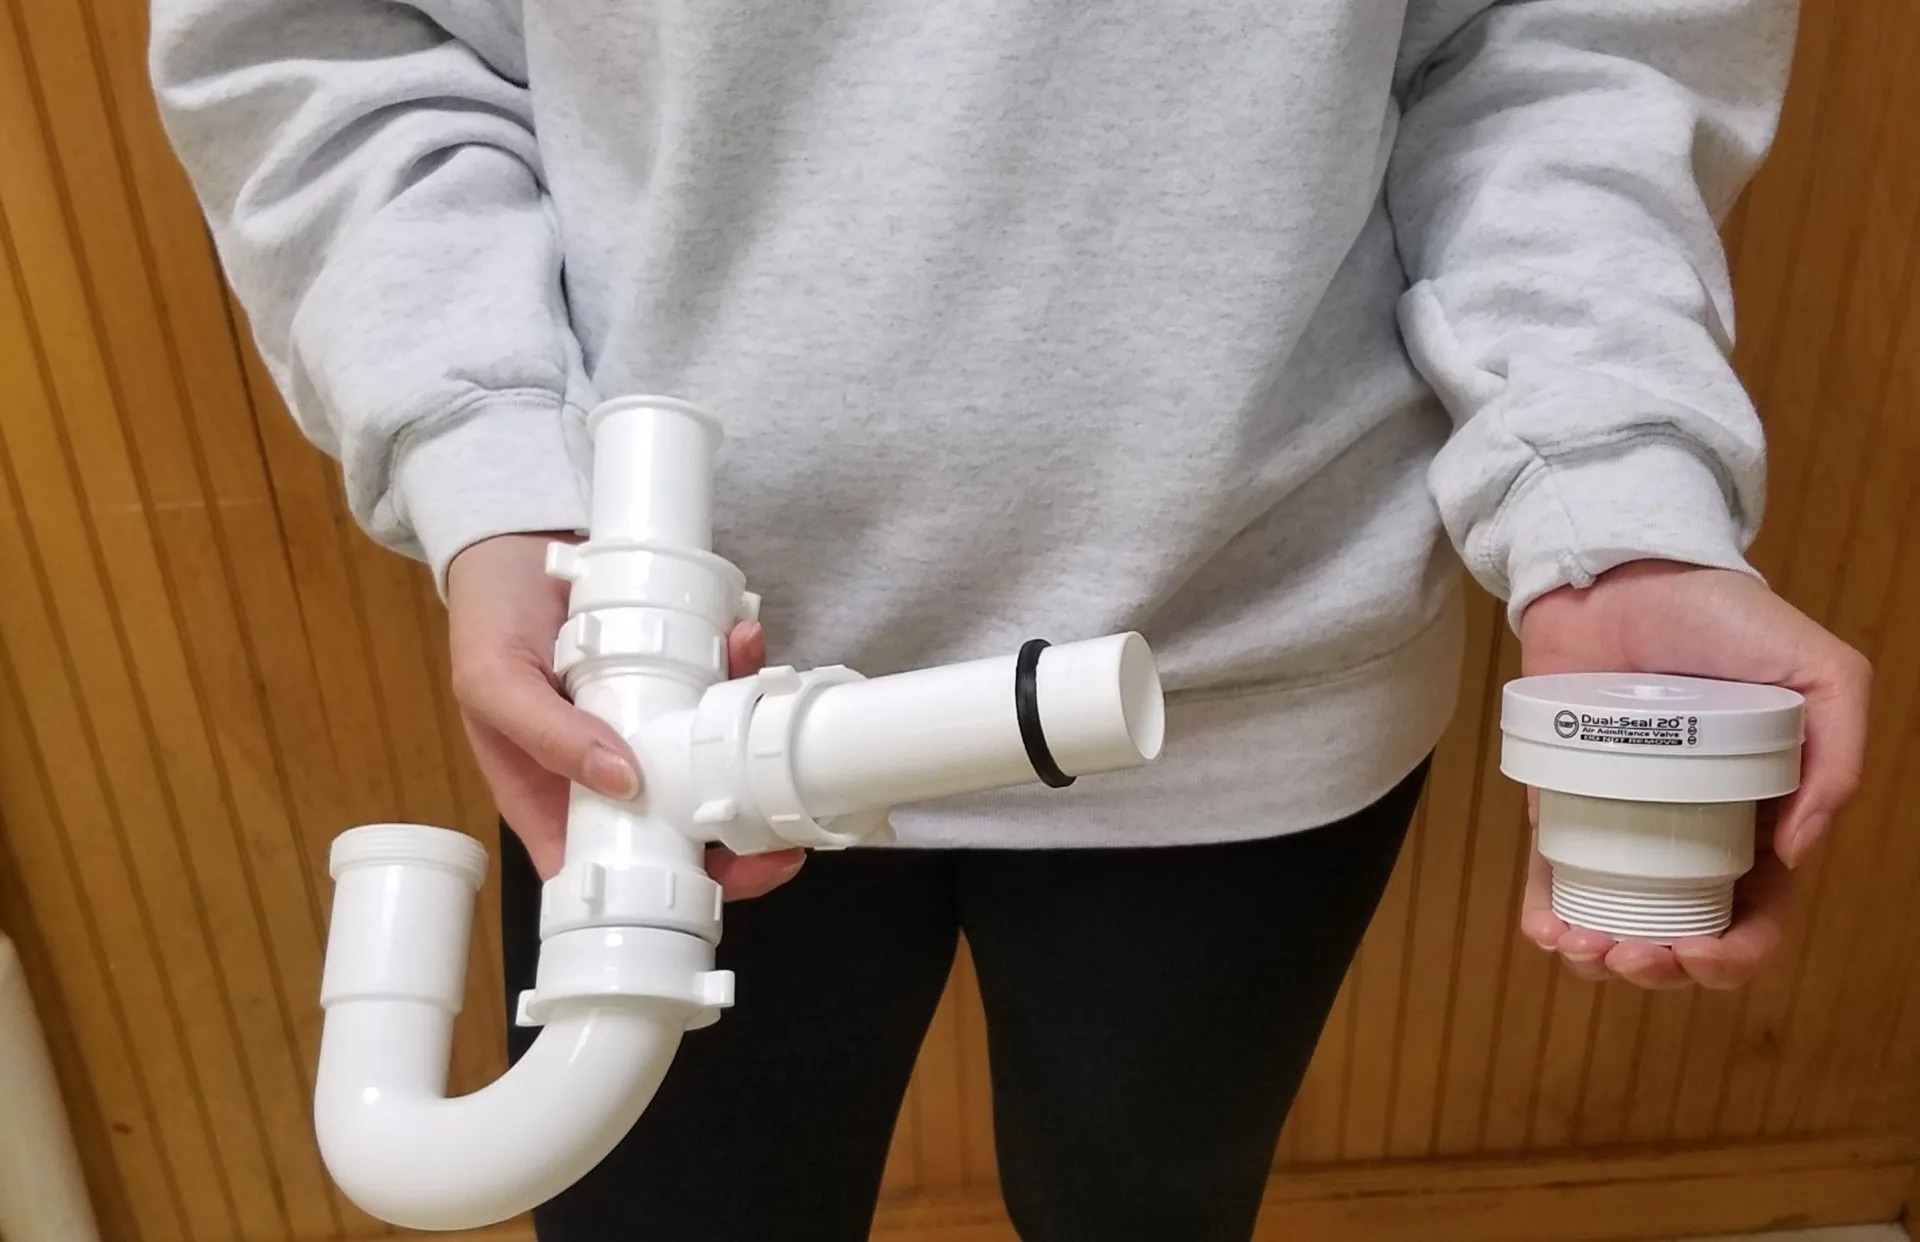
- New kitchen sink drain assembly
- Teflon tape
Once you have gathered all the required tools and materials, you’re ready to move on to the next step. It’s always a good idea to double-check and ensure that you have everything you need to avoid any delays during the process.
Keep in mind that the tools and materials required may vary depending on the type of sink and drain assembly you are working with. If you’re unsure about any specific requirements, consult the instructions provided with your new drain assembly or seek professional advice.
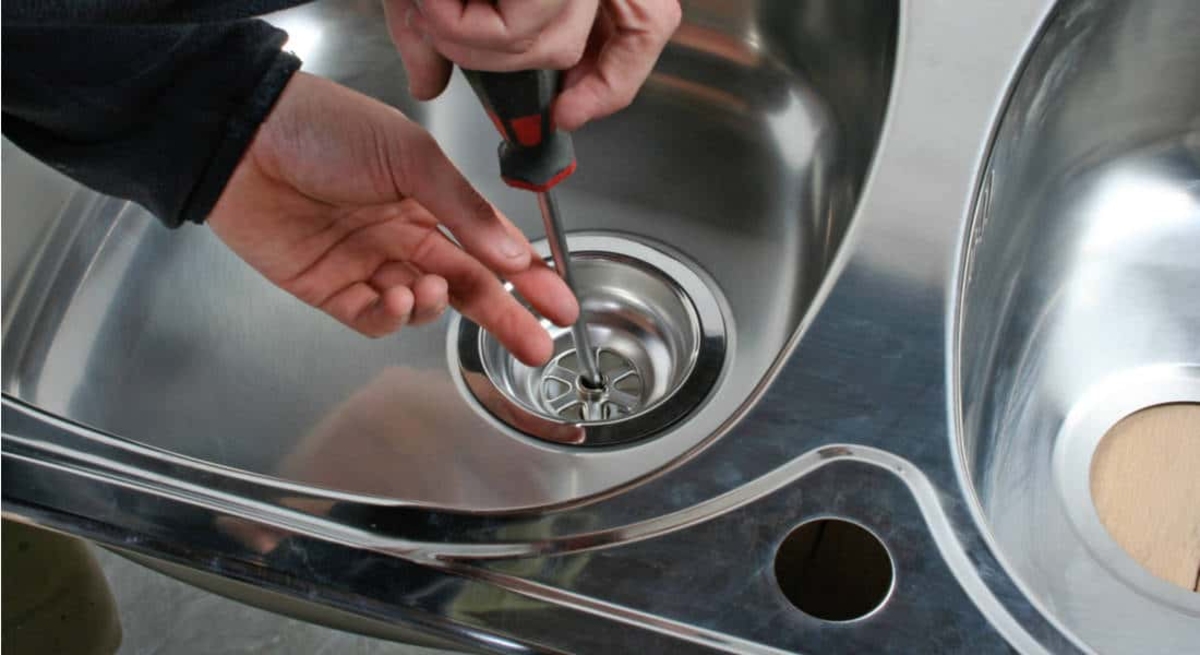
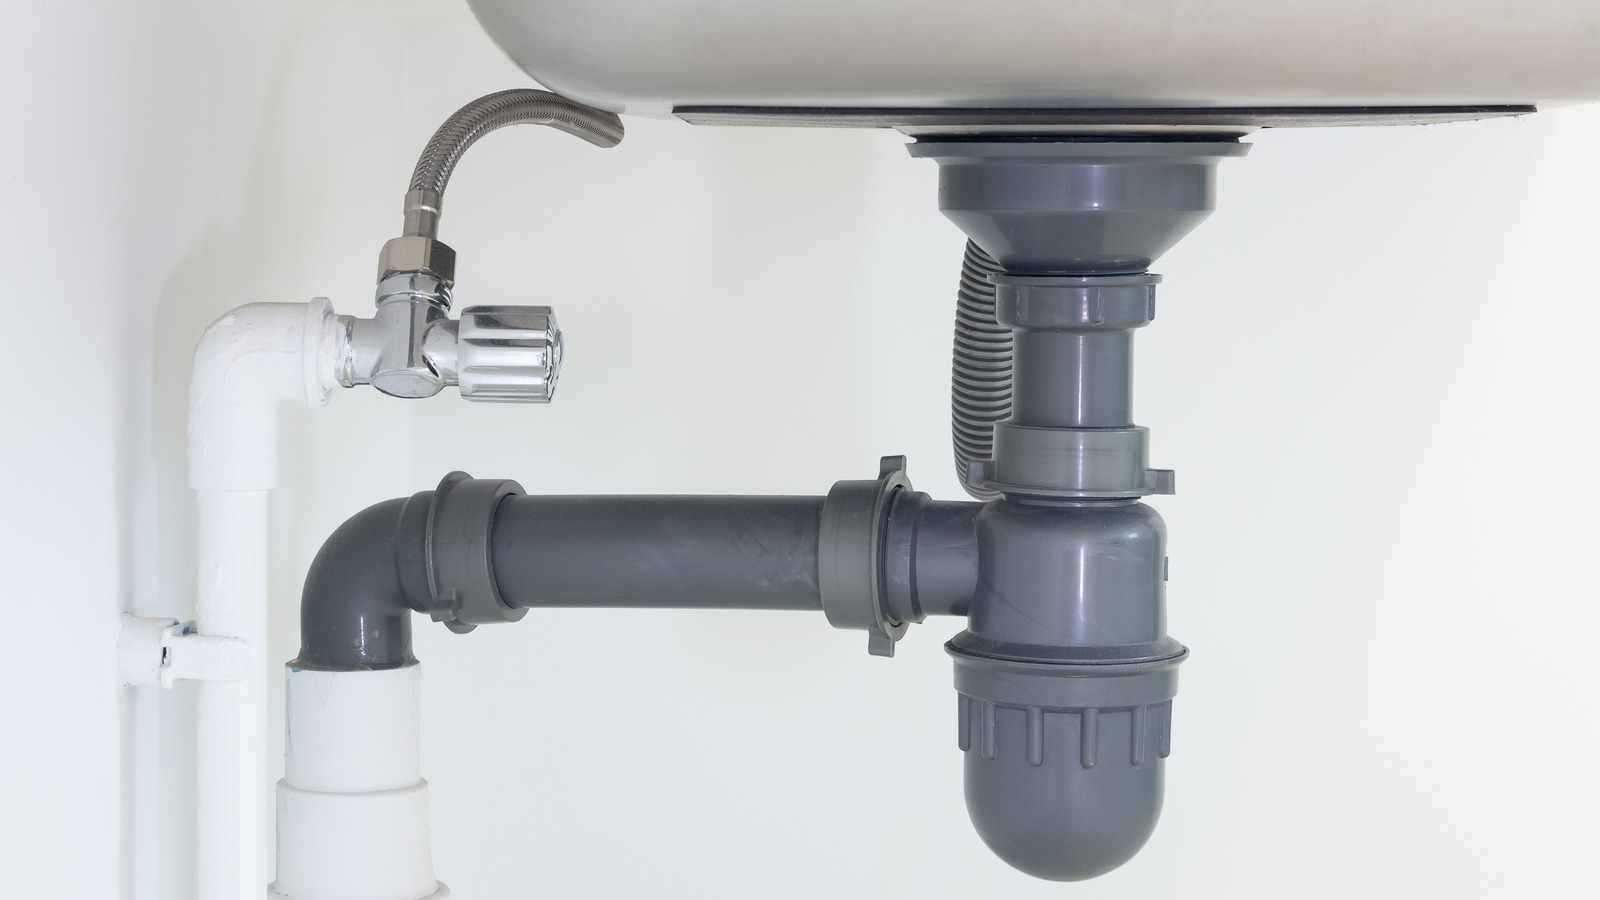
Step 2: Removing the old kitchen sink drain
Now that you have all your tools and materials ready, it’s time to remove the old kitchen sink drain. Follow these steps to ensure a smooth and successful removal:
- Before starting, it’s a good idea to turn off the water supply to your sink. Locate the shut-off valves under the sink and turn them clockwise to shut off the water flow.
- Place a bucket or container underneath the sink to catch any excess water that may drain out.
- Using an adjustable wrench, locate the slip nut connecting the drainpipe to the bottom of the sink drain. Loosen the slip nut by turning it counterclockwise.
- If there is a garbage disposal unit attached to your sink, you’ll need to disconnect it from the drain. Look for the metal ring securing the garbage disposal to the sink and use a screwdriver to loosen and remove it.
- Once the slip nut and garbage disposal (if applicable) are removed, gently twist and pull the old drain assembly out of the sink.
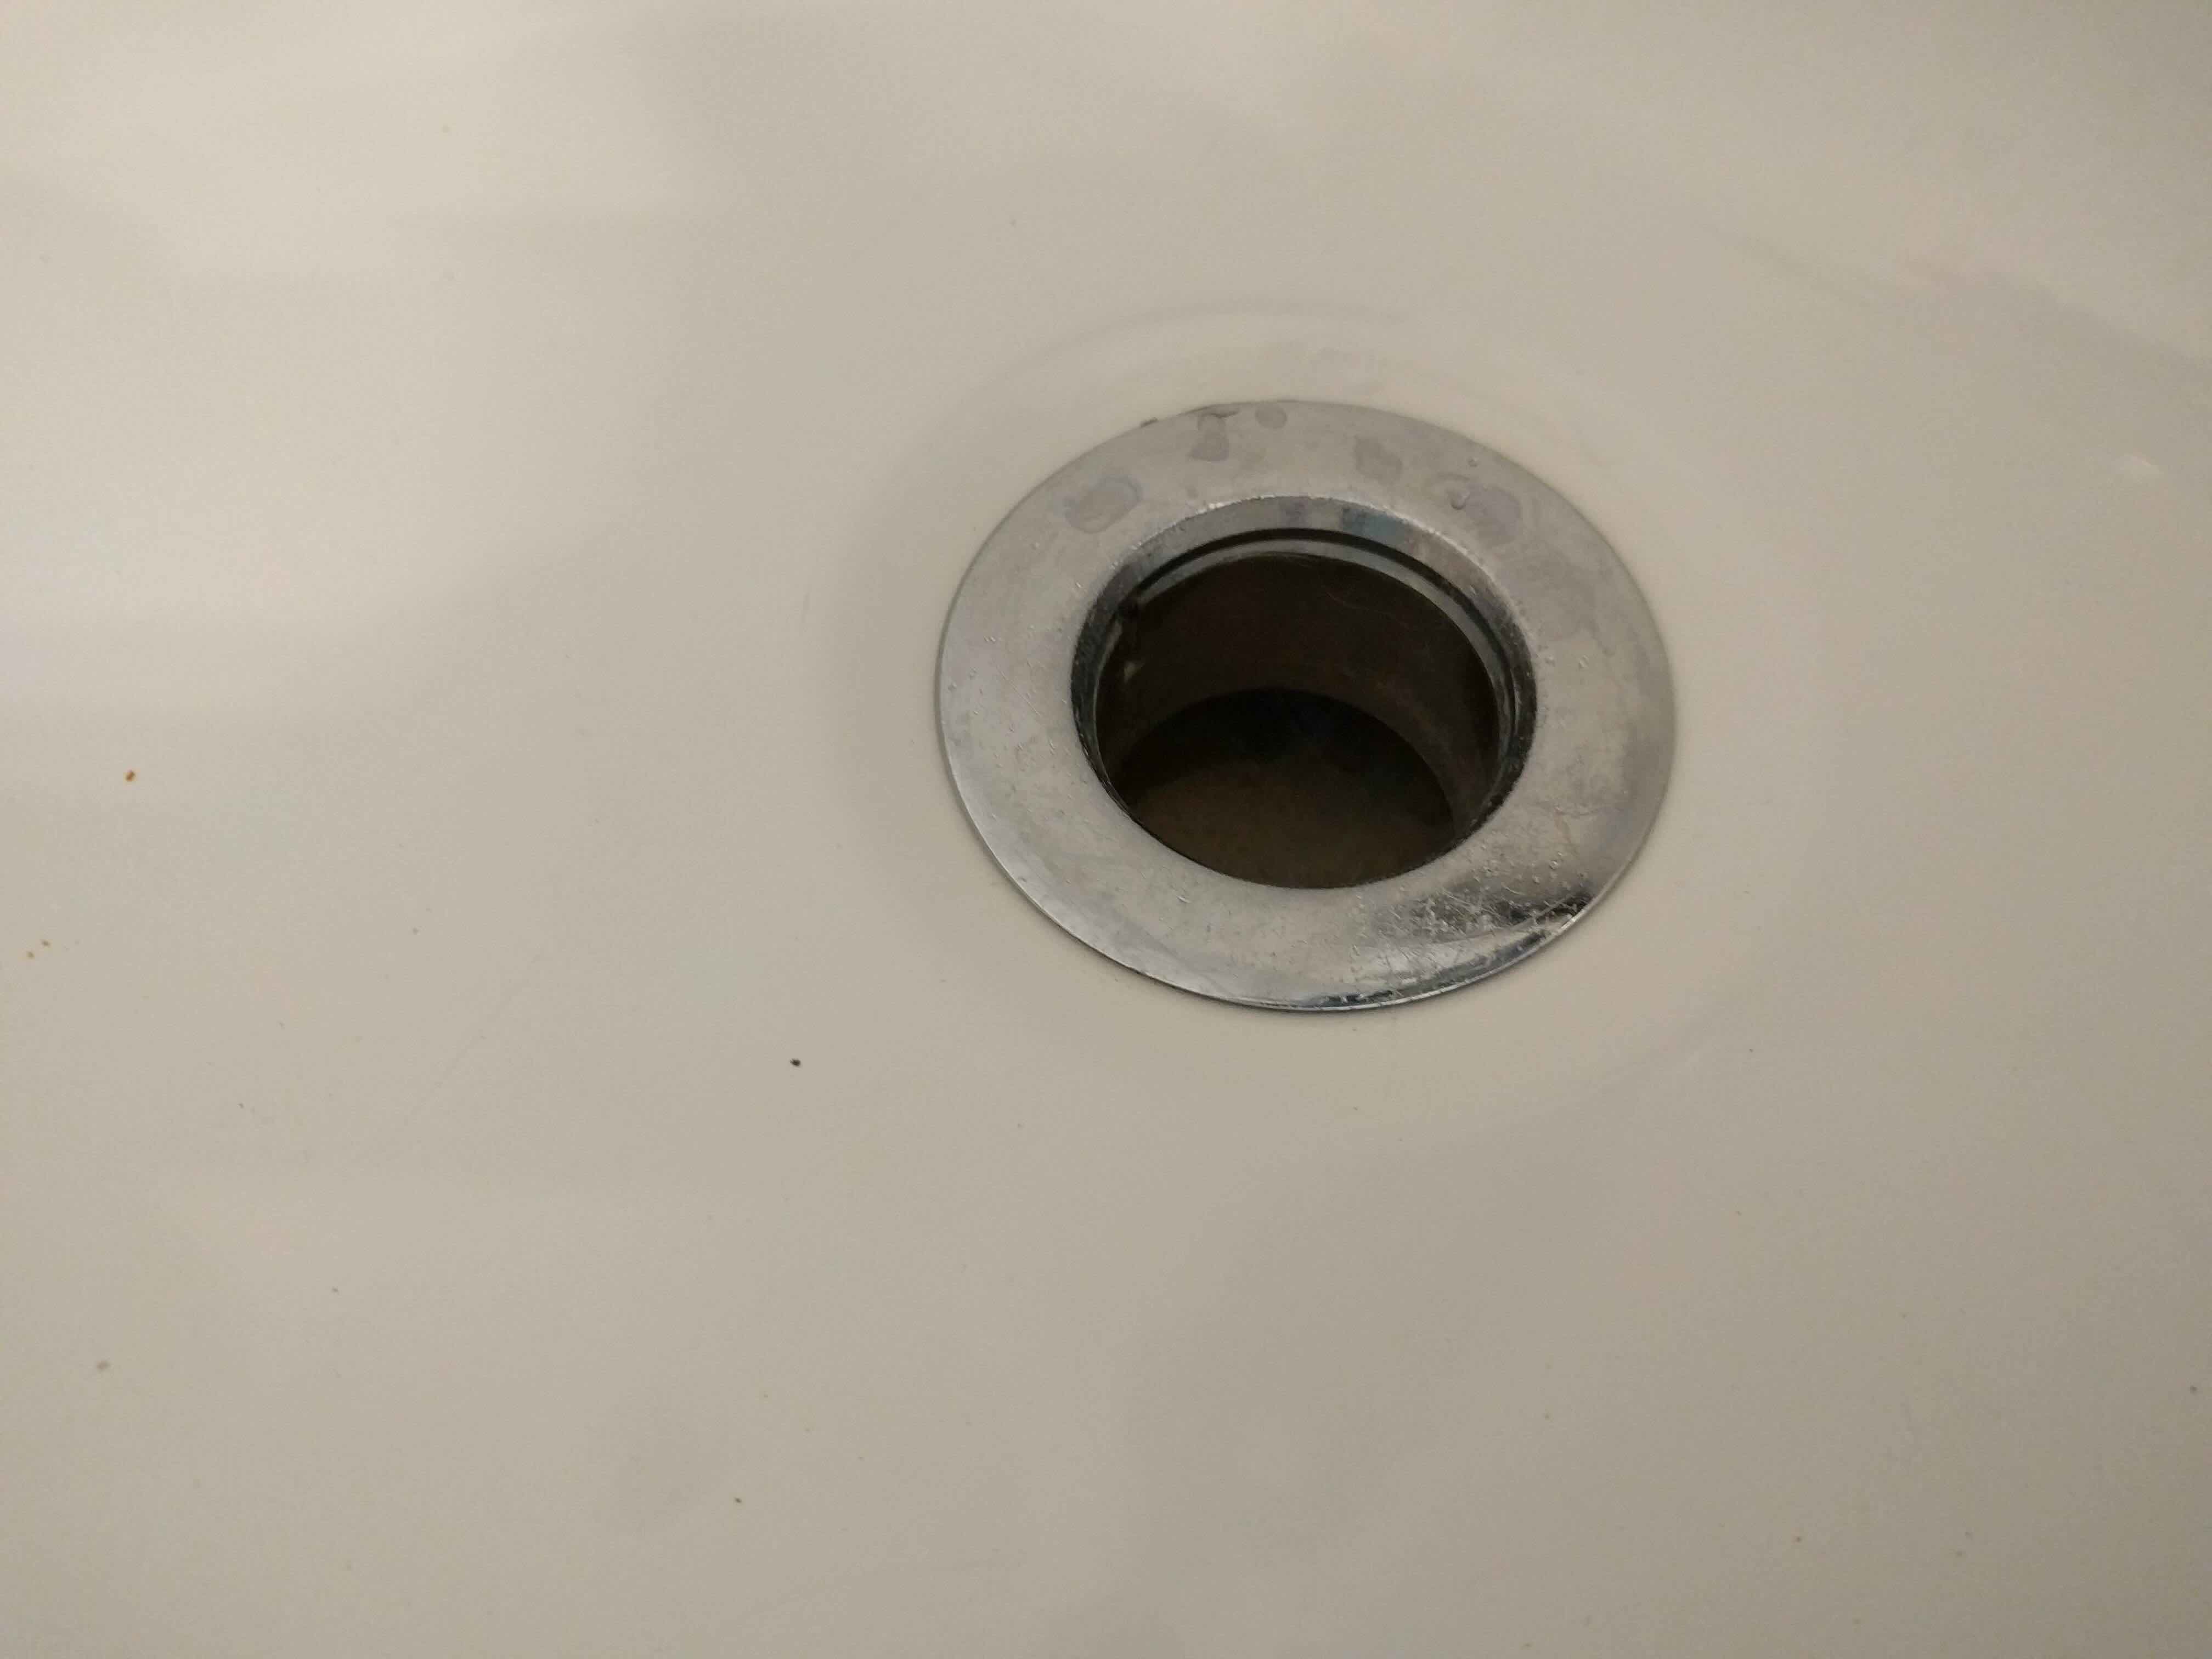
- Check the sink opening and clean any debris or leftover putty from the old drain.
With the old kitchen sink drain successfully removed, you’re now ready to move on to the next step: installing the new drain assembly. But before that, make sure to check the condition of the drainpipe and replace or repair it if necessary.
Stay tuned for Step 3: Installing the new kitchen sink drain!
When removing the old drain, be sure to have a bucket or towel handy to catch any water that may spill out. This will help keep your work area clean and prevent any water damage.
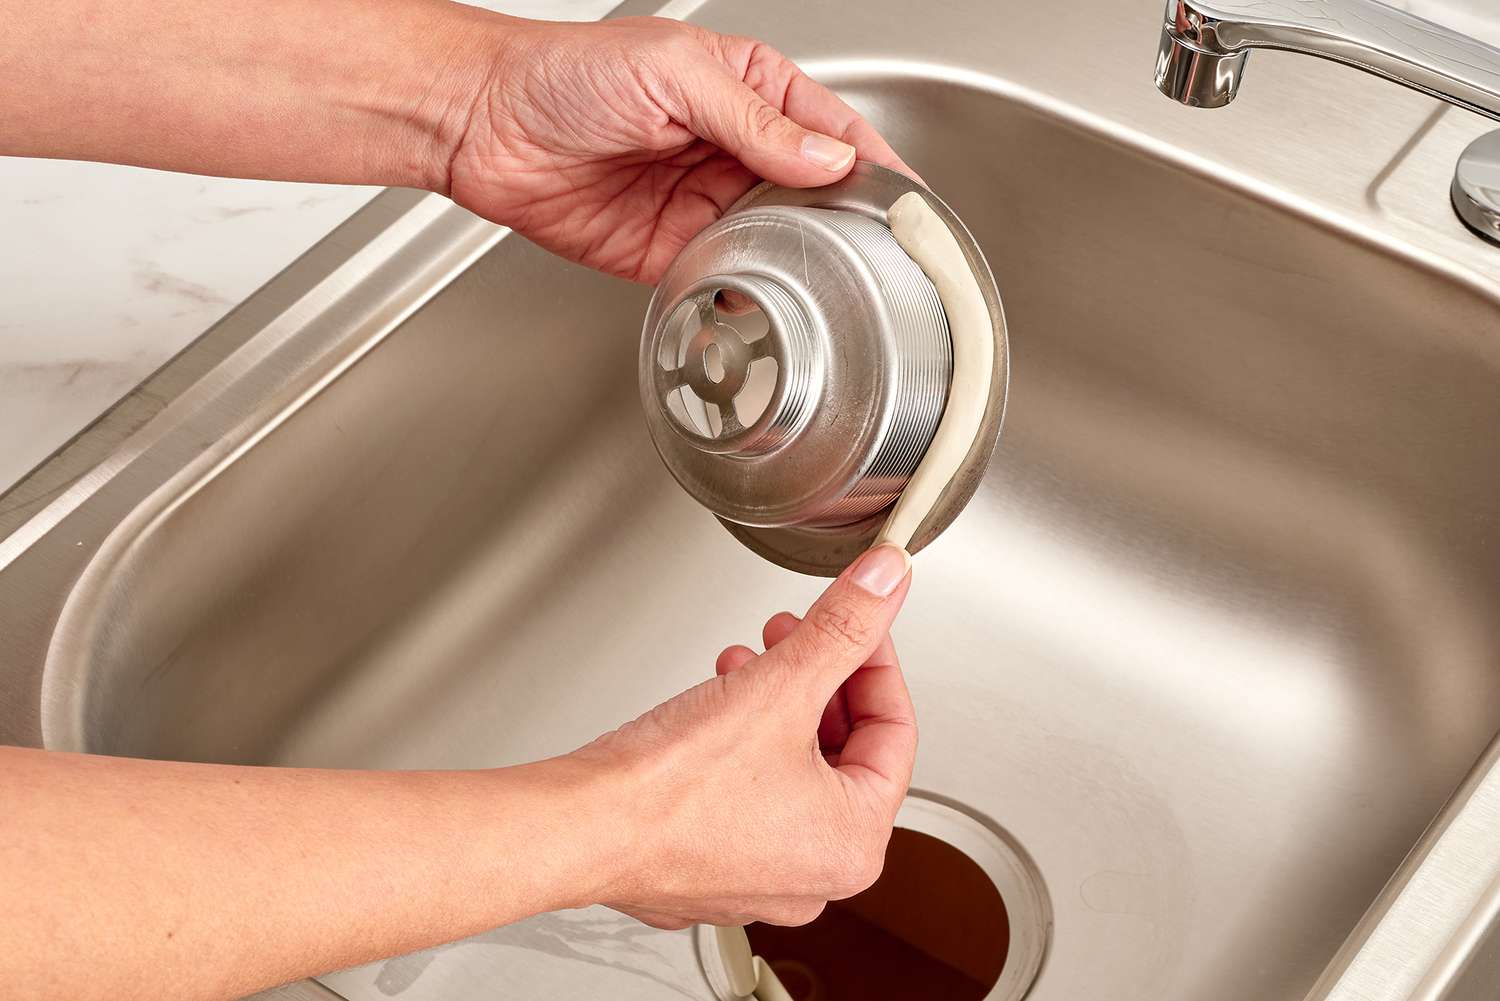
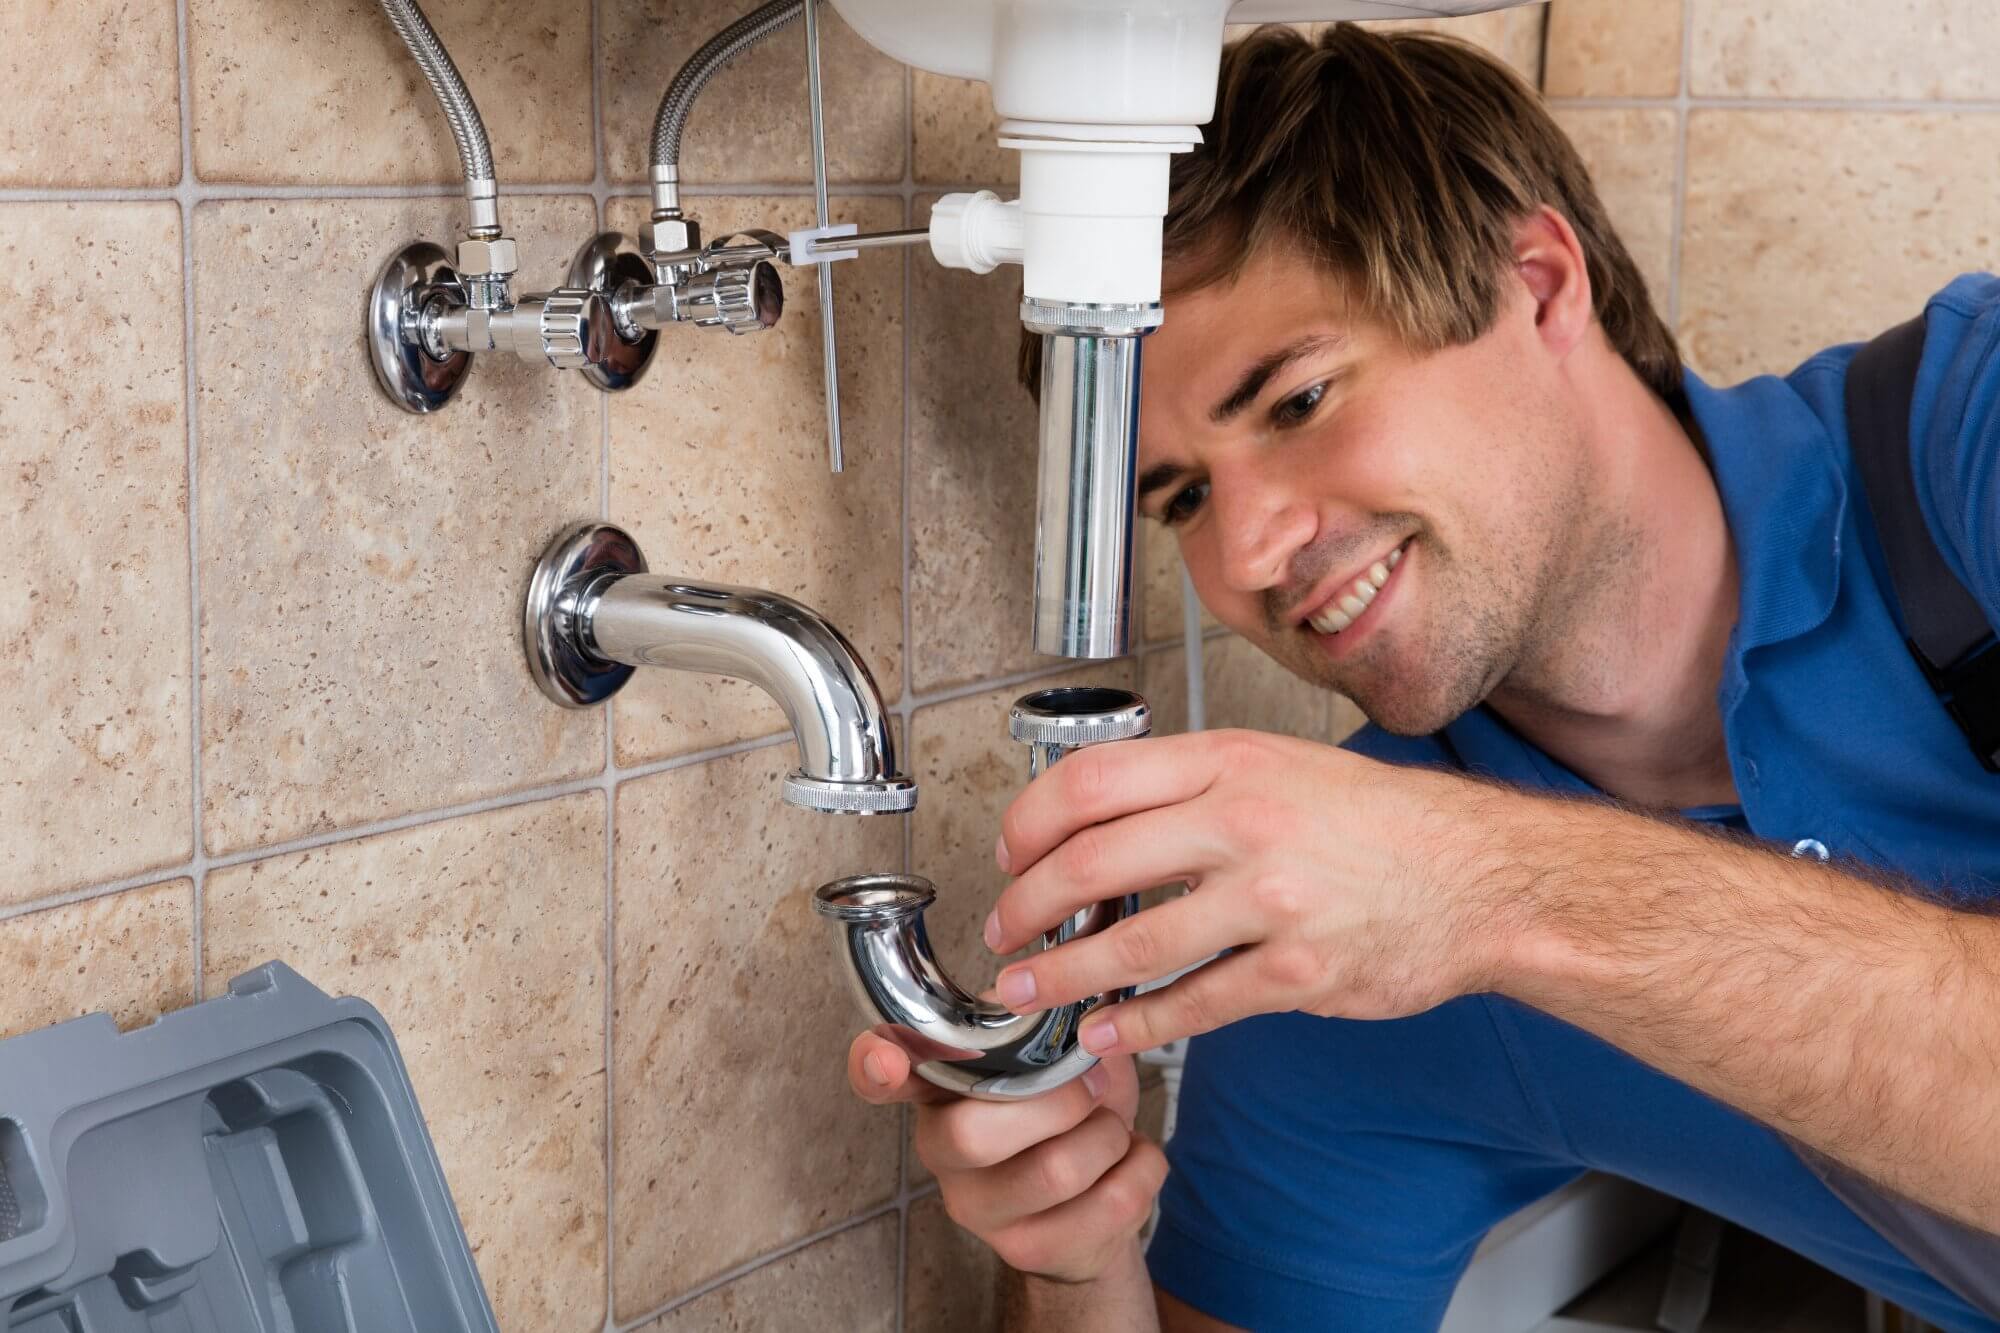
Step 3: Installing the new kitchen sink drain
Now that you have removed the old kitchen sink drain, it’s time to install the new one. Follow these steps to ensure a proper installation:
- Apply plumber’s putty or silicone caulk around the underside of the flange of your new kitchen sink drain. This will create a watertight seal when the drain is installed.
- Insert the new drain assembly into the sink opening and press it firmly to form a seal with the putty or caulk.
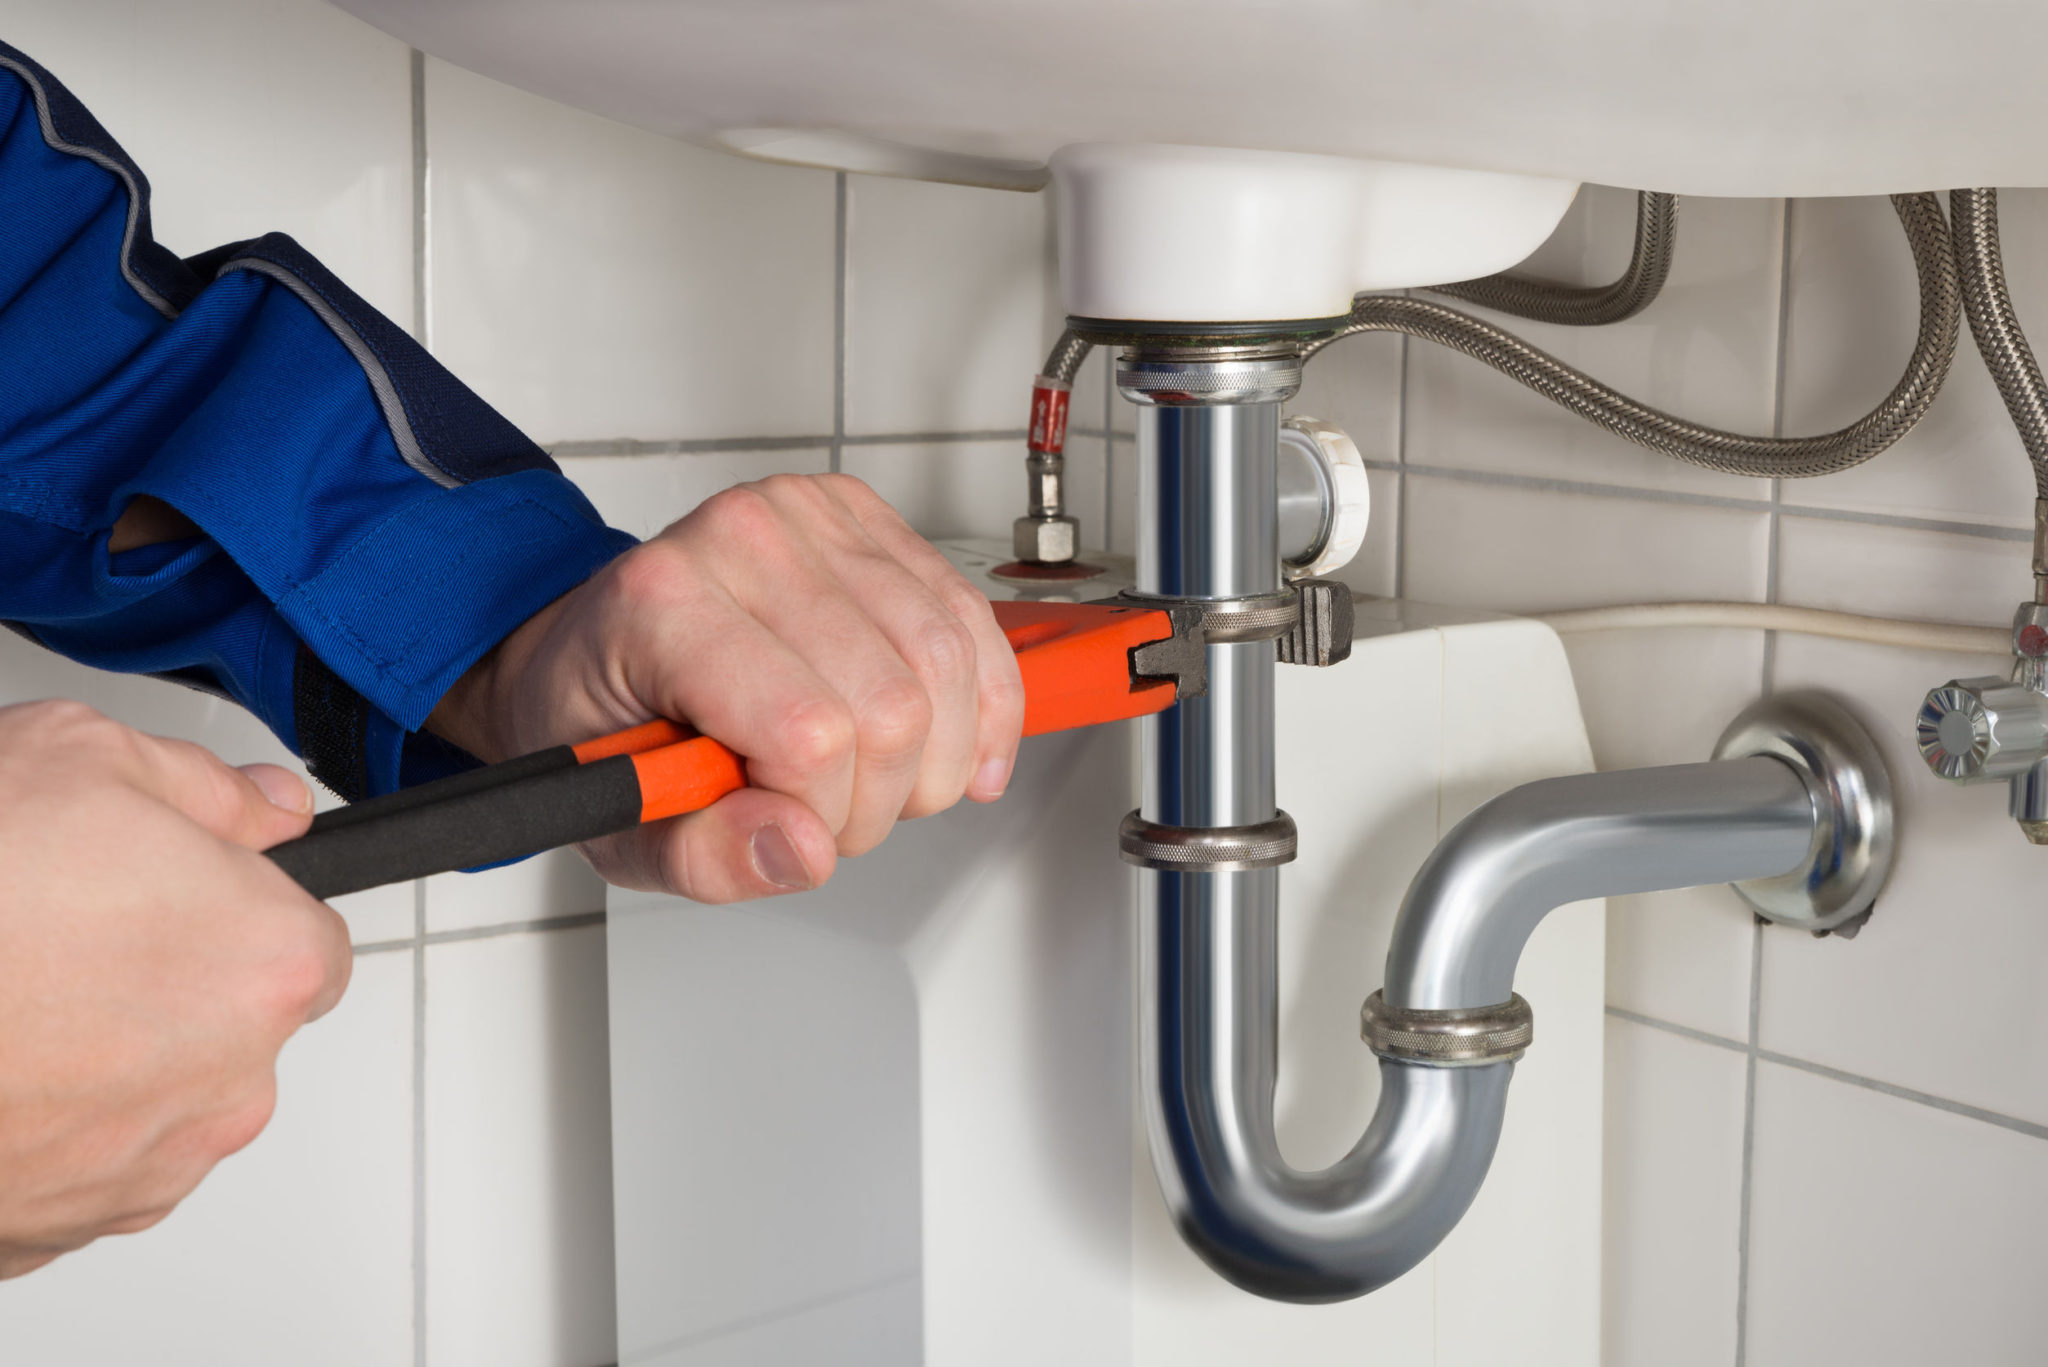
- From underneath the sink, place the rubber gasket and paper friction ring onto the drain assembly, followed by the slip nut. Tighten the slip nut by hand initially, and then use an adjustable wrench to further secure it. Be careful not to overtighten to avoid damaging the sink or drain assembly.
- If you have a garbage disposal unit, reattach it to the new drain assembly. Use a screwdriver to secure the metal ring back into place.
- Wrap Teflon tape around the threads of the sink drain tailpiece.
- Screw the tailpiece into the drain outlet on the bottom of the sink drain assembly. Use an adjustable wrench to tighten it securely.
- Reconnect the drainpipe to the sink drain. Ensure that the slip nut is tightened securely to prevent leaks.
Once the new kitchen sink drain is installed, it’s important to double-check all connections and make sure they are tight and secure. This will help prevent any future leaks or issues.
Now that you’ve successfully installed the new kitchen sink drain, it’s time for the final step: testing and ensuring proper functionality.
Step 4: Testing and ensuring proper functionality
After installing the new kitchen sink drain, it’s crucial to test it and ensure everything is functioning as it should. Follow these steps to test and verify the proper functionality:
- Turn on the water supply to the sink by turning the shut-off valves counterclockwise.
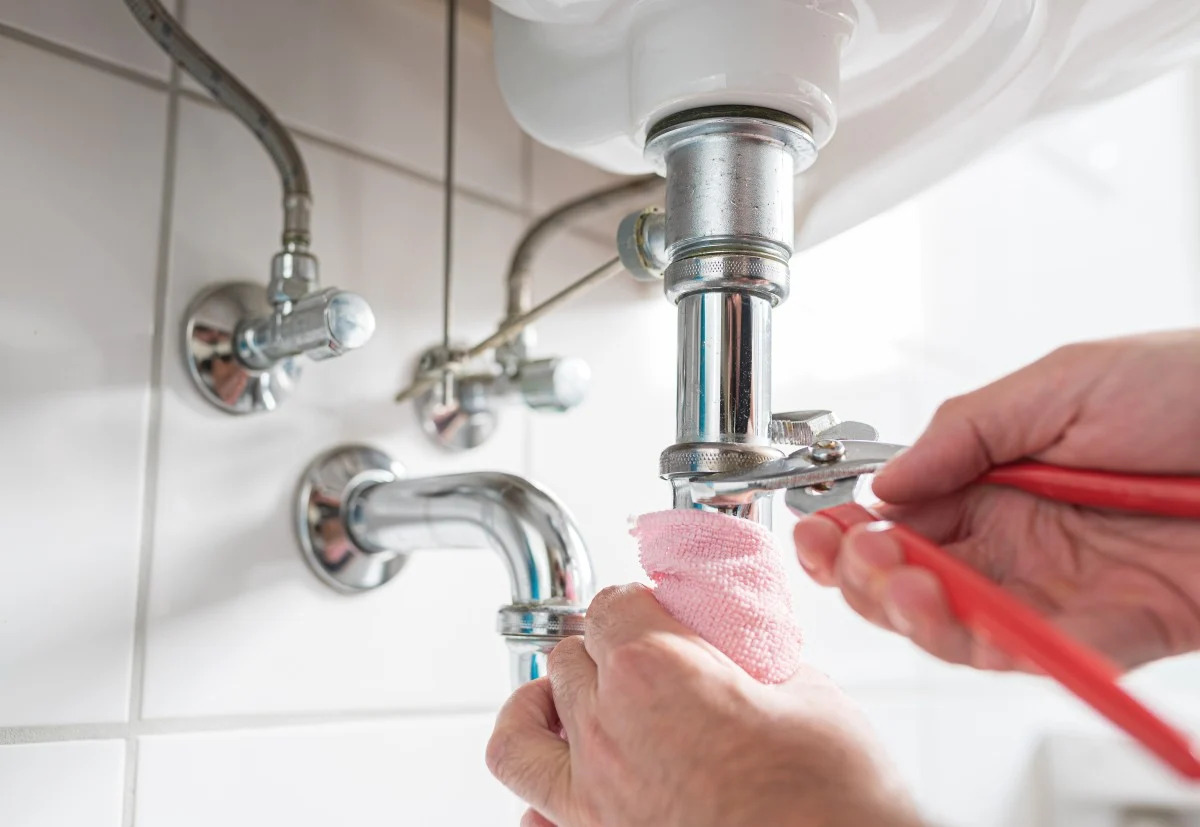
- Observe the connections and check for any signs of leaks. Pay close attention to the slip nuts, drainpipe, and the base of the sink drain assembly.
- If you notice any leaks, tighten the slip nuts or connections as necessary. Be cautious not to overtighten, as it can damage the components.
- To check the sink drain’s efficiency, fill the sink with water and let it drain while observing. Ensure the water drains quickly and without any backup or blockages.
- If there are any issues with drainage, you may need to adjust the slope of the drainpipe or clear any blockages within the plumbing system.
- Finally, consider running the garbage disposal to ensure it operates smoothly and doesn’t cause any leaks or strange noises.
If you detect any leaks or encounter problems with drainage or the garbage disposal, you may need to disassemble and inspect the connections to identify and resolve the issue. Seek professional help if necessary to ensure a proper fix.
Once you’ve tested and confirmed that the new kitchen sink drain is functioning correctly without any issues, congratulations! You have successfully completed the process of changing a kitchen sink drain.
Remember to maintain your sink drain regularly by cleaning it and being cautious about what you dispose of down the drain. This will help prolong the lifespan of your new drain and prevent future issues.
Now that you’re equipped with the knowledge and steps to change a kitchen sink drain, you can confidently tackle this DIY project whenever the need arises. Happy plumbing!
Read more: How To Take Sink Drain Out
Conclusion
Changing a kitchen sink drain may seem like a daunting task, but with the right tools, materials, and guidance, it can be a straightforward and rewarding DIY project. By following the four easy steps outlined in this article, you can successfully remove the old drain and install a new one, ensuring proper functionality and preventing leaks.
Remember to gather all the necessary tools and materials before starting, including an adjustable wrench, plumber’s putty or silicone caulk, and a new drain assembly. Take your time to remove the old drain, being cautious with any connected garbage disposal. With the old drain removed, proceed to install the new drain, creating a watertight seal and securing all connections.
After the installation, it’s crucial to test and ensure proper functionality. Check for any leaks, make adjustments as needed, and ensure the drainage and garbage disposal are working smoothly. By doing so, you can have confidence in the reliability of your new kitchen sink drain.
Remember, if you’re ever unsure or encounter any difficulties during the process, don’t hesitate to seek professional assistance. Plumbing can be complex, and it’s important to prioritize safety and accuracy.
Now that you’re equipped with the knowledge and steps to change a kitchen sink drain, you can confidently tackle this project whenever needed. Enjoy the satisfaction of a job well done and the peace of mind that comes with a properly functioning kitchen sink drain!
Frequently Asked Questions about How To Change A Kitchen Sink Drain: In Four Easy Steps
Was this page helpful?
At Storables.com, we guarantee accurate and reliable information. Our content, validated by Expert Board Contributors, is crafted following stringent Editorial Policies. We're committed to providing you with well-researched, expert-backed insights for all your informational needs.


0 thoughts on “How To Change A Kitchen Sink Drain: In Four Easy Steps”