Home>Furniture & Design>Bathroom Accessories>How To Change Out Bathtub Drain
Bathroom Accessories
How To Change Out Bathtub Drain
Modified: October 20, 2024
Learn how to easily change out your bathtub drain with our step-by-step guide. Upgrade your bathroom accessories hassle-free.
(Many of the links in this article redirect to a specific reviewed product. Your purchase of these products through affiliate links helps to generate commission for Storables.com, at no extra cost. Learn more)
Introduction
Changing out a bathtub drain may seem like a daunting task, but with the right guidance and a bit of know-how, it can be a manageable DIY project. Over time, bathtub drains can become worn, corroded, or simply outdated, prompting the need for a replacement. Whether you're looking to upgrade to a more modern drain or simply need to address a persistent drainage issue, this step-by-step guide will walk you through the process of changing out your bathtub drain.
By following these instructions, you can save time and money by tackling this project yourself, without the need to hire a professional plumber. Not only will you gain a sense of accomplishment from completing the task, but you'll also have the satisfaction of knowing that your bathtub is equipped with a new, efficient drain that meets your specific needs.
In the following sections, we will cover the essential steps required to change out a bathtub drain, from removing the old drain to installing the new one. Additionally, we'll provide tips on cleaning the area and testing the new drain to ensure it functions properly. Whether you're a seasoned DIY enthusiast or a novice looking to expand your home improvement skills, this guide is designed to equip you with the knowledge and confidence to successfully replace your bathtub drain.
So, roll up your sleeves, gather your tools, and let's dive into the process of changing out your bathtub drain. With a bit of patience and attention to detail, you'll soon have a rejuvenated bathtub that's ready to deliver years of reliable performance.
Key Takeaways:
- Changing out a bathtub drain is a manageable DIY project that can save you time and money. By following the steps in this guide, you can rejuvenate your bathtub with a new, efficient drain and gain valuable home improvement skills.
- After successfully replacing your bathtub drain, you can look forward to enjoying a refreshed bathing experience with reliable drainage. Your DIY efforts contribute to a personalized and upgraded bathing space, showcasing your resourcefulness and proactive mindset.
Read more: How To Get Toy Out Of Bathtub Drain
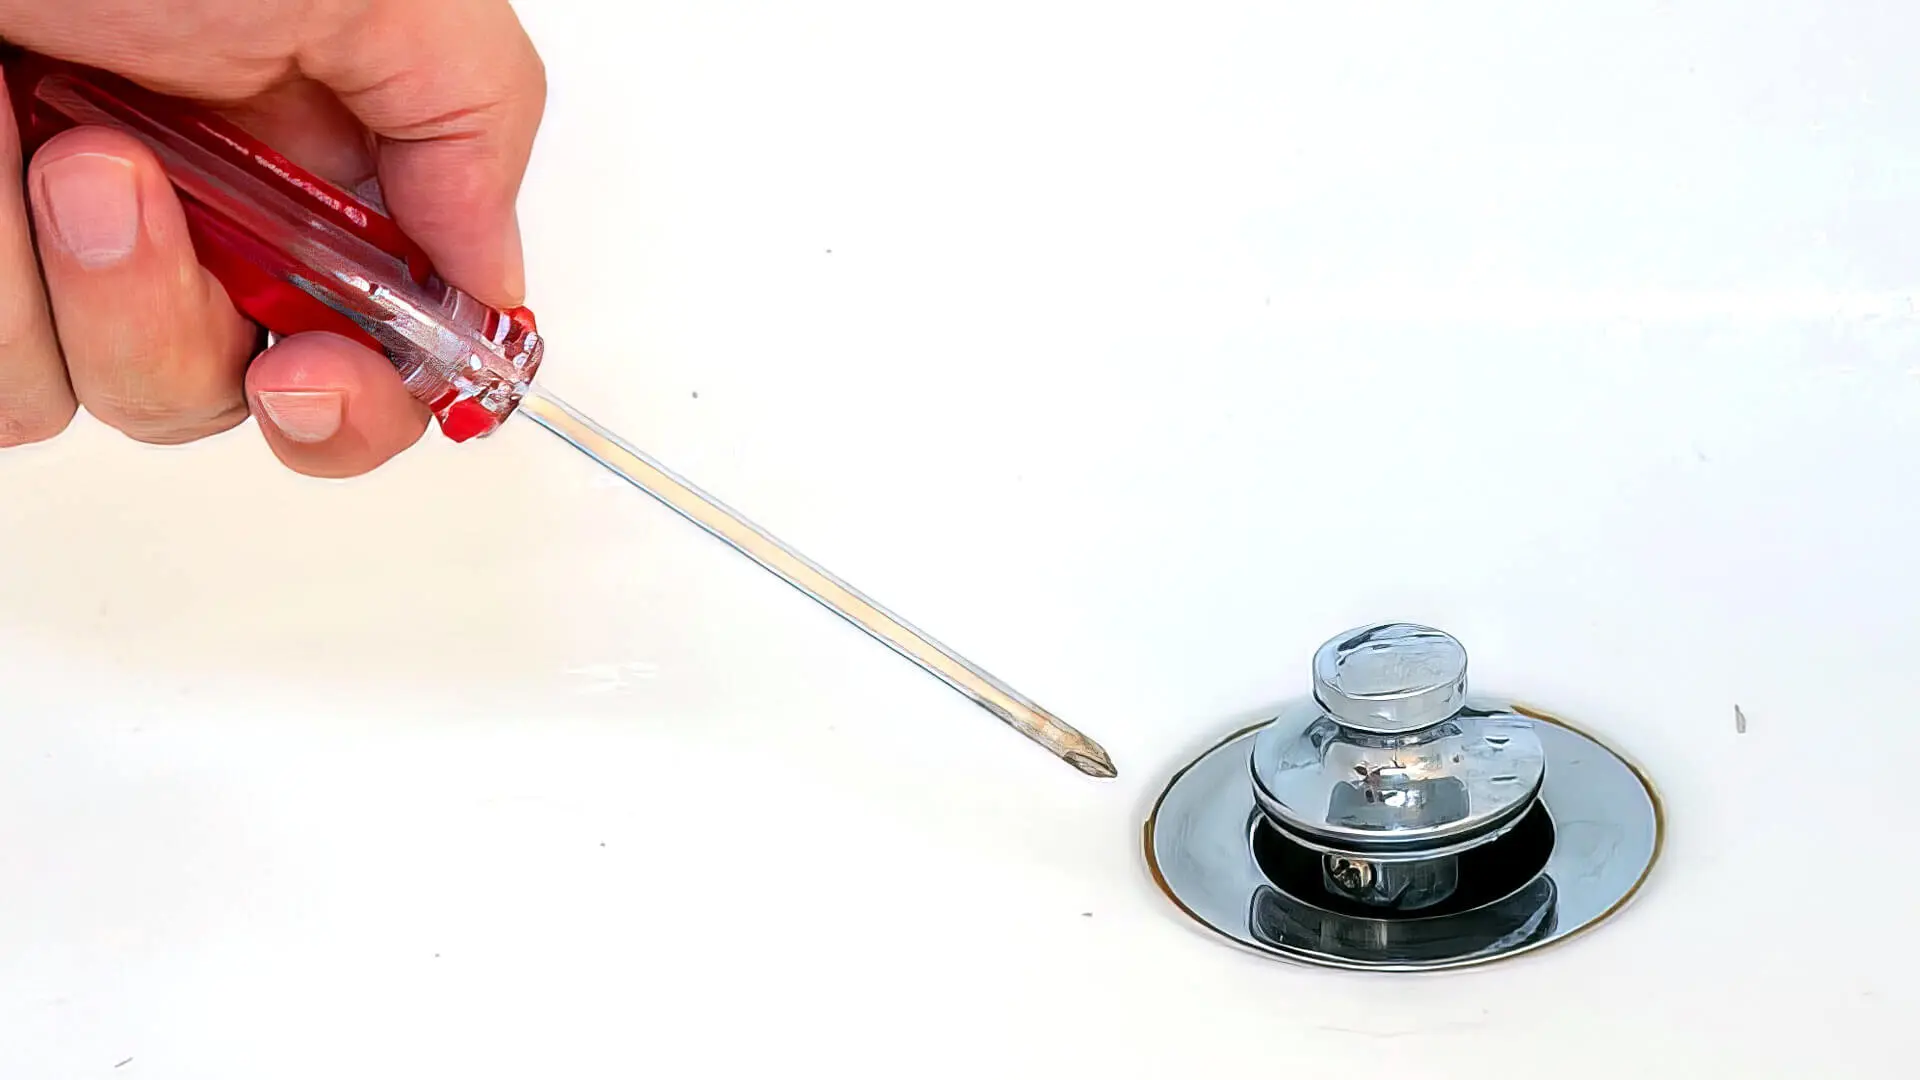
Step 1: Remove the old drain
Removing the old bathtub drain is the crucial first step in the process of replacing it with a new one. This task requires careful attention to detail and the use of appropriate tools. Here's a detailed guide on how to effectively remove the old drain:
Gather the Necessary Tools
Before starting the removal process, gather the essential tools required for this task. You will need a drain key or pliers, a screwdriver, and possibly a hacksaw if the drain is secured with a crossbar.
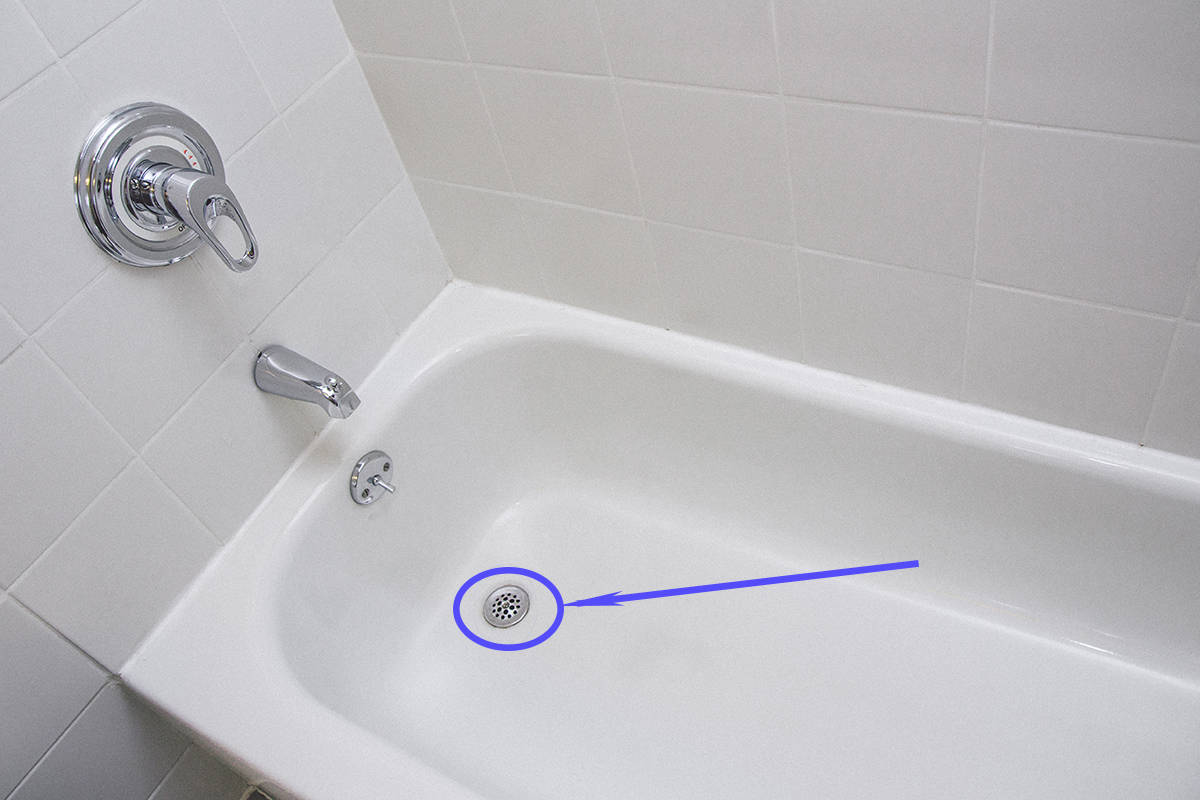
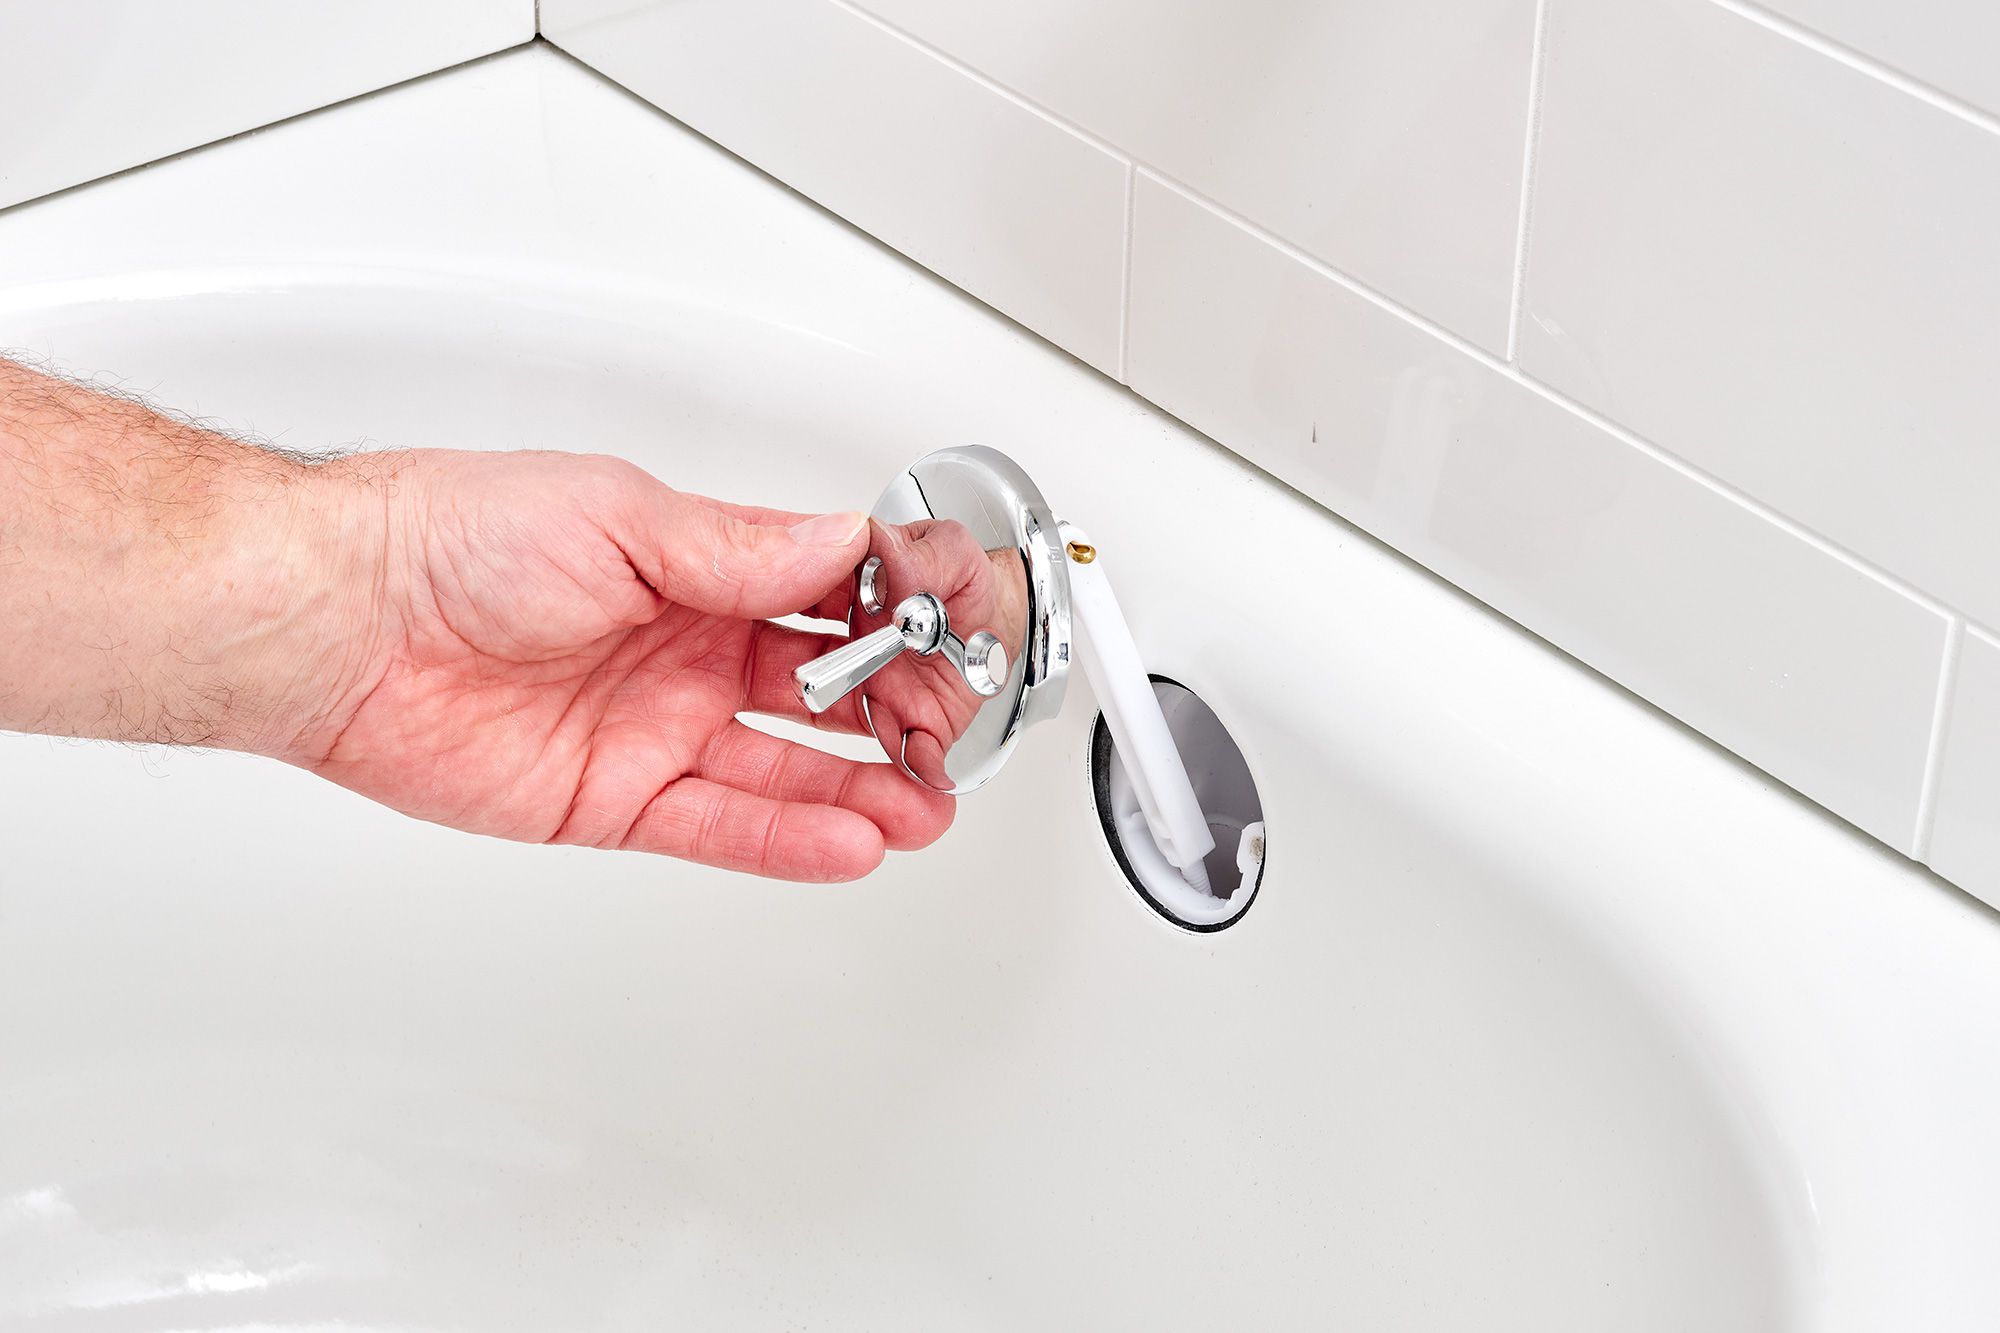
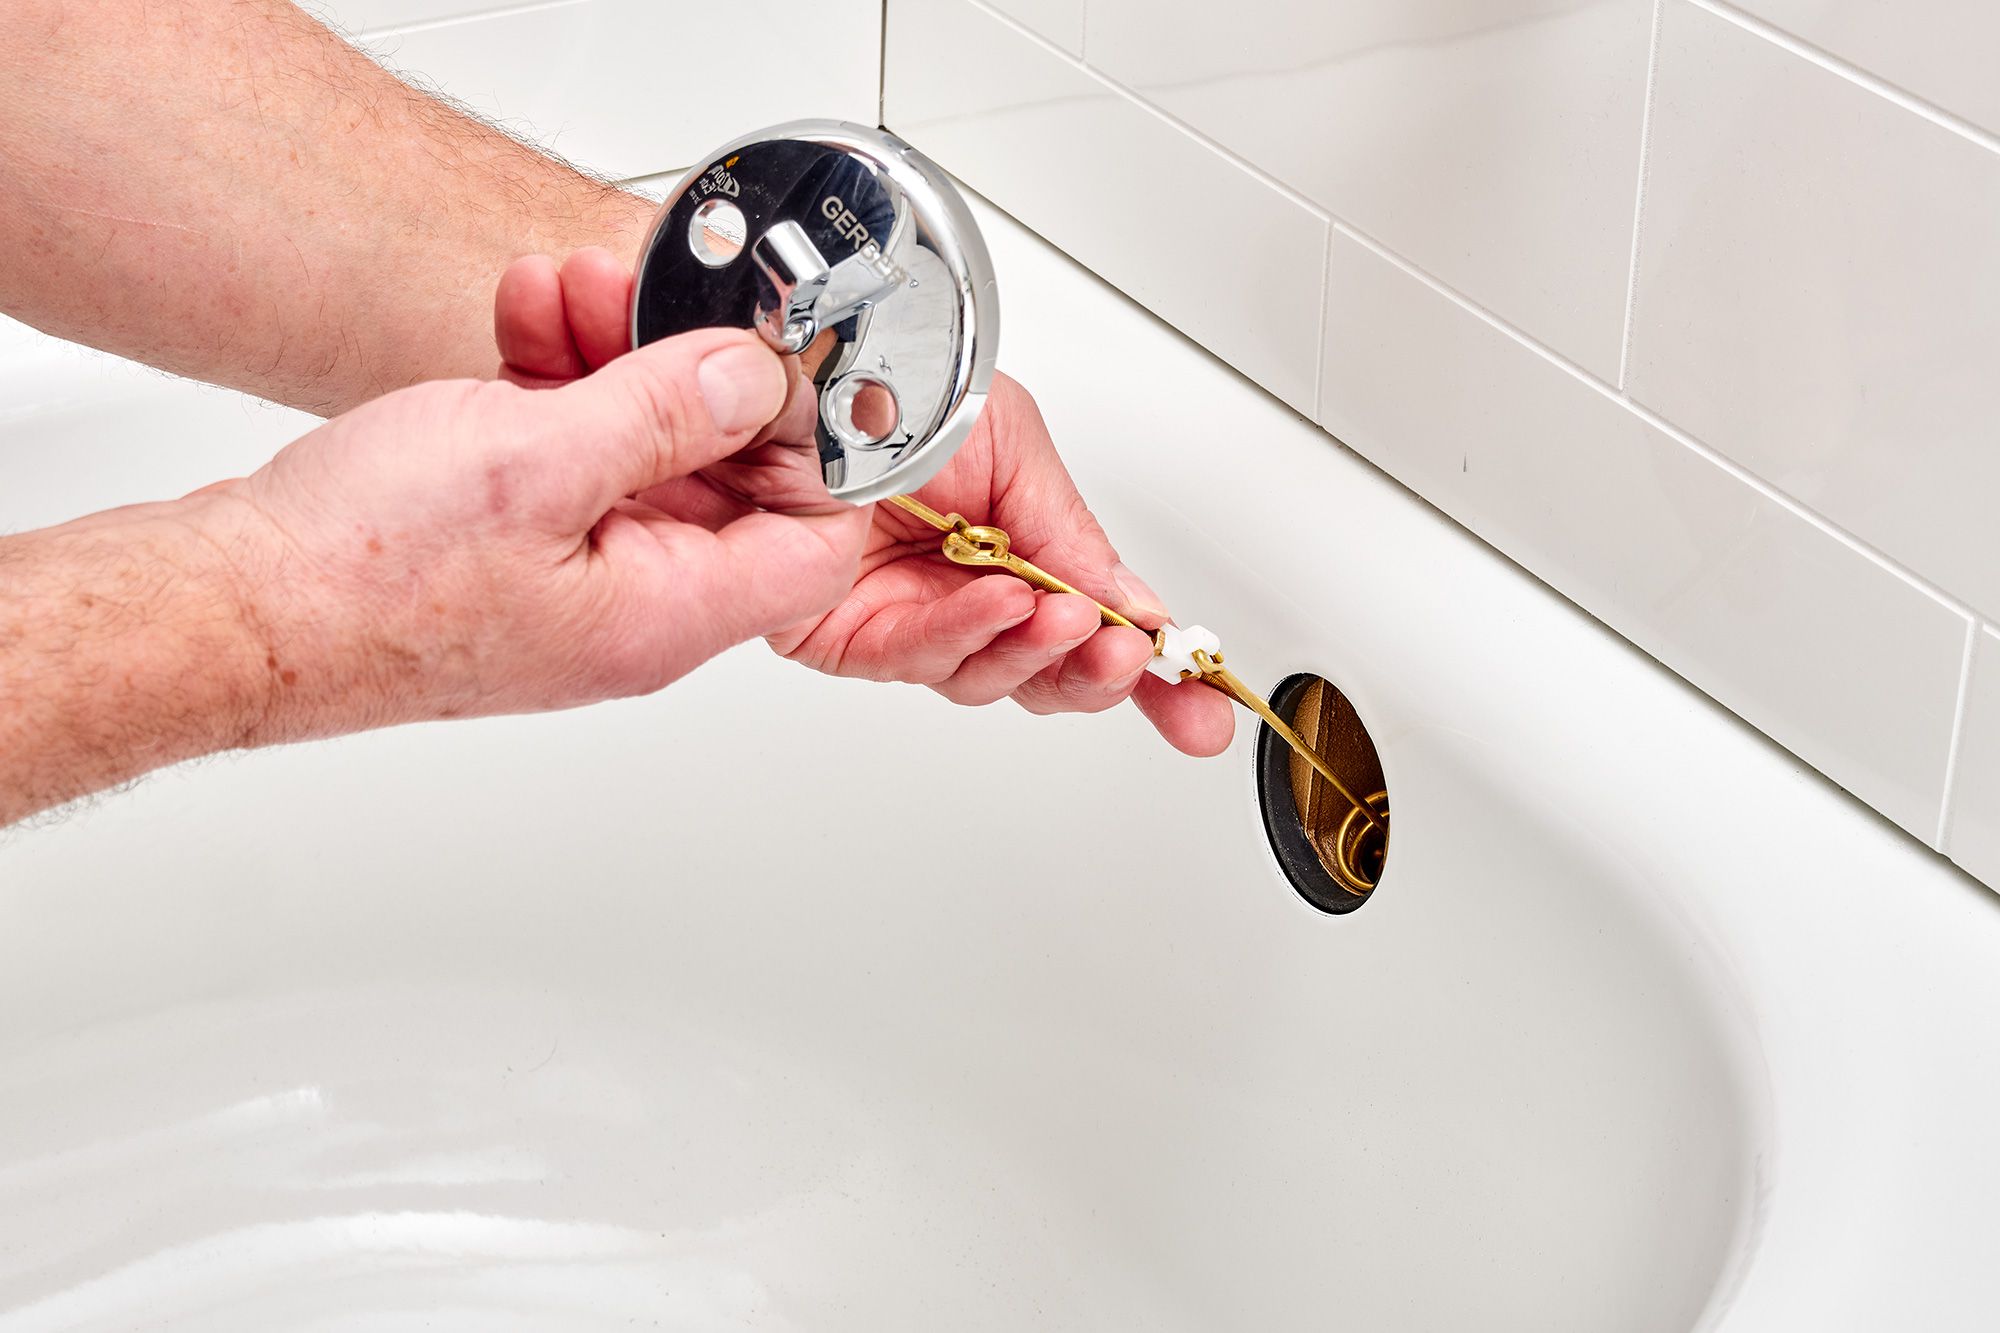
Access the Drain
To access the drain, you may need to remove the stopper or drain cover. This can typically be done by unscrewing the cover or stopper using a screwdriver. Once the cover is removed, you'll have a clear view of the drain assembly.
Loosen the Drain
Using a drain key or pliers, carefully loosen the old drain by turning it counterclockwise. It's important to exert steady pressure and avoid using excessive force to prevent damaging the surrounding plumbing fixtures.
Read more: How To Take Out Kohler Bathtub Drain
Check for a Crossbar
In some cases, the old drain may be secured in place by a crossbar underneath the tub. If this is the case, you may need to use a hacksaw to carefully cut through the crossbar, allowing you to fully remove the old drain.
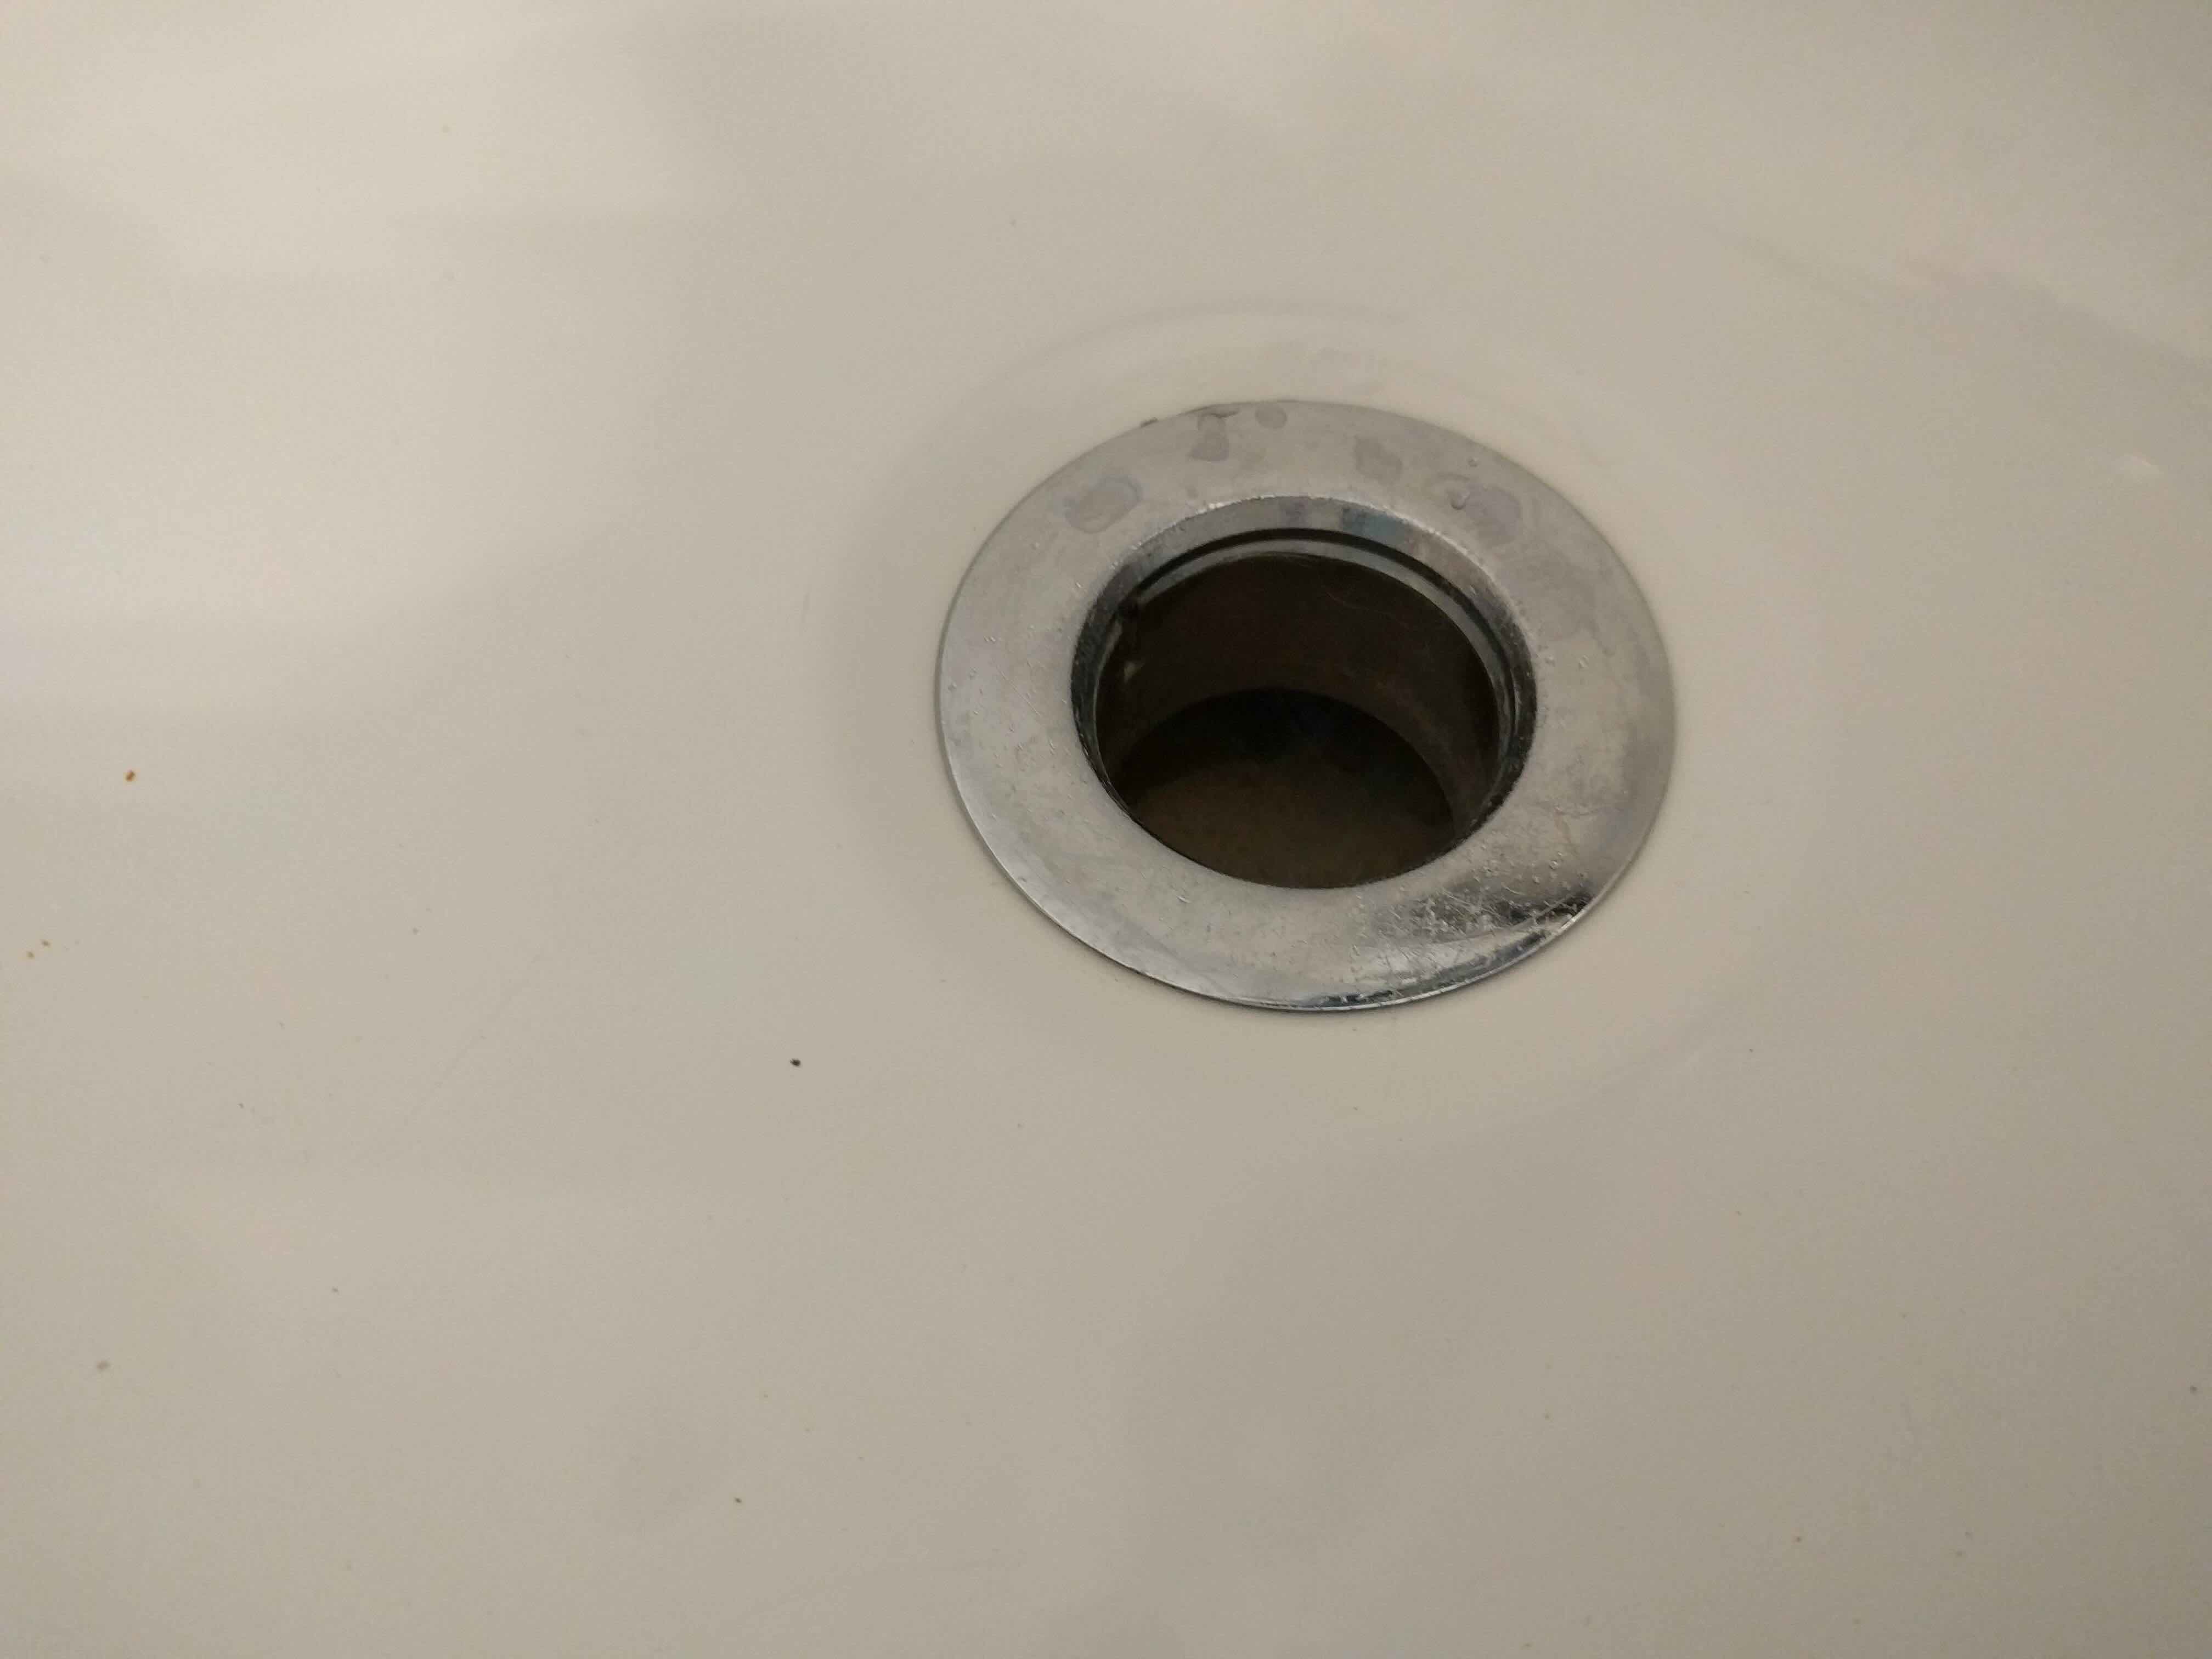
Clean the Area
After successfully removing the old drain, take a moment to clean the area around the drain opening. Use a rag to wipe away any debris or old plumber's putty, ensuring that the area is clean and ready for the installation of the new drain.
By following these steps, you can effectively remove the old bathtub drain, setting the stage for the subsequent installation of the new drain. With the old drain out of the way, you're now ready to proceed to the next step in the process of rejuvenating your bathtub with a new, efficient drain.
Step 2: Clean the area
After successfully removing the old bathtub drain, it's essential to thoroughly clean the area surrounding the drain opening. This step is crucial to ensure a proper and secure fit for the new drain. Here's a detailed guide on how to effectively clean the area:
Remove Residual Debris
Begin by inspecting the area around the drain opening for any residual debris, such as old plumber's putty, caulk, or dirt. Use a rag or paper towels to wipe away any remaining debris, ensuring that the surface is clean and free from any obstructions. This step is vital to create a smooth and even surface for the installation of the new drain.
Use a Degreaser
If the area appears to have accumulated grease or grime over time, consider using a mild degreaser to thoroughly clean the surface. Apply the degreaser according to the manufacturer's instructions and use a clean cloth to wipe away any residue. This will help ensure that the new drain adheres securely to the surface without any hindrances.
Inspect for Damage
While cleaning the area, take the opportunity to inspect the surrounding surfaces for any signs of damage or wear. Look for cracks, corrosion, or other issues that may affect the installation of the new drain. If any damage is detected, it's important to address it before proceeding with the installation to ensure a proper fit and seal for the new drain.
Dry the Surface
Once the area is clean and free from debris, use a dry cloth to thoroughly dry the surface around the drain opening. It's crucial to ensure that the area is completely dry before proceeding with the installation of the new drain. A dry surface will promote better adhesion and help prevent any potential issues during the installation process.
By following these steps, you can effectively clean the area around the drain opening, preparing it for the installation of the new bathtub drain. Taking the time to clean and inspect the area will contribute to a successful and secure installation, ensuring that your new drain functions optimally and provides reliable performance for years to come.
Step 3: Install the new drain
Installing a new bathtub drain is a pivotal step in rejuvenating your bathtub and ensuring optimal drainage performance. This process involves carefully fitting and securing the new drain to create a watertight seal and facilitate efficient water flow. Here's a comprehensive guide on how to effectively install the new drain:
Read more: How To Unfreeze Bathtub Drain
Select the Right Drain
Before beginning the installation process, ensure that you have the correct replacement drain that is compatible with your bathtub's design and plumbing configuration. Consider factors such as the drain size, type of drain assembly, and any specific features required to meet your preferences and functional needs.
Apply Plumber's Putty
Start by applying a thin, even layer of plumber's putty around the underside of the new drain flange. Plumber's putty helps create a watertight seal between the drain and the bathtub, preventing water from seeping into the subfloor. Ensure that the putty is evenly distributed to promote a secure seal.
Insert the Drain
Carefully insert the new drain into the drain opening, ensuring that it sits flush and level with the surface of the bathtub. Apply gentle pressure to seat the drain properly, taking care not to displace the plumber's putty. Verify that the drain aligns correctly with the drainpipe beneath the bathtub.
Secure the Drain
Using a drain key or pliers, securely tighten the new drain by turning it clockwise. Exercise caution to avoid over-tightening, as this can damage the drain or the surrounding plumbing components. Ensure that the drain is firmly secured in place, creating a reliable seal without any wobbling or movement.
Read more: How To Close Bathtub Drain
Test for Leaks
Once the new drain is installed, it's essential to test for leaks to confirm that the installation is successful. Fill the bathtub with water and allow it to drain completely while observing the area around the newly installed drain. Look for any signs of water leakage or seepage, which may indicate an improper seal or installation issue.
Clean Excess Putty
After confirming that the new drain is securely installed and free from leaks, use a clean cloth to carefully remove any excess plumber's putty that may have squeezed out around the drain flange. This final step helps create a neat and polished appearance while ensuring that the putty does not interfere with the drain's functionality.
By following these steps, you can effectively install the new bathtub drain, completing the process of rejuvenating your bathtub and ensuring reliable drainage performance. With the new drain in place, you can look forward to enjoying a refreshed bathtub that meets your functional and aesthetic preferences.
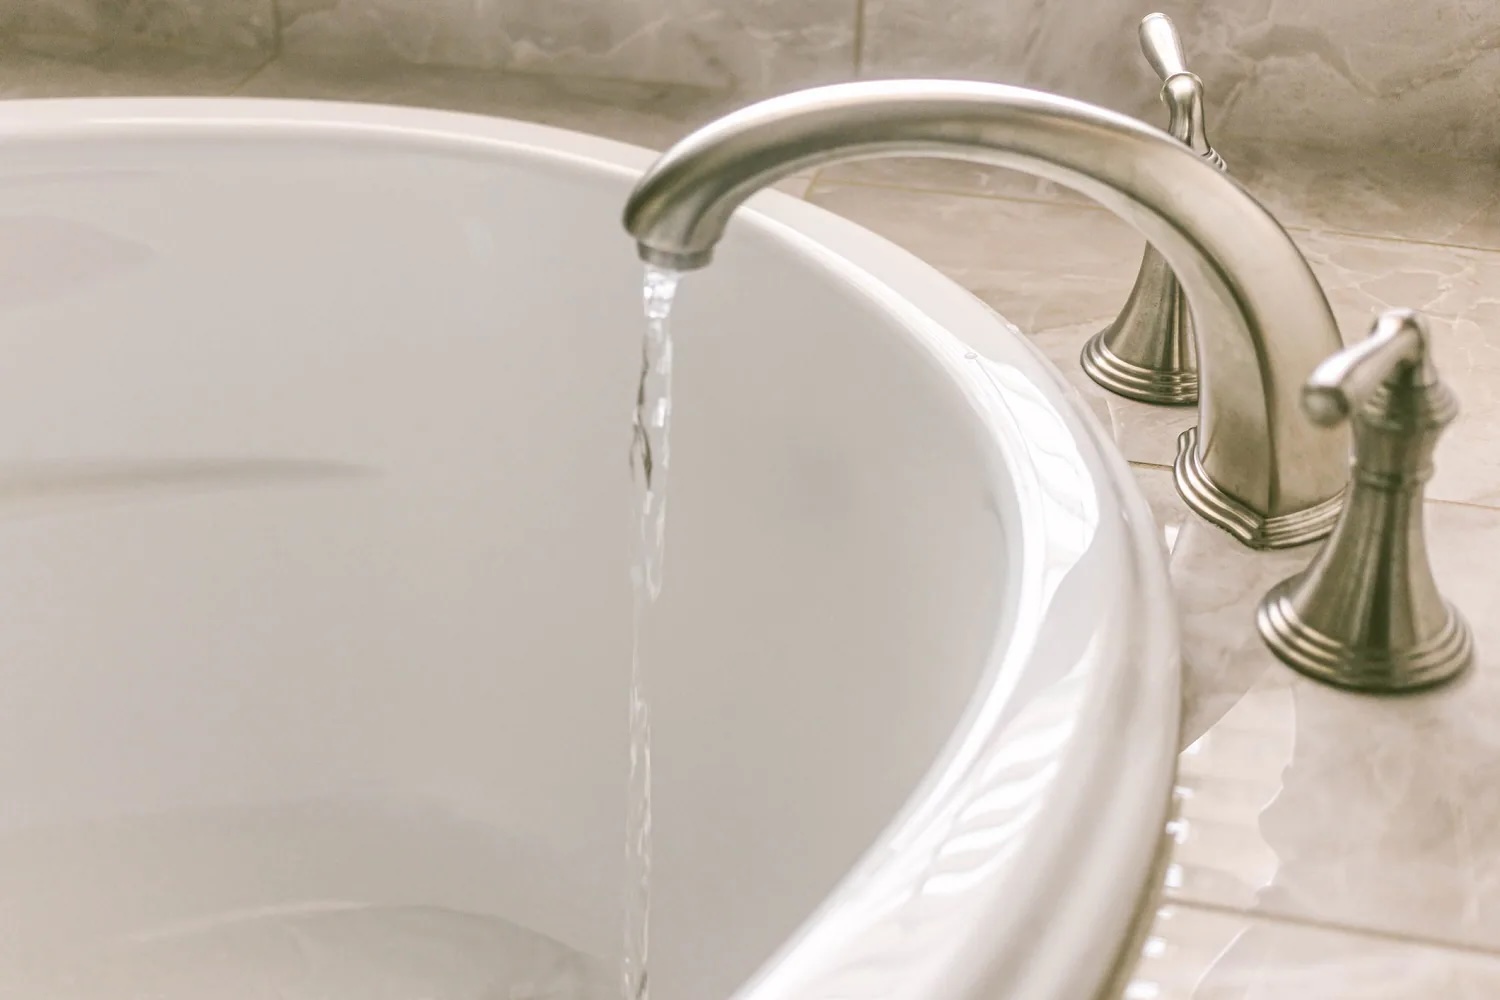
Step 4: Test the new drain
Testing the new bathtub drain is a critical step to ensure that the installation is successful and that the drain functions as intended. This process involves verifying the drainage performance, checking for leaks, and confirming that the new drain operates seamlessly. Here's a detailed guide on how to effectively test the new drain:
Fill the Bathtub
Start by filling the bathtub with water to a level that covers the newly installed drain. Use the bathtub's faucet to fill the tub, allowing the water to accumulate over the drain area. It's essential to fill the bathtub to a sufficient level to simulate typical usage and facilitate a comprehensive test of the drain's functionality.
Read more: How To Vent A Bathtub Drain
Observe the Drainage
As the bathtub fills with water, observe the drainage process closely. Pay attention to the rate at which the water drains from the tub, noting whether it flows smoothly and efficiently through the new drain. A properly installed and functioning drain should facilitate prompt and consistent water drainage without any signs of obstruction or slow drainage.
Check for Leaks
While the bathtub is filled with water, inspect the area around the new drain for any signs of leaks or seepage. Look for water accumulation, dampness, or discoloration around the drain flange and the surrounding surfaces. Any indication of leaks should be promptly addressed to ensure that the drain is properly sealed and that no water escapes into the subfloor or surrounding areas.
Test the Stopper
If your bathtub is equipped with a stopper mechanism, test its functionality during the drainage process. Engage the stopper to halt the water drainage and then release it to allow the water to drain. Verify that the stopper operates smoothly and effectively, securely sealing the drain when engaged and allowing unobstructed drainage when released.
Address Any Issues
If any issues are identified during the testing process, such as slow drainage, leaks, or stopper malfunctions, take the necessary steps to address them promptly. This may involve adjusting the drain's installation, resealing the drain with plumber's putty, or addressing any underlying issues that affect the drain's performance. It's crucial to resolve any issues to ensure that the new drain operates optimally.
Read more: How To Move A Bathtub Drain
Repeat the Test
After addressing any identified issues, repeat the testing process to confirm that the new drain functions as intended. Refill the bathtub with water and observe the drainage and stopper functionality to ensure that any previous issues have been effectively resolved. By repeating the test, you can verify that the new drain operates seamlessly and reliably.
By following these steps, you can effectively test the new bathtub drain, confirming that the installation is successful and that the drain functions optimally. A thorough testing process ensures that your bathtub is equipped with a reliable and efficient drain, providing you with the assurance of a rejuvenated bathing experience.
Conclusion
Congratulations on successfully completing the process of changing out your bathtub drain! By following the step-by-step guide provided in this article, you've taken a proactive approach to rejuvenating your bathtub and ensuring optimal drainage performance. As you reflect on the journey from removing the old drain to installing and testing the new one, it's important to acknowledge the sense of accomplishment that comes with completing a DIY home improvement project.
The decision to change out your bathtub drain not only addresses functional concerns but also presents an opportunity to personalize and upgrade an essential fixture in your home. Whether you opted for a more modern drain design, sought to resolve persistent drainage issues, or simply wanted to refresh the appearance of your bathtub, your efforts have contributed to enhancing the functionality and aesthetics of your bathing space.
As you stand back and admire the newly installed drain, take pride in the fact that you've acquired valuable skills and knowledge in the realm of home maintenance and improvement. The hands-on experience gained from this project serves as a testament to your ability to tackle practical tasks and make meaningful enhancements to your living environment.
Furthermore, the cost-saving aspect of completing this project yourself adds to the overall satisfaction. By avoiding the expense of hiring a professional plumber, you've demonstrated resourcefulness and a willingness to take on DIY challenges, ultimately contributing to the efficient management of your home maintenance budget.
Looking ahead, the successful replacement of your bathtub drain sets the stage for a rejuvenated bathing experience, free from the concerns associated with an outdated or malfunctioning drain. With a new, efficient drain in place, you can look forward to enjoying uninterrupted, reliable drainage each time you use your bathtub, adding to the comfort and convenience of your daily routine.
In conclusion, the process of changing out your bathtub drain embodies the spirit of proactive home maintenance, self-reliance, and the pursuit of an improved living environment. Your commitment to this project reflects a proactive mindset and a desire to create a space that aligns with your preferences and functional needs. As you embark on future home improvement endeavors, may the knowledge and confidence gained from this experience empower you to take on new challenges and continue enhancing your living space with creativity and practicality.
Frequently Asked Questions about How To Change Out Bathtub Drain
Was this page helpful?
At Storables.com, we guarantee accurate and reliable information. Our content, validated by Expert Board Contributors, is crafted following stringent Editorial Policies. We're committed to providing you with well-researched, expert-backed insights for all your informational needs.


0 thoughts on “How To Change Out Bathtub Drain”