
Articles
How To Clean Ice Maker Dispenser
Modified: October 27, 2024
Learn how to clean your ice maker dispenser with our informative articles. Keep your dispenser hygienic and functioning properly for ice cold drinks.
(Many of the links in this article redirect to a specific reviewed product. Your purchase of these products through affiliate links helps to generate commission for Storables.com, at no extra cost. Learn more)
Introduction
Welcome to this comprehensive guide on how to clean an ice maker dispenser. Your ice maker dispenser plays an essential role in providing you with refreshing ice cubes and chilled beverages. However, over time, it can accumulate dirt, bacteria, and other impurities, which can affect the quality of the ice and even lead to potential health risks.
Regular cleaning of your ice maker dispenser is crucial to ensure that it continues to operate efficiently and produces clean and safe ice. By following the steps outlined in this article, you will be able to maintain a clean and well-functioning ice maker dispenser, prolonging its lifespan and providing you with refreshing ice whenever you need it.
Key Takeaways:
- Regularly cleaning your ice maker dispenser is crucial for maintaining its performance, functionality, and the quality of the ice it produces. Follow the step-by-step guide to keep it clean, safe, and running smoothly.
- Proper maintenance and hygiene of your ice maker dispenser are essential for ensuring the longevity and efficient operation of this essential appliance. Regular cleaning improves the quality and taste of the ice while preventing clogs and malfunctions.
Read more: How To Clean A Igloo Ice Maker
Step 1: Gather the necessary supplies
Before you begin the cleaning process, it’s important to gather all the necessary supplies. Here’s a list of items you’ll need:
- Warm water
- Mild dish soap
- Vinegar or lemon juice
- Soft cloth or sponge
- Toothbrush
- Small brush or pipe cleaner
Make sure to have these supplies on hand before you proceed to the next steps. Having all the necessary items readily available will help make the cleaning process more efficient and seamless.
Step 2: Shut off the ice maker dispenser
Before you start cleaning, it’s important to shut off the ice maker dispenser to ensure your safety and prevent any accidents. Locate the power switch or circuit breaker that controls the dispenser and turn it off. This will prevent the dispenser from dispensing ice while you are cleaning it.
If your ice maker dispenser is connected to the water supply, you may also need to shut off the water valve to prevent any water flow during the cleaning process. Locate the water shut-off valve, typically located under the sink or behind the refrigerator, and turn it off.
By shutting off the power and water supply to the ice maker dispenser, you can safely proceed with the cleaning process without any interruptions.
Step 3: Remove ice from the dispenser
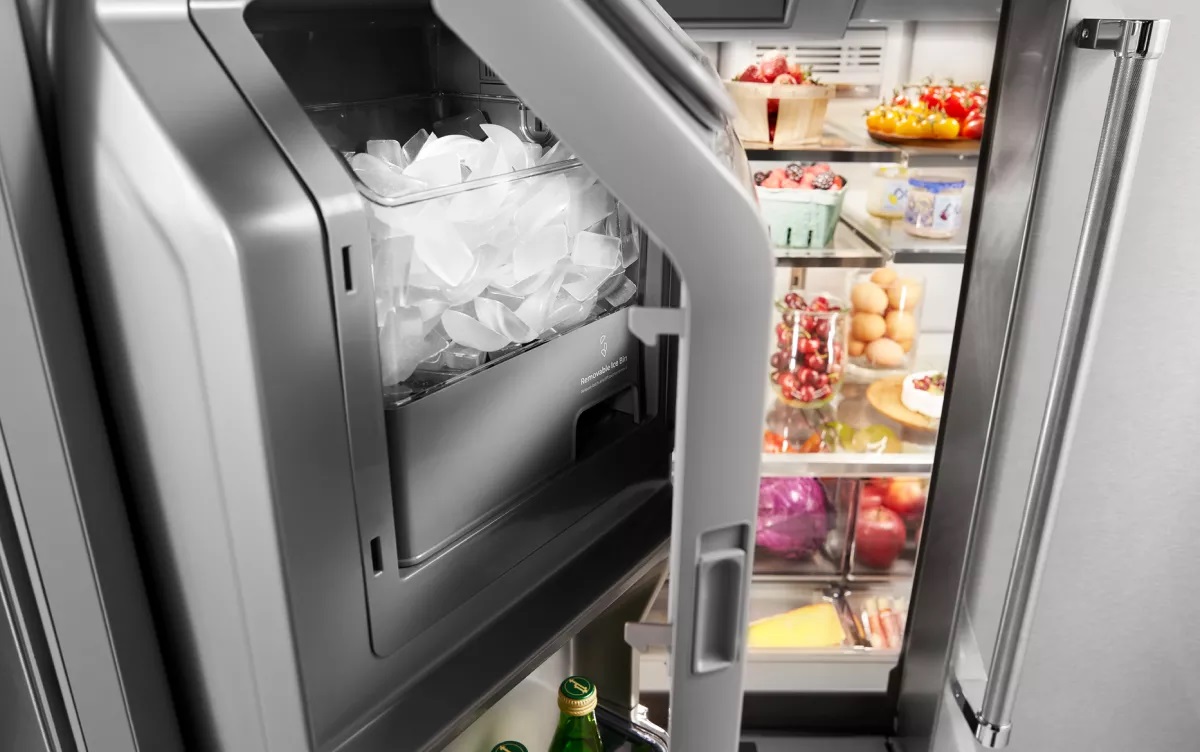
Before you can clean the ice maker dispenser, you’ll need to remove any existing ice from the dispenser tray and storage bin. This step is important to ensure that you have a clean surface to work with.
To remove the ice, simply press the dispenser lever or button to dispense all the ice cubes. If necessary, use a scoop or a clean utensil to remove any remaining ice. Transfer the ice to a separate container or discard it if it’s no longer needed.
Once the ice has been removed, you can proceed to the next step and begin cleaning the various components of the ice maker dispenser.
Step 4: Clean the dispenser tray
The dispenser tray is where the ice is collected and dispensed from. Over time, this tray can accumulate dirt, residue, and even mold, which can affect the quality and cleanliness of the ice cubes. Follow these steps to clean the dispenser tray:
- Start by preparing a solution of warm water and mild dish soap.
- Dip a soft cloth or sponge into the soapy water and gently scrub the dispenser tray. Pay close attention to any areas with stubborn stains or residue.
- Rinse the dispenser tray thoroughly with clean water to remove any soap residue.
- For any hard-to-reach areas or small crevices in the dispenser tray, use a toothbrush or a small brush to scrub away any dirt or debris.
- Once the dispenser tray is clean, wipe it dry with a clean cloth or allow it to air-dry completely.
It is important to ensure that the dispenser tray is thoroughly cleaned and dried to prevent the growth of mold or bacteria. Regular cleaning of the dispenser tray will help maintain the cleanliness and functionality of your ice maker dispenser.
To clean an ice maker dispenser, mix equal parts water and vinegar, then use a soft cloth to wipe down the dispenser and remove any built-up residue. Be sure to rinse thoroughly with water afterward.
Read more: How To Clean Out An Ice Maker
Step 5: Clean the ice storage bin
The ice storage bin is where the ice cubes are stored until they are dispensed. It is important to keep this area clean to ensure the quality and safety of the ice. Here’s how you can clean the ice storage bin:
- Empty the remaining ice from the storage bin and discard it.
- Prepare a solution of equal parts vinegar or lemon juice and water.
- Using a soft cloth or sponge soaked in the vinegar or lemon juice solution, wipe down the interior surfaces of the ice storage bin. Pay special attention to any stains or residue.
- For stubborn stains or buildup, use a toothbrush or small brush to gently scrub the affected areas.
- Rinse the ice storage bin thoroughly with clean water to remove any leftover vinegar or lemon juice solution.
- Wipe the interior of the ice storage bin dry with a clean cloth or allow it to air-dry completely.
Regularly cleaning the ice storage bin will help eliminate any bacteria or mold that may have accumulated over time. This will ensure that the ice produced by your ice maker dispenser remains safe for consumption.
Step 6: Clean the ice chute and ice dispenser mechanism
The ice chute and ice dispenser mechanism are crucial components of the ice maker dispenser that can become dirty and affect the ice dispensing process. Follow these steps to clean the ice chute and ice dispenser mechanism:
- Prepare a solution of warm water and mild dish soap.
- Dip a soft cloth or sponge into the soapy water and gently wipe down the ice chute and the surrounding area. Pay attention to any built-up residue or debris.
- For any hard-to-reach areas or stubborn stains, use a toothbrush or a small brush to brush away the dirt or grime.
- Rinse the ice chute and dispenser mechanism thoroughly with clean water to remove any soap residue.
- After rinsing, use a clean cloth or towel to wipe away any remaining moisture and ensure the surfaces are dry.
- If there are any visible signs of mold or mildew, you can use a solution of equal parts water and vinegar to help disinfect and remove the growth. Be sure to rinse thoroughly afterward.
Regular cleaning of the ice chute and ice dispenser mechanism will help prevent blockages and ensure smooth and efficient ice dispensing. It will also maintain the cleanliness of the ice, making it safe for consumption.
Step 7: Wipe down the exterior of the ice maker dispenser
In addition to cleaning the internal components, it’s important to give attention to the exterior of the ice maker dispenser. This step will help maintain its overall cleanliness and appearance. Here’s how you can effectively clean the exterior:
- Prepare a solution of warm water and mild dish soap.
- Dip a clean cloth or sponge into the soapy water and gently wipe down the exterior surfaces of the ice maker dispenser. Pay attention to any areas with visible stains or fingerprints.
- If the exterior surfaces are made of stainless steel, you can use a stainless steel cleaner or a solution of vinegar and water to remove any smudges or stubborn stains. Be sure to follow the manufacturer’s instructions for stainless steel cleaning.
- For any buttons or touchscreens, use a damp cloth to gently wipe away any dirt or residue. Avoid applying excessive moisture to these areas.
- Once the exterior surfaces are clean, use a dry cloth to remove any remaining moisture and ensure a streak-free finish.
Cleaning the exterior of the ice maker dispenser not only keeps it looking fresh and clean but also prevents the buildup of grime and bacteria. Regular maintenance of the exterior will enhance the overall hygiene and longevity of the dispenser.
Step 8: Reassemble and turn on the ice maker dispenser
After completing the cleaning process, it’s time to reassemble the various components of the ice maker dispenser and turn it back on. Follow these steps to complete the final stage:
- Ensure that all the cleaned components are completely dry before reassembling.
- Place the dispenser tray back into its designated position.
- Reconnect the ice storage bin and ensure it is securely in place.
- Turn on the water valve if the dispenser is connected to the water supply.
- Switch on the power or reset the circuit breaker to restore electricity to the ice maker dispenser.
- Wait for the ice maker dispenser to start producing ice. This may take some time, so be patient and allow the dispenser to go through a few cycles to ensure everything is functioning properly.
- Dispose of the first batch of ice produced after cleaning to ensure any lingering cleaning solution or debris is flushed out.
By carefully reassembling the components and turning on the ice maker dispenser, you can now enjoy clean and refreshing ice without any worries.
Remember to regularly clean and maintain your ice maker dispenser to ensure optimal performance and cleanliness. Follow the manufacturer’s guidelines and perform routine cleanings to keep your ice maker dispenser in top condition.
Read more: How To Clean A Silonn Ice Maker
Conclusion
Cleaning your ice maker dispenser is essential for maintaining its performance, functionality, and the quality of the ice it produces. By following the step-by-step guide outlined in this article, you can keep your ice maker dispenser clean, safe, and running smoothly.
Starting with gathering the necessary supplies, shutting off the ice maker dispenser, and removing any existing ice, each step is designed to thoroughly clean the various components of the dispenser. Cleaning the dispenser tray, ice storage bin, ice chute, ice dispenser mechanism, and the exterior of the dispenser will ensure that your ice maker dispenser remains free from dirt, residue, and potential contaminants.
Regularly cleaning your ice maker dispenser not only improves the quality and taste of the ice but also helps maintain its lifespan by preventing clogs and malfunctions. It’s important to note that different models of ice maker dispensers may have specific cleaning recommendations from the manufacturer. Always refer to the user manual for any additional instructions or precautions.
By following these cleaning steps on a regular basis, you can enjoy clean and refreshing ice cubes with every dispense. Don’t overlook the importance of proper maintenance and hygiene when it comes to your ice maker dispenser – a little effort goes a long way in ensuring the longevity and efficient operation of this essential appliance.
Frequently Asked Questions about How To Clean Ice Maker Dispenser
Was this page helpful?
At Storables.com, we guarantee accurate and reliable information. Our content, validated by Expert Board Contributors, is crafted following stringent Editorial Policies. We're committed to providing you with well-researched, expert-backed insights for all your informational needs.

0 thoughts on “How To Clean Ice Maker Dispenser”