Articles
How To Close In A Carport
Modified: December 6, 2023
Learn how to close in a carport with our informative articles. Gain valuable insights and tips to convert your carport into a secure, versatile space.
(Many of the links in this article redirect to a specific reviewed product. Your purchase of these products through affiliate links helps to generate commission for Storables.com, at no extra cost. Learn more)
Introduction
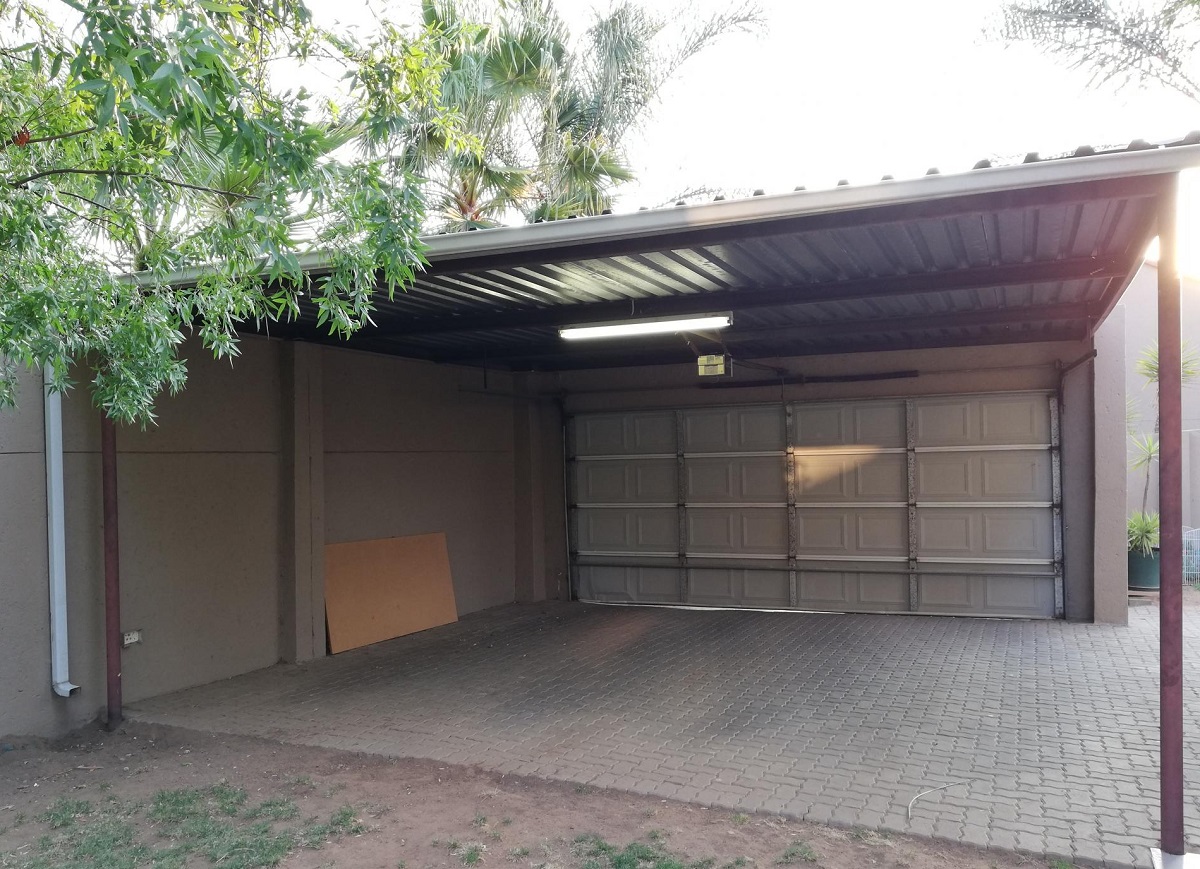
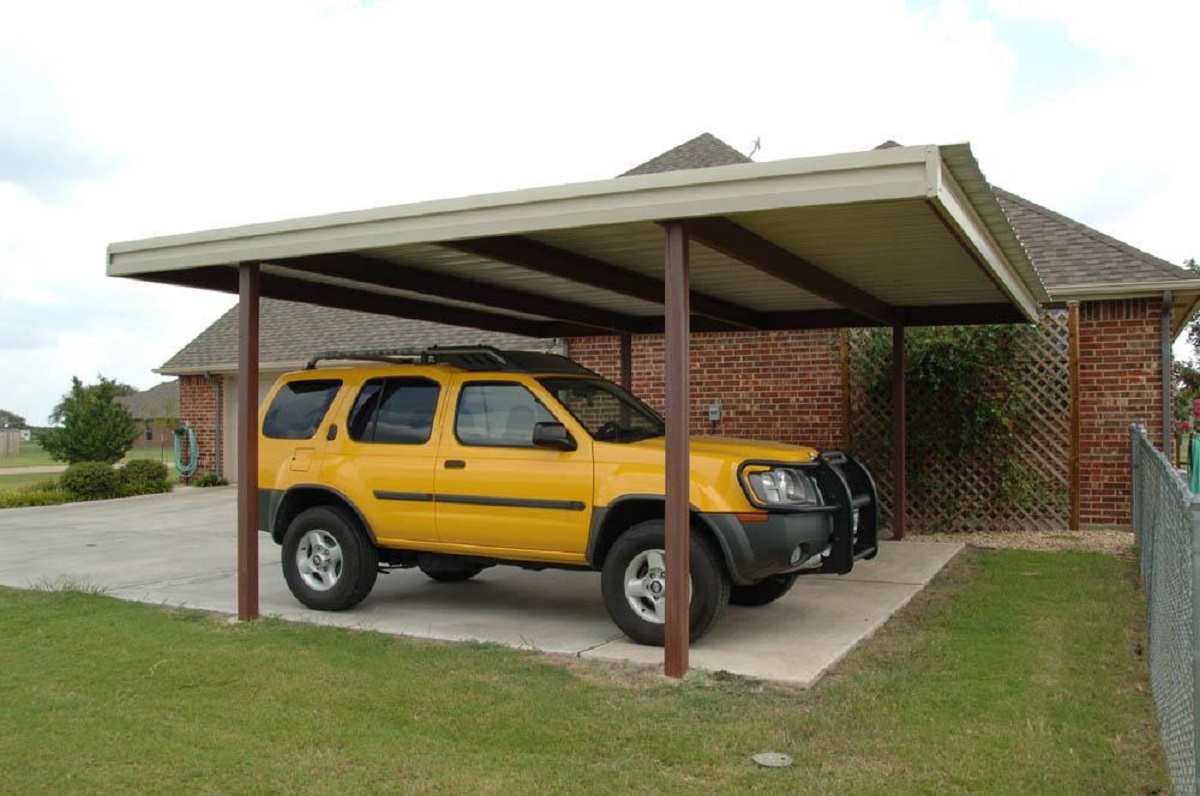
A carport is a valuable investment for homeowners, offering protection for vehicles from harsh weather conditions and providing additional storage space. However, there may come a time when you need to close in your carport to provide even greater protection or convert it into a more secure area. In this article, we will guide you through the steps to effectively close in your carport.
By following these steps, you can transform your carport into a fully enclosed structure that offers enhanced security and versatility. Whether you are looking to create a workshop, home office, or simply want to safeguard your vehicles, closing in a carport is a practical and achievable project that can be completed with the right materials and techniques.
Before embarking on this project, it is important to check with your local building codes and regulations to ensure compliance. This will help you avoid any potential issues or violations that may arise during the closure process. Once you have the necessary permits and approvals, you can begin gathering the materials needed and start the transformation process.
Key Takeaways:
- Transform your carport into a secure and versatile space by following the steps outlined in the article. From gathering materials to testing the closure, each step is crucial for a successful and durable enclosed carport.
- Consider local building codes, choose high-quality materials, and pay attention to aesthetics when closing in your carport. Enjoy the benefits of added security, protection, and enhanced property value.
Read more: How To Make A Carport
Step 1: Gather necessary materials
Before you begin closing in your carport, it is essential to gather all the necessary materials to ensure a smooth and successful project. Here is a list of items you will need:
- Measuring tape
- Power drill
- Screws and screwdriver
- Stud finder
- Hammer
- Nails
- Weatherproofing materials
- Insulation materials
- Wall panels or sheets
- Door and window frames
- Door locks
Having these materials on hand will make the process smoother and ensure that you have everything you need to complete the closure. It is important to choose high-quality materials that are durable and weather-resistant, as they will provide the best protection for your carport.
Additionally, consider the design and aesthetic of your carport and choose materials that complement the existing structure. This will help create a cohesive look and ensure that the closure blends seamlessly with the rest of your property.
Take accurate measurements of the carport area to determine the quantity of materials needed. This will prevent any wastage or the need for additional trips to the store during the construction process.
Once you have gathered the necessary materials, you are ready to move on to the next step: clearing the carport area.
Step 2: Clear the carport area
Before you can begin closing in your carport, it is crucial to clear the area of any items or clutter. This will provide you with a clean and blank canvas to work with, allowing for a smooth and efficient installation process.
Start by removing any vehicles, tools, or equipment from the carport. This will give you ample space to move around and work without any obstructions. Store these items temporarily in a safe and secure location to ensure they are not damaged during the closure process.
Next, remove any debris, such as leaves, sticks, or dirt, that may have accumulated in the carport. Sweeping or using a leaf blower can help you quickly and effectively clear the area. Pay close attention to corners and crevices, as debris may have collected in these areas.
Inspect the carport for any structural issues or damage that may need to be addressed before closing it in. Check for any loose or damaged beams, supports, or roofing. Repair or replace these elements as necessary to ensure the stability and integrity of the structure.
Once the carport area is cleared and any necessary repairs are made, you are ready to move on to the next step: securing any loose items.
Keep in mind that proper preparation and clearing of the carport area will not only ensure a smooth installation process, but it will also help create a safer and more organized workspace. Taking the time to clear the area will ultimately save you time and effort in the long run.
Step 3: Secure any loose items
Before closing in your carport, it is important to secure any loose items that could potentially cause damage or hinder the installation process. This step ensures the safety of your belongings and minimizes the risk of accidents during construction.
Start by securing any shelving units, cabinets, or storage containers in the carport. Use screws or bolts to fasten them to the walls or floor, ensuring that they are stable and unable to topple over. This step will prevent any potential hazards and keep your belongings protected.
If there are any hanging or suspended items, such as tools or bicycles, make sure to secure them properly. Use hooks, brackets, or straps to hold them in place and prevent them from swinging or falling. This will prevent damage to the items and reduce the risk of injury.
Additionally, if your carport has windows or glass panels, consider reinforcing them or covering them to protect against accidental breakage during the closure process. You can use protective film, cardboard, or plywood to provide temporary shielding.
Take the time to organize and store any loose items that you won’t be using during the carport closure. This will ensure that they are safely stored away from the construction area and prevent them from getting damaged or misplaced.
By securing any loose items in your carport, you create a safer and more organized workspace for the closure installation. With everything secured and protected, you can proceed with peace of mind to the next step: closing the carport door.
Step 4: Close the carport door
Closing the carport door is a crucial step in the process of closing in your carport. This step involves installing a suitable door that provides security, insulation, and easy access to the enclosed area.
Start by measuring the opening of the carport to determine the dimensions for your door. Take precise measurements of the width and height, ensuring that your door will fit perfectly into the space. Keep in mind that you may need to add an inch or two to the measurements to allow for proper installation.
Next, choose a door that suits your needs and complements the overall design of your carport. There are various options available, such as roll-up doors, sliding doors, or hinged doors. Consider factors such as durability, insulation, and ease of use when selecting the right door for your carport.
Once you have selected the door, carefully follow the manufacturer’s instructions for installation. This may involve attaching hinges, tracks, or any other required hardware. Use a power drill and screws to secure the door in place, ensuring that it is level and securely attached to the carport structure.
After the door is installed, test it to ensure that it opens and closes smoothly. Make any necessary adjustments to the door hardware or track to ensure proper operation. Additionally, check for any gaps or openings around the door and seal them using weatherstripping or caulk to prevent drafts or water from entering the enclosed area.
Closing the carport door is a significant step in transforming your carport into a closed and secure space. Once the door is successfully installed, you can move on to the next step: checking for any remaining openings.
Make sure all doors and windows are securely closed and locked. Use a carport cover or tarp to protect your vehicle from the elements. Consider installing a motion-activated security light for added protection.
Read more: How To Build A Carport
Step 5: Check for any remaining openings
After closing the carport door, it is essential to check for any remaining openings or gaps that could compromise the closure. Identifying and addressing these openings is crucial to ensure that your enclosed carport provides maximum protection against external elements.
Begin by thoroughly inspecting the walls and roof of your carport. Look for any cracks, holes, or gaps where air, water, or pests can enter. Pay close attention to the corners, joints, and areas where different materials meet, as these are common areas for openings to occur.
If you find any openings, take note of their size and location. Depending on the size and nature of the opening, you may need to use different techniques or materials to seal them properly.
To seal smaller gaps or cracks, you can use silicone caulk or weatherstripping. Apply the caulk or weatherstripping to the gap or crack, making sure to create a tight seal. Use a putty knife or your finger to smooth out the caulk and ensure a neat finish.
For larger openings, such as gaps between panels or sections of the carport, you may need to use additional materials. Plywood or wall panels can be affixed to cover and seal these openings, providing added insulation and protection.
It is important to ensure that all openings are properly sealed to prevent drafts, moisture, and pests from entering the enclosed carport. This step will help maintain a comfortable and secure environment inside the carport.
Once you have addressed all the openings, you are ready to move on to the next step: securing the closure mechanisms.
Step 6: Secure the closure mechanisms
Securing the closure mechanisms of your carport is an important step to ensure the stability and functionality of the enclosure. Properly securing the mechanisms will help prevent any unwanted movement or damage to the structure.
Start by inspecting the closure mechanisms, such as hinges, locks, and latches. Check for any loose or damaged components that may need to be repaired or replaced. Tighten any loose screws or bolts to ensure that everything is properly aligned and secure.
If your carport has roll-up doors, make sure the tracks are aligned correctly and the springs are properly tensioned. Lubricate the tracks and rollers to ensure smooth operation. If needed, consult the manufacturer’s instructions for adjusting the tension or contacting a professional for assistance.
For hinged doors, check if the door swings freely and that the hinges are securely fastened to the carport structure. If necessary, tighten or replace any loose or damaged hinges. Ensure that the door opens and closes smoothly without any obstructions.
If your carport has windows or ventilation openings, ensure that they are securely closed or have appropriate covers to prevent unwanted access or damage. Install locks or secure latches to keep them tightly closed and provide an added layer of security.
Lastly, consider adding additional security measures such as motion sensor lights, alarms, or surveillance cameras to enhance the protection of your enclosed carport. These measures can help deter potential intruders and provide you with peace of mind.
By properly securing the closure mechanisms, you ensure that your carport remains in place and functions effectively. This step is crucial for the overall durability and longevity of the enclosed structure.
With the closure mechanisms secured, it’s time to move on to the final step: testing the closure.
Step 7: Test the closure
The final step in closing in your carport is to thoroughly test the closure to ensure that everything is functioning properly and providing the desired level of security. Testing allows you to identify any potential issues or adjustments that may need to be made before considering the project complete.
Begin by testing the functionality of the carport door. Open and close it multiple times to ensure smooth operation and proper alignment. Pay attention to any unusual sounds, resistance, or misaligned tracks. If you notice any issues, make necessary adjustments or consult a professional for assistance.
Check the door locks to ensure they securely fasten and protect the enclosed area. Test each lock, ensuring they engage and disengage smoothly. Verify that the locks provide the desired level of security and peace of mind.
Inspect the closure for any gaps or openings that may have been missed during the sealing process. Look for daylight or any signs of air or water leakage. Address any detected issues promptly, applying additional weatherstripping or caulking as necessary.
Test the overall structural integrity of the closure by applying light pressure to different areas. This will help identify any weak spots or areas that may require reinforcement. Pay attention to any unusual movement or instability and address it promptly.
Finally, assess the effectiveness of the closure in terms of insulation and protection from external elements. Check for drafts, moisture, or unwanted pests that may have found their way inside. Adjust insulation materials or add additional barriers if needed.
By thoroughly testing the closure, you can ensure that your carport is fully sealed, secure, and functioning optimally. This step provides the final assurance that your closure project has been successful.
With the closure successfully tested, you can now enjoy the benefits of a fully enclosed carport that offers enhanced protection and versatility.
Conclusion
Closing in your carport is a worthwhile project that can provide numerous benefits, including added security, protection from the elements, and expanded usability. By following the steps outlined in this article, you can successfully transform your carport into a fully enclosed and functional space.
From gathering the necessary materials to testing the closure, each step in the process plays a crucial role in ensuring a successful outcome. Taking the time to clear the carport area, secure loose items, install a proper door, seal any openings, and test the closure will provide you with a durable and reliable enclosed carport.
Throughout the process, it is important to consider local building codes and regulations to ensure compliance and avoid potential issues. Additionally, choosing high-quality materials and employing proper techniques will ensure longevity and efficiency in your closure project.
Remember to pay attention to the aesthetic aspect of the closure as well. Select materials and designs that complement your property and provide a cohesive look and feel. A well-designed and properly closed carport will enhance the overall appearance of your home.
Whether you are closing in your carport to create a workshop, storage space, or simply seeking to protect your vehicles, this project can greatly improve the functionality and value of your property. Enjoy the benefits of a fully enclosed carport and make the most of your newfound space.
Lastly, don’t hesitate to seek professional assistance if needed. Consulting with experts or contractors can ensure that your closure project is completed to the highest standards and meets all safety requirements.
With a closed carport, you can have peace of mind knowing that your vehicles, belongings, and the additional space are well-protected and secure. So, roll up your sleeves and embark on this exciting project to maximize the potential of your carport!
Frequently Asked Questions about How To Close In A Carport
Was this page helpful?
At Storables.com, we guarantee accurate and reliable information. Our content, validated by Expert Board Contributors, is crafted following stringent Editorial Policies. We're committed to providing you with well-researched, expert-backed insights for all your informational needs.


0 thoughts on “How To Close In A Carport”