Articles
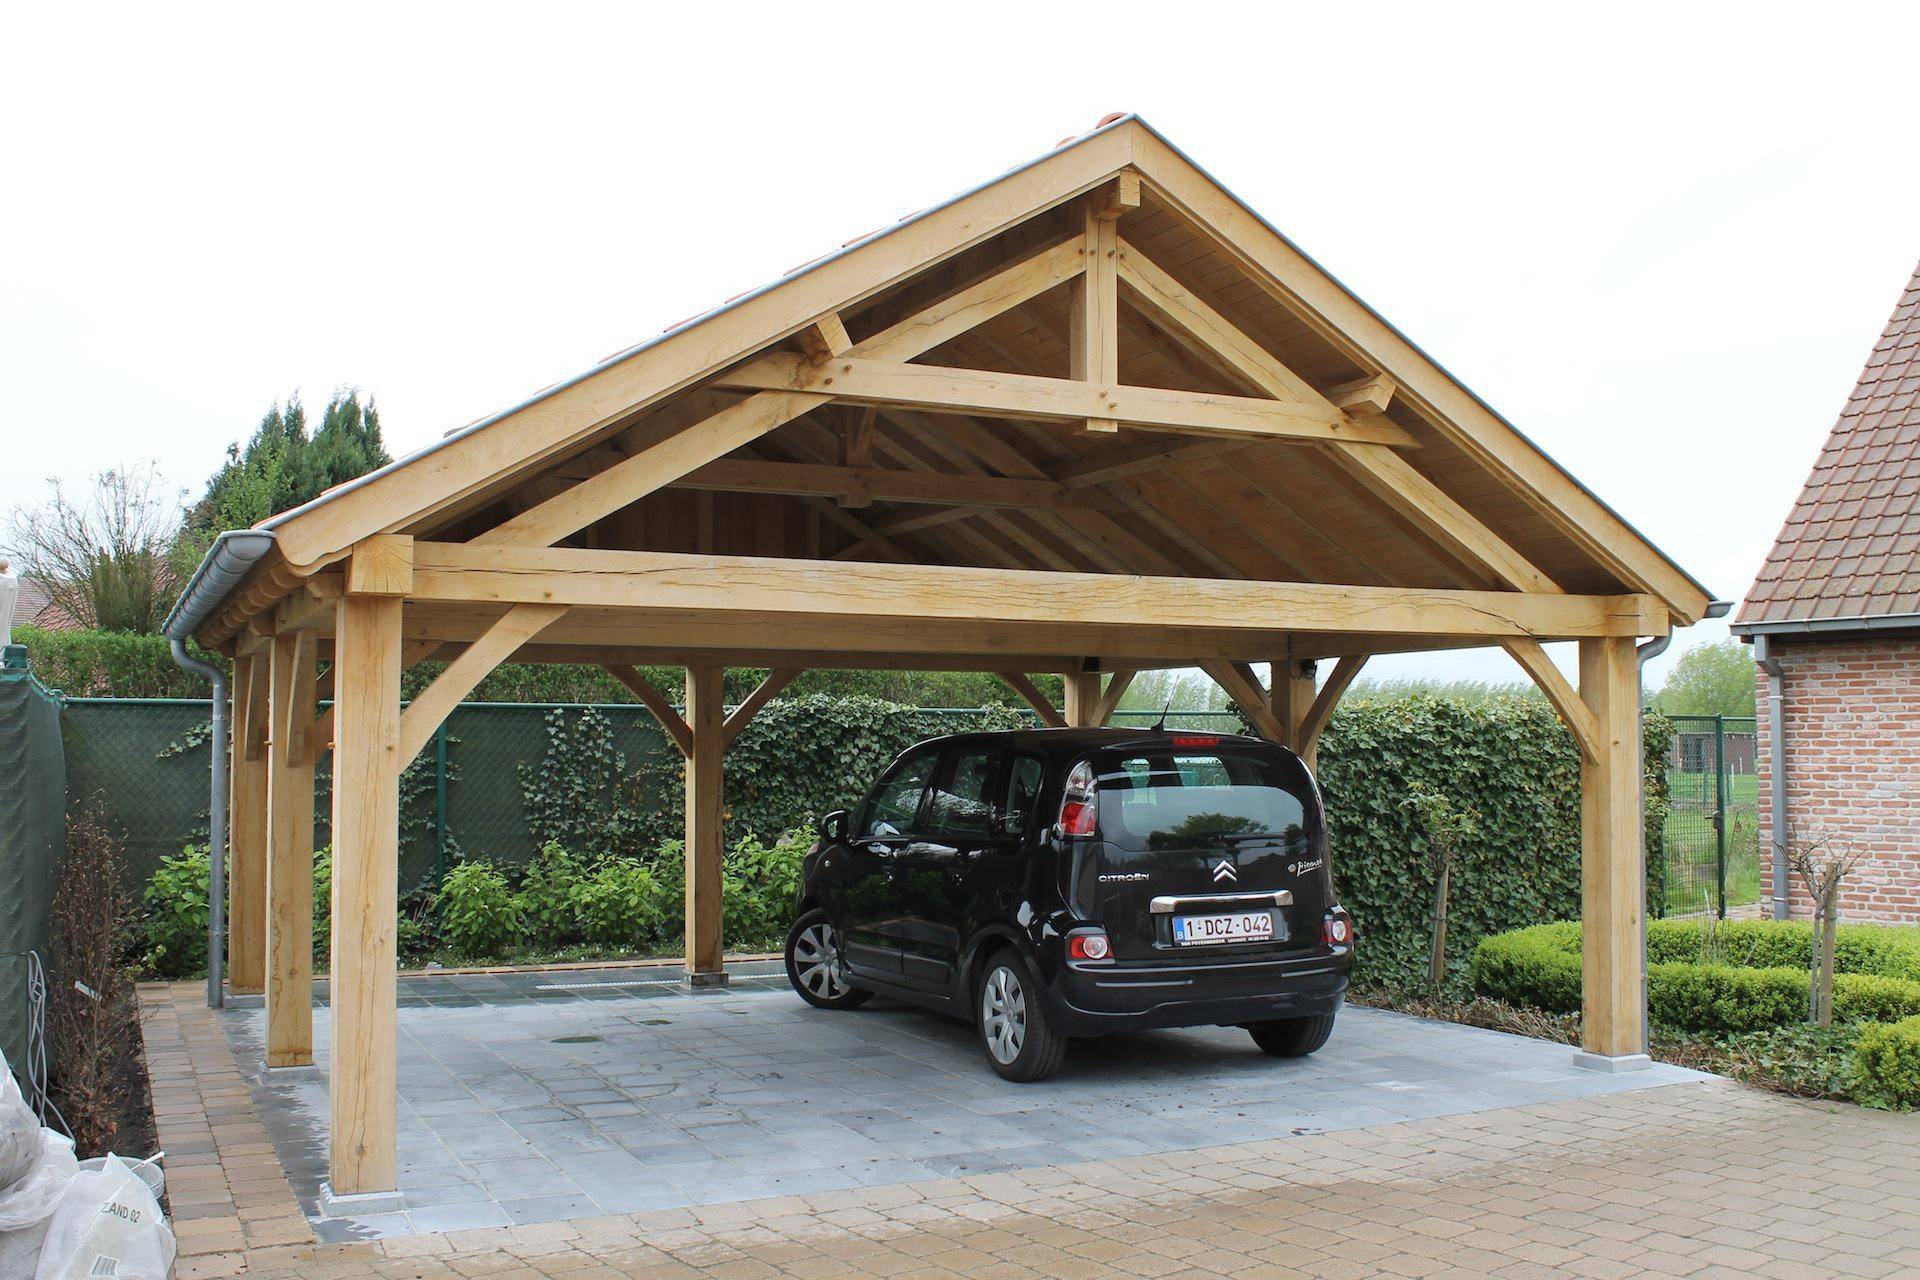
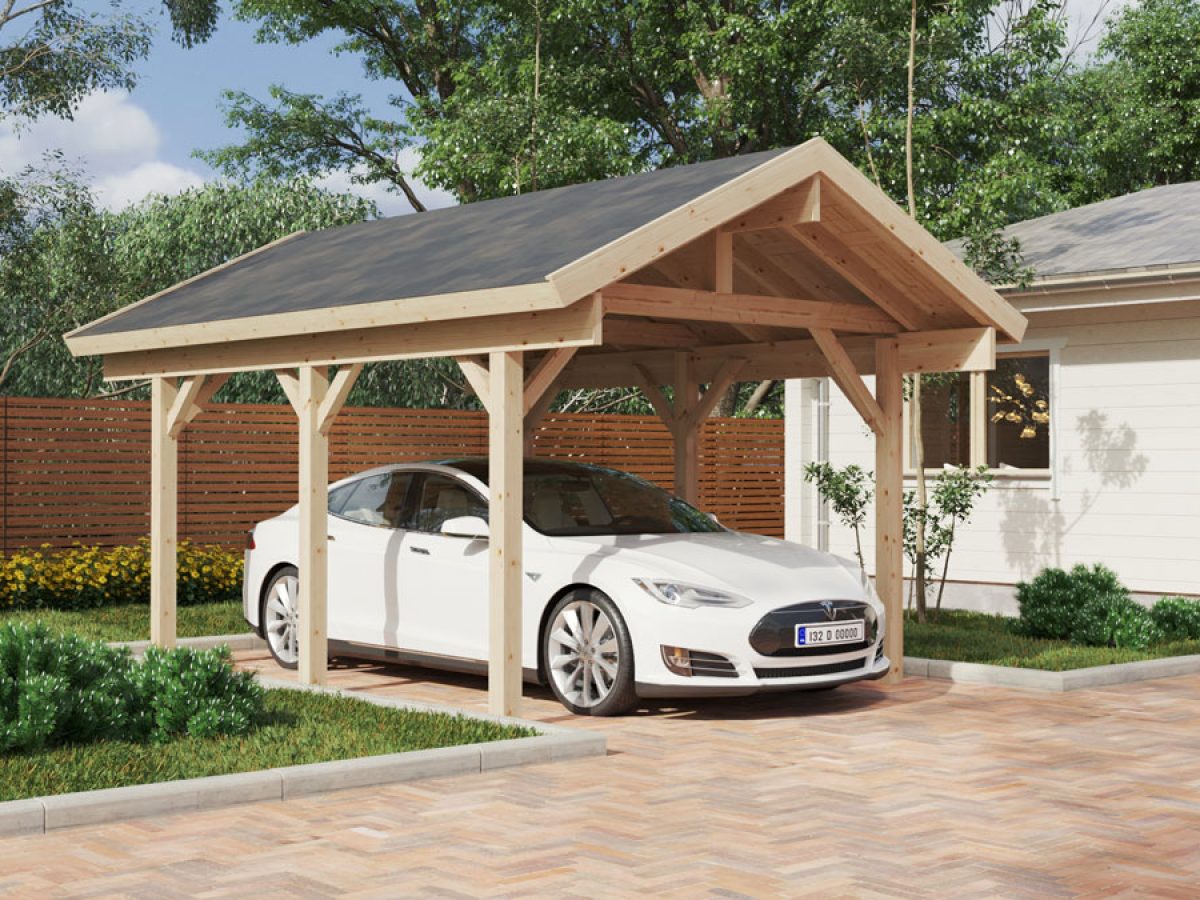
How To Build A Freestanding Carport
Modified: November 1, 2024
Learn how to build a freestanding carport with our comprehensive articles. Find step-by-step instructions, tips, and tricks to successfully complete your carport project.
(Many of the links in this article redirect to a specific reviewed product. Your purchase of these products through affiliate links helps to generate commission for Storables.com, at no extra cost. Learn more)
How to Build a Freestanding Carport
Are you looking to protect your vehicle from the elements without the need for a traditional garage? A freestanding carport provides a cost-effective and practical solution. With some planning, preparation, and basic construction skills, you can build your own carport that will not only shelter your car but also add value to your property. In this article, we will guide you through the step-by-step process of building a freestanding carport.
Read more: How To Build A Lean To Carport
Step 1: Planning and Design
The first step in building a freestanding carport is planning and designing. Consider the location for your carport, ensuring it is convenient for accessing your vehicle and fits within the property boundaries. Determine the size and dimensions of the carport based on the number and size of vehicles you intend to shelter. Choose the materials for the carport, such as wood or metal, based on durability, cost, and aesthetic preferences. Additionally, check with your local authorities to acquire any necessary permits or approvals.
Step 2: Gathering the Tools and Materials
Once you have the design and permits in place, it’s time to gather the necessary tools and materials for the construction. Common tools needed for building a carport include a tape measure, level, circular saw, drill, hammer, and wrenches. As for the materials, you will typically need posts, beams, roofing material, concrete for footings, screws, and nails. Make sure to have all the required supplies on hand before starting the construction process.
Step 3: Setting the Foundation
Before assembling the carport, it’s important to set a solid foundation. Clear the site where the carport will be constructed by removing any debris or vegetation. Mark out the dimensions of the carport according to your design plans. Dig the foundation holes and ensure they are level. Pour concrete footings into the holes for a sturdy and stable foundation.
Step 4: Building the Frame
With the foundation in place, it’s time to build the frame of the carport. Measure and cut the posts and beams according to your design specifications. Assemble the frame structure by securing the beams to the posts using screws or nails. Reinforce the frame with diagonal braces to ensure stability and strength.
Read more: How To Build A Freestanding Divider Wall
Step 5: Installing the Roof
The next step is to install the roof of the carport. Choose a roofing material that suits your preferences and climate conditions. Measure and cut the roof panels accordingly. Install the roof panels securely onto the frame using screws or nails, ensuring they are properly aligned and watertight. Add any necessary roofing accessories, such as gutters or downspouts, to channel water away from the carport.
Step 6: Adding the Sides and Finishing Touches
If you prefer additional protection from the elements, you can install side walls on your carport. Consider using materials that provide ventilation while still offering security. Once the main structure is complete, paint or stain the carport to enhance its appearance and protect it from weathering. You can also add any additional features or accessories, such as lighting or storage hooks, to make your carport more functional. Before considering the project complete, perform a final inspection to ensure everything is secure and clean up any construction debris.
Building a freestanding carport is a rewarding DIY project that can provide shelter for your vehicle and enhance your property value. By following these step-by-step instructions, you can successfully construct a carport that meets your needs and withstands the test of time. Remember to always prioritize safety during the construction process and consult local building codes and regulations. Start planning your freestanding carport project today and enjoy the benefits of a protected vehicle.
Key Takeaways:
- Planning and Design
Careful planning and design are crucial when building a freestanding carport. Consider location, size, materials, and permits to ensure a smooth and successful construction process. - Construction Process
From setting the foundation to adding finishing touches, each step in building a freestanding carport requires precision and attention to detail. Following the process ensures a sturdy and reliable structure.
Introduction
Whether you live in a region with harsh weather conditions or simply want to protect your vehicle from the elements, building a freestanding carport is a practical and cost-effective solution. A carport provides a sheltered space to park your car, keeping it safe from rain, snow, and harsh UV rays. Additionally, a well-designed carport can add value to your property and enhance its overall aesthetics.
By taking on the project of building a freestanding carport, you not only have the opportunity to customize the design and size to fit your specific needs but also gain a sense of accomplishment and pride in constructing a functional structure. While the process may seem daunting, with proper planning and execution, it can be a rewarding DIY project that saves you money from hiring a professional builder.
Before diving into the construction process, it is crucial to have a clear plan and design in mind. Start by analyzing your property and determining the ideal location for the carport. Consider accessibility, available space, and any local building codes or restrictions. Once you have selected the location, carefully measure the area to determine the appropriate size and dimensions for your carport.
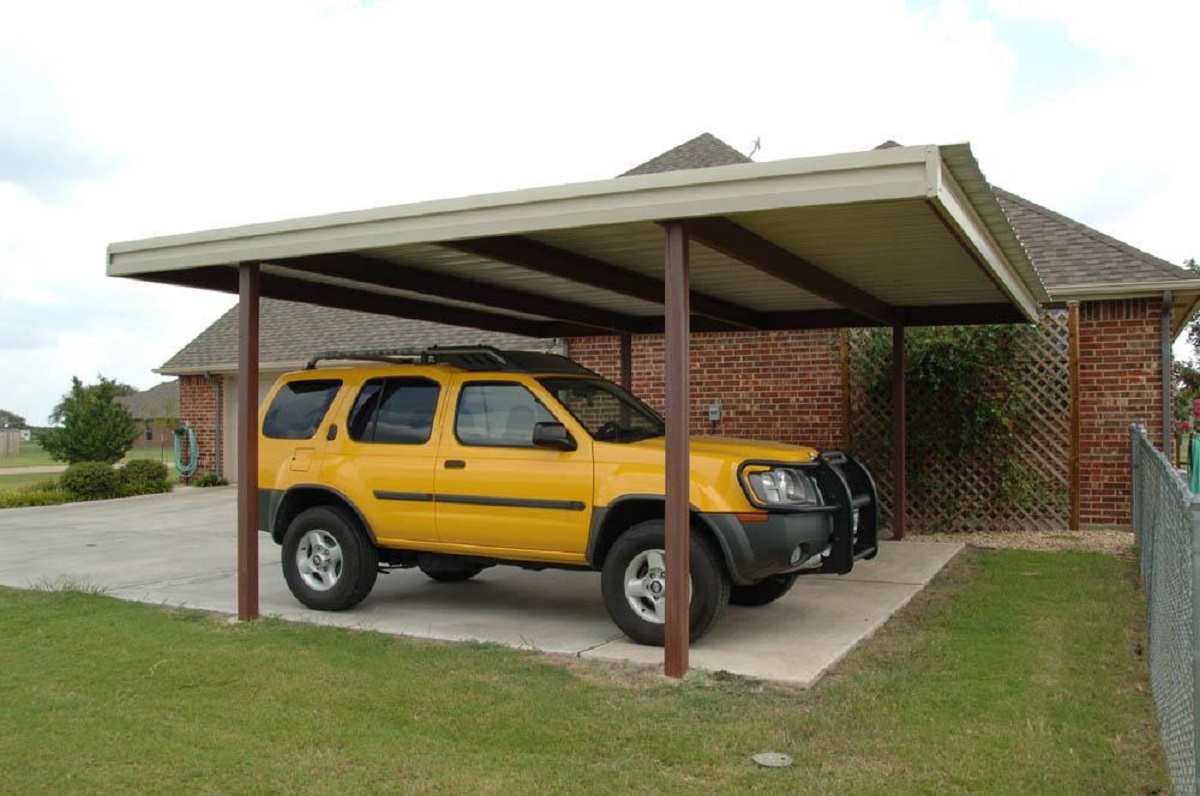
Choosing the right materials for your carport is another vital step. Wood and metal are the most common options, each with its advantages and visual appeal. Wood can provide a more traditional and rustic look, while metal offers durability and low maintenance. Consider factors such as weather conditions, local aesthetics, and your personal preferences when making this decision.
Prior to starting any construction, it is crucial to obtain the necessary permits and approvals from your local authorities. Building codes and regulations vary by region and may have specific requirements for carport construction. Compliance with these regulations ensures the safety and structural integrity of your carport.
The construction process itself can be broken down into several key steps, ranging from setting the foundation and building the frame to installing the roof and adding finishing touches. Throughout the process, it is essential to follow proper safety precautions and use the appropriate tools for the job.
In this comprehensive guide, we will walk you through each step of building a freestanding carport. We will provide detailed instructions, tips, and considerations to ensure a successful project. So, roll up your sleeves, gather your tools, and let’s get started on constructing your very own freestanding carport.
Step 1: Planning and Design
The first step in building a freestanding carport is careful planning and design. This phase lays the foundation for a successful construction project. Here are the key elements to consider during this crucial step:
Read more: How To Build A Wood Carport
Selecting the Location
Choosing the right location for your carport is essential. Look for a space on your property that is easily accessible and can accommodate the size of the carport you have in mind. Consider factors such as proximity to your home, driveway, and any existing structures on your property. Additionally, ensure that the carport will not obstruct any sightlines or violate local building codes.
Determining the Size and Dimensions
Once you have selected a suitable location, it’s time to determine the size and dimensions of your carport. Assess your needs based on the number and size of vehicles you plan to park in the carport. Measure the length, width, and height of your vehicles to ensure they will fit comfortably within the carport. Take into account any additional space you may need for storage or other purposes.
Choosing the Materials
Selecting the right materials for your carport is crucial for its durability and aesthetics. Wood and metal are the most common choices. Wood offers a natural, warm appearance and can be easily customized to match your property’s style. Metal carports, typically made of steel or aluminum, offer sturdiness and low maintenance. Consider factors such as your region’s climate, desired lifespan of the carport, and personal preferences when making this decision.
Obtaining Necessary Permits
Before you start construction, it is important to check with your local authorities to determine if you need any permits or approvals for building a carport. Building codes and regulations vary by region, and failure to comply can result in costly fines or having to tear down the structure. Contact your local building department or conduct online research to understand the specific requirements for your area. Obtain the necessary permits and keep them easily accessible throughout the construction process.
Planning and designing your carport is the crucial first step in realizing your vision. Take the time to carefully consider the location, size, materials, and permits to ensure a smooth and successful construction process. Once you have completed this step, you can move on to gathering the tools and materials needed for the project.
Read more: How Much To Build A Carport
Step 2: Gathering the Tools and Materials
Before you can begin constructing your freestanding carport, it is essential to gather all the necessary tools and materials for the project. Being prepared with the right equipment will ensure a smooth and efficient construction process. Here’s what you’ll need:
Tools Needed for the Project
– Tape measure: Used for accurate measurements of dimensions and materials.
– Level: Ensures that your carport is level and properly balanced.
– Circular saw: Used for cutting wood or metal beams to the required size.
– Drill: Essential for making holes and attaching screws or bolts.
– Hammer: Used for driving nails or pounding materials into place.
– Wrenches: Necessary for tightening nuts and bolts.
– Screwdriver: To tighten or loosen screws.
– Step ladder: Provides access to higher areas during construction.
– Shovel: Required for digging holes for foundation footings.
– Wheelbarrow: Useful for transporting materials and mixing concrete.
– Safety gear: Including gloves, goggles, and a hard hat to protect yourself during construction.
Materials Needed for the Carport Construction
– Posts: These vertical supports form the framework of your carport. Choose sturdy and durable materials such as treated wood or steel.
– Beams: Horizontal beams support the roof of the carport, and their type will depend on your chosen construction materials – wood or metal. Ensure they have sufficient strength to bear the load of the roof.
– Roofing material: Select a suitable material that offers adequate protection from the weather, such as metal roofing panels, polycarbonate sheets, or asphalt shingles.
– Concrete: Used for creating a solid foundation by pouring footings for the carport posts. Calculate the amount of concrete needed based on the size and number of footings required.
– Screws and nails: These fasteners are necessary for securely attaching various components of the carport, such as the beams, posts, and roof panels.
– Paint or stain: If desired, you may want to paint or stain the carport to enhance its appearance and protect it from weathering. Choose a high-quality exterior-grade product.
– Additional accessories: Depending on your preferences and needs, you may want to consider adding accessories such as gutters, downspouts, or lighting fixtures for functionality and aesthetics.
Before beginning construction, double-check that you have all the required tools and materials readily available. This preparation will save you time and ensure a smooth construction process. With everything in place, you can proceed to the next step of setting the foundation for your freestanding carport.
Step 3: Setting the Foundation
A solid foundation is crucial for the stability and longevity of your freestanding carport. The foundation provides support for the structure and helps distribute the weight evenly. Follow these steps to set a strong foundation for your carport:
Read more: How To Build A Cheap Carport
Clearing the Site
Start by clearing the designated area where you will be constructing your carport. Remove any vegetation, debris, or obstacles that may interfere with the construction process. This ensures a clean and level surface for building the foundation.
Marking Out the Dimensions
Using your design plans or measurements, mark out the dimensions of the carport on the cleared site. Use stakes and string to indicate the perimeter of the carport, ensuring it aligns with your desired size and shape. Double-check the measurements to ensure accuracy.
Digging and Leveling the Foundation Holes
With the dimensions marked, you can now proceed to dig the foundation holes. The depth and width of the holes will depend on your local building codes and the size of your carport. Typically, they should be at least 18 inches deep and wide enough to accommodate the base of the support posts.
Ensure that the holes are dug evenly and are level with each other. Use a tape measure and level to check the depth and alignment. Adjust the holes as necessary to achieve a consistent level among all the foundation holes.
Pouring Concrete Footings
Once the holes are dug and leveled, it’s time to pour concrete footings. Prepare the concrete mixture according to the manufacturer’s instructions. Start by adding a few inches of gravel or crushed stone at the base of each hole to improve drainage.
Next, carefully pour the concrete mixture into each hole, filling it up to ground level. Use a wooden or metal post level to ensure the posts are perfectly plumb and aligned. Allow the concrete to cure according to the recommended time frame before proceeding with further construction.
Ensure that the concrete footings are solid and fully cured before continuing with the construction process. This strong foundation will provide stability and support for the remaining steps of building your freestanding carport.
Setting a solid foundation is a critical step in constructing a durable and reliable carport. By clearing the site, marking out dimensions accurately, digging level foundation holes, and pouring concrete footings, you establish the groundwork for a sturdy structure. Once the footings are cured, you can move on to the next step—the exciting process of building the frame of your carport.
Read more: How To Build A Metal Carport
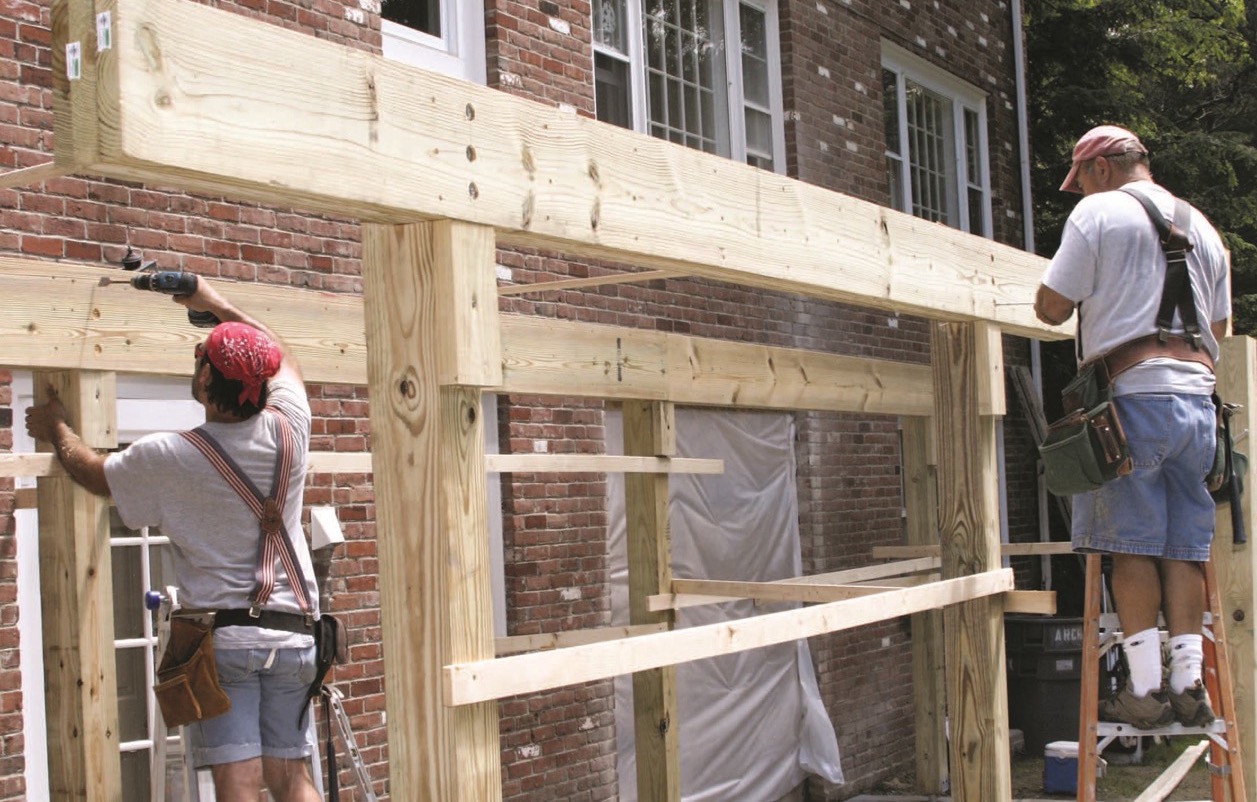
Step 4: Building the Frame
Once the foundation is set, it’s time to start building the frame of your freestanding carport. The frame provides the structural support for the roof and walls (if applicable) and forms the backbone of the entire structure. Follow these steps to construct a sturdy and well-built frame:
Measuring and Cutting the Posts and Beams
Begin by measuring and cutting the posts and beams according to your design plan and desired dimensions. Use a tape measure and a circular saw to accurately cut the materials to the required lengths. Take into consideration any additional height needed for proper clearance of your vehicles.
Ensure that each post is cut to the same height and each beam is cut to the appropriate length to ensure a level and balanced frame.
Assembling the Frame Structure
With the posts and beams cut to size, it’s time to assemble the frame structure. Position the posts in the foundation holes, ensuring they are plumb and secure. Use temporary bracing, such as 2×4 lumber, to hold the posts in place while assembling the frame.
Attach the beams to the posts by using appropriate fasteners, such as screws or nails, ensuring they are level and align with the design specifications. Double-check the measurements and make any necessary adjustments to ensure accuracy.
Attaching the Beams to the Posts
After securing the beams to the posts, reinforce the connection by using sturdy metal brackets or angle brackets. These brackets will provide additional stability and prevent any movement or shifting of the frame.
Ensure that the beams are securely attached to the posts and there is no wobbling or movement. This step is crucial to maintain the structural integrity and stability of the carport frame.
Read more: How To Build A Freestanding Pergola
Reinforcing the Frame with Braces
To further reinforce the frame and prevent any swaying or bending, add diagonal braces. These braces will add stability and rigidity, especially in areas prone to strong winds or heavy snow loads. Connect the braces using metal brackets or angle brackets, securing them to both the posts and the beams.
Consider placing braces at opposite corners of the frame or at regular intervals along the beams for optimal structural support.
By carefully measuring, cutting, assembling, and reinforcing the frame of your freestanding carport, you ensure a strong and durable structure. Properly aligned posts, securely attached beams, and strategically placed braces will provide stability and support for the remaining steps in building your carport. With the frame in place, you can now move on to the exciting task of installing the roof.
Step 5: Installing the Roof
With the frame of your freestanding carport complete, it’s time to move on to the next crucial step: installing the roof. The roof provides protection from the elements and plays a vital role in ensuring the longevity and functionality of your carport. Follow these steps to install the roof effectively:
Choosing the Roofing Material
Before you begin the installation process, it’s important to choose the right roofing material for your carport. Consider factors such as durability, weather-resistance, and aesthetics. Common options include metal roofing panels, polycarbonate sheets, or asphalt shingles. Evaluate the pros and cons of each material and select the one that best suits your needs and preferences.
Measuring and Cutting the Roof Panels
Once you have chosen your roofing material, accurately measure the dimensions of your carport to determine the size of the roof panels needed. Use a tape measure and a circular saw to cut the panels to the appropriate size. Double-check your measurements to ensure accurate cuts and a proper fit.
Read more: How To Build Freestanding Stairs
Installing the Roof Panels Securely
Start by positioning the first roof panel at one end of the carport, aligning it with the edge of the frame. Secure it in place using screws or nails, making sure they penetrate both the panel and the beams.
Continue installing the remaining roof panels, overlapping each one to prevent water from seeping through. Ensure that each panel is securely attached to the frame and properly aligned with the neighboring panels. Use roofing screws or nails at regular intervals along the edges and at the center of each panel for added stability.
Adding Any Necessary Roofing Accessories
To enhance the functionality and durability of your carport roof, consider adding any necessary roofing accessories. Install gutters and downspouts to effectively redirect rainwater away from the structure. This helps prevent water damage and erosion around the carport.
Additionally, if required, install ridge caps or flashing to ensure a watertight seal at the ridge of the roof or where the roof meets any adjoining structures.
Remember to follow the manufacturer’s instructions when installing roofing accessories, and ensure they are compatible with your chosen roofing material.
By carefully selecting and installing the appropriate roofing material, measuring and cutting the roof panels accurately, securely fastening the panels, and adding necessary accessories, you will create a strong and reliable roof for your freestanding carport.
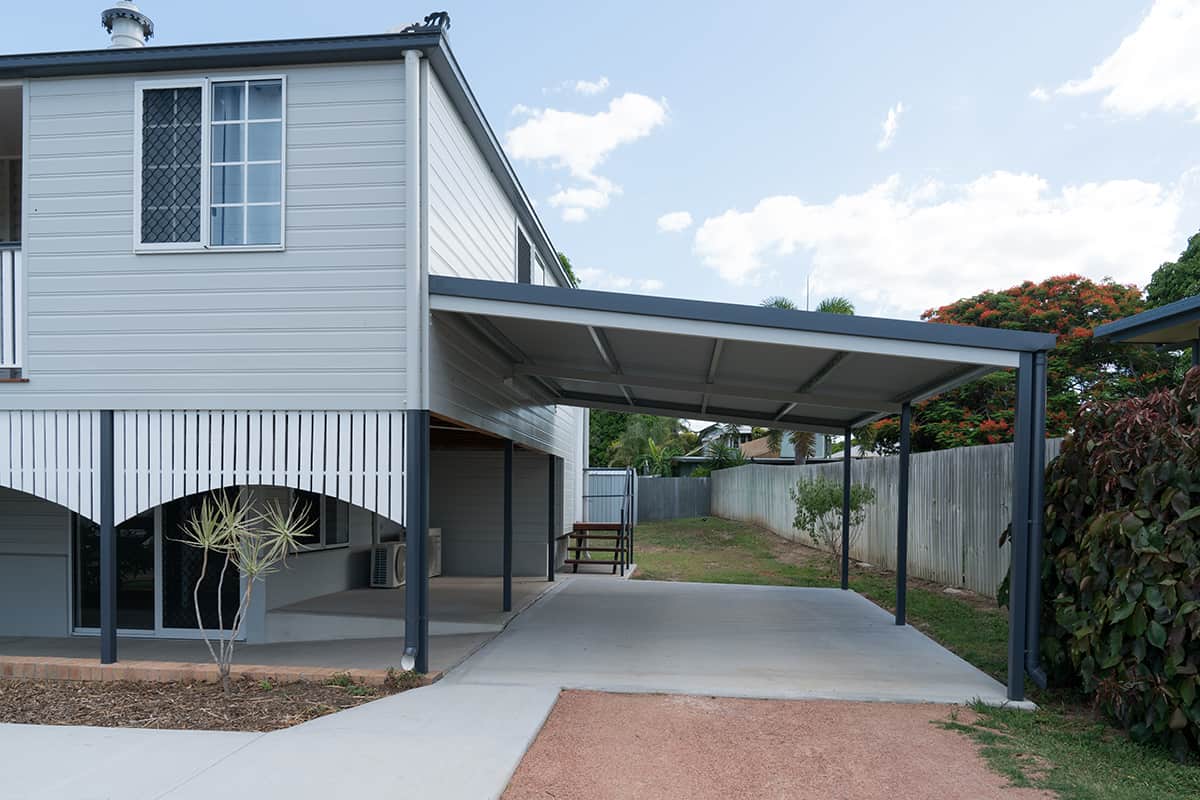
With the roof in place, you can move on to the final step of the construction process – adding any desired side walls or finishing touches to complete your freestanding carport.
Step 6: Adding the Sides and Finishing Touches
The construction of your freestanding carport is nearly complete, and it’s time to add the finishing touches. This final step involves adding any desired side walls and performing a few essential tasks to ensure your carport is functional, visually appealing, and ready for use. Follow these steps to complete your carport construction:
Installing the Side Walls, if Desired
If you prefer additional protection or privacy, you may choose to install side walls for your carport. Paneling or siding materials can be attached to the frame, enclosing the sides of the carport. Ensure the walls are securely fastened and aligned with the rest of the structure. Consider leaving openings or vents for ventilation, especially if your carport is enclosed on all sides.
Read more: How To Build A Carport Attached To House
Painting or Staining the Carport
To enhance the appearance of your carport and protect it from the elements, consider painting or staining the structure. Choose a high-quality exterior-grade paint or stain that is suitable for the material you used for the frame. Apply the paint or stain following the manufacturer’s instructions, ensuring even coverage and a smooth finish. This step not only adds visual appeal but also helps extend the lifespan of the carport.
Adding Any Additional Features or Accessories
Now is the time to add any extra features or accessories that enhance the functionality and convenience of your carport. Consider installing lighting fixtures for visibility at night or adding storage hooks or racks for organizing tools and equipment. You may also want to include rain gutters and downspouts, as mentioned in the earlier step, to divert water away from the carport and protect the surrounding area.
Performing a Final Inspection and Clean-Up
Before considering the construction complete, perform a thorough final inspection of your carport. Check for any loose screws or nails, ensure all connections are secure, and address any areas that require reinforcement or adjustment. Verify that the roof is properly installed, the side walls (if applicable) are stable, and all finishing touches are in place.
Once the inspection is complete, clean up the construction site by removing any debris or unused materials. Dispose of waste responsibly and ensure the area around the carport is tidy.
With the sides installed (if desired), the carport painted or stained, additional features added, and a final inspection conducted, your freestanding carport is now ready for use. Enjoy the benefits of your newly constructed space, knowing that it not only provides protection for your vehicles but also adds value and functionality to your property.
Conclusion
Congratulations! You have successfully completed the construction of your freestanding carport. By following the step-by-step guide outlined in this article, you have gained the knowledge and skills necessary to build a functional and durable carport that protects your vehicles from the elements.
Throughout the process, you carefully planned and designed your carport, taking into account factors such as location, dimensions, materials, and permits. You gathered the necessary tools and materials, ensuring you had everything you needed to complete the project. You set a solid foundation, built a sturdy frame, installed a reliable roof, and added finishing touches to make your carport both practical and aesthetically pleasing.
Not only does your new carport provide shelter for your vehicles, but it also adds value to your property. It offers convenience, protection, and an extension of your living space. Whether you live in an area with extreme weather conditions or simply want to keep your vehicles in top condition, your freestanding carport will prove to be a wise investment.
Remember to adhere to local building codes and regulations throughout the construction process. Safety should always be a priority, so use proper protective gear and take necessary precautions while working on your carport.
Consider maintaining and regularly inspecting your carport to ensure it remains in optimal condition. Keep an eye on the roof for any signs of damage, clean out gutters if installed, and check for any loose connections or deteriorating materials. By taking care of your carport, you can ensure that it continues to serve its purpose for many years to come.
Building a freestanding carport is a rewarding DIY project that not only saves you money but also allows you to customize the design to meet your specific needs. It empowers you to take control of your property and create a space that adds value and functionality. Whether you use your carport to shelter your vehicles, provide covered storage, or create an outdoor living area, it offers versatility and convenience.
We hope this guide has provided you with the necessary information, inspiration, and confidence to undertake your carport construction project. Enjoy the benefits of your newly built freestanding carport and bask in the satisfaction of a job well done!
Read more: How To Build A Freestanding Patio Cover
References
During the process of building a freestanding carport, it’s important to gather information from reliable sources to ensure a successful project. Here are a few references that can provide valuable guidance and insights:
1. How to Build a Carport” by The Spruce – This comprehensive guide offers step-by-step instructions, tips, and visuals to help you navigate the carport construction process. Available at: [URL]
2. “Carport Construction Guidelines” by FEMA – The Federal Emergency Management Agency provides guidelines for carport construction in regions prone to natural disasters. It covers important considerations for designing and building a carport that can withstand extreme weather conditions. Available at: [URL]
3. “DIY Carports” by The Family Handyman – This resource provides a collection of articles and tutorials on building carports, including different designs and materials. It offers practical tips and expert advice to ensure a successful DIY project. Available at: [URL]
4. Building Codes and Permitting Guidelines – Consult the building codes and regulations specific to your area. Contact your local building department or visit their website to access the necessary permits and guidelines for constructing a freestanding carport.
5. Manufacturer’s Instructions – If you are using a specific carport kit or roofing material, refer to the manufacturer’s instructions and guidelines. These instructions are designed to ensure proper installation and usage of their products.
Remember, always prioritize safety, consult professional advice when needed, and comply with local regulations throughout the construction process.
Please note that the references provided here are for informational purposes only, and it’s important to verify the validity and relevance of the information based on your specific location and project requirements.
Now that you’ve mastered building a freestanding carport, why not expand your skills with more exciting projects? For those interested in enhancing their outdoor space, our guide on outdoor structures offers unique ideas and designs. If woodworking is your passion, check out our list of woodworking projects that will challenge and delight you in the upcoming year. And for a quicker setup, consider the benefits of modern carport kits, which streamline construction without sacrificing durability.
Frequently Asked Questions about How To Build A Freestanding Carport
Was this page helpful?
At Storables.com, we guarantee accurate and reliable information. Our content, validated by Expert Board Contributors, is crafted following stringent Editorial Policies. We're committed to providing you with well-researched, expert-backed insights for all your informational needs.


0 thoughts on “How To Build A Freestanding Carport”