Articles
How To Move A Carport
Modified: September 1, 2024
Learn useful articles on how to move a carport efficiently. Discover expert tips and step-by-step guides to ensure a smooth and successful relocation.
(Many of the links in this article redirect to a specific reviewed product. Your purchase of these products through affiliate links helps to generate commission for Storables.com, at no extra cost. Learn more)
Introduction
When it comes to moving a carport, careful planning and execution are key to ensure a smooth and successful relocation. Whether you are moving to a new property or simply rearranging your outdoor space, moving a carport can be a challenging task. However, with the right approach and some handy tips, you can easily move your carport without any hassle.
Before diving into the process, it is crucial to understand that moving a carport requires careful measurement, disassembly, preparation of the new location, and reassembly. Each step is essential to ensure the carport’s structural integrity remains intact and the relocation is done safely. So, let’s walk through the process step by step.
Key Takeaways:
- Careful measurement, disassembly, and preparation are crucial for moving a carport. Accurate measurements, systematic disassembly, and proper new location preparation ensure a smooth relocation process.
- Patience, attention to detail, and proper anchoring are essential for successful carport relocation. Reassembling with care and securing the carport firmly in the new location ensure long-term stability and functionality.
Read more: How To Make A Carport
Measure the Carport
The first step in moving a carport is to accurately measure its dimensions. This is crucial as it will help you determine the space requirements and ensure that the new location can accommodate the carport properly.
Start by measuring the length, width, and height of the carport. Use a tape measure or a laser measure for precise measurements. Take note of these measurements as they will be essential when disassembling and reassembling the carport later.
Additionally, pay attention to any overhangs or clearance requirements that the carport may have. This includes any protruding beams or supports that may need extra clearance in the new location. By measuring all these aspects, you can plan ahead and avoid any potential issues during the relocation process.
If you are unsure about how to accurately measure the carport or if you are dealing with a complex design, it is recommended to consult a professional. An expert can provide guidance and ensure that the measurements are taken correctly.
Remember, accurate measurements will not only determine if the carport will fit in the new location but also help you plan the disassembly and reassembly process efficiently. So, take your time and measure twice to ensure the moving process goes smoothly.
Disassemble the Carport
Once you have measured the carport and prepared the new location, it’s time to disassemble the carport. Disassembling the carport involves carefully taking apart the various components to ensure they can be safely moved to the new location.
Start by removing any external attachments or accessories such as gutters, downspouts, or lighting fixtures. These items are often not part of the main structure and can be taken down separately. Keep them in a safe place for reinstallation later.
Next, take a systematic approach to dismantling the main structure of the carport. Begin by removing the roof panels or covering. Depending on the type of carport, this may involve detaching screws or bolts that hold the panels in place. Take extra caution when working at heights and ensure you have proper safety equipment.
Once the roof panels are removed, focus on disassembling the support beams and posts. Begin at one end and carefully remove any screws, bolts, or fasteners that hold the beams and posts together. It is advisable to have a helper to assist in holding the components as you work to prevent any accidental falls or damage.
As you disassemble each component, label them or mark them in a way that will make reassembly easier later. This can be done with colored tape, labels, or numbering the pieces. Taking photos of the disassembly process can also be helpful.
Ensure that all disassembled components are safely stored and protected during the moving process. Use blankets, tarps, or bubble wrap to prevent any scratches or damage during transportation.
Remember, disassembling the carport requires patience and attention to detail. Take your time and follow the same steps in reverse order when it comes time to reassemble the carport in the new location.
Prepare the New Location
After disassembling the carport, it’s time to prepare the new location where you will be moving the carport to. Proper preparation of the new location is crucial to ensure a smooth and secure reassembly of the carport.
Firstly, assess the new space and ensure that it is suitable for the carport. Verify that the dimensions of the new location align with the measurements taken earlier. Make sure there is enough space for the carport to fit comfortably and that there are no obstructions or potential hazards in the area.
Clear the new location of any debris, rocks, or vegetation that may hinder the reassembly process. Level the ground if necessary, especially if the new location has uneven terrain. A level surface is essential for ensuring the stability and proper alignment of the carport.
If the carport will be secured to the ground, make sure to review local building codes or regulations regarding anchoring methods. Choose appropriate anchors, such as concrete footings or ground stakes, to secure the carport firmly in place.
If the new location requires any additional foundations or supports, such as a concrete pad or gravel base, it is important to complete this work before attempting to reassemble the carport. Allow sufficient time for these preparations to ensure they are properly set and will provide a stable foundation.
Keep all necessary tools and equipment handy and easily accessible at the new location. This will help streamline the reassembly process and prevent delays or interruptions. Make sure you have all the required hardware, such as screws and bolts, readily available as well.
Lastly, consider the aesthetics of the new location. If desired, you can take this opportunity to improve the appearance by adding landscaping or decorative elements around the carport once it is installed. This will enhance the overall look and functionality of the area.
By taking the time to properly prepare the new location, you will ensure that the carport can be reassembled efficiently and securely. It will also help prevent any issues or complications during the installation process, allowing you to enjoy your carport in its new location with peace of mind.
When moving a carport, make sure to disassemble it carefully, label all parts, and keep all hardware organized. Use a trailer or professional moving service for transportation. Check local regulations for permits and restrictions.
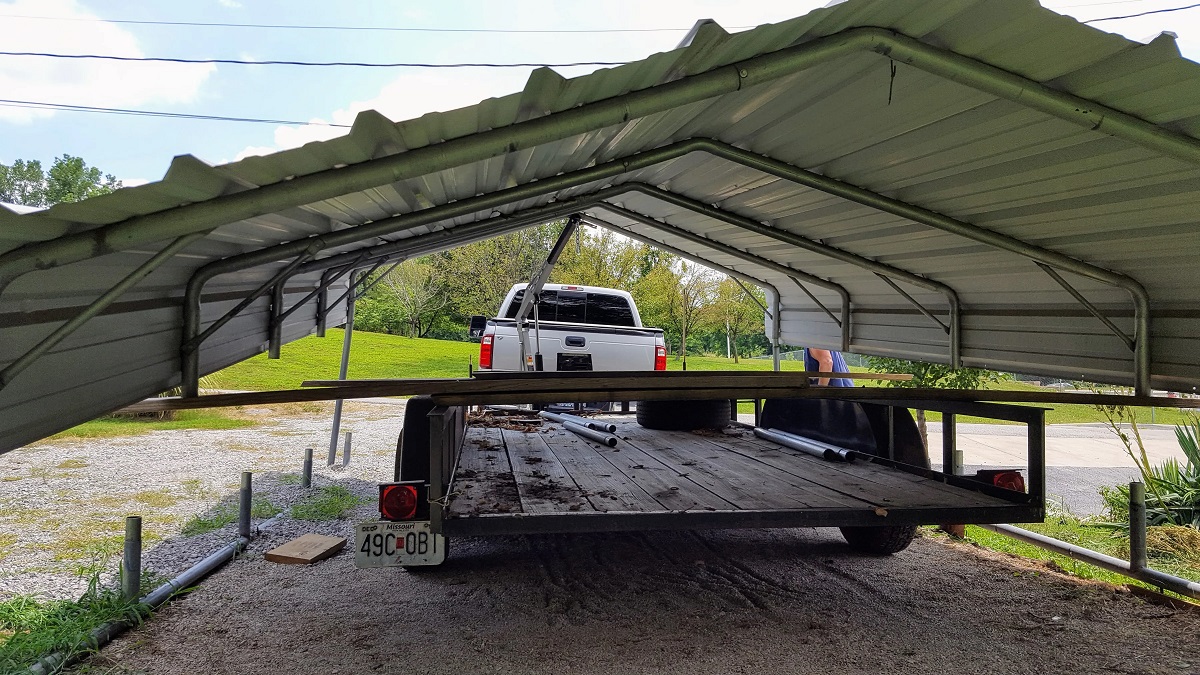
Move the Carport Components
With the new location prepared, it’s time to move the disassembled carport components to their destination. Moving these components requires careful handling and planning to ensure their safety and prevent any damage.
Start by organizing the disassembled components in a logical and systematic manner. Group similar parts together and label or mark them to easily identify each piece during the reassembly process. This will help streamline the moving process and prevent any confusion or mix-ups.
If possible, use a flatbed trailer or a truck with an open bed to transport the carport components. Secure the components firmly to prevent any shifting or movement during transit. Use straps, ropes, or bungee cords to secure the components in place and prevent them from sliding or falling off the vehicle.
Take into account the size and weight of each component when loading them onto the transportation vehicle. Ensure that the weight is evenly distributed and that no part of the carport is overloaded or prone to tipping over. If necessary, enlist the help of others to assist with lifting and moving the heavier pieces.
During transit, drive cautiously and avoid abrupt stops or sharp turns that may cause the carport components to shift or collide with one another. Observe all traffic regulations and drive at a speed appropriate for the type of load you are carrying.
Once you arrive at the new location, carefully unload the carport components and place them in a designated area. Ensure that the components are protected from any potential damage, such as extreme weather conditions or accidental impact.
Take inventory of all the components to verify that nothing was lost or damaged during the transportation process. Inspect each piece for any signs of wear or damage that may require repair or replacement before proceeding with the reassembly.
By taking the necessary precautions and handling the carport components with care, you can ensure a smooth and successful move to the new location. This will set the stage for the next step – reassembling the carport and bringing it back to its functional form.
Read more: What Is A Carport
Reassemble the Carport
Now that you have successfully moved the carport components to the new location, it’s time to begin the reassembly process. Reassembling the carport requires patience, attention to detail, and a systematic approach to ensure a secure and sturdy structure.
Start by referring to the labels or markings you made during the disassembly process. This will help you identify and locate each component easily. Lay out all the pieces in the order they will be reassembled, following any instructions or diagrams provided by the manufacturer.
Begin with the main support beams and posts. Reconnect them in the reverse order in which they were disassembled, ensuring that they are securely attached using the appropriate screws, bolts, or fasteners. Use a level to ensure that the beams are straight and aligned properly.
Once the support beams are in place, proceed to reattach the roof panels or covering. This may involve aligning the panels and using screws or bolts to secure them to the framework. Take care to ensure a tight fit and that the panels are properly sealed to prevent any water leakage.
During the reassembly process, refer to your photographs or any documentation you have to verify the correct placement and orientation of components. This will help avoid any confusion or mistakes when assembling the carport structure.
If you encounter any damaged components during the reassembly, consider repairing or replacing them before continuing. It is essential to ensure the structural integrity and safety of the carport.
As you progress with the reassembly, periodically check the overall stability and alignment of the carport. Make any adjustments if needed to ensure that the structure is level and properly positioned in the new location.
Remember to take your time and be thorough during the reassembly process. It is important to prioritize accuracy and quality to ensure that the carport is secure and functional once fully assembled.
Once the carport is reassembled, step back and admire your work. Take a moment to inspect the structure and make any final adjustments as necessary. Congratulations, your carport has found its new home!
Secure the Carport in the New Location
Now that the carport has been reassembled in its new location, it is crucial to secure it properly to ensure its stability and longevity. Proper anchoring and securing of the carport will protect it from strong winds, heavy rains, and other external forces.
Firstly, refer to the manufacturer’s instructions or consult local building codes to determine the appropriate anchoring method for your carport. Common methods include concrete footings, ground stakes, or anchor bolts. Choose the method that is best suited for your specific carport design and the terrain of the new location.
If your carport will be anchored with concrete footings, prepare the holes according to the recommended specifications. Dig the holes deep enough to accommodate the footings and follow any guidelines for minimum depth and diameter. Once the footings are placed, allow sufficient time for the concrete to cure and harden before proceeding.
If you will be using ground stakes or anchor bolts, ensure they are securely fastened to the ground or a suitable surface. Make sure they are inserted at the correct depth and angle to provide optimal stability for the carport.
During the securing process, check the alignment and levelness of the carport to ensure it is correctly positioned. Use a spirit level to verify that the carport is straight and balanced. Make any necessary adjustments before finalizing the anchoring and securing.
Once the carport is in the desired position and the anchoring is complete, test its stability by gently applying pressure from different directions. The carport should remain firm and resist movement. If you notice any wobbling or instability, double-check the anchoring and consider making additional adjustments or reinforcements.
Depending on your location and climate, you may also want to consider adding additional protective measures to your carport. These can include installing wind bracing or reinforcing connections between components. These measures can enhance the overall strength and durability of the carport, especially in areas prone to strong winds or extreme weather conditions.
Regularly inspect and maintain the anchoring system to ensure its integrity over time. Check for any signs of wear, corrosion, or damage and make repairs or replacements as needed. By keeping the carport properly secured, you can ensure its long-term functionality and safety.
Conclusion
Moving a carport may seem like a daunting task, but with careful planning and execution, it can be successfully accomplished. By following the steps outlined in this guide and paying attention to details, you can move your carport to a new location with ease.
From measuring the carport and disassembling it piece by piece to preparing the new location and moving the components, each step plays a vital role in ensuring a smooth relocation. Taking the time to properly measure the carport, disassemble it correctly, and prepare the new location will help streamline the moving process and prevent any complications.
Reassembling the carport is a critical step that requires patience and attention to detail. Following manufacturer instructions, accurately aligning and attaching each component, and testing the stability of the structure will ensure a secure and functional carport in its new location.
Finally, securing the carport properly will protect it from external forces and provide long-lasting stability. Anchoring the carport using appropriate methods and regularly inspecting the anchoring system will help ensure its structural integrity over time.
Remember, if you are unsure about any aspect of moving your carport, it is always best to consult professionals who specialize in carport relocation. They can provide expert advice, assist with the process, and ensure that your carport is moved and set up safely.
Moving a carport can be a rewarding experience, as it allows you to reinvent your outdoor space or adapt to a new property layout. With careful planning and implementation, you can enjoy the benefits of a functional carport in its new location for years to come.
Frequently Asked Questions about How To Move A Carport
Was this page helpful?
At Storables.com, we guarantee accurate and reliable information. Our content, validated by Expert Board Contributors, is crafted following stringent Editorial Policies. We're committed to providing you with well-researched, expert-backed insights for all your informational needs.


0 thoughts on “How To Move A Carport”