
Articles
How To Build A Carport Out Of Wood
Modified: October 20, 2024
Learn how to build a sturdy and durable carport using wood with our step-by-step articles. Perfect for protecting your vehicles and adding value to your property.
(Many of the links in this article redirect to a specific reviewed product. Your purchase of these products through affiliate links helps to generate commission for Storables.com, at no extra cost. Learn more)
Introduction
Welcome to our comprehensive guide on how to build a carport out of wood. Having a carport not only provides protection for your vehicles against harsh weather conditions but also adds value and convenience to your property. Whether you are a seasoned DIY enthusiast or a beginner, this step-by-step guide will help you navigate through the process of building a durable and functional wooden carport.
Before we dive into the details, it’s important to note that building a carport requires careful planning and preparation. You will need to consider factors such as the size and location of the carport, the materials needed, and any local regulations or permits that may be required. By following this guide, you will be able to construct a sturdy wooden carport that meets your needs and complements the aesthetics of your home.
Throughout this guide, we will walk you through each stage of the construction process, providing clear instructions and tips to ensure your carport is built to last. From choosing the right location to adding finishing touches, we’ve got you covered.
So, if you’re ready to embark on this exciting DIY project, let’s get started on building your wooden carport!
Key Takeaways:
- Proper planning and preparation are essential for building a sturdy wooden carport. Consider factors such as size, location, materials, and local regulations to ensure a successful construction process.
- Regular maintenance and care are crucial for preserving the functionality and aesthetics of your wooden carport. Inspect for damage, clean regularly, and address repairs promptly to ensure its longevity.
Read more: How To Build A Wood Carport
Planning and Preparation
Before you begin constructing your wooden carport, it’s crucial to spend time on planning and preparation. This will ensure that you have a clear vision of what you want to achieve and that you have all the necessary materials and tools ready.
Start by determining the purpose and size of your carport. Will it be used solely for protecting vehicles, or do you plan on using it as a multipurpose space? Consider the number of cars you need to accommodate and whether you will need additional space for storage or other activities.
Next, assess the available space on your property and select the most suitable location for the carport. Ensure that there is enough space to maneuver vehicles easily and that it is accessible from the driveway or main entrance.
Additionally, check with your local authorities regarding any building codes or permits required for constructing a carport. Familiarize yourself with the regulations to avoid any legal complications down the line.
Once you have finalized the size and location, create a detailed plan or blueprint of your carport. Determine the dimensions, roof pitch, and any additional features you want to incorporate. This will serve as your guide throughout the construction process.
With your plan in hand, it’s time to gather all the necessary materials and tools. Here’s a list of what you’ll typically need:
- Pressure-treated lumber for the posts, beams, and rafters
- Galvanized metal brackets and screws
- Roofing materials such as metal sheets or shingles
- Concrete for setting the posts
- Gravel for the foundation
- Plywood for the roof sheathing
- Basic carpentry tools including a saw, drill, level, tape measure, and hammer
- Safety equipment such as gloves, goggles, and a dust mask
Make sure to purchase high-quality materials to ensure the longevity and durability of your carport. It’s also a good idea to consult with a professional at your local hardware store for guidance in choosing the right materials for your specific needs.
Now that you have your plan and materials ready, you’re all set for the next stage: measuring and marking the area where your carport will be built.
Choosing the Right Location
Selecting the correct location for your wooden carport is crucial for both functionality and aesthetics. Consider the following factors when choosing the ideal spot:
1. Accessibility: The carport should be easily accessible from your driveway or main entrance. Ensure there is enough space for vehicles to maneuver in and out without any obstructions.
2. Orientation: Take into account the direction of the prevailing wind and sunlight. Orienting the carport in a way that maximizes natural light and minimizes exposure to wind-driven rain or snow can help protect your vehicles and make the carport more comfortable to use.
3. Proximity to the House: If possible, position the carport near your home to allow for easy access and convenience. This will also enable you to monitor the carport for any security concerns.
4. Drainage: Choose a location that has proper drainage to prevent water buildup or flooding. Avoid low-lying areas or spots with poor drainage that could potentially damage your vehicles.
5. Property Lines and Regulations: Be mindful of property lines and any local regulations or codes that dictate how close to the boundary you can build. Ensure you comply with these regulations to avoid any legal issues in the future.
6. Visibility: Consider the visibility of the carport from the street or neighboring properties. If aesthetics are important to you, choose a location that enhances the overall look of your property.
By carefully considering these factors, you’ll be able to select the ideal location for your wooden carport. Once you have determined the right spot, move on to the next step: gathering the required materials and tools for construction.
Gathering the Required Materials and Tools
Now that you have chosen the perfect location for your wooden carport, it’s time to gather all the necessary materials and tools for the construction process. Here’s a comprehensive list of what you’ll typically need:
1. Pressure-Treated Lumber: This type of lumber is resistant to rot and decay, making it ideal for outdoor structures like carports. You’ll need it for the posts, beams, and rafters.
2. Galvanized Metal Brackets and Screws: These are essential for connecting the different components of your carport securely. Look for brackets and screws that are specifically designed for outdoor use and can withstand varying weather conditions.
3. Roofing Materials: Depending on your preference and budget, choose either metal sheets or shingles for the roof. Metal sheets are durable and low-maintenance, while shingles offer a more traditional look. Make sure to select materials that are suitable for your climate.
4. Concrete: You’ll need concrete to set the posts securely into the ground. Ensure you have enough concrete mix to fill the holes for each post.
5. Gravel: Use gravel to create a stable and level foundation for your carport. It helps with drainage and prevents shifting of the structure over time.
6. Plywood: This will be used for the roof sheathing, providing a solid surface for attaching the roofing materials.
7. Basic Carpentry Tools: Make sure you have a saw for cutting the lumber, a drill for creating pilot holes and securing screws, a level for ensuring everything is straight, a tape measure for accurate measurements, and a hammer for any necessary adjustments.
8. Safety Equipment: Protect yourself during the construction process by wearing gloves, goggles, and a dust mask. This will help prevent injuries and keep you safe from dust and debris.
It’s important to purchase high-quality materials to ensure the longevity and structural integrity of your carport. Consult with professionals at your local hardware store to guide you in choosing the right materials for your specific needs and budget.
Once you have gathered all the required materials and tools, you are ready to move on to the next phase: measuring and marking the area where your carport will be built.
Measuring and Marking the Area
With all the necessary materials and tools in hand, it’s time to measure and mark the area where your wooden carport will be constructed. This step is essential to ensure accuracy and precision throughout the construction process.
Start by determining the dimensions of your carport, taking into account the number of vehicles you plan to accommodate and any additional space you require. Measure the length, width, and height of the carport, making allowances for any desired overhang or side walls.
Next, mark the corners of the carport area using stakes or spray paint. This will provide a visual representation of the carport’s footprint, making it easier to visualize the final structure.
Use a long piece of string or a measuring tape to verify that the corners are at right angles to ensure a square foundation. Adjust the stakes if necessary to achieve precise 90-degree angles.
Once the corners are marked, use a tape measure to determine the exact placement of the posts. Measure and mark equal distances between each post, ensuring they are evenly spaced along the length and width of the carport.
If your carport will have a sloped or gabled roof, mark the height of the posts accordingly. This will allow for a proper roof pitch and ensure adequate headroom for your vehicles.
Double-check all measurements and markings to ensure accuracy before proceeding to the next step. It is better to take the time to verify now than to encounter issues later in the construction process.
With the area measured and marked, you are now ready to move on to the next stage: digging and setting the posts.
Read more: How To Build A Lean To Carport
Digging and Setting the Posts
Now that you have measured and marked the area for your wooden carport, it’s time to dig the holes and set the posts. The posts provide the foundation and support for your carport, so it’s important to ensure they are properly installed.
Here are the steps to dig and set the posts:
- Using a post hole digger or an auger, dig holes at the marked locations. The depth of the holes will depend on the desired height of your carport and the local building codes. Typically, the holes should be at least 2 feet deep.
- Make sure the holes are wide enough to accommodate the posts. The diameter should be slightly larger than the width of the posts to allow for easy placement.
- Place a layer of gravel at the bottom of each hole. This will aid in drainage and prevent the posts from coming into direct contact with the soil, reducing the risk of rotting.
- Position the first post in one of the holes, ensuring it is level and plumb. Use a level and a plumb line to check for accuracy. Adjust as necessary until the post is perfectly straight.
- Fill the hole around the post with concrete mix. Follow the manufacturer’s instructions for mixing the concrete. Use a shovel to pour the concrete into the hole, ensuring it fully surrounds the post.
- Continue the same process for the remaining posts, one at a time. Double-check the level and plumb of each post before proceeding.
- Allow the concrete to cure and set according to the manufacturer’s instructions. This typically takes a few days, so be patient and avoid putting any weight or pressure on the posts during this time.
Once the concrete has fully cured, your posts will be firmly set into the ground, providing a stable foundation for your carport. With this crucial step completed, you can now move on to the next stage: installing the beams and roof supports.
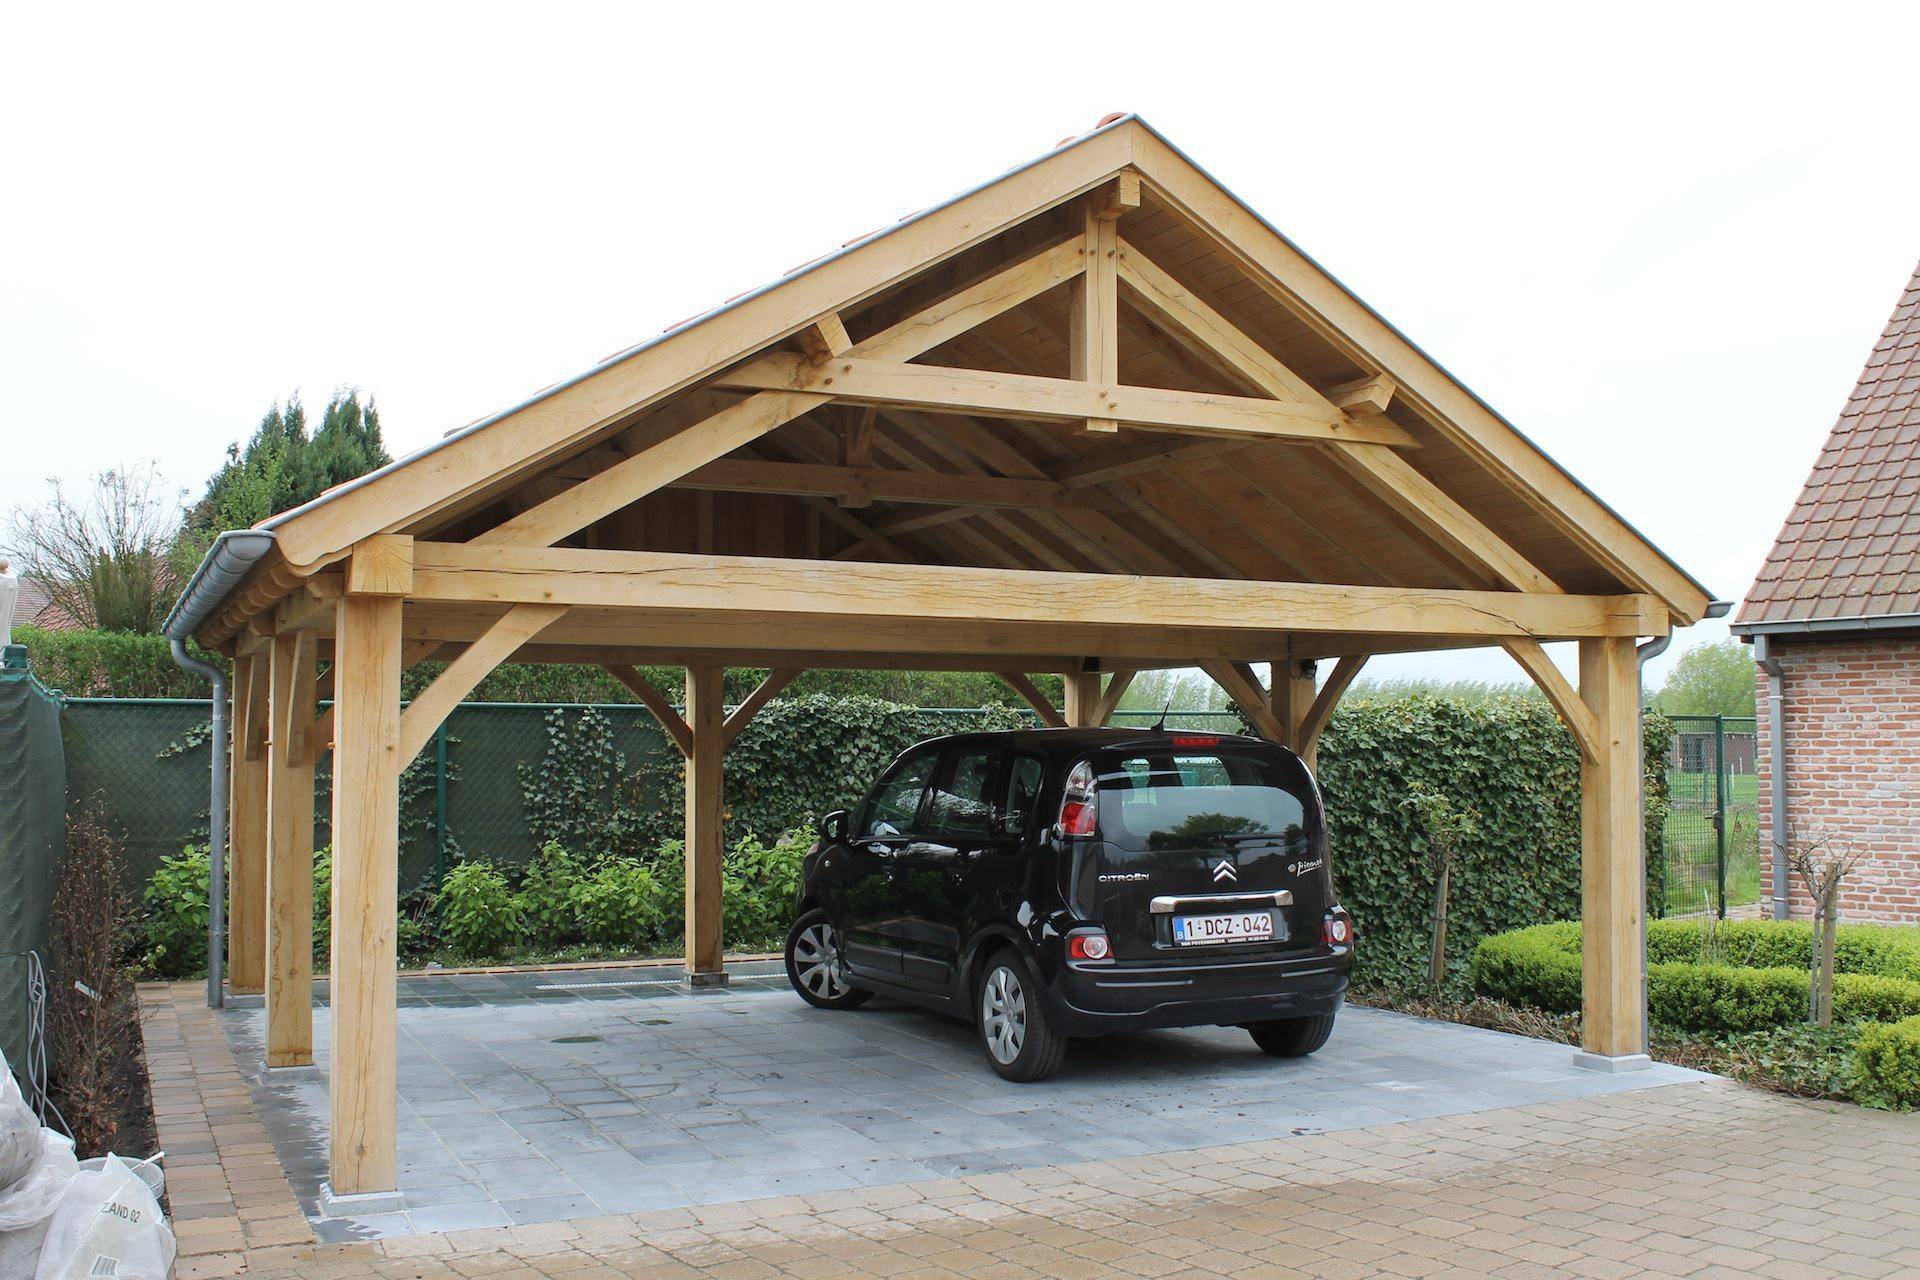
Installing the Beams and Roof Supports
With the posts securely set, it’s time to proceed with installing the beams and roof supports for your wooden carport. This step will provide the framework for the roof structure and ensure the stability and strength of the carport.
Installing the Beams:
- Measure the distance between the posts to determine the length of the beams. Cut the beams to the appropriate size using a saw.
- Position the beams on top of the posts, ensuring they are aligned and level. Use a level to check for accuracy and make any necessary adjustments.
- Secure the beams to the posts using galvanized metal brackets and screws. Place the brackets on both sides of the beams and attach them securely to the posts.
- Double-check the levelness of the beams before moving on to the next step. This will ensure that the roof structure is properly aligned.
Installing the Roof Supports:
- Measure and cut the roof supports to the desired length, taking into account the slope or pitch of the roof. These supports will connect the beams and provide the framework for the roof.
- Position the roof supports on top of the beams, ensuring they are evenly spaced and aligned with the marks from your initial plan.
- Attach the roof supports to the beams using galvanized metal brackets and screws. Make sure they are securely fastened to provide stability for the roof structure.
- Double-check the alignment and levelness of the roof supports to ensure a sturdy and even framework for the roof of your carport.
By installing the beams and roof supports correctly, you’ll establish a solid foundation for the roof structure of your wooden carport. This stage marks a significant milestone in the construction process. Next, we will move on to attaching the roofing material.
Read more: How Much To Build A Carport
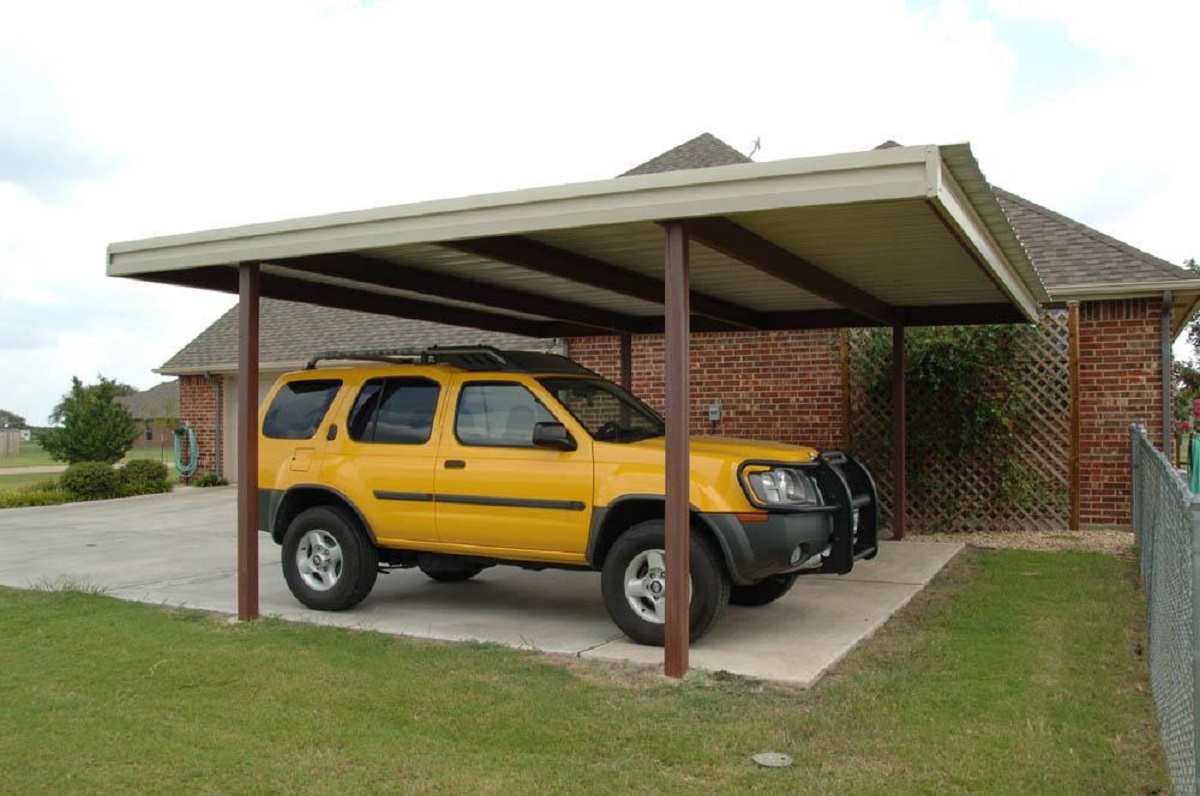
Attaching the Roofing Material
Now that the beams and roof supports are in place, it’s time to move on to attaching the roofing material to complete the roof structure of your wooden carport. The choice of roofing material will depend on your preferences, budget, and climate. Here are the steps to follow:
- Start by measuring and cutting the roofing material to fit the dimensions of your carport’s roof. Ensure you leave enough overhang on the sides and front to provide adequate coverage and protection.
- If you are using metal sheets, begin by attaching the sheets to the roof supports using roofing screws or nails. Place the screws or nails at regular intervals, following the manufacturer’s instructions for proper installation.
- Overlap the edges of each metal sheet for a secure and watertight seal. Use additional screws or nails to secure the overlapping sections.
- If you are using shingles, begin by attaching an underlayment material, such as roofing felt, to the roof sheathing. This will provide an additional layer of protection against water infiltration.
- Start from the bottom edge of the roof and lay the first row of shingles, ensuring they are aligned and straight. Use roofing nails to secure the shingles to the roof sheathing, following the recommended nailing pattern provided by the manufacturer.
- Continue installing subsequent rows of shingles, staggering them to ensure proper coverage. Make sure each shingle overlaps the one below it and is securely fastened.
- Trim the shingles as needed to fit the edges and corners of the roof. Use a utility knife or roofing scissors for precision cuts.
During the installation process, pay attention to the manufacturer’s guidelines and recommendations for the specific roofing material you are using. This will ensure that you achieve a secure and weather-resistant roof for your carport.
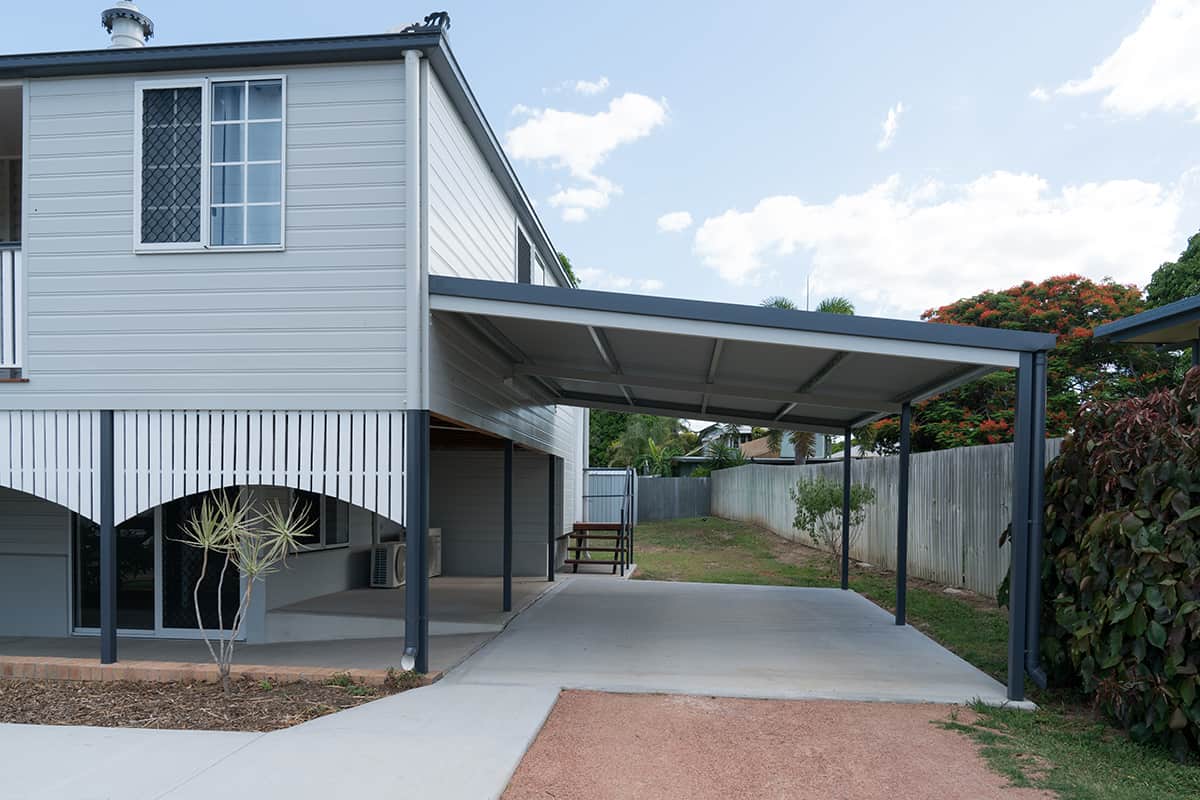
Once you have attached the roofing material, you’ve reached a significant milestone in the construction process. However, depending on your needs and preferences, you may wish to add optional sides or walls to your carport. We’ll discuss this next.
Adding Optional Sides or Walls
While a carport is traditionally an open structure, you may choose to add optional sides or walls to provide additional protection or privacy. This step is entirely optional and will depend on your specific needs and preferences. Here’s what you need to know about adding sides or walls to your wooden carport:
Considerations:
1. Functionality: Determine the purpose of adding sides or walls to your carport. Are you looking to create a storage area, a workshop, or simply increase the level of protection for your vehicles?
2. Local Regulations: Check with your local authorities to see if there are any regulations or permits required for enclosing your carport. Some areas may have specific requirements for structures that are not entirely open.
3. Material Choices: Consider the materials you will use for the sides or walls. You may opt for the same materials as the carport structure, such as wood, metal sheets, or even prefabricated panels. Make sure the materials are durable and suitable for outdoor use.
Installation Process:
If you decide to proceed with adding sides or walls, here are the general steps to follow:
- Measure the dimensions of the sides or walls you wish to install. Consider the height, width, and any openings such as doors or windows.
- Cut the chosen material to the appropriate size, ensuring it fits securely within the framework of the carport.
- Attach the material to the carport structure using brackets, screws, or nails. Make sure it is firmly secured and provides a stable enclosure.
- If you plan to add doors or windows, follow the manufacturer’s instructions for proper installation. Ensure they are properly sealed to prevent any water infiltration.
- Double-check the stability and alignment of the sides or walls to ensure a solid and uniform appearance.
Remember to consult local building codes and regulations before adding sides or walls to your carport. It’s also a good idea to seek professional advice or assistance if you’re unsure about any aspect of the installation process.
With the sides or walls in place, your carport is now better protected and can serve additional purposes, depending on your needs. However, if you’re satisfied with an open structure, you can move on to the finishing touches and safety considerations.
Read more: How To Build A Cheap Carport
Finishing Touches and Safety Considerations
As you near the completion of your wooden carport, there are a few finishing touches and safety considerations that you should keep in mind. These final steps will help ensure the longevity of your carport and the safety of both your vehicles and yourself. Here’s what you need to know:
Finishing Touches:
1. Trim and Paint: If desired, add trim around the edges and corners of your carport to give it a polished and finished look. Additionally, consider painting or staining the wood to protect it from the elements and enhance its appearance.
2. Gutters and Drainage: Install gutters along the edges of the roof to redirect rainwater away from the carport. This will help prevent water damage and ensure proper drainage. Direct the downspouts away from the carport and towards an appropriate drainage area.
3. Lighting: Consider adding lighting fixtures to your carport for increased visibility and security, especially during the darker hours. LED lights or motion sensor lighting can be effective options that require minimal maintenance.
Safety Considerations:
1. Fire Safety: Keep in mind that wood is a combustible material. Avoid placing any heat sources or flammable items near your carport to minimize the risk of fire. Additionally, consider installing a fire extinguisher nearby for added safety.
2. Regular Maintenance: Ensure that your carport receives regular maintenance to prolong its lifespan. Check for any signs of damage, such as rot or insect infestation, and address them promptly. Inspect the roofing material and replace any damaged or missing components as needed.
3. Secure for High Winds: If you live in an area prone to high winds or storms, reinforce your carport’s structure by adding additional supports or anchor points. This will help prevent damage during severe weather conditions.
4. Snow Removal: If you live in a snowy climate, regularly remove snow from the roof of your carport to prevent overloading and potential collapse. Use a roof rake or broom with a long handle to safely remove snow without damaging the roof.
Remember to prioritize safety and take necessary precautions throughout the construction and maintenance of your carport. If you have any concerns or uncertainties, consult with professionals to ensure the job is done correctly.
With the finishing touches and safety considerations in place, your wooden carport is now complete and ready to provide reliable shelter for your vehicles. Regular maintenance and responsible usage will ensure its functionality and longevity for years to come.
Maintenance and Care
Proper maintenance and care are essential for preserving the functionality and aesthetics of your wooden carport. With regular upkeep, you can ensure its longevity and protect it from potential damage. Here are some maintenance tips to keep in mind:
Read more: How To Build A Metal Carport
Cleaning:
Regularly clean your carport to remove dirt, debris, and leaves that may accumulate on the roof and other surfaces. Use a broom, leaf blower, or gentle water pressure from a hose to clean the area. Avoid using harsh chemicals that can damage the wood or roofing material.
Inspecting for Damage:
Periodically inspect the carport for any signs of damage, such as rot, insect infestation, or loose screws or brackets. Repair or replace any damaged components promptly to prevent further deterioration. Check for water leaks or stains on the roofing material and address them as needed.
Sealing and Finishing:
If you have chosen to paint or stain your wooden carport, consider applying a fresh coat of sealant or finish every few years. This will help protect the wood from moisture, UV rays, and other weather-related damage. Follow the manufacturer’s instructions for proper application.
Trim and Vegetation Maintenance:
Regularly trim any branches or foliage that may come into contact with the carport, especially those that could potentially damage the roof or structure during storms or high winds. Keep vegetation away from the carport to minimize the risk of rot or insect infestation.
Read more: How To Build Patio Furniture Out Of Wood
Snow and Ice Removal:
If you live in a snowy climate, regularly remove snow from the roof of your carport to prevent overloading and potential collapse. Use a roof rake or broom with a long handle to safely remove snow without damaging the roof. Clear any ice accumulation to prevent slips and falls.
Addressing Repairs Promptly:
If you notice any signs of damage or structural issues, such as sagging beams or loose connections, address them promptly. Ignoring these issues can lead to further damage and compromise the integrity of your carport.
Regular Inspections:
Perform regular inspections of your carport, especially before and after severe weather events. Look for any signs of damage or structural concerns. If necessary, consult with professionals for a more thorough evaluation.
By following these maintenance tips and regularly caring for your wooden carport, you can ensure its long-lasting performance and protect your investment. Prioritize regular inspections and address any concerns promptly to keep your carport in optimal condition.
With proper maintenance and care, your wooden carport will continue to provide reliable shelter and protection for your vehicles for many years to come.
Conclusion
Congratulations on completing the construction of your wooden carport! By following this comprehensive guide, you have successfully built a durable and functional structure that will provide reliable shelter and protection for your vehicles. Whether you are a seasoned DIY enthusiast or a beginner, this step-by-step process has equipped you with the knowledge and skills to tackle this project with confidence.
Throughout the construction process, you have learned about the importance of planning and preparation, choosing the right location, gathering the necessary materials and tools, measuring and marking the area, digging and setting the posts, installing the beams and roof supports, attaching the roofing material, and adding optional sides or walls. You have also considered safety considerations and learned about maintenance and care to ensure the longevity of your carport.
Remember, maintaining your carport and addressing repairs promptly are vital for its continued functionality and aesthetics. Regular inspections, cleaning, and sealing will help preserve the wood and keep the structure in optimal condition. By following these maintenance guidelines, you can enjoy the benefits of your carport for years to come.
Whether you use your carport solely for vehicle protection or create a multipurpose space, it adds value and convenience to your property. Your wooden carport not only offers shelter but also enhances the overall aesthetic appeal of your home.
Thank you for embarking on this DIY journey with us. We hope that you have found this guide helpful and informative. Remember that safety should always be your top priority and don’t hesitate to seek professional assistance if needed. Enjoy your new wooden carport and the benefits it brings to your everyday life!
Now that you've mastered building a carport, why not dive into more creative woodworking projects or tackle some exciting outdoor endeavors? Whether you're keen to craft beautiful wooden pieces or transform your backyard, our detailed guides have you covered. Discover the joys of shaping wood into art or embolden your outdoor space with projects that make every corner count. Ready for more hands-on action? Dive into our woodworking guide or get inspired with unique outdoor project ideas.
Frequently Asked Questions about How To Build A Carport Out Of Wood
Was this page helpful?
At Storables.com, we guarantee accurate and reliable information. Our content, validated by Expert Board Contributors, is crafted following stringent Editorial Policies. We're committed to providing you with well-researched, expert-backed insights for all your informational needs.


0 thoughts on “How To Build A Carport Out Of Wood”