

Articles
How To Build Wood Carport
Modified: January 6, 2024
Learn how to build a wood carport with our informative articles. From planning to construction, we provide step-by-step guides and expert tips.
(Many of the links in this article redirect to a specific reviewed product. Your purchase of these products through affiliate links helps to generate commission for Storables.com, at no extra cost. Learn more)
Introduction
Building a wood carport can be a great addition to your property. Not only does it provide shelter for your vehicles, but it also adds value to your home. Whether you need a place to park your car, protect your RV, or store your boat, a well-designed and well-built wood carport can meet all your needs.
In this article, we will guide you through the step-by-step process of building a wood carport. From planning and preparation to the finishing touches, we will cover everything you need to know to successfully complete this project. So let’s get started!
Before we dive into the construction process, it’s important to note that building a wood carport requires some basic knowledge of carpentry and construction. If you are not comfortable with these tasks, it’s advisable to seek the help of a professional or an experienced DIYer.
Now let’s move on to the first step: planning and preparation.
Key Takeaways:
- Planning and preparation are crucial for building a wood carport. Consider the size, design, permits, and materials carefully to ensure a smooth and successful construction process.
- Regular maintenance is essential for the longevity of a wood carport. Perform routine checks, address any issues promptly, and add finishing touches to keep the structure in optimal condition.
Read more: How To Build A Wood Carport
Step 1: Planning and Preparation
Before you start building your wood carport, it’s vital to spend time on careful planning and preparation. This will ensure that you have a clear vision of the end result and help you avoid any potential problems or setbacks along the way.
First, determine the size and location of your carport. Consider the number and size of vehicles you need to accommodate and any local building codes or restrictions that might apply. Measure the available space and mark the area where the carport will stand.
Next, decide on the design and style of your carport. You can choose from a variety of options, including a standalone structure or one attached to your house. Consider the architectural style of your home and select a design that complements it.
Once you have a clear plan in mind, it’s time to obtain any necessary permits or approvals from your local authorities. Check with your city or county building department to ensure you comply with all regulations. Failure to do so may result in costly fines or the need to tear down the carport.
In addition to permits, it’s important to consider the materials you will use for your carport. Wood is a popular choice due to its durability and aesthetic appeal. However, other options like metal or vinyl may be more suitable depending on your climate and personal preferences.
Lastly, gather all the necessary tools and equipment you will need for the construction process. This may include items such as a measuring tape, level, circular saw, drill, hammer, and safety gear like gloves and goggles.
By investing time in careful planning and preparation, you will set yourself up for a smooth and successful wood carport construction project. Once you have completed these initial steps, move on to gathering materials and tools for the next phase.
Step 2: Gathering Materials and Tools
Now that you have a solid plan in place, it’s time to gather all the necessary materials and tools to build your wood carport. By having everything readily available, you can streamline the construction process and minimize delays.
Start by making a list of all the materials you will need. This typically includes:
- Pressure-treated lumber for the posts, beams, and rafters
- Roofing materials such as metal sheets or shingles
- Galvanized screws, nails, and brackets for assembling the structure
- Cement for securing the posts
- Concrete mix for the foundation, if required
- Waterproof sealant or paint to protect the wood
Consider purchasing additional items that can enhance the functionality and longevity of your carport. This may include guttering systems to redirect rainwater, lighting fixtures for increased visibility, and storage solutions for organizing tools and equipment.
Once you have your materials list complete, it’s time to gather the necessary tools. Here are some commonly used tools for building a wood carport:
- Tape measure for accurate measurements
- Level for ensuring everything is straight and aligned
- Circular saw for cutting lumber to size
- Drill with appropriate drill bits for making holes
- Hammer or nail gun for securing nails or screws
- Wrench for tightening bolts and nuts
- Safety gear, including gloves and goggles, to protect yourself
Make sure that your tools are in good working condition and that you have all the necessary attachments and accessories. It’s also wise to have spare batteries or power cords on hand to avoid interruptions during the construction process.
Once you have gathered all the materials and tools, organize them in a convenient and accessible manner. This will save you time and effort during construction. Consider setting up a designated area for storage and workspace.
With your materials and tools ready, you’re now prepared to move on to the next step: setting the posts.
Step 3: Setting the Posts
Setting the posts is a crucial step in the construction of your wood carport, as they provide the foundation and stability for the entire structure. It’s important to ensure that the posts are correctly positioned and securely anchored in the ground.
Before you start setting the posts, double-check the dimensions and layout of your carport to ensure accuracy. Use a tape measure and marking tools to mark the exact locations where the posts will be placed.
Start by digging holes for the posts. The depth and diameter of the holes will depend on the size and height of your carport. As a general rule of thumb, the holes should be at least one-third of the height of the posts and wide enough to accommodate them.
Once the holes are dug, fill the bottom with gravel or crushed stone for drainage purposes. This will help prevent the posts from rotting due to moisture accumulation in the soil.
Now, position the posts in the holes and use a level to ensure they are plumb and straight. Make any necessary adjustments before moving on.
Next, secure the posts in place by pouring concrete into the holes. Mix the concrete according to the manufacturer’s instructions and pour it around the base of each post. Use a level to ensure that the posts remain plumb while the concrete sets.
Allow the concrete to cure and harden for the recommended amount of time before proceeding to the next step. This will typically take a few days, but refer to the specific instructions on the concrete packaging for accurate drying times.
Once the concrete is fully cured, check the stability of the posts. Give them a firm shake to ensure they are firmly anchored in the ground. If any of the posts feel wobbly, additional bracing or adjustments may be necessary.
With the posts securely set, you have completed an important milestone in your wood carport construction. The next step will involve installing the support beams to provide structural stability and support for the roof.
Step 4: Installing the Support Beams
Now that the posts are securely set, it’s time to move on to the next step: installing the support beams. The support beams are essential as they provide stability and strength to the structure of your wood carport.
Before you begin, measure and cut the beams to the appropriate length. Ensure that they align with the layout and dimensions of your carport. Use a circular saw or any other appropriate cutting tool to make clean and precise cuts.
Once the beams are ready, position them on top of the posts. Ensure that they are level and evenly spaced. Use a level and measuring tape to make necessary adjustments and maintain accuracy.
Secure the beams to the posts using brackets or joist hangers. These metal connectors will provide additional stability and ensure a secure attachment. Use galvanized screws or nails specifically designed for outdoor use to prevent rust and corrosion over time.
Check that the beams are level and securely fastened. Give them a gentle shake to ensure they are solid and stable. If any adjustments are needed, make them before proceeding to the next step.
Depending on the design and size of your carport, you may need additional support beams in the middle to distribute the weight evenly across the structure. Measure and cut these beams to size and attach them in the same manner as the outer support beams.
Once all the support beams are in place, double-check the alignment and stability. This is a critical step to ensure the structural integrity of your carport.
With the support beams securely installed, your wood carport is starting to take shape. The next step involves adding the rafters, which will form the framework for the roof.
Note: If you live in an area with heavy snowfall or extreme weather conditions, you may need to consult a structural engineer or local building codes to determine if additional support is required.
When building a wood carport, make sure to use pressure-treated lumber to prevent rot and decay. Additionally, consider adding a waterproof sealant to protect the wood from the elements.
Read more: How To Build A Carport Out Of Wood
Step 5: Adding the Rafters
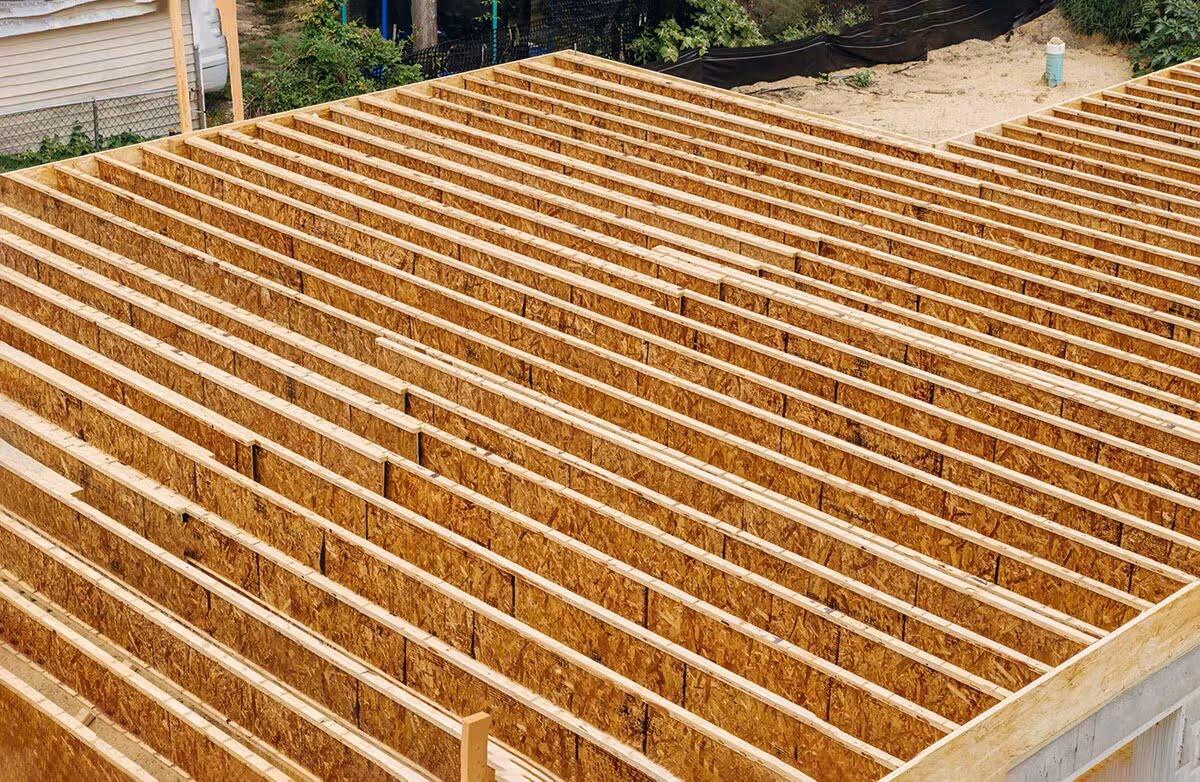
Adding the rafters is a significant step in the construction of your wood carport, as they will form the framework for your roof. Rafters provide support, stability, and allow for proper installation of the roofing materials.
Before you begin, measure and cut the rafters to the appropriate length. The length will depend on the slope and design of your carport roof. Use a measuring tape and a circular saw to make accurate cuts.
Start by installing the ridge beam, which runs along the top of your carport from one end to the other. Secure it to the support beams using brackets or joist hangers, ensuring that it is level and aligned with the carport’s layout.
Next, position the rafters perpendicular to the ridge beam, spacing them evenly apart according to your design plans. The spacing will also depend on the size and weight of the roofing materials that you will be using.
Align the rafters with the top edges of the support beams and ridge beam, ensuring that they are flush and even. Use a level and measuring tape to make any necessary adjustments.
Once the rafters are in place, secure them to the support beams and ridge beam using brackets or joist hangers. Make sure to use galvanized screws or nails designed for outdoor use to prevent rust and corrosion.
Check that the rafters are level and securely fastened. Give them a gentle shake to ensure they are stable and properly attached.
At this stage, you may also want to install any additional cross-bracing or hurricane ties for added support and stability, especially if you live in an area prone to high winds or extreme weather conditions.
With the rafters properly installed, your wood carport is starting to take shape. The next step will involve attaching the roofing materials to provide shelter and protection from the elements.
Note: If you are not confident in your carpentry skills or if your carport design is complex, it may be beneficial to seek the assistance of a professional carpenter or builder for this step.
Step 6: Attaching the Roofing Materials
Now that the framework of your wood carport is complete, it’s time to move on to one of the final steps: attaching the roofing materials. Your choice of roofing materials will depend on your climate, personal preference, and budget.
If you prefer a more traditional look, you can opt for asphalt shingles. These are a popular choice due to their durability and wide range of color options. They are relatively easy to install and provide good protection against the elements.
If you’re looking for a more modern or industrial aesthetic, metal roofing panels can be a great choice. They are durable, lightweight, and resistant to fire, pests, and rot. Metal panels are available in a variety of styles and colors, allowing for customization to suit your preference.
Start by measuring and cutting the roofing materials according to the dimensions of your carport. Ensure that you have enough materials to cover the entire roof surface, including any overhangs or eaves.
Secure the roofing materials to the rafters using appropriate fasteners recommended by the manufacturer. Whether you are using nails or screws, make sure they are designed for use with the specific roofing material you have chosen.
When attaching the roofing materials, start from one end and work your way towards the other, overlapping each row to ensure water runoff. Follow the recommended installation guidelines provided by the manufacturer to ensure a proper and secure installation.
Pay attention to the edges and corners, making sure they are properly sealed and protected against water infiltration. Consider using flashing materials to provide extra waterproofing and prevent leaks.
As you progress with the installation, periodically check for any misalignments, gaps, or loose fasteners. Make any necessary adjustments or repairs to ensure a watertight and secure roof.
Finally, once the roofing materials are fully installed, give the roof a thorough inspection. Make sure all seams are properly sealed and that the roof is securely attached to the rafters. This will help ensure the longevity and functionality of your wood carport.
With the roofing materials securely in place, your wood carport is nearly complete. The final step involves adding the finishing touches and performing regular maintenance for long-lasting durability and aesthetic appeal.
Step 7: Finishing Touches and Maintenance
Congratulations! You are in the final stage of building your wood carport. Now it’s time to add the finishing touches and perform regular maintenance to keep your carport looking great and functioning well for years to come.
Start by giving the wood surfaces a thorough inspection. Look for any rough edges, splinters, or imperfections. Sand down any rough spots and apply a protective sealant or stain to enhance the appearance and protect the wood from moisture, UV rays, and other elements.
Consider adding decorative touches to personalize your wood carport. This could include adding trim or molding, painting it with a color that complements your home, or adding lattice panels for a more decorative look.
Next, check the integrity of the structure. Look for any loose screws, nails, or brackets. Tighten or replace them as needed to ensure that the carport remains stable and secure.
Inspect the roofing materials for any signs of damage or wear. Replace any damaged or missing shingles or panels to maintain the weatherproofing and structural integrity of your carport.
Regular maintenance is essential to extend the lifespan of your wood carport. Perform routine checks to identify any potential issues, such as rot, insect damage, or water leakage. Address these issues promptly to prevent further damage.
Clean the carport regularly to remove dirt, debris, and leaves that may accumulate. This will not only keep it looking tidy but also prevent any potential issues caused by blocked gutters or drainage systems.
Inspect and clean the gutters and downspouts to ensure proper water flow and prevent clogging. Regularly removing debris from the gutters will help to avoid water damage to the carport and its foundation.
Lastly, it’s important to periodically inspect the posts, beams, and other structural components for any signs of deterioration or damage. If you notice any issues, address them promptly by reinforcing or replacing the affected parts.
By performing regular maintenance and addressing issues as soon as they arise, you can keep your wood carport in optimal condition, ensuring its longevity and functionality.
With the finishing touches completed and a maintenance plan in place, you can now enjoy the benefits of your newly built wood carport. Whether you use it to protect your vehicles or as additional outdoor storage, it is sure to add value and convenience to your property.
Remember, building a wood carport requires time, attention to detail, and a willingness to ensure its proper maintenance. By following these steps and investing effort into construction and upkeep, you can create a durable and attractive structure that will serve you well for years to come.
Conclusion
Building a wood carport can be a rewarding project that not only provides functional benefits but also adds value and aesthetic appeal to your property. By following the step-by-step process outlined in this article, you can confidently embark on constructing your own wood carport.
From careful planning and preparation to gathering the materials and tools, each step plays a vital role in ensuring the success of your carport construction. Setting the posts and installing the support beams provide a sturdy foundation, while adding the rafters and attaching the roofing materials complete the structure.
Don’t forget to add the finishing touches and perform regular maintenance to keep your wood carport looking its best and functioning optimally. This includes sealing the wood surfaces, performing routine inspections, and promptly addressing any issues that arise.
Remember, it’s important to consult local building codes and regulations to ensure compliance throughout the construction process. If you’re unsure about any aspect of building a wood carport, consider seeking the assistance of a professional or experienced DIYer.
With your new wood carport, you’ll have a versatile and convenient space to house your vehicles, protect your belongings, or even create a designated outdoor gathering area. Enjoy the benefits of your hard work and take pride in knowing that you built a durable and functional structure that will serve you well for years to come.
Frequently Asked Questions about How To Build Wood Carport
Was this page helpful?
At Storables.com, we guarantee accurate and reliable information. Our content, validated by Expert Board Contributors, is crafted following stringent Editorial Policies. We're committed to providing you with well-researched, expert-backed insights for all your informational needs.


0 thoughts on “How To Build Wood Carport”