Articles
How To Close Off A Chimney
Modified: October 20, 2024
Learn how to close off a chimney with this informative article. Find step-by-step instructions and helpful tips to seal your unused chimney effectively.
(Many of the links in this article redirect to a specific reviewed product. Your purchase of these products through affiliate links helps to generate commission for Storables.com, at no extra cost. Learn more)
Introduction
If you have a chimney in your home that is no longer in use, or you want to close off the chimney to prevent drafts and heat loss, it’s important to know the proper steps to take. Closing off a chimney not only helps improve energy efficiency but also prevents animals from entering and reduces the risk of chimney fires.
In this guide, we will walk you through the steps to close off a chimney effectively and safely. Whether you’re a DIY enthusiast or planning to hire a professional, understanding the process will enable you to make informed decisions and ensure the job is done right.
Please keep in mind that these instructions are general guidelines and may vary depending on the type of chimney you have and local building codes. It’s always a good idea to consult with a chimney professional or local authorities to ensure compliance and safety.
Now, let’s dive into the step-by-step process of closing off a chimney.
Key Takeaways:
- Properly closing off a chimney involves inspecting, removing obstructions, installing a chimney cap, sealing the flue and damper, insulating, and patching cracks. Following these steps improves energy efficiency and prevents safety hazards.
- Closing off a chimney requires attention to detail and adherence to safety guidelines. It’s essential to consult with professionals and follow local building codes to ensure compliance and safety. By properly sealing the chimney, you can improve energy efficiency and prevent issues such as drafts, pests, and chimney fires.
Read more: How To Close Chimney Flue
Step 1: Inspect the Chimney
The first step in closing off a chimney is to thoroughly inspect its condition. This involves visually examining the chimney from both the interior and exterior to identify any potential issues.
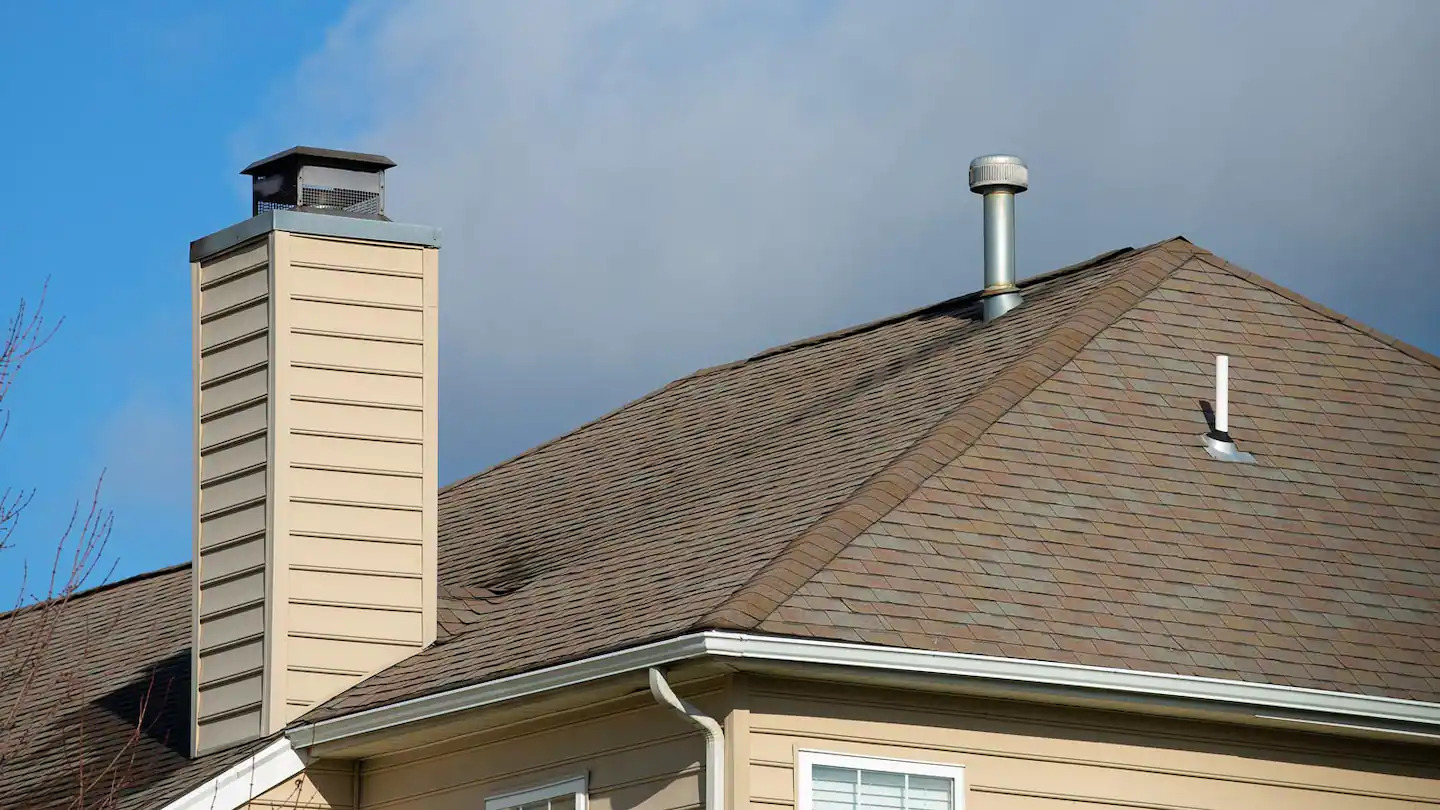
Start by accessing the roof and examining the chimney structure. Look for any signs of damage, such as cracks in the bricks or mortar, loose or missing bricks, or leaning chimney walls. These issues may require repairs before proceeding with the closure process.
Next, inspect the interior of the chimney. Use a flashlight to carefully examine the flue, damper, and any other components. Look for any signs of creosote buildup, which can be hazardous and may require professional cleaning.
Additionally, check for any obstructions, such as bird nests or debris, that may be present inside the chimney. Removing these obstructions is crucial to ensure proper ventilation and prevent any potential fire hazards.
During the inspection, if you encounter any major structural damage or safety concerns, it’s advisable to seek professional assistance. A chimney expert will be able to assess the situation more accurately and provide the necessary repairs or recommendations.
Once you have completed the inspection and addressed any necessary repairs, you can proceed to the next step of closing off the chimney.
Step 2: Remove Any Obstructions
Before closing off the chimney, it’s crucial to ensure that there are no obstructions blocking the flue. Obstructions such as bird nests, leaves, debris, or even small animals can hinder proper ventilation and pose a fire hazard.
Start by accessing the flue. This can typically be done by removing the chimney cap or accessing the flue from inside the home. Using a flashlight, carefully inspect the flue for any signs of obstructions.
If you find any debris or nesting material, use a chimney brush or a long cleaning tool to gently remove it. Avoid using sharp objects or excessive force, as this can damage the flue lining. Be thorough in your cleaning to ensure that the chimney is clear of any obstructions.
If you encounter an animal trapped inside the chimney, it’s important to handle this situation with care. Consult with local wildlife authorities or pest control professionals, as they will have the expertise to safely remove the animal from the chimney without causing harm to both the animal and your property.
Once you have removed any obstructions, double-check the flue to ensure it is completely clear. This will ensure that the chimney is ready for the next steps in the closure process.
Keep in mind that if you are uncomfortable or unsure about removing obstructions yourself, it’s best to seek professional assistance. They have the necessary tools and expertise to safely handle these situations.
With the obstructions removed, you are now ready to move on to the next step of closing off the chimney.
Step 3: Install a Chimney Cap
Installing a chimney cap is an essential step in closing off a chimney. A chimney cap not only prevents rain, snow, and debris from entering the chimney but also helps to keep animals out.
Before choosing a chimney cap, measure the dimensions of your chimney to ensure a proper fit. Chimney caps come in different sizes and styles, so select one that is suitable for your specific chimney type and size.
To install the chimney cap, start by accessing the roof and positioning the cap over the top of the chimney. Ensure that it is centered and level. Depending on the type of chimney cap you have, it may require securing it in place with screws or mounting brackets.
Follow the manufacturer’s instructions for the specific installation method, making sure that it is securely attached to the chimney structure.
The chimney cap serves as a barrier against rain and snow, preventing water from entering the chimney and causing damage. It also acts as a deterrent for animals, preventing them from entering the chimney and creating potential blockages or damage. By installing a chimney cap, you protect your chimney and help maintain its structural integrity.
Once the chimney cap is securely installed, move on to the next step of sealing the flue.
Step 4: Seal the Flue
Sealing the flue is an important step in closing off a chimney. The flue is the passageway that carries smoke and gases out of the chimney, and sealing it properly helps to prevent drafts, heat loss, and the entry of animals or debris.
There are various methods for sealing the flue, depending on the type of chimney and flue you have. Here are a few common options:
- Flue Plug: A flue plug is a device that fits into the flue opening and creates an airtight seal. It is typically made of inflatable materials or insulation and can be easily inserted and removed as needed.
- Flue Damper: A flue damper is a metal plate or device that can be opened or closed to control the airflow in the flue. Closing the flue damper effectively seals off the flue and prevents drafts and heat loss.
- Insulation: Another method for sealing the flue is to insulate it with fireproof insulation. This insulation helps to block drafts and heat transfer while maintaining the structural integrity of the chimney.
Depending on your particular chimney setup and preference, you may choose one of these methods or a combination of them for sealing the flue.
When sealing the flue, it’s important to ensure that the method you choose is secure and effective. This will help to maintain the energy efficiency of your home and prevent the entry of unwanted elements into the chimney.
Once the flue is sealed, move on to the next step of closing off the damper.
Before closing off a chimney, make sure to clean it thoroughly to remove any soot or debris. Then, install a chimney cap to prevent animals and debris from entering. Finally, seal the flue with a chimney balloon or metal damper to prevent drafts.
Read more: How To Block A Chimney Off
Step 5: Seal the Damper
Sealing the damper is a crucial step in closing off a chimney. The damper is a metal plate or flap that is located within the chimney and controls the airflow. By sealing the damper, you can prevent drafts, heat loss, and the entry of unwanted elements.
When the fireplace is not in use, the damper should be closed to keep the cold air from entering your home and to prevent warm air from escaping through the chimney. Here’s a step-by-step guide on sealing the damper:
- Ensure that the damper is in the closed position. You can typically find the damper lever or handle located near the fireplace or at the top of the chimney.
- Inspect the damper for any signs of damage, such as rust or loose hinges. If any issues are detected, it’s important to address them before proceeding with the sealing process.
- Apply a high-temperature silicone sealant around the edges of the damper. This sealant will create an airtight barrier when the damper is closed.
- Allow the sealant to dry completely according to the manufacturer’s instructions. This ensures that the seal is secure and long-lasting.
- Test the damper by opening and closing it to ensure it operates smoothly. This will ensure that the seal remains intact and effective.
Sealing the damper ensures that no air can leak through when the fireplace is not in use, reducing energy loss and preventing drafts. It also acts as an additional barrier against the entry of animals, debris, or rain into the chimney.
With the damper sealed, you can now move on to the next step of insulating the chimney.
Step 6: Insulate the Chimney
Insulating the chimney is an important step in closing off a chimney to maximize energy efficiency and prevent heat loss. Proper insulation helps to maintain the desired temperature inside your home and reduces the workload on your heating and cooling systems.
Here’s a step-by-step guide on how to insulate your chimney:
- Choose the right insulation material: There are different types of insulation materials available, such as fiberglass, cellulose, or foam. Consult with a professional or research the best option for your specific chimney before making a decision.
- Prepare the chimney: Before installing the insulation, ensure that the chimney is clean and free from any debris or obstructions. If necessary, clean the interior of the chimney using a chimney brush or hire a professional chimney cleaning service.
- Measure and cut the insulation: Measure the dimensions of the chimney walls and flue. Use these measurements to cut the insulation material to the appropriate size. Make sure to leave a small gap between the insulation and the flue to allow for air circulation.
- Install the insulation: Carefully insert the cut insulation pieces between the chimney walls and the flue. Press them firmly in place, ensuring a snug fit. Be cautious not to compress the insulation too tightly, as it may reduce its effectiveness.
- Seal any gaps: Use high-temperature silicone sealant or insulation caulk to seal any gaps or seams between the insulation pieces. This will prevent air leakage and ensure the insulation is secure.
- Check for proper ventilation: Ensure that any vents or openings in the chimney are not covered by the insulation. Proper ventilation is necessary to prevent moisture buildup and maintain chimney health.
Insulating the chimney helps to create a thermal barrier, preventing heat loss during cold seasons and keeping your home cool during hot seasons. It also reduces the risk of condensation and moisture-related issues inside the chimney.
After insulating the chimney, proceed to the next step of patching or sealing any cracks to further enhance its closure.
Step 7: Patch or Seal Any Cracks
Inspecting and addressing any cracks in the chimney is an important step in closing off a chimney. Cracks can allow drafts, pests, and moisture to enter the chimney, compromising its integrity and effectiveness. Here’s a guide on how to patch or seal any cracks:
- Thoroughly inspect the chimney: Examine both the interior and exterior of the chimney for any visible cracks or gaps. Pay close attention to the chimney crown, mortar joints, and the base of the chimney.
- Prepare the chimney surface: Clean the area around the cracks, removing any loose debris or crumbling mortar. Use a wire brush or similar tool to scrub away any dirt or old mortar, ensuring a clean surface for the patching material.
- Patch the cracks: Depending on the size and severity of the cracks, you may need different materials for patching. For small cracks, you can use a high-quality mortar mix or chimney repair sealant. Follow the manufacturer’s instructions for mixing and applying the patching material.
- Seal the cracks: Once the patches are applied, use a trowel or putty knife to smooth the surface and blend it with the surrounding chimney structure. This will create a seamless and aesthetically pleasing finish. Allow the patching material to cure or dry according to the manufacturer’s instructions.
- Inspect for hidden cracks: Some cracks may not be noticeable without a closer examination. Consider using a chimney inspection camera or consult with a professional to ensure that all cracks are identified and addressed.
Patching or sealing cracks in the chimney helps to maintain its structural integrity and prevent the entry of drafts, moisture, and pests. It also prolongs the lifespan of the chimney, reducing the need for future repairs.
After patching or sealing the cracks, it’s important to conduct a final inspection and implement safety measures to ensure the chimney is ready for closure.
Step 8: Final Inspection and Safety Measures
Before considering the chimney fully closed off, it’s crucial to conduct a final inspection and implement safety measures to ensure that everything is in order. This step will help ensure the safety of your home and chimney. Here’s what you need to do:
- Inspect the entire chimney: Carefully examine the chimney from both the interior and exterior to ensure that all the necessary steps have been followed correctly. Check for any missed cracks, gaps, or areas that require further attention.
- Test the chimney for drafts: Close all windows and doors near the chimney and light a candle near the fireplace or chimney opening. Watch the flame to see if it flickers, indicating a draft. If you detect a draft, inspect the chimney to locate and address the source.
- Review safety measures: Ensure that smoke and carbon monoxide detectors are installed and functioning properly in the vicinity of the fireplace or chimney. It’s also essential to have a fire extinguisher nearby and to review fire safety procedures with your household members.
- Secure access points: If the chimney has multiple access points, such as access doors or cleanout openings, make sure they are securely closed and sealed to prevent accessibility for pests and drafts.
- Dispose of any debris safely: If you had to remove any debris or nesting materials during the process, dispose of them in a sealed bag or container and place them in appropriate waste receptacles.
By conducting a final inspection and implementing safety measures, you can have peace of mind knowing that your closed-off chimney is secure, energy-efficient, and complies with safety regulations.
Closing off a chimney requires attention to detail, adherence to safety guidelines, and potentially seeking professional assistance if needed. Following these steps will help you successfully close off your chimney, improving energy efficiency and preventing issues such as drafts, pests, and chimney fires.
Remember to consult with local building codes and regulations and consider seeking professional guidance when necessary.
Now that you have completed the closing off process, you can enjoy the benefits of a well-sealed chimney and a more efficient home.
Read more: How To Seal Off A Chimney
Conclusion
Closing off a chimney is a practical and essential step to improve energy efficiency, prevent drafts, and ensure the safety of your home. By following the step-by-step guide outlined in this article, you can effectively close off your chimney and enjoy the benefits it brings.
Inspecting the chimney for damage, removing obstructions, installing a chimney cap, sealing the flue and damper, insulating the chimney, and patching or sealing any cracks are vital tasks to complete during the closure process. Each step plays a crucial role in creating a secure and efficient seal.
It’s important to remember that the process of closing off a chimney may vary depending on the type of chimney you have and local building codes. Always consult with a chimney professional or local authorities to ensure compliance and safety.
By taking the time to properly close off your chimney, you will not only improve the energy efficiency of your home but also prevent the entry of animals, debris, and moisture. Additionally, closing off your chimney minimizes the risk of chimney fires and enhances the overall safety of your home.
Remember to conduct regular inspections and follow safety measures to ensure that your closed-off chimney remains in good condition. Stay mindful of smoke and carbon monoxide detectors, secure access points, and dispose of debris safely.
Closing off a chimney is a task that requires attention to detail, patience, and potentially the assistance of professionals. However, the benefits of a properly sealed chimney far outweigh the effort involved in the process.
So, if you’re ready to improve energy efficiency, enhance safety, and enjoy a draft-free home, follow the steps outlined in this guide to successfully close off your chimney. By doing so, you’ll create a comfortable and secure living space for you and your family.
Frequently Asked Questions about How To Close Off A Chimney
Was this page helpful?
At Storables.com, we guarantee accurate and reliable information. Our content, validated by Expert Board Contributors, is crafted following stringent Editorial Policies. We're committed to providing you with well-researched, expert-backed insights for all your informational needs.


0 thoughts on “How To Close Off A Chimney”