Articles
How To Cut A Tight Conduit Seal
Modified: October 20, 2024
Learn how to cut seal tight conduit with our informative articles. Find step-by-step guides, tips, and expert advice to help you successfully complete your electrical projects.
(Many of the links in this article redirect to a specific reviewed product. Your purchase of these products through affiliate links helps to generate commission for Storables.com, at no extra cost. Learn more)
Introduction
Cutting and sealing tight conduit is a necessary skill for any DIY enthusiast or electrician. Whether you are installing electrical wiring in a new construction project or making repairs and upgrades in an existing structure, knowing how to properly cut and seal conduit is essential.
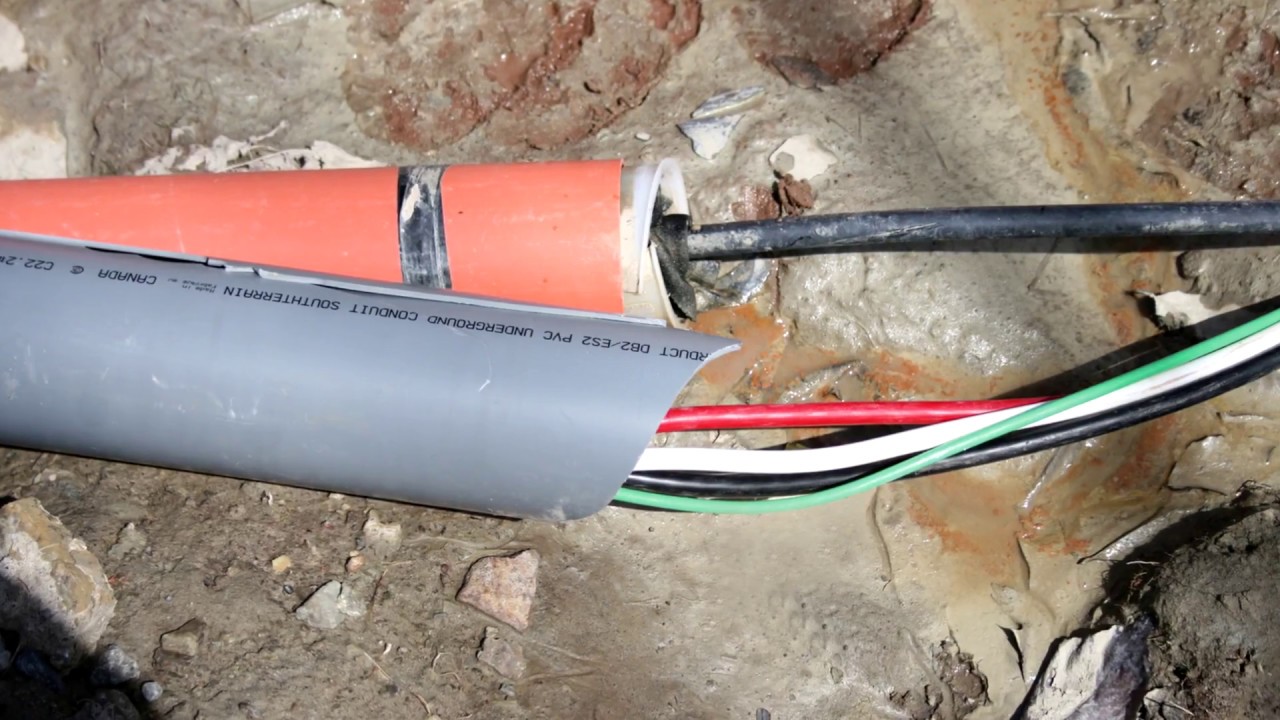
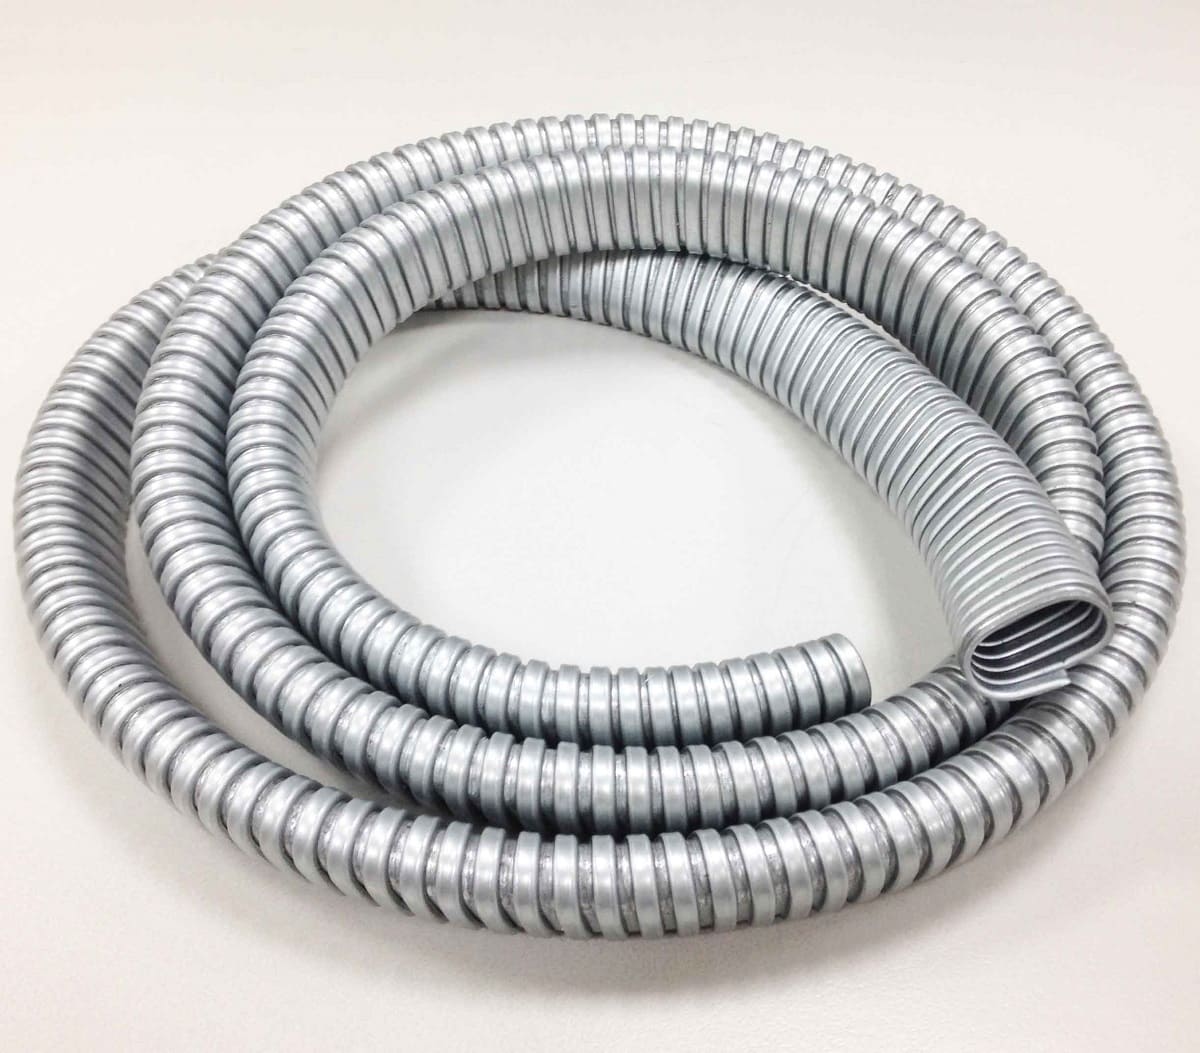
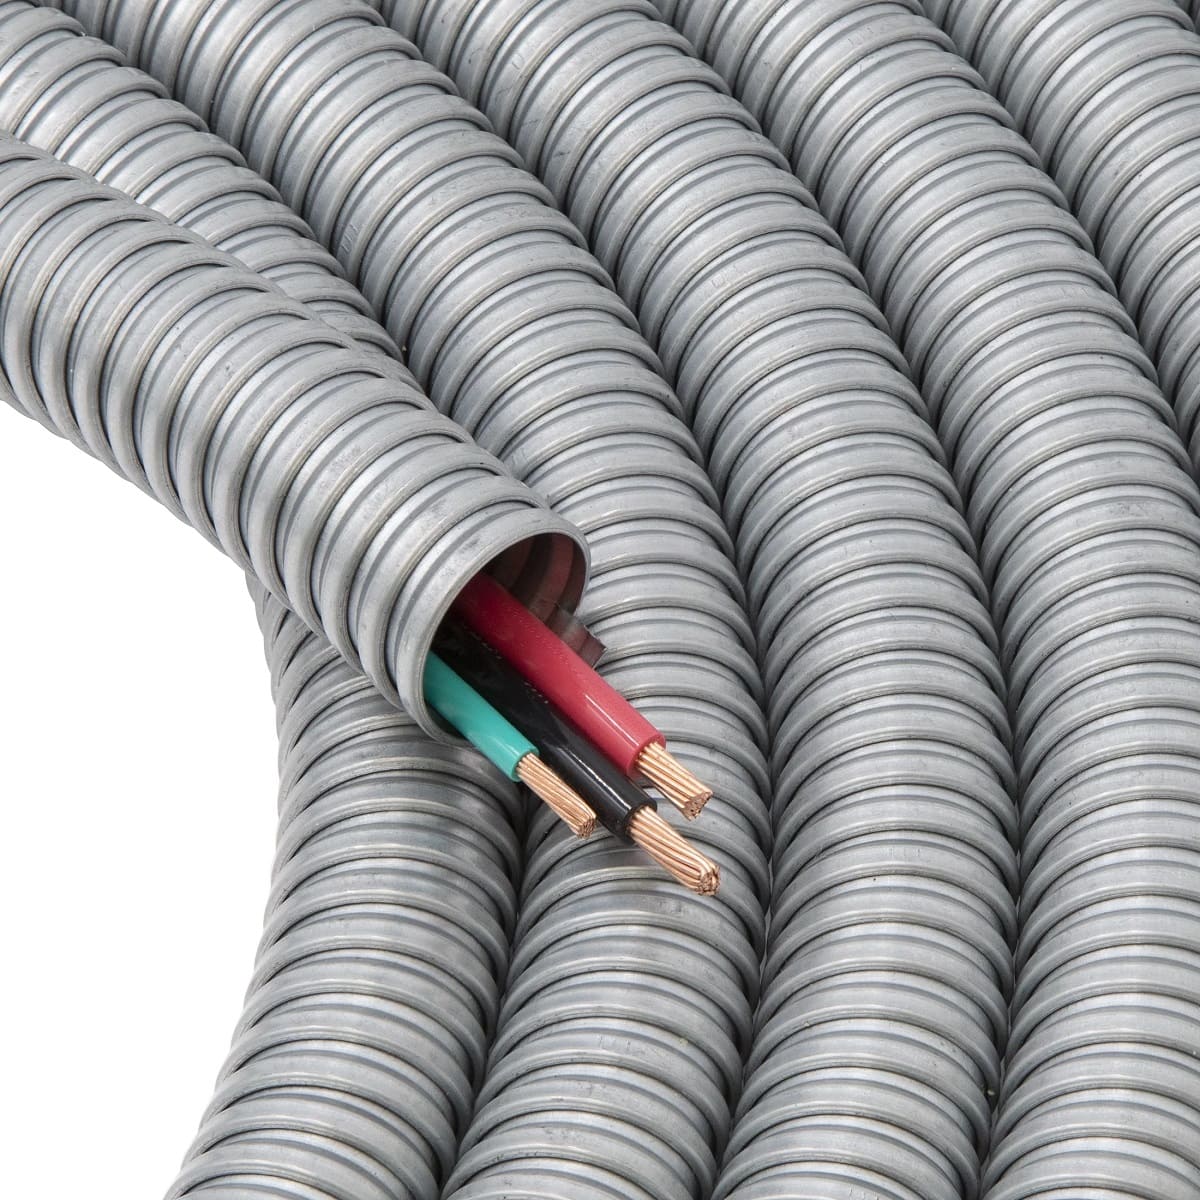
Conduit is a protective sleeve or tube that is used to encase electrical wires and cables. It provides a safe and organized way to route and protect the wiring, ensuring that it is shielded from damage and reducing the risk of accidents or electrical hazards. Cutting and sealing the conduit properly ensures a secure and tight fit, allowing for smooth wire installation and optimal performance.
In this article, we will provide you with a step-by-step guide on how to cut and seal tight conduit. We will discuss the tools and materials needed, as well as provide detailed instructions on how to measure, cut, deburr, and secure the conduit. By following these instructions, you will be able to confidently execute this task, ensuring a professional and reliable electrical installation.
So, let’s gather our tools and get started on this essential skill of cutting and sealing tight conduit!
Key Takeaways:
- Mastering the art of cutting and sealing tight conduit is essential for a professional and reliable electrical installation. By following the step-by-step guide, you can ensure precise cuts, secure fittings, and stable conduit placement.
- Prioritizing safety, using the right tools, and taking the time to measure, cut, deburr, and secure the conduit will result in a secure and organized electrical system. With this skill, you can confidently tackle any electrical project.
Read more: What Is Seal Tight Conduit
Tools and Materials Needed
Before you begin cutting and sealing tight conduit, it’s important to gather all the necessary tools and materials. Here is a list of what you will need:
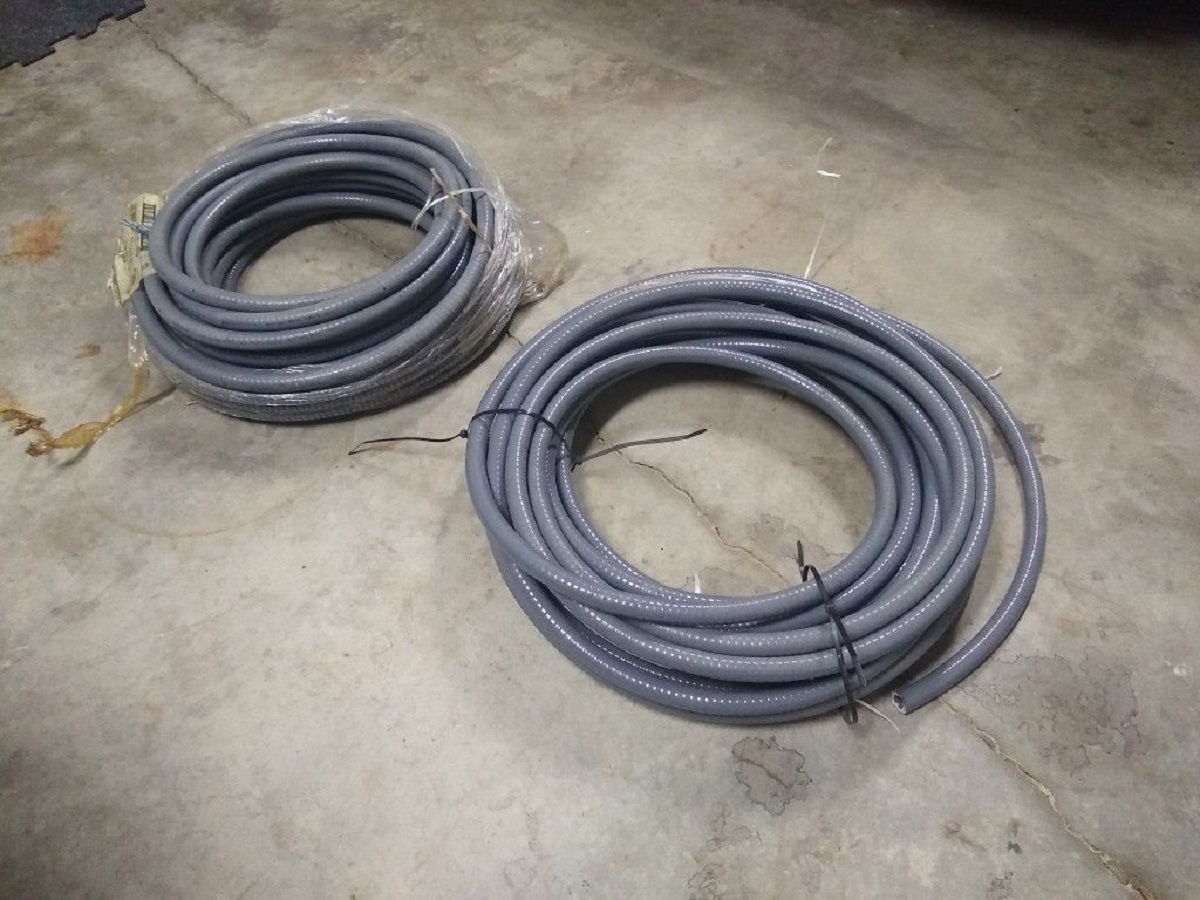
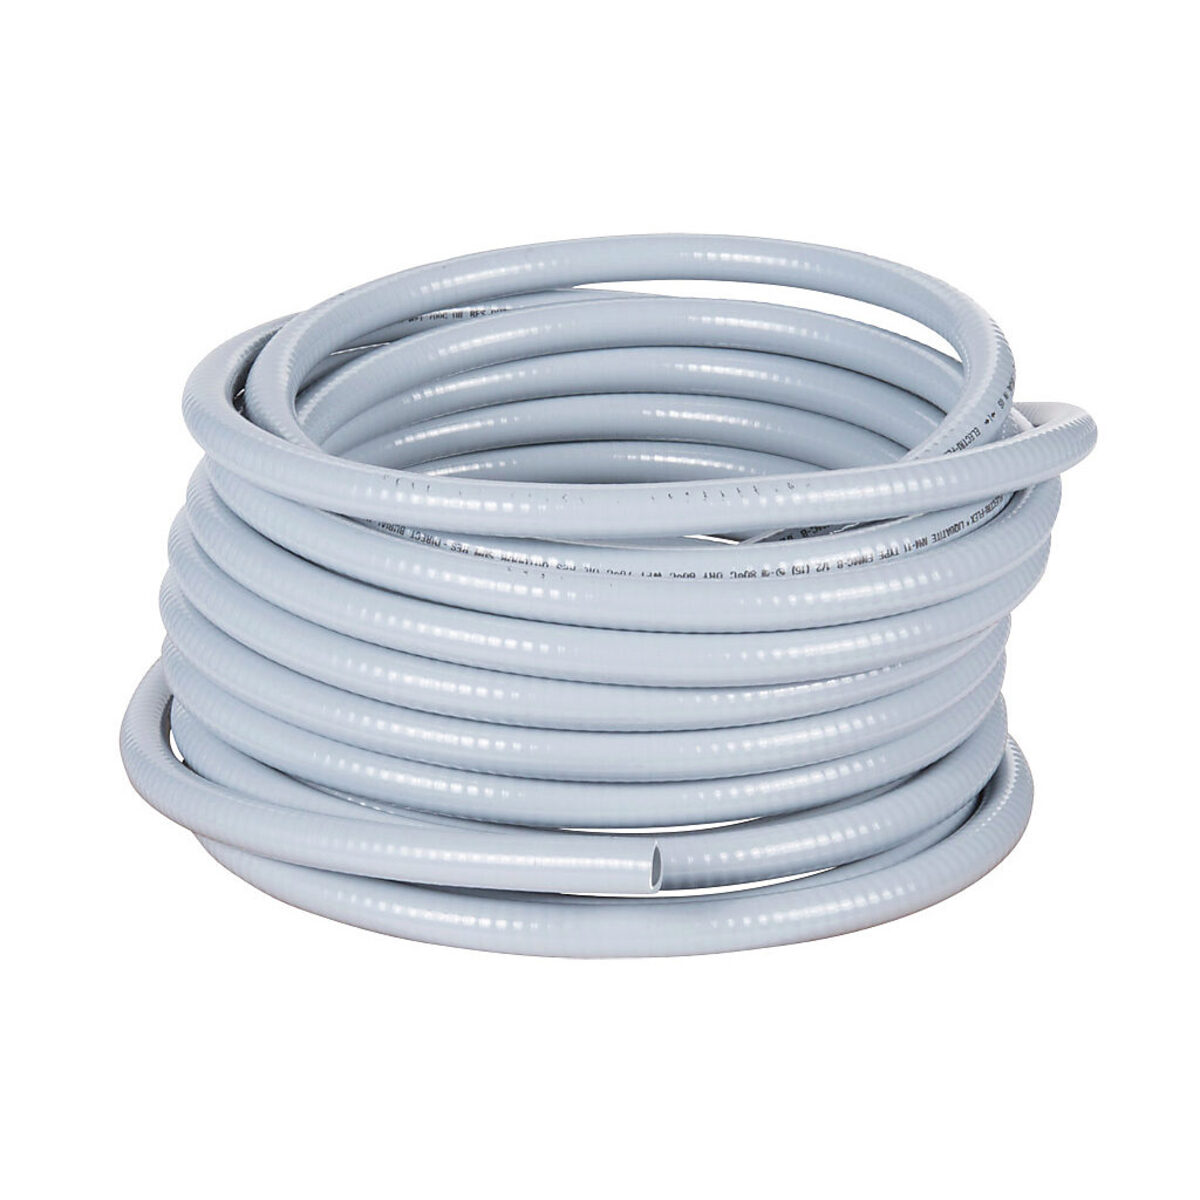
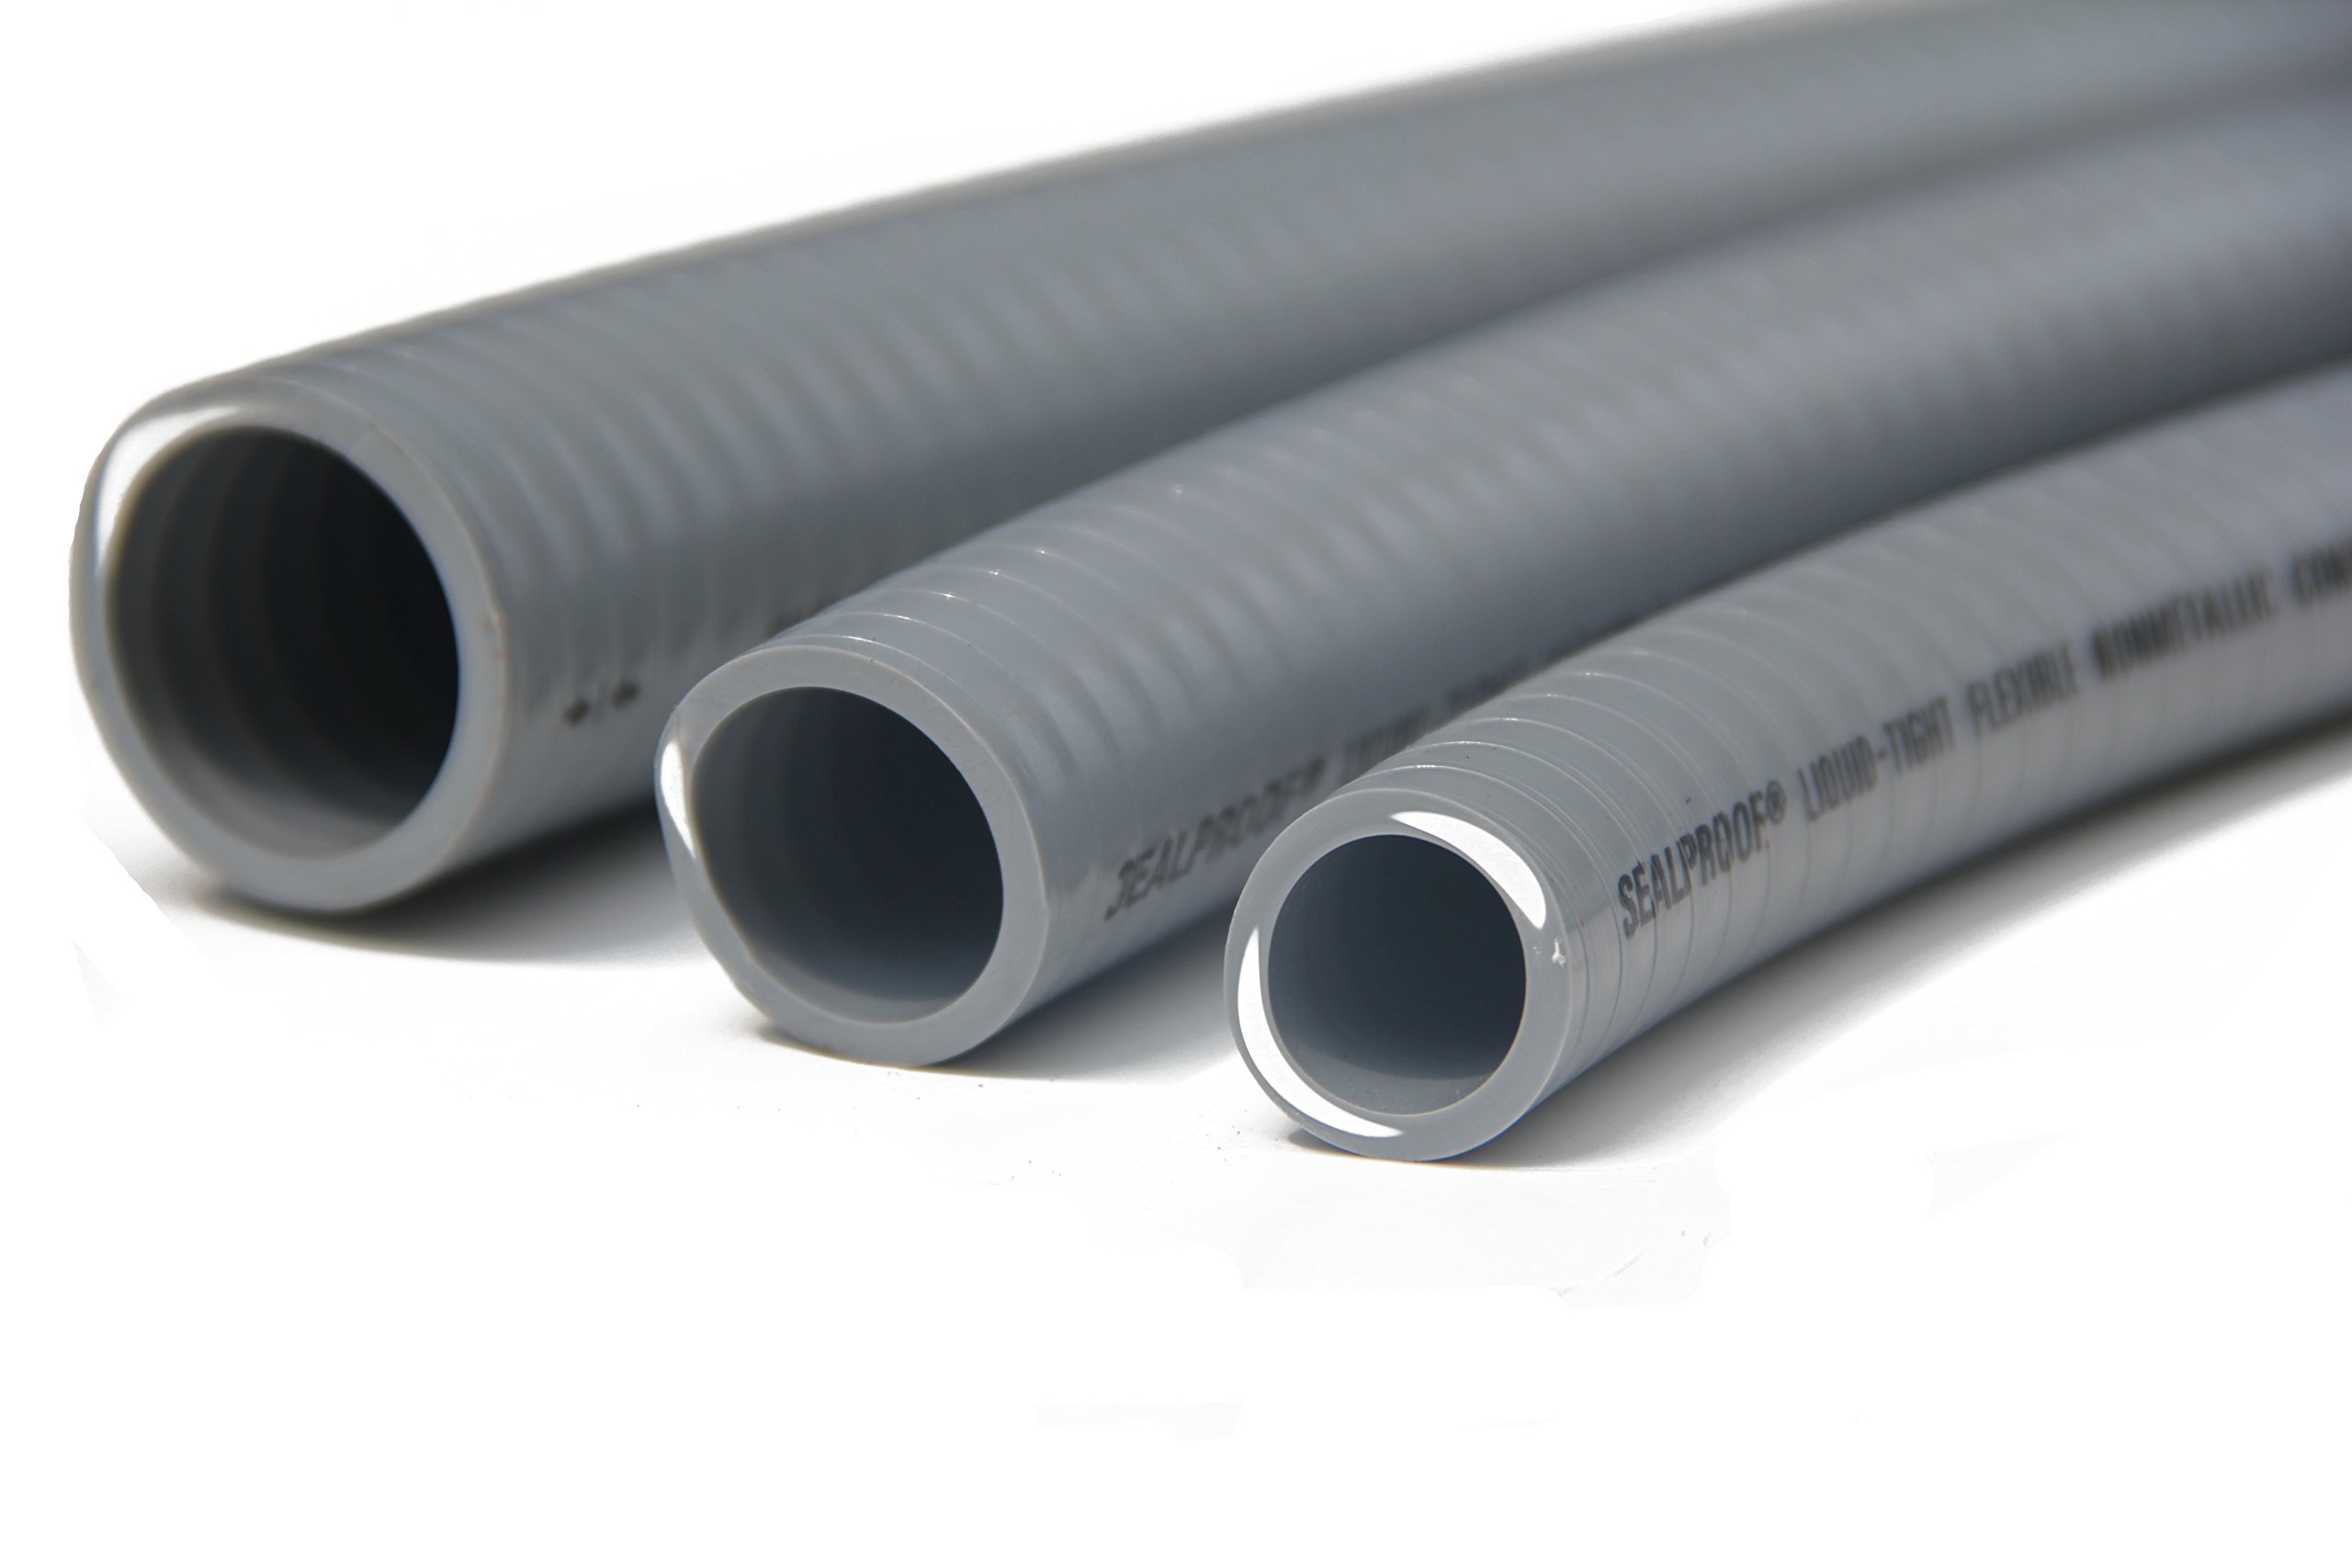
1. Conduit: You will need the appropriate type and size of conduit for your specific electrical installation. This can include rigid metal conduit (RMC), electrical metallic tubing (EMT), or flexible metallic conduit (FMC). Make sure to choose the correct material and size according to the electrical code requirements and your specific project needs.
2. Measuring Tape: A measuring tape is essential for accurately measuring the length of conduit required for the installation. This will help ensure a precise fit and avoid any unnecessary waste of conduit material.
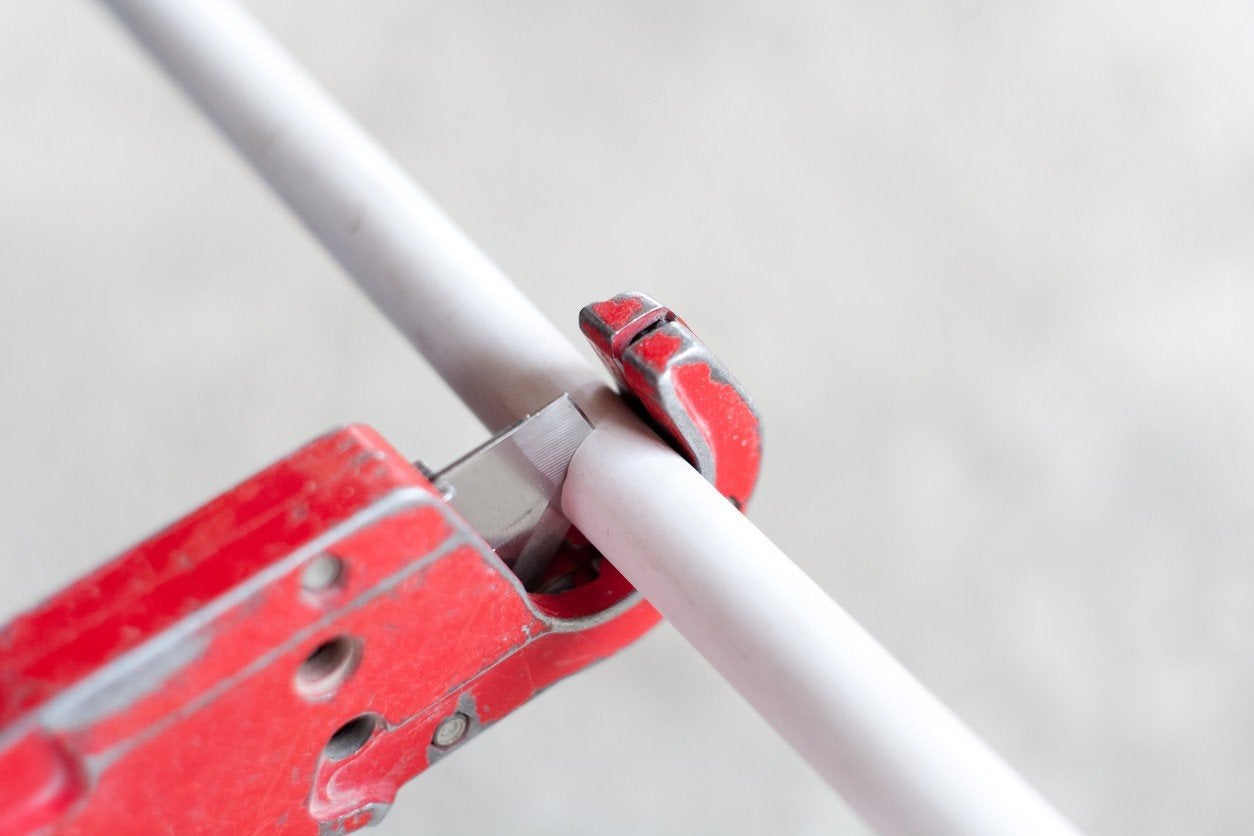
3. Hacksaw or Conduit Cutter: A hacksaw or conduit cutter is necessary for cutting the conduit to the desired length. A hacksaw with a fine-tooth blade can easily cut through metal and plastic conduits. If you prefer a quicker and more precise cut, a conduit cutter specifically designed for cutting conduit may be a better option.
4. Deburring Tool: After cutting the conduit, it’s important to remove any rough or sharp edges. A deburring tool helps smooth out the cut ends of the conduit and removes any burrs or metal shavings that may impede the wire installation.
5. File or Sandpaper: A file or sandpaper can be used to further smooth out the cut edges of the conduit if needed. This ensures a clean and even surface for attaching fittings and removing any remaining burrs.
6. Conduit Bender (optional): If you are working with metal conduit that requires bending, a conduit bender is a handy tool to have. It allows you to make precise bends in the conduit to fit around corners or obstacles.
7. Conduit Fittings: Depending on your specific electrical installation, you may need various conduit fittings such as connectors, couplings, elbows, or straps. These fittings are used to connect sections of conduit, change direction, and secure it in place.
8. Safety Equipment: Safety should always be a priority when working with electrical components. Be sure to have a pair of safety goggles and work gloves to protect your eyes and hands from any potential hazards.
Now that you have gathered all the necessary tools and materials, you are ready to move on to the next steps of cutting and sealing tight conduit.
Step 1: Measure and Mark the Conduit
Before cutting the conduit, it is crucial to take accurate measurements to ensure a proper fit. Here’s how you can measure and mark the conduit:
1. Identify the Starting Point: Determine where the conduit will begin and end in your electrical installation. This could be at an outlet, junction box, or any other point where the wiring needs to be connected.
2. Measure the Length: Using a measuring tape, measure the distance between the starting and ending points of the conduit. Be sure to account for any bends, corners, or vertical runs that the conduit may need to follow.
3. Add Extra Length: It is always a good idea to add a few extra inches to your measurements to allow for adjustments and fittings. This will ensure that you have enough conduit to work with and avoid any shortage during the installation.
4. Mark the Conduit: Once you have determined the correct length, use a marker or a pencil to mark the conduit at the desired measurement. Make a straight and clear line all around the circumference of the conduit at the marked point. This will serve as a guide for cutting the conduit accurately.
5. Double-Check the Measurement: Before proceeding to cut the conduit, double-check your measurement to ensure its accuracy. It’s better to spend a few extra moments verifying the length than to end up with an incorrectly sized conduit.
Taking the time to measure and mark the conduit correctly is critical for a successful electrical installation. Precision in this step will prevent any unnecessary wastage of conduit material and ensure a proper fit that allows for easy passage of wires and cables. Once you have measured and marked the conduit, you can move on to the next step of cutting it to the desired length.
Step 2: Cut the Conduit
With the conduit properly measured and marked, it’s time to cut it to the desired length. Follow these steps to ensure a clean and accurate cut:
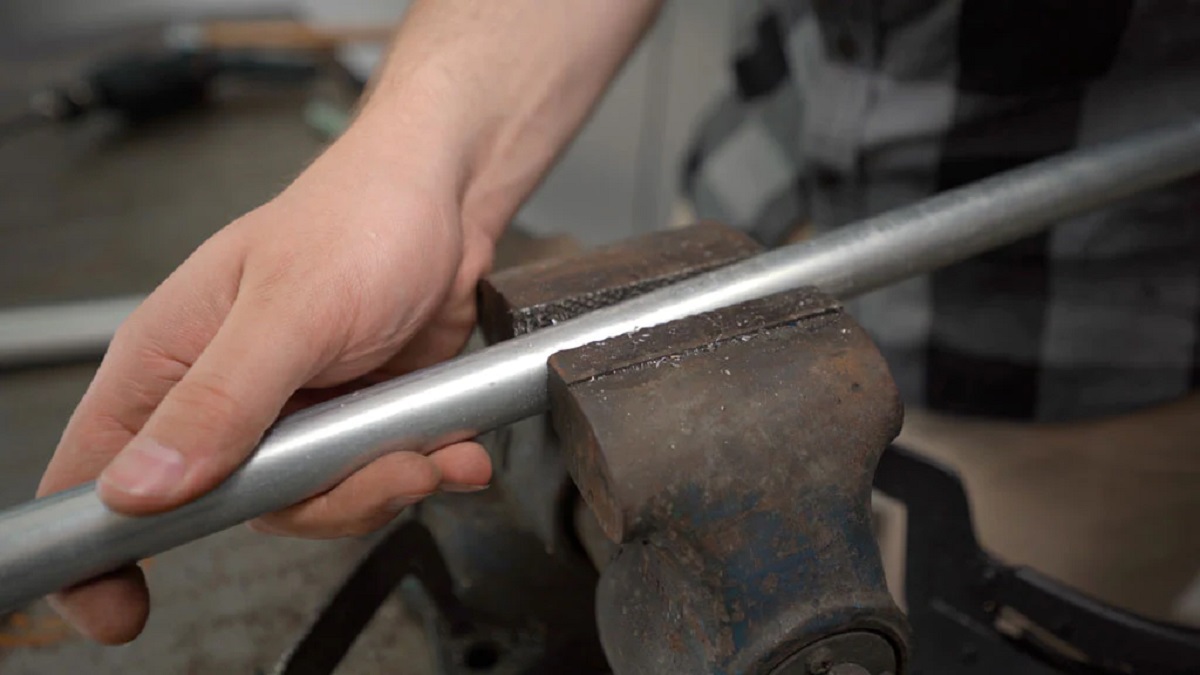
1. Secure the Conduit: Before you begin cutting, secure the conduit in a stable position. You can use a vise or clamp to hold the conduit firmly in place. This will prevent the conduit from moving or slipping while you are cutting.
2. Choose the Cutting Tool: Depending on the type of conduit you are working with, choose the appropriate cutting tool. For metal conduit, a hacksaw with a fine-tooth blade is ideal. If you are working with plastic or PVC conduit, a hacksaw or a specialized conduit cutter will work well.
3. Start Cutting: Position the cutting tool perpendicular to the conduit, aligning it with the marked line. Begin sawing back and forth with even strokes, applying light pressure. Take your time to ensure a smooth and accurate cut. If you are using a conduit cutter, follow the instructions provided by the manufacturer for cutting the conduit.
4. Cut through the Conduit: Continue cutting until you have completely severed the conduit. Take care not to rush or force the blade, as this can lead to an uneven or jagged cut. If you encounter any resistance or difficulty, make sure to readjust the conduit and ensure it is securely held in place before continuing.
5. Check the Cut: Once the cut is complete, inspect the conduit to ensure a clean and straight edge. If any rough or uneven areas are present, use a file or sandpaper to smooth them out. This will prevent any issues when attaching fittings or threading wires through the conduit.
Cutting the conduit accurately is crucial for a successful electrical installation. Take your time, maintain steady hand movements, and ensure that the cut is clean and straight. By following these steps, you will have a properly cut conduit ready for the next phase of the installation process.
When cutting seal tight conduit, use a hacksaw or a specialized conduit cutter to ensure a clean and precise cut. Be sure to wear safety goggles and gloves to protect yourself from any sharp edges.
Step 3: Remove Burrs and Deburr the Ends
After cutting the conduit, it’s important to remove any burrs or rough edges from the cut ends. Burrs can obstruct the smooth insertion of wires and cables, and they can also pose a safety hazard by causing cuts or abrasions. Follow these steps to remove burrs and deburr the ends of the conduit:
1. Inspect the Cut Ends: Take a close look at the cut ends of the conduit to identify any burrs or rough spots. Run your fingers along the edges to feel for any sharp or uneven areas.
2. Use a Deburring Tool: Utilize a deburring tool to remove the burrs and smooth out the cut ends. A deburring tool typically has a contoured blade that can fit inside the conduit, allowing you to chamfer the edges. Insert the deburring tool into the conduit and rotate it in a circular motion to shave off any burrs.
3. File or Sandpaper (if necessary): If the deburring tool is not sufficient to remove all the burrs, you can use a file or sandpaper as an alternative. Gently rub the file or sandpaper along the cut ends of the conduit, applying light pressure. Keep working until the edges are smooth and free of any roughness.
4. Clean the Ends: After deburring, use a clean cloth or rag to wipe away any debris or metal shavings from the ends of the conduit. This ensures that no loose particles remain that could potentially interfere with the wire installation or cause damage to the electrical components.
5. Repeat for Multiple Cuts: If you have made multiple cuts on different pieces of conduit, repeat the deburring process for each cut end. It’s important to ensure that all the ends are properly deburred and smooth.
Removing burrs and deburring the ends of the conduit is an essential step to create safe and efficient wire installation. By taking the time to address any sharp edges, you will prevent any damage to the wires and make it easier to feed them through the conduit. With the burrs removed, you can proceed to the next step with confidence.
Read more: How To Cut Conduit
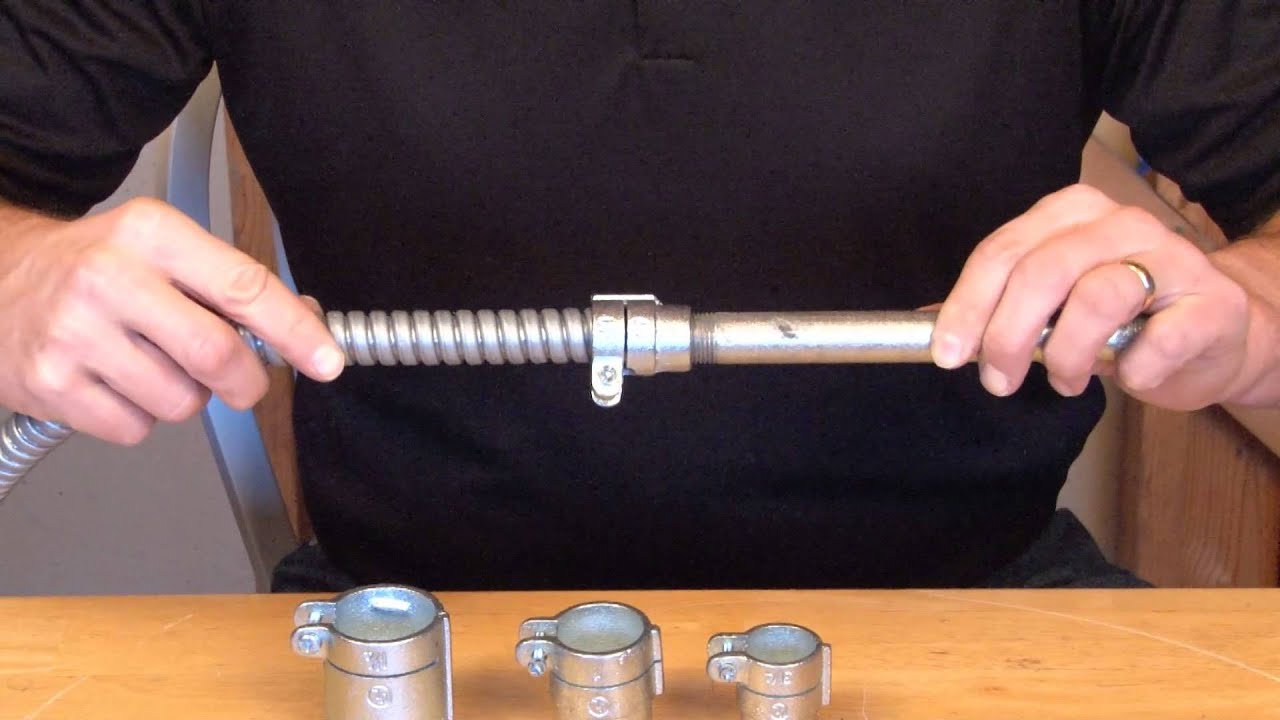
Step 4: Attach Fittings to the Conduit
Once the conduit is cut and deburred, the next step is to attach fittings to facilitate the proper installation and connection. Follow these steps to attach fittings to the conduit:
1. Select the Appropriate Fittings: Determine the type of fittings you need based on your specific electrical installation requirements. This could include connectors, couplings, elbows, or straps. Make sure the fittings are compatible with the size and material of your conduit.
2. Prepare the Conduit: Ensure that the cut ends of the conduit are clean and free of any debris or burrs. Wipe them down with a clean cloth or rag if necessary.
3. Measure and Mark the Insertion Depth: Check the instructions provided with the fittings to determine the necessary insertion depth of each fitting into the conduit. Use a measuring tape to carefully mark the desired insertion depth on the outside of the conduit. This will serve as a guide during the fitting process.
4. Apply Lubrication (if needed): If the fittings are difficult to insert, you can apply a small amount of lubricant, such as a silicone-based lubricant or electrical lubricant, to the inside of the conduit or the outside of the fittings. This will ease the insertion process.
5. Insert the Fittings: Align the fittings with the marked insertion depth on the conduit. Firmly push the fittings into the conduit, making sure they are securely seated. Use a twisting motion if necessary to aid in the insertion process. Ensure that the fittings are properly aligned and tightly connected to the conduit.
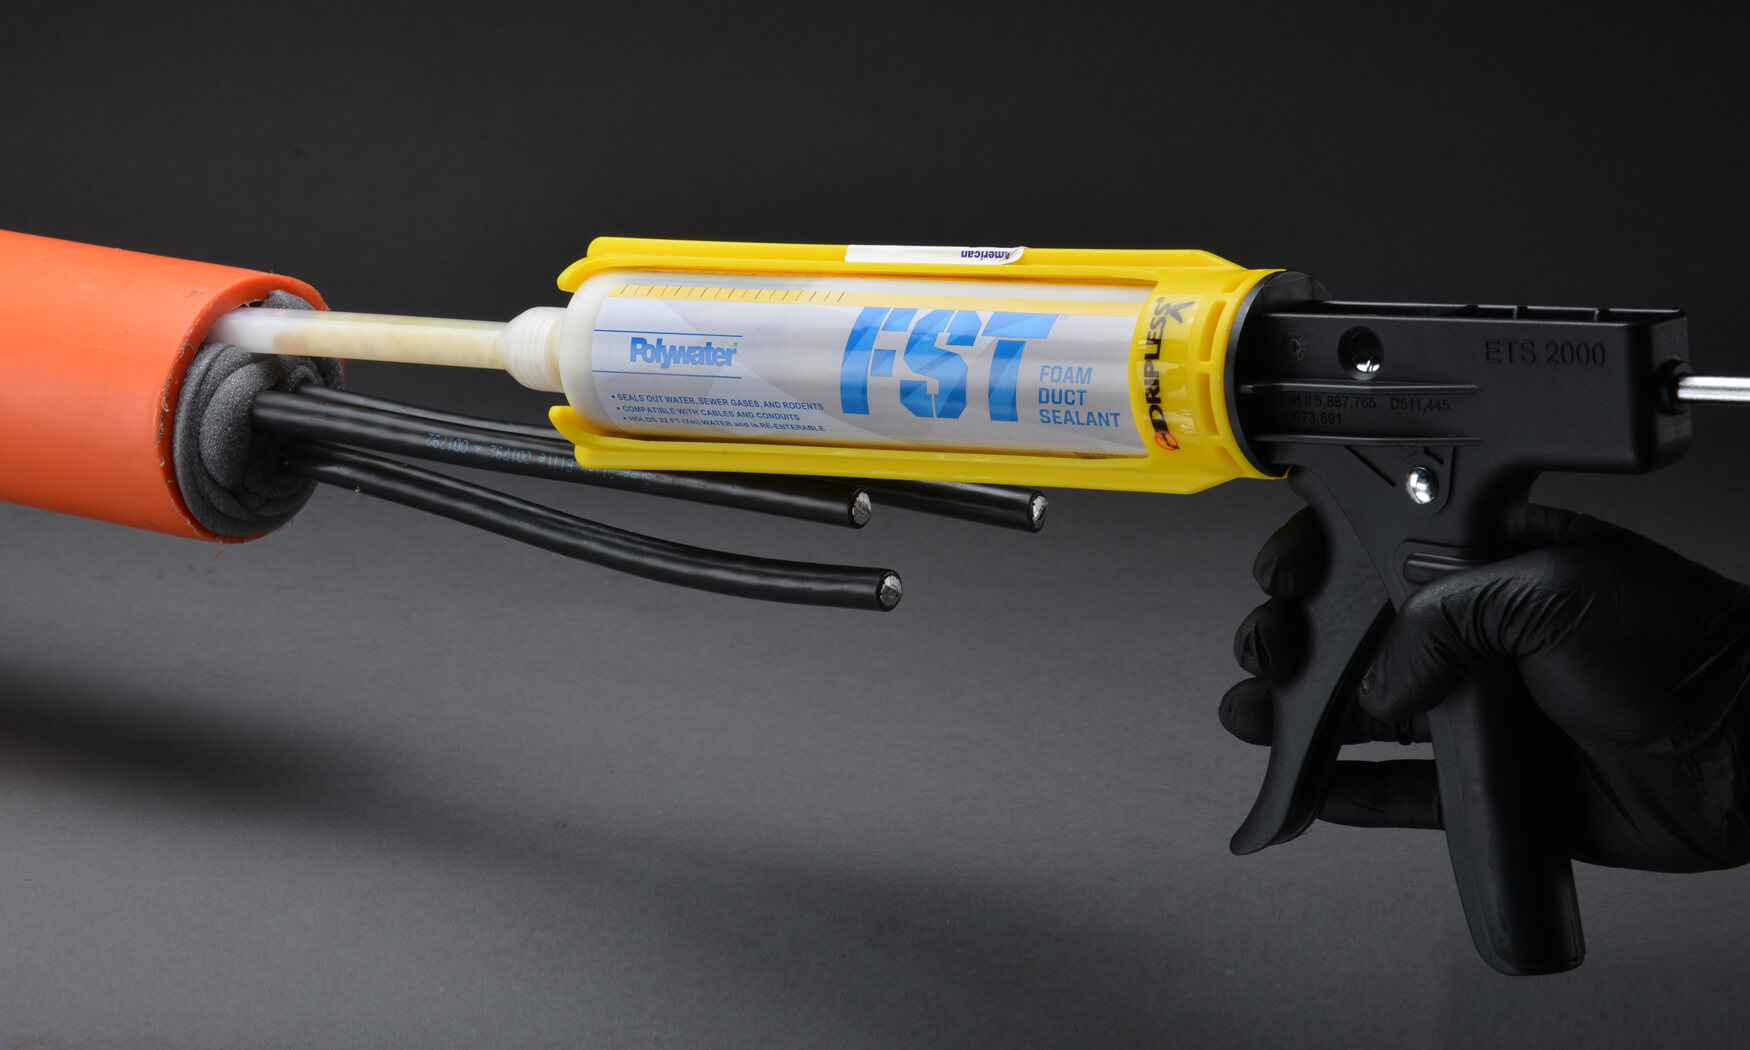
6. Secure the Fittings: Follow the manufacturer’s instructions to secure the fittings in place. This may involve tightening screws, using locking nuts, or applying adhesive or sealant to create a watertight seal. Be sure to use the appropriate tools and techniques specified by the manufacturer.
7. Inspect the Connections: After attaching the fittings, inspect them to ensure that they are securely attached and the connections are tight. This will prevent any leaks or loose connections that could compromise the integrity of the electrical installation.
By attaching fittings to the conduit, you are setting the foundation for a secure and reliable electrical system. Take your time to properly select and install the fittings, ensuring they are tightly connected to the conduit. With the fittings securely in place, you are ready to move on to the final step of securing the conduit in its desired location.
Step 5: Secure the Conduit in Place
Now that the conduit is cut, deburred, and fitted with the necessary connectors, it’s time to secure it in its desired location. Follow these steps to properly secure the conduit:
1. Plan the Conduit Route: Determine the best route for the conduit, considering safety, efficiency, and aesthetics. Take into account any obstacles or obstructions that may require the conduit to change direction or bend.
2. Mark Mounting Points: Use a pencil or marker to mark the locations where the conduit will be secured. These points will typically be where straps, hangers, or brackets are attached to the conduit and the mounting surface.
3. Attach Mounting Hardware: Depending on your project and the specific requirements, choose the appropriate mounting hardware, such as conduit straps, hangers, or brackets. Securely attach these hardware pieces to the conduit at the marked mounting points using screws or bolts.
4. Mount the Conduit: Position the conduit along the planned route, ensuring that it aligns with any marked mounting points. Use the appropriate fasteners, such as screws or anchors, to securely attach the conduit to the mounting surface. Ensure that the conduit is level and straight as it is being mounted.
5. Support Long Runs: For longer conduit runs, additional support may be necessary to prevent sagging. Install intermediate mounting hardware at regular intervals along the conduit to provide adequate support and maintain stability.
6. Check for Level and Alignment: Periodically check that the conduit remains level and aligned as you secure it in place. Use a level to ensure that the conduit is horizontally straight, and adjust as needed to maintain proper alignment.
7. Inspect and Test: Once the conduit is secured, visually inspect the entire system to ensure that it is properly installed and securely fastened. Give the conduit a gentle shake to test for any loose connections. Make any necessary adjustments or tighten connections if needed.
By properly securing the conduit, you ensure that it remains in place, providing stability and protecting the electrical wiring. Take the time to plan the conduit route, mark the mounting points, and attach the appropriate mounting hardware. By following these steps, you will have a securely installed conduit system ready for the safe and reliable passage of electrical wires and cables.
Conclusion
Cutting and sealing tight conduit is a crucial skill for any DIY enthusiast or electrician involved in electrical installations. Following the step-by-step guide outlined in this article, you have learned how to measure and mark the conduit accurately, cut it to the desired length, remove burrs and deburr the ends, attach fittings, and secure the conduit in its designated location.
By using the proper tools and materials, you can ensure a precise and clean cut, eliminating any rough edges or burrs that could hinder wire installation or pose safety risks. Attaching fittings correctly ensures a secure connection between conduit sections, allowing for proper routing and protecting electrical wires and cables.
Securing the conduit provides stability and support, preventing sagging or movement that could potentially damage the wires or compromise the electrical system’s integrity. By following these steps diligently, you can achieve a professional and reliable electrical installation that adheres to industry standards and promotes safety.
Remember to prioritize safety throughout the entire process. Wear appropriate personal protective equipment, use caution when handling tools, and follow all electrical safety guidelines outlined by your local building codes.
By mastering the skill of cutting and sealing tight conduit, you have gained the ability to perform a fundamental task in electrical installations. Whether you are working on a new construction project or making repairs and upgrades, having this skill will enable you to create a secure and organized electrical system.
Now, armed with the knowledge and techniques provided in this article, you can confidently take on your next electrical project, knowing how to cut and seal tight conduit with precision and efficiency. Happy wiring!
Frequently Asked Questions about How To Cut A Tight Conduit Seal
Was this page helpful?
At Storables.com, we guarantee accurate and reliable information. Our content, validated by Expert Board Contributors, is crafted following stringent Editorial Policies. We're committed to providing you with well-researched, expert-backed insights for all your informational needs.


0 thoughts on “How To Cut A Tight Conduit Seal”