(Many of the links in this article redirect to a specific reviewed product. Your purchase of these products through affiliate links helps to generate commission for Storables.com, at no extra cost. Learn more)
Introduction
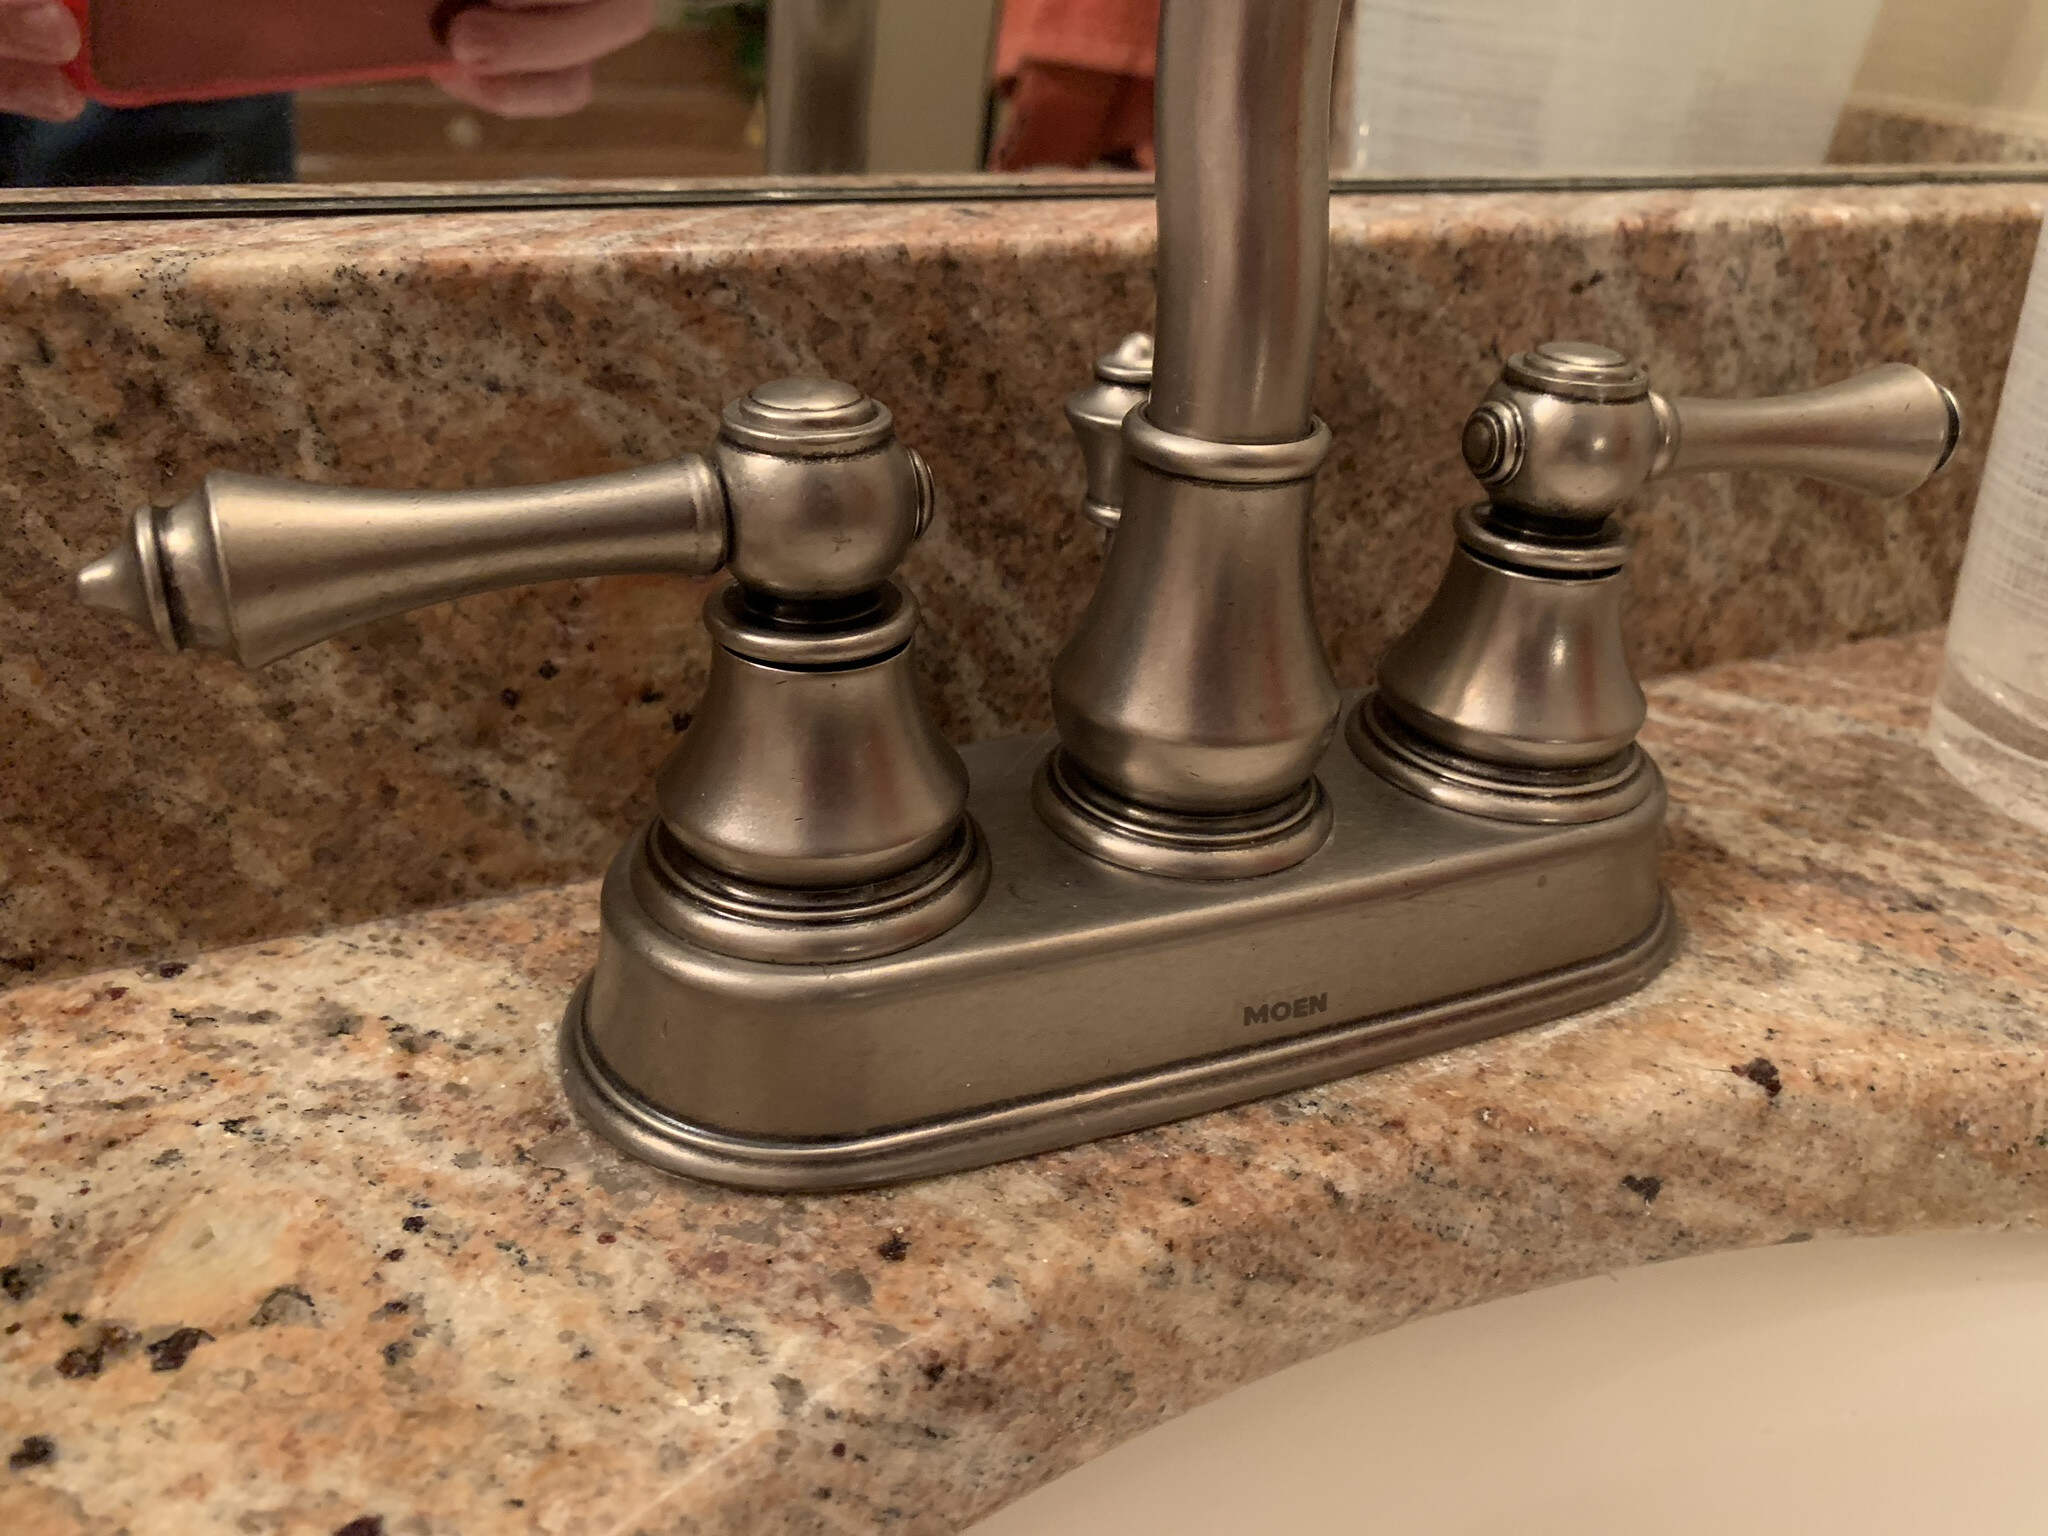
Having a tight faucet handle can be a frustrating and inconvenient problem. It can make it difficult to turn the water on and off and can even lead to further damage if not addressed promptly. However, loosening a tight faucet handle is a relatively simple task that can be done with minimal tools and effort.
In this article, we will guide you through the step-by-step process of loosening a tight faucet handle. By following these instructions, you will be able to restore the functionality of your faucet and alleviate the frustration caused by a stubborn handle.
Before we begin, it’s important to note that the specific steps and tools for loosening a tight faucet handle may vary depending on the type and model of your faucet. We will provide general guidelines that should work for most faucets, but it’s always a good idea to consult the manufacturer’s instructions or seek professional assistance if you are unsure.
Now, let’s gather the necessary tools and materials to get started.
Key Takeaways:
Easily resolve a tight faucet handle by following simple steps, including shutting off the water supply, removing the handle, inspecting for damage, and applying lubricant. Enjoy hassle-free faucet functionality!
Gather essential tools like an adjustable wrench and lubricant to loosen a tight faucet handle. Follow step-by-step instructions to reassemble and test the handle for smooth movement.
Before you begin loosening a tight faucet handle, you’ll need to gather a few essential tools and materials. These will help you navigate the process smoothly and ensure successful results. Here are the items you’ll need:
Adjustable wrench
Phillips-head screwdriver
Allen wrench (if applicable)
WD-40 or a similar penetrating lubricant
Cloth or rag
It’s crucial to have these tools readily available before starting the process. The adjustable wrench will be used to loosen and tighten various components of the faucet, while the Phillips-head screwdriver will help you access and remove specific parts.
If your faucet has a set screw, you’ll also need an Allen wrench to loosen it. Additionally, using a penetrating lubricant like WD-40 will facilitate the loosening process by reducing friction and rust.
Lastly, having a cloth or rag nearby will allow you to clean any debris or old lubricant from the handle and stem as you progress through the steps.
Now that you have all the necessary tools and materials, let’s move on to the step-by-step process of loosening your tight faucet handle.
Step 1: Shut off the Water Supply
The first step in loosening a tight faucet handle is to shut off the water supply. This is important to prevent any accidental leaks or water damage during the process. Here’s what you need to do:
Locate the shut-off valves: Look under your sink or in the utility room to find the shut-off valves. There should be one for hot water and one for cold water. Turn the valves clockwise to shut off the water supply.
Test the water supply: Once you’ve shut off the valves, turn on the faucet to make sure no more water is coming out. If you still see water flow, double-check that both valves are completely closed.
Shutting off the water supply before working on the faucet handle ensures a safe and dry environment. It also allows you to have full control over the process without worrying about any water leakage.
Now that you’ve successfully shut off the water supply, you’re ready to move on to the next step: removing the decorative handle cap.
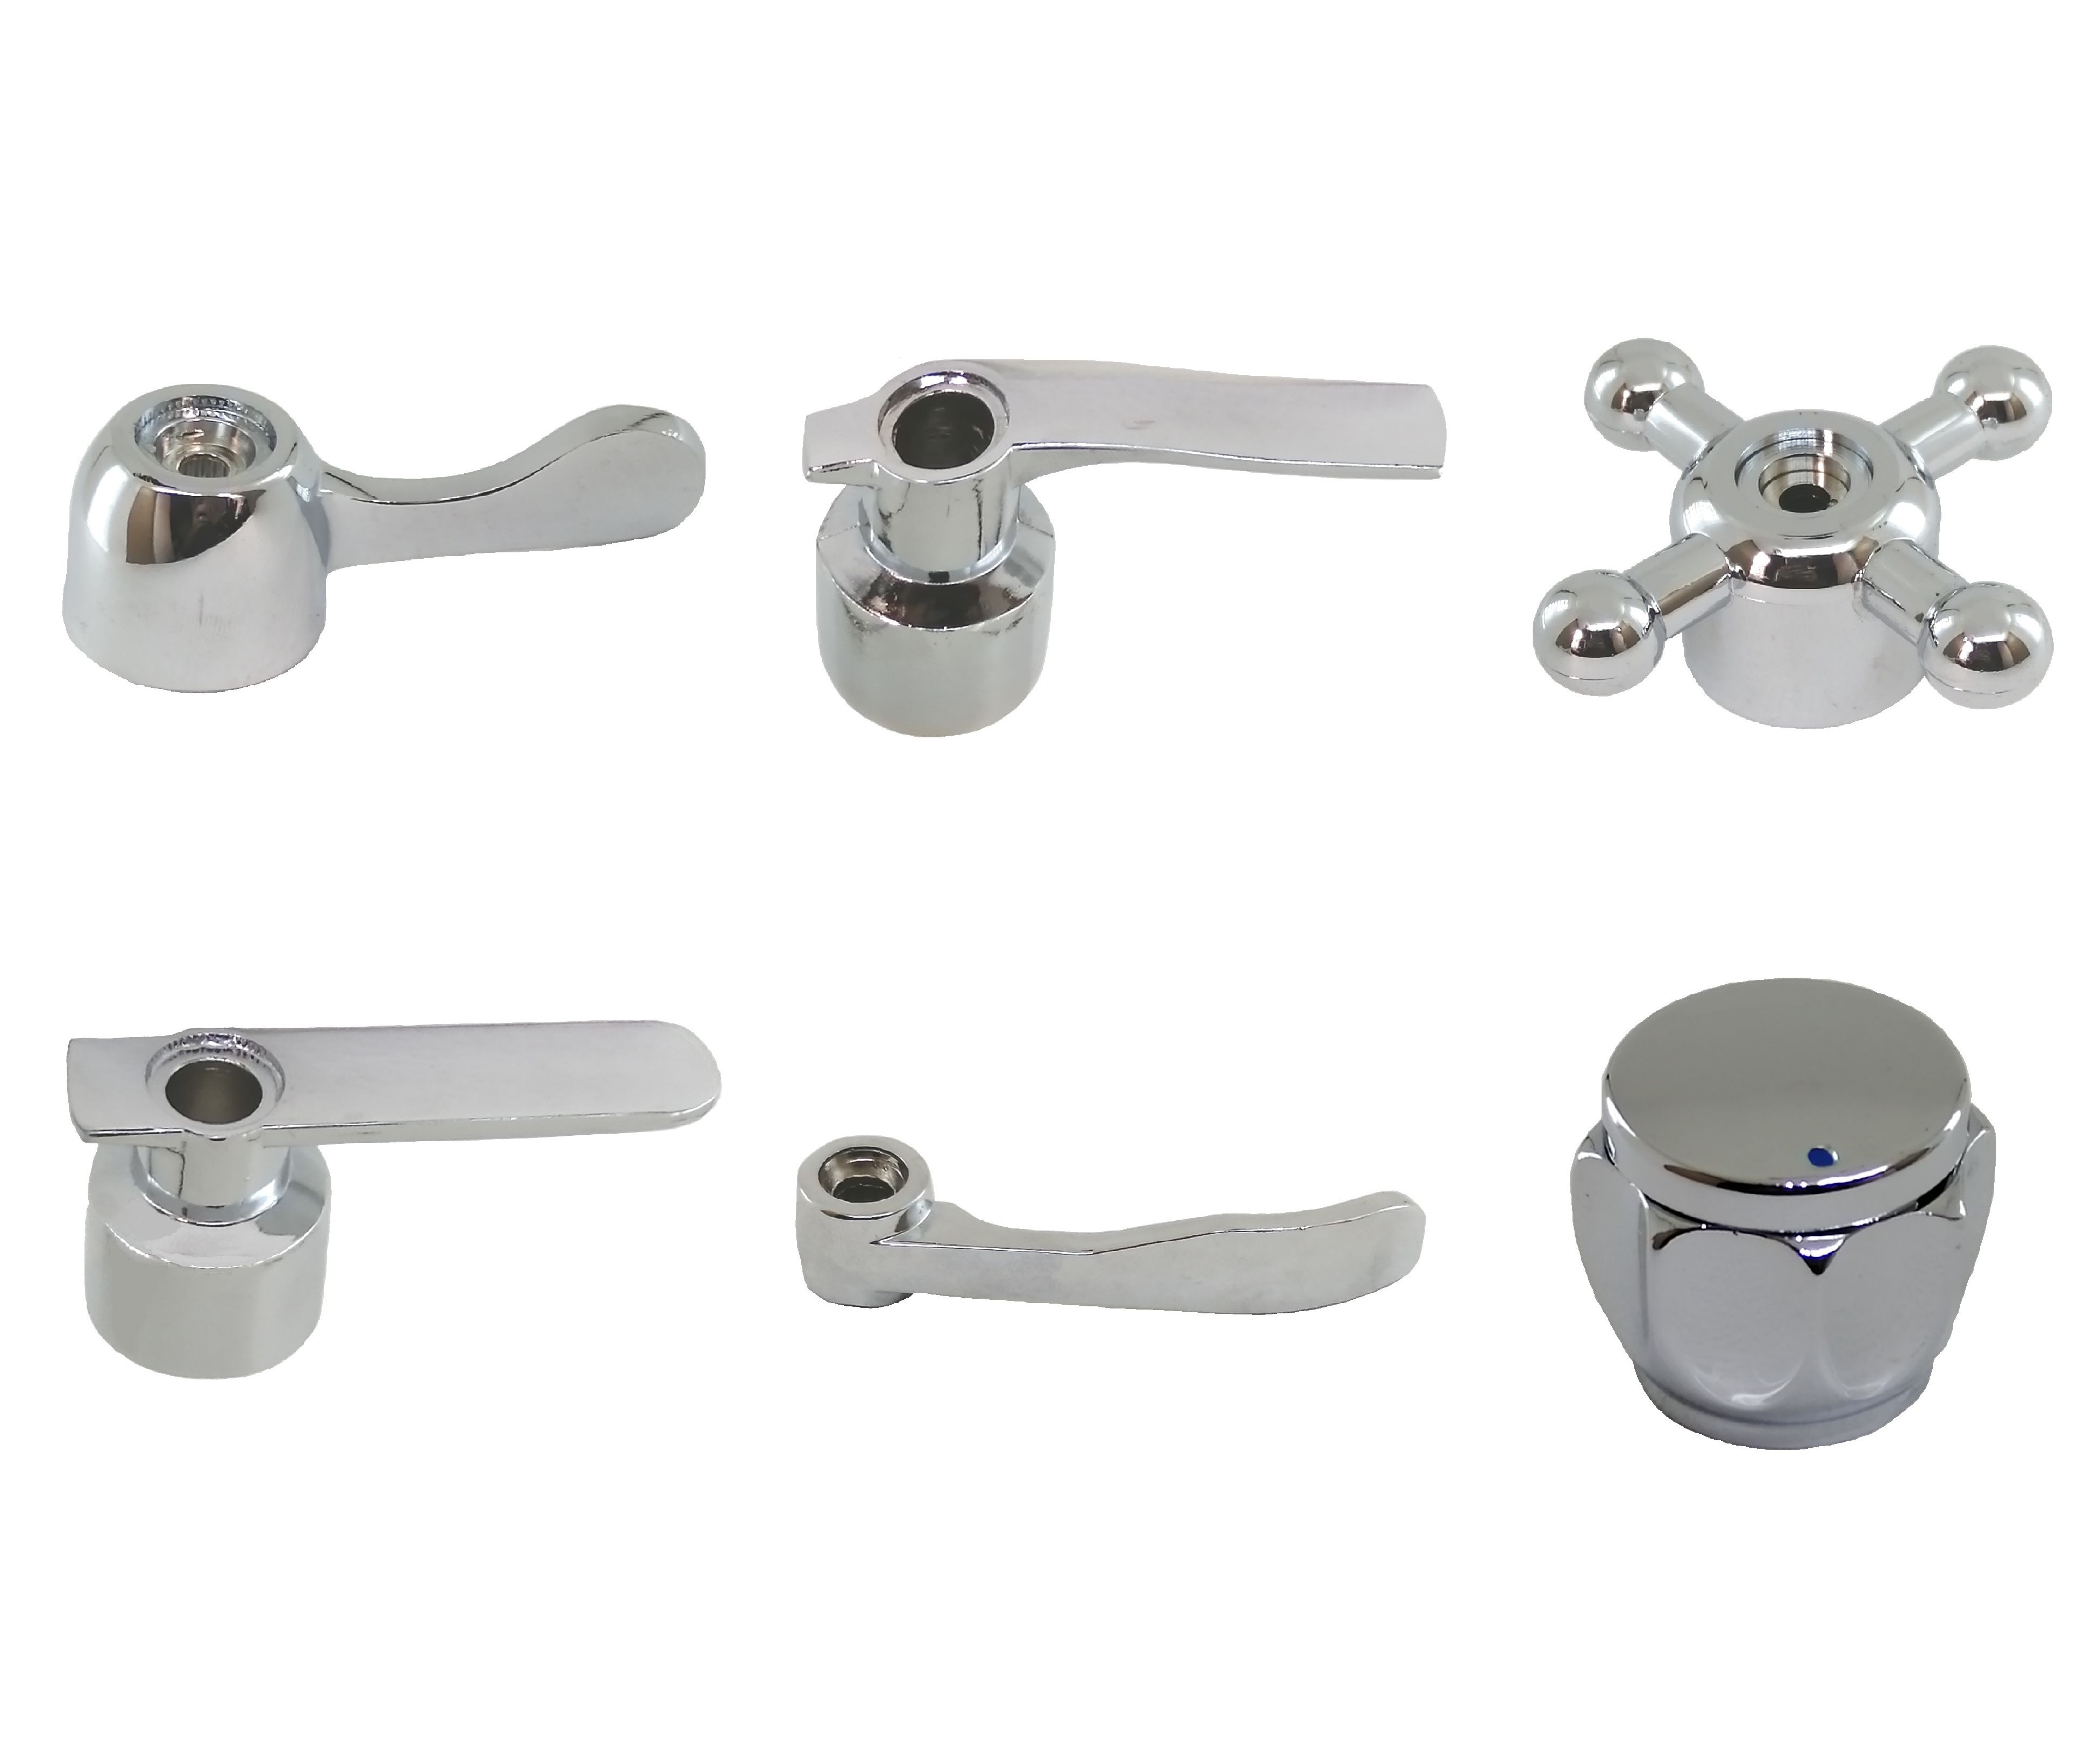
Step 2: Remove Decorative Handle Cap
Once you have shut off the water supply, it’s time to remove the decorative handle cap. This cap is usually located at the center of the faucet handle and serves as an aesthetic cover. Here’s how to proceed:
Inspect the handle: Take a close look at the handle to identify any visible screws, slots, or tabs. Some faucet handles have a small cap covering the screw, while others have a visible screw or slot.
If there is a small cap: If your faucet handle has a decorative cap, gently pry it off using a flat-head screwdriver or your fingernail. Be careful not to scratch the surface. Set the cap aside in a safe place for reassembly later.
If there is a visible screw or slot: If you see a visible screw or a slot on the handle, you can skip this step and proceed to the next one.
Removing the decorative handle cap will expose the inner components of the faucet handle, allowing you to access the set screw or other fastening mechanisms. Let’s move on to the next step to continue the process of loosening your tight faucet handle.
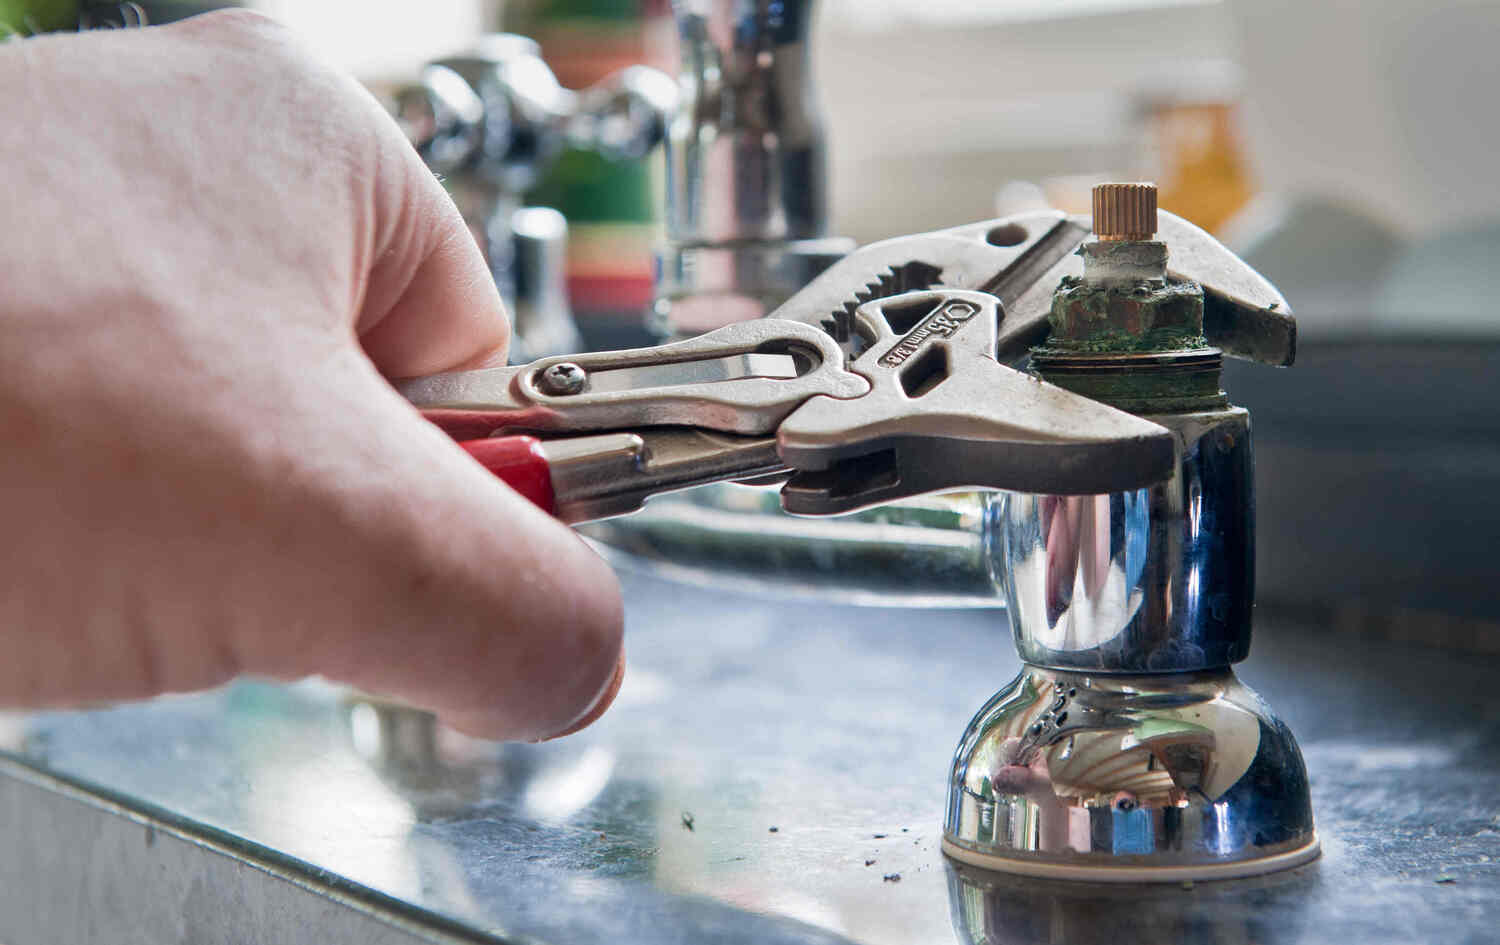
Step 3: Loosen the Set Screw
Now that you have removed the decorative handle cap, it’s time to loosen the set screw that holds the faucet handle in place. The set screw is typically located either beneath the cap or at the base of the handle itself. Follow these steps to proceed:
Locate the set screw: Using a flashlight if necessary, locate the set screw on the faucet handle. It is usually a small screw that secures the handle onto the stem.
Choose the right tool: Depending on the type of set screw, you will need either a Phillips-head screwdriver or an Allen wrench. Select the appropriate tool to fit the screw head.
Loosen the set screw: Insert your chosen tool into the set screw and turn it counterclockwise to loosen it. Only a few rotations are usually needed to loosen the screw. Once loosened, you can remove the screw completely.
Loosening the set screw will free the faucet handle from the stem, allowing you to move on to the next step of removing the handle itself. Take care not to lose the set screw during this process as you will need it for reassembly later. Ready to move forward? Let’s continue to step 4.
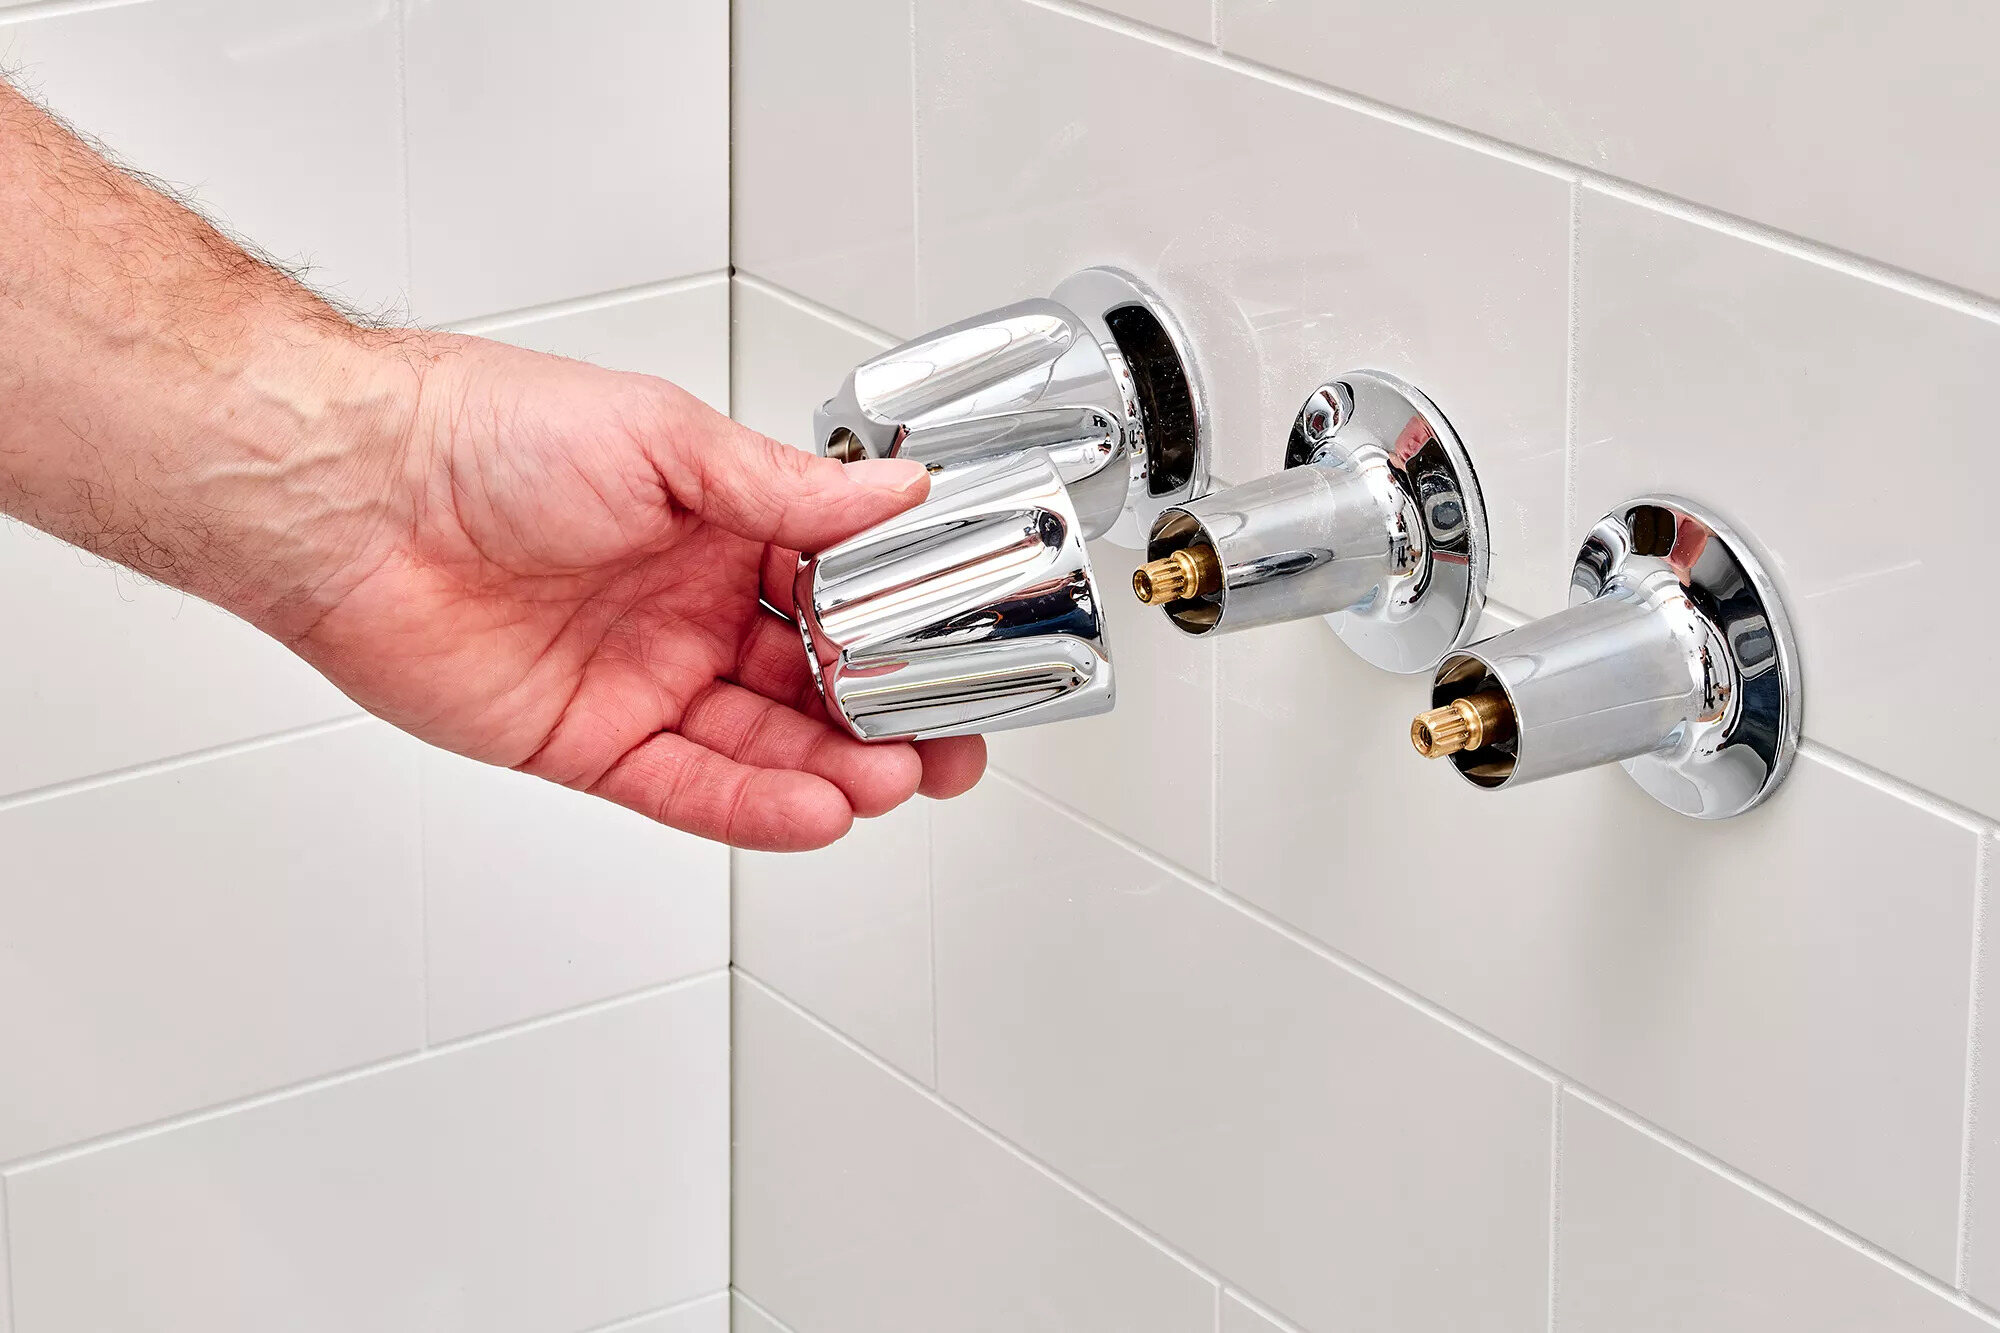
With the set screw loosened or removed, you can now proceed to remove the faucet handle itself. Follow these steps to successfully remove the handle:
Grip the handle: Use your hand to firmly grip the faucet handle. Ensure that you have a secure hold before proceeding.
Pull or twist the handle: Depending on the design of your faucet, you may need to either pull the handle straight out or twist it counterclockwise to remove it. Apply gentle but steady force, and the handle should eventually come off.
Inspect the stem: Once the handle is removed, take a moment to inspect the stem. Look for any signs of damage, corrosion, or buildup that may be causing the tightness. If you notice any issues, it may be necessary to clean or replace the stem.
By removing the handle, you gain direct access to the stem, allowing you to inspect it for any issues that could be contributing to the tightness. Cleaning or replacing a problematic stem can help ensure smoother operation once the handle is reassembled.
Now that you have successfully removed the faucet handle, it’s time to move on to the next step: inspecting the stem and handle for any potential issues.
If you have a tight faucet handle, try using a lubricant such as WD-40 to loosen it. Spray the lubricant around the base of the handle and let it sit for a few minutes before attempting to turn the handle again.
Step 5: Inspect the Stem and Handle
Now that you have removed the faucet handle, it’s important to take a close look at both the stem and the handle itself. This step will help you identify any underlying issues that may be causing the tightness. Follow these steps to inspect the stem and handle:
Examine the stem: Carefully inspect the stem for any signs of damage, corrosion, or debris. Check for any irregularities, such as cracks or worn-out parts. If you notice any issues, it may be necessary to clean or replace the stem to ensure smooth operation.
Inspect the handle: Pay attention to the handle itself, checking for any damage or buildup. Look for any signs of wear or degradation that may be affecting its functionality.
Clean the stem and handle: If you notice any debris or buildup, use a cloth or rag to clean the stem and handle. Remove any dirt, grime, or hardened residue that may be contributing to the tightness. Additionally, if the stem appears rusty, consider using a rust remover or lubricant to help loosen any corrosion.
Inspecting the stem and handle is an essential step in troubleshooting a tight faucet handle. Identifying and addressing any issues at this stage will help ensure that the handle operates smoothly once reassembled. Ready to move forward? Let’s proceed to the next step: lubricating the stem and handle.
Step 6: Lubricate the Stem and Handle
After inspecting the stem and handle, it’s time to apply lubrication to ensure smooth movement. Lubricating the components will help reduce friction and make it easier to turn the faucet handle. Follow these steps to properly lubricate the stem and handle:
Choose the right lubricant: Select a high-quality silicone-based lubricant or a plumber’s grease for optimal results. Avoid using petroleum-based products, as they can damage certain faucet materials.
Apply the lubricant: Take a small amount of lubricant and apply it to the stem. Ensure that you cover the entire surface of the stem, as well as any contact points inside the handle itself.
Gently work the lubricant: After applying the lubricant, move the handle back and forth or rotate it a few times to distribute the lubricant evenly. This will help ensure that the lubricant reaches all the necessary areas and facilitates smooth movement.
Applying lubrication is an important step in loosening a tight faucet handle. It helps to minimize friction and allows the handle to move freely. Proper lubrication will improve the overall functionality of the faucet and provide a smoother user experience.
Now that you have lubricated the stem and handle, it’s time to move on to the next step: reassembling the faucet handle.
Step 7: Reassemble the Faucet Handle
Now that you have completed the necessary preparations, it’s time to reassemble the faucet handle. Follow these steps to ensure a proper reassembly:
Place the handle back onto the stem: Align the handle with the stem and gently push it into place. Make sure it fits snugly and there are no gaps or misalignments.
Insert and tighten the set screw: If you had removed the set screw earlier, insert it back into its original position. Use the appropriate tool (Phillips-head screwdriver or Allen wrench) to tighten the set screw firmly. Ensure that it is secure but not overly tight to avoid damaging the handle or stem.
Replace the decorative handle cap: If you had removed a decorative cap earlier, now is the time to place it back onto the handle. Ensure it snaps or fits securely into place.
Reassembling the faucet handle is the final step in the process. Take care to align all the components properly and secure them tightly to avoid any future issues. Once you have completed this step, your faucet handle should be securely fastened and ready for testing.
Now, let’s move on to the final step: testing the handle for proper movement.
After reassembling the faucet handle, it’s crucial to test it to ensure that it moves smoothly and without any tightness. Follow these steps to assess the handle’s functionality:
Turn on the water supply: Carefully turn on the shut-off valves to restore the water supply. Take care to open the valves slowly to prevent any sudden surges of water.
Test the handle: Gently turn the faucet handle in both directions to check for any resistance or tightness. Ensure that the handle moves freely without any clicking, catching, or excessive force required.
Check for leaks: While testing the handle, keep an eye out for any water leaks around the base of the faucet or handle. If you notice any leaks, it may indicate a faulty seal that needs to be addressed.
If the handle moves smoothly without any tightness or leaks, congratulations! You have successfully loosened your tight faucet handle. Enjoy the improved functionality and convenience it brings.
However, if you still experience tightness or other issues with the handle, it may be necessary to seek professional assistance or consider further troubleshooting steps. Reaching out to a plumber or the manufacturer of your faucet can provide valuable guidance and support.
Remember, regular maintenance and periodic checks can help prevent future issues and ensure the longevity of your faucet. By taking the time to address a tight faucet handle promptly, you can avoid further damage and frustration in the future.
With that, you have completed the steps to loosen a tight faucet handle. We hope that this guide has been helpful and that you have successfully resolved the issue. Thank you for reading, and happy plumbing!
Conclusion
Dealing with a tight faucet handle can be a hassle, but with the right knowledge and tools, you can easily resolve the issue. Loosening a tight faucet handle not only restores functionality but also prevents further damage and frustration. By following the step-by-step process outlined in this article, you’ll be well-equipped to tackle the problem.
Remember, before you begin, it’s important to shut off the water supply to avoid any accidents or water damage. Additionally, having the right tools and materials, such as an adjustable wrench, screwdriver, lubricant, and cloth, will make the process smoother.
Throughout the steps, it’s essential to carefully inspect the stem and handle, clean any debris, and lubricate the components for smooth and effortless movement. Reassembling the faucet handle correctly and testing it for proper functionality are crucial final steps.
However, if you encounter any difficulties or the tightness persists, it’s advisable to seek professional assistance or contact the manufacturer for guidance.
We hope that this article has provided you with the necessary information and guidance to successfully loosen a tight faucet handle. Remember, regular maintenance and care of your faucet can go a long way in preventing future issues. By taking the time to address this problem, you ensure the longevity of your faucet and a hassle-free experience every time you use it.
Thank you for reading, and happy fixing!
Frequently Asked Questions about How To Loosen A Tight Faucet Handle
Why is my faucet handle so tight?
Faucet handles can become tight over time due to mineral buildup, corrosion, or worn-out parts. These issues can make it difficult to turn the handle and may require some maintenance to loosen it up.
Can I fix a tight faucet handle myself?
Yes, you can often fix a tight faucet handle yourself with some basic tools and a little know-how. By following some simple steps, you can loosen the handle and restore smooth operation to your faucet.
What tools do I need to loosen a tight faucet handle?
To loosen a tight faucet handle, you may need a screwdriver, adjustable wrench, penetrating oil, and possibly some replacement parts if the handle is severely damaged. These tools will help you disassemble the handle and address the underlying issue.
How do I prevent my faucet handle from getting tight in the future?
To prevent your faucet handle from getting tight in the future, it’s important to perform regular maintenance, such as cleaning and lubricating the handle and its components. This can help prevent mineral buildup and corrosion, keeping your faucet operating smoothly.
When should I consider calling a professional to fix a tight faucet handle?
If you’ve attempted to loosen the faucet handle yourself and are still experiencing issues, or if the handle is severely damaged, it may be time to call a professional plumber. They can assess the situation and make any necessary repairs to ensure your faucet functions properly.
Was this page helpful?
At Storables.com, we guarantee accurate and reliable information. Our content, validated by Expert Board Contributors, is crafted following stringent Editorial Policies. We're committed to providing you with well-researched, expert-backed insights for all your informational needs.
Comments
0 thoughts on “How To Loosen A Tight Faucet Handle”
This website uses cookies so that we can provide you with the best user experience possible. Cookie information is stored in your browser and performs functions such as recognising you when you return to our website and helping our team to understand which sections of the website you find most interesting and useful.
Strictly Necessary Cookies
Strictly Necessary Cookie should be enabled at all times so that we can save your preferences for cookie settings.
If you disable this cookie, we will not be able to save your preferences. This means that every time you visit this website you will need to enable or disable cookies again.


0 thoughts on “How To Loosen A Tight Faucet Handle”